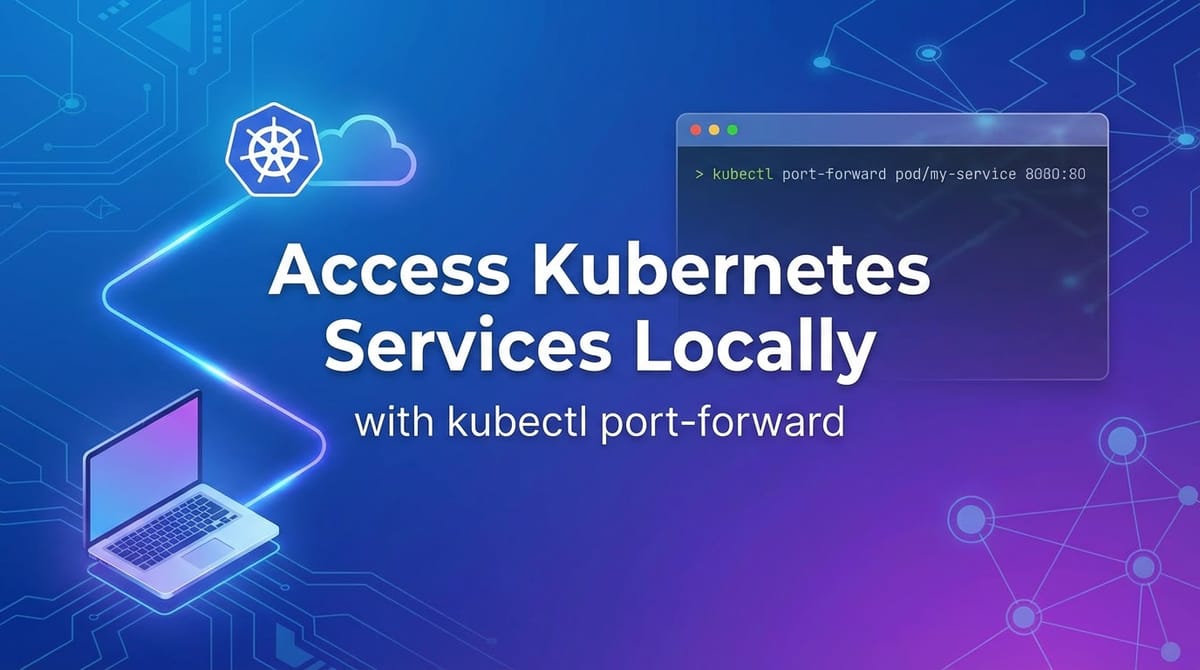
Access Kubernetes Services Locally with `kubectl port-forward`


The vast and intricate ecosystem of Kubernetes has fundamentally reshaped the landscape of modern software deployment and management. It has empowered organizations to orchestrate containerized applications at scale, driving unprecedented levels of efficiency, resilience, and agility. However, as applications scale and become distributed across numerous pods and services within a cluster, developers often face a common, yet critical, challenge: how to efficiently access and interact with these internal services directly from their local development environment for debugging, testing, or simply understanding their behavior. This is where the deceptively simple, yet incredibly powerful, kubectl port-forward command emerges as an indispensable tool in every Kubernetes developer's toolkit.
kubectl port-forward establishes a secure, temporary tunnel from your local machine to a specific pod or service within your Kubernetes cluster. It effectively bridges the gap between your local workstation and the internal network of your cluster, allowing you to treat a remote service as if it were running on localhost. This capability is paramount for accelerating development cycles, isolating issues, and ensuring the seamless integration of local components with their cloud-native counterparts, circumventing the complexities of external exposure mechanisms. This comprehensive guide will delve deep into the mechanics, practical applications, advanced considerations, and best practices surrounding kubectl port-forward, illuminating its profound utility in the daily workflow of anyone interacting with Kubernetes.
Understanding Kubernetes Networking Fundamentals
Before we dissect the intricacies of kubectl port-forward, it's crucial to establish a foundational understanding of how networking operates within a Kubernetes cluster. Kubernetes provides a rich and flexible networking model that allows pods to communicate with each other, and enables external traffic to reach services running inside the cluster. This model is built upon several core abstractions, each serving a distinct purpose in facilitating robust and scalable application communication.
Pods and Their Networking Identity
At the lowest level of Kubernetes networking, we encounter Pods. A Pod is the smallest deployable unit in Kubernetes, representing a single instance of a running process in your cluster. Each Pod is assigned its own unique IP address within the cluster's network. This IP address is typically private and is not directly routable from outside the cluster. All containers within a Pod share the same network namespace, including their IP address and network ports. This design allows containers within the same Pod to communicate with each other via localhost and shared ports, simplifying inter-container communication patterns within a single logical application unit. However, this inherent isolation means that to reach a Pod from outside the cluster, or even from another Pod in a different node, requires a specific mechanism.
Services: The Stable Abstraction Layer
While Pods are ephemeral entities that can be created, destroyed, and rescheduled, a Service provides a stable network endpoint for a set of Pods. A Service acts as an abstract way to expose an application running on a set of Pods as a network service. When a client (either another Pod or an external entity) sends a request to a Service, Kubernetes automatically routes that request to one of the healthy Pods associated with that Service. This abstraction is critical for several reasons:
- Stability: A Service's IP address (ClusterIP) remains constant throughout its lifetime, even if the underlying Pods are replaced or scaled.
- Load Balancing: Services provide built-in load balancing across their backend Pods, distributing incoming traffic efficiently.
- Discovery: Services make it easy for other applications within the cluster to discover and communicate with a specific application, using a stable DNS name and IP.
Kubernetes offers several Service types, each designed for different exposure scenarios:
ClusterIP: This is the default and most common Service type. It exposes the Service on an internal IP address within the cluster. Services of typeClusterIPare only reachable from within the cluster. This is precisely the type of service thatkubectl port-forwardis most commonly used to access.NodePort: This type exposes the Service on a static port on each Node's IP address. Any request to<NodeIP>:<NodePort>is forwarded to the Service. While it allows external access,NodePortis generally considered less suitable for production due to the arbitrary high port numbers and the need to manage node IPs.LoadBalancer: This type provisions an external load balancer from the underlying cloud provider (if available) and assigns an external IP address to the Service. This is ideal for exposing production services to the internet, providing robust load balancing and often integrating with cloud-provider specific features.ExternalName: This type maps the Service to the contents of theexternalNamefield (e.g.,my.database.example.com), by returning aCNAMErecord. It's used for services that live outside the cluster.
Ingress: External HTTP/HTTPS Routing
For HTTP and HTTPS services, Ingress provides a more sophisticated way to manage external access than NodePort or LoadBalancer. Ingress acts as an API object that manages external access to the services in a cluster, typically HTTP. It can provide load balancing, SSL termination, and name-based virtual hosting. An Ingress controller, which typically runs as a pod within the cluster, is responsible for fulfilling the Ingress rules. While Ingress is powerful for exposing multiple services under a single IP address and domain, its primary focus is on Layer 7 (HTTP/HTTPS) routing, and it does not facilitate direct, temporary TCP-level access for development purposes in the same way kubectl port-forward does.
The critical takeaway here is that ClusterIP services and individual Pods, while perfectly functional within the cluster, are not directly accessible from your local machine. This is by design, promoting security and isolation. However, during development, this isolation becomes a hurdle. How do you test a new feature on your local machine that needs to talk to a specific microservice running inside Kubernetes, or debug a database issue without exposing it publicly? This is precisely the problem kubectl port-forward elegantly solves by creating a secure, temporary, and direct tunnel.
Deep Dive into kubectl port-forward
kubectl port-forward is a core kubectl command that establishes a direct connection from your local machine to a port on a Pod or Service within your Kubernetes cluster. It effectively creates a secure, bidirectional tunnel, allowing network traffic from a specified local port to be forwarded to a specified port on the target resource inside the cluster, and vice-versa. This mechanism bypasses the need for external LoadBalancers, NodePorts, or Ingress rules, making it an invaluable tool for developers.
What It Does and How It Works
At its heart, kubectl port-forward operates by creating a secure WebSocket connection to the Kubernetes API server. The API server then initiates a connection to the kubelet agent running on the node where the target Pod resides. The kubelet then establishes the actual network tunnel to the specified container port within that Pod. If you target a Service, kubectl first resolves the Service to one of its backing Pods and then performs the port forwarding to that selected Pod.
This creates a local proxy. When you send traffic to localhost:<local-port>, it travels through this tunnel: 1. From your local machine to the kubectl process. 2. From kubectl (via the API server and kubelet) to the Kubernetes node. 3. From the node to the target Pod/container at <container-port>.
The response traffic follows the same path in reverse. This entire process is encrypted and authenticated through your kubectl configuration, leveraging the same security context used for other kubectl commands. This ensures that only authorized users can establish these tunnels, adding a layer of security to your debugging process.
Basic Syntax and Arguments Explained
The general syntax for kubectl port-forward is straightforward, yet versatile:
kubectl port-forward <resource-type>/<resource-name> <local-port>:<remote-port> [options]
Let's break down the key components:
<resource-type>/<resource-name>: This specifies the target resource within Kubernetes that you want to forward traffic to.pod/<pod-name>: The most granular target. You specify the exact name of a Pod (e.g.,pod/my-app-7b8b4c7f8c-abcde). This is useful when you need to connect to a very specific instance, perhaps one you know has a particular state or issue.service/<service-name>: This is often the preferred and most robust target. When you specify a Service name (e.g.,service/my-app),kubectlautomatically selects one of the healthy Pods associated with that Service to establish the tunnel. This provides resilience, as the tunnel will remain active even if the original Pod selected by the Service dies and is replaced, becausekubectlcan transparently switch to another healthy Pod. This also benefits from the load balancing and service discovery mechanisms provided by Kubernetes Services.deployment/<deployment-name>,replicaset/<replicaset-name>,statefulset/<statefulset-name>: You can also target higher-level controllers like Deployments.kubectlwill then pick an arbitrary Pod managed by that controller for the forwarding. While convenient, it's generally less explicit than targeting a Service, especially if you have specific routing needs.--address <ip-address>: This optional flag specifies the address to bind to on the local machine. By default,kubectl port-forwardbinds to127.0.0.1(localhost), meaning only applications on your local machine can access the forwarded port. If you want other machines on your local network to access the forwarded service (e.g., a colleague's machine, or another device on your network), you can use--address 0.0.0.0. This will bind to all available network interfaces, making the service accessible from other devices. Use this with caution, as it widens the access scope.<local-port>: This is the port number on your local machine that you want to use to access the remote service. For example,8080.<remote-port>(or<container-port>or<service-port>): This is the port number inside the Pod or Service that you want to forward traffic to.- If targeting a Pod, this is the port the application inside the container is listening on.
- If targeting a Service, this can be either the Service's
portor itstargetPort. It's generally safer and more explicit to use the Service's definedport(the port the Service itself listens on).kubectlwill then handle routing to thetargetPortof the underlying Pod.
Common Use Cases
kubectl port-forward is incredibly versatile and finds application in numerous development and debugging scenarios:
- Debugging a Microservice Locally: Imagine you have a backend microservice running in Kubernetes, and you're developing a new feature on your local machine that needs to interact with it. Instead of deploying your local changes to the cluster every time, you can
port-forwardto the backend service. This allows your local application to communicate with the remote service as if it were a local dependency, streamlining iterative development. - Connecting a Local IDE/Client to a Remote Database: Database services, especially in production, are rarely exposed publicly. If you need to inspect data, run manual queries, or perform migrations from your local SQL client,
port-forwardprovides a secure, temporary tunnel. You can forward a local port (e.g.,5432) to the database Pod's port (5432for PostgreSQL), and your local client can connect tolocalhost:5432. - Accessing a Web UI or Admin Dashboard: Many applications or tools deployed within Kubernetes come with their own web-based interfaces (e.g., Grafana, Prometheus, a custom application's admin panel). If these UIs are exposed via
ClusterIPservices,port-forwardis the quickest way to access them from your browser without configuring Ingress or other external exposure mechanisms. - Testing Internal APIs: When developing microservices, you often have internal APIs that are not meant for public consumption but need to be thoroughly tested.
port-forwardallows you to directly hit these internal API endpoints from your local machine using tools like Postman, curl, or your application's test suite, simulating how other internal services would interact with them. This is particularly relevant when discussing the broader concept ofapimanagement, asport-forwardserves as a foundational tool for a developer to interact directly with an individualapiinstance before it's potentially exposed through a more robustapi gatewayorapimanagement platform.
Practical Examples and Walkthroughs
Let's illustrate the power of kubectl port-forward with a series of practical examples. For these examples, ensure you have a running Kubernetes cluster and kubectl configured to connect to it.
Example 1: Forwarding to a Pod (Direct Pod Access)
This is the most direct way to forward a port, targeting a specific Pod instance.
Scenario: You have a simple Nginx web server running in a Pod, and you want to access its web page from your local browser.
Steps:
- Deploy an Nginx Pod: First, create a simple Nginx Pod if you don't already have one.
bash kubectl run nginx-pod --image=nginx --port=80This command creates a Pod namednginx-podrunning thenginximage and specifying that the container listens on port 80. - Verify Pod is Running: Wait for the Pod to be in a
Runningstate.bash kubectl get podsYou should see output similar to:NAME READY STATUS RESTARTS AGE nginx-pod 1/1 Running 0 30s - Perform Port Forwarding: Now, forward a local port (e.g.,
8080) to the Nginx container's port (80).bash kubectl port-forward pod/nginx-pod 8080:80You will see output indicating the forwarding is active:Forwarding from 127.0.0.1:8080 -> 80This command will block your terminal session as long as the tunnel is active. - Access from Local Browser: Open your web browser and navigate to
http://localhost:8080. You should see the default Nginx welcome page. - Stop Forwarding: Go back to your terminal where
kubectl port-forwardis running and pressCtrl+Cto terminate the connection.
Troubleshooting for Pod Forwarding: * Error from server: error dialing backend: dial tcp <pod-ip>:<container-port>: connect: connection refused: This often means the application inside the Pod is not listening on the specified <container-port>, or the Pod is not healthy. Double-check the container's exposed port. * Error from server: port is not listening: 80: The pod might not be fully ready or the application isn't listening on port 80 yet. Wait a moment and retry.
Example 2: Forwarding to a Service (Recommended for Stability)
Targeting a Service for port forwarding is generally preferred because it provides greater resilience. If the Pod currently serving the Service fails or is rescheduled, kubectl port-forward can often automatically switch to another healthy Pod backing the same Service, maintaining your connection.
Scenario: You have a web application deployed via a Deployment and exposed through a ClusterIP Service. You want to access it locally.
Steps:
- Verify Deployment and Service: Ensure the Deployment and Service are up and running.
bash kubectl get deployments my-webapp kubectl get services my-webapp-service kubectl get pods -l app=my-webappYou should seemy-webapp-servicewith aClusterIPand your Pods inRunningstate. - Perform Port Forwarding to the Service: Forward a local port (e.g.,
8081) to the Service's port (80).bash kubectl port-forward service/my-webapp-service 8081:80You'll see:Forwarding from 127.0.0.1:8081 -> 80 - Access from Local Browser: Open
http://localhost:8081in your browser. You should see the Apache HTTP Server Test Page.
Deploy an Application and Service: Let's deploy a simple httpd application using a Deployment and expose it with a ClusterIP Service.```yaml
app-deployment.yaml
apiVersion: apps/v1 kind: Deployment metadata: name: my-webapp labels: app: my-webapp spec: replicas: 2 selector: matchLabels: app: my-webapp template: metadata: labels: app: my-webapp spec: containers: - name: my-webapp image: httpd ports: - containerPort: 80
app-service.yaml
apiVersion: v1 kind: Service metadata: name: my-webapp-service spec: selector: app: my-webapp ports: - protocol: TCP port: 80 targetPort: 80 type: ClusterIP ```Apply these configurations: bash kubectl apply -f app-deployment.yaml kubectl apply -f app-service.yaml
Discussion on Service Port vs. Target Port: When forwarding to a Service, you specify the Service's port (80 in this case), which is the port the Service itself listens on. Kubernetes then takes care of routing that traffic to the targetPort (80) of an available Pod. This abstraction makes your port-forward command robust to changes in the underlying Pods.
Example 3: Forwarding to a Deployment (Implicit Pod Selection)
You can also directly target a Deployment. kubectl will then pick one of the Pods managed by that Deployment.
Scenario: Same as Example 2, but targeting the Deployment directly.
Steps:
- Use Existing Deployment: Assuming
my-webappDeployment is still running from Example 2. - Perform Port Forwarding to the Deployment: Forward a local port (e.g.,
8082) to the container's port (80) within a Pod managed by themy-webappDeployment.bash kubectl port-forward deployment/my-webapp 8082:80You'll see similar forwarding output. - Access from Local Browser: Open
http://localhost:8082. You will again see the Apache HTTP Server Test Page.
Caveats: * When forwarding to a Deployment, kubectl selects one available Pod. If that specific Pod dies, the port-forward session will terminate. Using a Service is generally more robust because kubectl can re-establish the connection to a different healthy Pod if the initial one fails. * This approach is useful if you are certain you want to target any pod of a deployment and don't have a service defined yet, or if you specifically want to avoid the service abstraction for some reason.
Example 4: Forwarding Multiple Ports
Sometimes an application exposes multiple ports (e.g., an HTTP API on one port and a metrics endpoint on another). You can forward multiple ports in a single command.
Scenario: An imaginary application with an api endpoint on port 8080 and a metrics endpoint on port 9090.
Steps:
- Assume a Service Exists: Imagine you have a service named
my-multiport-app-servicethat exposes ports8080and9090to its backing pods. - Perform Multi-Port Forwarding:
bash kubectl port-forward service/my-multiport-app-service 8080:8080 9090:9090This command will forward local port8080to the remote port8080and local port9090to remote port9090simultaneously.You'll see output like:Forwarding from 127.0.0.1:8080 -> 8080 Forwarding from 127.0.0.1:9090 -> 9090 - Access from Local Machine: You can now access your application's
apiathttp://localhost:8080and its metrics athttp://localhost:9090.
Example 5: Forwarding to a Random Local Port
If you don't care about the specific local port, or if you want kubectl to pick an available one to avoid conflicts, you can omit the local port specification or use :.
Scenario: You need to access a service but don't want to manually find an unused local port.
Steps:
- Perform Port Forwarding with Random Local Port: Target our
my-webapp-serviceagain, forwarding its remote port80to an automatically assigned local port.bash kubectl port-forward service/my-webapp-service :80kubectlwill pick a high-numbered ephemeral port on your local machine:Forwarding from 127.0.0.1:49152 -> 80(The49152will be a different random port on your system.) - Access from Local Machine: You can now access your application at
http://localhost:49152(replace with your assigned port).
This feature is particularly useful in scripts or when you're running multiple port-forward sessions concurrently and want to avoid manual port management.
Example 6: Using a Specific Address (Exposing to Network)
By default, port-forward binds to 127.0.0.1 (localhost). If you need to make the forwarded service accessible from other machines on your local network, you can use the --address flag.
Scenario: You're collaborating with a team member on the same local network, and they need to access a service you've forwarded.
Steps:
- Perform Port Forwarding to a Specific Address: Forward
my-webapp-serviceto local port8080, but bind it to0.0.0.0, which means "all network interfaces."bash kubectl port-forward --address 0.0.0.0 service/my-webapp-service 8080:80You'll see output like:Forwarding from 0.0.0.0:8080 -> 80 - Access from Other Machines: Now, other machines on your local network can access the service by navigating to
http://<your-machine-ip>:8080.
Security Implications: Binding to 0.0.0.0 exposes the forwarded port to your entire local network. While convenient for collaboration, always be mindful of what service you are exposing and who has access to your network. For sensitive services (like databases or internal APIs), consider the security implications before using --address 0.0.0.0.
Advanced Topics and Best Practices
While the basic usage of kubectl port-forward is straightforward, understanding its advanced aspects and adopting best practices can significantly enhance your productivity and maintain security.
Backgrounding port-forward
Running kubectl port-forward in the foreground blocks your terminal. For continuous development or when you need to run multiple tunnels, backgrounding the command is essential.
- Using
&(Bash Job Control): The simplest way to runport-forwardin the background is to append&to the command:bash kubectl port-forward service/my-webapp-service 8080:80 &This will immediately return control to your terminal. You'll see a job ID and process ID. To bring it back to the foreground, usefg. To list background jobs, usejobs. To kill a specific job, usekill %<job-id>. - Using
nohup(No Hangup):nohupallows a command to run even after you log out from the shell or close the terminal. It's often combined with&.bash nohup kubectl port-forward service/my-webapp-service 8080:80 > /dev/null 2>&1 &*nohup: Ensures the process continues even if the terminal is closed. *> /dev/null 2>&1: Redirects stdout and stderr to/dev/null, preventingnohup.outfiles from being created and keeping your terminal clean.To find and kill this process later, you'd typically useps aux | grep 'kubectl port-forward'to find its PID, thenkill <pid>.
Scripting port-forward: For complex setups or multiple forwards, simple shell scripts can automate the process. A script could find the Pod name (if targeting a Pod), check for port availability, and manage background processes.```bash
!/bin/bash
SERVICE_NAME="my-webapp-service" LOCAL_PORT="8080" REMOTE_PORT="80"echo "Forwarding service/$SERVICE_NAME from localhost:$LOCAL_PORT to remote:$REMOTE_PORT"
Check if port is already in use
if lsof -i :$LOCAL_PORT >/dev/null; then echo "Error: Local port $LOCAL_PORT is already in use." exit 1 fi
Run port-forward in background and store PID
kubectl port-forward service/$SERVICE_NAME $LOCAL_PORT:$REMOTE_PORT > /dev/null 2>&1 & PID=$! echo "Port-forward started with PID: $PID"
Store PID for later cleanup (e.g., in a file)
echo $PID > /tmp/my-webapp-forward.pidecho "Access at http://localhost:$LOCAL_PORT" echo "To stop, run: kill $PID or ./stop_forward.sh"
Example stop script
cat stop_forward.sh
#!/bin/bash
PID_FILE="/techblog/en/tmp/my-webapp-forward.pid"
if [ -f "$PID_FILE" ]; then
PID=$(cat "$PID_FILE")
echo "Stopping port-forward with PID: $PID"
kill $PID
rm "$PID_FILE"
else
echo "No port-forward PID file found."
fi
``` Such scripts enhance reproducibility and ease of management.
Security Considerations
While kubectl port-forward is powerful, its security implications must be understood:
- RBAC Implications: To run
kubectl port-forward, a user's Kubernetes Role-Based Access Control (RBAC) permissions must include theport-forwardverb for the target resource (Pods, Services). Specifically, the user needspods/portforwardpermission on the relevant Pods. If you are forwarding to a service, the underlying permission check will still be on the selected Pod. Granting this permission should be done with the principle of least privilege in mind. Avoid givingport-forwardaccess to everyone, especially for sensitive services like production databases.- Example RBAC Role for Port Forwarding: ```yaml apiVersion: rbac.authorization.k8s.io/v1 kind: Role metadata: name: port-forward-reader namespace: default rules:
- apiGroups: [""] # "" indicates the core API group resources: ["pods", "pods/portforward"] verbs: ["get", "list", "portforward"]
`` ThisRolegrantsget,list, andportforwardpermissions onpodsandpods/portforwardresources within thedefaultnamespace. ARoleBinding` would then link this role to a specific user or service account.
- apiGroups: [""] # "" indicates the core API group resources: ["pods", "pods/portforward"] verbs: ["get", "list", "portforward"]
- Example RBAC Role for Port Forwarding: ```yaml apiVersion: rbac.authorization.k8s.io/v1 kind: Role metadata: name: port-forward-reader namespace: default rules:
- Exposing to Local Network (
--address 0.0.0.0): As discussed, this broadens the accessibility. Ensure your local network is secure and only trusted individuals have access when using this option, especially if the forwarded service handles sensitive data. - Ephemeral Nature: The
port-forwardtunnel is temporary. It ceases to exist when thekubectlcommand is terminated. This is a security benefit, as it prevents persistent backdoor access. However, it means you need to re-establish it each time. - Internal Access vs. External Exposure:
port-forwardgrants internal access to a specific service. It does not provide the same level of security, logging, and traffic management as a production-grade Ingress,LoadBalancer, orapi gateway. It's a developer tool, not an infrastructure solution for external consumption.
Limitations and Alternatives
kubectl port-forward is excellent for its specific use case, but it's crucial to understand its limitations and when to consider alternatives:
- Not for Production Traffic:
port-forwardis designed for single-user, temporary access. It's not built for high-throughput, resilient, or load-balanced production traffic. It's a single point of failure (yourkubectlprocess), and it routes traffic through the Kubernetes API server, which is not optimized for data plane forwarding. - Limited to a Single Pod/Service: While you can target a Service, the underlying tunnel is still established to a single Pod selected by the Service. It doesn't provide multi-pod load balancing from your local machine (though the Service itself would do this if accessed from within the cluster). If that specific Pod goes down, your
port-forwardsession will break, even if other healthy Pods exist for the Service. - Not a Replacement for Ingress/LoadBalancer: For exposing HTTP/HTTPS services to external users in a robust, scalable, and manageable way, Ingress (for L7) and LoadBalancer (for L4/L7) are the correct tools.
kubectl proxy: This command is often confused withport-forward.kubectl proxycreates a local HTTP proxy to the Kubernetes API server itself. Its primary use case is to allow local applications to interact with the Kubernetes API, for instance, to list pods or watch events. It does not forward traffic to individual services or applications running in Pods.- VPNs: For full network-level access to the entire cluster's internal network (e.g., to access any Pod, any Service, or even the underlying nodes), a Virtual Private Network (VPN) connection to the cluster's VPC (Virtual Private Cloud) is the appropriate solution. This is more complex to set up but provides comprehensive network access, useful for advanced debugging or operating cluster-internal tools that require broad network reach.
- Service Mesh (e.g., Istio, Linkerd): These platforms provide advanced traffic management, security, and observability features for microservices. While they don't directly replace
port-forwardfor local access, they offer sophisticated ways to control and monitor inter-service communication within the cluster, which often reduces the need for constant local tunneling by providing better in-cluster tools and diagnostics.
Integrating api, gateway, api gateway Keywords
kubectl port-forward plays a crucial, albeit specific, role in the broader landscape of api management and access. It provides the most direct and unadorned pathway for a developer to interact with an api exposed by a microservice running inside Kubernetes, especially when that api is designed for internal consumption and not exposed publicly.
Consider a scenario where your application is composed of multiple microservices, each exposing various api endpoints. During development, you might be building a new feature in Service A that relies on an api provided by Service B. If Service B is a ClusterIP service, kubectl port-forward allows you to tunnel directly to Service B's api from your local machine, letting you test the integration without deploying Service A to the cluster or making Service B publicly accessible. This direct access is invaluable for debugging individual api calls, understanding response formats, and isolating issues before they cascade through a complex system.
However, port-forward is explicitly a developer tool for temporary, point-to-point connections. It offers none of the robust features required for managing apis at scale for external consumption or even secure internal consumption across teams. For these enterprise-grade requirements, an api gateway or a comprehensive api management platform becomes indispensable.
An api gateway acts as a single entry point for all api calls, routing requests to the appropriate microservices, handling authentication, authorization, rate limiting, caching, and more. It abstracts away the complexity of the backend microservices, providing a clean, consistent api interface to consumers, be they internal teams or external partners. The journey of an api often begins with a developer interacting with it via kubectl port-forward for local testing, then progressing to a point where it's exposed and managed through an api gateway for broader consumption.
This is precisely where solutions like APIPark provide immense value. While kubectl port-forward allows you to access an individual API for debugging, APIPark is designed to help enterprises manage, integrate, and deploy a multitude of AI and REST services as robust APIs. It acts as an open-source AI gateway and api developer portal that offers end-to-end api lifecycle management, quick integration of 100+ AI models, unified api formats, prompt encapsulation into REST apis, and secure api sharing within teams. It provides a centralized api gateway to handle traffic forwarding, load balancing, versioning, and detailed logging for your apis, ensuring performance, security, and traceability – capabilities that are fundamentally beyond the scope of a developer-focused tunneling tool like kubectl port-forward. Thus, port-forward is your precision scalpel for local api debugging, while APIPark offers the comprehensive platform for global api governance and exposure.
Troubleshooting Common Issues
Even with a seemingly straightforward command like kubectl port-forward, issues can arise. Knowing how to diagnose and resolve them efficiently is crucial for maintaining productivity.
Error from server: error dialing backend: dial tcp 10.x.x.x:<remote-port>: connect: connection refused- Cause: This is one of the most common errors. It means
kubectlsuccessfully established a connection to the Pod, but the application inside the Pod is not listening on the specified<remote-port>, or the Pod itself is not fully ready to accept connections. Network policies could also be blocking the connection internally. - Solution:
- Verify Container Port: Double-check that the
containerPortin your Pod definition (or thetargetPortin your Service definition) matches the<remote-port>you provided in theport-forwardcommand. - Check Pod Status and Logs: Use
kubectl get podsto ensure the Pod isRunningandReady. Usekubectl logs <pod-name>to check the application logs for any startup errors or messages indicating it's not listening on the expected port. - Check Application Readiness: It's possible the container started, but the application inside it isn't fully initialized and listening yet. Wait a few moments and retry.
- Network Policies: If you have strict Network Policies configured in your cluster, they might be preventing connections to the Pod even from within the node. Temporarily relax policies if possible for testing, or ensure your policies permit traffic on the required port.
- Verify Container Port: Double-check that the
- Cause: This is one of the most common errors. It means
Unable to listen on <local-port>: listen tcp 127.0.0.1:<local-port>: bind: address already in use- Cause: The local port you specified (
<local-port>) is already being used by another process on your machine. - Solution:
- Choose a Different Local Port: Simply try a different local port (e.g.,
8081,8000,9000). - Find and Kill Conflicting Process: On Linux/macOS, you can find the process using a port with
lsof -i :<local-port>ornetstat -tulnp | grep <local-port>. Then,kill -9 <PID>to terminate it. On Windows, usenetstat -ano | findstr :<local-port>to get the PID, thentaskkill /PID <PID> /F. - Use Random Local Port: As shown in Example 5, use
kubectl port-forward service/<service-name> :<remote-port>to letkubectlautomatically assign an available local port.
- Choose a Different Local Port: Simply try a different local port (e.g.,
- Cause: The local port you specified (
Forwarding from 127.0.0.1:8080 -> 80(No Further Output / Hanging)- Cause: This message means
kubectlhas successfully established the tunnel and is waiting for traffic. If your local client (browser,curl, etc.) isn't sending traffic, or if the remote application isn't responding, theport-forwardcommand will simply sit there, appearing to hang. - Solution:
- Initiate Traffic: Make sure you are actually sending requests to
localhost:<local-port>from your local machine. Trycurl http://localhost:8080(using your specific local port) to confirm if there's any response. - Check Application Responsiveness: If you're sending traffic but getting no response or a timeout, the problem lies with the application inside the Pod. Check Pod logs (
kubectl logs) and Pod events (kubectl describe pod) for clues.
- Initiate Traffic: Make sure you are actually sending requests to
- Cause: This message means
- RBAC Errors (e.g.,
Error from server (Forbidden): pods "nginx-pod" is forbidden: User "..." cannot portforward pods in namespace "...")- Cause: Your Kubernetes user account (or the service account used by
kubectl) does not have the necessary RBAC permissions to perform port forwarding on the target resource. - Solution:
- Check User Permissions: Contact your cluster administrator. You need
pods/portforwardpermission on the specific Pod or Services you are trying to access. The administrator might need to create or modify aRoleandRoleBindingto grant you these permissions within the relevant namespace.
- Check User Permissions: Contact your cluster administrator. You need
- Cause: Your Kubernetes user account (or the service account used by
Error: unable to identify a pod for deployment/my-webapp- Cause: When you target a Deployment, ReplicaSet, or StatefulSet,
kubectlneeds to find at least one running Pod managed by that controller. This error indicates that no such Pods are currently available (e.g., they are all restarting, scaling down, or have failed). - Solution:
- Check Pods: Use
kubectl get pods -l app=my-webapp(replaceapp=my-webappwith your deployment's selector labels) to see the status of the pods. Ensure they are in aRunningandReadystate. - Check Deployment Status: Use
kubectl get deployment my-webappandkubectl describe deployment my-webappto check if the deployment is healthy and if its desired number of replicas are available.
- Check Pods: Use
- Cause: When you target a Deployment, ReplicaSet, or StatefulSet,
By understanding these common troubleshooting steps, developers can quickly resolve issues and leverage kubectl port-forward effectively in their daily workflow.
APIPark is a high-performance AI gateway that allows you to securely access the most comprehensive LLM APIs globally on the APIPark platform, including OpenAI, Anthropic, Mistral, Llama2, Google Gemini, and more.Try APIPark now! 👇👇👇
Deep Dive into Use Cases for Developers
kubectl port-forward is not just a debugging utility; it's a versatile tool that integrates deeply into various aspects of the developer workflow for cloud-native applications. Its ability to create direct, secure channels to internal Kubernetes services streamlines development across multiple disciplines.
Front-end Development
Modern front-end applications, especially those built with frameworks like React, Angular, or Vue.js, often need to interact with a set of backend APIs. During development, constantly deploying the front-end to Kubernetes to test against the backend services can be time-consuming and inefficient.
- Connecting a Local UI to a Remote Backend: A front-end developer can run their UI application locally (e.g., via
npm start) and usekubectl port-forwardto connect it to the backendapiservices running in Kubernetes. For instance, if the backendapiservice ismy-backend-api-serviceexposed on port80, the developer can runkubectl port-forward service/my-backend-api-service 8000:80. Their local front-end application can then make API calls tohttp://localhost:8000, effectively treating the remote backend as a local resource. This drastically reduces the feedback loop, allowing for rapid iteration on UI changes without waiting for full deployments. - Eliminating Cloud Deployment for Every Change: This method eliminates the need for developers to deploy their front-end to a development or staging cluster for every small change, saving compute resources and deployment time. It's particularly useful when debugging UI interactions with specific backend
apiresponses.
Backend Development
For backend developers working on individual microservices, kubectl port-forward provides critical access for debugging and integration testing.
- Debugging a Specific Microservice: If a developer is working on
Service Cand wants to debug an issue that only manifests whenService Cinteracts withService D(which is already deployed in Kubernetes), they can runService Clocally in their IDE (with a debugger attached). Then,kubectl port-forwardtoService D. This allowsService C(running locally) to callService D(running in Kubernetes) as if it were a local dependency, enabling detailed, step-by-step debugging of the interaction. - Running Integration Tests Locally: Complex integration test suites often require access to multiple backend services, databases, or message queues. Instead of deploying the entire test environment locally (which can be resource-intensive), developers can use
port-forwardto access these dependencies already running in Kubernetes. This way, local integration tests can run against a realistic, shared environment, reducing setup overhead. - Accessing Internal Tools or Dashboards: Many development teams deploy internal tools, monitoring dashboards (like Grafana or Prometheus, if not publicly exposed), or custom admin UIs within their Kubernetes cluster.
port-forwardoffers the quickest and most secure way to access these tools from a local browser without modifying network configurations or exposing them externally.
Database Access
Accessing databases securely from a local machine is a common requirement for developers, DBAs, and data analysts. Exposing a production or staging database publicly is a significant security risk.
- Securely Connecting Local SQL Clients: Developers often need to connect a local SQL client (e.g., DBeaver, DataGrip, psql, MySQL Workbench) to a database instance (PostgreSQL, MySQL, MongoDB, Redis) running in Kubernetes.
kubectl port-forward service/my-database-service 5432:5432creates a secure tunnel, allowing the local client to connect tolocalhost:5432and interact with the remote database. This method avoids opening firewall ports or using less secure methods likeNodePortfor database access. - Performing Migrations, Data Inspection, or Manual Queries: During development or incident response, direct database access is often necessary for performing schema migrations, inspecting data, or running ad-hoc queries.
port-forwardprovides this capability securely and temporarily, without granting broad network access to the database.
Event Streaming/Messaging
Applications often rely on message brokers or event streaming platforms like Kafka, RabbitMQ, or NATS. Developers might need to connect local clients or consumer applications to these systems running in Kubernetes.
- Connecting Local Kafka Clients: If a Kafka cluster is running in Kubernetes, a developer can use
kubectl port-forwardto tunnel to a Kafka broker Pod. For example,kubectl port-forward pod/kafka-0 9092:9092would allow a local Kafka producer or consumer application to connect tolocalhost:9092, enabling local development and testing of message-driven components without needing a local Kafka instance or complex network setup.
In summary, kubectl port-forward empowers developers to seamlessly integrate their local development environment with remote Kubernetes services. It accelerates the development cycle, simplifies debugging, and provides secure, temporary access to critical application components, making it an indispensable tool for anyone building and managing applications on Kubernetes.
Comparing port-forward with Other Local Access Methods
While kubectl port-forward is a powerful tool for local access, it's essential to understand its place among other Kubernetes networking mechanisms. Each method serves different purposes, has distinct advantages and disadvantages, and is suited for particular scenarios.
kubectl proxy
Often confused with port-forward, kubectl proxy serves an entirely different function.
- Purpose:
kubectl proxycreates a local HTTP proxy to the Kubernetes API server. It allows you to access the Kubernetes API endpoints directly from your local machine, effectively bypassing authentication challenges that might exist when accessing the API server directly. - How it works: It runs locally and acts as an HTTP proxy. When you send an HTTP request to
localhost:<port>/api/v1/pods, for example, the proxy authenticates with the Kubernetes API server using yourkubeconfigcontext and forwards the request. The API server then responds, and the response is relayed back through the proxy to your client. - Use Cases:
- Interacting with the Kubernetes API programmatically from a local script or application without needing to embed
kubeconfigdetails. - Accessing the Kubernetes dashboard if it's running within the cluster and not externally exposed (though
port-forwardto the dashboard service itself is more common for this). - Exploring the raw Kubernetes API endpoints with a browser or
curl.
- Interacting with the Kubernetes API programmatically from a local script or application without needing to embed
- Key Differences from
port-forward:kubectl proxyaccesses the Kubernetes API server;kubectl port-forwardaccesses user-defined Pods or Services.kubectl proxyis an HTTP proxy (Layer 7);kubectl port-forwardis a TCP tunnel (Layer 4), capable of forwarding any TCP traffic (HTTP, raw TCP, database protocols, etc.).kubectl proxyprovides access to Kubernetes control plane resources;kubectl port-forwardprovides access to your application workloads.
NodePort Services
NodePort is one of the simpler Service types for external exposure.
- How it works: A
NodePortService exposes a Service on a static port (the NodePort) on each Node's IP address. Kubernetes reserves this port on all nodes. Any traffic sent to<NodeIP>:<NodePort>is routed to the Service and then load-balanced to its backing Pods. - Pros:
- Relatively simple to set up.
- Accessible from outside the cluster, provided network firewall rules allow it.
- Can be used for non-HTTP/HTTPS traffic.
- Cons:
- High Port Numbers: NodePorts typically use high-numbered ports (e.g., 30000-32767), which are less user-friendly and hard to remember.
- Requires Node IPs: Clients need to know the IP address of at least one Kubernetes node to connect. If nodes change, access might break.
- Not Production-Ready: Generally not suitable for production use cases due to fixed high ports, dependency on node IPs, and lack of advanced load balancing or security features provided by dedicated load balancers or Ingress.
- When to use vs.
port-forward: UseNodePortwhen you need simple, temporary external access for demonstration or very basic testing, and you don't mind exposing the service on a high, non-standard port across all nodes.port-forwardis better for developer-specific, secure, and temporary local access that doesn't affect the cluster's external configuration.
LoadBalancer Services
LoadBalancer Services are the standard way to expose services to the internet in a cloud environment.
- How it works: When you create a Service of type
LoadBalancerin a cloud provider environment (e.g., AWS, GCP, Azure), Kubernetes provisions an external cloud load balancer. This load balancer gets its own external IP address and forwards traffic to the Service's Pods. - Pros:
- Production-Ready: Provides a stable external IP, handles high traffic, and integrates with cloud-provider load balancing features.
- Robust: Offers health checks, automatic scaling of backend Pods, and often includes DDoS protection.
- Standard Ports: Can expose services on standard ports like 80/443.
- Cons:
- Cloud-Provider Specific: Requires a cloud provider with
LoadBalancerintegration. - Incurs Cost: Cloud load balancers are typically not free.
- Not for Internal Debugging: While providing external access, it's overkill and costly for simply debugging an internal
apior application from a local machine. It also doesn't provide the direct, granular access to a specific pod instance thatport-forwardcan.
- Cloud-Provider Specific: Requires a cloud provider with
- Why
port-forwardis better for local developer access: For a developer needing to access a service only from their workstation,port-forwardis free, quick to set up, and doesn't require public exposure, making it ideal for development and testing.LoadBalanceris for general public consumption.
Ingress Controllers
Ingress is a Kubernetes API object that manages external access to HTTP and HTTPS services within a cluster.
- How it works: An Ingress resource defines rules for routing external HTTP/HTTPS traffic to Services. An Ingress Controller (e.g., Nginx Ingress Controller, Traefik, GKE Ingress) watches for Ingress resources and configures a reverse proxy to implement those rules. It typically provides features like host-based routing, path-based routing, SSL termination, and basic load balancing.
- Pros:
- Centralized Routing: Manages access to multiple services under a single external IP (often provided by a
LoadBalancerorNodePortfor the Ingress Controller itself). - Layer 7 Features: Supports host-based routing (e.g.,
api.example.comto Service A,dashboard.example.comto Service B), path-based routing (example.com/apito Service A,example.com/dashboardto Service B). - SSL Termination: Can handle HTTPS traffic and decrypt it before forwarding to internal services.
- Centralized Routing: Manages access to multiple services under a single external IP (often provided by a
- Cons:
- More Complex Setup: Requires deploying and configuring an Ingress Controller, and defining Ingress rules.
- Primarily HTTP/HTTPS: Not suitable for arbitrary TCP/UDP traffic (though some Ingress controllers have extensions for TCP/UDP forwarding).
- Not for Internal Debugging: Similar to
LoadBalancer, Ingress is for general external access and doesn't provide the direct, temporary, and secure tunnel for a developer's local machine.
- Role of
port-forwardin an Ingress-managed environment: Even with Ingress,port-forwardis useful for testing a new service before its Ingress rules are fully configured, or for bypassing Ingress to directly hit a service for debugging purposes, ensuring Ingress itself isn't introducing an issue.
VPN Solutions (e.g., OpenVPN, WireGuard into the cluster VPC)
VPNs provide the broadest level of network access to a Kubernetes cluster.
- How it works: A VPN client on your local machine establishes a secure tunnel to a VPN server that is part of or has access to the cluster's underlying Virtual Private Cloud (VPC) network. Once connected, your local machine effectively becomes a part of the cluster's private network.
- Pros:
- Full Network Access: Can access any internal resource (any Pod IP, any ClusterIP Service, any node IP) as if you were inside the cluster network.
- Robust for Complex Debugging: Ideal for scenarios requiring deep network inspection, accessing internal network tools, or connecting multiple local services to multiple cluster services simultaneously.
- Cons:
- More Complex Setup: Requires significant network configuration, deployment of VPN servers, and client setup.
- Broader Access: Provides much broader access than
port-forward, which can be a security concern if not properly managed. - Potential Performance Overhead: VPNs can introduce network latency.
- When
port-forwardis sufficient vs. when a VPN is necessary:port-forwardis perfect for isolated, temporary access to one or a few specific services. A VPN is necessary when you need full network-level connectivity to the entire cluster, perhaps to run complex distributed tests, manage multiple deep integrations, or access systems that don't have well-defined Services.
Here's a table summarizing the comparison:
| Feature / Tool | Purpose | Accessibility | Complexity | Primary Use Case | Security Level |
|---|---|---|---|---|---|
kubectl port-forward |
Local, temporary access to specific Pod/Service | localhost or specific IP |
Low | Debugging, local dev, direct API access (internal) | High (temp, auth) |
kubectl proxy |
Access Kubernetes API server | localhost |
Low | Interacting with K8s API, K8s dashboard | High (auth) |
| NodePort Service | Expose service on all nodes | Node IPs:Port | Medium | Simple external access, basic testing, demo | Low (open ports) |
| LoadBalancer Service | External IP for production traffic (cloud) | External IP | Medium | Production web apps, public APIs, high scale | Medium (cloud managed) |
| Ingress Controller | HTTP/HTTPS routing, SSL (L7) | Domain name | High | Production web apps with multiple services, routing | Medium (config dependent) |
| VPN to Cluster VPC | Full network access to cluster VPC | Internal IPs (after VPN connect) | High | Complex debugging, accessing any internal resource | High (network level) |
This comparison highlights that kubectl port-forward excels in its niche: providing a straightforward, secure, and temporary bridge for developers to interact with Kubernetes services directly from their local environment, without the overhead or public exposure associated with other, more production-oriented networking solutions.
Automating and Scripting port-forward
While kubectl port-forward is powerful, manually executing and managing multiple sessions can become cumbersome. Automating and scripting these tasks can significantly improve developer efficiency, especially in environments with numerous microservices.
Shell Scripts for Enhanced Control
Simple shell scripts can wrap kubectl port-forward to add features like dynamic pod selection, port availability checks, and background process management.
Example: A forward-service.sh script
#!/bin/bash

# Configuration
NAMESPACE="default"
SERVICE_NAME=""
LOCAL_PORT=""
REMOTE_PORT=""

# --- Functions ---
usage() {
    echo "Usage: $0 -s <service-name> -l <local-port> -r <remote-port> [-n <namespace>]"
    echo "  -s: Kubernetes Service name to forward."
    echo "  -l: Local port to bind to."
    echo "  -r: Remote port on the service."
    echo "  -n: Kubernetes namespace (default: default)."
    echo "Example: $0 -s my-webapp-service -l 8080 -r 80"
    exit 1
}

check_port_in_use() {
    local port=$1
    if lsof -i :$port >/dev/null 2>&1; then
        echo "Error: Local port $port is already in use."
        return 0 # True (port is in use)
    fi
    return 1 # False (port is not in use)
}

# --- Parse Arguments ---
while getopts "s:l:r:n:h" opt; do
    case ${opt} in
        s ) SERVICE_NAME=$OPTARG ;;
        l ) LOCAL_PORT=$OPTARG ;;
        r ) REMOTE_PORT=$OPTARG ;;
        n ) NAMESPACE=$OPTARG ;;
        h ) usage ;;
        \? ) usage ;;
    esac
done

if [ -z "$SERVICE_NAME" ] || [ -z "$LOCAL_PORT" ] || [ -z "$REMOTE_PORT" ]; then
    usage
fi

# --- Main Logic ---
echo "Attempting to forward service/$SERVICE_NAME (namespace: $NAMESPACE) from localhost:$LOCAL_PORT to remote:$REMOTE_PORT..."

if check_port_in_use "$LOCAL_PORT"; then
    echo "Please choose a different local port or terminate the conflicting process."
    exit 1
fi

echo "Starting kubectl port-forward in background. PID will be printed."
kubectl port-forward service/"$SERVICE_NAME" "$LOCAL_PORT":"$REMOTE_PORT" --namespace "$NAMESPACE" > /dev/null 2>&1 &
PID=$!

if [ -z "$PID" ]; then
    echo "Failed to start port-forward."
    exit 1
fi

echo "Port-forward started. PID: $PID"
echo "Access via http://localhost:$LOCAL_PORT"
echo "To stop, use: kill $PID"

# Optional: Store PID in a file for easier management
PID_FILE="/techblog/en/tmp/port-forward-${SERVICE_NAME}-${LOCAL_PORT}.pid"
echo "$PID" > "$PID_FILE"
echo "PID stored in: $PID_FILE"

# Setup a trap to clean up PID file if script is killed (though port-forward itself will remain)
trap "rm -f $PID_FILE; echo 'PID file cleaned up.'" EXIT
This script provides: * Argument parsing: Makes the script more flexible. * Port availability check: Prevents "address already in use" errors. * Background execution: Uses & for non-blocking operation. * PID tracking: Stores the process ID for easy termination later. * Clear instructions: Guides the user on how to access and stop the forward.
Managing Multiple port-forward Sessions
For microservices architectures, you might need to forward several services simultaneously.
- Dedicated Terminal Tabs/Windows: The simplest approach is to dedicate a terminal tab or window to each
port-forwardcommand running in the foreground. This provides immediate visual feedback. - tmux/screen Sessions: Terminal multiplexers like
tmuxorscreenallow you to create multiple virtual terminal sessions within a single window, making it easier to manage several backgroundedport-forwardcommands and quickly switch between them. - Custom Bash Aliases: For frequently accessed services, define aliases:
bash alias pf-webapp='kubectl port-forward service/my-webapp-service 8080:80 &' alias pf-db='kubectl port-forward service/my-database 5432:5432 &'Remember to add a corresponding alias to kill the process by PID, or usepkillwith the command name. - Tools like
k9s: Tools likek9s(a terminal UI for Kubernetes) often integrateport-forwardfunctionality directly. You can navigate to a Pod or Service and initiate a port forward from within the UI, and it often handles the backgrounding and tracking for you. This simplifies the management experience significantly.
Considerations for CI/CD
While kubectl port-forward is primarily a local development and debugging tool, its underlying concept of direct service access can be relevant in specific CI/CD contexts, though less commonly.
- Isolated Integration Testing: In very specific scenarios where a CI pipeline needs to run integration tests for a component that cannot be fully deployed into the cluster, and needs direct, temporary access to a single internal dependency,
port-forwardcould theoretically be scripted. However, this is generally discouraged in favor of proper in-cluster testing or using a dedicated test environment with service exposure via Ingress/LoadBalancer. - Ephemeral Environments: In environments where ephemeral Kubernetes clusters or namespaces are spun up for each feature branch, a
port-forwardcould be part of an automated setup script to allow developers quick local access to their newly deployed feature's services.
In most CI/CD pipelines, port-forward is typically not used for production deployments or large-scale testing due to its single-connection, developer-centric nature. Production pipelines rely on robust, scalable access methods like Ingress, LoadBalancers, and internal service discovery. The scripting of port-forward is primarily focused on enhancing individual developer productivity and local testing workflows.
Deep Dive into Network Policies and RBAC Interaction
Understanding how kubectl port-forward interacts with Kubernetes Network Policies and Role-Based Access Control (RBAC) is crucial for both security and troubleshooting. These layers of control dictate not only who can establish a forward, but also what traffic is allowed through the forward once established.
Network Policies
Network Policies are Kubernetes resources that allow you to specify how groups of pods are allowed to communicate with each other and with other network endpoints. They provide a firewall at the Pod level.
- How Network Policies Affect
port-forward: Whenkubectl port-forwardestablishes a tunnel, it technically creates a connection to the Pod's network namespace on the target port. Once this tunnel is established, any traffic originating from your local machine, sent through this tunnel, appears to the target Pod as if it's coming from the IP address of the node where the Pod is running (specifically, from the kubelet agent on that node).Example Scenario: Imagine a database Pod with aNetworkPolicythat only allows ingress from application Pods with labelapp: my-app. If you try toport-forwarddirectly to this database Pod from your local machine, your connection will likely be refused, even if theport-forwardcommand itself succeeds in establishing the tunnel. The reason is that the traffic, once inside the cluster network, is blocked by the Network Policy at the database Pod's ingress.- The Critical Point: If a Network Policy is in place that restricts inbound traffic to the target Pod, even if you successfully establish a
port-forward, your local requests might still be blocked. For example, if a Pod has a Network Policy stating it can only accept traffic from Pods with a specific label within the same namespace, and no other sources, then traffic from thekubelet(and thus yourport-forwardtunnel) might be blocked. - Implications for Troubleshooting: If you can establish a
port-forwardbut your requests (curl, browser, etc.) are timing out or being refused, and you've already verified the application is listening, the next place to look is Network Policies. You might need to examine the Network Policies applied to the target Pod's namespace and labels to see if they are implicitly denying traffic from the node's internal IPs or generally being too restrictive. This can be a subtle and frustrating issue to debug without this knowledge.
- The Critical Point: If a Network Policy is in place that restricts inbound traffic to the target Pod, even if you successfully establish a
- Best Practice: When troubleshooting connectivity issues with
port-forward, always consider the possibility of restrictive Network Policies. Temporarily loosening policies (in a non-production environment) can help isolate if the policy is the root cause.
RBAC (Role-Based Access Control)
RBAC is Kubernetes' mechanism for regulating access to computer or network resources based on the roles of individual users within your organization. It determines who can do what to which resources.
- The
port-forwardVerb: To runkubectl port-forwardsuccessfully, your user account must have specific RBAC permissions. Specifically, theport-forwardoperation on Pods is controlled by thepods/portforwardsubresource.- Required Permissions: A user or service account needs at least the
get,list, andportforwardverbs on thepodsandpods/portforwardresources within the target namespace. If you are forwarding to aServiceorDeployment,kubectlstill ultimately performs the forward to an underlyingPod, so the permissions onpodsare crucial.
- Required Permissions: A user or service account needs at least the
- Principle of Least Privilege: It is a best practice to apply the principle of least privilege. Grant
port-forwardaccess only to users who genuinely need it, and only for the specific namespaces or Pods necessary for their work. Granting broadport-forwardaccess across an entire cluster, especially for sensitive environments, can be a significant security vulnerability, as it effectively allows a user to bypass many network controls and directly interact with internal services. - Troubleshooting RBAC Issues: If you receive
Forbiddenerrors when trying toport-forward, it's almost certainly an RBAC issue. You'll need to work with your cluster administrator to verify and adjust your permissions. Thekubectl auth can-i portforward pods --namespace <namespace>command can help diagnose if you have the required permissions.
Example RBAC Configuration: To allow a user (or group) named dev-team to port-forward to any Pod in the development namespace, you would define a Role and a RoleBinding:```yaml
dev-portforward-role.yaml
apiVersion: rbac.authorization.k8s.io/v1 kind: Role metadata: name: dev-portforwarder namespace: development rules: - apiGroups: [""] # Core API group resources: ["pods", "pods/portforward"] verbs: ["get", "list", "portforward"] # Grant necessary verbs
dev-portforward-rolebinding.yaml
apiVersion: rbac.authorization.k8s.io/v1 kind: RoleBinding metadata: name: dev-portforwarder-binding namespace: development subjects: - kind: User # Or Group, or ServiceAccount name: dev-team # The name of the user/group to bind the role to apiGroup: rbac.authorization.k8s.io roleRef: kind: Role name: dev-portforwarder apiGroup: rbac.authorization.k8s.io `` After applying these (kubectl apply -f ...), thedev-teamuser would be able toport-forwardto Pods in thedevelopment` namespace.
By carefully considering both Network Policies and RBAC, administrators can maintain a secure and controlled Kubernetes environment, while developers can understand potential roadblocks and efficiently troubleshoot connectivity issues when using kubectl port-forward. This layered approach ensures that direct local access remains a powerful development aid without compromising the overall security posture of the cluster.
The Evolution of Local Kubernetes Development
While kubectl port-forward is a fundamental and indispensable tool, the landscape of local Kubernetes development has evolved significantly, with new tools emerging to enhance and automate aspects of this workflow. These tools often build upon or integrate with the capabilities of port-forward to provide a more seamless developer experience.
- Telepresence (by Ambassador Labs): Telepresence is designed to allow developers to run a single service locally while connecting to a remote Kubernetes cluster for all other services. It creates a bidirectional proxy that replaces a service in the cluster with your locally running version. This means local requests to cluster services are forwarded, and cluster requests to your local service are routed to your local machine.
- How it relates to
port-forward: Telepresence uses advanced networking (including, but not limited to, tunneling concepts similar toport-forward) to achieve its goal. It essentially automates and extends the idea ofport-forwardfor multiple services and allows for intercepting traffic to a specific service. This is especially useful for debugging complex microservice interactions where you need your local service to transparently participate in the cluster network.
- How it relates to
- Skaffold (by Google): Skaffold is a command-line tool that facilitates continuous development for Kubernetes applications. It handles the workflow for building, pushing, and deploying your application, then continuously monitors your source code for changes and automatically rebuilds and redeploys when changes are detected.
- How it relates to
port-forward: Skaffold often integratesport-forwardas part of itsskaffold devloop. When your application is deployed, Skaffold can automatically set upport-forwardrules to make your service accessible onlocalhost, removing the manual step for the developer. It aims to provide a fast, iterative development experience akin to local development, but with the application running in Kubernetes.
- How it relates to
- Garden: Garden is another cloud-native development platform that allows you to define, build, and deploy your entire application stack. It provides an integrated workflow for local development, testing, and deployment to Kubernetes.
- How it relates to
port-forward: Similar to Skaffold, Garden can automate the process ofport-forwardingservices from your Kubernetes cluster to your local machine, allowing your local IDE and tools to interact directly with the remote deployment. It streamlines the connection process, especially in multi-service environments.
- How it relates to
- Tilt: Tilt is a local development environment for teams that deploy to Kubernetes. It aims to reduce friction by providing a unified interface for seeing the state of all your services, logs, and automatically deploying changes.
- How it relates to
port-forward: Tilt usesport-forwardunder the hood to expose services locally, often presenting a consolidated view of all forwarded ports and allowing easy access to those services from the developer's browser. It focuses on making the inner loop of Kubernetes development as smooth as possible.
- How it relates to
These tools represent an evolution towards more integrated and automated local Kubernetes development. They recognize the fundamental need for local access to remote services and often leverage or automate the core capabilities of kubectl port-forward to provide a more comprehensive and developer-friendly experience. While port-forward remains the essential building block, these higher-level tools abstract away some of its manual aspects, enabling developers to focus more on coding and less on infrastructure plumbing.
Conclusion
kubectl port-forward stands as an essential pillar in the Kubernetes developer's arsenal, bridging the critical gap between the local development environment and the intricate, isolated network of a Kubernetes cluster. Its ability to create secure, temporary tunnels to individual Pods or Services offers an unparalleled level of flexibility and efficiency for debugging, testing, and iterating on cloud-native applications. From connecting local front-ends to remote backends, securely accessing databases, or inspecting internal api endpoints of microservices, port-forward simplifies complex network interactions, treating remote services as readily available localhost resources.
While its power lies in its simplicity and directness, understanding its nuances, such as its interaction with Network Policies and RBAC, and knowing when to use it versus more robust external exposure mechanisms like Ingress or LoadBalancers, is paramount. It is a developer's precision tool, not a production api gateway or a comprehensive network solution. For managing a multitude of APIs at scale, with features like advanced routing, authentication, and lifecycle management, platforms like APIPark offer the necessary enterprise-grade capabilities, extending far beyond the temporary tunneling provided by port-forward.
Ultimately, kubectl port-forward dramatically accelerates the development feedback loop, empowering developers to maintain agility and responsiveness in the face of increasingly distributed and complex application architectures. Mastering this command is not just about knowing a syntax; it's about unlocking a fundamental workflow efficiency that transforms the daily experience of building and operating applications on Kubernetes. Its foundational utility, even amidst the rise of more automated developer tooling, solidifies its position as an indispensable component of modern cloud-native development.
5 FAQs
1. What is the primary purpose of kubectl port-forward? The primary purpose of kubectl port-forward is to create a secure, temporary, and direct tunnel from a local machine's port to a specific port on a Pod or Service within a Kubernetes cluster. This allows developers to access internal Kubernetes services (like APIs, databases, or web UIs) as if they were running on localhost, facilitating local development, debugging, and testing without exposing these services publicly.
2. Can kubectl port-forward be used for production traffic? No, kubectl port-forward is explicitly designed as a developer tool for temporary, single-user access and debugging. It is not suitable for production traffic due to several limitations: it establishes a single connection, routes traffic through the Kubernetes API server (which is not optimized for data plane forwarding), lacks load balancing, high availability, and the advanced security features required for production workloads. For production exposure, LoadBalancer Services, Ingress Controllers, or dedicated API Gateways are the appropriate solutions.
3. What is the difference between kubectl port-forward and kubectl proxy? kubectl port-forward creates a TCP tunnel from your local machine to a specific Pod or Service running your application workload. It allows you to access your application's apis or services directly. In contrast, kubectl proxy creates a local HTTP proxy to the Kubernetes API server itself. Its purpose is to allow local applications or users to interact with the Kubernetes control plane's API (e.g., to list pods, get cluster status, or browse the Kubernetes dashboard), not to access your deployed application services.
4. How does RBAC affect my ability to use kubectl port-forward? To successfully execute kubectl port-forward, your Kubernetes user account must have specific RBAC permissions. You need the get, list, and critically, the portforward verb on the pods and pods/portforward resources within the target namespace. If these permissions are not granted, kubectl will return a "Forbidden" error, preventing you from establishing the tunnel. This ensures that only authorized users can gain direct access to internal services.
5. How can I access a forwarded service from another machine on my local network? By default, kubectl port-forward binds to 127.0.0.1 (localhost), meaning only applications on your local machine can access the forwarded port. To allow other machines on your local network to access it, you need to use the --address 0.0.0.0 flag when starting kubectl port-forward. For example: kubectl port-forward --address 0.0.0.0 service/my-app 8080:80. This binds the local port to all available network interfaces, making it accessible from other devices via your machine's IP address. Always exercise caution and be aware of security implications when exposing services this way.
🚀You can securely and efficiently call the OpenAI API on APIPark in just two steps:
Step 1: Deploy the APIPark AI gateway in 5 minutes.
APIPark is developed based on Golang, offering strong product performance and low development and maintenance costs. You can deploy APIPark with a single command line.
curl -sSO https://download.apipark.com/install/quick-start.sh; bash quick-start.sh

In my experience, you can see the successful deployment interface within 5 to 10 minutes. Then, you can log in to APIPark using your account.

Step 2: Call the OpenAI API.

