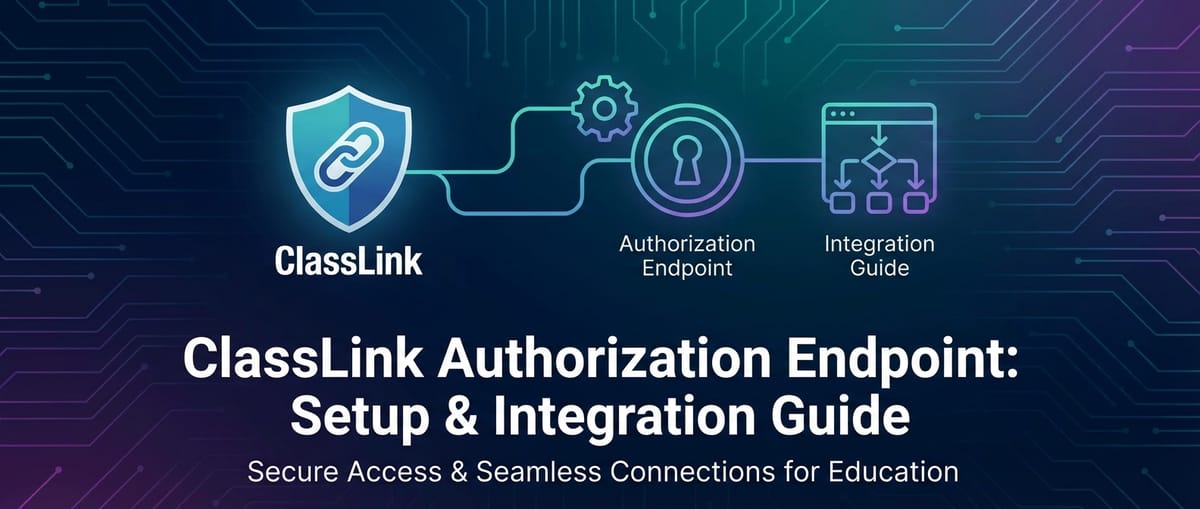
ClassLink Authorization Endpoint: Setup & Integration Guide


In the rapidly evolving landscape of educational technology, seamless and secure integration of various applications and services is paramount. Educational institutions, from K-12 districts to higher education universities, rely on a complex ecosystem of software to manage student data, streamline administrative tasks, and enhance the learning experience. At the heart of this intricate web of interconnected systems lies the critical need for robust identity management and authorization. ClassLink stands as a cornerstone in this environment, offering a unified platform for single sign-on (SSO), roster syncing, and application provisioning, thereby simplifying access for millions of students and educators worldwide. Its role as a central identity provider necessitates a thorough understanding of its authorization mechanisms, particularly the Authorization Endpoint, which serves as the initial gateway for secure communication between your application and the vast resources ClassLink manages.
Integrating with ClassLink effectively requires more than just a superficial understanding; it demands a deep dive into the underlying protocols and specific implementation details. This comprehensive guide aims to demystify the ClassLink Authorization Endpoint, walking developers and system administrators through the intricacies of its setup, configuration, and integration. We will explore the theoretical underpinnings of OAuth 2.0 and OpenID Connect (OIDC), the protocols that power ClassLink’s authorization flow, and then transition into practical, step-by-step instructions for establishing a secure and functional connection. The increasing complexity of integrating diverse systems, coupled with stringent data privacy regulations like FERPA and GDPR, underscores the importance of mastering these authorization flows. Furthermore, for organizations that manage a multitude of internal and external APIs, a robust API gateway becomes an indispensable component of their infrastructure, ensuring secure and efficient management of all these connections. By the end of this article, you will possess the knowledge to confidently configure your application to leverage ClassLink's authorization capabilities, ensuring a secure, efficient, and user-friendly experience for all stakeholders in the educational domain.
Understanding ClassLink's Ecosystem and Authorization Imperatives
ClassLink has firmly established itself as an indispensable tool within the educational sector, providing a centralized and streamlined approach to managing digital learning environments. At its core, ClassLink acts as an identity management platform, offering a unified portal where students and educators can access all their digital resources through a single sign-on (SSO) experience. This significantly reduces login fatigue, improves classroom efficiency, and minimizes help desk calls related to forgotten credentials. Beyond SSO, ClassLink excels in roster syncing, automatically provisioning user accounts and classes across various integrated applications, ensuring that student data is accurate and up-to-date across the entire educational technology stack. This automation frees up valuable administrative time, allowing schools and districts to focus more on teaching and learning rather than manual data entry and synchronization tasks.
The criticality of robust authorization in such an ed-tech ecosystem cannot be overstated. With sensitive student information at stake, data privacy and security are paramount. Authorization determines who can access what resources, preventing unauthorized access to personal student data, academic records, and other confidential information. Compliance with regulations such as the Family Educational Rights and Privacy Act (FERPA) in the United States and the General Data Protection Regulation (GDPR) in Europe is not just a legal requirement but an ethical imperative. Robust authorization mechanisms ensure that only authenticated and authorized individuals or applications can interact with specific APIs or data sets, thereby safeguarding privacy and maintaining trust. From a user experience perspective, efficient authorization means that users are seamlessly granted access to the applications they need, without unnecessary hurdles or repeated login prompts, contributing to a more productive and frustration-free learning environment. For resource access control, authorization ensures that applications only retrieve the specific data they are permitted to see, adhering to the principle of least privilege. For instance, a grading application might need access to student rosters and assignment submissions, but not necessarily to detailed medical records or disciplinary histories. Properly configured authorization limits the scope of access, enhancing overall system security.
ClassLink leverages industry-standard protocols to achieve its authorization objectives, primarily relying on OAuth 2.0 and OpenID Connect (OIDC). OAuth 2.0, an open standard for authorization, allows an application to obtain limited access to a user's account on an HTTP service, such as ClassLink, without giving away the user's password. It works by having the user authorize the application to access their information. OpenID Connect, built on top of OAuth 2.0, adds an identity layer, allowing clients to verify the identity of the end-user based on the authentication performed by an authorization server (ClassLink in this case) and to obtain basic profile information about the end-user. Together, these protocols provide a secure, standardized, and flexible framework for delegated authorization and identity verification.
In this context, ClassLink acts as both an Identity Provider (IdP) and an Authorization Server. As an IdP, it authenticates users, verifying their credentials against its internal directory or an integrated external directory (like Active Directory or Google Workspace). Once a user is authenticated, ClassLink, as the Authorization Server, issues tokens to client applications, granting them specific, limited permissions to access protected resources on behalf of the user. This multi-faceted role of ClassLink streamlines the integration process for developers, as they can rely on a single, trusted entity to handle both user authentication and resource authorization, significantly reducing the complexity and security risks associated with managing these aspects independently across multiple applications. Understanding ClassLink's position within this OAuth/OIDC framework is the foundational step towards successfully integrating with its Authorization Endpoint.
Diving Deep into the Authorization Endpoint
The Authorization Endpoint is the cornerstone of the OAuth 2.0 and OpenID Connect flows, acting as the initial point of interaction between your client application and the ClassLink authorization server. Its primary purpose is to authenticate the end-user (e.g., a student or teacher) and obtain their consent for your application to access specific resources on their behalf. When your application initiates an authorization request, it redirects the user's browser to this endpoint, providing a set of parameters that define the requested permissions and how the authorization server should respond. This redirection is critical because it ensures that sensitive user credentials are never directly handled by your application, but rather by ClassLink, which is specifically designed to securely manage identity and authentication. Upon successful authentication and user consent, ClassLink will then redirect the user back to your application with either an authorization code or tokens, depending on the requested response_type, thereby completing the first leg of the authorization dance.
Let's dissect the key parameters that are typically included in an authorization request to the ClassLink Authorization Endpoint. Each parameter plays a crucial role in orchestrating a secure and efficient authorization flow:
client_id: This is a unique identifier assigned to your application when you register it with ClassLink. It tells the authorization server which application is requesting access. Think of it as your application's public name tag. This parameter is mandatory and must precisely match theclient_idprovided by ClassLink. Mismatches here are a common source of integration failures.redirect_uri: This parameter specifies the URL to which the user's browser should be redirected after they have been authenticated and have granted or denied consent to your application. It is crucial for security that thisredirect_uriis pre-registered with ClassLink during your application setup. ClassLink will only redirect to a pre-approved URI, preventing malicious redirection attempts. This ensures that the authorization code or tokens are sent only to your legitimate application endpoint. Any deviation, even a slight path difference, will result in an error.response_type: This parameter defines the type of authorization response expected. For ClassLink, common values include:code: This is the recommended and most secureresponse_typefor web applications. It instructs ClassLink to return an authorization code to yourredirect_uri. Your application then exchanges this code for anaccess_token(and optionally anid_tokenandrefresh_token) at the Token Endpoint using a backend process. This keeps the tokens out of the user's browser history and makes them less vulnerable to interception.id_token: Used in the Implicit Flow (or hybrid flows), this requests ClassLink to return anid_tokendirectly to theredirect_uri. Thisid_tokenis a JSON Web Token (JWT) that contains information about the authenticated user. While simpler for client-side applications, it carries higher security risks as tokens are exposed in the browser's URL.token: Similar toid_tokenfor Implicit Flow, this requests anaccess_tokendirectly to theredirect_uri. Again, this is less secure than the authorizationcodeflow.code id_tokenorcode token: These represent hybrid flows, returning both an authorizationcodeand anid_token(oraccess_token) directly.
scope: This parameter specifies the exact permissions your application is requesting from the user. Scopes are typically strings defined by ClassLink that correspond to specific user data orAPIaccess. Examples might includeprofile(for basic user information),email(for the user's email address),roster.read(for reading student roster data), or custom scopes defined by ClassLink for specific integrations. It's best practice to request only the scopes absolutely necessary for your application's functionality, adhering to the principle of least privilege. The user will be prompted to grant consent for each requestedscope.state: This is an opaque value used by the client to maintain state between the request and the callback. It is a critical security parameter, primarily used to protect against Cross-Site Request Forgery (CSRF) attacks. When your application initiates the authorization request, it should generate a cryptographically randomstatevalue and store it securely (e.g., in a session). When ClassLink redirects back to yourredirect_uri, it will include this exactstatevalue. Your application must then compare the receivedstatewith the storedstate. If they don't match, the request should be rejected, indicating a potential CSRF attack. This parameter is highly recommended for all flows.nonce: This parameter is specifically used with OpenID Connect for replay attack mitigation when theid_tokenis returned. It's a cryptographically random string that the client includes in the authorization request. When ClassLink issues theid_token, it embeds thisnoncevalue within theid_token. Your application then verifies that thenoncein theid_tokenmatches thenonceoriginally sent in the authorization request. This ensures that theid_tokenhasn't been replayed from a previous request. This parameter is mandatory whenresponse_typeincludesid_token.
The typical flow of an authorization request unfolds as follows: your user clicks a "Login with ClassLink" button in your application. Your application constructs a URL to the ClassLink Authorization Endpoint, populating it with the aforementioned parameters, including a unique state value. The user's browser is then redirected to this ClassLink URL. ClassLink presents a login screen if the user is not already authenticated, followed by a consent screen detailing the permissions your application is requesting. Once the user authenticates and grants consent, ClassLink redirects their browser back to your redirect_uri, appending the authorization code (or tokens) and the state parameter to the URL. Your application then processes this callback, verifying the state and proceeding to exchange the code for tokens, thereby establishing a secure and authorized session. The careful construction and validation of these parameters are fundamental to a secure and functional integration with ClassLink.
Prerequisites for Integration
Before embarking on the actual integration with ClassLink's Authorization Endpoint, a series of crucial preparatory steps must be diligently completed. These prerequisites lay the groundwork for a secure, functional, and compliant connection between your application and the ClassLink ecosystem. Skipping any of these steps can lead to frustrating errors, security vulnerabilities, or an incomplete integration.
The foremost prerequisite is registering your application with ClassLink. This is not merely a formality but a foundational step that establishes your application as a trusted entity within the ClassLink environment. The process typically involves accessing the ClassLink developer portal or reaching out to ClassLink support to initiate the registration. During this registration, you will provide essential details about your application, such as its name, description, and importantly, its intended redirect_uris. Once registered, ClassLink will furnish you with two critical pieces of information:
client_id: This is a publicly exposed, unique identifier for your application. It's akin to a username for your application when it communicates with ClassLink. This ID is used in the authorization request to identify your application.client_secret: This is a confidential credential, much like a password, that must be kept absolutely secret. Theclient_secretis used by your application's backend during the process of exchanging an authorization code for anaccess_tokenat the Token Endpoint. It should never be exposed in client-side code (e.g., JavaScript in a browser) or transmitted insecurely. The security of yourclient_secretis paramount to the overall security of your integration, as its compromise could allow malicious actors to impersonate your application.
Configuring redirect_uris accurately is another non-negotiable step. As discussed, the redirect_uri is the specific URL within your application where ClassLink will send the user back after successful authentication and authorization, along with the authorization code or tokens. You must register all possible redirect_uris that your application might use with ClassLink. This often includes a primary production URL, staging or development URLs, and potentially even local development URLs (http://localhost). It's crucial to ensure that these URIs are exact matches, including path and scheme (HTTP vs. HTTPS). For production environments, always use HTTPS to ensure encrypted communication and protect the integrity and confidentiality of the authorization code and tokens. ClassLink's security policies will typically enforce HTTPS for all production redirect_uris.
Understanding and selecting the appropriate scopes is equally vital. Scopes define the granular permissions your application requests from the user. When registering your application or configuring its permissions within ClassLink, you will specify the list of scopes it requires. ClassLink provides a range of predefined scopes, which might include: * profile: Basic user information (name, avatar, etc.). * email: The user's email address. * roster.read: Permission to read student and teacher roster data. * oneroster.read: Specifically for accessing OneRoster APIs to retrieve detailed academic data. * full: Often a broad scope that grants access to most available APIs, though generally discouraged in favor of more specific scopes following the principle of least privilege. You must carefully consider what data your application genuinely needs to function and request only those corresponding scopes. Requesting excessive permissions can raise user privacy concerns and lead to lower consent rates. The scopes your application requests will be presented to the user on a consent screen, and they will explicitly grant or deny access.
The choice of response_type directly influences the flow and security of your integration. While ClassLink supports various response_types (as detailed in the previous section), for robust web applications, the code response_type (Authorization Code Flow) is overwhelmingly recommended. This flow involves your application receiving a temporary authorization code, which is then securely exchanged for access_tokens and id_tokens on your backend server. This keeps sensitive tokens out of the browser's URL and history, significantly reducing the risk of interception and compromise. For purely client-side applications (like single-page applications without a backend), the Implicit Flow (response_type=id_token or token) might seem simpler, but it comes with inherent security risks. Modern best practices for public clients (those without a confidential client_secret) lean towards the Authorization Code Flow with Proof Key for Code Exchange (PKCE) extension.
Finally, ensure you have the necessary tools and technologies in place. For a web application, this typically involves: * An HTTP client library: To make POST requests to the Token Endpoint (e.g., requests in Python, fetch or axios in JavaScript for backend Node.js, HttpClient in C#). * A web framework: To handle incoming redirect_uri callbacks and manage user sessions (e.g., Express.js, Flask, ASP.NET Core, Ruby on Rails). * Secure storage for client_secret: Environment variables, a secure configuration management system, or a secret manager are ideal. Never hardcode it directly in your source code. * Understanding OpenAPI specifications: While ClassLink's core authorization mechanism doesn't directly use an OpenAPI specification for the authorization endpoint itself, many of the ClassLink APIs you will eventually access using the access_token are documented using OpenAPI (formerly Swagger) specifications. Familiarity with these specifications can greatly aid in understanding the data structures and endpoints for various ClassLink APIs, allowing you to accurately anticipate responses and structure your requests. This understanding becomes invaluable as you move beyond basic authorization to leverage ClassLink's rich API offerings for roster data, user profiles, and more.
By meticulously completing these prerequisites, you establish a solid foundation for a successful and secure integration with the ClassLink Authorization Endpoint, preparing your application to interact effectively within the ClassLink ecosystem.
APIPark is a high-performance AI gateway that allows you to securely access the most comprehensive LLM APIs globally on the APIPark platform, including OpenAI, Anthropic, Mistral, Llama2, Google Gemini, and more.Try APIPark now! 👇👇👇
Step-by-Step Integration Guide (Authorization Code Flow Focus)
The Authorization Code Flow is the industry-standard and most secure method for integrating web applications with OAuth 2.0 and OpenID Connect providers like ClassLink. This section will guide you through each phase of this flow, providing a comprehensive understanding of the interactions between your application, the user's browser, and ClassLink.
Phase 1: Initiating the Authorization Request
The integration process begins when your user, typically by clicking a "Login with ClassLink" or "Connect to ClassLink" button, triggers an action in your application that needs to authenticate or gain authorized access to ClassLink resources. Instead of directly asking for credentials, your application constructs a special URL pointing to the ClassLink Authorization Endpoint. This URL is carefully crafted with several query parameters that inform ClassLink about your application's identity and the permissions it seeks.
The construction of this URL involves concatenating the base URL of ClassLink's Authorization Endpoint with your client_id, redirect_uri, response_type (which should be code for this flow), the requested scopes, and a uniquely generated state parameter. It is imperative that before redirecting the user, your application generates a cryptographically secure random string for the state parameter and stores it in the user's session (e.g., in a server-side session variable or a secure, HTTP-only cookie). This state parameter is crucial for preventing Cross-Site Request Forgery (CSRF) attacks upon callback.
Example URL Structure (conceptual):
GET https://launchpad.classlink.com/oauth2/v2/auth?
    client_id={YOUR_CLIENT_ID}&
    redirect_uri={YOUR_ENCODED_REDIRECT_URI}&
    response_type=code&
    scope=profile%20email%20oneroster.read&
    state={YOUR_UNIQUE_STATE_VALUE}&
    nonce={YOUR_UNIQUE_NONCE_VALUE}
Note: The exact base URL for the Authorization Endpoint might vary slightly based on your ClassLink instance or region. Always refer to ClassLink's official developer documentation for the precise endpoint URL.
After constructing this URL, your application performs an HTTP 302 Redirect to this ClassLink URL. The user's browser is then sent to ClassLink. At this point, the user will interact directly with ClassLink. If they are not already logged in, ClassLink will present its login page. After successful authentication, ClassLink will then display a consent screen, detailing the specific permissions (scopes) your application is requesting. The user must explicitly grant these permissions. This entire interaction ensures that your application never directly handles the user's credentials, enhancing security.
Phase 2: Handling the Callback
Once the user successfully authenticates with ClassLink and grants consent to your application, ClassLink takes over and redirects the user's browser back to the redirect_uri that you provided in the initial authorization request. This callback URL will have query parameters appended to it.
Example Callback URL (conceptual):
GET https://yourapp.com/auth/callback?
    code={AUTHORIZATION_CODE_FROM_CLASSLINK}&
    state={YOUR_ORIGINAL_STATE_VALUE}
Your application's /auth/callback endpoint (or whatever you've configured as your redirect_uri) is now responsible for processing this incoming request. The very first and most critical step is to verify the state parameter. Retrieve the state value received from ClassLink in the URL and compare it with the state value you stored in the user's session during Phase 1. If these two values do not match, or if no state was found in your session, you must reject the request. This discrepancy is a strong indicator of a potential CSRF attack, where a malicious actor might be attempting to trick a user into granting access to a different application or hijacking a session. Rejecting the request means denying the callback and potentially logging the security incident.
If the state parameter successfully verifies, you can then safely extract the code parameter from the URL. This code is the authorization code, a short-lived, single-use credential. It is not an access_token itself, but rather a key that your application will use in the next phase to obtain actual tokens.
Phase 3: Exchanging Code for Tokens
With the authorization code securely obtained and the state parameter validated on your backend, your application can now proceed to exchange this code for the actual access_token, id_token, and potentially a refresh_token. This exchange happens directly between your application's backend server and ClassLink's Token Endpoint, not via the user's browser. This server-to-server communication is crucial for security as it keeps your client_secret confidential.
To perform this exchange, your application needs to make an HTTP POST request to ClassLink's Token Endpoint. The request must include specific parameters in the x-www-form-urlencoded format in the request body, and it usually requires HTTP Basic Authentication using your client_id and client_secret.
Required Parameters for the POST Request Body:
grant_type: This must be set toauthorization_code. This tells ClassLink that you are using an authorization code to obtain tokens.code: The authorizationcodethat your application received in the previous callback phase.redirect_uri: The exact sameredirect_urithat was used in the initial authorization request. This is a security measure to ensure the code exchange is happening for the correct application.client_id: Your application'sclient_id.client_secret: Your application'sclient_secret. This is why this request must be made from a secure backend server.
Example POST Request (conceptual):
POST https://launchpad.classlink.com/oauth2/v2/token HTTP/1.1
Content-Type: application/x-www-form-urlencoded
Authorization: Basic {BASE64_ENCODED(CLIENT_ID:CLIENT_SECRET)}

grant_type=authorization_code&
code={AUTHORIZATION_CODE}&
redirect_uri={YOUR_ENCODED_REDIRECT_URI}&
client_id={YOUR_CLIENT_ID}&
client_secret={YOUR_CLIENT_SECRET}
Note: Again, verify the exact Token Endpoint URL with ClassLink's official documentation.
If the request is successful, ClassLink's Token Endpoint will respond with a JSON object containing the tokens:
access_token: This is the primary token used to access protected resources (ClassLinkAPIs) on behalf of the user. It's usually a Bearer token, meaning it should be included in theAuthorizationheader of subsequentAPIcalls (e.g.,Authorization: Bearer {access_token}).Access_tokens have a limited lifespan, typically minutes to an hour.id_token: (Ifopenidscope was requested) This is a JSON Web Token (JWT) that contains claims about the authenticated user, such as their unique identifier (sub), name, email, and other profile information. It is signed by ClassLink, allowing your application to verify its authenticity and integrity. This token is primarily for identity verification.expires_in: An integer representing the lifetime in seconds of theaccess_token. Your application should note this and refresh the token before it expires.refresh_token: (Ifoffline_accessscope was requested and granted) This long-lived token allows your application to obtain newaccess_tokens after the current one expires, without requiring the user to re-authenticate. This is crucial for maintaining continuous access to ClassLink resources even when the user is not actively present. Therefresh_tokenitself typically does not grant access to resources directly but rather to the Token Endpoint for newaccess_tokens.
Your application must parse this JSON response and securely store the access_token, id_token, and refresh_token (if provided).
Phase 4: Using the Tokens
With the access_token in hand, your application can now confidently make requests to ClassLink's various APIs to retrieve user data, roster information, or interact with other protected resources on behalf of the authenticated user.
To use the access_token, you include it in the Authorization header of your HTTP requests to ClassLink APIs, typically as a Bearer token:
Example API Request:
GET https://api.classlink.com/v2/users/{user_id}/profile HTTP/1.1
Authorization: Bearer {YOUR_ACCESS_TOKEN}
Note: The exact API endpoints and required parameters will be detailed in ClassLink's specific API documentation, often adhering to OpenAPI specifications.
When using the id_token (if obtained), its primary purpose is to verify the user's identity. Your application should perform several validations on the id_token to ensure its authenticity and integrity: * Signature Verification: The id_token is a JWT and contains a cryptographic signature. Your application must verify this signature using ClassLink's public keys (often retrieved from ClassLink's OIDC discovery endpoint or a pre-configured certificate). This confirms that the token was issued by ClassLink and has not been tampered with. * Issuer (iss): Verify that the iss claim in the id_token matches ClassLink's expected issuer URL. * Audience (aud): Verify that your application's client_id is present in the aud claim, indicating the token is intended for your application. * Expiration (exp): Check that the exp claim (expiration time) has not passed. * Nonce (nonce): If a nonce was sent in the initial authorization request, verify that the nonce claim in the id_token matches the original nonce value stored in your session.
After successful validation, the claims within the id_token (e.g., sub, name, email) can be used to establish the user's identity within your application.
Phase 5: Refreshing Tokens (if applicable)
Since access_tokens are short-lived for security reasons, your application needs a mechanism to obtain new ones without repeatedly sending the user back through the entire authorization flow. This is where the refresh_token comes into play. If your application requested the offline_access scope during the initial authorization request and ClassLink issued a refresh_token, you can use it to get fresh access_tokens.
To refresh an access_token, your application makes another POST request to ClassLink's Token Endpoint, but this time with a different grant_type:
Required Parameters for Refresh Token Request Body:
grant_type: Set torefresh_token.refresh_token: Therefresh_tokenyou previously received.client_id: Your application'sclient_id.client_secret: Your application'sclient_secret.
Example Refresh Token Request (conceptual):
POST https://launchpad.classlink.com/oauth2/v2/token HTTP/1.1
Content-Type: application/x-www-form-urlencoded
Authorization: Basic {BASE64_ENCODED(CLIENT_ID:CLIENT_SECRET)}

grant_type=refresh_token&
refresh_token={YOUR_STORED_REFRESH_TOKEN}&
client_id={YOUR_CLIENT_ID}&
client_secret={YOUR_CLIENT_SECRET}
Upon a successful refresh request, ClassLink will respond with a new access_token (and potentially a new id_token and a new refresh_token). Your application should then replace the old access_token with the new one and update its expiration time. This allows your application to maintain continuous, authorized access to ClassLink resources, enhancing user experience by reducing the need for frequent re-authentications. Properly managing the refresh_token lifecycle, including secure storage and timely refreshing, is a key aspect of building a robust integration.
This detailed, five-phase guide provides a solid framework for implementing the Authorization Code Flow with ClassLink, ensuring that your application adheres to security best practices and provides a seamless user experience.
Advanced Topics and Best Practices
Moving beyond the basic Authorization Code Flow, there are several advanced topics and best practices that developers should consider to further enhance the security, reliability, and maintainability of their ClassLink integrations. These considerations address common challenges, optimize performance, and leverage the full potential of modern API management strategies.
Implicit Flow vs. Authorization Code Flow
While we've focused heavily on the Authorization Code Flow due to its inherent security benefits for confidential clients (applications with a backend where client_secret can be securely stored), it's important to understand the alternatives and their appropriate use cases. The Implicit Flow (response_type=token or id_token) was historically used by single-page applications (SPAs) or mobile apps that lacked a backend server capable of securely storing a client_secret. In this flow, access_tokens and id_tokens are returned directly in the URL fragment of the redirect_uri.
However, the Implicit Flow is now largely deprecated due to significant security concerns. Tokens exposed in the browser's URL are vulnerable to various attacks, including URL injection, browser history leakage, and referrer header leakage. For modern SPAs and mobile applications, the recommended approach is the Authorization Code Flow with PKCE (Proof Key for Code Exchange).
PKCE (Proof Key for Code Exchange) for Public Clients
PKCE (pronounced "pixy") is an extension to the Authorization Code Flow specifically designed to mitigate the threat of authorization code interception attacks for "public clients" (like SPAs and mobile apps) that cannot securely store a client_secret. PKCE works by having the client generate a high-entropy cryptographically random code_verifier for each authorization request. It then derives a code_challenge from this verifier and sends the code_challenge (along with a code_challenge_method) in the initial authorization request to ClassLink.
When the authorization code is received at the redirect_uri, the client includes the original code_verifier (which was never sent in the initial request) in the subsequent token exchange request to ClassLink's Token Endpoint. ClassLink then verifies that the code_verifier matches the code_challenge it received earlier. If an attacker intercepts the authorization code, they cannot exchange it for tokens without the code_verifier, which they don't possess. This effectively secures the Authorization Code Flow for public clients without requiring a client_secret. ClassLink's OIDC implementation should support PKCE, and it is highly recommended for any client-side or mobile integrations.
Error Handling
Robust error handling is crucial for creating a resilient integration. ClassLink, as an Authorization Server, will return specific error codes and descriptions in various scenarios. Your application must be prepared to gracefully handle these. Common errors from the Authorization Endpoint might include: * invalid_request: Missing a required parameter or an invalid parameter value. * unauthorized_client: The client_id is not recognized or authorized to use the requested response_type. * access_denied: The user explicitly denied the authorization request. * unsupported_response_type: The requested response_type is not supported. * invalid_scope: An requested scope is invalid, unknown, or malformed. When these errors occur, ClassLink will redirect back to your redirect_uri with error and error_description parameters. Your application should display a user-friendly error message, log the details for debugging, and avoid exposing sensitive technical information to the end-user. Similarly, the Token Endpoint can return errors (e.g., invalid_grant for an expired or invalid code, unauthorized_client for invalid credentials). Always check the HTTP status code (e.g., 400 Bad Request) and the JSON error response from ClassLink.
Security Hardening
Beyond PKCE and state parameters, several other practices contribute to a secure integration: * Protecting client_secret: As reiterated, never expose your client_secret in client-side code. Store it in environment variables, a secrets management service (like AWS Secrets Manager, Azure Key Vault, or HashiCorp Vault), or a secure configuration file on your backend server. Restrict access to these secrets rigorously. * Secure Storage of Tokens: Access_tokens and especially refresh_tokens should be stored securely. For web applications, refresh_tokens should be stored in a secure, HTTP-only cookie or a server-side session, encrypted at rest. Access_tokens can be kept in memory for the duration of a request or temporarily in a secure session. Never store them in local storage (localStorage) in the browser as they are vulnerable to XSS attacks. * HTTPS Enforcement: Always use HTTPS for all communication with ClassLink, including your redirect_uri and any API calls. This encrypts data in transit, preventing eavesdropping and tampering. ClassLink will typically enforce HTTPS for production redirect_uris. * Input Validation and Sanitization: Thoroughly validate and sanitize all inputs received from ClassLink, especially parameters in callback URLs, to prevent injection attacks. * Token Expiration and Rotation: Design your application to handle access_token expiration gracefully, using refresh_tokens to obtain new tokens. Implement a strategy for rotating client_secrets periodically.
Rate Limiting and API Usage Policies
ClassLink, like any API provider, will likely have rate limiting policies to protect its services from abuse and ensure fair usage. Your application should be designed to respect these limits. This often involves: * Backoff and Retry Mechanisms: If your application encounters a rate limit error (e.g., HTTP 429 Too Many Requests), implement an exponential backoff strategy before retrying the request. * Caching: Cache API responses where appropriate to reduce the number of redundant API calls. * Understanding Policies: Familiarize yourself with ClassLink's API usage terms and rate limits specified in their developer documentation to avoid service interruptions.
The Role of an API Gateway
For organizations managing a multitude of internal and external APIs, a robust API gateway becomes an indispensable component of their infrastructure. It acts as a single entry point for all API calls, handling tasks such as authentication, authorization, rate limiting, and traffic management, thereby offloading these concerns from individual microservices. Products like APIPark, an open-source AI gateway and API management platform, offer comprehensive solutions for end-to-end API lifecycle management, ensuring efficient and secure API operations, which can be particularly beneficial when integrating with systems like ClassLink. An API gateway can centralize policies for ClassLink API access, enforce granular authorization rules, apply rate limiting consistently across multiple applications, and provide detailed logging and analytics for all API interactions, including those with ClassLink's Authorization Endpoint and subsequent resource APIs. This layered approach enhances security, improves performance, and simplifies the overall API management overhead.
OpenAPI for API Documentation
Finally, while the core authorization endpoints often follow standard OAuth/OIDC specifications, the various ClassLink APIs you access using the access_token are typically documented using OpenAPI specifications. Familiarity with OpenAPI (formerly Swagger) is a significant advantage. OpenAPI specifications provide a machine-readable description of your APIs, including endpoints, operations, input/output parameters, authentication methods, and data models. This allows for automated client code generation, interactive documentation (like Swagger UI), and easier API testing and consumption. When integrating with ClassLink's roster APIs or other data APIs, consulting their OpenAPI documentation will clarify how to structure your requests, what parameters to send, and what responses to expect, significantly streamlining your development process. This standardized approach to API description ensures that developers can quickly understand and integrate with ClassLink's extensive API offerings.
By incorporating these advanced topics and best practices, developers can build integrations with ClassLink that are not only functional but also secure, scalable, and maintainable in the long run, contributing to a more reliable and trustworthy educational technology ecosystem.
Troubleshooting Common Issues
Even with a thorough understanding of the ClassLink Authorization Endpoint and best practices, encountering issues during setup and integration is a common part of the development process. Effective troubleshooting relies on a systematic approach to identify and resolve these problems. Here's a breakdown of common pitfalls and strategies to address them:
1. redirect_uri Mismatch
This is arguably the most frequent error encountered during OAuth 2.0/OIDC integrations. * Symptom: ClassLink returns an error message like "Invalid redirect_uri" or "The redirect_uri provided in the request does not match the ones registered for the client." * Cause: The redirect_uri sent in your initial authorization request (Phase 1) does not exactly match one of the URIs you registered for your application in the ClassLink developer portal. Even a minor difference in casing, a trailing slash, port number, or the HTTP/HTTPS scheme will cause a mismatch. * Resolution: * Verify Exact Match: Double-check the redirect_uri in your code against the registered redirect_uris in ClassLink's configuration. Ensure they are identical, including the scheme (http vs. https), host, port, and path. * Trailing Slashes: Be mindful of trailing slashes. https://yourapp.com/auth/callback/ is different from https://yourapp.com/auth/callback. * Environment Differences: Ensure that redirect_uris for development, staging, and production environments are all correctly registered in ClassLink. Localhost URIs (http://localhost:port/path) must also be registered if you're developing locally. * URL Encoding: Ensure that your redirect_uri is properly URL-encoded when included as a query parameter in the authorization request.
2. Invalid scope
- Symptom: ClassLink returns an error like "Invalid
scope" or "One or more requested scopes are invalid." - Cause: You've requested a
scopethat is not recognized or supported by ClassLink, or your application is not authorized to request that particularscope. - Resolution:
- Consult Documentation: Refer to ClassLink's official
APIdocumentation to get the exact list of supported scopes. - Case Sensitivity: Scopes are often case-sensitive.
- Application Permissions: Verify in your ClassLink application registration that your
client_idhas been granted permission to request the desired scopes. Sometimes, certain scopes require explicit approval or activation within the ClassLink administration console.
- Consult Documentation: Refer to ClassLink's official
3. Expired code or token
- Symptom: During the code-to-token exchange (Phase 3), ClassLink returns an error like "invalid_grant" or "The authorization
codehas expired." Or, subsequentAPIcalls fail with "Unauthorized" after some time. - Cause:
- Authorization Code Expiration: Authorization codes are very short-lived (typically 1-10 minutes). If there's a significant delay between receiving the
codeand making the POST request to the Token Endpoint, it might expire. Access_tokenExpiration:Access_tokens also have a limited lifespan. If your application attempts to use an expiredaccess_tokenfor anAPIcall, it will be rejected.
- Authorization Code Expiration: Authorization codes are very short-lived (typically 1-10 minutes). If there's a significant delay between receiving the
- Resolution:
- Prompt Exchange: Ensure your application exchanges the authorization
codefor tokens as quickly as possible after receiving it. Do not introduce unnecessary delays. - Refresh Token Logic: Implement robust
refresh_tokenlogic (Phase 5). Your application should check theexpires_invalue of theaccess_tokenand use therefresh_tokento proactively obtain a newaccess_tokenbefore the current one expires, or gracefully handle401 Unauthorizedresponses by attempting to refresh the token and re-attempting theAPIcall.
- Prompt Exchange: Ensure your application exchanges the authorization
4. client_id/client_secret Errors
- Symptom: During the token exchange (Phase 3), ClassLink returns "unauthorized_client" or "invalid_client."
- Cause: Your
client_idorclient_secretis incorrect, or the authentication header for the token exchange request is malformed. - Resolution:
- Double-Check Credentials: Verify that the
client_idandclient_secretused in your code are absolutely correct and match what ClassLink provided. Copy-pasting is prone to subtle errors. - Encoding: Ensure your
client_secretis correctly base64-encoded if you are using HTTP Basic Authentication in theAuthorizationheader. - Secure Storage: Confirm that your
client_secretis being retrieved correctly from your secure storage mechanism (e.g., environment variables) and not being truncated or altered. - Confidentiality: Remember that the
client_secretis used only from your backend. If you're attempting to use it from a client-side application, you're misusing the flow, and it will likely fail for security reasons.
- Double-Check Credentials: Verify that the
5. Network Connectivity Issues
- Symptom: Requests to ClassLink endpoints (Authorization or Token) time out or result in network errors.
- Cause: Firewall blocks, DNS issues, or temporary network outages preventing your server from reaching ClassLink's servers.
- Resolution:
- Check Firewalls: Ensure that your server's firewall allows outbound HTTPS traffic to ClassLink's domains.
- DNS Resolution: Verify that your server can correctly resolve ClassLink's domain names (e.g.,
launchpad.classlink.com,api.classlink.com). - Ping/Traceroute: Use network diagnostic tools like
pingortraceroutefrom your server to ClassLink's endpoints to check connectivity. - ClassLink Status Page: Check ClassLink's official status page to see if there are any ongoing service outages or maintenance.
6. Missing or Invalid state Parameter
- Symptom: Your application rejects the callback from ClassLink with a CSRF error, or ClassLink itself returns an error if the
stateparameter is missing or too short. - Cause: Your application failed to generate and store a
stateparameter, or thestatereceived from ClassLink doesn't match the one you stored. - Resolution:
- Generate
state: Always generate a cryptographically randomstatevalue for each authorization request. - Store Securely: Store the
statesecurely in the user's session (e.g., server-side session, encrypted HTTP-only cookie) before redirecting to ClassLink. - Validate on Callback: Implement strict validation on the
stateparameter during the callback. Reject requests if it doesn't match or is absent.
- Generate
Debugging Strategies
- Detailed Logging: Implement comprehensive logging at each stage of the authorization flow on your server. Log the full authorization request URL, the callback URL received, the parameters sent to the Token Endpoint, and the full response from ClassLink. Crucially, sanitize logs to avoid recording actual
client_secrets or raw tokens. - Browser Developer Tools: Use your browser's developer tools (Network tab) to inspect the HTTP redirects and verify the parameters being sent to and received from ClassLink's Authorization Endpoint. Pay close attention to URL encoding.
- Postman/Insomnia: For debugging the Token Endpoint exchange, tools like Postman or Insomnia are invaluable. You can manually construct the POST request to the Token Endpoint with your
client_id,client_secret, and a valid authorizationcodeto isolate issues with that specific step. - ClassLink Developer Tools/Support: Leverage any debugging tools or logs provided by ClassLink. If you're still stuck, reaching out to ClassLink's developer support with your
client_id, request/response logs, and a detailed description of the issue can be very helpful.
By systematically approaching these common issues and utilizing appropriate debugging strategies, you can efficiently troubleshoot and resolve challenges in your ClassLink Authorization Endpoint integration, leading to a successful and robust connection.
Conclusion
Navigating the complexities of secure authorization in today's interconnected educational technology landscape is a formidable task, yet one of paramount importance. ClassLink, as a pivotal identity management and SSO platform, offers a standardized and robust mechanism for integrating applications into the academic ecosystem. This comprehensive guide has endeavored to illuminate the intricate workings of the ClassLink Authorization Endpoint, detailing its underlying OAuth 2.0 and OpenID Connect protocols, dissecting the critical parameters involved, and providing a step-by-step walkthrough of the secure Authorization Code Flow.
We've delved into the essential prerequisites, from registering your application and securing your client_secret to meticulously configuring redirect_uris and understanding scopes. The phased integration guide covered everything from initiating the authorization request and handling the callback to securely exchanging authorization codes for tokens and leveraging those tokens to access ClassLink's rich APIs. Furthermore, we explored advanced topics such as the superior security of PKCE for public clients, robust error handling strategies, and critical security hardening measures like HTTPS enforcement and secure token storage. The discussion around API gateway solutions, exemplified by products like APIPark, underscored their role in centralizing API management, security, and traffic control, which is especially valuable for organizations dealing with multiple API integrations, including those with ClassLink. We also highlighted the utility of OpenAPI specifications in streamlining API consumption. Finally, a practical troubleshooting section equipped developers with the knowledge to diagnose and resolve common integration hurdles effectively.
The benefits of mastering ClassLink integration extend far beyond mere connectivity; they encompass enhanced data security, improved compliance with privacy regulations like FERPA and GDPR, and a significantly streamlined user experience for students and educators alike. By securely and efficiently integrating with ClassLink's Authorization Endpoint, developers can unlock access to a wealth of educational data and functionalities, building applications that seamlessly fit into existing digital learning environments. This not only drives efficiency and reduces administrative burden but also fosters a more engaging and accessible learning experience for all stakeholders. As ed-tech continues to evolve, the principles of secure API management and authorization will remain foundational, urging developers to continuously refine their understanding and implementation of these critical integration patterns to build a more secure, interconnected, and effective future for education. The journey into ClassLink integration is an investment in creating impactful and reliable educational tools.
Frequently Asked Questions (FAQ)
- What is the difference between the Authorization Endpoint and the Token Endpoint in ClassLink's OAuth 2.0 flow? The Authorization Endpoint is where your application redirects the user's browser to authenticate with ClassLink and obtain their consent for your application to access specific resources. It's the first step, involving the user's interaction. Upon success, ClassLink redirects the user back to your application with an authorization code. The Token Endpoint, on the other hand, is a server-to-server endpoint where your application's backend exchanges that authorization code (along with its
client_idandclient_secret) foraccess_tokens,id_tokens, andrefresh_tokens. This endpoint never involves the user's browser directly and is crucial for keeping yourclient_secretconfidential. - Why is the
stateparameter so important in the Authorization Code Flow? Thestateparameter is a critical security measure used primarily to prevent Cross-Site Request Forgery (CSRF) attacks. When your application initiates the authorization request, it generates a unique, cryptographically randomstatevalue and stores it in the user's session. ClassLink then includes this exactstatevalue when redirecting the user back to yourredirect_uri. Your application must verify that the receivedstatematches the storedstate. If they don't match, it indicates a potential attack where a malicious actor might have initiated the authorization flow on behalf of the user, and the request should be rejected. - What are
scopesand how do I determine which ones I need for my application?Scopesdefine the specific permissions your application is requesting from the user on ClassLink. They represent granular access to user data orAPIfunctionalities (e.g.,profilefor basic user info,emailfor email address,oneroster.readfor roster data). You should determine the minimum set ofscopesabsolutely necessary for your application to function, adhering to the principle of least privilege. Requesting too manyscopescan raise privacy concerns for users and potentially lead to lower consent rates. Always consult ClassLink'sAPIdocumentation for the availablescopesand their meanings. - How often do ClassLink
access_tokens expire, and what should I do when they do? ClassLinkaccess_tokens are generally short-lived, often expiring within minutes to an hour, for security reasons. When anaccess_tokenexpires, attempts to use it forAPIcalls will result in an "Unauthorized" error (e.g., HTTP 401). To maintain continuous access without user re-authentication, your application should request theoffline_accessscopeduring the initial authorization to obtain arefresh_token. When anaccess_tokenexpires, use therefresh_tokento make a POST request to ClassLink's Token Endpoint withgrant_type=refresh_tokento get a newaccess_token. This process should be handled gracefully by your application's backend. - Can I use ClassLink's Authorization Endpoint with a Single-Page Application (SPA) or a mobile app? Yes, you can, but with specific considerations. For SPAs and mobile apps, which are "public clients" because they cannot securely store a
client_secreton their client-side, the recommended approach is the Authorization Code Flow with PKCE (Proof Key for Code Exchange). PKCE adds an extra layer of security by requiring the client to demonstrate proof of ownership of the authorization code during the token exchange, mitigating the risk of authorization code interception. The older "Implicit Flow" (response_type=tokenorid_token) is generally considered less secure and is deprecated for new development.
🚀You can securely and efficiently call the OpenAI API on APIPark in just two steps:
Step 1: Deploy the APIPark AI gateway in 5 minutes.
APIPark is developed based on Golang, offering strong product performance and low development and maintenance costs. You can deploy APIPark with a single command line.
curl -sSO https://download.apipark.com/install/quick-start.sh; bash quick-start.sh

In my experience, you can see the successful deployment interface within 5 to 10 minutes. Then, you can log in to APIPark using your account.

Step 2: Call the OpenAI API.