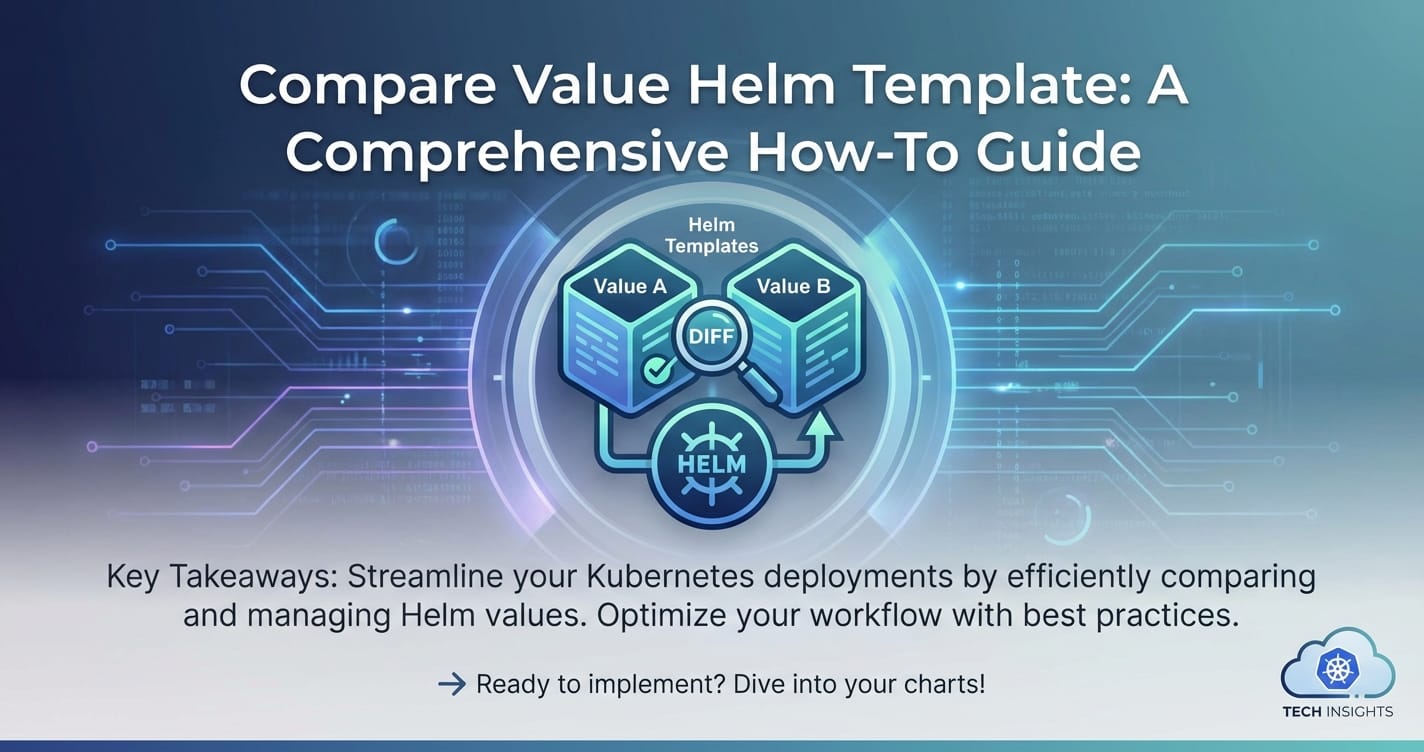
Compare Value Helm Template: A Comprehensive How-To Guide


The cloud-native landscape has revolutionized how applications are built, deployed, and managed. At the heart of this transformation lies Kubernetes, an immensely powerful container orchestration system. However, the sheer complexity of managing Kubernetes resources – from deployments and services to ingresses and persistent volumes – can be daunting. This is where Helm, often dubbed the "package manager for Kubernetes," steps in, simplifying the process of defining, installing, and upgrading even the most intricate applications.
Helm achieves this simplification through its use of charts, which are collections of pre-configured Kubernetes resource definitions. Crucially, these charts are not static. They are dynamic templates, designed to be flexible and adaptable to various environments and configurations. This adaptability is primarily driven by the ability to "compare values" within these templates – a powerful mechanism that allows developers and operations teams to tailor deployments without modifying the core chart logic. Understanding how to effectively compare values in Helm templates is not just a best practice; it's a fundamental skill for anyone looking to master Kubernetes application management. This comprehensive guide will delve into every facet of value comparison in Helm, from the foundational concepts to advanced techniques, ensuring your deployments are robust, flexible, and perfectly aligned with your operational needs.
Part 1: Introduction to Helm and the Power of Templating
1.1 What is Helm and Why is it Indispensable for Kubernetes?
Kubernetes, while offering unparalleled power and flexibility, comes with a steep learning curve, especially when managing application deployments. A typical application might require multiple Kubernetes manifests: a Deployment for the application pods, a Service to expose them, an Ingress for external access, ConfigMaps for configuration, and Secrets for sensitive data. Manually creating, managing, and updating these YAML files for every application and environment quickly becomes unsustainable. This is precisely the problem Helm was designed to solve.
Helm acts as a package manager for Kubernetes. Just as apt manages packages on Ubuntu or npm manages JavaScript libraries, Helm manages Kubernetes applications. It bundles all the necessary Kubernetes resources for an application into a single, versioned package called a "chart." A Helm chart encapsulates an application's definition, allowing it to be easily installed, upgraded, rolled back, and deleted with simple commands. This abstraction significantly reduces the operational overhead of deploying and managing applications on Kubernetes, enabling teams to focus more on development and less on infrastructure boilerplate. The benefits extend beyond mere convenience; Helm fosters consistency across environments, streamlines CI/CD pipelines, and promotes reusability of application configurations, making it an indispensable tool for modern cloud-native development.
1.2 The Role of Helm Charts in Packaging Kubernetes Applications
A Helm chart is essentially a directory structure containing various files that define an application. The core components include: * Chart.yaml: This file provides metadata about the chart, such as its name, version, and a brief description. It’s the chart's manifest, essential for identification and dependency management. * values.yaml: This crucial file defines the default configuration values for the chart. These values can then be overridden by users during installation or upgrade, providing the flexibility needed for different environments. * templates/: This directory contains the actual Kubernetes manifest templates, written in Go template syntax. These are not static YAML files but dynamic constructs that are rendered into Kubernetes manifests using the values provided. * _helpers.tpl: Often found within the templates/ directory, this file is used to define reusable named templates and partials that can be included in other templates, promoting modularity and reducing repetition. * charts/: This directory can contain dependent charts, allowing for the composition of complex applications from simpler, reusable components.
By packaging all these elements together, a Helm chart provides a self-contained, versioned unit for deploying applications. This standardized packaging model allows for easy sharing and discovery of applications through Helm repositories, fostering a vibrant ecosystem of pre-built and community-maintained charts for a vast array of software. From databases like PostgreSQL to monitoring stacks like Prometheus, countless applications are readily deployable via Helm charts, vastly accelerating time-to-market and reducing deployment complexities.
1.3 Introduction to Helm Templating: The Core Concept
At the heart of Helm's flexibility lies its templating engine. Helm charts use the Go template language, extended with Sprig functions (a comprehensive library of utility functions), to generate Kubernetes manifests dynamically. Instead of writing static YAML files, you write templates that contain placeholders and logical constructs. These placeholders are then populated with values provided by the user or defined in values.yaml at installation time.
Consider a simple Deployment manifest. Instead of hardcoding the number of replicas, you might define it as {{ .Values.replicaCount }}. When Helm processes this template, it looks for replicaCount in your values and substitutes its actual number. This allows a single chart to be used for multiple environments (e.g., a development environment with 1 replica and a production environment with 5 replicas) simply by providing different values.yaml files or command-line overrides. The templating engine handles the heavy lifting, transforming your abstract chart definition into concrete Kubernetes resources tailored to your specific needs. This capability is fundamental to building reusable and adaptable charts that can serve a wide range of use cases without requiring chart modification for each deployment scenario.
1.4 Why "Comparing Values" in Helm Templates is Crucial
The true power of Helm templating isn't just in substituting values; it's in comparing them. By introducing conditional logic based on value comparisons, Helm charts can become incredibly intelligent and adaptable. Imagine a scenario where you want to deploy an Ingress controller only if external access is required, or provision a persistent volume claim only if stateful storage is enabled for a particular service. These decisions depend on comparing configuration values.
Value comparison allows you to: * Enable/Disable Features: Conditionally include or exclude entire Kubernetes resources (like Ingresses, Persistent Volume Claims, or specific sidecar containers) based on a boolean flag. * Tailor Configurations to Environments: Adjust resource requests/limits, logging levels, or database connection strings based on environment values (e.g., "dev," "staging," "prod"). * Handle Different Architectures: Deploy different storage classes or network policies based on infrastructure-specific values. * Implement Feature Flags: Roll out new features gradually by toggling them via Helm values. * Ensure Security and Compliance: Configure security contexts or network policies conditionally based on compliance requirements.
Without the ability to compare values, Helm charts would be far less flexible, requiring separate charts or manual modifications for each unique deployment scenario. This would defeat the purpose of a package manager, leading to configuration drift and increased maintenance burden. Mastering value comparison transforms your Helm charts into powerful, dynamic configuration engines, capable of adapting to almost any requirement.
Part 2: The Fundamentals of Helm Values
The values.yaml file is the entry point for customizing a Helm chart. It serves as the chart's configuration interface, allowing users to define parameters that influence how the templates are rendered. Understanding how values are structured, processed, and prioritized is crucial for effective Helm chart usage and development.
2.1 values.yaml: The Cornerstone of Chart Configuration
Every Helm chart must have a values.yaml file, even if it's empty. This file defines the default configuration parameters for the chart. These parameters are structured as a YAML dictionary, mirroring the hierarchical nature of Kubernetes manifests and application configurations. For example, a common pattern is to nest related configurations under a top-level key:
# values.yaml example
replicaCount: 1

image:
  repository: nginx
  tag: 1.21.6
  pullPolicy: IfNotPresent

service:
  type: ClusterIP
  port: 80

ingress:
  enabled: false
  className: ""
  annotations: {}
  host: chart-example.local
  paths:
    - path: /
      pathType: ImplementationSpecific
In your templates, you would access these values using the .Values object. For instance, {{ .Values.replicaCount }} would fetch 1, and {{ .Values.image.repository }} would fetch nginx. The values.yaml file acts as a clear contract between the chart developer and the chart user, documenting the available configuration options and their default behaviors. Well-structured values.yaml files, accompanied by inline comments, significantly improve the usability and maintainability of Helm charts, making it easier for new users to understand and adapt the chart to their specific needs without extensive external documentation.
2.2 Understanding Different Sources of Values: Default, User-Provided, Command-Line
Helm offers a powerful cascading mechanism for values, allowing configuration to be layered from multiple sources, with later sources overriding earlier ones. This hierarchy provides immense flexibility:
- Default Values (
values.yamlwithin the chart): These are the baseline configurations provided by the chart developer. They are always applied first. - User-Provided Value Files (
-for--valuesflag): Users can provide one or more customvalues.yamlfiles. These files are typically specific to an environment (e.g.,values-dev.yaml,values-prod.yaml). Values in these files override corresponding values from the defaultvalues.yaml. If multiple-fflags are used, the values are merged in order, with the last file taking precedence. - Command-Line Overrides (
--setor--set-stringor--set-jsonflags): The highest precedence is given to values specified directly on the command line using--set. These are useful for quick, ad-hoc changes or for setting environment variables in automated scripts.--set key=value: Sets a simple string value.--set key.subkey=value: Sets a nested value.--set key={val1,val2}: Sets a list of values.--set-string key=value: Ensures the value is treated as a string, preventing potential YAML type inference issues.--set-json key='{"foo": "bar"}': Sets a JSON object or array.
This cascading order ensures that chart developers can provide sensible defaults, while users can fine-tune those defaults for their specific deployment contexts without having to fork or modify the original chart. For example, a chart might default to a single replica, but a user could easily override this for production with --set replicaCount=5. This layered approach is critical for managing complexity and promoting reusability across diverse deployment scenarios.
2.3 Data Types and Structure within values.yaml
YAML, being a superset of JSON, supports various data types that can be used in values.yaml:
- Strings:
name: "my-app"ortag: latest - Numbers:
replicaCount: 3,port: 8080(integers and floats) - Booleans:
enabled: true,debug: false - Lists (Arrays): ```yaml tolerations:
- key: "special-node" operator: "Exists" effect: "NoSchedule" ```
- Dictionaries (Maps/Objects):
yaml resources: limits: cpu: 100m memory: 128Mi requests: cpu: 50m memory: 64Mi
Understanding these data types is vital because how you compare values in templates often depends on their type. For instance, comparing a boolean true with the string "true" will yield different results if not handled carefully. Helm's Go template engine, combined with Sprig functions, provides utilities to work with different data types, allowing for robust and type-aware comparisons. Incorrect data types can lead to subtle bugs that are hard to debug, emphasizing the need for careful consideration during chart development.
2.4 Best Practices for Organizing values.yaml
A well-organized values.yaml file is key to a maintainable Helm chart. Here are some best practices:
- Group Related Settings: Use nested dictionaries to logically group related configurations. For instance, all image-related settings under
image, all service-related settings underservice, etc. This improves readability and makes it easier to find specific settings. - Provide Sensible Defaults: Configure values that represent the most common or safest deployment scenario. For example,
replicaCount: 1for development, oringress.enabled: falseby default for security. - Include Explanatory Comments: Document each significant value or section with comments explaining its purpose, accepted values, and any implications. This is invaluable for users who are new to the chart.
- Avoid Over-Configuration: Don't expose every single Kubernetes manifest field as a configurable value. Focus on the parameters that are most likely to change across deployments or environments. Too many options can make the chart cumbersome.
- Use Consistent Naming Conventions: Stick to a clear and consistent naming scheme (e.g., camelCase or kebab-case) for all your value keys to improve predictability.
- Separate Environment-Specific Values: For complex applications, recommend that users create separate
values-dev.yaml,values-prod.yamlfiles instead of trying to cram all environment-specific logic into the mainvalues.yamlwith complex comparisons. This promotes clarity and reduces errors.
By adhering to these practices, chart developers can create Helm charts that are not only powerful but also user-friendly and easy to maintain, reducing the cognitive load for anyone interacting with them.
Part 3: Deep Dive into Helm Templating Language (Go Template)
The Go template language, enhanced by Sprig functions, is the engine that powers Helm charts. To effectively compare values, a solid understanding of this language's syntax, variables, and control flow is essential.
3.1 Introduction to Go Template Syntax
Go templates use special delimiters to denote templated content: * {{ ... }}: Used for actions, which can be data evaluations, control structures, or function calls. * {{- ... -}}: Removes whitespace before and after the evaluated content. * {{ ... -}}: Removes whitespace after. * {{- ... }}: Removes whitespace before.
The primary object available within templates is ., which refers to the current context. In Helm, at the top level, . refers to the entire values.yaml content combined with chart metadata. Specifically: * .Values: Accesses the merged values from values.yaml, user-provided files, and command-line overrides. * .Chart: Accesses the metadata from Chart.yaml. * .Release: Provides information about the current Helm release (e.g., name, namespace, service). * .Capabilities: Provides information about the Kubernetes cluster's capabilities (e.g., Kubernetes version).
A basic template might look like this:
apiVersion: apps/v1
kind: Deployment
metadata:
  name: {{ .Release.Name }}-{{ .Chart.Name }}
spec:
  replicas: {{ .Values.replicaCount }}
  selector:
    matchLabels:
      app: {{ .Chart.Name }}
  template:
    metadata:
      labels:
        app: {{ .Chart.Name }}
    spec:
      containers:
        - name: {{ .Chart.Name }}
          image: "{{ .Values.image.repository }}:{{ .Values.image.tag }}"
          ports:
            - containerPort: {{ .Values.service.port }}
This snippet demonstrates how {{ .Release.Name }} fetches the name of the Helm release, {{ .Chart.Name }} fetches the chart's name, and {{ .Values.replicaCount }} fetches a value from the values.yaml. The use of quotation marks around image strings is crucial to prevent YAML parsers from misinterpreting numeric tags (like 1.0) as numbers, leading to potential deployment failures. Understanding these fundamental syntax elements is the first step towards writing sophisticated and dynamic Helm templates.
3.2 Variables, Functions, and Pipelines
Go templates are not just for direct value substitution; they support variables, functions, and powerful pipelines.
- Variables: You can declare local variables within templates using the
:=operator. This is useful for storing intermediate results or reusing complex expressions.go {{- $fullName := printf "%s-%s" .Release.Name .Chart.Name -}} apiVersion: apps/v1 kind: Deployment metadata: name: {{ $fullName }}The{{- ... -}}syntax here ensures no extra whitespace is introduced, which is vital in YAML manifests. - Functions: Helm extends Go templates with a rich set of Sprig functions. These functions perform various operations like string manipulation, arithmetic, data type conversions, and logical operations. Examples include
default,quote,hasPrefix,toUpper,add,list,indent,b64enc, and many more.go image: "{{ .Values.image.repository }}:{{ default "latest" .Values.image.tag }}"Here, thedefaultfunction provides a fallback tag ifimage.tagis not specified invalues.yaml. - Pipelines: Functions can be chained together using the pipe
|operator, forming a "pipeline." The output of one function becomes the input of the next.go name: {{ .Values.appName | default "my-app" | quote | upper }}This example first provides a default value forappName, then wraps it in quotes, and finally converts it to uppercase. Pipelines make templates more concise and readable, allowing complex data transformations to be expressed elegantly.
3.3 Control Flow: if/else, range
Control flow statements are what enable value comparison to drive conditional logic in Helm templates.
if/else: This is the most common control structure for conditional rendering.go {{- if .Values.ingress.enabled }} apiVersion: networking.k8s.io/v1 kind: Ingress metadata: name: {{ include "mychart.fullname" . }} {{- with .Values.ingress.annotations }} annotations: {{- toYaml . | nindent 4 }} {{- end }} spec: rules: - host: {{ .Values.ingress.host }} http: paths: {{- .Values.ingress.paths | toYaml | nindent 14 }} {{- end }}This snippet demonstrates how an entire Ingress resource can be conditionally created only ifingress.enabledis set totrue. Thewithaction changes the scope of.toingress.annotationswithin its block, making it easier to access nested values. Thenindentfunction is a crucial Sprig function for proper YAML indentation.range: This iterates over lists or dictionaries. ```go env: {{- range $key, $value := .Values.environmentVariables }}- name: {{ $key | upper }} value: {{ $value | quote }} {{- end }}
`` Here,rangeiterates over a dictionaryenvironmentVariables`, creating an environment variable for each key-value pair. This is incredibly useful for dynamically generating lists of resources, environment variables, or other repeatable configurations.
- name: {{ $key | upper }} value: {{ $value | quote }} {{- end }}
3.4 Named Templates and _helpers.tpl
For complex charts, repeating common snippets of Go template code can lead to maintenance headaches. Helm addresses this with "named templates," often stored in _helpers.tpl files.
_helpers.tpl: This file (or multiple files with a leading underscore) is specifically for defining reusable templates. Helm treats files starting with an underscore as non-resource files, meaning they won't be rendered directly into Kubernetes manifests.- Named Templates: You define a named template using
{{- define "chart.name" -}} ... {{- end -}}. ```go {{/ Expand the name of the chart. /}} {{- define "mychart.name" -}} {{- default .Chart.Name .Values.nameOverride | trunc 63 | trimSuffix "-" -}} {{- end -}}{{/ Create a default fully qualified app name. /}} {{- define "mychart.fullname" -}} {{- if .Values.fullnameOverride -}} {{- .Values.fullnameOverride | trunc 63 | trimSuffix "-" -}} {{- else -}} {{- $name := default .Chart.Name .Values.nameOverride -}} {{- if contains $name .Release.Name -}} {{- .Release.Name | trunc 63 | trimSuffix "-" -}} {{- else -}} {{- printf "%s-%s" .Release.Name $name | trunc 63 | trimSuffix "-" -}} {{- end -}} {{- end -}} {{- end -}}`` These examples show common_helpers.tpl` templates for generating names. includeandrequired: To use a named template, you use theincludefunction, passing the current context (.) to it.yaml metadata: name: {{ include "mychart.fullname" . }}Therequiredfunction, often used in conjunction with named templates or variable assignments, ensures that certain values are provided, failing the Helm operation if they are missing. This is a powerful way to enforce mandatory configuration.
Using named templates not only promotes DRY (Don't Repeat Yourself) principles but also makes charts more readable and easier to maintain. It allows chart developers to encapsulate complex logic into reusable blocks, significantly improving the overall quality and robustness of their charts.
3.5 Scope and Context in Templates
Understanding scope and context (.) is fundamental to avoiding common Helm templating errors. The . refers to the current data context. When you use with or range, the context changes.
- Global Context: At the top level of a template file,
.refers to the fullReleaseobject, which includes.Values,.Chart,.Release, and.Capabilities. - Context with
with: Thewithaction temporarily changes the context.go {{- with .Values.ingress }} # Inside this block, . refers to .Values.ingress host: {{ .host }} # This is equivalent to .Values.ingress.host outside the block {{- end }} - Context with
range: In arangeloop,.refers to the current item in the iteration.go {{- range $key, $value := .Values.environmentVariables }} # Inside this block, . refers to the current item (e.g., a dictionary for env var) # $key is the key, $value is the value {{- end }} - Accessing Global Context from a Changed Scope: Sometimes, you need to access a top-level value (like
.Release.Name) from within awithorrangeblock where.has changed. You can do this by passing the global context into thewithorrangeblock as an argument, or by assigning the global context to a variable before entering the block.go {{- $global := . }} {{- with .Values.ingress }} # Inside this block, . refers to .Values.ingress, but $global still refers to the top-level context name: {{ $global.Release.Name }}-ingress host: {{ .host }} {{- end }}Alternatively, for named templates, you always pass the desired context.{{ include "mychart.fullname" . }}passes the current context. If you want to force the top-level context, you would write{{ include "mychart.fullname" $global }}.
Misunderstanding context is a common source of bugs in Helm charts. Always be aware of what . represents at any given point in your template.
Part 4: The Art of Comparison in Helm Templates
The ability to compare values is the cornerstone of dynamic Helm charts. It allows your templates to react intelligently to configuration changes, enabling highly flexible and environment-aware deployments.
4.1 Why Compare Values? Use Cases (Environment-Specific Configs, Feature Flags, Scaling)
Value comparison isn't just an academic exercise; it's a practical necessity for real-world Kubernetes deployments. Here are compelling reasons and common use cases:
- Environment-Specific Configurations:
- Resource Limits: Production environments often require higher CPU/memory limits than development. You can compare
environment: prodtoenvironment: devand set different resource requests/limits. - External Service Endpoints: Database connection strings, message queue URLs, or external API endpoints will vary. A simple
if .Values.environment == "prod"can switch between production and staging URLs. - Logging Levels: Verbose logging in dev, concise logging in prod.
- Resource Limits: Production environments often require higher CPU/memory limits than development. You can compare
- Feature Flags and Toggles:
- Optional Components: A sidecar container for metrics collection, a debugging proxy, or an auxiliary database migration job might only be needed in specific scenarios. A boolean
metrics.enabled: trueordebug.enabled: trueallows you to conditionally include these. - New Feature Rollout: Gradually enable a new feature for a subset of users or environments by toggling a flag, providing a controlled release mechanism.
- Optional Components: A sidecar container for metrics collection, a debugging proxy, or an auxiliary database migration job might only be needed in specific scenarios. A boolean
- Dynamic Scaling and Availability:
- Replica Counts: Set
replicaCount: 1for development,replicaCount: 3for staging, andreplicaCount: 5for production. - High Availability (HA) Settings: Enable anti-affinity rules, PDBs (Pod Disruption Budgets), or specific node selectors only when
ha.enabled: true.
- Replica Counts: Set
- Security and Compliance:
- Network Policies: Apply stricter network policies in production environments compared to development.
- Security Contexts: Enforce
readOnlyRootFilesystem: trueor specificrunAsUsersettings only for production.
- Infrastructure Selection:
- Storage Classes: Use a fast SSD storage class in production vs. a cheaper HDD class in development.
- Node Pools: Deploy specific workloads to dedicated GPU or high-memory node pools.
By embedding this conditional logic directly into the Helm chart, you create a single, canonical definition of your application that can adapt to a multitude of situations without manual intervention, significantly reducing configuration drift and operational errors.
4.2 Basic Comparison Operators: eq, ne, lt, le, gt, ge
Go templates, enhanced by Sprig, provide a suite of comparison operators for various data types. These are typically used within if statements.
ne(not equals): Checks if two values are not equal.go {{- if ne .Values.environment "dev" }} # Any environment except dev {{- end }}lt(less than): Checks if the first value is less than the second.go {{- if lt .Values.resource.cpuLimit 200 }} # CPU limit is less than 200m {{- end }}This is primarily used for numerical comparisons.le(less than or equals): Checks if the first value is less than or equal to the second.go {{- if le .Values.replicaCount 1 }} # Single-instance or no replica configuration {{- end }}gt(greater than): Checks if the first value is greater than the second.go {{- if gt .Values.resource.memoryLimit 1024 }} # Memory limit is over 1GB {{- end }}ge(greater than or equals): Checks if the first value is greater than or equal to the second.go {{- if ge .Capabilities.KubeVersion.Major "1" | and (ge .Capabilities.KubeVersion.Minor "20") }} # Kubernetes version is 1.20 or newer {{- end }}This example also introduces logicaland, showing how comparisons can be combined.
eq (equals): Checks if two values are equal. ```go {{- if eq .Values.environment "prod" }} # Production-specific configuration {{- end }}{{- if eq .Values.replicaCount 3 }}
Specific logic for 3 replicas
{{- end }} ``eq` can compare strings, numbers, and booleans. It's robust for most equality checks.
These basic operators form the foundation of most conditional logic in Helm templates. Correctly applying them allows for fine-grained control over resource generation and configuration.
4.3 Logical Operators: and, or, not
For more complex conditional scenarios, Helm templates support logical operators to combine multiple comparison results.
and: Returnstrueif all arguments aretrue.go {{- if and (eq .Values.environment "prod") (.Values.ingress.enabled) }} # Ingress is enabled AND it's a production environment {{- end }}Notice that.Values.ingress.enabledalone acts as a boolean check.or: Returnstrueif at least one argument istrue.go {{- if or (eq .Values.environment "dev") (.Values.debug.enabled) }} # Debug mode is on OR it's the development environment {{- end }}not: Returns the logical negation of its argument.go {{- if not .Values.ingress.enabled }} # Ingress is NOT enabled {{- end }}This is equivalent to{{- if not (eq .Values.ingress.enabled true) }}or{{- if eq .Values.ingress.enabled false }}. Usingnotcan sometimes make the condition more readable.
By combining these logical operators with comparison operators, you can construct highly sophisticated conditional expressions, enabling your charts to make complex deployment decisions based on multiple configuration parameters. Parentheses () are used for grouping conditions, similar to mathematical expressions, to control the order of evaluation.
4.4 Conditionals with if and else: Practical Examples
The if/else construct is where comparisons are truly put into action. It allows you to render different blocks of YAML based on conditions.
Example 1: Environment-Specific Resource Limits
# values.yaml
environment: dev # or prod
resources:
  dev:
    limits:
      cpu: 100m
      memory: 128Mi
    requests:
      cpu: 50m
      memory: 64Mi
  prod:
    limits:
      cpu: 500m
      memory: 1Gi
    requests:
      cpu: 250m
      memory: 512Mi
# deployment.yaml template
resources:
{{- if eq .Values.environment "prod" }}
{{ toYaml .Values.resources.prod | nindent 6 }}
{{- else if eq .Values.environment "dev" }}
{{ toYaml .Values.resources.dev | nindent 6 }}
{{- else }}
{{ toYaml .Values.resources.dev | nindent 6 }} # Default to dev resources if environment not specified or unknown
{{- end }}
This example uses if/else if/else to select different resource definitions based on the environment value. The toYaml function converts the dictionary into a YAML string, and nindent ensures proper indentation.
Example 2: Conditional Sidecar Container
# values.yaml
metrics:
  enabled: true
  port: 9090
# deployment.yaml template (snippet)
spec:
  template:
    spec:
      containers:
        - name: my-app
          image: my-repo/my-app:latest
          ports:
            - containerPort: 8080
        {{- if .Values.metrics.enabled }}
        - name: metrics-sidecar
          image: prom/exporter:latest
          ports:
            - containerPort: {{ .Values.metrics.port }}
          # additional metrics sidecar configuration
        {{- end }}
Here, the metrics-sidecar container is only included in the Deployment if metrics.enabled is set to true. This demonstrates how entire parts of a manifest can be toggled.
These examples highlight the flexibility that conditional logic brings to Helm templates, allowing a single chart to serve multiple, distinct configuration requirements.
4.5 Using lookup Function for Dynamic Comparisons
The lookup function is a powerful, yet less commonly used, Sprig function that allows Helm to query the Kubernetes API server for existing resources during templating. This means you can make decisions based on the current state of your cluster.
The syntax for lookup is (lookup apiVersion kind namespace name).
Example: Conditional Ingress Creation if an Existing Service Exists
Imagine you want to create an Ingress only if a certain Service (e.g., my-service) already exists in the same namespace.
{{- $serviceExists := false }}
{{- $foundService := lookup "v1" "Service" .Release.Namespace "my-service" }}
{{- if $foundService }}
{{- $serviceExists = true }}
{{- end }}

{{- if and .Values.ingress.enabled $serviceExists }}
apiVersion: networking.k8s.io/v1
kind: Ingress
metadata:
  name: {{ include "mychart.fullname" . }}-ingress
spec:
  rules:
    - host: {{ .Values.ingress.host }}
      http:
        paths:
          - path: /
            pathType: Prefix
            backend:
              service:
                name: my-service
                port:
                  number: 80
{{- end }}
In this scenario, Helm will attempt to retrieve the my-service Service. If it finds it ($foundService is not nil), $serviceExists becomes true, and the Ingress is rendered (assuming ingress.enabled is also true). This adds a dynamic layer of intelligence to your charts, allowing them to adapt not just to provided values but also to the actual state of the Kubernetes cluster. However, use lookup judiciously, as querying the API server can add overhead to Helm operations and might lead to unexpected behavior if not handled carefully (e.g., race conditions if other resources are being created concurrently).
4.6 Comparing Strings, Numbers, Booleans, and Arrays
While the basic operators (eq, ne, etc.) work across types, it's crucial to understand how they behave with different data types.
- Strings: String comparisons are typically case-sensitive.
go {{- if eq .Values.region "us-east-1" }} ... {{- end }}For case-insensitive comparisons, you might convert both to uppercase or lowercase first:go {{- if eq (.Values.region | lower) "us-east-1" }} ... {{- end }}For partial string matching, Sprig provideshasPrefix,hasSuffix,contains:go {{- if contains "prod" .Values.environment }} # Matches "production", "prod-eu", etc. {{- end }} - Numbers: Numerical comparisons (
lt,gt,eq, etc.) behave as expected for integers and floats.go {{- if gt .Values.maxConnections 1000 }} ... {{- end }}Be mindful of YAML's type inference. If you intend a string to be a number, ensure it's not quoted, and vice versa. - Booleans: Booleans (
true,false) are often used directly inifstatements.go {{- if .Values.featureToggle.enabled }} ... {{- end }} {{- if not .Values.debugMode }} ... {{- end }}Directly comparing withtrueorfalseusingeqis also valid:{{- if eq .Values.featureToggle.enabled true }}.
Arrays (Lists): Direct equality comparison (eq) on arrays will typically check if they are the exact same object in memory or if they have the exact same elements in the exact same order. For checking if an array contains a specific element, Sprig's has function is invaluable. ```go # values.yaml features: ["metrics", "logging", "tracing"]
template.yaml
{{- if has "metrics" .Values.features }}
Metrics feature is enabled
{{- end }} To check if an array is empty:go {{- if not .Values.tolerations }} # If tolerations list is empty or nil
No tolerations defined
{{- end }} `` Theemptyfunction also works:{{- if empty .Values.tolerations }}`.
Understanding these type-specific behaviors prevents unexpected template rendering issues and allows you to write accurate and robust comparison logic.
4.7 Advanced Comparisons: Checking for Existence, Non-Empty Values
Beyond simple equality, Helm templates often need to check if a value exists or if it's not empty, which is slightly different from being false or 0.
- Checking for Existence (Nil/Empty): The
ifstatement in Go templates treatsnil,false,0, and empty strings/collections as "falsy". This is extremely useful.go # Check if a value is provided at all {{- if .Values.database.password }} # Password is set, so create a Secret {{- end }}This works because ifdatabase.passwordis not present invalues.yaml(or overridden), it will benil, and theifcondition will evaluate tofalse. - Using
defaultfor Robustness: Often, you want to provide a default value if a key is missing.go port: {{ .Values.service.port | default 80 }}Here, ifservice.portis not defined, it defaults to80. This is not a comparison, but it's a common pattern when dealing with optional values. - Using
emptyfunction: Theemptyfunction explicitly checks if a variable is considered "empty" (nil, false, 0, empty string, empty map, empty array).go {{- if empty .Values.customConfig }} # No custom config provided {{- else }} # Custom config present {{- end }}
Using hasKey function: To check if a specific key exists within a map (dictionary), irrespective of its value (even if it's nil or false), use hasKey. ```go # values.yaml myMap: myKey: null # This key exists, but its value is null anotherKey: "hello"
template.yaml
{{- if hasKey .Values.myMap "myKey" }} # This will be true Key 'myKey' exists. {{- end }}{{- if hasKey .Values.myMap "nonExistentKey" }} # This will be false {{- end }} ``hasKey` is particularly useful when you need to differentiate between a key being absent and a key existing with an empty or null value.
These advanced techniques empower you to write more resilient and intelligent Helm charts that gracefully handle various input scenarios, from completely missing values to intentionally empty ones.
Part 5: Advanced Templating Patterns for Value Comparison
Moving beyond basic comparisons, advanced patterns leverage these techniques to create highly flexible and scalable Helm charts. These patterns address common real-world challenges in Kubernetes deployments.
5.1 Overriding Values: How to Manage Multiple values.yaml Files
While --set is useful for ad-hoc changes, managing configuration for different environments (dev, staging, prod) or specific customers typically involves multiple values.yaml files. Helm processes these files in a specific order:
helm install my-app ./mychart \
  -f values.yaml \              # Default values (often in the chart itself)
  -f values-common.yaml \       # Common overrides for all environments
  -f values-dev.yaml \          # Dev-specific overrides
  -f values-secrets.yaml        # Sensitive values (optional, often managed by external tools)
Values are merged from left to right, with later files taking precedence. This allows you to define a baseline, apply common changes, and then apply environment-specific overrides.
Example: Layered Configuration
values-common.yaml:
image:
  repository: my-app
  tag: 1.0.0
resourceRequests:
  cpu: 100m
  memory: 128Mi
values-prod.yaml:
replicaCount: 5
image:
  tag: 1.0.1 # Overrides common tag
resourceRequests:
  cpu: 500m # Overrides common CPU request
  memory: 1Gi
ingress:
  enabled: true
  host: myapp.production.com
When these are merged, replicaCount will be 5, image.tag will be 1.0.1, and ingress will be enabled. This layered approach dramatically simplifies managing complex configurations for diverse deployment needs, avoiding the need for intricate if/else structures for every single variable in the main chart templates.
5.2 Using include and tpl Functions for Complex Logic
tpl (Template Pipeline): The tpl function is extremely powerful and allows you to render a string as a Go template within another template. This enables dynamic template generation.Example: Dynamically Generated Configuration based on a Value Suppose you have a complex configuration string that depends on other values, and you want to store this string in values.yaml but still have it templated.```yaml
values.yaml
myConfig: | apiVersion: v1 kind: ConfigMap metadata: name: my-dynamic-config-{{ .Release.Name }} data: app.properties: | application.name={{ .Chart.Name }} environment={{ .Values.environment }} custom.setting={{ .Values.customSetting | default "default" }} customSetting: some-value environment: dev ``````go
configmap.yaml template
{{- if .Values.myConfig }} {{ .Values.myConfig | tpl . | nindent 0 }} # Pass the current context . to tpl {{- end }} `` Here, the string inmyConfigitself contains Go template syntax. Thetplfunction evaluates this string as a template, using the current chart context (.). This allows for highly flexible configuration where parts of your YAML are themselves generated dynamically, useful for very advanced or generic charts. Usetpl` with caution, as it can make debugging more challenging if the embedded template logic is complex.
include: As seen earlier, include is used to inject the rendered output of a named template into the current template. It's similar to a function call in programming. ```go # _helpers.tpl {{- define "mychart.labels" -}} app.kubernetes.io/name: {{ include "mychart.name" . }} app.kubernetes.io/instance: {{ .Release.Name }} {{- if .Chart.AppVersion }} app.kubernetes.io/version: {{ .Chart.AppVersion | quote }} {{- end }} {{- end -}}
deployment.yaml
metadata: labels: {{- include "mychart.labels" . | nindent 4 }} ``` This makes the label definition reusable and ensures consistency across all resources in the chart.
5.3 Conditional Resource Generation
One of the most impactful uses of value comparison is to conditionally create or omit entire Kubernetes resources. This is commonly done for optional components.
Example: Deploying an Ingress only when enabled
# values.yaml
ingress:
  enabled: true
  host: myapp.example.com
# templates/ingress.yaml
{{- if .Values.ingress.enabled }}
apiVersion: networking.k8s.io/v1
kind: Ingress
metadata:
  name: {{ include "mychart.fullname" . }}
  labels:
    {{- include "mychart.labels" . | nindent 4 }}
spec:
  rules:
    - host: {{ .Values.ingress.host }}
      http:
        paths:
          - path: /
            pathType: Prefix
            backend:
              service:
                name: {{ include "mychart.fullname" . }}
                port:
                  number: 80
{{- end }}
This pattern is ubiquitous. It allows a single chart to be used for deployments that need an Ingress and those that don't, controlled by a simple boolean flag. The same logic applies to PersistentVolumeClaims, NetworkPolicies, HorizontalPodAutoscalers, or even entire deployments of optional services like a database or caching layer.
5.4 Dynamic Resource Naming Based on Values
Helm's templating allows you to generate dynamic names for resources, which is crucial for distinguishing multiple deployments of the same chart or adhering to naming conventions.
Example: Environment-prefixed Names
# values.yaml
environment: dev
appName: my-service
# deployment.yaml
apiVersion: apps/v1
kind: Deployment
metadata:
  name: {{ .Values.environment }}-{{ .Values.appName }}
spec:
  selector:
    matchLabels:
      app: {{ .Values.environment }}-{{ .Values.appName }}
  template:
    metadata:
      labels:
        app: {{ .Values.environment }}-{{ .Values.appName }}
This generates resources named dev-my-service. If environment changes to prod, the resources become prod-my-service. This ensures uniqueness and clear identification within the Kubernetes cluster, preventing name collisions and making resource management more intuitive. This pattern is particularly useful when deploying the same application multiple times within the same namespace.
5.5 Handling Sensitive Information: helm secrets and External Secret Management
While values.yaml is excellent for configuration, it should never contain sensitive information like passwords or API keys. Storing secrets directly in values.yaml or Git repositories is a major security risk. Helm itself doesn't offer native secret encryption within values.yaml, but there are established patterns:
helm secretsPlugin: This popular community plugin allows you to encryptvalues.yamlfiles (e.g.,secrets.yaml) using SOPS (Secrets OPerationS) or GnuPG. These encrypted files can be safely committed to Git. Helm transparently decrypts them at deploy time.bash helm secrets edit mychart/secrets.yaml helm install my-app ./mychart -f values.yaml -f secrets.yamlInsecrets.yaml, you would define your sensitive values:yaml # secrets.yaml (encrypted) database: password: ENC[AES256_GCM,data:...,iv:...,tag:...,type:str]Your template then accesses{{ .Values.database.password }}as usual.- External Secret Management (e.g., Vault, AWS Secrets Manager, Azure Key Vault, Google Secret Manager): For enterprise-grade security, integrate with dedicated secret management systems.A Helm chart would typically define a Kubernetes Secret resource template, which then references the external secret. For instance, the external secrets operator would create a
database-credsKubernetes Secret, and your Helm chart would then reference this:yaml env: - name: DB_PASSWORD valueFrom: secretKeyRef: name: database-creds key: passwordValue comparison in this context might be used to conditionally enable or disable secret injection based on whether an external secret store is configured (if .Values.secretManagement.enabled). This ensures that your application is not only configured correctly but also securely, protecting sensitive information throughout its lifecycle.- Kubernetes External Secrets Operator: This operator syncs secrets from external systems into native Kubernetes Secrets. Your Helm chart then simply references these Kubernetes Secrets. This is generally the most robust and secure approach.
- Env Variables from Secrets: Containers can consume secrets mounted as files or exposed as environment variables from Kubernetes Secret resources.
Part 6: Best Practices for Robust Helm Template Comparisons
Building powerful and flexible Helm charts requires not only understanding the syntax but also adhering to best practices that ensure maintainability, readability, and reliability.
6.1 Maintainability and Readability
Complex template logic, while powerful, can quickly become a tangled mess if not managed carefully. * Modularize with _helpers.tpl: Break down complex logic, especially repetitive comparisons or calculations, into named templates within _helpers.tpl. This makes individual template files cleaner and promotes reuse. * Use Variables for Complex Expressions: If a comparison involves multiple functions or chained operations, assign the result to a variable for clarity. go {{- $isProdAndIngress := and (eq .Values.environment "prod") .Values.ingress.enabled }} {{- if $isProdAndIngress }} # ... logic {{- end }} * Add Comments Generously: Explain non-obvious template logic, especially complex conditional blocks or the purpose of specific value comparisons. Good comments are invaluable for future maintainers. * Consistent Indentation and Formatting: Helm templates are YAML, and YAML is whitespace-sensitive. Use nindent and indent functions consistently to ensure correct formatting of rendered output. Linting tools can help enforce this.
6.2 Testing Helm Templates (helm lint, helm template)
Before deploying, always test your Helm charts, especially after introducing new comparison logic.
helm lint: This command performs static analysis on your chart, checking for common errors, best practices, and valid YAML syntax.bash helm lint ./mychartIt catches syntax errors in your templates and validatesChart.yamlandvalues.yaml.helm template: This is your most powerful debugging tool. It renders the chart into raw Kubernetes YAML manifests without installing it on a cluster.bash helm template my-release ./mychart --values values-prod.yaml --debugThe--debugflag shows all values used during rendering. This allows you to inspect the generated YAML files and verify that your comparison logic produces the expected resources and configurations under differentvalues.yamlinputs. Runhelm templatewith various combinations of inputvalues.yamlfiles to test all conditional paths.- Unit Testing with
helm-unittest: For more rigorous testing of template logic, consider thehelm-unittestplugin. It allows you to write test cases (in YAML) that assert specific conditions on the rendered output, such as checking if a resource exists, if a field has a specific value, or if a template fails as expected.
By diligently testing, you can catch errors early, ensuring your comparison logic functions correctly across all intended scenarios.
6.3 Version Control for Charts and Values
Both your Helm chart's source code (including templates) and your values.yaml files (especially environment-specific ones) should be managed under version control (Git).
- Chart Versioning: Follow SemVer (Semantic Versioning) for your charts in
Chart.yaml. This helps manage compatibility and upgrades. - GitOps Approach: Store all your Kubernetes configurations, including Helm charts and their customized
values.yamlfiles, in a Git repository. Tools like Argo CD or Flux CD can then automate the deployment process, ensuring that the cluster state always reflects the desired state defined in Git. This makesvalues.yamland conditional logic a central part of your GitOps strategy. - Review Processes: Implement code reviews for changes to both chart templates and
values.yamlfiles. This helps catch errors, enforce best practices, and ensures that complex comparison logic is understood by the team.
Version control provides an audit trail, enables rollbacks, and fosters collaborative chart development, which is critical for maintaining stability in dynamic Kubernetes environments.
6.4 Documentation of Template Logic
Complex conditional logic, especially when involving multiple value comparisons, needs clear documentation.
- Inline Comments: Use Go template comments (
{{- /* ... */ -}}) to explain intricateif/elseblocks, the purpose of specific comparisons, or the expected impact of certain values. README.mdin Chart: The chart'sREADME.mdfile should provide comprehensive documentation of all configurable values invalues.yaml, their types, default values, and a clear explanation of how they interact with conditional logic. Specifically, document which values enable or disable certain features or change behavior.- Examples: Provide example
values.yamlfiles for common scenarios (e.g.,values-prod.yaml,values-dev.yaml) to demonstrate how to use the chart's conditional features effectively.
Good documentation reduces the learning curve for new users and prevents misunderstandings that can lead to misconfigurations or deployment issues.
6.5 Avoiding Common Pitfalls (e.g., Excessive Complexity, Missing Defaults)
- Excessive Complexity: While powerful, don't over-engineer your templates with too many nested
ifstatements or overly complex comparisons. If a template becomes unreadable, consider breaking it into sub-templates or rethinking the value structure. Sometimes, separate charts for fundamentally different deployments are better than one massive, overly generic chart. - Missing Defaults: Always provide sensible default values in
values.yaml. This ensures that the chart works out of the box and provides a fallback if a user forgets to specify a value. Use thedefaultfunction ({{ .Values.myValue | default "fallback" }}) liberally. - Type Mismatches: Be careful when comparing values of different types.
eq 1 "1"might not always work as expected depending on the Go template version or how values are parsed. If in doubt, explicitly cast types or useprintf "%v"to ensure both sides of the comparison are strings. - Whitespace Issues: YAML is sensitive to whitespace. Use
{{- ... -}},nindent, andtrimSuffixto control whitespace and avoid validation errors in your rendered YAML. - Security Concerns: Never embed sensitive information directly in
values.yaml. Always use secret management solutions. - Too Many
--setFlags: While--setis convenient, using too many can makehelm upgradecommands unwieldy and prone to errors. Prefer using dedicatedvalues.yamlfiles for structured overrides.
6.6 Security Considerations in Template Logic
Security should always be a top priority when designing Helm charts, especially when using conditional logic. * Principle of Least Privilege: Use comparisons to enforce minimal permissions. For example, if environment: prod, ensure readOnlyRootFilesystem: true and a non-root runAsUser are applied. * Network Policies: Conditionally apply restrictive network policies in production environments. {{- if eq .Values.environment "prod" }} could enable a NetworkPolicy that only allows ingress from an API gateway and egress to approved services. * Image Pull Policies: For production deployments, ensure image.pullPolicy: Always is enforced, especially when using mutable tags like latest. This can be a conditional if eq .Values.environment "prod". * Ingress Security: If ingress.enabled: true, ensure that TLS is enabled and configured correctly, possibly by comparing ingress.tls.enabled.
By carefully designing your comparison logic, you can build security best practices directly into your chart, making it harder for users to inadvertently deploy insecure configurations.
Part 7: Integrating with Modern Kubernetes Ecosystem (Including APIPark & Gateway Concepts)
Helm charts don't operate in a vacuum; they are integral to a broader Kubernetes ecosystem. Understanding how value comparisons facilitate integration with modern cloud-native components, especially API services and gateway solutions, is crucial for building complete application platforms.
7.1 How Helm Templates Can Configure API Services
Modern applications are built as microservices, each often exposing an API. Helm templates play a vital role in configuring these API services within Kubernetes. * Service Definition: Helm templates define Kubernetes Service objects (ClusterIP, NodePort, LoadBalancer, ExternalName) that expose your application's API endpoints. Value comparisons might determine the type of service based on service.type (e.g., expose as LoadBalancer if service.external: true). * Environment Variables: Templates can inject environment variables into containers that define API endpoint URLs for inter-service communication. For instance, MY_SERVICE_API_URL: http://{{ include "my-other-service.fullname" . }}.{{ .Release.Namespace }}.svc.cluster.local. * ConfigMaps for API Clients: Helm charts can generate ConfigMaps containing API client configurations, base URLs, or authentication parameters, which are then mounted into application pods. Conditional logic can switch between different ConfigMaps based on the target environment or desired API version. * Service Discovery: While Kubernetes provides internal DNS for service discovery, Helm templates can configure advanced service mesh settings (e.g., Istio VirtualService or Gateway resources) based on values, managing how API traffic is routed and policies are applied.
By abstracting these configurations into values and using comparison logic, Helm ensures that API service deployments are consistent, adaptable, and easily managed across various deployment scenarios.
7.2 Deploying and Configuring an API Gateway Using Helm
An API gateway is a critical component in many microservices architectures, acting as a single entry point for all external API requests. It handles routing, authentication, rate limiting, and more. Helm templates are exceptionally well-suited for standardizing the deployment and configuration of such gateways.
Example: Conditional Ingress Controller/API Gateway Deployment
Many API gateway solutions or ingress controllers can be deployed via Helm. Consider a scenario where you want to deploy a specific API gateway (e.g., Nginx Ingress Controller, Traefik, or even a custom solution) only if gateway.enabled is set to true in your values.yaml.
# values.yaml for a chart that deploys an API Gateway
apiGateway:
  enabled: true
  type: nginx
  nginx:
    replicaCount: 2
    service:
      type: LoadBalancer
  traefik:
    enabled: false # Default to false for other gateway types
# templates/apigateway-deployment.yaml
{{- if .Values.apiGateway.enabled }}
  {{- if eq .Values.apiGateway.type "nginx" }}
apiVersion: apps/v1
kind: Deployment
metadata:
  name: {{ include "mychart.fullname" . }}-nginx-gateway
  labels:
    {{- include "mychart.labels" . | nindent 4 }}
    app.kubernetes.io/component: nginx-gateway
spec:
  replicas: {{ .Values.apiGateway.nginx.replicaCount }}
  selector:
    matchLabels:
      app.kubernetes.io/component: nginx-gateway
  template:
    metadata:
      labels:
        {{- include "mychart.labels" . | nindent 8 }}
        app.kubernetes.io/component: nginx-gateway
    spec:
      containers:
        - name: nginx-controller
          image: nginx/ingress-controller:1.0.0
          args: ["--configmap=$(POD_NAMESPACE)/nginx-config"]
          ports:
            - name: http
              containerPort: 80
            - name: https
              containerPort: 443
  ---
apiVersion: v1
kind: Service
metadata:
  name: {{ include "mychart.fullname" . }}-nginx-gateway-svc
  labels:
    {{- include "mychart.labels" . | nindent 4 }}
    app.kubernetes.io/component: nginx-gateway
spec:
  type: {{ .Values.apiGateway.nginx.service.type }}
  ports:
    - port: 80
      targetPort: http
      protocol: TCP
      name: http
    - port: 443
      targetPort: https
      protocol: TCP
      name: https
  selector:
    app.kubernetes.io/component: nginx-gateway
  {{- else if eq .Values.apiGateway.type "traefik" }}
  # Traefik gateway resources would go here, conditionally rendered
  {{- end }}
{{- end }}
This comprehensive example illustrates how a Helm chart can dynamically deploy and configure different API gateway types based on value comparisons. The chart's values.yaml acts as a control panel, allowing users to select their preferred gateway and configure its specific parameters (e.g., replicaCount, service.type). This pattern provides immense flexibility, enabling the same chart to adapt to different infrastructure requirements or organizational preferences for API gateway solutions.
7.3 APIPark: An Open Platform for AI Gateway & API Management
When deploying complex microservices architectures, an API gateway becomes indispensable. Helm templates are exceptionally well-suited for standardizing the deployment of such gateways. For instance, an organization might use a platform like APIPark, an Open Source AI Gateway & API Management Platform, to manage their AI and REST services. A Helm chart for APIPark could leverage value comparisons to configure different instances based on environment (e.g., a development instance with minimal resources versus a production instance with high availability and specific API routing rules).
For example, a Helm chart for APIPark would have a values.yaml like this:
# values.yaml for APIPark Helm chart
apipark:
  enabled: true
  environment: prod # dev, staging, prod
  replicaCount: 1
  resources:
    limits:
      cpu: 800m
      memory: 1Gi
    requests:
      cpu: 400m
      memory: 512Mi
  ingress:
    enabled: true
    host: apipark.production.com
    tls:
      enabled: true
      secretName: apipark-tls
  database:
    type: postgres # mysql
    external:
      enabled: false
      host: ""
      port: 5432
      user: ""
      password: ""
In the APIPark Helm chart templates, comparisons would be used extensively: * {{- if eq .Values.apipark.environment "prod" }}: Higher replicaCount, more resources.limits, and ingress.tls.enabled would likely be true. * {{- if .Values.apipark.database.external.enabled }}: Don't deploy an internal PostgreSQL/MySQL instance; instead, configure APIPark to connect to an external database using the provided host, port, user, and password values. * {{- if .Values.apipark.ingress.enabled }}: Deploy an Ingress resource to expose the APIPark gateway. {{- if .Values.apipark.ingress.tls.enabled }} would further configure TLS for secure API access.
APIPark, being an Open Platform for AI gateway and API management, benefits greatly from the flexibility offered by Helm's value comparison. It allows organizations to deploy APIPark with configurations perfectly tailored to their scale, security requirements, and underlying infrastructure (e.g., internal vs. external databases, different ingress solutions). The powerful API governance solution that APIPark provides can be consistently deployed and managed across an enterprise using these advanced Helm templating techniques, ensuring seamless integration and efficient operation of their API and AI services.
7.4 Connecting Helm to CI/CD Pipelines for Automated Deployments and Value Management
Helm charts, with their value comparison capabilities, are central to modern CI/CD (Continuous Integration/Continuous Delivery) pipelines. * Automated Releases: A CI/CD pipeline can automatically build Docker images, update chart image.tag values, and then use helm upgrade --install to deploy or update applications on Kubernetes. * Environment-Specific Values: The pipeline can pick the correct values-dev.yaml, values-prod.yaml, etc., based on the target deployment stage. This ensures that the right configurations are applied automatically without manual intervention. * Dynamic Overrides: For testing branches or specific feature deployments, the pipeline can inject ad-hoc overrides using --set flags during helm install or helm upgrade. * Secrets Integration: CI/CD pipelines often integrate with secret management systems (like Vault) to fetch secrets at deploy time and pass them to Helm (e.g., via helm secrets or by generating temporary secrets.yaml files), ensuring sensitive data never resides in plain text in Git.
By embedding logic within Helm templates and managing values.yaml files via Git, CI/CD pipelines can achieve fully automated, reproducible, and robust deployments, adapting to any environment or feature flag through intelligent value comparison.
7.5 Helm as an Enabler for an "Open Platform" Approach to Kubernetes Deployments
Helm inherently supports an "Open Platform" philosophy for Kubernetes. * Standardization: Helm charts provide a standardized way to package and deploy applications, allowing different teams or external vendors to contribute components to a common platform. * Reusability: A well-designed Helm chart can be reused across countless projects and environments, fostering an "Open Platform" where shared components are easily consumable. * Extensibility: Chart values and comparison logic allow extensive customization without modifying the core chart, enabling an "Open Platform" to support diverse needs from a common foundation. * Community and Ecosystem: The vast ecosystem of public Helm charts on Artifact Hub demonstrates the "Open Platform" nature, where solutions for databases, messaging queues, monitoring, and other infrastructure components are readily available and customizable via values.yaml.
This Open Platform approach empowers organizations to leverage existing solutions, reduce vendor lock-in, and accelerate innovation by building on a robust, shared foundation, all managed efficiently through Helm's powerful templating and value comparison capabilities.
Part 8: Advanced Scenarios and Troubleshooting
Even with best practices, complex Helm charts can present unique challenges. Knowing how to debug, compare changes, and extend Helm can save significant time and effort.
8.1 Debugging Complex Template Logic
Debugging Go template logic can be tricky, as errors often manifest as invalid YAML or missing resources.
helm template --debug: As mentioned, this is your primary tool. It shows the values used to render the template, which is invaluable for understanding why a comparison might be failing.printf "%T" .Values.myValue: To debug type issues, use theprintffunction to print the type of a variable.{{- printf "%T" .Values.replicaCount -}}might outputint, while{{- printf "%T" "1" -}}would outputstring. This helps confirm if values are being interpreted as expected.- Intermediate Variable Inspection: Use
{{- $myVar := someComplexExpression }}followed by{{- $myVar | toYaml | nindent 0 }}(orprintf "%v"for simple types) to inspect the value of intermediate variables at different points in your template. - Isolate Problematic Templates: If an entire chart is failing, comment out sections or individual template files to narrow down where the error originates.
- Small Reproducible Examples: For complex comparison logic, create a minimal chart that only includes the problematic template and values to isolate and test the specific logic.
8.2 Using helm diff for Understanding Changes
helm diff is an indispensable plugin for previewing the changes an helm upgrade or helm install command would make to your Kubernetes cluster before applying them.
helm diff upgrade my-release ./mychart -f values-prod.yaml
This command will show a detailed diff output, similar to git diff, indicating which resources will be created, updated, or deleted. This is critical for: * Preventing Accidental Deletions: Catching if a conditional comparison inadvertently causes a resource to be removed. * Verifying Configuration Changes: Ensuring that your value overrides and comparison logic result in the exact desired changes to resource fields. * Auditing: Reviewing changes before they go live, especially in production environments.
Regularly using helm diff with various values.yaml files is a powerful way to validate your chart's behavior under different conditions and catch errors introduced by conditional logic.
8.3 Leveraging Post-Render Hooks
Helm hooks allow you to run specific Kubernetes jobs or operations at various stages of a release lifecycle (e.g., pre-install, post-install, pre-upgrade, post-upgrade, pre-delete, post-delete). Value comparisons can control when these hooks are included.
Example: Conditional Database Migration Job
You might want to run a database migration job before an application upgrade (pre-upgrade), but only if migration.enabled is true and if it's not a fresh install.
# values.yaml
migration:
  enabled: true
  jobImage: my-registry/migration-tool:1.0.0
# templates/db-migration-job.yaml
{{- if and .Values.migration.enabled (not .Release.IsInstall) }}
apiVersion: batch/v1
kind: Job
metadata:
  name: {{ include "mychart.fullname" . }}-db-migrate-{{ .Release.Revision }}
  labels:
    {{- include "mychart.labels" . | nindent 4 }}
  annotations:
    "helm.sh/hook": pre-upgrade,pre-rollback
    "helm.sh/hook-delete-policy": before-hook-creation
spec:
  template:
    metadata:
      labels:
        {{- include "mychart.labels" . | nindent 8 }}
    spec:
      restartPolicy: Never
      containers:
        - name: migrator
          image: {{ .Values.migration.jobImage }}
          # ... migration commands
{{- end }}
Here, the Job is conditionally created only if migration.enabled is true AND the current operation is an upgrade or rollback (not a fresh install). The annotations define it as a pre-upgrade hook. This demonstrates how comparisons can intelligently manage the lifecycle of auxiliary tasks around your main application deployments.
8.4 Customizing Helm with Plugins
Helm's plugin system allows you to extend its functionality. While not directly related to template value comparison, plugins can enhance the overall Helm experience, especially for tasks around value management or chart development. * helm-secrets: Already discussed, crucial for secure value management. * helm-unittest: For unit testing chart templates. * helm-diff: For previewing changes. * Custom Plugins: You can write your own plugins to automate tasks like generating values.yaml files from a CMDB, integrating with internal APIs, or performing custom validations based on enterprise policies.
By leveraging plugins, Helm can be further customized to fit specific organizational workflows, enhancing the power of value comparisons with external tooling and automation.
Part 9: Conclusion
Mastering value comparison in Helm templates is a critical skill that elevates Kubernetes application management from a rigid, manual process to a flexible, automated, and intelligent system. We've journeyed from the foundational concepts of Helm templating and value definitions to advanced patterns that enable dynamic resource generation, environment-specific configurations, and robust feature toggles.
The ability to compare strings, numbers, booleans, and arrays, combined with logical operators and control flow, empowers chart developers to create highly adaptable charts. These charts can deploy applications that automatically conform to different environments, scale requirements, security postures, and feature roadmaps, all controlled by simple, well-defined values.yaml files. We explored how this power integrates with critical components like API gateways (such as APIPark, an **Open Source AI Gateway & API Management Platform)), enabling standardized and flexible deployment of core infrastructure components.
By adhering to best practices in organization, testing, version control, and documentation, and by carefully considering security implications, your Helm charts will not only be powerful but also maintainable and reliable. Embracing Helm's templating capabilities, particularly the nuanced art of value comparison, transforms your Kubernetes deployments. It moves you towards an "Open Platform" approach where applications are consistently packaged, easily deployed, and intelligently configured to meet the ever-evolving demands of modern cloud-native environments. This deep understanding empowers you to harness the full potential of Helm, making Kubernetes less daunting and infinitely more efficient.
Frequently Asked Questions (FAQs)
1. What is the primary purpose of comparing values in Helm templates? The primary purpose is to enable conditional logic within Helm charts. By comparing values, you can dynamically enable or disable features, tailor configurations to specific environments (e.g., development, production), adjust resource scaling, or even conditionally deploy entire Kubernetes resources based on the input values provided to the chart. This makes charts highly flexible and reusable.
2. What are the most common operators used for value comparison in Helm templates? The most common operators are eq (equals), ne (not equals), lt (less than), le (less than or equals), gt (greater than), and ge (greater than or equals). These are often combined with logical operators like and, or, and not to build complex conditional statements within if/else blocks.
3. How do I conditionally deploy an entire Kubernetes resource, like an Ingress, using Helm? You can use an if statement around the entire resource definition in your template. For example, {{- if .Values.ingress.enabled }} would wrap an Ingress manifest. If ingress.enabled is true in your values.yaml, the Ingress resource will be rendered and deployed; otherwise, it will be skipped. This is a fundamental pattern for optional components.
4. What is the role of values.yaml when comparing values, and how can I provide environment-specific values? values.yaml provides the default values for the chart, which are the baseline for all comparisons. To provide environment-specific values, you typically create separate YAML files (e.g., values-dev.yaml, values-prod.yaml) and pass them to Helm using the -f flag during installation or upgrade (e.g., helm install my-app ./mychart -f values-common.yaml -f values-prod.yaml). Helm merges these files, with later files overriding earlier ones, allowing your comparison logic to react to the correct environment-specific settings.
5. How can I debug issues with value comparisons in my Helm templates? The most effective debugging tool is helm template --debug my-release ./mychart -f values-your-env.yaml. This command renders the chart locally and outputs the generated YAML, along with all the values used during rendering. You can inspect this output to see if your conditional logic is producing the expected Kubernetes resources and if the values being compared are what you anticipate them to be. Additionally, using printf "%T" .Value.myKey can help debug type mismatches.
🚀You can securely and efficiently call the OpenAI API on APIPark in just two steps:
Step 1: Deploy the APIPark AI gateway in 5 minutes.
APIPark is developed based on Golang, offering strong product performance and low development and maintenance costs. You can deploy APIPark with a single command line.
curl -sSO https://download.apipark.com/install/quick-start.sh; bash quick-start.sh

In my experience, you can see the successful deployment interface within 5 to 10 minutes. Then, you can log in to APIPark using your account.

Step 2: Call the OpenAI API.