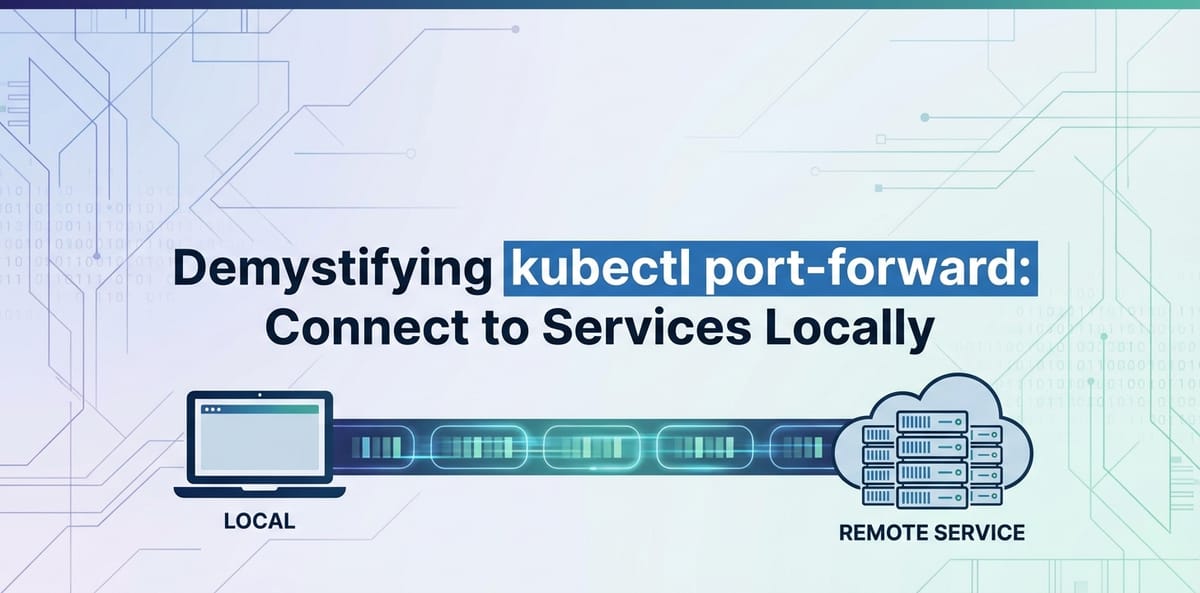
Demystifying kubectl port-forward: Connect to Services Locally


In the rapidly evolving landscape of cloud-native development, Kubernetes has emerged as the de facto standard for orchestrating containerized applications. While Kubernetes offers unparalleled power in deploying, scaling, and managing workloads, it introduces a unique set of challenges, especially when it comes to local development and debugging. One of the most frequently encountered hurdles for developers is how to access services running inside a Kubernetes cluster from their local machine. This is where kubectl port-forward steps in as an indispensable tool, acting as a temporary, ad-hoc gateway that bridges the gap between your local workstation and the labyrinthine network of your Kubernetes cluster.
This comprehensive guide aims to thoroughly demystify kubectl port-forward, moving beyond its basic syntax to explore its inner workings, advanced applications, security considerations, and common troubleshooting scenarios. By the end of this journey, you will not only be proficient in using port-forward but will also understand its strategic place within your development workflow, enabling you to connect to services, debug applications, and iterate on features with unprecedented efficiency.
The Challenge of Local Access in Kubernetes
Before diving into kubectl port-forward, it's crucial to understand the problem it solves. Kubernetes clusters are inherently isolated environments. Pods, which are the smallest deployable units in Kubernetes, reside within a flat network space, but their IP addresses are ephemeral and not directly accessible from outside the cluster by default. Services, which provide a stable network endpoint for a set of pods, are also primarily designed for internal cluster communication via ClusterIPs. While NodePort, LoadBalancer, and Ingress resources exist to expose services externally, they often involve public IPs, DNS configurations, and security implications that are overkill or inappropriate for transient local development and debugging tasks.
Imagine you're developing a new feature for a microservice deployed in a Kubernetes cluster. You need to test your local frontend application against this remote backend service, or perhaps you need to debug an issue with a database running inside the cluster. Directly accessing these internal services from your laptop is not straightforward. Copying data in and out, or setting up complex VPNs for every development task, quickly becomes cumbersome and inefficient. This is precisely the scenario where kubectl port-forward shines, providing a simple, on-demand tunnel to poke holes through the cluster's network isolation, enabling seamless local interaction.
Unpacking kubectl port-forward: The Core Concept
At its heart, kubectl port-forward establishes a secure, bidirectional tunnel between a port on your local machine and a port on a pod (or a service, deployment, etc.) within your Kubernetes cluster. It's essentially a temporary network bridge, creating a direct pathway that bypasses the complexities of external service exposure mechanisms. When you initiate a port-forward command, the kubectl client communicates with the Kubernetes API server, which then instructs a kubelet on a node to forward traffic from a specific pod's port to the kubectl client, and subsequently to a specified local port.
This process is akin to having a dedicated telephone line directly connecting your desk to a specific room inside a large, secure building. Instead of navigating the building's complex internal routing system or using a public entrance, you have a private, temporary connection. Any traffic sent to the local port is encapsulated by kubectl, sent through the established tunnel to the cluster, and then delivered to the target pod's port. Responses follow the reverse path. This allows you to treat a remote service as if it were running on localhost.
How the Tunnel is Established
- Client Request: You execute
kubectl port-forward <resource>/<name> <local-port>:<remote-port>. - API Server Interaction:
kubectlsends a request to the Kubernetes API server, asking it to set up a port forwarding session for the specified resource. - Kubelet Involvement: The API server, acting as a control plane, identifies the node where the target pod (or a pod backing the service/deployment) is running. It then instructs the kubelet on that node to open a network stream to the target pod's specified port.
- Data Stream: The kubelet establishes a connection to the pod. Simultaneously,
kubectlon your local machine creates a listener on the specified local port. A secure, WebSocket-based stream is then established between yourkubectlclient and the kubelet, through the API server. - Traffic Forwarding: Any traffic directed to your local port is captured by
kubectl, sent over this secure stream to the kubelet, which then forwards it to the pod's port. Responses from the pod travel back through the same tunnel to your local application.
It's important to note that kubectl port-forward is a client-side utility. The forwarding process happens primarily on your local machine and the targeted node's kubelet, mediated by the API server. No special ingress rules or network policies need to be configured within the cluster for port-forward to function, as long as your kubectl client has the necessary permissions to access the target resource.
Basic Syntax and Initial Usage
The general syntax for kubectl port-forward is straightforward:
kubectl port-forward <resource_type>/<resource_name> <local_port>:<remote_port>
Let's break down the components:
<resource_type>: This specifies the type of Kubernetes resource you want to forward. Common types includepod,service,deployment,replicaset, and evenstatefulset.<resource_name>: The name of the specific resource (e.g.,my-app-pod-abcde,my-backend-service).<local_port>: The port on your local machine that you want to listen on.<remote_port>: The port inside the pod or service that you want to expose.
Example 1: Forwarding a Pod's Port
This is the most direct way to use port-forward. You target a specific pod.
First, identify a pod. Let's say you have a Nginx pod named nginx-deployment-789c67789f-abcd1.
kubectl get pods
# Output might include: nginx-deployment-789c67789f-abcd1   1/1     Running   0          5d
Now, forward port 80 (Nginx's default) from the pod to port 8080 on your local machine:
kubectl port-forward pod/nginx-deployment-789c67789f-abcd1 8080:80
You will see output similar to:
Forwarding from 127.0.0.1:8080 -> 80
Forwarding from [::1]:8080 -> 80
While this command is running, open your web browser or use curl and navigate to http://localhost:8080. You should see the Nginx welcome page, directly served from the pod inside your Kubernetes cluster.
To stop the forwarding, simply press Ctrl+C in the terminal where the port-forward command is running.
Example 2: Forwarding a Service's Port
Forwarding to a service is often more practical because services provide a stable endpoint that abstracts away individual pods. If the pods backing a service are rescheduled or replaced, the port-forward to the service will automatically connect to a new healthy pod, whereas a port-forward to a specific pod might break if that pod disappears.
Let's assume you have a service named my-backend-service that exposes an API on port 3000.
kubectl get services
# Output might include: my-backend-service   ClusterIP   10.96.0.100   <none>        3000/TCP   5d
To access this api from your local machine on port 8000:
kubectl port-forward service/my-backend-service 8000:3000
Now, your local application can make api calls to http://localhost:8000, and they will be routed to the my-backend-service within the cluster. This is an incredibly powerful feature for local development, allowing a frontend running locally to interact with a backend api running in Kubernetes.
Example 3: Forwarding a Deployment's Port
Similar to services, you can also forward ports directly to a deployment. kubectl will automatically pick one of the active pods managed by that deployment.
Suppose you have a deployment called my-app-deployment running an application that listens on port 5000.
kubectl port-forward deployment/my-app-deployment 9000:5000
This will establish a tunnel to one of the pods in my-app-deployment, exposing its port 5000 on your local port 9000.
Advanced Usage Scenarios and Nuances
kubectl port-forward offers more flexibility than just basic one-to-one port mapping. Understanding these advanced scenarios can significantly enhance your development workflow.
Specifying Localhost Only vs. All Interfaces
By default, kubectl port-forward binds to 127.0.0.1 (localhost) on your local machine. This means only applications running on your machine can access the forwarded port. However, you can make the forwarded port accessible from other machines on your local network by specifying an address.
To bind to all network interfaces (e.g., to share the forwarded service with a colleague on the same LAN):
kubectl port-forward service/my-backend-service --address 0.0.0.0 8000:3000
Now, anyone on your local network can access the service via http://<your-machine-ip>:8000. Be cautious with this, as it reduces isolation and potentially exposes internal services more broadly. It should only be used in trusted development environments.
Multiple Port Forwards
You can forward multiple ports simultaneously in a single command, or by running multiple port-forward commands in separate terminals.
To forward multiple ports in one command:
kubectl port-forward service/my-multi-service 8080:80 9000:443
This will forward port 80 of the service to local port 8080, and port 443 to local port 9000. This is particularly useful when an application exposes multiple endpoints (e.g., an HTTP api and a management interface).
Running port-forward in the Background
Keeping a terminal open for port-forward can be inconvenient, especially if you need to run several. You can background the process using standard shell techniques.
For Linux/macOS, append & to the command:
kubectl port-forward service/my-backend-service 8000:3000 &
The process will run in the background, and you'll get your shell prompt back. To find and kill this background process later, you can use jobs, ps, and kill:
jobs                # List background jobs
kill %1             # Kill job number 1 (replace 1 with the actual job number)
Alternatively, you can find the process ID (PID) and kill it:
ps aux | grep 'kubectl port-forward'
kill <PID>
For a more robust backgrounding solution, especially in scripts, consider using nohup or screen/tmux.
Using port-forward with Specific Pod Labels
Sometimes you might want to forward to a pod that matches certain labels, rather than a specific name (which might change). While port-forward itself doesn't directly support label selectors, you can combine it with kubectl get pods to achieve this.
First, get a pod name based on labels:
POD_NAME=$(kubectl get pods -l app=my-app,env=dev -o jsonpath='{.items[0].metadata.name}')
kubectl port-forward pod/$POD_NAME 8000:3000
This command snippet finds the first pod with app=my-app and env=dev labels and then forwards its port.
port-forward and Namespaces
Always remember that kubectl operations are namespace-scoped. If your service or pod is not in the default namespace, you must specify the namespace using the -n or --namespace flag.
kubectl port-forward service/my-backend-service -n staging 8000:3000
This will forward the service from the staging namespace.
Common Use Cases in Detail
- Local Frontend Development against Remote Backend
APIs: This is perhaps the most common use case. Developers can run their frontend application locally, taking advantage of fast iteration cycles, while still connecting to the real backendapis deployed in a Kubernetes cluster. This setup ensures that the local frontend is tested against the actualapiresponses and data structures, rather than mocked data. - Debugging Microservices: When a microservice is misbehaving,
port-forwardallows you to connect a local debugger (like VS Code's debugger for Node.js or Python) directly to a process running inside a pod. You would configure your debugger to attach tolocalhost:<forwarded-port>, and the traffic would flow throughport-forwardto the remote service. This is invaluable for step-by-step debugging of complex issues. - Accessing Internal Databases or Caches: Need to inspect the contents of a Redis cache or a PostgreSQL database running within the cluster?
port-forwardcan tunnel a database client (e.g., DBeaver, psql, redis-cli) to the database pod, allowing you to run queries, manage data, or verify state directly from your local machine.bash # Example for PostgreSQL kubectl port-forward service/my-postgres-db 5432:5432 # Now connect using psql: psql -h localhost -p 5432 -U myuser -d mydb - Accessing Web UIs/Dashboards: Many applications and infrastructure components (e.g., Prometheus, Grafana, custom application dashboards) expose web interfaces.
port-forwardis a quick way to access these without exposing them publicly.bash # Example for Prometheus UI kubectl port-forward service/prometheus-k8s -n monitoring 9090:9090 # Then access in browser: http://localhost:9090 - Testing Webhooks or Callback
APIs: If your application in Kubernetes needs to send data to a local endpoint (e.g., a development server for a webhook listener),port-forwardcan't directly help with "inbound" connections from the cluster to your machine if the cluster itself doesn't know about your local IP. For these scenarios, tools likengrokorlocaltunnelare more appropriate, as they create a public URL that tunnels to your local machine. However, if your local application needs to interact with a remote service that then triggers a callback,port-forwardis still useful for the initial interaction.
Troubleshooting Common kubectl port-forward Issues
While port-forward is generally robust, you might encounter issues. Here's how to diagnose and resolve them.
1. Port Conflicts (Local Port Already in Use)
Symptom: You see an error like bind: address already in use or error: unable to listen on any of the listeners: [::1]:8000 (listen tcp [::1]:8000: bind: address already in use). Cause: Another process on your local machine is already using the specified <local_port>. Solution: * Choose a different <local_port> that is not in use. * Identify and terminate the process currently using the port: * Linux/macOS: bash sudo lsof -i :<local_port> kill <PID> * Windows: bash netstat -ano | findstr :<local_port> taskkill /PID <PID> /F
2. Service/Pod Not Found
Symptom: Error from server (NotFound): pods "<pod-name>" not found or Error from server (NotFound): services "<service-name>" not found. Cause: * Incorrect resource name. * Incorrect resource type (e.g., trying to forward a deployment as a pod). * Resource is in a different namespace, and you haven't specified it. * The pod might be pending, unhealthy, or has been deleted. Solution: * Verify the exact name and type of the resource using kubectl get pods, kubectl get services, kubectl get deployments. * Ensure you are in the correct namespace or use the -n <namespace> flag. * Check the pod's status with kubectl get pod <pod-name> -o wide or kubectl describe pod <pod-name>.
3. Connection Refused (After Forwarding)
Symptom: curl http://localhost:<local_port> gives Connection refused, or your application fails to connect. The port-forward command itself might be running without errors. Cause: * The application inside the pod is not listening on the <remote_port> you specified. * The application inside the pod is not running or crashed. * The application inside the pod is listening on 127.0.0.1 (localhost) instead of 0.0.0.0 (all interfaces) and might not accept connections from the kubelet. This is a common misconfiguration for applications intended to run in containers. * Network policies might be blocking internal pod-to-pod communication (less common for port-forward but possible if the kubelet can't reach the pod). Solution: * Verify remote port: Check the application's configuration or Dockerfile to confirm which port it listens on. Use kubectl describe pod <pod-name> to see container ports. * Check application status: Use kubectl logs <pod-name> to check application logs for errors. Use kubectl exec -it <pod-name> -- /bin/bash to shell into the pod and verify the process is running and listening on the expected port (e.g., netstat -tulnp). * Application bind address: Ensure the application inside the pod is configured to listen on 0.0.0.0 to accept connections from outside the pod's localhost. Most containerized applications are configured this way by default. * Network Policies: If you suspect network policies, temporarily disable them (if possible in a dev environment) or consult your cluster administrator.
4. Permissions Issues
Symptom: Error from server (Forbidden): User "..." cannot portforward pods "..." in namespace "...". Cause: Your Kubernetes user (or the service account kubectl is using) does not have the necessary RBAC permissions to perform port-forward operations on the target resource in that namespace. Solution: * Contact your cluster administrator to grant you the port-forward permission (e.g., through a Role and RoleBinding). The required verb is portforward for pods.
5. port-forward Hangs or Terminates Unexpectedly
Symptom: The port-forward command starts but then seems to freeze, or it exits after a short period without a clear error message. Cause: * Network instability between your local machine and the Kubernetes API server/node. * The target pod being terminated or restarting. * The node hosting the pod becoming unhealthy or unreachable. * Kubernetes API server issues. Solution: * Check your local network connection. * Monitor the target pod's status using kubectl get pod -w <pod-name>. If the pod is restarting, the port-forward will break. You might need to re-run the command once the pod stabilizes. * Check the status of the Kubernetes nodes (kubectl get nodes). * Check Kubernetes API server logs (if you have access).
Debugging with --v=4 or --v=6
For deeper insights into what kubectl is doing during port-forward, you can increase its verbosity level:
kubectl port-forward service/my-backend-service 8000:3000 --v=4
This will print more detailed information about the API calls being made and the network connection establishment, which can be invaluable for diagnosing subtle issues. --v=6 is even more verbose, showing full request and response bodies.
APIPark is a high-performance AI gateway that allows you to securely access the most comprehensive LLM APIs globally on the APIPark platform, including OpenAI, Anthropic, Mistral, Llama2, Google Gemini, and more.Try APIPark now! 👇👇👇
Security Considerations and Best Practices
While kubectl port-forward is incredibly useful, it's a powerful tool that, if misused, can pose security risks. It essentially creates a temporary gateway to internal cluster resources, bypassing external firewalls and access controls.
1. Temporary Nature
- Principle:
port-forwardshould always be treated as a temporary measure for development and debugging, not a permanent solution for exposing services. - Best Practice: Terminate
port-forwardsessions as soon as they are no longer needed. Avoid leaving them running in the background indefinitely, especially if binding to0.0.0.0.
2. Principle of Least Privilege
- Principle: Your Kubernetes user should only have the minimum necessary RBAC permissions.
- Best Practice: Limit
port-forwardpermissions to specific namespaces or specific resource types if possible. Ensure that developers only haveport-forwardaccess to resources relevant to their work.
3. Local Machine Security
- Principle: A
port-forwardsession essentially makes a remote service appear local. If your local machine is compromised, the forwarded service could be exposed. - Best Practice: Ensure your development machine is secure, up-to-date, and protected by appropriate firewalls and antivirus software.
4. Binding Address (--address)
- Principle: The default
127.0.0.1binding is the most secure as it restricts access to your local machine only. - Best Practice: Only use
--address 0.0.0.0in controlled, trusted development environments where you explicitly intend to share access with other team members on the same isolated network. Never use it to expose internal cluster services to untrusted external networks.
5. Alternatives for Production and Permanent Exposure
For exposing services permanently or to a wider audience, especially in production environments, port-forward is not the right tool. Instead, consider these robust Kubernetes networking concepts:
- ClusterIP: For internal-only cluster communication.
- NodePort: Exposes a service on a specific port on each node's IP address. Accessible from outside the cluster, but often requires an external load balancer for production.
- LoadBalancer: Integrates with cloud provider load balancers to provide an external, stable IP address for your service.
- Ingress: A powerful
APIobject that manages external access to services within a cluster, typically HTTP/HTTPS traffic. Ingress controllers (like Nginx Ingress, Traefik, or Istio'sgateway) provide routing, SSL termination, and host-based/path-based routing. This is the preferred method for exposing webapis and applications in production. - Service Mesh (e.g., Istio, Linkerd): Adds advanced traffic management, security, and observability features for inter-service communication and external
gatewayingress.
6. Integrating with APIPark for Robust API Management
When moving from local development and ad-hoc port-forward access to a more structured and secure approach for managing APIs at scale, platforms like APIPark become invaluable. While kubectl port-forward is excellent for temporary local access, it lacks the features necessary for production-grade API management, such as centralized authentication, access control, traffic management, rate limiting, and analytics.
APIPark functions as an open-source AI gateway and API management platform. It allows enterprises to manage, integrate, and deploy AI and REST services with ease, offering a unified API format for invocation, prompt encapsulation into REST APIs, and end-to-end API lifecycle management. Instead of relying on individual port-forward sessions for multiple developers accessing various APIs, APIPark provides a robust, scalable, and secure gateway through which all API traffic can be routed, monitored, and governed. This approach centralizes control, enhances security, and provides detailed insights into API usage—features that are critical for any organization serious about its API strategy. It can provide a more structured and secure alternative for exposing services than ad-hoc port-forwarding or even basic Ingress for many use cases.
Practical Examples and Scenarios
Let's explore some more detailed practical examples that illustrate the power and versatility of kubectl port-forward.
Scenario 1: Developing a Frontend with a Remote Backend
Imagine you have a single-page application (SPA) frontend that consumes a RESTful API from a backend service. The backend api is deployed in Kubernetes, but you want to develop the frontend locally for rapid iteration.
Kubernetes Setup: * A backend service named my-backend-api exposes a REST api on port 8080. * A deployment my-backend-deployment manages the pods for this service.
Local Development Workflow:
- Start
port-forwardfor the backendAPI:bash kubectl port-forward service/my-backend-api 3001:8080 &This command forwards the backendAPI's port8080to your local machine's port3001. The&puts it in the background. - Configure your local frontend: In your local frontend application's configuration (e.g.,
src/environments/environment.tsin Angular, orwebpack.config.jsproxy settings in React), set theAPI_BASE_URLtohttp://localhost:3001.```javascript // Example for a React app using fetch const API_BASE_URL = 'http://localhost:3001';async function fetchData() { const response = await fetch(${API_BASE_URL}/api/data); const data = await response.json(); console.log(data); } ``` - Run your local frontend:
bash npm start # Or yarn start, etc.Now, when your frontend makesAPIcalls, they will targethttp://localhost:3001, whichkubectl port-forwardwill transparently tunnel to themy-backend-apiservice in your Kubernetes cluster. This allows for a seamless development experience, combining local iteration speed with access to the real backend environment.
Scenario 2: Debugging a Message Queue Consumer
Suppose you have a Kafka consumer service in Kubernetes that isn't processing messages correctly. You want to inspect its internal state or logs, or even connect a local tool to its debugging port.
Kubernetes Setup: * A pod named kafka-consumer-7890abcdef-12345 is running your consumer application. * The application exposes a health check api on port 8080 and an internal metrics api on port 9090.
Debugging Workflow:
- Access Health Check/Metrics:
bash kubectl port-forward pod/kafka-consumer-7890abcdef-12345 8080:8080 9090:9090Now, you can checkhttp://localhost:8080/healthandhttp://localhost:9090/metricsin your browser or withcurlto get live status and performance metrics from the consumer. - Remote Debugging (if supported by your application): If your Java consumer, for instance, exposes a JDWP (Java Debug Wire Protocol) port (e.g.,
5005), you can forward it:bash kubectl port-forward pod/kafka-consumer-7890abcdef-12345 5005:5005Then, configure your IDE (e.g., IntelliJ IDEA, Eclipse) to "Attach to Remote JVM" atlocalhost:5005. This enables you to set breakpoints and step through the code of your remote application as if it were running locally. This is an extremely powerful feature for diagnosing runtime issues.
Scenario 3: Accessing an Internal Kubernetes Dashboard (e.g., Prometheus)
Monitoring tools like Prometheus and Grafana are often deployed inside Kubernetes clusters. While they might have Ingress rules for production, for quick inspection during development or troubleshooting, port-forward is simpler.
Kubernetes Setup: * Prometheus is deployed in the monitoring namespace. * Its service is named prometheus-k8s and exposes its UI on port 9090.
Accessing the UI:
kubectl port-forward service/prometheus-k8s -n monitoring 9090:9090
Open your web browser and go to http://localhost:9090. You now have direct access to the Prometheus dashboard, allowing you to query metrics, inspect targets, and review alerts without needing public exposure. This method is also applicable for other internal dashboards, such as Redis Commander, RabbitMQ Management UI, or custom application dashboards.
Scenario 4: Creating a Temporary Gateway for Database Access
Let's say you have a PostgreSQL database running in your Kubernetes cluster, and you need to perform some ad-hoc queries or migrations using a local database client.
Kubernetes Setup: * A service my-postgres-db in the data namespace exposes PostgreSQL on port 5432.
Local Database Access:
- Forward the database port:
bash kubectl port-forward service/my-postgres-db -n data 5432:5432 - Connect with your local client: Open your favorite PostgreSQL client (e.g.,
psqlcommand-line tool, DBeaver, PgAdmin) and connect using these parameters:For example, withpsql:bash psql -h localhost -p 5432 -U myuser -d mydbYou now have direct, secure access to your remote database as if it were running on your local machine. This is far more secure than exposing the database directly via aNodePortorLoadBalancerfor development purposes.- Host:
localhost - Port:
5432 - User/Password: (The credentials for your database inside Kubernetes)
- Database: (The name of your database inside Kubernetes)
- Host:
Comparison with Other Kubernetes Networking Concepts
To fully appreciate kubectl port-forward, it's helpful to understand how it contrasts with other methods of exposing Kubernetes services.
| Feature | kubectl port-forward |
ClusterIP | NodePort | LoadBalancer | Ingress |
|---|---|---|---|---|---|
| Purpose | Temporary local access for dev/debug | Internal cluster communication | Expose service on each node's IP & specific port | Expose service via external load balancer (cloud provider) | Manage external HTTP/HTTPS access to services (Layer 7) |
| Scope | Local machine <-> Single pod/service | Cluster-internal | Cluster-external (via node IPs) | Cluster-external (via dedicated LB IP) | Cluster-external (via Ingress Controller & often LB) |
| Access | localhost:<local-port> on dev machine |
Other pods/services within the cluster | node-ip:node-port |
external-ip:service-port |
hostname/path (e.g., api.example.com/v1) |
| Security | Good for dev (isolated, temporary) | Internal (relies on cluster network security) | Less secure (exposes ports on all nodes), use with care | Secure (cloud LB features), but exposes service directly | Best for production (SSL, WAF, authentication via gateway features) |
| Persistence | Temporary (command-line, ends on Ctrl+C) |
Permanent (as long as service exists) | Permanent | Permanent | Permanent |
| Configuration | Simple command | Service YAML |
Service YAML |
Service YAML |
Ingress YAML (requires Ingress Controller) |
| Complexity | Low | Low | Medium | Medium (depends on cloud provider integration) | High (requires Ingress Controller setup, rules, certs) |
| Use Case | Local dev, debugging, quick checks, ad-hoc api calls |
Inter-service communication, database backends | Simple external exposure for demos, some legacy apps | Standard external exposure for stateless services | Public web services, REST apis, microservices with domain routing |
The table clearly illustrates that kubectl port-forward occupies a distinct niche. It's not a solution for production traffic or permanent service exposure. Instead, it's a developer's secret weapon for immediate, direct, and temporary interaction with cluster internals. While other mechanisms like Ingress or LoadBalancer are designed to be robust, scalable, and secure gateways for external traffic, port-forward provides a surgical tool for local, ephemeral access.
Best Practices and General Tips
- Always specify resource type: While
kubectl port-forwardcan often inferpod/if you just give a pod name, explicitly statingpod/<name>orservice/<name>is clearer and less prone to errors. - Use
service/whenever possible: Forwarding to a service is generally more robust than forwarding to a specific pod. If the pod restarts or moves to a different node, theport-forwardto the service will automatically adapt. - Check logs for issues: If you're having trouble connecting, always check the logs of the target pod (
kubectl logs <pod-name>) to ensure the application inside is running correctly and listening on the expected port. - Namespace awareness: Don't forget the
-n <namespace>flag if your resources aren't in the default namespace. - Consider aliases: If you frequently forward to the same service/pod, consider creating a shell alias for the command to save typing.
- Use a consistent local port for development: Establish a convention within your team, e.g., all backend
APIs forward to3001, all databases to5432, etc., to avoid conflicts and improve predictability. - Combine with
kubectl getandgrep: For dynamic environments, you might need to find a specific pod ID.bash POD=$(kubectl get pods -l app=my-app -o jsonpath='{.items[0].metadata.name}') kubectl port-forward $POD 8000:8080 - Don't rely on
port-forwardfor inter-service communication: Services inside the cluster should communicate directly via theirClusterIPor DNS names, not through your local machine'sport-forwardtunnel. - Educate your team: Ensure all developers understand how to use
port-forwardeffectively and securely.
Conclusion
kubectl port-forward is an indispensable tool in the Kubernetes developer's toolkit. It elegantly solves the challenge of local interaction with remote services, enabling seamless debugging, rapid local development against cloud-native backends, and convenient access to internal dashboards and databases. By creating a temporary, secure tunnel, it acts as a personal gateway that brings the distant cluster environment right to your desktop.
While its power is evident, understanding its mechanics, recognizing its limitations, and adhering to best security practices are crucial. It's a development and debugging utility, not a production-grade exposure mechanism. For robust API management, sophisticated traffic routing, and stringent security in production, dedicated API gateways like APIPark offer a comprehensive solution that far surpasses the capabilities of port-forward.
Mastering kubectl port-forward means unlocking a more efficient, less frustrating Kubernetes development experience. It empowers you to navigate the complexities of distributed systems with greater agility, ensuring that your local development workflow remains as fluid and productive as possible, even when your applications are running in the cloud. Embrace port-forward, and demystify your path to productive Kubernetes development.
Frequently Asked Questions (FAQ)
1. What is the primary purpose of kubectl port-forward?
The primary purpose of kubectl port-forward is to create a secure, temporary, and bidirectional tunnel from a local port on your machine to a specific port of a pod or service within a Kubernetes cluster. This allows developers to access internal cluster services as if they were running on localhost, facilitating local development, debugging, and direct interaction with backend apis, databases, or web UIs without exposing them publicly.
2. Is kubectl port-forward suitable for exposing services in a production environment?
No, kubectl port-forward is explicitly not suitable for exposing services in production environments. It is designed for temporary local development and debugging sessions. For production, services should be exposed using Kubernetes Service types like NodePort, LoadBalancer, or preferably Ingress, which offer robust traffic management, scalability, security features (like SSL termination and WAF), and permanent endpoints that port-forward lacks.
3. What types of Kubernetes resources can kubectl port-forward connect to?
kubectl port-forward can connect to several types of Kubernetes resources, including pod, service, deployment, replicaset, and statefulset. When connecting to a deployment, replicaset, or statefulset, kubectl will automatically select one of the healthy, running pods managed by that resource to establish the tunnel. Connecting to a service is often preferred as it abstracts away individual pods, automatically adapting if a pod restarts or is replaced.
4. How can I run kubectl port-forward in the background and manage it?
To run kubectl port-forward in the background on Linux or macOS, you can append & to the command (e.g., kubectl port-forward service/my-service 8000:3000 &). To manage these background jobs, use jobs to list them and kill %<job_number> to terminate a specific job. Alternatively, you can find the process ID (PID) using ps aux | grep 'kubectl port-forward' and then use kill <PID> to stop it. For more robust backgrounding in scripts, consider nohup or screen/tmux.
5. What are the main security considerations when using kubectl port-forward?
The main security considerations for kubectl port-forward include its temporary nature (it should be closed when not needed), the principle of least privilege (limit RBAC permissions), and the security of your local machine. By default, it binds to 127.0.0.1 (localhost), which is secure. However, using --address 0.0.0.0 exposes the forwarded port to your local network, which should only be done in trusted development environments. Never use port-forward to expose sensitive internal services to untrusted external networks. For comprehensive API security and management in production, consider a dedicated API gateway like APIPark.
🚀You can securely and efficiently call the OpenAI API on APIPark in just two steps:
Step 1: Deploy the APIPark AI gateway in 5 minutes.
APIPark is developed based on Golang, offering strong product performance and low development and maintenance costs. You can deploy APIPark with a single command line.
curl -sSO https://download.apipark.com/install/quick-start.sh; bash quick-start.sh

In my experience, you can see the successful deployment interface within 5 to 10 minutes. Then, you can log in to APIPark using your account.

Step 2: Call the OpenAI API.