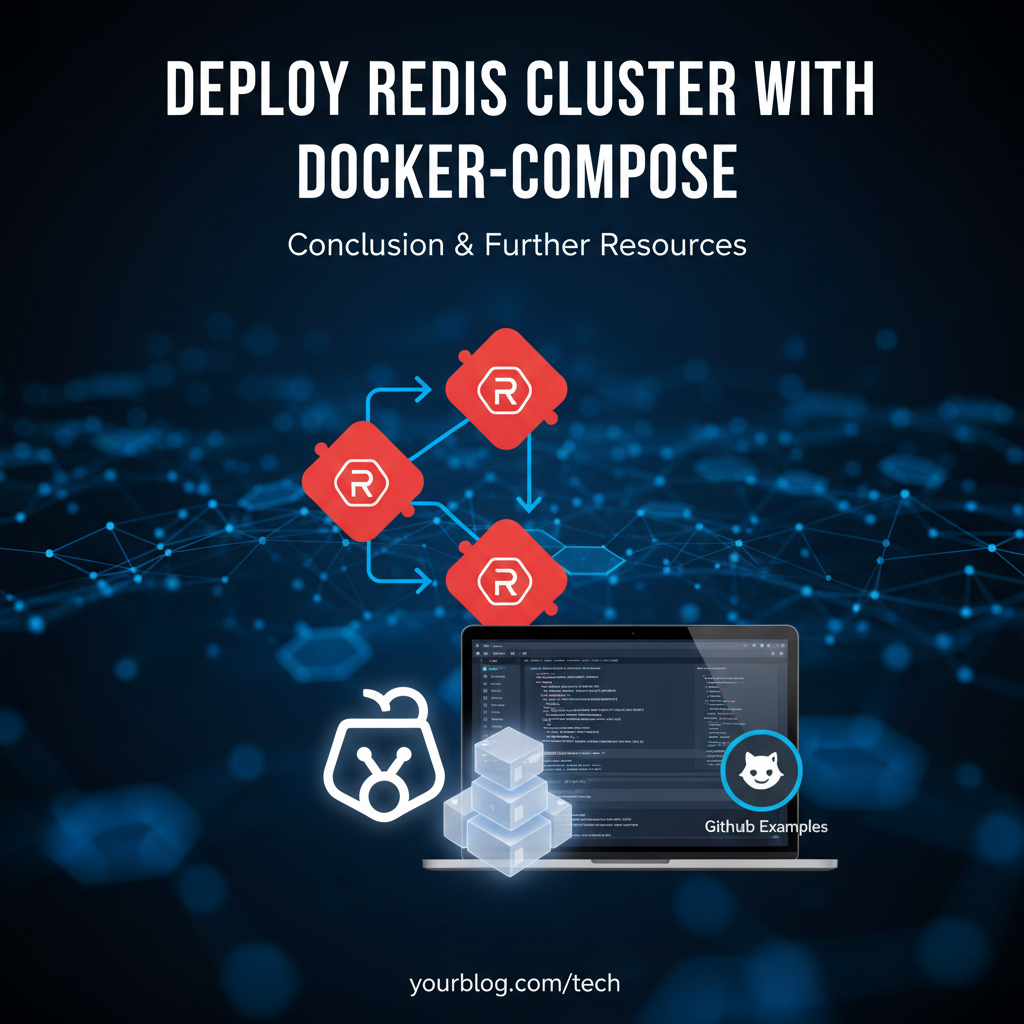
Deploy Redis Cluster with docker-compose: GitHub Examples


In the rapidly evolving landscape of modern application development, data storage solutions must not only be blazingly fast but also inherently scalable and fault-tolerant. At the heart of many high-performance systems lies Redis, an open-source, in-memory data structure store renowned for its unparalleled speed and versatility. From caching frequently accessed data to managing real-time leaderboards, session stores, and message queues, Redis has become an indispensable component for applications demanding low-latency data access.
However, a standalone Redis instance, while powerful, presents a single point of failure and limitations in terms of scaling beyond the capacity of a single server. This is where the Redis Cluster mode shines, offering a distributed and sharded architecture that provides both high availability and horizontal scalability. By distributing data across multiple nodes, a Redis Cluster can handle massive amounts of data and traffic, ensuring that your application remains responsive and resilient even under extreme load or partial system failures.
The complexity of deploying and managing a distributed system like a Redis Cluster can be daunting, especially when dealing with multiple instances, their configurations, and inter-node communication. This is precisely where containerization technologies like Docker, coupled with the orchestration capabilities of Docker Compose, offer a transformative solution. Docker Compose allows developers to define and run multi-container Docker applications with a single YAML file, simplifying the setup of complex service architectures, ensuring consistency across development and production environments, and providing a robust foundation for infrastructure as code.
This comprehensive guide will meticulously walk you through the process of deploying a Redis Cluster using Docker Compose, drawing insights from various GitHub examples and best practices. We will delve deep into the architectural nuances of Redis Cluster, explore the practicalities of configuring it within a containerized environment, and provide a step-by-step tutorial complete with docker-compose.yml and configuration files. Beyond mere setup, we will address crucial considerations for production deployments, including data persistence, security, and monitoring, ensuring that you gain a holistic understanding of building a high-performance, highly available Redis backbone for your applications. Our aim is to equip you with the knowledge and confidence to not only deploy but also understand and maintain a resilient Redis Cluster, fostering applications that can scale to meet the demands of tomorrow.
Understanding Redis and its Cluster Mode
Before we immerse ourselves in the intricacies of deployment, a foundational understanding of Redis and the rationale behind its Cluster mode is paramount. Grasping these concepts will empower you to make informed decisions throughout the deployment process and troubleshoot effectively.
What is Redis? A Deep Dive into its Core Strengths
Redis, short for REmote DIctionary Server, is more than just a cache; it's an in-memory data structure store that supports a wide array of abstract data types, including strings, lists, sets, sorted sets, hashes, streams, and more. Its distinguishing features are:
- In-Memory Performance: Redis primarily stores data in RAM, which is significantly faster than disk-based storage, leading to sub-millisecond response times. This makes it ideal for real-time applications where latency is critical.
- Versatility: Beyond simple key-value storage, Redis offers rich data structures that enable complex operations directly at the server level, minimizing application-side logic and network round trips. For instance, you can atomically push elements to a list, union two sets, or increment a counter in a sorted set without fetching data to the client.
- Persistence Options: While in-memory, Redis offers mechanisms to persist data to disk (RDB snapshots and AOF logs), ensuring data durability even in the event of a server restart or crash. This allows Redis to be used as a primary database for certain use cases, not just a transient cache.
- Publish/Subscribe Messaging: Redis includes robust pub/sub capabilities, making it an excellent choice for real-time messaging, chat applications, and event streaming architectures.
- Atomic Operations: Most Redis operations are atomic, guaranteeing that commands are executed completely or not at all, which is vital for data integrity in concurrent environments.
- Simple API: Despite its power, Redis exposes a remarkably simple and intuitive API, making it easy for developers to integrate into their applications using a multitude of client libraries available for nearly every programming language.
Common use cases for Redis span a wide spectrum: session management, full-page caching, message queues, real-time analytics, rate limiting, leaderboards, geospatial indexing, and as a primary data store for microservices requiring extreme performance. Its efficiency and flexibility make it a cornerstone technology for modern web and mobile applications.
The Limitations of a Standalone Redis Instance
While a single Redis instance can deliver impressive performance for many applications, it inevitably faces two critical limitations when demand grows:
- Single Point of Failure (SPOF): If the single Redis server crashes or becomes unavailable, the entire application that relies on it will suffer, leading to downtime and potential data loss (depending on persistence settings). This is unacceptable for production-grade applications requiring high availability.
- Vertical Scaling Ceiling: A standalone Redis instance can only scale vertically by adding more CPU, RAM, and faster storage to the single server. This approach has practical limits imposed by hardware constraints and diminishing returns. Eventually, a single server will exhaust its capacity to handle more data or requests, becoming a bottleneck.
To overcome these limitations, Redis offers two primary solutions for enhanced availability and scalability: Redis Sentinel and Redis Cluster. Understanding their distinctions is key.
Redis Sentinel vs. Redis Cluster: Choosing the Right Strategy
Both Redis Sentinel and Redis Cluster aim to improve the resilience and performance of Redis deployments, but they achieve these goals through fundamentally different architectures and address distinct problems.
Redis Sentinel: High Availability for Master-Replica Setups
Redis Sentinel is a high availability solution designed to manage and monitor multiple Redis server instances, providing automatic failover when a master node becomes unavailable. It works by:
- Monitoring: Sentinels constantly monitor all Redis master and replica instances.
- Notification: If a monitored instance goes down, sentinels can notify system administrators or other applications.
- Automatic Failover: When a master fails, Sentinels agree on its failure and promote one of its replicas to be the new master. They then reconfigure the remaining replicas to replicate from the new master and update clients about the new master's address.
- Configuration Provider: Sentinels also act as authoritative sources for client applications to discover the current master's address. Clients connect to Sentinels to get the address of the current master, making the failover transparent to the application.
Key Characteristics of Sentinel: * Focus: Primarily on high availability and fault tolerance for a single logical dataset. * Scalability: Does not offer horizontal data sharding. All data still resides on a single master (and its replicas). It only handles scaling reads by directing them to replicas, but writes are still bottlenecked by the master. * Deployment: Requires multiple Sentinel processes (typically an odd number for quorum) along with Redis master and replica instances.
When to Choose Sentinel: * You need high availability and automatic failover for a Redis instance. * Your dataset fits comfortably within the memory of a single Redis server. * You don't require horizontal scaling (sharding) of your data.
Redis Cluster: True Sharding, Horizontal Scalability, and Fault Tolerance
Redis Cluster is a distributed implementation of Redis that provides a way to automatically shard your dataset across multiple Redis instances. It achieves:
- Horizontal Scalability: Data is partitioned across multiple master nodes. This allows for distributing both data storage and processing load across many servers, overcoming the vertical scaling limits.
- Fault Tolerance: Each master node can have one or more replica nodes. If a master fails, its replica is automatically promoted to take over, ensuring continuous operation. If all master nodes in a shard fail, the cluster becomes unavailable (unless there's a replica to promote).
- No Central Proxy: Unlike some other distributed systems, Redis Cluster clients communicate directly with the cluster nodes. When a client sends a request for a key that resides on a different node, the target node redirects the client to the correct node using a
MOVEDorASKredirection. This design minimizes latency and avoids a single point of failure at the proxy level.
Key Characteristics of Cluster: * Focus: Scalability (sharding) and high availability. * Data Partitioning: Uses 16384 "hash slots" to distribute keys across master nodes. Each key is mapped to a specific hash slot, and each master node is responsible for a subset of these slots. * Gossip Protocol: Nodes communicate with each other using a gossip protocol to exchange information about the cluster state (which nodes are up/down, which slots are owned by which node, etc.). * Minimum Nodes: Requires a minimum of 3 master nodes for a functional cluster that can withstand a single node failure. For high availability (where each master has a replica), a minimum of 6 nodes (3 masters, 3 replicas) is recommended.
When to Choose Cluster: * Your dataset is too large to fit into a single Redis server's memory. * You need to scale your Redis deployment horizontally to handle high traffic loads. * You require the highest levels of fault tolerance and availability across multiple nodes.
Summary Comparison:
| Feature | Redis Standalone | Redis Sentinel | Redis Cluster |
|---|---|---|---|
| Primary Goal | Fast, in-memory data store | High Availability (HA) for a single dataset | Horizontal Scalability & HA for sharded dataset |
| Data Sharding | No | No (single logical dataset) | Yes (data partitioned across masters) |
| Scalability | Vertical scaling only | Vertical scaling only (reads can be distributed) | Horizontal scaling (data, reads, writes) |
| Fault Tolerance | None (SPOF) | Automatic failover for master-replica setup | Automatic failover for individual master nodes |
| Complexity | Low | Medium (multiple sentinels + master/replicas) | High (many nodes, slot management, client redirects) |
| Minimum Nodes | 1 | 1 master + N replicas + 3 Sentinels (recommended) | 3 masters (minimum), 3 masters + 3 replicas (HA) |
For this guide, our focus is squarely on Redis Cluster, as it offers the most robust solution for applications demanding both extreme scalability and fault tolerance in a distributed environment.
Redis Cluster Architecture Deep Dive
Understanding the internal workings of a Redis Cluster is crucial for effective deployment and troubleshooting. Let's break down its core components and mechanisms:
- Nodes: A Redis Cluster is composed of multiple Redis instances, each referred to as a "node." Each node can play one of two roles:
- Master Node: Responsible for storing a subset of the cluster's data (a range of hash slots) and serving client requests for that data.
- Replica Node: A copy of a master node, providing redundancy. If its master fails, a replica can be promoted to become the new master, ensuring high availability.
- Hash Slots: The entire keyspace in a Redis Cluster is divided into 16384 hash slots. When a key is stored, Redis calculates a hash of the key (or part of it, using hash tags) and maps it to one of these 16384 slots. Each master node in the cluster is responsible for serving a fixed subset of these hash slots. This partitioning mechanism allows for:
- Data Distribution: Spreading the dataset evenly across multiple master nodes.
- Dynamic Resharding: Slots can be moved between nodes without downtime, allowing the cluster to be resized (adding or removing nodes) or rebalanced.
- Client Interaction (MOVED/ASK Redirections): Unlike Sentinel where clients primarily connect to Sentinels to find the master, Redis Cluster clients are "smart clients." They maintain a map of hash slots to nodes. When a client sends a command for a key:
- It first calculates the hash slot for that key.
- If it knows which node owns that slot, it sends the command directly to that node.
- If the client's map is outdated (e.g., due to resharding or node failure) or incorrect, the node receiving the request will respond with a
MOVEDredirection. TheMOVEDerror tells the client the correct node (IP and port) for that specific slot, and the client updates its internal map and retries the command on the correct node. - An
ASKredirection is used during online resharding operations when a slot is migrating. It's a temporary redirection for specific keys being moved.
- Gossip Protocol and Consensus: All nodes in a Redis Cluster continuously exchange information about their state and the state of other nodes using a peer-to-peer gossip protocol. This allows nodes to collectively agree on the cluster's configuration and detect failures.
- Failure Detection: If a significant number of master nodes (a quorum) agree that another node is unreachable, that node is marked as "FAIL."
- Failover Process: When a master node is marked as
FAIL, its replicas initiate a failover process. The replica that collects votes from a majority of other master nodes becomes the new master for the failed master's hash slots. This ensures that even if a master node crashes, its data remains available.
- Cluster Bus: Nodes communicate over a dedicated TCP port (typically the Redis data port + 10000, e.g., 7000 and 17000 for cluster bus). This bus is used for node-to-node communication, including heartbeat messages, cluster state updates, and command propagation during failovers.
This distributed architecture, with its self-healing capabilities and data partitioning, makes Redis Cluster a powerful solution for building highly scalable and resilient data layers.
Why Docker Compose for Redis Cluster?
The journey to deploying a Redis Cluster can seem complex, given the multiple nodes, their configurations, and the inter-node communication required for a functioning cluster. This complexity is precisely where Docker Compose offers a significant advantage, simplifying the entire deployment and management lifecycle.
The Overarching Benefits of Containerization
Before diving into Docker Compose specifically, it's worth reiterating the fundamental benefits that containerization with Docker brings to any application, especially distributed systems like a Redis Cluster:
- Isolation: Each Redis instance runs in its own isolated container, meaning its dependencies, libraries, and configuration are bundled together without interfering with other services or the host system. This eliminates "it works on my machine" problems.
- Portability: Docker containers are highly portable. A containerized Redis Cluster definition can be moved and run consistently across different environments—from a developer's laptop to a staging server, and ultimately to production—as long as Docker is installed. This ensures environmental parity.
- Consistency: The container image acts as a immutable blueprint. Every time a container is spun up from that image, it starts in the same pristine state, reducing configuration drift and making deployments predictable.
- Rapid Deployment and Scaling: Spinning up new Redis nodes or tearing down an entire cluster becomes a matter of executing a few Docker commands, significantly accelerating development, testing, and even production scaling (when integrated with orchestrators like Kubernetes).
- Resource Efficiency: Containers are lighter than virtual machines, sharing the host OS kernel. This results in faster startup times and lower resource overhead, allowing more services to run on the same underlying hardware.
Docker Compose: Orchestrating Multi-Container Applications with Ease
While Docker provides the building blocks (containers), Docker Compose provides the architectural blueprint and orchestration capabilities for defining and running multi-container Docker applications. For a Redis Cluster, which inherently involves multiple interconnected Redis instances, Docker Compose is an invaluable tool for several reasons:
- Define Multi-Service Applications: With Docker Compose, you define all the services that make up your application (e.g.,
redis-0,redis-1,redis-2, etc.) in a single, human-readable YAML file (docker-compose.yml). This centralizes your infrastructure definition. - Simplified Configuration: Instead of manually configuring each Redis instance, you can specify shared configurations, network settings, volume mounts, and environment variables directly within the
docker-compose.yml. This reduces manual errors and ensures consistency. - Network Isolation and Service Discovery: Docker Compose automatically creates a default network for your services, allowing them to communicate with each other using their service names (e.g.,
redis-0can reachredis-1by hostnameredis-1). This simplifies inter-container communication and network management. - Dependencies and Startup Order (Implicit): While Docker Compose doesn't enforce strict startup order between unrelated services, it manages the lifecycle of all services defined in the YAML file. You can
docker-compose upto start everything, anddocker-compose downto stop and remove all services. - Infrastructure as Code (IaC): The
docker-compose.ymlfile serves as an infrastructure as code artifact. It can be version-controlled, reviewed, and deployed just like application code, bringing consistency, auditability, and reproducibility to your infrastructure setup. This is incredibly beneficial for development teams, enabling them to spin up identical Redis Cluster environments with minimal effort. - Local Development and Testing Parity: Docker Compose allows developers to run a production-like Redis Cluster environment directly on their local machines. This significantly reduces discrepancies between development, staging, and production environments, leading to fewer surprises and faster debugging cycles. For example, if your application is designed to interact with a Redis Cluster, you can test this interaction locally without needing a remote cluster.
Without Docker Compose, deploying a Redis Cluster would involve: 1. Manually starting multiple Docker containers with docker run. 2. Ensuring unique port mappings and configurations for each. 3. Manually configuring their network to allow inter-communication. 4. Keeping track of all running instances and their settings.
Docker Compose abstracts away much of this complexity, allowing you to focus on the Redis Cluster itself rather than the underlying container orchestration primitives. It bridges the gap between individual containers and a cohesive, multi-service application, making it the ideal tool for prototyping, developing, and even deploying small-to-medium scale Redis Clusters. For larger, production-grade, multi-host deployments, while docker-compose can still serve as a definition, it's often complemented or superseded by more robust orchestrators like Kubernetes or Docker Swarm, which build upon similar container-centric principles.
Prerequisites for Deployment
Before we embark on the step-by-step deployment of our Redis Cluster, ensure you have the following prerequisites in place. These foundational tools and understandings are essential for a smooth setup.
1. Docker and Docker Compose Installation
The cornerstone of our deployment is Docker, the containerization platform, and Docker Compose, its multi-container orchestrator.
- Docker Engine: You need Docker installed and running on your system. This includes the Docker daemon (dockerd) and the Docker CLI.
- Linux: Follow the official Docker Engine installation guide for your specific Linux distribution (Ubuntu, CentOS, Fedora, etc.).
- macOS: Install Docker Desktop for Mac.
- Windows: Install Docker Desktop for Windows (requires WSL 2 for best performance on Windows 10/11 Home, or Hyper-V for Pro/Enterprise).
- Docker Compose: Docker Compose is often bundled with Docker Desktop for macOS and Windows. For Linux, it might need to be installed separately.
- Verify Installation: After installation, open your terminal or command prompt and run:
bash docker --version docker compose version # Note: newer Docker Compose versions are integrated as `docker compose`, older standalone as `docker-compose`You should see version information for both Docker and Docker Compose. If using an older standalonedocker-composecommand, it would bedocker-compose --version. We will assume the newerdocker composesyntax for this guide, which is the recommended approach.
- Verify Installation: After installation, open your terminal or command prompt and run:
2. Basic Understanding of Docker Concepts
While we'll guide you through the specifics, a basic familiarity with the following Docker concepts will be beneficial:
- Images: Read-only templates used to create containers (e.g.,
redis:latest). - Containers: Runnable instances of images.
- Volumes: Persistent storage mechanisms that allow data generated by Docker containers to persist outside the container's lifecycle. Crucial for Redis persistence.
- Networks: How Docker containers communicate with each other and the outside world. Docker Compose automatically sets up a default bridge network.
- Ports: How services inside containers are exposed to the host machine or other networks.
3. System Resources
Deploying a Redis Cluster, especially with multiple master and replica nodes, consumes more resources than a single Redis instance.
- CPU: A multi-node cluster will distribute load, but each node still requires processing power. An 8-core CPU or more is generally recommended for development/testing of a 6-node cluster, with more for larger production deployments.
- RAM: Redis is an in-memory database. The total dataset size plus overhead will dictate RAM requirements. For a 6-node cluster (3 masters, 3 replicas) each with a modest dataset, plan for at least 8GB to 16GB of RAM on your host machine to comfortably run the cluster alongside the Docker daemon itself. Each Redis container might start with 100-200MB even when empty.
- Disk Space: For persistence (RDB snapshots, AOF logs), you'll need sufficient disk space, especially if using volumes. SSDs are highly recommended for better I/O performance.
Ensure your machine meets these basic requirements to avoid performance bottlenecks or instability during cluster setup. With these prerequisites squared away, we are ready to dive into the practical implementation.
Step-by-Step Guide: Deploying a Basic Redis Cluster with Docker Compose
This section will guide you through the process of setting up a functional Redis Cluster using Docker Compose. We will design a cluster, create the necessary configuration files, define our services in docker-compose.yml, and initialize the cluster.
1. Designing the Cluster: Nodes and Topology
For a minimal yet resilient Redis Cluster, a common and recommended setup involves three master nodes, each with one replica. This results in a total of six Redis instances:
redis-0(Master) ->redis-3(Replica)redis-1(Master) ->redis-4(Replica)redis-2(Master) ->redis-5(Replica)
This configuration ensures that: * The cluster can withstand the failure of any single master node (its replica will be promoted). * It meets the Redis Cluster's minimum requirement of 3 master nodes for functionality and quorum. * Data is sharded across three distinct master nodes.
We will assign specific ports to each Redis instance for clarity and external accessibility (though in production, external exposure should be carefully managed). We'll use ports 7000-7005 for the main Redis communication and their respective cluster bus ports (17000-17005).
2. Setting Up the Project Directory Structure
Let's create a dedicated directory for our project. Inside, we'll place our docker-compose.yml and a configuration directory for Redis settings.
mkdir redis-cluster-docker-compose
cd redis-cluster-docker-compose
mkdir config
3. Creating redis.conf for Cluster Mode
Each Redis instance in the cluster needs a specific configuration that enables cluster mode and sets various parameters. We'll create a single redis.conf file that will be mounted into each container, overriding default values where necessary. The port will be dynamically set by Docker Compose using environment variables, so we won't hardcode it here.
Create config/redis.conf:
# General configuration
bind 0.0.0.0
protected-mode no
port 6379 # Default port, will be overridden by docker-compose environment variable

# Cluster configuration
cluster-enabled yes
cluster-config-file nodes.conf # The cluster configuration file generated by Redis
cluster-node-timeout 5000
cluster-announce-ip 127.0.0.1 # Important for Docker Compose on single host
# The cluster-announce-port and cluster-announce-bus-port will be dynamically set

# Persistence configuration
appendonly yes
appendfsync everysec
dir /data # Directory where Redis will store persistence files and nodes.conf
Explanation of key redis.conf directives:
bind 0.0.0.0: Allows Redis to listen on all network interfaces, making it accessible from other containers on the Docker network.protected-mode no: Disables protected mode, which is important when Redis instances are running inside containers on a private network, but should be set toyesin production and accessed only via secure channels.port 6379: This is the internal port within the container. Docker Compose will map this to different host ports.cluster-enabled yes: This crucial directive enables Redis Cluster mode for the instance.cluster-config-file nodes.conf: Redis Cluster nodes automatically generate and update their cluster configuration here. This file should be persisted using Docker volumes.cluster-node-timeout 5000: The maximum amount of time a node can be unreachable before it is considered to be in aFAILstate (in milliseconds).cluster-announce-ip 127.0.0.1: This is critical when deploying on a single host with Docker Compose. By default, Redis cluster nodes try to advertise their internal container IP, which is not reachable from other containers when they try to connect to the bus port. By explicitly settingcluster-announce-ipto the host's loopback address (127.0.0.1) and mapping different host ports, we make nodes appear as distinct endpoints. Note: For multi-host deployments or if you want to access the cluster from external hosts without127.0.0.1redirection, this needs to be the actual host IP or DNS.appendonly yes: Enables AOF (Append Only File) persistence, which logs every write operation. This provides better data durability than RDB snapshots alone.dir /data: Sets the working directory inside the container where persistence files andnodes.confwill be stored. This directory will be mounted to a Docker volume.
4. Crafting docker-compose.yml
Now, let's define our six Redis services in docker-compose.yml. Each service will run a Redis container, mount the shared redis.conf, and use a dedicated volume for persistence.
Create docker-compose.yml in the project root:
version: '3.8'

services:
  redis-0: &redis-base
    image: redis:7.2.4-alpine
    command: redis-server /usr/local/etc/redis/redis.conf --port 7000 --cluster-announce-port 7000 --cluster-announce-bus-port 17000
    ports:
      - "7000:7000"
      - "17000:17000"
    volumes:
      - ./config/redis.conf:/usr/local/etc/redis/redis.conf
      - redis-data-0:/data
    networks:
      - redis-cluster-network
    # Required for Redis Cluster to function on Linux systems (adjust as needed for other OS)
    sysctls:
      net.core.somaxconn: 65535
      net.ipv4.tcp_tw_reuse: 1
      net.ipv4.ip_local_port_range: 1024 65000
    healthcheck:
      test: ["CMD", "redis-cli", "-p", "7000", "ping"]
      interval: 5s
      timeout: 3s
      retries: 5

  redis-1:
    <<: *redis-base
    command: redis-server /usr/local/etc/redis/redis.conf --port 7001 --cluster-announce-port 7001 --cluster-announce-bus-port 17001
    ports:
      - "7001:7001"
      - "17001:17001"
    volumes:
      - ./config/redis.conf:/usr/local/etc/redis/redis.conf
      - redis-data-1:/data

  redis-2:
    <<: *redis-base
    command: redis-server /usr/local/etc/redis/redis.conf --port 7002 --cluster-announce-port 7002 --cluster-announce-bus-port 17002
    ports:
      - "7002:7002"
      - "17002:17002"
    volumes:
      - ./config/redis.conf:/usr/local/etc/redis/redis.conf
      - redis-data-2:/data

  redis-3:
    <<: *redis-base
    command: redis-server /usr/local/etc/redis/redis.conf --port 7003 --cluster-announce-port 7003 --cluster-announce-bus-port 17003
    ports:
      - "7003:7003"
      - "17003:17003"
    volumes:
      - ./config/redis.conf:/usr/local/etc/redis/redis.conf
      - redis-data-3:/data

  redis-4:
    <<: *redis-base
    command: redis-server /usr/local/etc/redis/redis.conf --port 7004 --cluster-announce-port 7004 --cluster-announce-bus-port 17004
    ports:
      - "7004:7004"
      - "17004:17004"
    volumes:
      - ./config/redis.conf:/usr/local/etc/redis/redis.conf
      - redis-data-4:/data

  redis-5:
    <<: *redis-base
    command: redis-server /usr/local/etc/redis/redis.conf --port 7005 --cluster-announce-port 7005 --cluster-announce-bus-port 17005
    ports:
      - "7005:7005"
      - "17005:17005"
    volumes:
      - ./config/redis.conf:/usr/local/etc/redis/redis.conf
      - redis-data-5:/data

networks:
  redis-cluster-network:
    driver: bridge

volumes:
  redis-data-0:
  redis-data-1:
  redis-data-2:
  redis-data-3:
  redis-data-4:
  redis-data-5:
Key elements of docker-compose.yml:
version: '3.8': Specifies the Docker Compose file format version.services: Defines our individual Redis instances.redis-0toredis-5: Each is a distinct service.&redis-baseand<<: *redis-base: This is YAML anchor syntax, used to avoid repetition.redis-basedefines common properties, and other services then merge them in.image: redis:7.2.4-alpine: Uses the official Redis Docker image.alpinevariants are lightweight. Specifying a version is good practice.command: Overrides the default command to start Redis. We pass the path to our customredis.confand crucially, we use--port,--cluster-announce-port, and--cluster-announce-bus-portto ensure each node advertises its correct, externally mapped port. This is essential for cluster communication on a single host. Withoutcluster-announce-portandcluster-announce-bus-port, nodes would advertise their internal container ports, making them unreachable to other nodes via the host network mapping.ports: Maps the container's internal Redis port (e.g.,7000) and its cluster bus port (e.g.,17000) to the host machine's corresponding ports. This allows external clients and other nodes on the host to connect.volumes:./config/redis.conf:/usr/local/etc/redis/redis.conf: Mounts our customredis.conffrom the host into the container, replacing the default.redis-data-X:/data: Creates a named Docker volume for each Redis instance, mapping it to the/datadirectory inside the container. This ensures that persistence files (nodes.conf, AOF, RDB) are stored persistently outside the container and survive container restarts.
networks: Assigns all Redis services to a custom bridge network namedredis-cluster-network. This isolates our cluster traffic and enables inter-service communication by hostname.sysctls: These are kernel parameters specific to Linux. They are often recommended for high-performance network applications like Redis to optimize TCP/IP stack behavior, allowing more connections and better port reuse.healthcheck: Defines a health check for each container. Docker will periodically runredis-cli pingto ensure the Redis server is responsive. This is useful fordocker-compose psto show health status and for orchestrators to manage restarts.
networks: Defines the custom bridge network.volumes: Declares the named volumes used by our services. Docker will manage these volumes.
5. Initialization Script: Forming the Cluster
Once all Redis containers are up and running, they are still just standalone instances. They need to be told to form a cluster. This is done using the redis-cli --cluster create command.
Create init-cluster.sh in the project root:
#!/bin/bash
# init-cluster.sh

echo "Waiting for Redis nodes to start..."
# Use a simple loop to check if redis-0 is available
# In a real scenario, you might want a more robust check for all nodes.
until docker compose exec redis-0 redis-cli -p 7000 ping | grep PONG; do
  sleep 1
done
echo "Redis nodes are up. Attempting to create cluster..."

# Create the cluster.
# We connect to redis-0 and pass the IP:port of all initial master nodes.
# --cluster-replicas 1 specifies that each master should have one replica.
# The nodes must be reachable from the host where this script is run,
# so we use the host-mapped ports (7000-7005).
docker compose exec redis-0 redis-cli --cluster create \
127.0.0.1:7000 127.0.0.1:7001 127.0.0.1:7002 \
127.0.0.1:7003 127.0.0.1:7004 127.0.0.1:7005 \
--cluster-replicas 1 --cluster-yes

echo "Redis Cluster creation initiated. Checking cluster status..."
sleep 5 # Give some time for cluster formation

# Check cluster nodes
docker compose exec redis-0 redis-cli -p 7000 cluster nodes

echo "Redis Cluster setup complete!"
Explanation of init-cluster.sh:
#!/bin/bash: Shebang for executing with bash.until docker compose exec redis-0 redis-cli -p 7000 ping | grep PONG; do sleep 1; done: This simple loop waits for theredis-0container to be responsive on port 7000 before proceeding. A more robust script might check all nodes or use Docker's healthcheck status.docker compose exec redis-0 redis-cli --cluster create ...: This is the core command.docker compose exec redis-0: Executes theredis-clicommand inside theredis-0container. We use this container as a convenient point to run thecreatecommand, as any node in the cluster can initiate the creation.--cluster create: Tellsredis-clito create a new cluster.127.0.0.1:7000 ... 127.0.0.1:7005: These are the host IP and port combinations of all six Redis instances that will form the cluster. It's crucial to use127.0.0.1and the host-mapped ports here, as that's how the instances are externally accessible.--cluster-replicas 1: Instructsredis-clito assign one replica to each master. It will intelligently pairredis-3withredis-0,redis-4withredis-1, andredis-5withredis-2by default.--cluster-yes: Automatically confirms the proposed cluster configuration.
docker compose exec redis-0 redis-cli -p 7000 cluster nodes: After creation, this command lists the nodes in the cluster and their roles (master/replica), which slots they handle, and their connection status.
Make the script executable: chmod +x init-cluster.sh
6. Bringing it All Together: Deploying the Cluster
Now, execute the commands in your terminal:
- Start the Redis containers:
bash docker compose up -dThe-dflag runs the containers in detached mode (in the background). Docker Compose will pull theredis:7.2.4-alpineimage if not already present, create theredis-cluster-network, and start all six Redis services. - Initialize the cluster:
bash ./init-cluster.shThis script will wait forredis-0to be ready, then execute theredis-cli --cluster createcommand to form the cluster, and finally show the cluster status.
If everything goes as planned, you should see output indicating the cluster has been successfully created, showing masters, replicas, and hash slot assignments.
...
>>> Performing hash slots allocation on 6 nodes...
Master[0] -> Slots 0 - 5460
Master[1] -> Slots 5461 - 10922
Master[2] -> Slots 10923 - 16383
Adding replica 127.0.0.1:7003 to 127.0.0.1:7000
Adding replica 127.0.0.1:7004 to 127.0.0.1:7001
Adding replica 127.0.0.1:7005 to 127.0.0.1:7002
M: 80f... 127.0.0.1:7000
   slots:[0-5460] (5461 slots) master
M: 52e... 127.0.0.1:7001
   slots:[5461-10922] (5462 slots) master
M: 171... 127.0.0.1:7002
   slots:[10923-16383] (5461 slots) master
S: 2b4... 127.0.0.1:7003
   replicates 80f...
S: 1c3... 127.0.0.1:7004
   replicates 52e...
S: 5f9... 127.0.0.1:7005
   replicates 171...
Can I set the above configuration? (type 'yes' to accept): yes
>>> Nodes configuration updated
>>> Assign a different config epoch to the new masters.
>>> Sending CLUSTER MEET messages to join the cluster
Waiting for the cluster to join
.
>>> Performing Cluster Check (using node 127.0.0.1:7000)
M: 80f... 127.0.0.1:7000
   slots:[0-5460] (5461 slots) master
   1 additional replica(s)
M: 52e... 127.0.0.1:7001
   slots:[5461-10922] (5462 slots) master
   1 additional replica(s)
M: 171... 127.0.0.1:7002
   slots:[10923-16383] (5461 slots) master
   1 additional replica(s)
S: 2b4... 127.0.0.1:7003
   slots: (0 slots) slave
   replicates 80f...
S: 1c3... 127.0.0.1:7004
   slots: (0 slots) slave
   replicates 52e...
S: 5f9... 127.0.0.1:7005
   slots: (0 slots) slave
   replicates 171...
[OK] All 16384 slots covered.
...
Congratulations! You now have a Redis Cluster running locally via Docker Compose.
To tear down the cluster and remove all containers and volumes:
docker compose down -v
The -v flag is important as it also removes the named volumes, effectively clearing all persisted Redis data (including nodes.conf). This is useful for starting fresh, but exercise caution in environments where you need to preserve data.
Verification and Testing
With the Redis Cluster deployed, the next crucial step is to verify its functionality and ensure it behaves as expected. This involves connecting to the cluster, checking its state, and performing basic data operations.
1. Connecting to the Cluster
To interact with the Redis Cluster, you need to use redis-cli with the -c (cluster mode) flag. This flag enables the client to understand and handle MOVED and ASK redirections, ensuring it connects to the correct node for any given key.
You can connect to any of the master nodes (e.g., redis-0 on port 7000) from your host machine:
redis-cli -c -p 7000
You should see a prompt like 127.0.0.1:7000>
2. Checking Cluster State
Once connected, you can use several Redis Cluster commands to inspect its health and topology.
CLUSTER NODES: This command provides a detailed list of all nodes in the cluster, their IDs, IP addresses, ports, roles (master/slave), current state, and the hash slots they own.127.0.0.1:7000> CLUSTER NODESYou will observe which masters have which slots, and which replicas are connected to which masters. For example:80f... 127.0.0.1:7000@17000 master - 0 1679361623000 1 connected 0-5460 52e... 127.0.0.1:7001@17001 master - 0 1679361623500 2 connected 5461-10922 171... 127.0.0.1:7002@17002 master - 0 1679361623000 3 connected 10923-16383 2b4... 127.0.0.1:7003@17003 slave 80f... 0 1679361623000 1 connected 1c3... 127.0.0.1:7004@17004 slave 52e... 0 1679361623000 2 connected 5f9... 127.0.0.1:7005@17005 slave 171... 0 1679361623000 3 connectedCLUSTER INFO: This command provides a high-level summary of the cluster's health and configuration.bash 127.0.0.1:7000> CLUSTER INFOLook forcluster_state: okto confirm the cluster is healthy and operational. Other useful fields includecluster_slots_assigned,cluster_slots_ok,cluster_known_nodes, etc.
3. Setting and Getting Keys
Now, let's perform some basic data operations to observe how keys are distributed and how the client redirects requests.
- Setting a key:
bash 127.0.0.1:7000> SET mykey "Hello Redis Cluster" -> Redirected to slot 15495 residing at 127.0.0.1:7002 OKNotice the-> Redirected to slot ...message. This indicates thatmykey(which hashes to slot 15495) is owned by the node listening on127.0.0.1:7002. Theredis-cli -cautomatically redirected your command to the correct node. If you were using a "smart client" library in an application, it would handle this redirection transparently. - Getting the same key:
bash 127.0.0.1:7000> GET mykey -> Redirected to slot 15495 residing at 127.0.0.1:7002 "Hello Redis Cluster"Again, the redirection occurs. The client knows which node holds the key. - Experiment with different keys: Try
SET user:1 "Alice",SET product:100 "Laptop",SET session:abc "data". Observe which node each key is redirected to. You'll see keys being distributed acrossredis-0,redis-1, andredis-2(ports 7000, 7001, 7002) according to their hash slots. - Multi-key operations and
CROSSSLOT: Redis Cluster has a strict rule: multi-key commands (likeMSET,MGET,DELwith multiple keys,SUNION, etc.) can only be executed if all involved keys map to the same hash slot. If they don't, you'll encounter aCROSSSLOTerror.bash 127.0.0.1:7000> SET key1 "val1" OK 127.0.0.1:7000> SET key2 "val2" OK 127.0.0.1:7000> MGET key1 key2 (error) CROSSSLOT Keys in MGET/MSET/DEL are required to be in the same hash slot.This is a fundamental aspect of Redis Cluster's design to maintain atomicity and simplify sharding. To perform multi-key operations across different slots, you need to manage them at the application level. Alternatively, you can use "hash tags" by including{tag}in your key names (e.g.,user:{123}:nameanduser:{123}:email). Keys with the same hash tag{...}will always map to the same hash slot, allowing multi-key operations on related data.
4. Simulating Failover
One of the primary benefits of Redis Cluster is its ability to handle node failures gracefully. Let's simulate a master failure and observe the automatic failover.
- Identify a master node: From
CLUSTER NODESor yourinit-cluster.shoutput, pick a master node, e.g.,redis-0(port 7000). Set a key that you know belongs to this master (e.g.,SET mykey_on_7000 "This should be on 7000"ifmykey_on_7000happens to hash to a slot owned byredis-0). - Stop the master container: Open a new terminal and stop
redis-0:bash docker compose stop redis-0(Ordocker stop <container_id_of_redis-0>) - Restart the failed node:
bash docker compose start redis-0Afterredis-0restarts, it will rejoin the cluster as a replica of the newly promoted master (redis-3). You can verify this withCLUSTER NODES.
Observe failover: Go back to your redis-cli -c -p 7000 session (it might temporarily show connection errors). After a few seconds (based on cluster-node-timeout and election process), if you try CLUSTER NODES again, you will see that redis-0 is marked as fail and its replica (redis-3 on port 7003) has been promoted to master.```
After stopping redis-0, redis-cli might show
(error) CLUSTERDOWN The cluster is down
Or connection refused. After some time, try connecting to a still alive node, e.g., 7001
redis-cli -c -p 7001 127.0.0.1:7001> CLUSTER NODES
You should now see something like:
80f... 127.0.0.1:7000@17000 master,fail - 1679361623000 1679361623000 1 disconnected # redis-0 is failed 2b4... 127.0.0.1:7003@17003 master - 0 1679361630000 1 connected 0-5460 # redis-3 is now master for those slots! ... `` And crucially, if you try toGET mykey_on_7000, it will now redirect to127.0.0.1:7003` (the new master for those slots) and successfully retrieve the data. This demonstrates the automatic failover capability of Redis Cluster.
This robust testing and verification process confirms that your Docker Compose-deployed Redis Cluster is not only operational but also resilient to failures, laying a strong foundation for your applications.
APIPark is a high-performance AI gateway that allows you to securely access the most comprehensive LLM APIs globally on the APIPark platform, including OpenAI, Anthropic, Mistral, Llama2, Google Gemini, and more.Try APIPark now! 👇👇👇
Advanced Considerations and Best Practices
While a basic Redis Cluster deployment with Docker Compose provides a powerful foundation, moving towards a production-ready setup requires deeper consideration of several advanced topics. These best practices enhance durability, security, performance, and manageability.
1. Persistence: Ensuring Data Durability
Redis, being an in-memory database, relies on persistence mechanisms to prevent data loss upon restarts or failures. Docker volumes are crucial here.
- RDB (Redis Database) Snapshots: This mechanism performs point-in-time snapshots of your dataset at specified intervals. It's excellent for disaster recovery as it creates compact binary files. However, if Redis crashes between snapshots, you might lose some data.
- AOF (Append Only File): The AOF logs every write operation received by the server. When Redis restarts, it replays the AOF to reconstruct the dataset. AOF typically provides better durability (less data loss) than RDB, especially with
appendfsync everysec(which is often a good balance between performance and durability). - Combining RDB and AOF: Redis allows you to enable both. AOF is used for recovery, and RDB snapshots can be taken periodically for backups and faster restarts (as loading a snapshot is usually quicker than replaying a large AOF).
- Volume Mapping for Durability: In our
docker-compose.yml, we used named Docker volumes (redis-data-X:/data). This is vital. Without persistent volumes, any data stored by Redis inside the container's ephemeral filesystem would be lost when the container is removed. Ensure your persistence directory (/datain ourredis.conf) is always mapped to a Docker volume or bind mount.
Example redis.conf for robust persistence:
# RDB persistence
save 900 1     # Save if 1 key changes in 15 minutes
save 300 10    # Save if 10 keys change in 5 minutes
save 60 10000  # Save if 10000 keys change in 1 minute

# AOF persistence
appendonly yes
appendfilename "appendonly.aof"
# fsync policy for AOF. always, everysec, or no. everysec is a good balance.
appendfsync everysec
no-appendfsync-on-rewrite yes # Don't fsync during AOF rewrite (less latency impact)
auto-aof-rewrite-percentage 100
auto-aof-rewrite-min-size 64mb

dir /data
2. Security: Protecting Your Data
Running a Redis Cluster, especially in production, demands robust security measures.
protected-mode yesandbind: Inredis.conf, we setprotected-mode nofor easier development. For production, always setprotected-mode yes. Combine this withbind 127.0.0.1or specific internal IPs to restrict access to trusted network interfaces only. If external access is required, use a firewall or API Gateway.- Authentication (AUTH): Use a strong password to protect your Redis instances.
# In redis.conf requirepass your_strong_password_here masterauth your_strong_password_here # For replicas to authenticate with mastersThen, clients (includingredis-cli) must authenticate:redis-cli -c -p 7000 -a your_strong_password_here. - Network Segmentation/Firewalls: Isolate your Redis Cluster nodes within a private network segment. Use network firewalls to restrict inbound connections to only those from your application servers and monitoring tools.
- TLS/SSL: For sensitive data, consider enabling TLS/SSL for client-server and inter-node communication. Redis supports TLS natively since version 6. This adds a layer of encryption, preventing eavesdropping. This requires more complex configuration and potentially recompiling Redis with TLS support, or using a TLS proxy.
- Docker Secrets: For managing sensitive information like Redis passwords, avoid hardcoding them in
docker-compose.yml. Use Docker Secrets (with Docker Swarm or Kubernetes) or environment variables (with care for local development).
3. Resource Allocation and Limits
Containerized environments make it easy to manage resource consumption.
- CPU and Memory Limits: In
docker-compose.yml, definecpusandmem_limitfor each Redis service to prevent a single node from monopolizing host resources.yaml services: redis-0: # ... deploy: resources: limits: memory: 256m # Max 256MB RAM per container cpus: '0.5' # Max 0.5 CPU core per container reservations: # Minimum resources to reserve memory: 128m cpus: '0.25'Adjust these values based on your expected dataset size and traffic. Remember Redis is in-memory; if it runs out of memory, it crashes. - Overcommit Prevention: Redis has a
maxmemorydirective inredis.conf. Set this to a value lower than the container'smem_limitto give the OS and Redis some headroom. Also configuremaxmemory-policy(e.g.,allkeys-lrufor LRU eviction) to define how Redis should behave when memory limits are reached.
4. Monitoring: Keeping an Eye on Performance and Health
Proactive monitoring is critical for any production system.
- Redis INFO: The
INFOcommand provides a wealth of statistics about Redis (memory usage, clients, replication, CPU, persistence, cluster state). You can parse its output for custom monitoring scripts. redis-cli --latency: Useful for real-time latency checks.- Prometheus and Grafana: For comprehensive monitoring, integrate Redis Exporter with Prometheus to collect metrics, and visualize them with Grafana dashboards. This provides historical trends, alerts, and detailed insights into your cluster's performance.
- Log Aggregation: Configure Redis logs to be sent to a centralized logging system (e.g., ELK stack, Splunk, Loki) for easier troubleshooting and analysis across all nodes. Docker's logging drivers can facilitate this.
5. Client Libraries: "Smart" Cluster-Aware Clients
As discussed, Redis Cluster requires "smart clients" that understand the cluster's topology and handle MOVED/ASK redirections. Using a standard non-cluster client will likely lead to MOVED errors your application can't handle.
Popular client libraries with Redis Cluster support include: * Java: Jedis, Redisson, Lettuce * Python: redis-py * Node.js: ioredis * Go: go-redis
Ensure your application uses a client library specifically designed for Redis Cluster. This abstracts away the complexity of cluster topology from your application code.
6. Production Deployment: Beyond Docker Compose
While Docker Compose is excellent for local development and single-host deployments, large-scale production Redis Clusters typically reside on multiple hosts for true fault tolerance and scalability. For such scenarios, container orchestration platforms like Kubernetes or Docker Swarm are more suitable.
- Kubernetes: The de-facto standard for container orchestration. Kubernetes offers robust features for deploying stateful applications like Redis Cluster, including StatefulSets for managing persistent storage and stable network identities, service discovery, and advanced self-healing capabilities.
- Docker Swarm: A simpler, native Docker orchestrator. It allows you to deploy multi-host Docker Compose files (using
docker stack deploy) across a swarm of Docker engines. - Overlay Networks: For multi-host clusters, Docker overlay networks (or Kubernetes CNI plugins) enable seamless communication between containers running on different hosts, crucial for Redis Cluster's inter-node communication.
- Backup and Restore Strategies: Implement regular backup routines (e.g., copying RDB files to object storage) and test your restore procedures.
7. Networking Nuances
In our Docker Compose setup, cluster-announce-ip 127.0.0.1 and mapping host ports 700x and 1700x were critical. For production, especially multi-host, this needs to change:
- Each node should announce its actual IP address or a routable hostname/DNS entry that other nodes and clients can resolve and reach.
- If using an overlay network, nodes can often announce their internal container IPs, as the overlay network handles routing. However, external clients would still need to access through a load balancer or service.
Careful planning of network topology and node advertisement is essential to avoid CLUSTERDOWN or CLUSTERSTATE FAIL issues.
Integrating Redis Cluster with Modern Applications via API Management (APIPark Mention)
As applications grow in complexity, embracing microservices architectures and leveraging powerful backend data stores like Redis Clusters becomes common. These highly specialized components, while crucial for performance and scalability, are often internal and not directly exposed to end-users or external systems. However, the data or capabilities they provide might need to be consumed by other services, internal teams, or even external partners through well-defined APIs. This is where an efficient API management solution becomes not just useful, but indispensable.
Platforms like APIPark emerge as pivotal tools for streamlining this entire integration and governance process. APIPark, an open-source AI gateway and API management platform, allows developers to transcend basic API exposure. It facilitates the management of all REST services, and significantly, it offers the capability to integrate over 100 AI models, encapsulating complex logic – which might internally rely on a high-performance Redis cluster for caching, session management, or even as a fast data store for AI model results – into unified, manageable APIs.
For instance, an application might use a Redis Cluster to cache user profiles, manage real-time game states, or store intermediate results for a large language model. APIPark can then be used to create a "User Profile API" or a "Game State API" that internally interacts with the Redis Cluster. This provides several benefits:
- Unified Access: Instead of clients needing direct knowledge of the Redis Cluster (its connection parameters, cluster mode handling), they interact with a stable, well-documented API endpoint provided by APIPark.
- Security Layer: APIPark acts as a gatekeeper, enforcing authentication, authorization, rate limiting, and access control policies before requests even reach the Redis Cluster. This shields your backend from direct exposure and potential attacks.
- Abstraction and Decoupling: Changes in the underlying Redis Cluster (e.g., adding/removing nodes, upgrading Redis versions) do not directly impact client applications, as long as the API contract remains stable. APIPark handles the routing and translation.
- Monitoring and Analytics: APIPark provides detailed logging and powerful data analysis on all API calls, giving you insights into who is consuming your Redis-backed services, how often, and with what performance. This is crucial for capacity planning and troubleshooting, complementing Redis's internal monitoring capabilities.
By using an API management platform like APIPark, developers can effectively manage the lifecycle of APIs that expose or leverage data from their Redis Clusters. This approach enhances security, simplifies consumption of complex backend services for various internal teams, and provides robust governance over the interactions that drive modern, data-intensive applications.
Real-World GitHub Examples and Resources
Learning from practical, community-driven examples is often the most effective way to solidify understanding and discover alternative approaches. GitHub is a treasure trove of such resources. While I cannot link directly to specific constantly evolving repositories, I can describe the types of examples you'll find and what to look for.
When searching GitHub for "redis cluster docker compose", "docker-compose redis cluster example", or "redis high availability docker", you'll encounter various patterns and implementations. Here's what to look for and how to analyze them:
Common Patterns and Approaches
- Separate
redis.conffor Each Node: Some examples create distinctredis.conffiles for each node, hardcoding theportandcluster-announce-portdirectly into each file.- Pros: Very explicit, no need for dynamic
commandoverrides indocker-compose.yml. - Cons: More verbose, harder to maintain if you have many nodes or need to change a common parameter. Our approach of a single
redis.confand dynamiccommandarguments is often preferred for maintainability.
- Pros: Very explicit, no need for dynamic
- Using
supervisordwithin a Single Container: An older or less common approach involves running multiple Redis instances (e.g., 3 masters) within a single Docker container, managed by a process supervisor likesupervisord. This is generally an anti-pattern in modern Docker practices.- Why avoid: Docker philosophy emphasizes "one process per container." Running multiple processes complicates logging, resource management, scaling, and fault isolation. If
supervisorditself fails or one Redis instance crashes, the whole container might restart, impacting other instances. - Look for: Avoid
Dockerfiles that installsupervisordor similar process managers to run multiple Redis instances.
- Why avoid: Docker philosophy emphasizes "one process per container." Running multiple processes complicates logging, resource management, scaling, and fault isolation. If
- Variations in Cluster Initialization:
- External
redis-cli: Some examples runredis-cli --cluster createfrom the host machine directly, connecting to the exposed host ports, similar to ourinit-cluster.sh. This is common and straightforward. docker execwith service names: Ourinit-cluster.shusesdocker compose exec redis-0 redis-cli .... Other examples might use a separate "cluster-creator" container that waits for all Redis nodes and then runs theredis-cli --cluster createcommand internally, communicating with Redis nodes via their service names on the Docker network (e.g.,redis-0:7000,redis-1:7000, etc., if they all run on the same internal port). This requires more complex scripting to correctly advertise the internal IPs.
- External
- Different Persistence Strategies: You'll see examples using only RDB, only AOF, or both. The choice often depends on the specific use case's durability requirements. Always check that volumes are properly mapped.
- Multi-Host Cluster Emulation: Some advanced GitHub examples might attempt to simulate a multi-host Redis Cluster on a single machine using complex network setups, or they might provide configurations for Docker Swarm or Kubernetes to achieve true multi-host deployments. These are valuable for understanding the next steps beyond simple
docker-compose.
Example docker-compose.yml Snippet from a Hypothetical GitHub Repo
Here's a condensed look at what a docker-compose.yml from a GitHub example might look like, highlighting slight differences or commonalities:
version: '3.8'

services:
  redis-master-1:
    image: redis:6.2.6-alpine
    command: redis-server /etc/redis/redis.conf --port 6379 --cluster-announce-port 6379 --cluster-announce-bus-port 16379 --cluster-announce-ip ${REDIS_HOST_IP}
    environment:
      REDIS_HOST_IP: 127.0.0.1 # Or use host.docker.internal on Docker Desktop
    ports:
      - "6379:6379"
      - "16379:16379"
    volumes:
      - ./config/redis_master_1.conf:/etc/redis/redis.conf
      - redis-data-master-1:/data
    networks:
      - redis-cluster-net

  redis-master-2:
    image: redis:6.2.6-alpine
    command: redis-server /etc/redis/redis.conf --port 6380 --cluster-announce-port 6380 --cluster-announce-bus-port 16380 --cluster-announce-ip ${REDIS_HOST_IP}
    environment:
      REDIS_HOST_IP: 127.0.0.1
    ports:
      - "6380:6380"
      - "16380:16380"
    volumes:
      - ./config/redis_master_2.conf:/etc/redis/redis.conf
      - redis-data-master-2:/data
    networks:
      - redis-cluster-net

  # ... (and so on for replicas)

networks:
  redis-cluster-net:
    driver: bridge

volumes:
  redis-data-master-1:
  redis-data-master-2:
Critique of this snippet:
redis-announce-ipwithREDIS_HOST_IPenvironment variable: This is a common pattern to make thecluster-announce-ipconfigurable, which is good. The value127.0.0.1works for a single-host setup. For Docker Desktop,host.docker.internalmight be preferred to resolve to the host's actual IP.- Separate
redis.confper service:redis_master_1.conf,redis_master_2.conf. This is a valid approach, as mentioned earlier, but can be less DRY (Don't Repeat Yourself) than using a single template and dynamiccommandarguments. - Port Naming: Ports
6379and6380for masters is fine, but ensures they are distinct and correctly announced.
What to Learn and Emphasize
- Understand the
commandline: Pay close attention to how Redis is started (redis-server <config-file> ...) and especially how--cluster-announce-port,--cluster-announce-bus-port, and--cluster-announce-ipare handled. This is the most frequent source of cluster formation issues. - Persistence (
volumes): Verify that data volumes are correctly mapped to prevent data loss. - Network Setup: Ensure containers are on a common network and can resolve each other.
- Initialization Scripts: Examine how
redis-cli --cluster createis invoked, and if any waiting/health checks are performed. - Security: Look for authentication (
requirepass) and network binding (bind) configurations.
By studying diverse GitHub examples, you can broaden your understanding of Redis Cluster deployment nuances, compare different approaches, and adapt the best practices to your specific needs. It's a fantastic way to learn directly from the community's collective experience.
Troubleshooting Common Issues
Deploying a distributed system like Redis Cluster can sometimes present challenges. Knowing how to diagnose and resolve common issues efficiently is key to a smooth operation. Here's a rundown of frequently encountered problems and their solutions.
1. (error) CLUSTERDOWN The cluster is down
This is one of the most disheartening errors, indicating that your cluster is not in a healthy state and cannot serve requests.
Common Causes and Solutions:
- Not Enough Masters: A Redis Cluster requires a majority of master nodes to be available for it to be considered
OK. If you have 3 masters and 2 of them fail, the cluster will goCLUSTERDOWN.- Solution: Ensure you have enough masters online. For a 3-master cluster, at least 2 masters must be up. For a cluster with replicas, ensure that if a master fails, its replica can be promoted (which means the replica itself must be healthy and reachable).
- Misconfigured Ports or
cluster-announce-ip: Nodes cannot communicate with each other, or clients cannot reach the announced node addresses.- Solution: Double-check
docker-compose.ymlfor correct port mappings (both data and bus ports). Verifycluster-announce-ip,cluster-announce-port, andcluster-announce-bus-portin yourcommandorredis.conf. They must reflect the externally reachable IP and port for each node, especially on a single host (127.0.0.1:port). UseCLUSTER NODESto see what addresses nodes are advertising.
- Solution: Double-check
nodes.confCorruption: Thenodes.conffile is crucial for cluster state. If it gets corrupted, a node might struggle to rejoin or start the cluster.- Solution: If in a development environment and data loss is acceptable, stop the cluster, remove all
redis-data-Xvolumes (docker compose down -v), and restart. In production, this requires careful recovery procedures.
- Solution: If in a development environment and data loss is acceptable, stop the cluster, remove all
- Firewall Issues: Host firewalls or Docker's internal networking rules might block traffic between containers or from the host.
- Solution: Temporarily disable firewalls for testing (not recommended for production) or ensure rules allow traffic on relevant ports (7000-7005 and 17000-17005 in our example).
2. (error) CROSSSLOT Keys in MGET/MSET/DEL are required to be in the same hash slot.
This error is a feature, not a bug, and arises from a fundamental design principle of Redis Cluster.
Common Causes and Solutions:
- Attempting Multi-key Operations Across Different Slots: You are trying to use a command like
MGET,MSET,SUNION, etc., with keys that Redis has assigned to different hash slots.- Solution:
- Redesign Application Logic: For commands involving multiple keys, ensure all keys hash to the same slot. If data is logically related (e.g.,
user:100:name,user:100:email), use hash tags by enclosing the common part in curly braces{}. Example:MSET {user:100}:name "Alice" {user:100}:email "alice@example.com". Both keys will now hash to the same slot as{user:100}. - Client-Side Aggregation: If keys are truly unrelated and belong to different slots, fetch them individually and aggregate the results in your application.
- Avoid Cluster for Certain Use Cases: If your application heavily relies on multi-key operations across entirely disparate keys, Redis Cluster might not be the ideal solution for that specific dataset. Consider Redis Sentinel or a non-sharded setup for such scenarios, or re-evaluate your data model.
- Redesign Application Logic: For commands involving multiple keys, ensure all keys hash to the same slot. If data is logically related (e.g.,
- Solution:
3. Persistence Issues: Data Loss After Restart
You restart your containers, and your data is gone.
Common Causes and Solutions:
- Missing or Incorrect Volume Mapping: The most common reason. If you don't map a persistent Docker volume to the Redis
dir(/datain ourredis.conf), data is lost when containers are removed.- Solution: Ensure your
docker-compose.ymlhasvolumes: - redis-data-X:/datafor each service and that the named volumes are declared under thevolumes:top-level key.
- Solution: Ensure your
- Incorrect
redis.confPersistence Settings: RDB or AOF might not be enabled or configured correctly.- Solution: Verify
appendonly yes(for AOF) andsavedirectives (for RDB) are present inredis.conf.
- Solution: Verify
- Accidental Volume Deletion: Using
docker compose down -vor manually removing volumes (docker volume rm) will delete all persisted data.- Solution: Be mindful when using
-v. For graceful shutdowns that preserve data, usedocker compose downwithout-v.
- Solution: Be mindful when using
4. protected-mode Blocking Connections
During development, you might forget that protected-mode is enabled (either by default or in a production-oriented redis.conf).
Common Causes and Solutions:
protected-mode yeswithoutbindorrequirepass: Redis refuses connections from non-loopback clients if nobindaddress is specified andrequirepassis not set.- Solution (Development): Set
protected-mode noinredis.conf. - Solution (Production): Keep
protected-mode yes. Ensurebindis set to specific, trusted internal IPs. Even better, setrequirepasswith a strong password. Clients must then use-a <password>to connect.
- Solution (Development): Set
5. High Memory Usage
Redis, being in-memory, can consume a lot of RAM.
Common Causes and Solutions:
- Unbounded Dataset Growth: Your application is storing too much data in Redis.
- Solution:
- Set
maxmemoryandmaxmemory-policy: Configuremaxmemoryinredis.confto a value lower than your container'smem_limit. Choose an appropriatemaxmemory-policy(e.g.,allkeys-lrufor Least Recently Used eviction,noevictionto prevent any evictions which will cause write errors if memory is full). - Review Data Model: Are you storing unnecessary data? Is data being properly expired using
EXPIREcommands? - Add More Nodes: For a cluster, horizontal scaling by adding more master nodes will distribute the dataset and reduce memory pressure on individual nodes.
- Set
- Solution:
- Memory Fragmentation: Redis can experience memory fragmentation, leading to
used_memory_rssbeing higher thanused_memory.- Solution:
INFO memorycommand provides fragmentation ratio. Restarting Redis can often reclaim fragmented memory.
- Solution:
- Buggy Client or Application: A client application might be accidentally creating a huge number of keys or very large keys.
- Solution: Use
MONITORcommand (carefully, as it impacts performance) or client-side debugging to identify problematic operations.
- Solution: Use
6. Client Connection Issues
Applications struggle to connect to or interact with the cluster.
Common Causes and Solutions:
- Not Using a Cluster-Aware Client: Using a standard Redis client that doesn't understand
MOVEDredirections.- Solution: Switch to a "smart" Redis Cluster client library in your application (e.g., Jedis, redis-py with cluster mode, ioredis).
- Incorrect Connection String: Providing the wrong IP/port or not providing enough seed nodes to the client.
- Solution: Provide one or more reachable Redis Cluster node addresses (IP:port) to your client library. The smart client will then discover the rest of the cluster topology.
- Network Latency/Instability: Intermittent network issues between clients and Redis nodes.
- Solution: Check network connectivity, analyze network logs, ensure proper network configuration in Docker (especially for multi-host setups).
By systematically checking these potential issues and applying the suggested solutions, you can effectively troubleshoot and maintain a robust Redis Cluster deployment. Always consult Redis logs (docker compose logs <service_name>) for specific error messages, as they are invaluable diagnostic tools.
Conclusion
The journey through deploying a Redis Cluster with Docker Compose reveals a powerful synergy between high-performance data storage and modern container orchestration. We've traversed the foundational concepts of Redis, understanding its in-memory prowess and the critical need for a distributed architecture to achieve both horizontal scalability and fault tolerance. By dissecting the Redis Cluster's intricate design—from hash slots and node roles to the gossip protocol and failover mechanisms—we've laid a robust theoretical groundwork.
Our step-by-step guide meticulously walked through the practical implementation, demonstrating how Docker Compose elegantly simplifies the setup of multiple interconnected Redis nodes. Through carefully crafted docker-compose.yml and redis.conf files, we constructed a resilient 6-node cluster, emphasizing the importance of correct port mappings, persistent volumes, and explicit cluster communication parameters. The initialization script, wielding redis-cli --cluster create, brought the cluster to life, showcasing how a collection of individual Redis instances coalesce into a cohesive, self-healing data store.
Beyond initial deployment, we delved into advanced considerations crucial for production environments: hardening data durability with comprehensive persistence strategies, fortifying security with authentication and network isolation, optimizing performance through careful resource allocation, and ensuring continuous health with diligent monitoring. We also highlighted the significance of "smart" client libraries and the architectural evolution towards orchestrators like Kubernetes for large-scale, multi-host deployments. The natural integration of platforms like APIPark was discussed as a means to manage the API layer that interacts with these robust backend services, simplifying consumption and enhancing governance.
Finally, we equipped you with a practical troubleshooting guide, addressing common pitfalls like CLUSTERDOWN states, CROSSSLOT errors, and data persistence challenges, empowering you to quickly diagnose and resolve issues.
The combination of Redis Cluster and Docker Compose offers a formidable solution for applications demanding speed, scale, and resilience. Whether you're building a real-time analytics engine, a high-throughput session store, or an ultra-fast caching layer, mastering this deployment strategy provides a significant competitive advantage. As you continue to explore and refine your deployments, remember that the principles of robust configuration, proactive monitoring, and a deep understanding of the underlying architecture will be your most valuable allies. Embrace the power of containerization and distributed systems, and unleash the full potential of your applications.
Redis Deployment Modes Comparison Table
To summarize the key differences between Redis Standalone, Redis Sentinel, and Redis Cluster, here's a comparative table that highlights their primary characteristics, use cases, and limitations.
| Feature | Redis Standalone | Redis Sentinel | Redis Cluster |
|---|---|---|---|
| Primary Goal | High-speed, in-memory data storage for a single node | High Availability (HA) and automatic failover for a single logical dataset | Horizontal Scalability, Data Sharding, and High Availability |
| Data Sharding | No (single instance) | No (single logical dataset, master-replica replication) | Yes (data partitioned across multiple master nodes) |
| Scalability | Vertical scaling only (more RAM, CPU on a single server) | Vertical scaling primarily; read replicas can offload read traffic from master | Horizontal scaling for both data storage and throughput (reads/writes) |
| Fault Tolerance | None (Single Point of Failure - SPOF) | Automatic failover for master node failures (Sentinel promotes a replica to master) | Automatic failover for master nodes; cluster remains operational if a master fails and a replica takes over |
| Dataset Size Limit | Limited by the memory of a single server | Limited by the memory of a single master server | Can scale to terabytes, limited by total memory of all master nodes |
| Complexity | Low | Medium (multiple Sentinel processes, master, replicas) | High (multiple master/replica nodes, slot management, client redirections) |
| Minimum Nodes | 1 | 1 master + N replicas + 3 Sentinels (for quorum) | 3 masters (minimum for functionality); 3 masters + 3 replicas (recommended for HA) |
| Client Interaction | Direct connection to the single Redis instance | Clients connect to Sentinels to discover the current master; Sentinels update clients on failover | "Smart clients" connect to any cluster node and are redirected to the correct node for a given key |
| Use Cases | Caching, simple key-value store, development environments | Session store, caching with HA, message queues, where entire dataset fits one server | Large-scale caching, massive session stores, real-time analytics, distributed databases, requiring sharding |
| Persistence | RDB & AOF supported | RDB & AOF supported | RDB & AOF supported on each node |
| Write Throughput | Limited by single master's CPU/network | Limited by single master's CPU/network | Distributed across multiple master nodes, significantly higher throughput potential |
This table serves as a quick reference to help you decide which Redis deployment strategy best aligns with your application's requirements for scalability, availability, and operational complexity.
Frequently Asked Questions (FAQs)
Q1: What is the primary difference between Redis Sentinel and Redis Cluster, and when should I use each?
A1: The primary difference lies in their approach to scalability and data partitioning. Redis Sentinel provides high availability (HA) and automatic failover for a single logical dataset. It monitors a master-replica setup and promotes a replica to master if the current master fails. However, it does not shard data; all data still resides on one master. Use Sentinel when your dataset comfortably fits within a single Redis server's memory, but you require automatic failover and high availability. Redis Cluster, on the other hand, provides both horizontal scalability (data sharding) and high availability by distributing data across multiple master nodes. Each master node handles a subset of the data (hash slots) and can have its own replicas for failover. Use Redis Cluster when your dataset is too large for a single server, or when you need to distribute read and write traffic across multiple nodes for increased throughput and resilience.
Q2: Why is cluster-announce-ip crucial when deploying Redis Cluster with Docker Compose on a single host?
A2: When deploying a Redis Cluster with Docker Compose on a single host, each Redis container often has an internal Docker IP address that is not directly routable by other containers or the host using its externally exposed port. By default, a Redis cluster node will advertise its internal IP and port to other nodes. If cluster-announce-ip is not explicitly set, nodes will tell each other to connect to these internal IPs, which will fail if they are trying to reach nodes through the host's 127.0.0.1 mapped ports. Setting cluster-announce-ip 127.0.0.1 (or the host's actual IP) and explicitly mapping different host ports (7000-7005 for data, 17000-17005 for cluster bus) ensures that each node advertises an externally reachable address. This allows all nodes to communicate correctly and for clients to connect via the host. For multi-host deployments, cluster-announce-ip would typically be set to the container's actual internal IP on an overlay network or the host's routable IP.
Q3: What happens if a master node in my Redis Cluster fails, and what is the role of replicas?
A3: If a master node in your Redis Cluster fails (e.g., its container crashes), the cluster's other master nodes will detect this failure through the gossip protocol. If a majority of master nodes agree that the node is unreachable, it is marked as FAIL. Subsequently, one of the failed master's replicas (if present) will be elected and promoted to become the new master for the hash slots previously owned by the failed master. This process is automatic and ensures that the data remains available and the cluster continues to operate without interruption. The former master, if it eventually recovers and rejoins the cluster, will become a replica of the newly promoted master. This mechanism is the core of Redis Cluster's high availability.
Q4: How do I ensure data persistence for my Redis Cluster when using Docker Compose?
A4: To ensure data persistence and prevent data loss upon container removal or restarts, you must configure Redis persistence (RDB snapshots and/or AOF logs) and map these persistence files to Docker volumes. In your docker-compose.yml, for each Redis service, define a named Docker volume (e.g., redis-data-0) and mount it to the directory where Redis stores its persistence files (typically /data within the container). In your redis.conf, ensure appendonly yes (for AOF) and appropriate save directives (for RDB) are enabled, and set dir /data. This way, the nodes.conf file (which stores cluster topology) and your actual data will be written to the Docker volumes, persisting even if containers are stopped, removed, or recreated.
Q5: What is the CROSSSLOT error, and how should applications handle it?
A5: The CROSSSLOT error occurs when you attempt to execute a multi-key Redis command (like MSET, MGET, DEL with multiple keys, SUNION, etc.) where the involved keys do not all map to the same hash slot. Redis Cluster enforces this rule to maintain atomicity and simplify data sharding across nodes. Applications should handle this by: 1. Using Hash Tags: For logically related keys that need to be processed together, use hash tags by enclosing a common part of the key name in curly braces (e.g., {user:123}:name and {user:123}:email). Keys with the same hash tag will always map to the same hash slot, allowing multi-key operations. 2. Client-Side Logic: If keys are unrelated and reside on different nodes, the application must fetch/modify them individually by sending separate commands to the respective nodes (the "smart client" library will handle redirection for individual keys). The application then aggregates the results or processes them as needed. 3. Redesigning Data Model: If frequent cross-slot multi-key operations are inherent to your data model, reconsider if Redis Cluster is the right fit for that specific dataset, or explore alternative ways to structure your keys.
🚀You can securely and efficiently call the OpenAI API on APIPark in just two steps:
Step 1: Deploy the APIPark AI gateway in 5 minutes.
APIPark is developed based on Golang, offering strong product performance and low development and maintenance costs. You can deploy APIPark with a single command line.
curl -sSO https://download.apipark.com/install/quick-start.sh; bash quick-start.sh

In my experience, you can see the successful deployment interface within 5 to 10 minutes. Then, you can log in to APIPark using your account.

Step 2: Call the OpenAI API.