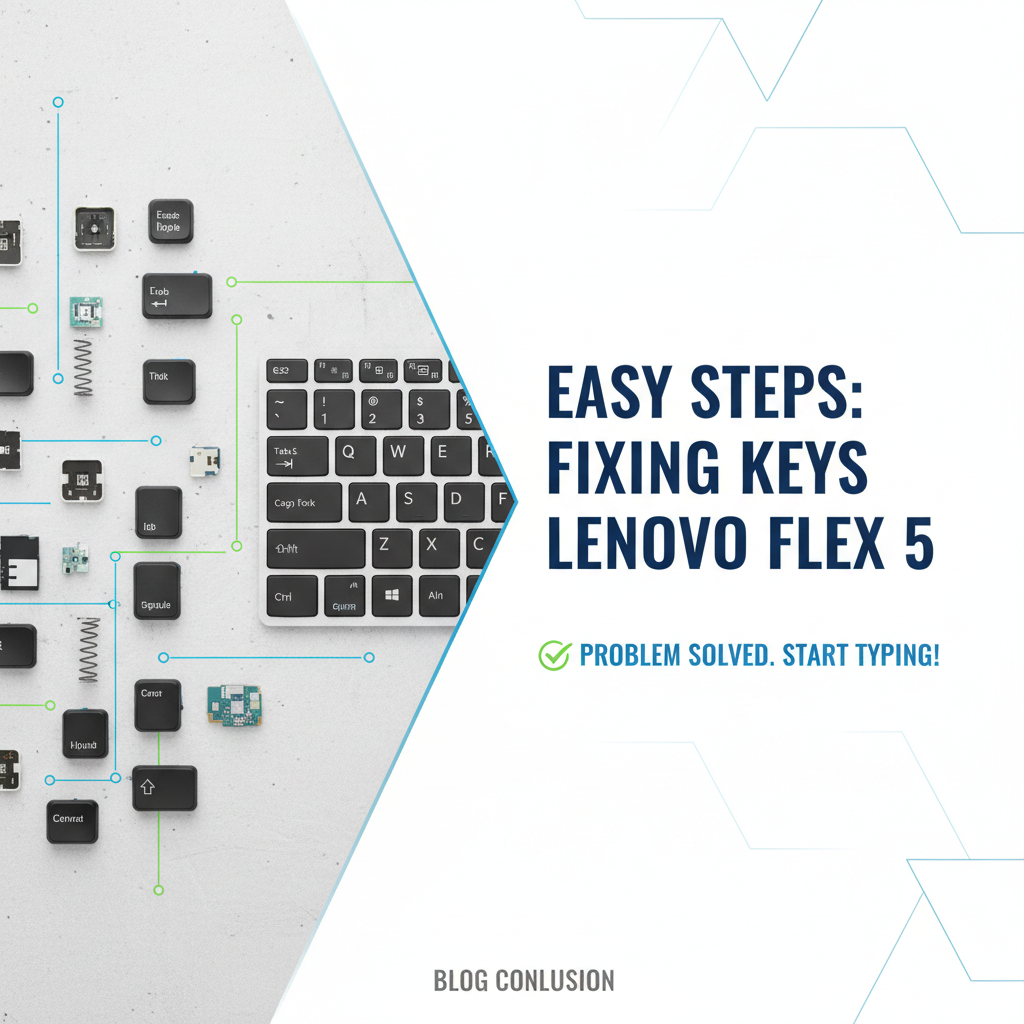
Easy Steps: Fixing Keys on Your Lenovo Flex 5


The keyboard on your Lenovo Flex 5 is more than just an input device; it's the primary interface through which you interact with your digital world, a conduit for creativity, productivity, and communication. From drafting crucial documents to sending quick emails or engaging in marathon gaming sessions, the fluidity and responsiveness of each key are paramount to a seamless user experience. When a key becomes sticky, unresponsive, or goes missing entirely, it can transform a minor inconvenience into a major disruption, grinding your workflow to a halt and testing the limits of your patience. The frustration of wrestling with a malfunctioning keyboard is universal, leading many to immediately consider costly professional repairs or even the premature replacement of their entire laptop.
However, before you resign yourself to such drastic measures, it's worth understanding that many common Lenovo Flex 5 keyboard repair issues are surprisingly straightforward to diagnose and fix yourself. This comprehensive guide is designed to empower you with the knowledge and confidence to tackle these problems head-on, offering a detailed, step-by-step approach to bring your beloved Flex 5 keyboard back to its optimal working condition. We'll delve into everything from the simplest cleaning routines to more intricate key cap and mechanism replacements, and even initial troubleshooting for more severe issues like liquid damage. By taking a methodical and patient approach, you can not only save significant time and money but also gain a deeper appreciation for the mechanics of your device. This journey into DIY repair for your Lenovo Flex 5 keys will not only extend the life of your laptop but also equip you with valuable technical skills.
Before You Begin: Essential Preparations and Safety
Embarking on any DIY electronics repair, no matter how seemingly simple, necessitates a foundation of meticulous preparation and an unwavering commitment to safety. Rushing into the process without these crucial preliminary steps can exacerbate the problem, cause further damage, or even pose a risk to your personal safety. Taking the time to properly set up your workspace, gather the correct tools, and understand fundamental safety protocols is not merely a recommendation; it is an indispensable prerequisite for a successful and uneventful fixing Lenovo Flex 5 keys project.
Safety First: Disconnecting Power and Battery
This is arguably the most critical step before you even think about touching the internal components of your laptop. Electrical power can cause short circuits, damage sensitive components, and, more importantly, deliver a significant shock.
- Power Down Completely: Do not merely close the lid or put your laptop to sleep. Perform a full shutdown of your Lenovo Flex 5. Ensure all programs are closed and the operating system has completely powered down.
- Unplug All Peripherals: Disconnect the AC adapter, any USB devices, external monitors, headphones, and any other cables attached to your laptop. The goal is to isolate the laptop completely.
- Remove the Battery: For many modern laptops like the Lenovo Flex 5, the battery is internal and requires opening the bottom case to disconnect. However, if your specific Flex 5 model has an external, user-removable battery, remove it immediately. For internal batteries, you will first need to open the laptop's bottom panel (as detailed in later sections if required) and then carefully disconnect the battery cable from the motherboard. This step is non-negotiable for safety and to prevent accidental short circuits during the repair. Even a disconnected AC adapter leaves residual charge in capacitors and the battery itself, which can cause damage.
Gathering Your Tools: The Right Instrument for Every Task
Having the correct tools at your disposal will make the repair process smoother, safer, and more effective. Improvised tools can often lead to stripped screws, scratched casings, or damaged delicate components.
- Precision Screwdriver Set: You'll primarily need small Phillips head screwdrivers (PH00 or PH000) for laptop screws. Some laptops might also use Torx screws (T5 or T6), so a comprehensive kit is advisable. Ensure the tips are magnetic to prevent losing tiny screws.
- Plastic Spudgers and Pry Tools: These are indispensable for safely separating plastic clips and prying open casing gaps without marring or scratching the laptop's finish. Metal tools should be avoided for prying, as they can easily cause cosmetic or structural damage.
- Compressed Air Duster: Essential for blowing away loose dust, crumbs, and other debris from under keycaps and within the keyboard assembly. Use short bursts and keep the can upright to prevent propellant discharge.
- High-Purity Isopropyl Alcohol (IPA - 90% or higher): This fast-evaporating solvent is excellent for cleaning sticky residues, oils, and light corrosion without leaving behind moisture. Avoid rubbing alcohol with lower concentrations as it contains more water.
- Cotton Swabs and Microfiber Cloths: Use cotton swabs for precise application of IPA and for cleaning small, intricate parts. Microfiber cloths are ideal for wiping surfaces clean without leaving lint or scratches.
- Fine-Tip Tweezers: Extremely useful for handling tiny screws, delicate ribbon cables, or small pieces of debris.
- Flashlight or Headlamp: Even in a well-lit room, a focused light source can help illuminate intricate details and hidden corners during disassembly and inspection.
- Small Containers/Magnetic Mat: Tiny screws can easily get lost. Use small bowls, a parts organizer with compartments, or a magnetic mat to keep screws organized and grouped according to where they came from. Labeling them can be a lifesaver.
- Anti-Static Wrist Strap (Optional but Recommended): Static electricity can damage sensitive electronic components. An anti-static wrist strap, properly grounded, provides an extra layer of protection, though less critical for keyboard key repair than for motherboard work.
- Replacement Parts (If Necessary): If you anticipate needing a new key cap, scissor mechanism, or even a full keyboard, having these on hand before starting will prevent delays. Ensure they are specifically for your Lenovo Flex 5 model.
Workspace: Clean, Well-Lit, and Organized
Your environment plays a significant role in the success of your repair.
- Clean Surface: Work on a clean, flat, and stable surface. A desk or table with ample space is ideal. Lay down a non-slip, anti-static mat or even a clean towel to protect both your laptop and the work surface.
- Good Lighting: Ensure your workspace is brightly lit. This will help you see small components, connectors, and any debris clearly. A dedicated task lamp is highly beneficial.
- Organization: As you disassemble components, especially screws, organize them carefully. Taking photos at each stage of disassembly can be an invaluable reference when it comes time to reassemble.
By adhering to these preparatory steps, you significantly increase your chances of a successful and stress-free Lenovo Flex 5 keyboard repair.
Diagnosing the Root Cause: What's Wrong With Your Key?
Before you embark on any repair, an accurate diagnosis is paramount. Without understanding the specific nature of the problem, you might waste time on ineffective solutions or even inadvertently cause further damage. The symptoms your Lenovo Flex 5 keyboard exhibits can tell you a great deal about the underlying issue. Taking a methodical approach to observation and testing will help pinpoint the exact cause, guiding you towards the most appropriate and efficient fix.
Observational Analysis: Listening to What Your Keys Tell You
Pay close attention to how the malfunctioning key feels and behaves compared to a working key.
- The Sticky Key:
- Symptom: The key feels sluggish, gummy, or slow to return to its original position after being pressed. It might even remain partially depressed, causing repeated characters.
- Probable Cause: This is almost invariably due to a spill of a sugary drink (soda, coffee, juice), or the accumulation of sticky food particles, dirt, and oils underneath the keycap. The residue gums up the scissor mechanism or the rubber dome, preventing smooth movement. This is one of the most common issues users face with their Lenovo Flex 5 sticky key fix being highly sought after.
- Initial Fix Direction: Thorough cleaning of the keycap, scissor mechanism, and the area around the rubber dome.
- The Unresponsive Key:
- Symptom: You press the key, but nothing happens on screen. There's no character input, or it works intermittently. The key might feel normal to press, or it might feel "dead."
- Probable Cause:
- Debris: A small piece of crumb, dust, or lint lodged directly under the rubber dome or preventing the scissor mechanism from fully depressing the dome.
- Damaged Scissor Mechanism: The plastic clips or arms of the scissor mechanism might be broken, preventing the keycap from properly engaging the rubber dome switch.
- Worn-out Rubber Dome/Switch: Over time, the conductive material on the underside of the rubber dome might wear out, or the dome itself might lose its springiness.
- Circuitry Issue: The conductive trace on the keyboard membrane under the rubber dome might be damaged, or the connection to the main keyboard ribbon cable could be compromised. This is a more serious hardware issue.
- Initial Fix Direction: Start with cleaning. If that fails, inspect and potentially replace the scissor mechanism/rubber dome. If the key still exhibits Lenovo Flex 5 unresponsive key behavior, consider driver issues or deeper hardware inspection.
- The Missing Key Cap/Mechanism:
- Symptom: A keycap is physically gone, leaving a visible hole, or the keycap is present but the underlying plastic scissor mechanism is broken or missing.
- Probable Cause: Accidental snagging, forceful impact, or improper cleaning attempts. The delicate plastic clips holding the keycap and mechanism can be fragile.
- Initial Fix Direction: Sourcing and installing a replacement keycap and/or scissor mechanism. This is a common requirement when users need to replace Lenovo Flex 5 key cap.
- Key Actuating Randomly or Typing Wrong Characters:
- Symptom: Characters appear on screen without you pressing them, or a different character appears than the one you pressed. This can range from ghost presses to repeating characters.
- Probable Cause: This can be trickier. It might be due to severe liquid damage causing a short circuit on the keyboard membrane, a software/driver issue, or a physically stuck key that appears normal.
- Initial Fix Direction: First, check for physically stuck keys. Then, move to software diagnostics (drivers). If liquid damage is suspected, follow those specific protocols.
- Liquid Damage (Post-Spill Observation):
- Symptom: Immediately after a spill, keys may become unresponsive, sticky, or behave erratically. Over time, corrosion might set in, leading to widespread keyboard failure or even affecting other components.
- Probable Cause: Conductive liquid shorting out keyboard circuits, or sticky residue gumming up mechanisms.
- Initial Fix Direction: Immediate power down, battery disconnect, and thorough drying. Cleaning with IPA if residue is visible.
Initial Testing: Ruling Out Software and External Factors
Before you grab your tools, conduct a simple test to determine if the problem is purely hardware-related or potentially influenced by software.
- Test with an External USB Keyboard: Connect an external USB keyboard to your Lenovo Flex 5. If the external keyboard works perfectly and the problematic key(s) on the built-in keyboard still malfunction, it strongly suggests a hardware issue with your internal keyboard. If the external keyboard also exhibits similar issues (though this is rare for specific key failures), then you might be looking at a deeper system-level software problem or a very unusual motherboard controller issue, which is highly unlikely for individual key failures.
Visual Inspection: What Can You See?
Once you've done your initial behavioral diagnosis, it's time for a physical examination.
- Examine the Affected Key:
- Look closely around the edges of the malfunctioning key and its neighboring keys. Can you see any visible crumbs, lint, pet hair, or dried liquid residue?
- Gently try to wiggle the keycap. Does it feel loose or uneven compared to other keys?
- If a keycap is missing, inspect the exposed area. Is the scissor mechanism intact? Is the rubber dome beneath it present and not torn or flattened?
By systematically going through these diagnostic steps, you will gain a clear understanding of what ails your Lenovo Flex 5's keyboard, setting you on the right path for a targeted and effective repair.
Step-by-Step Solutions: Bringing Your Keys Back to Life
With a clear diagnosis in hand, it's time to roll up your sleeves and begin the repair process. This section will guide you through the most common fixes, ranging from simple cleaning to replacing individual key components, providing detailed instructions for each scenario. Remember, patience and precision are your most valuable tools here.
A. The Simplest Fix: Cleaning Beneath Sticky or Unresponsive Key Caps
This is often the first and most effective step for issues like a Lenovo Flex 5 sticky key fix or an intermittently unresponsive key. Dust, crumbs, pet hair, and dried liquid are the usual culprits here.
Understanding Key Cap Anatomy for Your Flex 5
Modern laptop keyboards, including your Lenovo Flex 5, use a scissor-switch mechanism beneath each keycap. This mechanism consists of two interlocking plastic pieces that resemble a pair of scissors when compressed. These scissors provide stability and uniform key travel. Below the scissor mechanism is a rubber dome (or sometimes a butterfly mechanism for very thin keyboards, though less common on Flex 5), which provides the tactile feedback and, when fully depressed, makes contact with a conductive pad on the keyboard's circuit membrane, registering the keypress. Understanding these components is crucial for careful disassembly and cleaning.
Safe Key Cap Removal: A Delicate Operation
Removing key caps requires a gentle but firm approach. Laptop key caps are held on by delicate plastic clips on the scissor mechanism, which can easily break if excessive force or the wrong technique is used.
- Identify the Target Key(s): Clearly mark or remember which keys you need to remove.
- Start with a Plastic Pry Tool: Position a thin plastic spudger or your fingernail carefully under one edge of the keycap, ideally the top edge, away from the spacebar. The clips are usually stronger on the top and bottom or left and right edges. Some guides suggest starting from the bottom, so if one side feels too resistant, try another.
- Gentle Upward Pressure: Apply gentle, steady upward pressure. You should hear a soft "click" as one or two of the clips detach.
- Work Around the Edges: Once one side is loose, carefully move your pry tool to an adjacent side and continue to gently lift. The goal is to release all four (or sometimes two) clips without snapping them.
- Special Keys (Spacebar, Shift, Enter): Larger keys like the Spacebar, Shift, and Enter keys often have an additional metal stabilizer bar underneath the keycap, connecting to the scissor mechanism. When removing these, be extra cautious. Once the keycap is partially loose, you might need to gently disengage the stabilizer bar from its hooks on the keycap. Note its orientation for reinstallation.
- Inspection Post-Removal: Once the keycap is off, carefully examine the scissor mechanism and the rubber dome underneath. Note how the scissor mechanism interlocks and how it sits on the keyboard base. This visual memory will be crucial for reassembly. If the scissor mechanism comes off with the keycap, that's fine; keep them together. If it stays on the keyboard, inspect it.
Cleaning the Components: Eradicating the Obstacles
This is where you address the root cause of your Lenovo Flex 5 sticky key fix.
- Clean the Key Cap:
- Wipe the underside and top of the keycap with a microfiber cloth lightly dampened with water or a tiny bit of isopropyl alcohol. Ensure no moisture remains before reassembly. Pay attention to any sticky residue.
- Clean the Scissor Mechanism (if detached or still on keyboard):
- If Detached: If the scissor mechanism came off with the keycap or detached independently, inspect it for damage. If it's sticky, gently clean it with a cotton swab lightly dampened with isopropyl alcohol. Allow it to air dry completely.
- If Still on Keyboard: Use compressed air in short bursts to blow away any loose debris from within and around the mechanism. Then, take a cotton swab lightly moistened with isopropyl alcohol and carefully clean the moving parts of the scissor mechanism. Ensure you don't use too much liquid, as it could seep under the membrane. The goal is to dissolve any sticky residue.
- Clean the Rubber Dome and Keyboard Base:
- Compressed Air: Use short, controlled bursts of compressed air to clear away any crumbs, dust, or hair that might be around the exposed rubber dome and on the keyboard membrane.
- Isopropyl Alcohol (if necessary): If you see dried liquid residue or stickiness directly around or on the rubber dome, very carefully use a cotton swab barely dampened with IPA to clean the area. Be extremely gentle with the rubber dome itself to avoid tearing it. The integrity of this dome is crucial for key functionality.
- Inspect for Damage: While cleaning, check the scissor mechanism for any broken clips or arms. If it's visibly damaged, you'll need to consider replacing the mechanism entirely (see next section).
Reassembling the Key Cap: The Final Touch
Once everything is clean and dry, it's time to put the key back together.
- Reinstall the Scissor Mechanism (if it detached):
- This is often the trickiest part. Align the two parts of the "scissor" correctly (they only fit one way) and then place them onto the small hooks on the keyboard base. You might need to gently press the corners to snap them into place. Ensure it moves freely and smoothly.
- Attach the Key Cap:
- Carefully align the keycap over the installed scissor mechanism. The small plastic tabs on the underside of the keycap should line up perfectly with the corresponding clips on the scissor mechanism.
- For larger keys with stabilizer bars, ensure the metal bar is properly seated in its hooks on both the keycap and the keyboard base/scissor mechanism.
- Once aligned, press down firmly and evenly on the center of the keycap until you feel and hear distinct "clicks" as it snaps into place. Do not use excessive force; if it's not clicking, something is misaligned.
- Test: Power on your Lenovo Flex 5 and test the newly cleaned key thoroughly. Press it multiple times, checking for responsiveness, tactile feel, and smooth return. If it still feels sticky, a more aggressive cleaning or even replacement might be needed. If it's unresponsive, ensure the rubber dome is properly activating the switch.
B. Replacing a Missing or Broken Key Cap/Mechanism
If your problem is a physically missing or damaged keycap or its underlying scissor mechanism, cleaning won't suffice. You'll need to source and install a replacement. This is a common solution for those looking to replace Lenovo Flex 5 key cap.
Sourcing Replacement Parts: Precision is Key
Finding the right replacement part is crucial. Laptop key components are highly specific to make and model, and even different revisions of the same model can have variations.
- Identify Your Exact Lenovo Flex 5 Model: Look at the sticker on the bottom of your laptop for the full model number (e.g., Lenovo Flex 5 14ARE05, Flex 5 15IIL05). This detail is critical.
- Determine the Specific Key: The size and shape of keycaps, and more importantly, the design of the scissor mechanism, can vary even within the same keyboard (e.g., standard letter keys often use one type, while larger keys might use another).
- Online Retailers:
- Specialized Laptop Parts Stores: Many online vendors specialize in individual laptop key replacements. Websites like LaptopKeys.com, ReplacementLaptopKeys.com, or eBay sellers often categorize parts by laptop brand and model.
- eBay/Amazon: You can often find sellers offering single key replacements or "key repair kits" for specific Lenovo Flex 5 models.
- Matching the Scissor Mechanism: When ordering, it's not just the keycap you need to match. Pay extremely close attention to the scissor mechanism design. Often, sellers will provide pictures of different scissor types (e.g., "Type A," "Type B," "Chicony," "Lite-On"). You'll need to visually compare the mechanism under a working key on your keyboard with the pictures provided by the seller to ensure a perfect match. Buying a keycap without the correct scissor mechanism is a common mistake. If possible, buy a kit that includes both the keycap and its corresponding scissor mechanism.
- Consider a Donor Keyboard: If you have access to an old, non-functional laptop of the exact same model, you might be able to salvage a key from it.
Installation Process: Careful Assembly
Once you have your replacement part, the installation is relatively straightforward but still requires care.
- Prepare the Area: Ensure the spot where the new key will go is clean and free of any debris.
- Install the Scissor Mechanism First (if separate):
- If your replacement came as a separate keycap and scissor mechanism, you'll generally install the scissor mechanism onto the keyboard base first.
- Observe how a working scissor mechanism is attached. It typically involves small plastic hooks on the keyboard base that the scissor pieces clip into.
- Align the two parts of the scissor mechanism and then gently press them onto the corresponding hooks on the keyboard base. Ensure it's securely attached and moves freely, providing the spring-back action. Test its movement before adding the keycap.
- Attach the New Key Cap:
- Align the new keycap directly over the installed scissor mechanism. The small plastic tabs on the underside of the keycap should perfectly match the clips on the scissor mechanism.
- For larger keys with stabilizer bars, ensure the metal bar is correctly seated in the hooks on both the keycap and the base.
- Once aligned, press down firmly and evenly on the center of the keycap until you feel and hear it click securely into place. Do not force it; if it doesn't click, it's likely misaligned. Re-align and try again.
- Test: Power on your Lenovo Flex 5 and test the newly installed key repeatedly. Check for smooth operation, proper tactile feedback, and correct character input.
C. Initial Response to Liquid Damage (Urgent Steps)
Liquid spills are arguably the most dangerous culprits for keyboard damage, capable of causing sticky keys, unresponsive keys, or even catastrophic failure of the entire laptop if the liquid reaches the motherboard. Immediate and correct action is critical to minimize damage and potentially save your device. This section focuses on the urgent, initial steps to mitigate damage from a spill.
Immediate Action: The Race Against Time
Every second counts when liquid is involved. Do not hesitate.
- Power Off Immediately: Do not try to save your work. Do not try to shut down gracefully. Hold down the power button until the laptop forcibly shuts off. This is the single most important step to prevent short circuits.
- Disconnect Charger (AC Adapter): Unplug the power cord from the wall and from the laptop immediately. Even if the laptop is off, a connected charger can still supply power, increasing the risk of damage.
- Remove the Battery (If Possible): If your Flex 5 has an easily removable external battery, take it out right away. For internal batteries (which is common for the Flex 5), you will likely need to open the bottom case to disconnect the battery cable. If you are not comfortable doing this immediately, proceed with other steps and consider professional help or review the "Deep Dive" section quickly. The goal is to cut all power sources.
Orientation and Drying: Letting Gravity Do Its Work
Once power is cut, focus on removing as much liquid as possible.
- Turn Upside Down: Immediately flip the laptop upside down (tent mode or completely inverted) over a towel. This uses gravity to encourage the liquid to drain out rather than seep further into the internals. Pay particular attention to the area where the spill occurred.
- Absorb Surface Liquid: Use highly absorbent cloths (microfiber, paper towels) to gently blot and absorb any visible liquid from the keyboard surface, touchpad, and surrounding casing. Do not rub vigorously, as this can spread the liquid.
- Avoid Heat: Do NOT use a hairdryer or place the laptop in direct sunlight. High heat can warp plastic components, damage internal solder joints, and drive moisture deeper into crevices. Air drying is the safest method.
- Air Drying (Extended Period): Place the laptop in a well-ventilated, dry area, preferably still in an inverted position or tent mode, to allow maximum airflow. Leave it to air dry for an extended period – at least 24-48 hours, but ideally 72 hours (3 full days). Resist the urge to turn it back on prematurely. Moisture can hide in tiny crevices.
- Desiccants (Optional): You can place the laptop (still open and inverted) in a large container or bag with desiccant packets (like silica gel) or even uncooked rice. While rice can absorb moisture, it's controversial as fine rice dust can also get into ports and components. If using rice, ensure it doesn't enter any openings. Silica gel is generally safer and more effective.
Inspection for Residue: Post-Drying Cleanup
After thorough drying, it's time to inspect for residual damage.
- Visual Check: Once you are absolutely confident the laptop is dry, carefully inspect the affected keyboard area for any sticky residue, discoloration, or signs of corrosion. Sugary liquids, in particular, leave behind sticky films that can permanently gum up key mechanisms and even corrode circuits over time.
- Cleaning with Isopropyl Alcohol: If you spot sticky residue around or under keycaps, carefully remove the affected keycaps (as described in Section A) and use cotton swabs lightly dampened with high-purity isopropyl alcohol to clean away the residue. IPA is effective at dissolving sugars and evaporating quickly without leaving moisture. Be extremely gentle and avoid applying excessive liquid.
- Check Ports: Inspect any ports (USB, HDMI, audio) that might have been affected for signs of liquid or corrosion.
When to Stop and Seek Professional Help
Recognize your limits. Liquid damage can be severe and complex.
- Deep Ingress: If you suspect a large amount of liquid penetrated deep into the laptop, past the keyboard membrane and onto the motherboard, it's highly recommended to seek professional help. A technician can fully disassemble the laptop, inspect the motherboard for corrosion, and perform ultrasonic cleaning if necessary. Attempting to power on a deeply wet laptop can fry components.
- Corrosion: If you see significant green or white crystalline corrosion on metal components or circuit boards, this requires specialized cleaning and possibly component replacement that is beyond typical DIY scope.
- Persistent Issues: If after drying and cleaning, your keyboard (or other parts of the laptop) still doesn't function correctly or exhibits erratic behavior, professional diagnosis is the safest next step.
Liquid damage is a serious threat, but with prompt and correct action, you significantly increase the chances of a successful recovery for your Lenovo Flex 5.
D. Software Side: Troubleshooting Drivers and Settings
Sometimes, the culprit behind an unresponsive key or an erratic keyboard isn't physical debris or a broken mechanism but rather a software glitch. Before diving deep into hardware, it's always prudent to rule out driver issues or incorrect settings. This can save you a lot of time and effort in physical disassembly and reassembly, especially if you've already attempted basic cleaning for your Lenovo Flex 5 keyboard not working.
- A Simple Restart:
- The oldest trick in the book often works wonders for temporary software glitches. A full system restart can resolve many minor software conflicts or temporarily hung processes that might be interfering with keyboard input.
- Perform a full shutdown and then power your Lenovo Flex 5 back on. Avoid "Sleep" or "Hibernate" modes, as they don't fully refresh the system.
- Check Device Manager for Keyboard Drivers:
- Windows manages all hardware through drivers. If a keyboard driver is corrupted, outdated, or conflicting, it can lead to functionality issues.
- Access Device Manager: Right-click the Start button (Windows logo) and select "Device Manager" from the context menu.
- Locate Keyboards: Expand the "Keyboards" category. You should see "Standard PS/2 Keyboard" or "HID Keyboard Device," and potentially others.
- Look for Warning Signs: Check for any yellow exclamation marks or red 'X' icons next to your keyboard devices. These indicate a problem with the driver or the device itself.
- Update Driver: Right-click on your keyboard device(s) and select "Update driver." Choose "Search automatically for updated driver software." If Windows finds a newer driver, install it.
- Roll Back Driver: If the problem started after a recent update, you could try "Roll Back Driver" (if available) to revert to a previous version.
- Uninstall and Reinstall Driver: If updating doesn't work, right-click and select "Uninstall device." Do NOT check the box "Delete the driver software for this device" unless specifically instructed by Lenovo support. Then, restart your laptop. Windows will typically automatically detect the keyboard and reinstall the driver upon reboot.
- Disable/Enable Keyboard: As a quick diagnostic, you can right-click your keyboard device in Device Manager and choose "Disable device," then "Enable device" again after a few seconds. This can sometimes refresh the connection.
- Run Windows Troubleshooter:
- Windows has built-in troubleshooters that can automatically detect and fix common problems.
- Access Troubleshooter: Go to
Settings > Update & Security > Troubleshoot(orSettings > System > Troubleshooton Windows 11). - Run Hardware and Devices Troubleshooter: Look for a troubleshooter related to "Hardware and Devices" or "Keyboard" and run it. Follow any on-screen prompts.
- Check Keyboard Settings (Filter Keys, Sticky Keys):
- Accessibility features, while helpful for some, can sometimes be accidentally enabled and make the keyboard behave unusually.
- Filter Keys: This feature ignores brief or repeated keystrokes. If enabled, it can make keys seem unresponsive.
- On Windows 10:
Settings > Ease of Access > Keyboard. - On Windows 11:
Settings > Accessibility > Keyboard. - Ensure "Filter Keys" is turned off.
- On Windows 10:
- Sticky Keys: This allows modifier keys (Ctrl, Alt, Shift, Windows key) to remain active until another key is pressed. While not directly causing unresponsive regular keys, it can lead to unexpected input. Ensure it's off if you don't use it.
- Toggle Keys: Plays a sound when Caps Lock, Num Lock, or Scroll Lock are pressed. Less likely to cause issues but worth checking.
- Check for BIOS/UEFI Updates:
- While rare for individual key issues, a corrupt or outdated BIOS/UEFI firmware can sometimes affect hardware communication. Visit the official Lenovo support website for your specific Flex 5 model to check for available BIOS updates. Follow their instructions carefully if you decide to update, as a failed BIOS update can brick your laptop.
By systematically addressing these software-related possibilities, you can effectively rule out common non-hardware causes before committing to more involved physical repairs for your Lenovo Flex 5 keyboard not working. If these steps don't resolve the issue, it points strongly to a hardware problem requiring further investigation.
APIPark is a high-performance AI gateway that allows you to securely access the most comprehensive LLM APIs globally on the APIPark platform, including OpenAI, Anthropic, Mistral, Llama2, Google Gemini, and more.Try APIPark now! 👇👇👇
Deep Dive: When Simple Fixes Aren't Enough – Internal Hardware
When cleaning, key cap replacement, and software troubleshooting fail to resurrect your Lenovo Flex 5 keyboard, it suggests a deeper internal hardware issue. This could involve the keyboard's ribbon cable connection to the motherboard or, in more severe cases, a complete failure of the keyboard membrane itself, often requiring a full keyboard module replacement. These tasks are more involved and require comfort with disassembling your laptop.
A. Accessing the Keyboard Ribbon Cable (Flex 5 Specific Disassembly)
The keyboard inside your Flex 5 connects to the motherboard via one or more delicate ribbon cables. These cables carry the signals from each keypress. If a cable is loose, dirty, or damaged, it can cause keys or sections of the keyboard to become unresponsive. Inspecting and reseating this cable is the next logical step before considering a full replacement.
Disclaimer: Proceed with caution. Disassembling your laptop may void its warranty and carries a risk of damaging components if not performed correctly. Take your time, work methodically, and reference videos or service manuals specific to your Lenovo Flex 5 model if possible.
General Lenovo Flex 5 Disassembly Overview
While specific screw counts and clip locations can vary slightly between Flex 5 sub-models, the general procedure to open the bottom case is similar:
- Prepare Your Workspace: As outlined in Section II, ensure you have a clean, well-lit area, your precision tools, and containers for screws. Crucially, ensure your laptop is completely powered off and unplugged.
- Remove Bottom Case Screws: Carefully turn your Lenovo Flex 5 upside down. You will see numerous small Phillips head screws (typically PH00 or PH000) securing the bottom cover. Remove ALL visible screws. Pay attention to any screws hidden under rubber feet or stickers. Use your magnetic mat to keep track of their positions, as they can sometimes vary in length.
- Carefully Pry Open the Bottom Case: Once all screws are removed, use a plastic spudger or thin plastic pry tool (like a guitar pick) to gently work your way around the seam between the bottom case and the main chassis. Start from a corner or an edge that seems to have a slight gap.
- Be Gentle: There are typically plastic clips holding the case together in addition to the screws. Apply gentle, consistent pressure, wiggling the spudger to release these clips. You'll hear soft popping sounds.
- Avoid Force: If you encounter resistance, recheck for any missed screws. Never force it, as you could snap delicate plastic tabs.
- Lift Slowly: Once most clips are released, carefully lift the bottom cover. Be mindful of any cables that might be attached to the bottom cover (though this is rare for the Flex 5 bottom panel).
- Locate and Disconnect the Battery: This is a critical safety step once the bottom case is off.
- Identify the battery pack inside your laptop. It's usually a large, rectangular component.
- Locate the battery cable connector where it plugs into the motherboard. It's typically a multi-pin connector.
- Gently (but firmly) pull the connector straight up or away from its socket. Some connectors have a small tab you need to lift first. Always pull on the connector itself, not the wires. Do not proceed with any other steps until the battery is disconnected.
- Identify the Keyboard Ribbon Cable(s):
- With the laptop internals exposed, carefully look around the motherboard for flat, translucent orange or blue ribbon cables. These are Flexible Flat Cables (FFC).
- The main keyboard cable will typically be relatively wide and often runs from underneath the keyboard area (which is usually the top case assembly) to a ZIF (Zero Insertion Force) connector on the motherboard. There might be a separate, narrower cable for the keyboard backlight or touchpad. Focus on the main keyboard data cable.
- APIPark Integration Point: As we navigate the intricate world of hardware repair, where every component plays a crucial role in the system's overall function, it's a testament to the complex engineering that underpins our digital lives. Similarly, in the realm of software development, especially with the rapid evolution of AI, managing and integrating diverse components is key to seamless operation. For developers and enterprises building sophisticated applications that leverage artificial intelligence, platforms like APIPark offer indispensable tools for API management and AI gateway services, simplifying the orchestration of complex AI models and REST services into unified, efficient systems. Much like understanding each key on your Lenovo Flex 5, understanding and managing your digital infrastructure's APIs ensures everything works harmoniously, from the smallest ribbon cable to the largest data stream.
Inspecting and Reseating the Cable
Once you've located the keyboard ribbon cable, it's time to inspect and reseat it.
- Understand ZIF Connectors: Ribbon cables are typically secured by ZIF connectors. These connectors have a small, hinged latch (usually black or brown) that either flips up or slides out to release the cable.
- Release the Latch: Carefully use your fingernail or a plastic spudger to gently flip up or slide out the latch of the ZIF connector. Be extremely delicate, as these latches are very fragile and can easily break.
- Gently Remove the Cable: Once the latch is open, the ribbon cable should slide out easily from the connector. Do not pull hard.
- Inspect the Cable: Examine both ends of the ribbon cable for any signs of damage:
- Tears or Creases: Even a tiny tear can break a conductive trace.
- Corrosion: Greenish or whitish residue on the gold contacts indicates liquid damage.
- Bending: Ensure the cable is perfectly flat and straight where it enters the connector.
- Missing or Damaged Contacts: Look for any missing or scratched gold contact pads.
- Clean the Contacts: If the contacts look dull or slightly dirty, gently clean them with a cotton swab barely dampened with isopropyl alcohol. Allow it to dry completely.
- Reseat the Cable:
- Carefully reinsert the ribbon cable squarely and completely into the ZIF connector. Ensure it's fully seated and not at an angle. The gold contacts should be completely hidden within the connector.
- Once seated, gently push down or flip back the ZIF connector latch to secure the cable in place. Give it a very gentle tug to confirm it's secure.
- Reconnect Battery (Temporarily for Test): Before fully reassembling, you can temporarily reconnect the battery and power on the laptop (carefully, without shorting anything) to test the keyboard. If it now works, then a loose connection was likely the problem.
- Full Reassembly: If the test is successful, disconnect the battery again, then meticulously reverse the disassembly steps: reconnect all other cables, replace the bottom cover, and secure all screws.
B. Full Keyboard Replacement (The Ultimate Solution)
If inspecting and reseating the ribbon cable doesn't resolve the issue, or if there's extensive physical damage or liquid damage to the keyboard membrane itself, a full keyboard replacement is likely necessary. For many laptops, including the Lenovo Flex 5, the keyboard is often integrated into the "palm rest" or "top case" assembly. This means you can't just pop out the keyboard; you'll need to replace a significant portion of the laptop's chassis.
Understanding Lenovo Flex 5 Keyboard Integration
- Integrated Design: Unlike older laptops where keyboards were often separate modules that could be unclipped, many modern slim laptops like the Flex 5 integrate the keyboard directly into the upper part of the chassis (the palm rest assembly). This makes replacement significantly more involved, as you essentially transfer all internal components from your old palm rest to a new one.
- Component Transfer: This means you'll need to remove the motherboard, cooling system, battery, speakers, trackpad, screen hinges, and sometimes even the screen itself from the old top case and meticulously reassemble them into the new top case with the pre-installed keyboard.
Sourcing the Part: Precision Part Numbers (FRU)
Finding the correct replacement part is critical and requires even more precision than single keycaps.
- Identify the FRU (Field Replaceable Unit) Part Number: For Lenovo laptops, look for the "FRU P/N" on a sticker, often on the bottom case, or sometimes on the original keyboard ribbon cable or the palm rest itself. This is a specific part number that guarantees compatibility.
- Search with FRU P/N and Model Number: Use your full Lenovo Flex 5 model number (e.g., Flex 5 14ARE05) and the FRU P/N to search online.
- Reputable Suppliers: Purchase from reputable laptop parts suppliers, the Lenovo parts store, or trusted eBay/Amazon sellers specializing in laptop components. Be wary of excessively cheap parts, which might be low quality or incorrect.
- "Palm Rest with Keyboard" Assembly: What you'll typically be looking for is a "Lenovo Flex 5 [your model] Palm Rest with Keyboard" assembly. Ensure the language layout (e.g., US English, UK English) matches yours, and if applicable, that it includes a backlight if your original did.
The Replacement Process (High-Level Overview): A Significant Undertaking
This is a complex and time-consuming repair that can take several hours and is generally recommended for experienced DIYers or professionals.
- Full Laptop Disassembly: This involves removing the bottom case (as already described), disconnecting the battery, removing the Wi-Fi card, SSD, RAM, cooling fan(s) and heatsink, speakers, and then the motherboard itself. You may also need to disconnect and unroute various other cables (webcam, screen, touchpad, etc.).
- Screen Hinge Removal: The screen assembly is attached to the palm rest via hinges. You will need to carefully unscrew these hinges and separate the screen from the palm rest.
- Component Transfer: Once the old palm rest is empty, you will meticulously transfer every single component (motherboard, cooling, battery, speakers, trackpad, screen hinges, etc.) to the new palm rest assembly. This involves re-routing cables, reapplying thermal paste to the CPU/GPU, and ensuring everything is seated correctly.
- Reassembly and Testing: Once all components are transferred to the new palm rest, you'll reattach the screen assembly, then finally close up the bottom case. Power on and thoroughly test all functions, not just the keyboard.
Cost vs. Repair: Making an Informed Decision
Replacing the entire palm rest assembly with a new keyboard can be expensive, often ranging from $100-$300+ for the part alone, depending on your model and availability.
- Weigh the Cost: Compare the cost of the replacement part (and potential professional labor if you're not doing it yourself) against the value of your laptop and the cost of a new replacement laptop.
- Skill Level: Be honest about your comfort level with extensive laptop disassembly. If you're unsure, it's always safer to consult a professional technician.
While a full keyboard replacement is the most drastic solution, for a beloved or expensive Lenovo Flex 5, it can be a cost-effective way to extend its lifespan significantly, bringing it back to full functionality.
Proactive Measures: Preventing Future Keyboard Woes
Successfully fixing your Lenovo Flex 5 keyboard is a rewarding accomplishment, but the best repair is one that's never needed. By adopting a few simple proactive habits, you can significantly reduce the risk of future keyboard malfunctions, extending the life and pristine condition of your keys. These preventive measures are easy to implement and can save you considerable time, frustration, and potential repair costs down the line.
- Avoid Eating and Drinking Near Your Laptop: This is perhaps the golden rule. Food crumbs are notorious for getting lodged under keycaps, causing sticky key and unresponsive key issues. Sugary drinks are even worse, leading to corrosive damage and persistent stickiness. Designate a "no-food, no-drink" zone around your laptop, or at least be exceptionally careful. If you absolutely must have a beverage nearby, opt for a sealed water bottle or a cup with a lid, and place it far away from the keyboard.
- Regular Cleaning with Compressed Air: Even if you're meticulous, dust, pet hair, and microscopic debris will inevitably accumulate.
- Frequency: Aim for a quick clean with compressed air at least once a month, or more frequently if you live in a dusty environment or have pets.
- Technique: Turn your laptop off. Hold the can of compressed air upright (to prevent propellant discharge) and use short, controlled bursts. Tilt your laptop at various angles, including upside down, to allow debris to fall out. Focus on the gaps between and around the keycaps.
- Consider a Keyboard Cover: A thin, silicone keyboard cover is an inexpensive accessory that provides an excellent barrier against spills, dust, and crumbs.
- Pros: Highly effective protection, easy to clean, can add a personal touch.
- Cons: Some users find them slightly alter the typing feel, and they can sometimes leave slight marks on the screen if the laptop is closed tightly with the cover on. Ensure you get one specifically designed for your Lenovo Flex 5 model to guarantee a perfect fit and avoid blocking sensors.
- Gentle Typing Habits: While modern laptop keyboards are designed for durability, excessive force or aggressive typing can still contribute to premature wear and tear on keycaps and scissor mechanisms. Be mindful of your typing style; a lighter touch is often sufficient and healthier for your fingers and your keyboard.
- Clean Your Hands Regularly: Oils, lotions, and grime from your hands can transfer to keycaps, leading to a greasy buildup and potentially causing keys to stick over time. Washing your hands or using a hand sanitizer before using your laptop can help keep your keyboard cleaner.
- Regular Surface Wipes: Occasionally wipe down your keycaps and the palm rest area with a slightly damp (water or screen cleaner) microfiber cloth to remove skin oils and light grime. Ensure the cloth is barely damp and the laptop is off.
By incorporating these simple yet effective habits into your routine, you can significantly extend the life of your Lenovo Flex 5 keyboard, preserving its functionality and ensuring a consistently smooth typing experience for years to come. Prevention truly is the best cure when it comes to laptop keyboard maintenance.
When to Call a Professional: Knowing Your Limits
While this guide empowers you to tackle many common Lenovo Flex 5 keyboard repair issues yourself, it's equally important to recognize when a problem extends beyond your DIY capabilities or comfort zone. Attempting repairs that are too complex or for which you lack the necessary tools or experience can lead to further damage, potentially turning a fixable issue into a more expensive or even irreparable one. Knowing when to call a professional is a sign of good judgment and can ultimately save you time, money, and frustration.
Here are scenarios where seeking expert assistance for your fixing Lenovo Flex 5 keys might be the wisest course of action:
- Extensive Liquid Damage: If you suspect a significant amount of liquid has penetrated deep into your laptop, beyond the keyboard membrane and onto the motherboard, professional intervention is highly recommended. Technicians have specialized tools (like ultrasonic cleaners) and expertise to assess and clean internal components for corrosion, which can be invisible to the untrained eye and lead to long-term reliability issues if not addressed properly. Powering on a laptop with extensive internal liquid damage is a high-risk gamble.
- Motherboard Issues Suspected: If an external keyboard also malfunctions, or if your laptop exhibits other unusual symptoms (e.g., random shutdowns, inability to boot, unusual error codes) in conjunction with keyboard problems, it could indicate a deeper motherboard issue. Diagnosing and repairing motherboard components requires advanced soldering skills and diagnostic equipment that most DIYers do not possess.
- Lack of Confidence in Complex Disassembly: The full keyboard replacement for the Lenovo Flex 5 often involves disassembling nearly the entire laptop to transfer components to a new palm rest. If you're uncomfortable with this level of intricate disassembly, fear breaking fragile plastic clips, or are worried about losing tiny screws and reassembling correctly, a professional can perform the task efficiently and reliably.
- No Resolution After Basic DIY Steps: If you've diligently followed all the cleaning, key cap/mechanism replacement, and software troubleshooting steps outlined in this guide, and the problem persists, it indicates a more complex underlying hardware issue. At this point, a professional's diagnostic tools and deeper experience can pinpoint the elusive cause.
- Warranty Still Active: If your Lenovo Flex 5 is still under warranty, attempting any internal repairs yourself will almost certainly void it. In such cases, it's always best to contact Lenovo support first. Even if the repair isn't covered by warranty (e.g., accidental damage like spills), they might offer a discounted out-of-warranty repair service.
- Time Constraints or Value Proposition: Sometimes, your time is simply more valuable than the cost of a professional repair. If you need your laptop back up and running quickly for work or study, or if the repair is complex and you don't have the hours to dedicate to it, a professional service can provide a faster turnaround.
While DIY repair is incredibly empowering, knowing your limits and when to defer to an expert is a crucial part of responsible device ownership. A qualified technician has the tools, experience, and knowledge to handle complex issues safely and effectively, ensuring your Lenovo Flex 5 is returned to you in optimal working condition.
Conclusion: Empowering Your DIY Journey
The journey of fixing keys on your Lenovo Flex 5 is one that many users will, unfortunately, embark upon at some point during their laptop's lifespan. From the annoying stickiness caused by a casual coffee spill to the silent frustration of an unresponsive key or the glaring void of a missing key cap, keyboard malfunctions are a common disruptor to our digital lives. However, as this extensive guide has sought to demonstrate, such issues do not always necessitate a costly trip to a repair shop or the premature retirement of your reliable Lenovo Flex 5.
By methodically diagnosing the problem, whether it's the insidious accumulation of debris requiring a thorough clean Lenovo Flex 5 keyboard procedure, the need to replace Lenovo Flex 5 key cap after an unfortunate accident, or addressing the immediate aftermath of Lenovo Flex 5 liquid damage keyboard, you are empowered to tackle many of these challenges head-on. We've walked through the essential safety precautions, the precise tools required, and the detailed, step-by-step instructions for common repairs. Even more complex scenarios, such as delving into the internal hardware to reseat a Lenovo Flex 5 keyboard ribbon cable or considering a full Lenovo Flex 5 full keyboard replacement for more severe issues, have been demystified, providing you with a roadmap for deeper troubleshooting.
Ultimately, this DIY Lenovo Flex 5 keyboard repair guide serves not just as a manual for fixing a specific problem, but as an encouragement to embrace a more proactive and self-reliant approach to your technology. Successfully repairing your own device instills a profound sense of accomplishment, saves valuable resources, and deepens your understanding of the intricate engineering that makes our modern devices tick. Beyond the immediate fix, adopting simple preventive measures ensures that your efforts today contribute to a longer, more reliable future for your Lenovo Flex 5's keyboard. So, take pride in your newfound skills, type with renewed confidence, and enjoy the extended life of your perfectly functioning laptop.
FAQ: Frequently Asked Questions About Lenovo Flex 5 Keyboard Repair
Here are 5 frequently asked questions related to fixing keys on a Lenovo Flex 5, providing quick answers to common concerns.
| Issue Type | Probable Cause | Initial DIY Fix | When to Consider Professional Help |
|---|---|---|---|
| Sticky Key | Spills (sugary drinks), food crumbs, dust | Remove keycap, clean thoroughly with isopropyl alcohol and compressed air | If stickiness persists after cleaning or liquid entered deep |
| Unresponsive Key | Debris under key, worn-out rubber dome, broken scissor mechanism, faulty circuit | Remove keycap, clean, replace mechanism. Test drivers. | If cleaning/mechanism replacement fails, suspect internal circuit/ribbon cable issue |
| Missing Key Cap | Accidental detachment, physical damage | Source and install a replacement keycap and mechanism | If the underlying rubber dome or keyboard membrane is damaged |
| Liquid Spill | Drinks, water | Immediately power off, disconnect battery, turn upside down, air dry. | Always recommended if significant liquid ingress, potential for internal corrosion |
| Random Keypresses | Driver issue, stuck key, internal short circuit | Update/reinstall drivers, test external keyboard, inspect for physical damage | Persistent issues after driver checks and basic inspection |
1. Can I replace just a single key on my Lenovo Flex 5 keyboard, or do I need to replace the entire keyboard?
Answer: Yes, in most cases, you can absolutely replace just a single keycap and its underlying scissor mechanism. This is a common and relatively easy DIY fix for missing or broken individual keys. You'll need to source a replacement keycap and the correct scissor mechanism specifically designed for your Lenovo Flex 5 model, as these components vary between laptop models and even different keyboard manufacturers. A full keyboard replacement is typically only necessary if multiple keys are non-functional, if there's extensive physical damage to the keyboard membrane, or if liquid damage has affected a large area of the keyboard's circuitry.
2. What's the best way to clean sticky keys after a drink spill on my Lenovo Flex 5?
Answer: The best approach for sticky keys due to a drink spill involves carefully removing the affected keycap(s) using a plastic pry tool or your fingernail. Once the keycap is off, gently clean both the keycap and the exposed scissor mechanism underneath with a cotton swab lightly dampened with high-purity (90% or higher) isopropyl alcohol. This dissolves sugary residue effectively and evaporates quickly without leaving moisture. You should also use compressed air to clear any debris from around the rubber dome on the keyboard base. Ensure everything is completely dry before reattaching the keycap. Remember to power off your laptop and disconnect the battery before attempting any cleaning after a spill.
3. My Lenovo Flex 5 keyboard isn't working at all after an accidental fall. What should I check first?
Answer: If your keyboard completely stops working after a fall, first perform a full system restart. If that doesn't help, the most likely hardware issue is a loosened keyboard ribbon cable. You would need to open the bottom case of your Lenovo Flex 5 (after powering it off and disconnecting the battery), locate the keyboard ribbon cable, and carefully reseat it into its ZIF connector on the motherboard. A fall can easily dislodge these delicate connections. If reseating doesn't work, there might be internal damage to the cable or the keyboard membrane itself, which would necessitate professional repair or a full keyboard replacement.
4. Is it safe to use compressed air to clean my Lenovo Flex 5 keyboard?
Answer: Yes, using compressed air is generally safe and highly recommended for cleaning your Lenovo Flex 5 keyboard, but with a few important caveats. Always use short, controlled bursts and hold the can upright to prevent liquid propellant from spraying onto your keyboard. Tilt your laptop at various angles, including upside down, while blowing to help dislodge and remove debris rather than just pushing it deeper. Ensure your laptop is powered off before cleaning with compressed air. Avoid inserting the nozzle directly under keycaps as this could potentially dislodge or damage them.
5. My keys are still unresponsive after cleaning and checking drivers. What's the next step for my Lenovo Flex 5?
Answer: If cleaning under the keycaps and troubleshooting software drivers haven't resolved the unresponsive key issue, the problem likely lies deeper within the hardware. The next step would be to open your Lenovo Flex 5's bottom case (following safety precautions like power-off and battery disconnection) and inspect the keyboard ribbon cable. Gently remove it from its ZIF connector on the motherboard, clean the contacts with isopropyl alcohol, inspect for any damage, and then carefully reseat it. If this still doesn't fix it, the individual rubber dome/switch or the keyboard membrane itself might be faulty, often requiring a replacement of the entire keyboard module (which is typically integrated with the palm rest on Flex 5 models).
🚀You can securely and efficiently call the OpenAI API on APIPark in just two steps:
Step 1: Deploy the APIPark AI gateway in 5 minutes.
APIPark is developed based on Golang, offering strong product performance and low development and maintenance costs. You can deploy APIPark with a single command line.
curl -sSO https://download.apipark.com/install/quick-start.sh; bash quick-start.sh

In my experience, you can see the successful deployment interface within 5 to 10 minutes. Then, you can log in to APIPark using your account.

Step 2: Call the OpenAI API.