Essential Guide to Default Helm Environment Variables


In the intricate tapestry of modern cloud-native development, orchestrating applications and managing their configurations across diverse environments poses a significant challenge. Kubernetes has emerged as the de facto standard for container orchestration, providing a robust platform for deploying, scaling, and managing containerized workloads. However, the sheer complexity of defining and maintaining Kubernetes resources across various stages of development—from local testing to staging and production—necessitated a higher-level package manager. This is where Helm, often dubbed "the Kubernetes Package Manager," steps in, simplifying the deployment and management of even the most complex applications.
Helm charts package pre-configured Kubernetes resources into a single, versionable unit, enabling developers and operations teams to share, install, and upgrade applications with unprecedented ease. But even with Helm's powerful templating engine and values.yaml files, the need for dynamic configuration, especially for sensitive data or environment-specific settings, remains paramount. This is precisely where environment variables come into play. They offer a flexible and standardized mechanism for injecting configuration details directly into application containers or for influencing the behavior of the Helm client itself.
This comprehensive guide delves deep into the world of default Helm environment variables, exploring not only how applications deployed via Helm can leverage environment variables but also how the Helm command-line interface (CLI) itself is profoundly influenced by a set of predefined environment variables. We will navigate the nuances of Kubernetes' approach to environment variables, understand Helm's role in templating these variables, and meticulously examine the array of HELM_ prefixed variables that empower greater control over Helm's operations. By the end of this journey, you will possess a profound understanding of how to harness the power of environment variables to build more resilient, adaptable, and secure cloud-native applications using Helm, integrating seamlessly with critical components like api endpoints and api gateway configurations.
Chapter 1: The Foundation - Kubernetes, Helm, and the Configuration Paradigm
Before we dive into the specifics of Helm environment variables, it's crucial to establish a foundational understanding of the ecosystem in which they operate. Kubernetes, as an open-source system for automating deployment, scaling, and management of containerized applications, fundamentally changed how applications are developed and operated. It provides a declarative API, allowing users to describe the desired state of their applications and infrastructure, with Kubernetes continuously working to achieve that state. This declarative nature is a cornerstone of its power but also introduces a unique challenge: how to manage configuration that varies across environments or specific deployments without altering the core application code or Kubernetes manifests directly.
The concept of separating configuration from code is not new; it's a well-established principle in software engineering, particularly within the Twelve-Factor App methodology. This separation enhances portability, simplifies deployment, and improves security by keeping sensitive information out of version control. In Kubernetes, several mechanisms facilitate this separation: ConfigMaps, Secrets, the Downward API, and, critically, environment variables. Each serves a distinct purpose and is often used in conjunction with others to provide a comprehensive configuration strategy. ConfigMaps are ideal for non-sensitive configuration data, such as log levels, feature flags, or application parameters. Secrets, on the other hand, are specifically designed for sensitive information like database passwords, API keys, or TLS certificates, offering basic encryption at rest within etcd and more secure handling within the Kubernetes API. The Downward API allows containers to consume information about themselves or their surrounding environment (e.g., Pod name, namespace, IP address) directly as environment variables or files.
Helm builds upon this Kubernetes foundation by providing a templating engine that allows users to define parameterized Kubernetes manifests. A Helm chart typically consists of a Chart.yaml file (metadata), values.yaml (default configuration values), templates/ directory (Kubernetes manifests with Go templating), and other optional files. When a user installs a Helm chart, the Helm CLI takes the values.yaml (potentially overridden by user-provided values), processes the templates, and generates the final Kubernetes manifests, which are then applied to the cluster. This abstraction significantly reduces boilerplate and allows for dynamic configuration injection. For instance, a single chart can deploy an api service that connects to different database instances in development versus production, simply by overriding a value in values.yaml that then renders the appropriate database connection string into an environment variable for the application container. The challenge then shifts to how these dynamic values, especially those specific to the running environment or the Helm client's operation, are most effectively managed and utilized, bringing us to the crucial role of environment variables.
Chapter 2: Demystifying Environment Variables in Kubernetes
Environment variables serve as a ubiquitous mechanism for configuring programs in Unix-like operating systems, and their utility extends seamlessly into the containerized world of Kubernetes. For applications running within a container, environment variables provide a simple, yet powerful, way to pass configuration settings at runtime without modifying the container image itself. This immutability of container images is a core tenet of modern DevOps practices, promoting consistency and reducing the risk of "works on my machine" syndrome.
In Kubernetes, you can inject environment variables into your Pods (and thus into the containers within those Pods) in several ways, each suited for different scenarios:
- Directly in the Pod/Container Specification (
env): This is the most straightforward method. You can define a list of name-value pairs directly under theenvfield of a container specification. This is suitable for static, non-sensitive configuration that is unlikely to change frequently.yaml apiVersion: v1 kind: Pod metadata: name: my-app-pod spec: containers: - name: my-app-container image: my-app:latest env: - name: MY_APP_LOG_LEVEL value: "INFO" - name: MY_APP_FEATURE_TOGGLE value: "true"While simple, this approach embeds configuration directly into the manifest, which might not be ideal for environment-specific values or secrets. - Loading from ConfigMaps (
envFrom,valueFrom): For non-sensitive configuration that needs to be easily updated or shared across multiple Pods, Kubernetes offers ConfigMaps. You can reference a ConfigMap in two primary ways to inject its data as environment variables:valueFrom: This method allows you to select a specific key from a ConfigMap and assign its value to a named environment variable. This offers more granular control, especially when you only need a subset of a ConfigMap's data.yaml apiVersion: v1 kind: Pod metadata: name: my-app-pod-valuefrom-cm spec: containers: - name: my-app-container image: my-app:latest env: - name: MY_SPECIFIC_API_ENDPOINT valueFrom: configMapKeyRef: name: app-config key: API_URL
- Downward API: The Downward API allows a container to consume information about itself or the cluster it runs in. This includes metadata like the Pod's name, namespace, IP address, or even resource limits and requests. This data can be exposed either as environment variables or as files within the container.
yaml apiVersion: v1 kind: Pod metadata: name: my-app-pod-downward spec: containers: - name: my-app-container image: my-app:latest env: - name: POD_NAME valueFrom: fieldRef: fieldPath: metadata.name - name: POD_NAMESPACE valueFrom: fieldRef: fieldPath: metadata.namespace - name: CONTAINER_CPU_LIMIT valueFrom: resourceFieldRef: containerName: my-app-container resource: limits.cpu
Loading from Secrets (envFrom, valueFrom): Secrets function similarly to ConfigMaps but are designed for sensitive data. Kubernetes provides mechanisms to prevent accidental exposure of Secret data in logs and stores them in etcd (often encrypted at rest). Injecting Secret data as environment variables follows the same envFrom and valueFrom patterns as ConfigMaps, using secretRef or secretKeyRef respectively.```yaml apiVersion: v1 kind: Secret metadata: name: app-secret type: Opaque data: DB_PASSWORD: "c3VwZXJzZWNyZXRwYXNzd29yZA==" # base64 encoded "supersecretpassword" API_KEY: "YWJjZGVmMTIzNDU2" # base64 encoded "abcdef123456"
apiVersion: v1 kind: Pod metadata: name: my-app-pod-secret spec: containers: - name: my-app-container image: my-app:latest env: - name: DATABASE_PASSWORD valueFrom: secretKeyRef: name: app-secret key: DB_PASSWORD - name: EXTERNAL_API_KEY valueFrom: secretKeyRef: name: app-secret key: API_KEY ```Using envFrom with Secrets is also possible, but it's crucial to be aware that it exposes all keys from the Secret as environment variables, which might not always align with the principle of least privilege. For sensitive data, valueFrom is often preferred to explicitly name the variables and keys being exposed.
envFrom: This method injects all key-value pairs from a specified ConfigMap as environment variables into the container. This is particularly useful when a large set of related configuration parameters needs to be exposed.```yaml apiVersion: v1 kind: ConfigMap metadata: name: app-config data: API_URL: "http://my-api-service:8080" DATABASE_HOST: "prod-db.example.com"
apiVersion: v1 kind: Pod metadata: name: my-app-pod-configmap spec: containers: - name: my-app-container image: my-app:latest envFrom: - configMapRef: name: app-config ```Here, API_URL and DATABASE_HOST would become environment variables inside my-app-container. This is a common pattern for defining internal service api endpoints or other foundational settings that applications require.
The judicious use of these methods allows for highly flexible and secure configuration management within Kubernetes. For applications that require communication with other services, especially through apis, or that are part of an api gateway infrastructure, setting api endpoints, authentication tokens, or routing rules via environment variables is a common and effective pattern. It allows the same container image to function correctly in different environments, pointing to different backend services or gateway configurations simply by changing the Kubernetes deployment manifest or the underlying ConfigMaps/Secrets. However, understanding how Helm orchestrates these configurations is the next critical step.
Chapter 3: Helm's Interaction with Environment Variables - The User's Perspective
Helm, as a templating engine for Kubernetes manifests, plays a pivotal role in defining and managing environment variables for the applications it deploys. While Kubernetes provides the mechanisms to inject environment variables, Helm provides the means to parameterize and abstract these injections, allowing chart users to easily configure their applications without directly editing complex YAML files. This is primarily achieved through Helm's values.yaml and its Go templating capabilities.
When you, as a chart user, want to configure an application deployed by Helm, you typically interact with the values.yaml file. This file contains a set of default configuration parameters. You can override these defaults by providing your own values.yaml file or by passing individual --set flags during helm install or helm upgrade commands. Helm then takes these values and injects them into the Kubernetes manifests defined in the templates/ directory of the chart.
Consider a common scenario: an api service that needs to connect to a database. The database connection string often varies between development, staging, and production environments. Instead of hardcoding this string into the application's container image or the Kubernetes deployment YAML, Helm allows you to define it as a variable in values.yaml and then template it into an environment variable within the deployment.
Example: Defining Environment Variables via values.yaml
Let's assume your values.yaml looks something like this:
# values.yaml
application:
  logLevel: "DEBUG"
  apiBaseUrl: "http://backend-api-dev:8080"
  database:
    host: "dev-db.example.com"
    port: 5432
    username: "devuser"
    passwordSecretName: "dev-db-secret" # Name of a Kubernetes Secret
Now, in your templates/deployment.yaml for your application, you would reference these values to construct the environment variables:
# templates/deployment.yaml
apiVersion: apps/v1
kind: Deployment
metadata:
  name: {{ include "my-chart.fullname" . }}
  labels:
    {{- include "my-chart.labels" . | nindent 4 }}
spec:
  replicas: {{ .Values.replicaCount }}
  selector:
    matchLabels:
      {{- include "my-chart.selectorLabels" . | nindent 6 }}
  template:
    metadata:
      {{- with .Values.podAnnotations }}
      annotations:
        {{- toYaml . | nindent 8 }}
      {{- end }}
      labels:
        {{- include "my-chart.selectorLabels" . | nindent 8 }}
    spec:
      containers:
        - name: {{ .Chart.Name }}
          image: "{{ .Values.image.repository }}:{{ .Values.image.tag | default .Chart.AppVersion }}"
          imagePullPolicy: {{ .Values.image.pullPolicy }}
          env:
            - name: APP_LOG_LEVEL
              value: "{{ .Values.application.logLevel }}"
            - name: API_BASE_URL
              value: "{{ .Values.application.apiBaseUrl }}"
            - name: DB_HOST
              value: "{{ .Values.application.database.host }}"
            - name: DB_PORT
              value: "{{ .Values.application.database.port | quote }}"
            - name: DB_USERNAME
              value: "{{ .Values.application.database.username }}"
            # Reference a value from an existing Secret
            - name: DB_PASSWORD
              valueFrom:
                secretKeyRef:
                  name: {{ .Values.application.database.passwordSecretName }}
                  key: password # Assuming the key in the secret is 'password'
          ports:
            - name: http
              containerPort: 80
              protocol: TCP
          livenessProbe:
            httpGet:
              path: /healthz
              port: http
          readinessProbe:
            httpGet:
              path: /ready
              port: http
          resources:
            {{- toYaml .Values.resources | nindent 12 }}
      {{- with .Values.nodeSelector }}
      nodeSelector:
        {{- toYaml . | nindent 8 }}
      {{- end }}
      {{- with .Values.affinity }}
      affinity:
        {{- toYaml . | nindent 8 }}
      {{- end }}
      {{- with .Values.tolerations }}
      tolerations:
        {{- toYaml . | nindent 8 }}
      {{- end }}
In this example: * APP_LOG_LEVEL, API_BASE_URL, DB_HOST, DB_PORT, and DB_USERNAME are directly populated from values.yaml. * DB_PASSWORD demonstrates how Helm can reference an existing Kubernetes Secret (whose name is also configurable via values.yaml) to pull sensitive data. This approach keeps sensitive data out of values.yaml and leverages Kubernetes' Secret management.
Using envFrom with Helm for ConfigMaps and Secrets
For larger sets of configuration, using envFrom with ConfigMaps or Secrets is often more efficient. Helm can facilitate the creation of these ConfigMaps and Secrets dynamically based on values.yaml.
# values.yaml
# ... (previous application settings)
config:
  applicationSettings:
    GLOBAL_TIMEOUT_MS: "5000"
    CACHE_EXPIRY_SECONDS: "3600"
secrets:
  apiKeys:
    STRIPE_API_SECRET: "your-stripe-secret"
    GITHUB_TOKEN: "your-github-token"
Then, in your Helm chart, you might have templates/configmap.yaml and templates/secret.yaml that generate these resources:
# templates/configmap.yaml
apiVersion: v1
kind: ConfigMap
metadata:
  name: {{ include "my-chart.fullname" . }}-config
  labels:
    {{- include "my-chart.labels" . | nindent 4 }}
data:
  {{- range $key, $value := .Values.config.applicationSettings }}
  {{ $key }}: {{ $value | quote }}
  {{- end }}
# templates/secret.yaml
apiVersion: v1
kind: Secret
metadata:
  name: {{ include "my-chart.fullname" . }}-secret
  labels:
    {{- include "my-chart.labels" . | nindent 4 }}
type: Opaque
data:
  {{- range $key, $value := .Values.secrets.apiKeys }}
  {{ $key }}: {{ $value | b64enc | quote }}
  {{- end }}
And finally, in your templates/deployment.yaml, you would use envFrom:
# templates/deployment.yaml (snippet)
          envFrom:
            - configMapRef:
                name: {{ include "my-chart.fullname" . }}-config
            - secretRef:
                name: {{ include "my-chart.fullname" . }}-secret
This pattern is extremely powerful. It allows chart developers to define a clean interface (the values.yaml) for configuring their applications, while chart users can easily override these values to suit their specific environment requirements. This flexibility is crucial for deploying microservices that interact with various apis or for configuring api gateway components that need to route traffic based on dynamic settings. For example, an api gateway deployed via Helm might have its upstream api service URLs, caching policies, or authentication mechanisms configured entirely through environment variables derived from Helm values and Kubernetes Secrets.
Furthermore, when dealing with complex API deployments, especially those involving AI services, platforms like APIPark offer robust API gateway capabilities. Such a platform itself could be deployed using Helm, where its configuration—ranging from integrated AI model endpoints to API lifecycle management settings—would naturally be managed through environment variables templated by Helm charts, demonstrating the real-world synergy of these technologies.
By leveraging Helm's templating for environment variables, developers maintain application portability, operations teams gain granular control over deployment configurations, and the entire process of managing cloud-native applications becomes significantly streamlined. This user-centric approach to configuration is one of Helm's greatest strengths, but it's only one half of the story. The Helm CLI itself can also be configured and controlled using its own set of environment variables, which we'll explore next.
Chapter 4: The Helm CLI and its Environment Variables - Powering the Toolkit
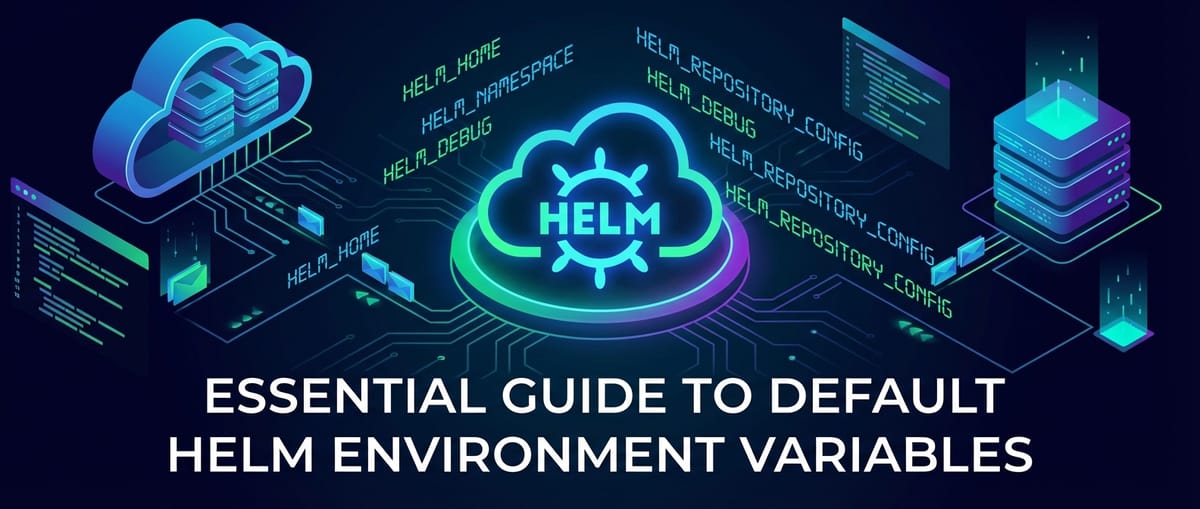
Beyond configuring the applications deployed by Helm, the Helm command-line interface (CLI) itself can be profoundly influenced and controlled by a dedicated set of environment variables. These variables, typically prefixed with HELM_, allow users to alter Helm's default behavior, specify configurations for various operations, and provide credentials without repeatedly typing them on the command line. Understanding these environment variables is crucial for advanced Helm usage, automation, and consistent deployments across different environments. They serve as a powerful meta-configuration layer for the Helm client, impacting everything from debugging verbosity to registry authentication and release history management.
Let's dissect some of the most critical default Helm environment variables:
HELM_DEBUG:- Purpose: This variable enables debug-level logging for the Helm CLI. When set to
true(or any non-empty string), Helm will output significantly more verbose information about its operations, including templating processes, API calls to Kubernetes, and internal states. - Usage:
export HELM_DEBUG=true - Implication: Indispensable for troubleshooting chart rendering issues, understanding why a Kubernetes resource isn't being created as expected, or diagnosing connectivity problems with the Kubernetes API server. It provides a window into Helm's internal workings, which is especially helpful when dealing with complex Go templates or unexpected manifest generation.
- Purpose: This variable enables debug-level logging for the Helm CLI. When set to
HELM_NAMESPACE:- Purpose: Overrides the target Kubernetes namespace for Helm operations. By default, Helm uses the namespace specified in your current Kubernetes context or the namespace defined in the chart's metadata. This environment variable provides a global override.
- Usage:
export HELM_NAMESPACE=my-staging-namespace - Implication: Extremely useful in scripting and automation where you need to perform Helm operations against a specific namespace without modifying the
kubeconfigcontext or adding--namespaceto every command. For instance, when deploying multiple instances of anapi gatewayin different namespaces, this variable ensures consistency.
HELM_KUBECONTEXT:- Purpose: Specifies the Kubernetes context to use for Helm operations. This is equivalent to passing the
--kube-contextflag to Helm commands. - Usage:
export HELM_KUBECONTEXT=my-cluster-dev - Implication: Essential when working with multiple Kubernetes clusters or contexts defined in your
kubeconfigfile. It allows you to ensure Helm interacts with the correct cluster, preventing accidental deployments to the wrong environment (e.g., deploying to production instead of development).
- Purpose: Specifies the Kubernetes context to use for Helm operations. This is equivalent to passing the
HELM_REGISTRY_CONFIG:- Purpose: Specifies the path to the Helm registry configuration file. This file contains authentication credentials for OCI (Open Container Initiative) registries where Helm charts can be stored.
- Usage:
export HELM_REGISTRY_CONFIG=/path/to/my/registry/config.json - Implication: Critical for pulling or pushing Helm charts to private OCI registries. This allows secure access to private chart repositories without embedding credentials directly in scripts or relying on interactive login prompts.
HELM_REGISTRY_USERNAME/HELM_REGISTRY_PASSWORD:- Purpose: Provides username and password for basic authentication against OCI registries. These are often used in conjunction with
HELM_REGISTRY_CONFIGor for simpler, non-interactive authentication. - Usage:
export HELM_REGISTRY_USERNAME=myuser; export HELM_REGISTRY_PASSWORD=mypassword - Implication: Offers a straightforward way to authenticate with private registries in CI/CD pipelines where more complex credential management might be overkill or temporarily unavailable. However, direct exposure of passwords in environment variables should be handled with extreme care due to security risks.
- Purpose: Provides username and password for basic authentication against OCI registries. These are often used in conjunction with
HELM_HOME(Historical/Deprecated, now XDG-based):- Purpose: Historically, this variable pointed to the directory where Helm stored its configuration files, cache, and plugin data.
- Usage:
export HELM_HOME=/path/to/helm/config(legacy) - Implication: In Helm 3 and later,
HELM_HOMEhas been deprecated in favor of the XDG Base Directory Specification. Helm now respectsXDG_CACHE_HOME,XDG_CONFIG_HOME, andXDG_DATA_HOMEenvironment variables. If these are not set, it defaults to~/.cache/helm,~/.config/helm, and~/.local/share/helmrespectively. WhileHELM_HOMEmight still be recognized for backward compatibility in some contexts, it's best practice to use the XDG variables or rely on the standard locations. This shift enhances adherence to Linux filesystem standards and improves consistency across applications.
HELM_PLUGINS:- Purpose: Specifies one or more colon-separated paths to Helm plugin directories.
- Usage:
export HELM_PLUGINS=/usr/local/helm-plugins:/opt/my-custom-plugins - Implication: Allows Helm to discover and load plugins from non-standard locations. This is useful for custom plugins, testing new plugin versions, or in environments where plugins are managed separately from the default Helm installation.
HELM_DRIVER:- Purpose: Configures the storage backend that Helm uses to keep track of release information. Options include
secret(default),configmap, orsql. - Usage:
export HELM_DRIVER=configmap - Implication: The
secretdriver is the default and generally recommended for production as it leverages Kubernetes Secrets for storing release metadata, offering a basic level of confidentiality.configmapstores release data in ConfigMaps, which are plaintext and less secure for sensitive release information.sqlis an experimental driver for storing release data in an external SQL database, useful for highly scaled or federated Helm deployments. Choosing the right driver depends on your security requirements and operational scale.
- Purpose: Configures the storage backend that Helm uses to keep track of release information. Options include
HELM_NO_PLUGINS:- Purpose: If set to
true, this variable prevents Helm from loading any plugins. - Usage:
export HELM_NO_PLUGINS=true - Implication: Useful for debugging, security auditing, or in environments where you want to ensure no unexpected plugin behavior interferes with Helm operations.
- Purpose: If set to
HELM_EXPERIMENTAL_OCI:- Purpose: This variable was historically used to enable experimental OCI support in Helm 3.
- Usage:
export HELM_EXPERIMENTAL_OCI=true(historical) - Implication: While OCI support for charts is now generally available (GA) in Helm 3.8 and later and no longer requires an explicit flag or environment variable, understanding its past existence provides context to Helm's evolution in embracing container registry standards for chart distribution. It highlights how Helm adapts to industry trends, especially those concerning
apiand artifact management.
HELM_GENERATE_NAME:- Purpose: If set to
true, Helm will automatically generate a release name if one is not explicitly provided with thehelm installcommand. - Usage:
export HELM_GENERATE_NAME=true - Implication: Simplifies scripting and ad-hoc testing by removing the need to come up with unique release names manually. The generated names usually follow a pattern like
chart-name-randomsuffix.
- Purpose: If set to
HELM_REPO_CACHE:- Purpose: Specifies the path to the local directory where Helm stores cached copies of chart repositories.
- Usage:
export HELM_REPO_CACHE=/var/helm/cache - Implication: Useful for managing storage locations, especially in constrained environments or CI/CD pipelines where specific paths are required for caching.
HELM_MAX_HISTORY:- Purpose: Sets the maximum number of release revisions to keep for a given Helm release. Old revisions are pruned automatically.
- Usage:
export HELM_MAX_HISTORY=5 - Implication: Helps manage the size of the release history stored in Kubernetes Secrets or ConfigMaps, preventing them from growing indefinitely. This is crucial for maintaining a clean and efficient control plane, especially for frequently updated applications like an
api gatewayor criticalapiservices.
HELM_TIMEOUT:- Purpose: Sets the maximum time (in seconds or duration string, e.g., "5m") that Helm will wait for Kubernetes resources to become ready during operations like
install,upgrade, orrollback. - Usage:
export HELM_TIMEOUT=300sorexport HELM_TIMEOUT=5m - Implication: Prevents Helm operations from hanging indefinitely if resources fail to reach a ready state. Essential for robust automation and ensuring deployments either succeed or fail within a predictable timeframe, which is vital for
apiand service uptime.
- Purpose: Sets the maximum time (in seconds or duration string, e.g., "5m") that Helm will wait for Kubernetes resources to become ready during operations like
HELM_WAIT:- Purpose: If set to
true, Helm will wait until all Pods, PVCs, Services, and minimum number of updated Pods of a Deployment or StatefulSet are in a ready state before marking a release as successful. - Usage:
export HELM_WAIT=true - Implication: Ensures that an application is fully operational before the Helm command exits, which is particularly important in CI/CD pipelines where subsequent steps might depend on the deployed application being ready to serve requests. This is especially critical for
api gatewaycomponents that must be fully initialized to correctly route incomingapicalls.
- Purpose: If set to
These HELM_ prefixed environment variables provide an unparalleled level of control over the Helm CLI's behavior. By leveraging them, administrators and developers can tailor Helm operations to specific environment needs, enhance automation scripts, improve security posture, and gain deeper insights into the deployment process. They are an often-underutilized tool in the Helm user's arsenal, yet mastering them unlocks significant operational efficiency and reliability, transforming Helm from a simple package manager into a highly configurable and adaptable deployment engine.
APIPark is a high-performance AI gateway that allows you to securely access the most comprehensive LLM APIs globally on the APIPark platform, including OpenAI, Anthropic, Mistral, Llama2, Google Gemini, and more.Try APIPark now! 👇👇👇
Chapter 5: Advanced Techniques and Best Practices for Helm Environment Variables
Leveraging environment variables effectively with Helm goes beyond basic templating. Advanced techniques and adherence to best practices can significantly enhance the robustness, security, and maintainability of your Helm charts and the applications they deploy. This chapter delves into some sophisticated patterns and crucial considerations for using environment variables in complex cloud-native environments.
Conditional Environment Variables Based on values.yaml
One of Helm's most powerful features is its Go templating engine, which allows for conditional logic within your Kubernetes manifests. This means you can define environment variables that are only present or have different values based on specific settings in your values.yaml. This is particularly useful for feature flagging, enabling/disabling certain integrations (e.g., a specific api client), or altering behavior based on the deployment environment (e.g., dev, staging, prod).
Example: Environment-Specific API Endpoint
Imagine you have an application that connects to an external payment API. The endpoint for this API might be different in staging versus production.
# values.yaml
environment: "staging" # or "production"
externalApis:
  payment:
    stagingUrl: "https://staging.payment.api.example.com"
    prodUrl: "https://prod.payment.api.example.com"
In your templates/deployment.yaml:
# templates/deployment.yaml (snippet)
          env:
            - name: PAYMENT_API_URL
              value: >-
                {{- if eq .Values.environment "production" }}
                {{ .Values.externalApis.payment.prodUrl | quote }}
                {{- else }}
                {{ .Values.externalApis.payment.stagingUrl | quote }}
                {{- end }}
            # ... other env vars
This ensures that the correct API endpoint is injected based on the environment value, making your chart adaptable without needing separate chart versions. This is a crucial pattern for configuring api gateway solutions where different upstream api services are targeted based on the deployment context.
Secrets Management: Beyond Basic Kubernetes Secrets
While Kubernetes Secrets provide a fundamental way to store sensitive data, directly embedding base64-encoded secrets in your Helm chart (even in values.yaml, though it's discouraged) is not ideal for highly secure environments. Modern approaches integrate Helm with external secret managers to inject secrets directly into Pods or Kubernetes Secrets at deployment time.
Popular external secret managers include: * HashiCorp Vault: With the vault-agent-injector or specific Helm plugins, Vault can dynamically provide secrets to Pods as environment variables or mounted files. * External Secrets Operator: This Kubernetes operator fetches secrets from external apis (like AWS Secrets Manager, Azure Key Vault, GCP Secret Manager) and automatically synchronizes them into native Kubernetes Secrets. Your Helm chart then simply references these generated Kubernetes Secrets using valueFrom or envFrom.
Best Practice: Never hardcode sensitive values directly into your values.yaml or templates. Always use Kubernetes Secrets, ideally managed by an external secrets manager or injected at deployment time. If you must pass them via helm install --set, ensure your CI/CD pipeline handles them securely, e.g., using secret injection mechanisms.
Using ConfigMap and Secret Generators Within Helm Charts
For charts that need to manage complex configurations or a large number of secrets, manually writing ConfigMap and Secret YAML can become cumbersome. While the earlier examples showed basic generation, for more intricate scenarios, tools like helm-secrets (a Helm plugin that decrypts secrets stored in Git with tools like SOPS) or dedicated operators are invaluable. They allow you to define encrypted secret values directly within your chart's values.yaml (or separate files) and decrypt them at install/upgrade time, ensuring secrets are encrypted in transit and at rest in your version control system.
Dynamic Configuration from Downward API
The Kubernetes Downward API can inject Pod-specific or container-specific metadata as environment variables. This is excellent for self-configuring applications that need to know their own identity or resource constraints.
# templates/deployment.yaml (snippet)
          env:
            - name: MY_POD_NAME
              valueFrom:
                fieldRef:
                  fieldPath: metadata.name
            - name: MY_POD_IP
              valueFrom:
                fieldRef:
                  fieldPath: status.podIP
            - name: MY_CPU_REQUEST
              valueFrom:
                resourceFieldRef:
                  containerName: {{ .Chart.Name }}
                  resource: requests.cpu
            # ...
This allows applications to log their specific instance ID, connect to other services using their IP, or adjust behavior based on allocated resources, without any external configuration.
Injecting API Keys or Gateway URLs from External Sources
A common pattern for microservices or api gateway components is to consume configuration from a central configuration service (e.g., Consul, etcd, Spring Cloud Config). While these services themselves might be deployed via Helm, their dynamic configuration data can be sourced and injected into application environment variables. This might involve:
- Init Containers: An
initContainerin your Pod can fetch configuration from an external source during Pod startup and write it to a shared volume. The main application container then reads these files, or theinitContainerpopulates anenvfile that is then sourced. - Sidecar Containers: A sidecar container can continuously watch for configuration changes from an external source and update configuration files or signal the main application to reload settings.
- Custom Controllers/Operators: For advanced scenarios, a custom Kubernetes controller can watch a Custom Resource Definition (CRD) that describes external configuration, then automatically create/update ConfigMaps or Secrets, which are then consumed by Helm-deployed applications.
For example, an api gateway often needs to know about the upstream api services it manages, their health check endpoints, and routing rules. These could be defined in an external configuration management system. Helm would deploy the api gateway, and environment variables would point the gateway to the configuration system, allowing it to dynamically fetch and update its routing tables. This is where platforms like APIPark excel, offering unified API management where API definitions and invocation formats are standardized. Deploying such a sophisticated api gateway with Helm would involve carefully configuring its various modules (e.g., AI model integration endpoints, traffic management rules) through environment variables to ensure it operates correctly within its target environment.
The Role of API Gateway Configuration Through Environment Variables
API gateways are critical components in modern microservice architectures, acting as a single entry point for API requests, providing routing, load balancing, authentication, rate limiting, and more. Deploying and configuring an api gateway using Helm heavily relies on environment variables for:
- Upstream
APIEndpoints: Dynamically pointing to different backend microservices based on environment. - Authentication Mechanisms: Specifying
APIkey locations, OAuth/OIDC provider URLs, or JWT validation parameters. - Traffic Management: Setting rate limits, circuit breaker thresholds, or load balancing algorithms.
- Logging and Monitoring: Defining log destinations, metrics endpoints, or tracing configurations.
- Feature Flags: Enabling/disabling specific
gatewayfunctionalities.
Using environment variables here allows the api gateway chart to be highly reusable. The same api gateway Helm chart can be installed multiple times in different environments, each time configured with environment-specific details, without any modifications to the core chart logic. This declarative approach, supported by Helm's templating and Kubernetes' environment variable injection, is fundamental to building scalable and maintainable api infrastructures.
By adopting these advanced techniques and best practices, teams can build Helm charts that are not only powerful and flexible but also secure and easy to manage, truly unlocking the potential of cloud-native application deployment.
Chapter 6: Security and Debugging with Environment Variables
While environment variables offer unparalleled flexibility in configuring applications and the Helm CLI, they also introduce critical considerations related to security and debugging. Mismanagement of environment variables can lead to security vulnerabilities, while a lack of understanding of Helm's debug capabilities can prolong troubleshooting efforts.
Security Considerations for Environment Variables
The primary security concern with environment variables, especially within Kubernetes, is the potential for exposure of sensitive information.
- Never Hardcode Sensitive Information: This cannot be stressed enough. Passwords,
APIkeys, cryptographic keys, and other sensitive data should never be directly embedded invalues.yamlfiles,ConfigMapdata, or as directvalueentries inenvfields within your deployment manifests.values.yamlandConfigMapdata are stored in plaintext within Kubernetes and often committed to version control systems (like Git), making them easily accessible.- Mitigation: Always use Kubernetes Secrets for sensitive data. These are stored encrypted at rest in
etcd(though they are decoded when retrieved via the Kubernetes API, so proper RBAC is essential). LeveragevalueFrom.secretKeyReforenvFrom.secretRefto inject these secrets into your containers. For higher security, integrate with external secret managers (as discussed in Chapter 5) that handle secret rotation and access control more robustly.
- Mitigation: Always use Kubernetes Secrets for sensitive data. These are stored encrypted at rest in
- Least Privilege Principle: When injecting secrets via
envFrom.secretRef, all key-value pairs from the Secret are exposed as environment variables. If a Secret contains multiple sensitive keys but your application only needs one, usingvalueFrom.secretKeyReffor the specific key is more secure as it adheres to the principle of least privilege, exposing only what is absolutely necessary.- Mitigation: Review the contents of your Secrets. If a Secret contains highly disparate sensitive values, consider splitting it into multiple, smaller Secrets that can be referenced individually with
valueFrom.
- Mitigation: Review the contents of your Secrets. If a Secret contains highly disparate sensitive values, consider splitting it into multiple, smaller Secrets that can be referenced individually with
- Environment Variable Visibility: Environment variables are visible to processes running within the same container, and potentially to other containers in the same Pod if
pidMode: hostis used (which is rare). More importantly, they can be easily dumped by anyone with exec access to the container (kubectl exec my-pod -- env) or by inspecting the Pod definition (kubectl get pod my-pod -o yaml).- Mitigation: Combine strong Kubernetes Role-Based Access Control (RBAC) to limit who can
getPods orexecinto containers. Implement strict security policies to prevent unauthorized access to the Kubernetes API server itself. For extremely sensitive data, consider mounting secrets as files rather than injecting them as environment variables, as file permissions can be more granularly controlled.
- Mitigation: Combine strong Kubernetes Role-Based Access Control (RBAC) to limit who can
- Logging and Tracing: Be extremely cautious about logging environment variables. Application logs or distributed tracing systems can inadvertently capture and expose sensitive information if environment variables containing secrets are logged.
- Mitigation: Implement robust logging practices where sensitive environment variables are explicitly excluded from logs. Review log aggregation systems to ensure they don't ingest or display sensitive data.
Debugging with Helm Environment Variables
Effective debugging is crucial for identifying and resolving issues quickly. Helm provides several mechanisms, often influenced by environment variables, to aid in this process.
HELM_DEBUG=truefor Verbose Output: As discussed in Chapter 4, settingHELM_DEBUGtotrueis your first line of defense when troubleshooting Helm chart issues. It provides extensive output, including:- Detailed templating results (what YAML is being generated).
- API requests being made to the Kubernetes cluster.
- Error messages from Helm's internal logic.
- Timing information for various operations.
- Usage Scenario: If your deployment isn't creating the expected resources,
HELM_DEBUGcan show you exactly what Kubernetes YAML Helm is attempting to apply. If a template error occurs, it often provides more context than the default error message.
helm templatefor Pre-flight Checks: Before deploying a chart, especially one with complex environment variable logic, usehelm templateto render the Kubernetes manifests without actually deploying them to the cluster.- Usage:
helm template my-release ./my-chart --values my-values.yaml - Implication: This command allows you to inspect the final YAML that would be applied, including all environment variables populated. You can pipe the output to
grepto quickly check for specific environment variable values ordiffit against a known good configuration. This is invaluable for verifying that yourvalues.yamloverrides and template logic are producing the desired environment variable configurations for yourapiservices orapi gateway.
- Usage:
- Inspecting Deployed Pods: Once an application is deployed, you can directly inspect the environment variables visible inside a running container.
- Usage:
kubectl get pod <pod-name> -o yaml | grep -A5 -B5 "env:"(to view the Pod spec definition)kubectl exec -it <pod-name> -- env(to view environment variables inside the running container)
- Implication: The
kubectl get pod -o yamlcommand shows you exactly what environment variables Kubernetes attempted to inject based on the Pod's definition. Thekubectl exec -- envcommand shows you what environment variables the application actually sees at runtime. Discrepancies between these two can indicate issues withvalueFromreferences, ConfigMap/Secret names, or other Kubernetes-level configuration problems. This is especially useful if yourapiclient orapi gatewayisn't picking up the correct endpoint or authentication token.
- Usage:
- Resource Limits and Requests (
resourceFieldRef): If an application's behavior depends on its allocated CPU or memory (e.g., a garbage collector tuning itself), and these are injected via the Downward API as environment variables, debugging might involve checking if the correct values are being injected.- Usage: Verify the
resourceFieldRefconfiguration in yourtemplates/deployment.yamland then usekubectl get pod -o yamlto confirm the values in the Pod spec.
- Usage: Verify the
By combining proactive security measures with a thorough understanding of Helm's debugging tools, you can ensure that your environment variable configurations are both secure and correct, contributing to the overall stability and reliability of your cloud-native deployments. These practices are non-negotiable for critical infrastructure components, especially those handling sensitive data or acting as central api gateway components.
Chapter 7: Real-World Scenarios and Practical Implementations
To solidify our understanding, let's explore a few real-world scenarios where Helm environment variables become indispensable, demonstrating their practical implementation and the benefits they bring. These examples will illustrate how to configure api endpoints, manage api gateway settings, and handle database credentials across different environments.
Scenario 1: Configuring a Microservice's API Endpoint
Consider a microservice (e.g., a "Product Catalog" service) that needs to communicate with an upstream "Inventory Management" API. The URL for this Inventory API will differ between development, staging, and production environments.
Helm Chart Structure:
my-product-catalog-chart/
├── Chart.yaml
├── values.yaml
└── templates/
    └── deployment.yaml
values.yaml:
# my-product-catalog-chart/values.yaml
replicaCount: 1

image:
  repository: myrepo/product-catalog-service
  tag: latest
  pullPolicy: IfNotPresent

service:
  type: ClusterIP
  port: 80

# Environment-specific API endpoints
environment: "development" # Can be overridden to "staging" or "production"

apiEndpoints:
  inventoryService:
    development: "http://inventory-dev.svc.cluster.local:8080/api/v1/inventory"
    staging: "http://inventory-stg.svc.cluster.local:8080/api/v1/inventory"
    production: "http://inventory-prod.svc.cluster.local:8080/api/v1/inventory"
templates/deployment.yaml (snippet focusing on env):
# my-product-catalog-chart/templates/deployment.yaml
# ... (standard deployment metadata and spec)
      containers:
        - name: {{ .Chart.Name }}
          image: "{{ .Values.image.repository }}:{{ .Values.image.tag }}"
          imagePullPolicy: {{ .Values.image.pullPolicy }}
          env:
            - name: INVENTORY_API_URL
              value: >-
                {{- if eq .Values.environment "production" }}
                {{ .Values.apiEndpoints.inventoryService.production }}
                {{- else if eq .Values.environment "staging" }}
                {{ .Values.apiEndpoints.inventoryService.staging }}
                {{- else }}
                {{ .Values.apiEndpoints.inventoryService.development }}
                {{- end }}
            - name: APP_PORT
              value: "8080" # Example static env var
          ports:
            - name: http
              containerPort: 8080
              protocol: TCP
# ... (rest of deployment)
Deployment: * Development: helm install product-catalog ./my-product-catalog-chart --set environment=development * Staging: helm install product-catalog-stg ./my-product-catalog-chart --set environment=staging * Production: helm install product-catalog-prod ./my-product-catalog-chart --set environment=production
Each deployment will inject the correct INVENTORY_API_URL environment variable into the Product Catalog service's containers, ensuring it connects to the appropriate Inventory API instance for its environment.
Scenario 2: Setting Up Different API Gateway Configurations for Dev/Prod
An api gateway needs to be configured differently based on the environment. For example, in development, it might allow more verbose logging and have relaxed rate limits, while in production, it needs stricter rate limits and connects to a production-grade authentication service. This is a perfect use case for Helm's templating and environment variables.
Let's assume we are deploying an api gateway application. This application, being itself an API management platform, is likely to be robust and highly configurable. For example, APIPark is an open-source AI Gateway and API Management Platform. While APIPark simplifies deployment with a quick-start script, understanding how to configure its underlying components (if deployed via Helm) using environment variables is key to advanced customization and integration within an existing Kubernetes ecosystem.
Helm Chart Structure:
my-api-gateway-chart/
├── Chart.yaml
├── values.yaml
└── templates/
    ├── deployment.yaml
    └── configmap.yaml
values.yaml:
# my-api-gateway-chart/values.yaml
replicaCount: 2

image:
  repository: myrepo/api-gateway
  tag: 1.0.0
  pullPolicy: IfNotPresent

environment: "development" # or "production"

gatewayConfig:
  defaultRateLimit:
    development: "100req/s"
    production: "50req/s"
  loggingLevel:
    development: "DEBUG"
    production: "INFO"
  authServiceUrl:
    development: "http://dev-auth.svc.cluster.local:8080"
    production: "http://prod-auth.svc.cluster.local:8080"
  adminEmail: "admin@example.com" # Stays constant, put in ConfigMap

# APIPark specific: You might have specific AI model integration settings
apipark:
  aiModelIntegrationEnabled: true
  defaultAiModelEndpoint: "https://api.openai.com/v1/chat/completions" # Default, could be overridden
templates/configmap.yaml:
# my-api-gateway-chart/templates/configmap.yaml
apiVersion: v1
kind: ConfigMap
metadata:
  name: {{ include "my-api-gateway-chart.fullname" . }}-config
  labels:
    {{- include "my-api-gateway-chart.labels" . | nindent 4 }}
data:
  ADMIN_EMAIL: {{ .Values.gatewayConfig.adminEmail | quote }}
  APIPARK_AI_INTEGRATION: {{ .Values.apipark.aiModelIntegrationEnabled | quote }}
  APIPARK_DEFAULT_AI_ENDPOINT: {{ .Values.apipark.defaultAiModelEndpoint | quote }}
templates/deployment.yaml (snippet focusing on env and envFrom):
# my-api-gateway-chart/templates/deployment.yaml
# ...
      containers:
        - name: {{ .Chart.Name }}
          image: "{{ .Values.image.repository }}:{{ .Values.image.tag }}"
          imagePullPolicy: {{ .Values.image.pullPolicy }}
          env:
            - name: GATEWAY_RATE_LIMIT
              value: >-
                {{- if eq .Values.environment "production" }}
                {{ .Values.gatewayConfig.defaultRateLimit.production }}
                {{- else }}
                {{ .Values.gatewayConfig.defaultRateLimit.development }}
                {{- end }}
            - name: GATEWAY_LOGGING_LEVEL
              value: >-
                {{- if eq .Values.environment "production" }}
                {{ .Values.gatewayConfig.loggingLevel.production }}
                {{- else }}
                {{ .Values.gatewayConfig.loggingLevel.development }}
                {{- end }}
            - name: AUTH_SERVICE_URL
              value: >-
                {{- if eq .Values.environment "production" }}
                {{ .Values.gatewayConfig.authServiceUrl.production }}
                {{- else }}
                {{ .Values.gatewayConfig.authServiceUrl.development }}
                {{- end }}
            # Example of an environment variable for APIPark (if it consumed env vars for config)
            # This demonstrates how you might configure aspects of an API gateway solution.
            # For comprehensive API management, an open-source AI Gateway like [APIPark](https://apipark.com/)
            # offers unified API formats and AI invocation, making its configuration critical
            # for different environments.
            - name: APIPARK_MAX_AI_THREADS
              value: "10" # This would be an example specific to an AI gateway's performance tuning.
          envFrom:
            - configMapRef:
                name: {{ include "my-api-gateway-chart.fullname" . }}-config
          ports:
            - name: http
              containerPort: 80
              protocol: TCP
# ...
Deployment: * Development: helm install api-gateway-dev ./my-api-gateway-chart --set environment=development * Production: helm install api-gateway-prod ./my-api-gateway-chart --set environment=production
This setup allows a single Helm chart to deploy an api gateway that is tailored to specific environment requirements, adjusting its operational parameters and backend api interactions based on values.yaml.
Scenario 3: Database Connection Details for an Application
Securing and managing database credentials is a classic use case for Kubernetes Secrets and Helm. We want to avoid putting sensitive passwords in values.yaml.
Helm Chart Structure:
my-data-app-chart/
├── Chart.yaml
├── values.yaml
└── templates/
    └── deployment.yaml
values.yaml:
# my-data-app-chart/values.yaml
replicaCount: 1

image:
  repository: myrepo/data-processor
  tag: latest
  pullPolicy: IfNotPresent

database:
  host: "prod-db-instance.example.com"
  port: 5432
  username: "produser"
  # We assume a Kubernetes Secret named 'db-credentials-prod' exists
  # in the target namespace with keys 'username' and 'password'.
  # In a real-world scenario, you might also create this Secret with Helm
  # but with encrypted values (e.g., using helm-secrets).
  existingSecretName: "db-credentials-prod"
  passwordSecretKey: "password" # Key within the secret for the password
templates/deployment.yaml (snippet focusing on env from secretKeyRef):
# my-data-app-chart/templates/deployment.yaml
# ...
      containers:
        - name: {{ .Chart.Name }}
          image: "{{ .Values.image.repository }}:{{ .Values.image.tag }}"
          imagePullPolicy: {{ .Values.image.pullPolicy }}
          env:
            - name: DB_HOST
              value: "{{ .Values.database.host }}"
            - name: DB_PORT
              value: "{{ .Values.database.port | quote }}"
            - name: DB_USERNAME
              value: "{{ .Values.database.username }}"
            - name: DB_PASSWORD
              valueFrom:
                secretKeyRef:
                  name: {{ .Values.database.existingSecretName }}
                  key: {{ .Values.database.passwordSecretKey }}
          ports:
            - name: http
              containerPort: 8080
              protocol: TCP
# ...
Pre-requisite: A Kubernetes Secret must exist in the target namespace. Example Secret (base64 encoded password for supersecret123):
apiVersion: v1
kind: Secret
metadata:
  name: db-credentials-prod
stringData:
  username: "produser"
  password: "supersecret123"
Or, if using a values.yaml with helm-secrets:
# values.yaml (with helm-secrets)
database:
  existingSecretName: "db-credentials-prod"
  passwordSecretKey: "password"
  secretValues:
    password: ENC[AES256_GCM,data:...,iv:...,tag:...] # encrypted password
Deployment: helm install data-app ./my-data-app-chart
This ensures that the sensitive database password is never exposed in plaintext in your Helm chart or its values.yaml, leveraging Kubernetes Secrets for secure injection.
Table: Summary of Key Helm CLI Environment Variables
For quick reference, here's a table summarizing the most important Helm CLI environment variables we've discussed, along with their primary functions. This serves as a useful cheat sheet for managing Helm's own behavior.
| Environment Variable | Description | Default Value / Notes |
|---|---|---|
HELM_DEBUG |
Enables verbose debug output for Helm operations. | false |
HELM_NAMESPACE |
Overrides the target Kubernetes namespace for Helm operations. | Current Kubernetes context's namespace or chart-defined. |
HELM_KUBECONTEXT |
Specifies the Kubernetes context to use. | Current Kubernetes context. |
HELM_REGISTRY_CONFIG |
Path to the Helm OCI registry configuration file. | ~/.config/helm/registry.json (XDG) |
HELM_REGISTRY_USERNAME |
Username for OCI registry basic authentication. | None |
HELM_REGISTRY_PASSWORD |
Password for OCI registry basic authentication. | None |
HELM_DRIVER |
Configures the storage backend for Helm release information. | secret (stores in Kubernetes Secrets) |
HELM_PLUGINS |
Colon-separated paths to discover additional Helm plugin directories. | ~/.local/share/helm/plugins (XDG) |
HELM_NO_PLUGINS |
If set to true, prevents Helm from loading any plugins. |
false |
HELM_GENERATE_NAME |
If set to true, Helm will automatically generate a release name if not provided. |
false |
HELM_MAX_HISTORY |
Sets the maximum number of release revisions to keep. | 10 |
HELM_TIMEOUT |
Maximum time (duration string, e.g., "5m") Helm will wait for Kubernetes resources to become ready. | 300s (5 minutes) |
HELM_WAIT |
If set to true, Helm waits until all resources are in a ready state before marking release successful. |
false |
HELM_REPO_CACHE |
Path to the local directory where Helm stores cached chart repositories. | ~/.cache/helm/repository (XDG) |
These real-world examples and the summary table highlight the versatility and critical importance of environment variables in the Helm ecosystem. By strategically using them, developers and operators can create highly adaptable, secure, and efficient cloud-native deployments, whether for simple microservices or complex api gateway solutions, laying a strong foundation for robust application management.
Conclusion
The journey through the realm of default Helm environment variables reveals a critical facet of effective cloud-native application management. From providing dynamic configuration to containerized applications to influencing the very behavior of the Helm CLI, environment variables stand as a cornerstone of flexibility, automation, and security within the Kubernetes ecosystem. We've explored how Kubernetes inherently supports environment variable injection through various mechanisms like direct env fields, ConfigMaps, Secrets, and the Downward API, providing a rich substrate for application configuration.
Helm, as the Kubernetes package manager, elegantly abstracts and parameterizes these Kubernetes capabilities. Through its powerful Go templating engine, Helm charts allow developers to define sophisticated logic in values.yaml that dictates how environment variables are populated within deployed applications. This enables a single chart to serve multiple environments—development, staging, and production—each with its unique api endpoints, logging levels, or resource limits, purely by overriding values. This declarative approach vastly simplifies the management of api services, ensures consistent deployments of critical components like an api gateway, and fosters highly adaptable application architectures.
Furthermore, we delved into the comprehensive suite of HELM_ prefixed environment variables that directly govern the Helm CLI's operations. These variables empower users with granular control over Helm's internal workings, from debugging verbosity (HELM_DEBUG) and target namespace selection (HELM_NAMESPACE) to OCI registry authentication (HELM_REGISTRY_USERNAME/_PASSWORD) and release history management (HELM_MAX_HISTORY). Mastering these CLI-specific variables is indispensable for advanced automation, robust CI/CD pipelines, and efficient troubleshooting, transforming Helm from a simple deployment tool into a highly customizable and reliable orchestrator.
Crucially, the security implications of environment variables cannot be overstated. The principle of never hardcoding sensitive information and leveraging Kubernetes Secrets (ideally backed by external secret managers) is paramount. Careful attention to least privilege, environment variable visibility, and logging practices is essential to prevent accidental exposure of critical data, especially when dealing with api keys or authentication tokens that an api gateway might handle.
In essence, the intelligent use of environment variables, both for applications and for the Helm CLI itself, is a hallmark of mature cloud-native operations. It enables the creation of charts that are not only powerful and flexible but also secure, maintainable, and highly resilient. As the landscape of distributed systems continues to evolve, with increasing demands for dynamic configuration and intricate api integrations, the foundational understanding and adept application of Helm environment variables will remain an invaluable skill for any developer or operator navigating the complexities of Kubernetes. By embracing these practices, you lay a solid groundwork for scalable, secure, and efficient application deployments in the ever-expanding cloud-native world.
Frequently Asked Questions (FAQs)
1. What is the primary difference between setting environment variables directly in a deployment.yaml and using Helm's values.yaml?
While you can set environment variables directly within a deployment.yaml in Kubernetes, using Helm's values.yaml provides a layer of abstraction and parameterization. With values.yaml, you define configurable parameters (like api endpoints, logLevel, etc.) that are then templated into the deployment.yaml by Helm. This means you can reuse the same Helm chart for different environments (e.g., development, staging, production) simply by providing different values.yaml files or --set flags during helm install or helm upgrade, without modifying the underlying Kubernetes manifest templates. It centralizes configuration and promotes chart reusability.
2. How do HELM_NAMESPACE and the --namespace flag differ in their effect?
Both HELM_NAMESPACE environment variable and the --namespace flag achieve the same goal: specifying the target Kubernetes namespace for a Helm operation. The key difference lies in their scope and persistence. HELM_NAMESPACE sets a global default for your current shell session or for scripts, meaning every subsequent helm command in that session will target the specified namespace unless explicitly overridden. The --namespace flag, on the other hand, applies only to the specific command it's attached to. For automation and consistent behavior across multiple commands in a script, HELM_NAMESPACE is very useful. For one-off operations or overriding the default, --namespace is preferred.
3. What is the recommended way to handle sensitive data like API keys or database passwords with Helm?
The best practice is to never hardcode sensitive information directly into values.yaml or ConfigMap data. Instead, leverage Kubernetes Secrets. You can create Secrets manually, use a Helm chart to generate them (though this requires careful handling of encrypted values with tools like helm-secrets), or integrate with external secret managers (e.g., HashiCorp Vault, AWS Secrets Manager via an operator). Once the Secret exists, your Helm chart's deployment.yaml should use valueFrom.secretKeyRef or envFrom.secretRef to inject these values as environment variables into your application containers, ensuring the sensitive data remains encrypted at rest within Kubernetes and is not exposed in plaintext within your chart.
4. Can I use Helm environment variables to configure an API gateway like APIPark?
Yes, absolutely. An api gateway like APIPark is designed to be highly configurable, and if deployed via Helm, its various operational parameters—such as upstream api service URLs, authentication settings, rate limits, or specific AI model integration endpoints—can be robustly managed through environment variables. Helm charts would define these variables, pulling values from values.yaml (for non-sensitive settings) or Kubernetes Secrets (for sensitive api keys or credentials). This allows you to deploy APIPark or any api gateway with specific configurations tailored for different environments (e.g., development versus production), ensuring it routes traffic, manages API lifecycle, and handles AI invocations appropriately.
5. How can I debug issues related to environment variables not being correctly set in my Helm-deployed application?
There are several effective debugging steps: * Use helm template: Run helm template my-release ./my-chart --values my-values.yaml to render the final Kubernetes manifests. Inspect the deployment.yaml (or relevant resource) output to ensure the env or envFrom sections are correctly formed and contain the expected values/references. * Enable HELM_DEBUG: Set export HELM_DEBUG=true before running your helm install or helm upgrade command. This provides verbose output, including templating results and Kubernetes API interactions, which can highlight issues in how Helm is processing your chart. * Inspect the Deployed Pod: After deployment, use kubectl get pod <pod-name> -o yaml to examine the Pod's definition and confirm that the env section contains the correct environment variables as specified in your manifest. * Exec into the Container: For runtime verification, use kubectl exec -it <pod-name> -- env to list the environment variables actually visible inside the running container. Discrepancies between this output and the Pod's definition can indicate Kubernetes-level issues (e.g., missing ConfigMaps/Secrets).
🚀You can securely and efficiently call the OpenAI API on APIPark in just two steps:
Step 1: Deploy the APIPark AI gateway in 5 minutes.
APIPark is developed based on Golang, offering strong product performance and low development and maintenance costs. You can deploy APIPark with a single command line.
curl -sSO https://download.apipark.com/install/quick-start.sh; bash quick-start.sh

In my experience, you can see the successful deployment interface within 5 to 10 minutes. Then, you can log in to APIPark using your account.

Step 2: Call the OpenAI API.