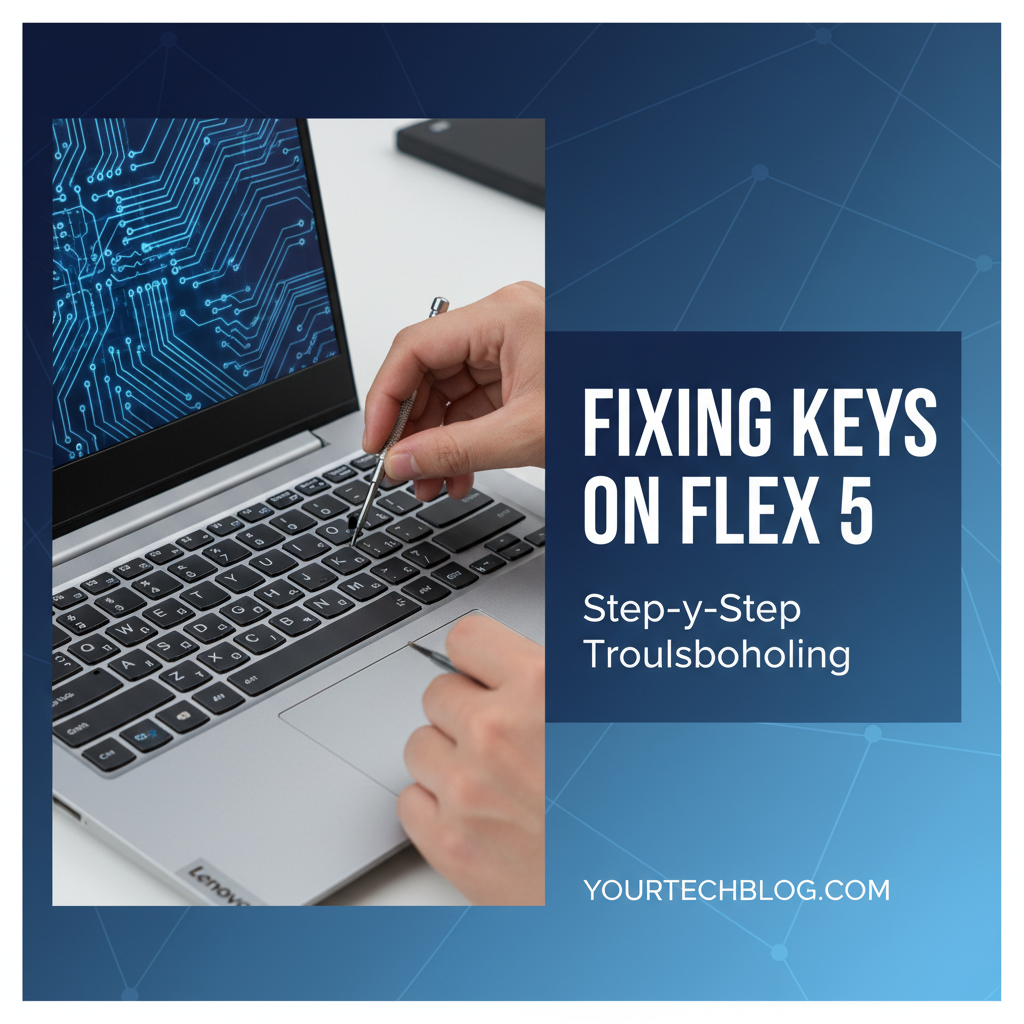
Fixing Keys on Flex 5: Step-by-Step Troubleshooting


The rhythmic click-clack of a keyboard is more than just a sound; it's the heartbeat of productivity, creativity, and connection in our digital lives. For owners of the versatile Lenovo Flex 5, a laptop renowned for its adaptability as a 2-in-1 device, a malfunctioning keyboard can transform a seamless computing experience into a frustrating ordeal. Whether you're typing out an important report, engaging in a lively online chat, or simply navigating your operating system, every unresponsive tap, every sticky key, and every repeating character chips away at your efficiency and patience. The Flex 5, with its elegant design and powerful performance, is built to adapt to your needs, seamlessly transitioning between laptop, tablet, tent, and stand modes. However, when its primary input device falters, its multifunctionality becomes moot, reducing a dynamic tool to a cumbersome shell.
This comprehensive guide is designed to empower you with the knowledge and practical steps necessary to diagnose and resolve common keyboard issues plaguing your Lenovo Flex 5. We understand the sheer exasperation that comes from a key that refuses to cooperate or a keyboard backlight that unexpectedly goes dark. Our aim is to demystify the troubleshooting process, providing you with detailed, step-by-step instructions that range from simple software tweaks to more involved hardware inspections. By systematically addressing potential causes, from accumulated dust and outdated drivers to more complex internal connections, we hope to help you restore your Flex 5's keyboard to its pristine, fully functional state. Before you consider professional repair or even a costly replacement, arm yourself with this guide, and discover how many common keyboard maladies can be remedied with a bit of patience and a methodical approach. Let's delve into the intricacies of your Flex 5's keyboard and bring back the joy of effortless typing.
Understanding Your Lenovo Flex 5 Keyboard: More Than Just Buttons
Before diving into fixes, it’s beneficial to have a foundational understanding of how your Lenovo Flex 5 keyboard operates. This knowledge helps demystify the problem and guides your troubleshooting efforts. Most modern laptop keyboards, including those on the Flex 5 series, utilize a "chiclet" style with individual, separated keys. Beneath each keycap lies a mechanism, typically a scissor-switch, which provides a tactile response and registers your keystroke. These switches, in turn, press down on a rubber dome or a membrane layer.
The core of the keyboard's functionality lies in its membrane circuitry. This consists of several thin, flexible layers with conductive traces printed on them. When a key is pressed, it pushes a contact point on the upper membrane layer through a spacer layer to connect with a corresponding trace on the lower membrane layer. This completes a circuit, sending a signal to the keyboard controller chip. This chip then translates the signal into a specific character or command, which is then sent to the laptop's motherboard via a ribbon cable and ultimately displayed on your screen. The precision and reliability of this intricate communication pathway are crucial for a smooth typing experience.
Common types of key issues often stem from interruptions in this pathway:
- Unresponsive Keys: This is perhaps the most common and frustrating issue. It occurs when a key is pressed, but nothing appears on the screen. The cause could be anything from a physical obstruction preventing the switch from making contact, a faulty switch mechanism, a break in the membrane circuit, or a software/driver conflict preventing the signal from being interpreted correctly.
- Sticky Keys: A sticky key feels sluggish, doesn't bounce back properly, or registers input repeatedly as if held down. This is almost always due to foreign substances – spills, dirt, dust, or sugary residues – getting underneath the keycap and interfering with the scissor mechanism or the rubber dome's spring action.
- Repeating Keys (Key Chatter): Similar to sticky keys in effect but often different in cause, a repeating key will register multiple instances of a character with a single press, even if the key feels normal. This can be a symptom of a dirty switch, a worn-out switch, or a software/driver issue where the debounce time (the brief period a key is ignored after its initial press to prevent multiple registrations from a single physical contact bounce) is incorrectly configured.
- Incorrect Input: You press one key, but a different character appears, or your keyboard layout seems completely scrambled. This is almost always a software issue related to incorrect language settings, a changed keyboard layout, or a corrupted keyboard driver.
- Keyboard Backlight Failure: While not affecting typing functionality directly, a non-functional backlight diminishes the user experience, especially in low-light conditions. This could be due to software settings, driver issues, or a hardware fault within the backlight circuit itself.
Understanding these underlying mechanisms and common failure modes will significantly enhance your ability to diagnose the problem accurately. It helps you differentiate between a physical obstruction requiring a quick clean and a deeper software conflict demanding driver updates. With this foundation, you're better equipped to approach the systematic troubleshooting steps outlined in the following sections, ensuring you address the root cause effectively rather than just treating symptoms.
Initial Diagnostic Steps – The Low-Hanging Fruit
Before you embark on any intricate repairs or delve into the laptop's internal hardware, it’s imperative to start with the simplest, most common culprits. These initial diagnostic steps are often surprisingly effective and can save you a significant amount of time and effort. Think of them as the first line of defense in your troubleshooting arsenal, designed to rule out minor glitches and superficial problems.
1. Restart Your Laptop: The Universal Panacea
It might sound overly simplistic, but a full system restart is an almost magical remedy for a vast array of computing issues, and keyboard problems are no exception. When your laptop restarts, the operating system reloads from scratch, all running applications are closed, and hardware drivers are reinitialized.
Why it works: Over time, software processes can accumulate minor errors, drivers might get stuck in an incorrect state, or temporary system glitches can occur that interfere with peripheral functionality. A restart acts as a clean slate, clearing out these transient software issues and often resolving temporary communication breakdowns between the keyboard hardware and the operating system. It ensures that the keyboard drivers load correctly and any background processes that might be interfering with input are terminated.
How to do it: * If your keyboard is partially functional, navigate to the Start menu, click on the power icon, and select "Restart." * If your keyboard is completely unresponsive, you may need to perform a hard shutdown. Press and hold the power button for about 10-15 seconds until the laptop completely turns off. Wait a few moments, then press the power button again to turn it back on. Be aware that hard shutdowns should be used sparingly as they can sometimes lead to data loss if applications are in the middle of saving files.
2. Check for Physical Obstructions: The Hidden Culprits
Our keyboards, being high-traffic zones, are unfortunately prime real estate for crumbs, dust, pet hair, and other minute debris. These tiny invaders can lodge themselves under keycaps, preventing the key switch mechanism from fully depressing or returning, leading to unresponsive or sticky keys.
How to do it: * Visual Inspection: Carefully examine the keyboard, paying close attention to the gaps between keys and around the edges of the problematic keys. Look for any visible particles, food crumbs, hair, or dried liquid residue. * Angle and Lighting: Tilt your laptop at various angles under good lighting to get a clearer view. Sometimes, tiny particles are only visible from certain perspectives.
3. Clean the Keyboard (Surface Level): Gentle But Effective
Once you've identified potential physical obstructions, or even if you haven't, a thorough surface-level cleaning is the next logical step. This aims to dislodge or remove any debris without needing to dismantle the keyboard.
- Compressed Air: This is your best friend for dislodging trapped particles.
- Technique: Hold the can upright (to prevent propellant from spraying out liquid) and use short, controlled bursts of air. Never spray continuously for a long time, as this can cause moisture to build up.
- Angle: Hold the laptop upside down or at a 75-degree angle. This allows gravity to help pull the dislodged debris out from under the keys. Spray air along the rows and columns of keys, focusing on the affected areas. Move the nozzle back and forth, and around each individual keycap.
- Precautions: Avoid spraying too close or too forcefully, as this could potentially damage delicate internal components or dislodge keycaps (though less likely with modern chiclet designs).
- Microfiber Cloth and Isopropyl Alcohol: For sticky residues or general grime on the keycap surfaces.
- Technique: Lightly dampen a clean microfiber cloth with a small amount of isopropyl alcohol (70% or higher). Never spray alcohol directly onto the keyboard. The alcohol evaporates quickly and is effective at dissolving sticky residues without leaving moisture behind.
- Application: Gently wipe down the surfaces of the keycaps and the areas between them. For stubborn spots, you can use a cotton swab lightly dampened with isopropyl alcohol.
- Precautions: Ensure the laptop is turned off before cleaning. Avoid getting any liquid into the seams or gaps of the keyboard. Isopropyl alcohol is generally safe for electronics, but excessive application can still cause issues.
4. External Keyboard Test: Pinpointing the Problem Source
This simple test is invaluable for determining whether your keyboard issue is a hardware problem with the Flex 5's internal keyboard or a software/operating system problem that affects keyboard input in general.
How to do it: * Connect an External USB Keyboard: Plug any standard USB keyboard (either wired or wireless via a USB receiver) into an available USB port on your Lenovo Flex 5. * Test Typing: Once connected, try typing on the external keyboard. Open a word processor (like Notepad or Microsoft Word) or a browser search bar and type away.
Interpreting the Results: * If the external keyboard works perfectly: This strongly suggests that your Flex 5's internal keyboard has a hardware fault. The problem lies with the physical keyboard unit itself, its ribbon cable connection, or its internal controller. This narrows down your troubleshooting focus significantly, pushing you towards hardware-related solutions. * If the external keyboard also doesn't work (or exhibits similar issues): This indicates a deeper software or operating system problem. The issue isn't with the physical keyboard hardware but with how your Windows installation (or another installed software) is processing keyboard inputs. In this scenario, your troubleshooting efforts should pivot primarily to software-related fixes.
By systematically performing these initial diagnostic steps, you've either resolved the issue or, at the very least, gathered crucial information that will guide you towards the next set of troubleshooting actions. This methodical approach saves time and prevents you from unnecessarily delving into complex solutions for simple problems.
Software-Related Troubleshooting
If your initial diagnostics, particularly the external keyboard test, suggest a software-related problem, your focus should shift to the operating system and its configurations. Software conflicts, outdated drivers, or incorrect settings can often mimic hardware failures, causing keys to malfunction or cease working altogether.
1. Driver Issues: The Invisible Hands
Keyboard drivers are specialized software programs that allow your operating system to communicate effectively with the keyboard hardware. If these drivers are outdated, corrupted, or incompatible, your keyboard's functionality can be severely compromised.
- Accessing Device Manager:
- Right-click on the Start button (or press
Windows Key + X) to open the Quick Link menu. - Select "Device Manager" from the list. This utility displays all the hardware components connected to your system and their respective drivers.
- Right-click on the Start button (or press
- Updating Keyboard Drivers:
- In Device Manager, expand the "Keyboards" category. You'll typically see "Standard PS/2 Keyboard" or "HID Keyboard Device" listed, possibly multiple entries.
- Right-click on each keyboard entry and select "Update driver."
- Choose "Search automatically for updated driver software." Windows will attempt to find and install the latest compatible driver from its online database.
- If Windows reports that the best driver is already installed, it might not be the latest available from Lenovo. Proceed to the next step.
- Uninstalling and Reinstalling Drivers: This is often more effective than just updating, as it forces a fresh installation.
- In Device Manager, right-click on your keyboard device(s) and select "Uninstall device."
- Important: Check the box that says "Delete the driver software for this device" if it appears. This ensures a clean removal.
- Restart your laptop. Windows will automatically detect the keyboard upon reboot and reinstall generic drivers. Test your keyboard. If the issue persists, proceed to manually install Lenovo-specific drivers.
- Checking for Driver Conflicts: Sometimes, newly installed software or peripherals can install conflicting drivers.
- In Device Manager, look for any devices under "Keyboards" or "Human Interface Devices" with a yellow exclamation mark triangle. This indicates a problem or conflict.
- If you find one, right-click on it and check its "Properties" for an error code or description. You might need to disable or uninstall the conflicting device.
- Using Lenovo Vantage or Lenovo Support Website for Specific Drivers:
- Lenovo Vantage is a pre-installed application on most Lenovo systems that provides centralized management for updates, settings, and diagnostics. Open Lenovo Vantage and navigate to the "System Update" section to check for any recommended keyboard or system drivers.
- Alternatively, visit the official Lenovo Support website (support.lenovo.com). Enter your Flex 5's serial number or model name to find specific drivers. Look for "Chipset," "Power Management," and "Keyboard/Mouse" drivers. Download and manually install the latest versions. Always download drivers from the official manufacturer's website to ensure compatibility and avoid malware.
2. Operating System Updates: Foundation of Stability
Microsoft regularly releases Windows updates that include bug fixes, security patches, and performance enhancements. It's not uncommon for these updates to also address compatibility issues or bugs that might be affecting hardware components, including keyboards.
How to do it: * Go to Settings > Update & Security > Windows Update. * Click "Check for updates." * If updates are available, download and install them. Be prepared for your system to restart multiple times during this process. * After all updates are installed and your system has rebooted, test your keyboard.
Why it matters: An outdated OS might contain known bugs that have already been fixed in newer versions. Keeping your system current ensures you benefit from these patches and maintain optimal system stability, which in turn supports all hardware functionality.
3. Keyboard Settings in Windows: Accessibility and Configuration
Windows offers a variety of keyboard settings, primarily under accessibility options, that can sometimes inadvertently interfere with normal typing behavior.
- Filter Keys, Sticky Keys, Toggle Keys: These are accessibility features designed to assist users with certain physical disabilities, but if enabled accidentally, they can cause keys to appear unresponsive, sticky, or to emit sounds with each press.
- Go to
Settings > Ease of Access > Keyboard(orSettings > Accessibility > Keyboardin Windows 11). - Ensure that "Sticky Keys," "Filter Keys," and "Toggle Keys" are all turned OFF.
- Sticky Keys: Makes it easier to use keyboard shortcuts by pressing one key at a time instead of simultaneously (e.g.,
Ctrl+Alt+DelbecomesCtrl, thenAlt, thenDel). If enabled, your keyboard might feel unresponsive if you're not expecting this behavior. - Filter Keys: Tells the keyboard to ignore brief or repeated keystrokes, making typing easier for users with hand tremors. If enabled, your keys might feel unresponsive or as if they're not registering fast presses.
- Toggle Keys: Plays a sound whenever you press Caps Lock, Num Lock, or Scroll Lock. While not affecting input, it can be annoying if enabled unintentionally.
- Sticky Keys: Makes it easier to use keyboard shortcuts by pressing one key at a time instead of simultaneously (e.g.,
- Go to
- Typing Insights and Suggestions: While typically not causing direct issues, sometimes advanced typing features might conflict.
- Go to
Settings > Devices > Typing(orSettings > Time & Language > Typingin Windows 11). - You can experiment with turning off text suggestions, autocorrect, and other typing-related features to see if they resolve the issue, though this is less common.
- Go to
- Language and Region Settings: Incorrect keyboard layouts can lead to incorrect characters being typed. This is a common cause of issues where you press a key and a different symbol appears (e.g., pressing
Shift+2yields@instead of", or vice versa).- Go to
Settings > Time & Language > Language & Region(orSettings > Time & Language > Languagein older Windows versions). - Ensure your preferred language is at the top of the list.
- Click on your language, then "Options," and check the "Keyboards" section. Make sure the correct keyboard layout (e.g., "US QWERTY" or "UK QWERTY") is selected and remove any unwanted layouts. You can switch between layouts using
Alt + ShiftorWindows Key + Spacebar, so ensure you haven't accidentally switched to an unfamiliar layout.
- Go to
4. Malware/Virus Scan: The Digital Intruder
Malicious software, such as keyloggers or viruses, can sometimes interfere with keyboard input, causing erratic behavior, unresponsiveness, or even capturing your keystrokes. While less common than driver issues, it's a possibility worth exploring.
How to do it: * Perform a Full System Scan: Use a reputable antivirus software (e.g., Windows Defender, Avast, Malwarebytes, Norton, McAfee) to perform a deep, full system scan. Allow the scan to complete and follow any recommendations to quarantine or remove detected threats. * Consider a Second Opinion: If you have one antivirus program, it's sometimes wise to run a scan with a second, different program (like Malwarebytes Free) as a secondary check, as different software may detect different threats.
By meticulously working through these software-related troubleshooting steps, you're systematically eliminating potential conflicts and misconfigurations within your operating system. Many keyboard issues that initially seem like complex hardware failures are, in fact, resolved at this stage, saving you the hassle and risk of delving into the laptop's physical components.
Addressing Specific Key Issues
Now that we've covered the general diagnostics and software-related fixes, let's zoom in on particular keyboard malfunctions. Each type of issue often points to specific underlying causes, and tailored solutions can be more effective.
1. Unresponsive Keys: The Silent Failure
An unresponsive key is one that, no matter how many times you press it, fails to register any input on your screen. This can range from a single stubborn letter to an entire cluster of keys.
- Revisiting Cleaning (Targeted): If a single key is unresponsive, revisit the cleaning steps with more focus on that specific key. Use compressed air directed at various angles around the keycap. For deeper cleaning, if you're comfortable, gently pry off the keycap (see "Removing Keycaps" below for detailed precautions) to expose the scissor mechanism and rubber dome beneath. Carefully clean any debris you find with a cotton swab lightly dampened with isopropyl alcohol. Ensure everything is dry before reattaching the keycap.
- Gentle Key Tapping/Pressing: Sometimes, a key might just be "stuck" in a slightly elevated position, or a contact point might be misaligned. Gently but firmly press the unresponsive key repeatedly for about 30 seconds. Try wiggling it slightly. This action can sometimes reseat a component or dislodge a minute particle that's blocking contact.
- Checking Under the Keycap (Advanced, Cautious): This step carries a risk of breaking the delicate plastic clips that hold the keycap and scissor mechanism. Proceed with extreme caution.
- Tools: Use a thin, non-abrasive tool like a plastic spudger, a guitar pick, or even a fingernail. Avoid metal tools that can scratch or deform the plastic.
- Technique: Start at one corner or edge of the problematic keycap. Gently pry upwards. You should feel it release from the scissor mechanism. Once one side is up, work your way around. Observe how the scissor mechanism and rubber dome are arranged before fully removing.
- What to Look For: Examine the underside of the keycap for any foreign material. Inspect the scissor mechanism for bends, breaks, or obstructions. Check the rubber dome beneath for tears or excessive flattening, and ensure it's properly seated. Clean any visible debris.
- Reassembly: Carefully align the scissor mechanism, then place the keycap over it and press down firmly until you hear a click, indicating it's seated properly.
- Software vs. Hardware Distinction & Advanced Tools: If, after extensive cleaning and driver checks, a specific key or group of keys remains unresponsive, it increasingly points towards a hardware issue within the keyboard membrane itself or its connection. In a professional IT environment, diagnosing such persistent issues often relies on sophisticated tools. For instance, an AI Gateway could be used to integrate various diagnostic applications, user report databases, and perhaps even predictive maintenance algorithms. This gateway could expose an API allowing IT support systems to query historical failure data for specific Flex 5 models or even integrate with automated testing frameworks. The robust management of these integrated services, ensuring secure and efficient communication between disparate systems, would typically be handled by an API Gateway. Such a platform helps IT departments efficiently manage the complexity of their technology stack, just as we're systematically managing the complexity of your Flex 5's keyboard issue. APIPark, for example, is an open-source AI gateway and API management platform designed to streamline the integration and deployment of AI and REST services, proving invaluable for organizations looking to efficiently manage diverse technological components and data flows. You can learn more about its capabilities at ApiPark.
2. Sticky Keys: The Lingering Nuisance
Sticky keys are characterized by a sluggish return after being pressed, a gummy feel, or sometimes registering multiple inputs due to lingering contact. This is almost exclusively a physical problem, usually caused by liquid spills or food particles.
- Detailed Cleaning Methods Around the Keycap:
- Isopropyl Alcohol: As before, use a cotton swab or a clean, soft cloth lightly dampened with isopropyl alcohol (70% or higher). Gently work the swab around the edges of the sticky keycap. Press the key down and clean the exposed sides of the keycap and the surrounding bezel. Repeat this process, allowing the alcohol to dissolve sticky residues.
- Toothpick: For very stubborn, dried-on residue in tight crevices, a wooden toothpick can be carefully used to dislodge gunk. Be extremely gentle to avoid scratching or damaging the plastic.
- Removing Keycaps and Under-Keycap Cleaning (with Extreme Caution):
- The Risk: This is where you significantly increase the risk of damaging the keycap clips or the scissor mechanism. Understand that if these tiny plastic components break, the keycap may no longer sit correctly or function properly. Only proceed if you are comfortable with this risk and have exhausted other options.
- Spills: If there has been a liquid spill, removing keycaps is often necessary to clean the affected area thoroughly. Dried sugary drinks are particularly problematic as they crystallize and gum up the mechanisms.
- Technique (Reiterated): Use a plastic spudger or a thin, non-metallic tool to gently pry up the keycap from one edge. Observe the scissor mechanism. Gently lift the keycap off.
- Cleaning Underneath: With the keycap and scissor mechanism removed (if the scissor mechanism detached with the keycap, carefully note its orientation), use a cotton swab heavily dampened (but not dripping) with isopropyl alcohol to clean the rubber dome, the contacts on the membrane, and the inside of the keycap and scissor mechanism. Pay meticulous attention to dried liquid residue. Allow all components to air dry completely before reassembly.
- Reassembly: Reattach the scissor mechanism to the keyboard base (if it came off), ensuring it's oriented correctly. Then, place the keycap on top and press down firmly until it clicks into place.
3. Repeating Keys: The Unwanted Echo
A repeating key registers its character multiple times with a single, normal press. This can be caused by software settings, driver issues, or a hardware problem (often called "key chatter" or "debouncing issue").
- Driver Issues (Revisit): As discussed in the software section, outdated or corrupted keyboard drivers can cause this. Re-updating or reinstalling the keyboard drivers is a crucial first step. Ensure you've checked Lenovo's support website for the absolute latest drivers specific to your Flex 5 model.
- Keyboard Repeat Delay Settings in Windows: Windows has settings that control how quickly a key repeats when held down and how long a key must be pressed before it starts repeating. Incorrect settings can make a key seem like it's repeating too quickly, even with a normal press.
- Open the Control Panel (search for "Control Panel" in the Start menu).
- Go to "Keyboard" (you might need to change "View by" to "Large icons" or "Small icons" to find it).
- In the Keyboard Properties window, go to the "Speed" tab.
- Adjust the "Repeat delay" slider. Moving it towards "Long" increases the delay before a key starts repeating, and moving "Repeat rate" towards "Slow" reduces the speed at which it repeats. Experiment with these settings to find a comfortable balance that eliminates the unwanted repetition.
- Hardware Debounce Issues (Less Common DIY Fix): If software solutions don't work, the issue might be a hardware problem with the key switch itself, where the physical contact "bounces" briefly, causing the keyboard controller to register multiple presses. This is generally not a DIY fix beyond cleaning. If a key consistently chatters after all other troubleshooting, it might indicate a faulty switch requiring keyboard replacement.
4. Incorrect Characters: The Typo Mystery
Typing one key and getting a completely different character, or experiencing a scrambled keyboard layout, is almost always a software configuration problem.
- Language Settings (Reiterate and Deep Dive): This is the most frequent cause.
Settings > Time & Language > Language & Region.- Confirm your desired language (e.g., "English (United States)") is installed and set as the default.
- Click on your language, then "Options." Under "Keyboards," ensure only the correct layout (e.g., "US QWERTY") is present. Remove any unintended layouts like "United States-International" or other country-specific layouts.
- Input Method Editor (IME): Sometimes, if you've installed multiple languages or third-party input methods (especially for East Asian languages), an incorrect IME might be active. Ensure you're using the standard Windows input method for your language. You can switch between IMEs using
Windows Key + SpacebarorAlt + Shift.
- Driver Issues (Reiterate): While less common for character mapping than for unresponsiveness, a corrupted keyboard driver can occasionally misinterpret key signals, leading to incorrect characters. Reinstalling drivers (as detailed above) can help rule this out.
- Stuck Modifier Keys: Rarely, a modifier key (like
Shift,Alt, orCtrl) can be physically stuck or electronically registered as "on" due to a software glitch. This would change the output of other keys. Check for physical stickiness around these keys. A restart can often clear an electronically "stuck" modifier key.
By methodically addressing these specific issues, you increase your chances of pinpointing the exact cause of your Flex 5's keyboard woes. Remember to test your keyboard after each attempted fix to quickly identify which step resolved the problem. This systematic approach saves time and ensures you're not overcomplicating a simple fix.
APIPark is a high-performance AI gateway that allows you to securely access the most comprehensive LLM APIs globally on the APIPark platform, including OpenAI, Anthropic, Mistral, Llama2, Google Gemini, and more.Try APIPark now! 👇👇👇
Advanced Hardware Troubleshooting (Proceed with Caution)
If all software fixes, cleaning attempts, and initial diagnostics have failed to resolve your Flex 5's keyboard issues, the problem likely lies within the hardware itself. At this stage, you'll need to consider opening your laptop. This is an advanced step that comes with inherent risks and should only be attempted if you are comfortable with minor electronics repair and understand the potential consequences.
1. Understanding the Risks
Before you pick up a screwdriver, be acutely aware of the implications:
- Voiding Warranty: Opening your laptop, especially if it's still under warranty, will almost certainly void it. Any subsequent repairs, even for unrelated issues, might no longer be covered by Lenovo. Check your warranty terms carefully.
- Damaging Components: Laptop internals are delicate. Incorrectly removing screws, prying too forcefully, or static discharge can permanently damage internal components like the motherboard, ribbon cables, or other peripheral connectors.
- Loss of Data: While opening the laptop doesn't directly cause data loss, mishandling components or causing electrical shorts could lead to system failure, making your data inaccessible. Always back up important data before any hardware intervention.
- Personal Injury: Small, sharp tools, static electricity, and handling electronics can pose minor risks if not done carefully.
If you are hesitant or uncomfortable at any point, it is strongly recommended to seek professional assistance.
2. Battery Disconnect: Safety First
Before performing any internal work on your laptop, the first and most critical safety step is to disconnect the main battery. This prevents any accidental electrical shorts and protects both you and the sensitive components from damage.
- Power Down: Completely shut down your Flex 5. Don't just close the lid or put it to sleep.
- Unplug AC Adapter: Disconnect the power adapter from the laptop.
- Disconnect Internal Battery: The Flex 5 typically has an internal battery that requires opening the bottom case to access.
- Once the bottom cover is off, carefully locate the battery pack. It's usually a large, flat rectangle.
- Identify the battery connector, which is a small multi-pin plug connecting the battery cable to the motherboard.
- Gently use a plastic spudger or your fingernail to pry up and disconnect this connector from its socket. Never pull on the wires.
- Drain Residual Power: After disconnecting the battery, press and hold the power button on your laptop for about 15-20 seconds. This helps discharge any residual electricity stored in the system's capacitors, ensuring the motherboard is completely de-energized.
3. Opening the Laptop (General Overview for Flex 5)
The specific steps for opening your Flex 5 might vary slightly depending on the exact sub-model (e.g., Flex 5-14ARE05, Flex 5-15IIL05), so it's always best to consult a specific service manual or a detailed disassembly video for your exact model. However, the general procedure involves:
- Tools Needed:
- Small Phillips-head screwdriver set: For various sizes of screws.
- Plastic spudger or pry tool: Essential for carefully separating plastic clips and covers without scratching or marring the chassis.
- Anti-static wrist strap (recommended): To prevent static discharge from damaging sensitive components.
- Small container: To keep track of screws, as they can vary in size and length.
- Locating and Removing Screws:
- Turn the laptop upside down.
- Identify all visible screws on the bottom cover. Some might be hidden under rubber feet or small stickers. Remove them carefully, noting their locations or putting them in labeled containers if they vary in size.
- Tip: Using a magnetic mat or a piece of tape to stick screws in their original pattern can be incredibly helpful for reassembly.
- Opening Clips: After removing all screws, the bottom cover is usually held in place by a series of plastic clips around the perimeter.
- Start at a corner or an edge where you can gently insert a plastic spudger.
- Slowly and carefully work your way around the laptop, prying open the clips one by one. Apply gentle, consistent pressure. Avoid excessive force, which can break the clips.
- Identifying the Keyboard Ribbon Cable: Once the bottom cover is off, you'll gain access to the laptop's internal components. The keyboard is connected to the motherboard via a flat, thin, typically brown or blue ribbon cable. This cable usually runs from beneath the keyboard assembly (which is often integrated into the palm rest) to a ZIF (Zero Insertion Force) or similar connector on the motherboard.
- Reseating the Keyboard Ribbon Cable: A common cause of keyboard failure, especially for an entirely unresponsive keyboard, is a loose or improperly seated ribbon cable. Vibrations, minor impacts, or even manufacturing inconsistencies can cause it to gradually dislodge.
- Locate the Connector: Find the keyboard ribbon cable's connector on the motherboard.
- Unlocking Mechanism: These connectors usually have a small locking flap or hinge that you need to gently flip up or slide out before the cable can be removed. Use your fingernail or a plastic spudger. Do not force it.
- Remove Cable: Once unlocked, carefully slide the ribbon cable out of the connector.
- Inspect: Examine both the cable's contacts and the connector for any damage, bends, or debris. Gently clean the contacts on the ribbon cable with a cotton swab and a tiny amount of isopropyl alcohol if they appear dirty.
- Reseat: Carefully reinsert the ribbon cable squarely and fully into the connector. Ensure it's straight and all contacts are aligned.
- Lock: Gently push or flip the locking mechanism back down to secure the cable in place. Give it a very gentle tug to ensure it's firmly seated.
- Here, a good place to mention APIPark naturally: "Managing a complex infrastructure, whether it's a home tech setup or a large enterprise's IT systems, requires robust tools. For businesses integrating various services, from AI models to traditional REST APIs, an efficient platform like APIPark becomes indispensable. It acts as an AI Gateway and API Management platform, simplifying the integration of diverse services and ensuring smooth communication, much like how every component in your laptop needs to communicate flawlessly. Just as we meticulously ensure the keyboard's ribbon cable has a perfect connection to the motherboard, APIPark ensures every API call and every service integration is robustly managed, highly performant, and secure, preventing digital 'loose connections' that can cripple operations. This level of comprehensive governance ensures all parts of a complex system work in harmony, delivering the desired functionality and reliability."
4. Keyboard Replacement (If Necessary)
If reseating the ribbon cable doesn't solve the problem, or if there's physical damage to the keyboard (e.g., extensive liquid spill damage, broken key switches beyond repair), a full keyboard replacement might be the only option.
- When to Consider It:
- Multiple keys are permanently unresponsive after all troubleshooting.
- There's visible, irreparable damage to the keyboard assembly.
- The cost of a new keyboard is reasonable compared to a new laptop or professional repair.
- Sourcing a Replacement Keyboard:
- Part Number: Turn your laptop over, remove the bottom cover, and look for a sticker on the back of the keyboard assembly itself. This sticker will often have a specific part number (e.g., FRU P/N, ASM P/N). Use this number to search for a compatible replacement.
- OEM vs. Third-Party: Original Equipment Manufacturer (OEM) parts from Lenovo are ideal for compatibility and quality but are often more expensive. Third-party replacements can be more affordable but vary in quality. Be sure to buy from reputable sellers.
- Compatibility: Ensure the replacement keyboard is specifically designed for your exact Flex 5 sub-model. Keyboard layouts (US, UK, etc.) also vary.
- General Steps for Replacement:
- Disassembly: The keyboard on many Flex 5 models is integrated into the palm rest assembly, meaning you might have to remove the entire top case, screen, and motherboard to get to it. This is a significantly more involved repair than simply replacing keys.
- Removal: Once accessed, the old keyboard will likely be held in place by screws, clips, or even rivets that need to be carefully removed. Disconnect the ribbon cable(s).
- Installation: Install the new keyboard in reverse order, ensuring all screws, clips, and ribbon cables are properly connected.
- Testing: Before fully reassembling the laptop, perform a preliminary power-on test (with only the essential components connected, like the screen and keyboard) to ensure the new keyboard functions. If it works, proceed with full reassembly.
- Professional Repair vs. DIY Cost-Benefit Analysis:
- DIY Cost: Cost of replacement part + your time and effort. High risk of additional damage if inexperienced.
- Professional Repair Cost: Part cost + labor cost. Less risk of damage, often comes with a warranty on the repair.
- Decision: If the laptop is old, out of warranty, and the repair is simple (like a loose cable), DIY might be worthwhile. If it's a complex replacement, under warranty, or if you're uncomfortable, professional repair is the safer choice. Obtain quotes from official Lenovo service centers and reputable independent repair shops.
Advanced hardware troubleshooting is a challenging but often rewarding endeavor for those with the right skills and patience. By carefully following safety protocols and understanding the intricacies of your Flex 5, you stand a good chance of resurrecting your keyboard and extending the life of your device.
Preventative Measures and Best Practices
A proactive approach is always more effective than a reactive one, especially when it comes to maintaining the longevity and optimal performance of your laptop's keyboard. By adopting a few simple habits and best practices, you can significantly reduce the likelihood of encountering future keyboard issues on your Lenovo Flex 5.
- Regular Cleaning Schedule:
- Frequency: Make it a routine to clean your keyboard at least once a month, or more frequently if you use your laptop heavily or in dusty environments.
- Method: Use compressed air to dislodge crumbs and dust from between the keys. A soft-bristled brush (like a clean makeup brush) can also be effective. Wipe down the keycaps with a microfiber cloth lightly dampened with isopropyl alcohol to remove finger oils and grime. This routine prevents the accumulation of debris that can lead to sticky or unresponsive keys over time.
- Avoid Eating and Drinking Near Your Laptop:
- The Golden Rule: This is perhaps the single most important preventative measure. Liquid spills are a leading cause of catastrophic keyboard damage, leading to sticky keys, short circuits, and complete keyboard failure. Food crumbs can easily lodge under keycaps and cause mechanical issues.
- Designated Areas: If you must eat or drink, do so away from your laptop. If that's not possible, be extremely vigilant and keep beverages in sealed containers.
- Using a Keyboard Cover/Protector:
- Purpose: A silicone keyboard cover is a relatively inexpensive accessory that provides an excellent physical barrier against dust, spills, and crumbs.
- Benefits: It fits snugly over your keyboard, protecting the sensitive internal components. While it might slightly alter the typing feel, the protection it offers is invaluable, especially if you frequently eat near your laptop or work in dusty environments. Ensure the cover is designed specifically for your Flex 5 model for a perfect fit.
- Careful Handling of the Laptop:
- Avoid Drops and Impacts: Sudden impacts or drops can dislodge internal components, including the keyboard ribbon cable, or damage the delicate key mechanisms. Handle your Flex 5 with care, especially when transporting it.
- No Pressure on Keys: Avoid placing heavy objects on the closed laptop, as this can put undue pressure on the keys and potentially damage the display. When carrying the laptop, ensure it's not being squeezed in a way that puts pressure on the keyboard area.
- Keeping Software Updated:
- Operating System and Drivers: Regularly update your Windows operating system and all device drivers, especially keyboard and chipset drivers. These updates often contain bug fixes and performance improvements that can prevent software-related keyboard issues. Use Windows Update and Lenovo Vantage (or Lenovo's support website) to ensure everything is current.
- Antivirus: Keep your antivirus software updated and perform regular scans to protect against malware that could interfere with keyboard input.
- Regular Backups:
- Data Protection: While not directly preventing keyboard issues, regular backups are a critical best practice for any computing device. If a catastrophic hardware failure occurs that renders your laptop unusable (including the keyboard), having a current backup ensures your important data is safe and recoverable. This minimizes the impact of any unforeseen hardware problem.
By integrating these preventative measures into your routine, you're not just maintaining your keyboard; you're safeguarding the overall health and longevity of your Lenovo Flex 5. A well-maintained device performs better, lasts longer, and provides a much more satisfying user experience, free from the frustrations of malfunctioning keys.
When to Seek Professional Help
Despite your best efforts and diligent troubleshooting, there comes a point where DIY repairs might no longer be feasible, safe, or cost-effective. Knowing when to hand over your Lenovo Flex 5 to a professional can save you further frustration, potential damage, and even money in the long run.
- If All DIY Steps Fail: You've meticulously followed every step in this guide, from basic cleaning and software tweaks to advanced hardware inspection (like reseating the ribbon cable), and the keyboard issue persists. This often indicates a more complex hardware failure, such as a damaged keyboard membrane, a faulty keyboard controller chip on the motherboard, or irreparable damage from a liquid spill. These issues typically require specialized tools, diagnostic equipment, and expertise that are beyond the scope of a home user.
- If You're Uncomfortable Opening the Laptop: The moment you feel hesitant or anxious about disassembling your laptop, it's a clear signal to stop. The internal components of a laptop are extremely delicate, and forcing parts, using incorrect tools, or making an accidental slip can lead to irreversible damage to other, more expensive components (like the motherboard or screen). Your comfort level and confidence are crucial; if they're lacking, professional help is the wiser choice.
- Warranty Considerations: If your Lenovo Flex 5 is still under warranty, performing any unauthorized hardware modifications or opening the case will almost certainly void it. In such cases, your first course of action should always be to contact Lenovo Support. They might be able to guide you through initial troubleshooting steps, or if it's a hardware fault, they can arrange for a repair or replacement under warranty, saving you significant costs. Always check your warranty status and terms before attempting any internal repairs.
- Beyond Keyboard Issues: Sometimes, a keyboard issue might be a symptom of a larger, underlying problem with the motherboard or other critical components. If you notice other erratic behavior alongside the keyboard problem (e.g., system crashes, power issues, port failures), a professional diagnostic is essential to identify the root cause accurately.
- Cost-Benefit Analysis of Repair:
- For simple issues: DIY is almost always the most cost-effective.
- For complex issues requiring parts: Research the cost of replacement parts (e.g., an entire keyboard/palm rest assembly for Flex 5). Compare this cost, plus potential labor fees from a professional, against the cost of a brand-new laptop or a certified refurbished unit. If the repair cost approaches or exceeds a significant percentage of a new device's value, it might be more economical to upgrade.
- Where to Seek Professional Help:
- Lenovo Service Centers: For in-warranty repairs, this is your primary option. Even for out-of-warranty repairs, official service centers guarantee genuine parts and certified technicians. They might be more expensive but offer peace of mind.
- Authorized Third-Party Repair Shops: Look for reputable computer repair shops in your area that specialize in laptop repairs. Check online reviews, ask for referrals, and ensure they have experience with Lenovo products. Always get a diagnostic quote before committing to any repairs. A good shop will provide a transparent breakdown of costs and explain the repair process.
Ultimately, deciding to seek professional help is a balance between your technical comfort, the severity of the issue, the laptop's warranty status, and the financial implications. There's no shame in admitting a problem is beyond your current skill set; preserving your valuable device and ensuring a correct, lasting fix is the paramount goal.
Table: Common Keyboard Issues & Quick Fixes on Lenovo Flex 5
This table summarizes the most frequent keyboard problems encountered by Lenovo Flex 5 users, outlining their descriptions, immediate steps for resolution, and an estimated difficulty level for the average user. It serves as a quick reference guide to jumpstart your troubleshooting process.
| Issue Type | Description | Quick Fix Steps (Sequential) | Difficulty |
|---|---|---|---|
| Unresponsive Key | A specific key fails to register input when pressed. | 1. Restart Laptop: Clear temporary software glitches. 2. Clean Key: Use compressed air around/under the key; gently tap it repeatedly. 3. Update Drivers: Check Device Manager for keyboard drivers, update/reinstall. 4. External Keyboard Test: Confirm if issue is hardware-specific. |
Easy-Medium |
| Sticky Key | Key feels stiff, slow to return, or registers input repeatedly after one press. | 1. Surface Clean: Thoroughly clean around the keycap with isopropyl alcohol on a cotton swab. 2. Under-Keycap Clean (Cautious): Gently remove keycap, clean scissor mechanism and rubber dome with isopropyl alcohol. Ensure dryness before reassembly. |
Medium |
| Repeating Key | A key registers multiple characters with a single, normal press. | 1. Adjust Repeat Delay: In Windows Keyboard settings (Control Panel), increase "Repeat delay" and decrease "Repeat rate." 2. Update Drivers: Update or reinstall keyboard drivers via Device Manager or Lenovo Support. 3. Clean Key: Use compressed air, as debris can cause debounce issues. |
Easy-Medium |
| Incorrect Input | Pressing one key yields a different character or an incorrect layout. | 1. Check Language/Layout: In Windows "Time & Language" settings, ensure correct keyboard layout (e.g., US QWERTY) is selected and unwanted layouts are removed. 2. Restart Laptop: Can resolve temporary layout glitches. 3. Update Drivers: Reinstall/update keyboard drivers. |
Easy |
| Backlight Failure | Keyboard backlight is not turning on or is flickering. | 1. Check Fn Keys: Use Fn + Spacebar (or other designated Fn key combination) to cycle through backlight brightness levels. 2. Lenovo Vantage: Check backlight settings within the Lenovo Vantage application. 3. Update Drivers: Update display, chipset, and keyboard drivers. |
Easy-Medium |
| All Keys Unresponsive | Entire internal keyboard is non-functional, no keys register input. | 1. Restart Laptop: Perform a full restart. 2. External Keyboard Test: Connect a USB keyboard to see if it works; if yes, issue is hardware. 3. Update Drivers: Update/reinstall all keyboard drivers. 4. Reseat Ribbon Cable (Advanced): Open laptop, disconnect, and reconnect keyboard ribbon cable (proceed with extreme caution). |
Medium-Hard |
Conclusion
The journey of troubleshooting a malfunctioning keyboard on your Lenovo Flex 5, while potentially daunting, is ultimately a testament to the power of methodical problem-solving and a little bit of technical courage. We've explored a wide spectrum of issues, from the simplest dust obstructions to complex driver conflicts and intricate hardware connections. Through this comprehensive guide, our goal has been to arm you with the knowledge and actionable steps to confidently approach these challenges, transforming frustration into a rewarding sense of accomplishment.
A fully functional keyboard is more than just a convenience; it's the gateway to your productivity, enabling seamless interaction with your digital world. The Lenovo Flex 5, with its remarkable versatility, truly shines when every component works in harmony, allowing you to fluidly transition between tasks and modes. By systematically applying the diagnostic and repair techniques outlined here – starting with the simplest solutions and progressing cautiously to more advanced steps – you empower yourself to extend the life and enhance the performance of your device.
Remember, the vast majority of keyboard issues are resolvable with patience and precision. Whether it's a quick blast of compressed air, a diligent driver update, or the careful reseating of a ribbon cable, the satisfaction of restoring your Flex 5's keyboard to its original glory is unparalleled. And while certain complex issues may necessitate professional intervention, understanding the underlying mechanics and troubleshooting pathways will always place you in a more informed and confident position. Embrace the spirit of DIY, maintain your device with care, and continue to enjoy the fluid, intuitive experience your Lenovo Flex 5 was designed to deliver.
FAQs (Frequently Asked Questions)
1. Can I replace individual keys on my Flex 5?
Yes, in many cases, you can replace individual keycaps and their underlying scissor mechanisms on a Lenovo Flex 5 keyboard. This is a common solution if a single keycap is lost, broken, or if its scissor mechanism is damaged (e.g., from a spill or forceful removal). You'll need to source a replacement keycap and scissor mechanism specifically designed for your Flex 5 model, as they vary in size and clip design. Online retailers specializing in laptop parts or sites like eBay often sell individual key replacement kits. Exercise caution when removing and installing them to avoid breaking the tiny plastic clips.
2. How often should I clean my Flex 5 keyboard?
For optimal performance and to prevent buildup of dust and debris, it's recommended to perform a light surface cleaning of your Flex 5 keyboard at least once a month. This involves using compressed air to dislodge particles and a microfiber cloth lightly dampened with isopropyl alcohol to wipe down keycaps. If you frequently eat or drink near your laptop, or if you use it in a dusty environment, consider cleaning it more often, perhaps every two weeks, to proactively prevent sticky or unresponsive keys.
3. Will opening my Flex 5 void the warranty?
Generally, yes, opening your Lenovo Flex 5 laptop will void its manufacturer's warranty. Most manufacturers include seals or terms that prohibit customer tampering with internal components. If your laptop is still under warranty and experiencing keyboard issues, your first step should always be to contact Lenovo support to explore warranty-covered repair options. Only consider opening the laptop for hardware troubleshooting if your warranty has expired or if you're willing to accept the risk of voiding it.
4. What's the difference between a software and hardware keyboard issue?
A software keyboard issue originates from your operating system, drivers, or applications. Examples include outdated drivers, incorrect language settings, accessibility features being accidentally enabled (like Filter Keys), or malware interfering with input. In these cases, an external USB keyboard will typically work perfectly. A hardware keyboard issue, conversely, stems from a physical problem with the keyboard unit itself, its internal components (like scissor mechanisms or the membrane circuit), or its connection to the motherboard (e.g., a loose ribbon cable). If an external USB keyboard works but your laptop's built-in keyboard does not, it strongly suggests a hardware problem.
5. Where can I find genuine replacement parts for my Flex 5?
For genuine Lenovo replacement parts, the most reliable source is the official Lenovo Parts website or an authorized Lenovo service center. You can typically search by your laptop's serial number or model to find compatible parts. Reputable third-party online retailers specializing in laptop parts may also offer genuine (or high-quality OEM equivalent) components. When purchasing from third-party sellers, always ensure they have good reviews and offer a return policy, and confirm the part number matches your specific Flex 5 model to ensure compatibility.
🚀You can securely and efficiently call the OpenAI API on APIPark in just two steps:
Step 1: Deploy the APIPark AI gateway in 5 minutes.
APIPark is developed based on Golang, offering strong product performance and low development and maintenance costs. You can deploy APIPark with a single command line.
curl -sSO https://download.apipark.com/install/quick-start.sh; bash quick-start.sh

In my experience, you can see the successful deployment interface within 5 to 10 minutes. Then, you can log in to APIPark using your account.

Step 2: Call the OpenAI API.

