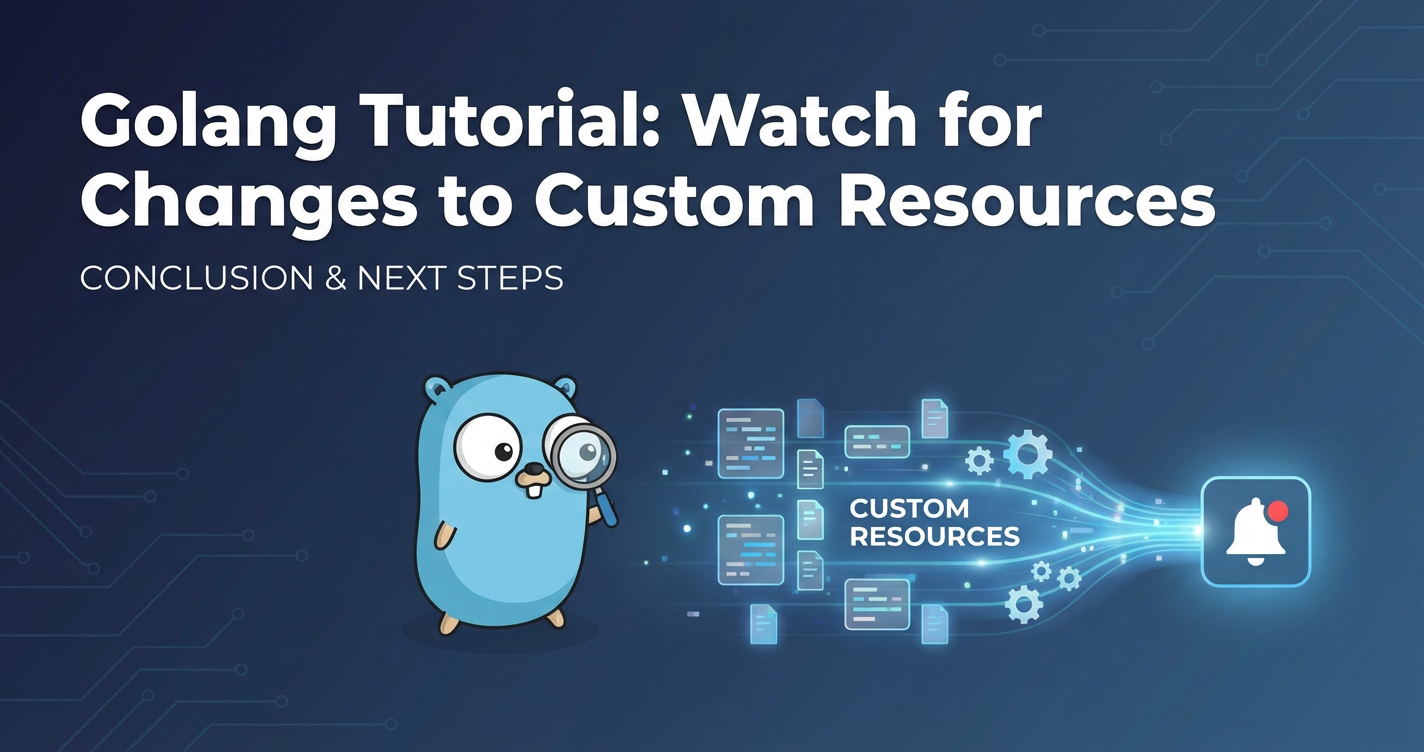
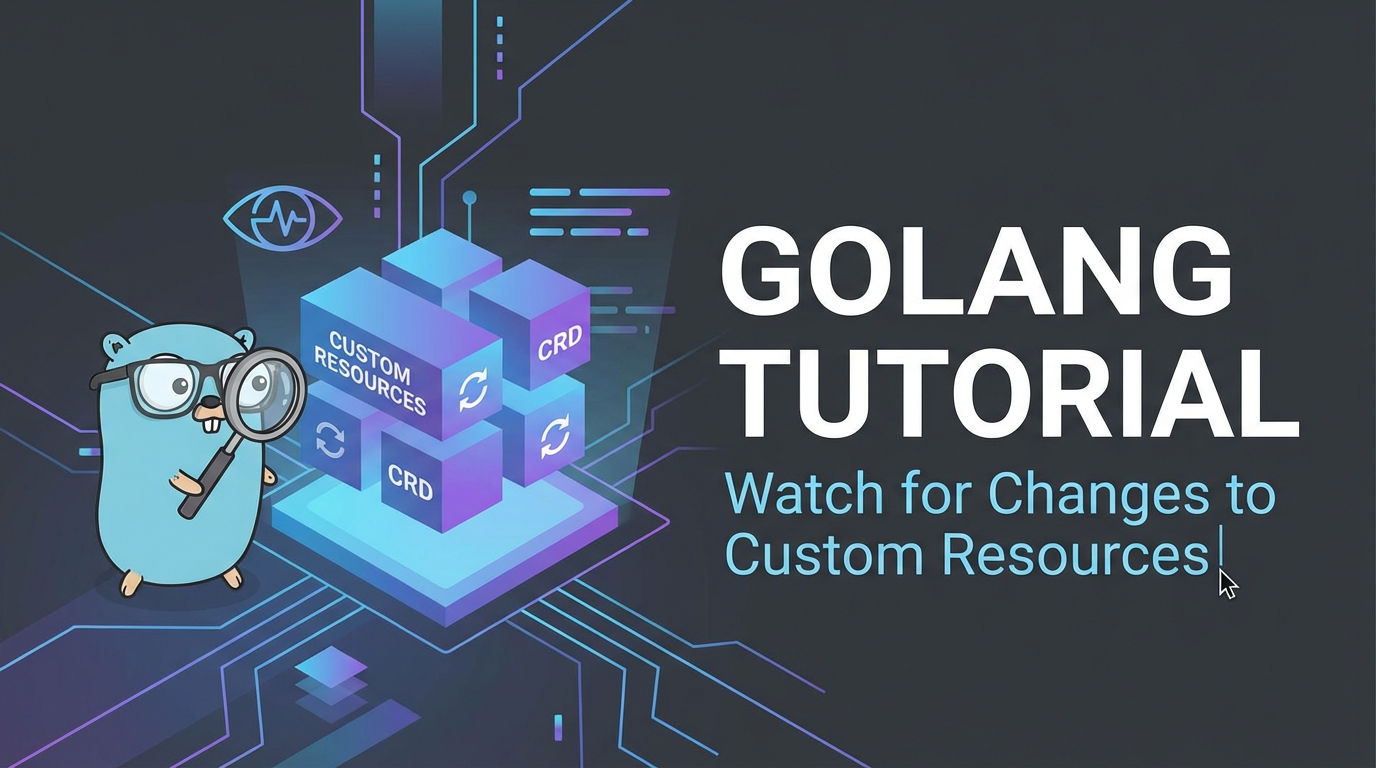
Golang Tutorial: Watch for Changes to Custom Resources


In the ever-evolving landscape of cloud-native applications, Kubernetes has emerged as the de facto operating system for the data center, providing a robust and extensible platform for managing containerized workloads. At its core, Kubernetes operates on a declarative model, where users define the desired state of their applications and the system works tirelessly to reconcile the current state with that desired state. This powerful paradigm is what makes Kubernetes so resilient and scalable.
However, the built-in resource types provided by Kubernetes—such as Pods, Deployments, and Services—while comprehensive, cannot possibly cover every single operational nuance or domain-specific requirement that an enterprise might encounter. This is where the true extensibility of Kubernetes shines through: the ability to define and manage Custom Resources (CRs). Custom Resources allow you to extend the Kubernetes API with your own object types, providing a seamless way to integrate domain-specific logic and automation directly into the Kubernetes control plane. They empower developers to model their unique application components or operational workflows as first-class citizens within Kubernetes, leading to a more unified and streamlined management experience.
For any custom resource to be truly useful, there must be a mechanism to observe changes to its state and react accordingly. This is the fundamental concept behind Kubernetes controllers and operators. A controller, at its heart, is a piece of software that continuously watches for changes to specific resource types (whether built-in or custom) and performs actions to bring the cluster's actual state closer to the desired state. When it comes to custom resources, building a controller in Golang is a common and highly effective approach, given Golang's native support for concurrency, its efficiency, and its deep integration with the Kubernetes ecosystem through libraries like client-go. The client-go library provides the necessary tools to interact with the Kubernetes API server, allowing your Go application to list, get, create, update, delete, and, most importantly for this tutorial, watch for changes to Kubernetes resources.
This comprehensive tutorial will guide you through the intricate process of developing a Golang application that watches for changes to your custom resources. We will delve deep into the core concepts, illustrate the practical implementation steps, and equip you with the knowledge to build robust and reactive Kubernetes extensions. By the end of this journey, you will not only understand the mechanics of watching CRs but also appreciate the power of extending Kubernetes to meet your bespoke needs, truly harnessing the declarative and self-healing nature of the platform. The ability to automatically respond to changes in your custom configurations is a cornerstone of building sophisticated, autonomous systems within Kubernetes, freeing operators from manual toil and enhancing the reliability of complex deployments.
Understanding Kubernetes Custom Resources (CRs)
Before we dive into the Golang implementation, it's crucial to have a solid grasp of what Custom Resources are and why they are so pivotal in the Kubernetes ecosystem. Think of Kubernetes as an operating system for your cluster, complete with its own rich set of APIs for managing applications, networking, and storage. However, just like a traditional operating system allows you to install new applications and utilities that extend its core functionality, Kubernetes offers a powerful mechanism to extend its API itself. This mechanism is primarily driven by Custom Resource Definitions (CRDs) and their instances, Custom Resources (CRs).
What are Custom Resources (CRs)?
At their core, Custom Resources are simply extensions of the Kubernetes API. They allow you to introduce new kinds of objects into Kubernetes that are specific to your application or domain. Imagine you're building a highly specialized database-as-a-service on Kubernetes. While you can certainly manage the database pods and services using standard Kubernetes resources, you might want to introduce an object called DatabaseInstance that encapsulates all the complexities of provisioning, scaling, and backing up your database. This DatabaseInstance would be a Custom Resource.
Custom Resources enable you to:
- Model Domain-Specific Concepts: Define abstractions that directly map to the entities and workflows within your application's domain. This makes your Kubernetes manifests more readable, understandable, and manageable for domain experts. For instance, instead of managing a dozen pods, services, and persistent volumes separately, a single
DatabaseInstanceCR can represent the entire database system. - Achieve Declarative Management: Just like built-in Kubernetes resources, CRs are declarative. You define the desired state of your custom object, and a controller (which we'll discuss shortly) works to bring the actual state into alignment with that desired state. This is a significant advantage over imperative approaches, as it reduces human error and enhances system resilience.
- Integrate with the Kubernetes Control Plane: Once defined, CRs behave just like any other Kubernetes object. You can use
kubectlto create, update, delete, and list them. They benefit from Kubernetes' authentication, authorization (RBAC), and event mechanisms. This seamless integration means your custom logic feels like a natural extension of Kubernetes itself, rather than a separate, bolted-on system. - Enable Operator Pattern: CRs are the bedrock of the Operator pattern. An Operator is essentially a domain-specific controller that uses CRs to encapsulate operational knowledge for a specific application. It extends Kubernetes' functionality by automating common tasks like deployment, scaling, backup, and recovery of complex applications.
CustomResourceDefinitions (CRDs): The Blueprint
While Custom Resources are the instances of your custom objects, a CustomResourceDefinition (CRD) is the schema or blueprint that defines the new custom resource kind. Before you can create any Custom Resources, you must first define its CRD. Think of a CRD as analogous to a table schema in a relational database, or a class definition in an object-oriented programming language. It specifies:
apiVersionandkind: The API version and the singular/plural names for your new resource type (e.g.,MyService,MyServices).scope: Whether the resource isNamespaced(like Pods) orClusterscoped (like Nodes).versions: The different API versions for your resource (e.g.,v1alpha1,v1). Each version can have its own schema.schema: The most crucial part, defining the structure of your custom resource'sspecandstatusfields using OpenAPI v3 schema. This schema ensures that all instances of your CR conform to a predefined structure, enabling validation and type checking.subresources: Defines optional subresources like/status(for status updates) and/scale(for scaling functionality).
Example CRD Structure (Simplified):
apiVersion: apiextensions.k8s.io/v1
kind: CustomResourceDefinition
metadata:
  name: myservices.tutorial.example.com
spec:
  group: tutorial.example.com
  versions:
    - name: v1
      served: true
      storage: true
      schema:
        openAPIV3Schema:
          type: object
          properties:
            spec:
              type: object
              properties:
                image:
                  type: string
                  description: The container image to use for the service.
                replicas:
                  type: integer
                  minimum: 1
                  description: The number of desired replicas.
                port:
                  type: integer
                  minimum: 80
                  maximum: 65535
                  description: The port the service listens on.
            status:
              type: object
              properties:
                availableReplicas:
                  type: integer
                  description: The number of currently available replicas.
  scope: Namespaced
  names:
    plural: myservices
    singular: myservice
    kind: MyService
    shortNames:
      - ms
Once this CRD is applied to a Kubernetes cluster, the Kubernetes API server dynamically extends its capabilities. It now understands MyService as a valid resource type. You can then create instances of MyService Custom Resources, just like you would a Pod or Deployment.
Example Custom Resource Instance (Based on the above CRD):
apiVersion: tutorial.example.com/v1
kind: MyService
metadata:
  name: my-first-service
spec:
  image: "nginx:latest"
  replicas: 3
  port: 80
Applying this YAML creates an instance of your MyService Custom Resource. At this point, it's just a data object stored in etcd (Kubernetes' backing store). It doesn't do anything on its own. To bring this MyService to life and actually provision Nginx pods, a controller is needed. This clear separation between defining the desired state (CR) and implementing the logic to achieve it (controller) is fundamental to the Kubernetes philosophy. The ability to extend the core API in such a flexible manner is what makes Kubernetes so powerful and adaptable to virtually any workload.
The Role of Controllers and Operators
The beauty of Custom Resources lies not just in their ability to extend the Kubernetes API with domain-specific objects, but in how they enable the creation of intelligent, automated systems known as controllers and operators. These components are the active agents within Kubernetes that observe the state of resources and continuously work to bring the cluster to its desired state. Without a controller, a Custom Resource is merely a static data entry; it's the controller that imbues it with purpose and action.
What is a Controller? The Reconciliation Loop
At its essence, a Kubernetes controller is a control loop that watches for changes to specific resource types and performs actions to ensure the actual state of the cluster matches the desired state. This continuous cycle of observation, analysis, and action is often referred to as the "reconciliation loop."
Here's how a typical controller works:
- Observe: The controller continuously monitors a set of resources (e.g.,
MyServiceCustom Resources, Pods, Deployments) for any additions, updates, or deletions. This watching mechanism is highly efficient, typically using long-lived HTTP connections (watches) to the Kubernetes API server, rather than constantly polling. - Analyze: When a change is detected (or periodically, if configured), the controller fetches the current state of the relevant resources from the Kubernetes API server. It then compares this actual state with the desired state specified in the resource definition (e.g., the
specof aMyServiceCR). - Act: If a discrepancy is found, the controller takes corrective actions. For example, if a
MyServiceCR specifiesreplicas: 3but only two Nginx pods are running, the controller would create an additional Nginx pod. Ifimage: "nginx:1.20"is changed toimage: "nginx:1.21", the controller might initiate a rolling update of the Nginx pods. This action could involve creating, updating, or deleting other Kubernetes resources (like Deployments, Services, ConfigMaps, Secrets), or even interacting with external systems. - Repeat: Once the action is complete, the controller returns to the observation phase, ready to react to the next set of changes. This loop runs indefinitely, ensuring that the desired state is maintained even in the face of failures or manual interventions.
Controllers are the workhorses of Kubernetes. Even the built-in Kubernetes functionalities, such as managing Deployments (Deployment Controller), scaling Pods (Horizontal Pod Autoscaler), or ensuring node health (Node Controller), are implemented as controllers.
What is an Operator? A Specialized Controller
The term "Operator" was introduced by CoreOS (now Red Hat) to describe a specific pattern of Kubernetes controllers. An Operator is essentially an application-specific controller that extends the Kubernetes API to create, configure, and manage instances of complex stateful applications on behalf of a Kubernetes user. Operators leverage Custom Resources to encode domain-specific knowledge about how to deploy, manage, and upgrade a particular application.
Consider a complex application like a distributed database (e.g., Cassandra, PostgreSQL). Managing such an application involves more than just deploying pods:
- Initial Provisioning: Setting up clusters, configuring replication, defining storage.
- Scaling: Adding or removing nodes, rebalancing data.
- Backup and Restore: Scheduling backups, performing point-in-time recovery.
- Upgrades: Performing rolling upgrades with minimal downtime, handling schema migrations.
- Failure Recovery: Automatically replacing failed nodes, self-healing.
An Operator for this database would define a DatabaseCluster Custom Resource. When a user creates a DatabaseCluster CR, the Operator watches for it and then performs all the necessary steps: creating StatefulSets, Services, PersistentVolumeClaims, and even running database-specific commands to configure the cluster. When the user updates the replicas field in the DatabaseCluster CR, the Operator knows how to safely scale the database, potentially involving complex steps beyond just increasing a StatefulSet count.
In essence, an Operator encapsulates the human operational knowledge of a particular application into software, automating tasks that would otherwise require expert intervention. They significantly reduce the operational burden of running complex applications on Kubernetes, making them feel like native Kubernetes services. The Custom Resource serves as the user-facing API for this encapsulated operational knowledge.
Key Components of a Go Controller
When building a controller in Golang using client-go, several fundamental components work in concert to achieve the watch and reconcile pattern:
- Informers (
SharedInformerFactoryandSharedIndexInformer): Informers are the primary mechanism for a controller to watch resources efficiently. Instead of directly querying the Kubernetes API server for every change, an informer maintains an in-memory cache of resources. It establishes a long-lived watch connection to the API server and updates its cache whenever changes occur. This significantly reduces the load on the API server and allows controllers to react quickly.SharedInformerFactoryis used to create and manage multiple informers, ensuring that different parts of your application can share the same cached data, further optimizing resource usage. - Listers (
Lister): Listers are used to retrieve objects from the informer's local in-memory cache. They provide a fast, read-only interface to the cached data, meaning your controller doesn't need to hit the API server for every read operation. This is crucial for performance, especially when a controller needs to frequently check the state of many resources. - Workqueues (
workqueue.RateLimitingInterface): Workqueues are used to decouple event handling from the actual processing logic. When an informer detects a change (add, update, delete), it adds the key of the affected object (e.g.,namespace/name) to a workqueue. Worker goroutines then pick items from the workqueue, process them, and then mark them as done. This pattern offers several benefits:- Rate Limiting: Prevents event storms from overwhelming the controller.
- Retries: Automatically re-queues items that fail processing, often with exponential backoff.
- Idempotency: Ensures that processing an item multiple times yields the same result, which is crucial in a distributed system where events might be delivered more than once.
- Concurrency: Allows multiple worker goroutines to process items concurrently.
These components form the backbone of any robust Kubernetes controller built in Go. Understanding their roles and how they interact is key to developing effective automation for your custom resources. The efficiency provided by informers and listers, coupled with the resilience and decoupling offered by workqueues, creates a powerful framework for interacting with the Kubernetes API and building intelligent operators.
Setting Up Your Golang Development Environment
Before we embark on writing the actual code for our custom resource watcher, we need to ensure our development environment is properly configured. A well-prepared workspace will save you from common pitfalls and allow you to focus on the core logic.
1. Golang Installation
First and foremost, you need Go installed on your system. If you haven't already, head over to the official Go website and follow the installation instructions for your operating system. We recommend using a recent stable version of Go (e.g., Go 1.20 or newer) for optimal compatibility with client-go and other Kubernetes tools.
You can verify your Go installation by running:
go version
This command should output the installed Go version.
2. Kubernetes Cluster
To test our controller, we'll need access to a Kubernetes cluster. For local development, there are several excellent options:
- Minikube: A tool that runs a single-node Kubernetes cluster on your local machine. It's great for development and testing.
- Installation:
minikube start
- Installation:
- Kind (Kubernetes in Docker): A tool for running local Kubernetes clusters using Docker containers as "nodes." It's often preferred for CI/CD pipelines and complex multi-node testing.
- Installation:
kind create cluster
- Installation:
- Docker Desktop (with Kubernetes enabled): If you're using Docker Desktop, it often includes a built-in Kubernetes cluster that can be easily enabled from its settings.
Choose the one that best suits your workflow. For the purpose of this tutorial, any functional Kubernetes cluster that you have kubectl access to will suffice.
3. kubectl Setup
kubectl is the command-line tool for interacting with your Kubernetes cluster. Ensure it's installed and configured to communicate with your chosen local cluster.
You can test your kubectl configuration by running:
kubectl get nodes
This should list the nodes in your cluster (e.g., one node for Minikube or Kind).
4. Project Structure and Go Modules
We'll start by creating a new Go module for our project. This helps manage dependencies and project structure.
First, create a new directory for your project:
mkdir golang-cr-watcher
cd golang-cr-watcher
Initialize a new Go module:
go mod init tutorial.example.com/golang-cr-watcher
This command creates a go.mod file, which will track our project's dependencies.
5. Installing client-go and Other Tools
We'll need a few key Go packages:
client-go: The official Go client library for Kubernetes.controller-runtime/pkg/manager: A foundational library for building Kubernetes operators (though we will focus more on basicclient-gofor this tutorial,controller-runtimeis built on top ofclient-goand simplifies many aspects).k8s.io/apimachinery: Core Kubernetes API types.k8s.io/apiextensions-apiserver: For CRD client interactions.sigs.k8s.io/controller-tools/cmd/controller-gen: A crucial tool for generating boilerplate code for CRDs, clientsets, informers, and listers.
Install them using go get:
go get k8s.io/client-go@kubernetes-release-1.28 # Or your desired Kubernetes release version
go get k8s.io/apimachinery@kubernetes-release-1.28
go get k8s.io/apiextensions-apiserver@kubernetes-release-1.28
go get sigs.k8s.io/controller-tools/cmd/controller-gen@v0.14.0 # Use a specific version
(Note: Replace @kubernetes-release-1.28 with the actual release tag corresponding to your Kubernetes cluster version, e.g., kubernetes-1.28.x for client-go and apimachinery. It's vital to match these versions closely to avoid compatibility issues with your cluster's Kubernetes API.)
Also, make sure controller-gen is accessible. It's often recommended to install it directly:
go install sigs.k8s.io/controller-tools/cmd/controller-gen@latest
Verify controller-gen is in your PATH:
controller-gen --version
Now your environment is ready. We have Go, a Kubernetes cluster, kubectl, our project with go.mod, and the necessary client-go and controller-gen libraries. We are poised to delve into the core concepts of watching Custom Resources. This robust setup ensures that our exploration into custom resource management is smooth and productive, allowing us to seamlessly interact with the Kubernetes API and build our specialized controller logic.
Core Concepts for Watching CRs in Go
Building a robust controller in Golang for watching Custom Resources requires a deep understanding of several core concepts and client-go components. These components work together to provide an efficient, scalable, and resilient mechanism for reacting to changes in your Kubernetes cluster.
1. Kubernetes Client-Go Library: Your Gateway to the Kubernetes API
The k8s.io/client-go library is the official Golang client for interacting with the Kubernetes API server. It provides a set of structured and dynamic interfaces to perform all operations: GET, LIST, WATCH, CREATE, UPDATE, DELETE, etc.
kubernetes.Clientset(Typed Clients for Built-in Resources): This is the most common way to interact with standard Kubernetes resources like Pods, Deployments, and Services. AClientsetis generated from the Kubernetes API definitions and provides type-safe methods for each resource. For example,clientset.AppsV1().Deployments("default").Get(...)directly gets a Deployment object. While powerful for built-in types, it cannot directly interact with Custom Resources unless specific client code is generated for them.dynamic.Interface(Dynamic Clients for Untyped Resources): Thek8s.io/client-go/dynamicpackage offers a flexible way to interact with any Kubernetes resource, including Custom Resources, without having their Go types compiled into your binary. This is particularly useful when you're building a generic controller that might manage various CRDs or when you don't want to go through the process of generating typed client code for every single CRD. You work withunstructured.Unstructuredobjects, which are essentiallymap[string]interface{}. This provides immense flexibility but sacrifices compile-time type safety.Example usage:go dynamicClient, err := dynamic.NewForConfig(config) // ... gvr := schema.GroupVersionResource{ Group: "tutorial.example.com", Version: "v1", Resource: "myservices", } unstructuredObj, err := dynamicClient.Resource(gvr).Namespace("default").Get(ctx, "my-first-service", metav1.GetOptions{})- CRD-specific ClientSet (Typed Clients for Custom Resources): This is often the preferred approach for building controllers that specifically manage your own custom resources. Instead of using
dynamic.Interface, you can generate aClientset, InformerFactory, and Listers specifically tailored to your CRD's Go types. This brings back the benefits of compile-time type safety and code autocompletion, making development much more robust and less error-prone. Thecontroller-gentool (which we'll use) automates this code generation process based on your CRD's Go type definitions.The choice between dynamic and typed clients depends on your use case. For building an Operator specifically managing yourMyServiceCRs, typed clients are generally recommended for their developer experience benefits. For more generic tools, dynamic clients offer greater adaptability.
2. Informers: The Heart of Watching
Informers are the cornerstone of efficient resource watching in client-go. They solve a critical problem: how to efficiently keep track of thousands of Kubernetes resources without overwhelming the API server or constantly polling for changes.
SharedInformerFactory(k8s.io/client-go/informers): AnInformerFactoryis responsible for creating and managing informers for different resource types. ASharedInformerFactoryis particularly useful because it allows multiple controllers or components within a single application to share the same informer for a given resource type. This means only one watch connection is established to the API server for that resource, and all components share the same in-memory cache, saving resources and reducing load on the API server.go // Create a new SharedInformerFactory factory := informers.NewSharedInformerFactory(clientset, time.Minute*5) // Resync every 5 minutes // Or for our custom resource: // factory := myclientset.NewSharedInformerFactory(clientset, time.Minute*5)cache.SharedIndexInformer(k8s.io/client-go/tools/cache): This is the actual informer instance for a specific resource type. It performs three main functions:TheAddEventHandlermethod of an informer is where you register your callback functions to react to events:go informer.AddEventHandler(cache.ResourceEventHandlerFuncs{ AddFunc: func(obj interface{}) { /* handle new resource */ }, UpdateFunc: func(oldObj, newObj interface{}) { /* handle resource update */ }, DeleteFunc: func(obj interface{}) { /* handle resource deletion */ }, })These handlers are called when the informer detects a change. However, directly performing heavy logic within these handlers is generally discouraged. This is where workqueues come in.- List: Performs an initial
LISTcall to the Kubernetes API server to populate its cache. - Watch: Establishes a
WATCHconnection to the API server, receiving real-time notifications about changes (Add, Update, Delete) to the resource. - Cache: Maintains an in-memory store of the resources it's watching. All subsequent reads are served from this cache.
- Index: Optionally, it can build indexes on certain fields of the resources, allowing for efficient lookups (e.g., finding all pods belonging to a specific deployment).
- List: Performs an initial
3. Listers: Reading from the Informer's Cache
Listers (k8s.io/client-go/listers) provide a read-only interface to the informer's cache. Once an informer has synchronized its cache with the API server, you can use a lister to quickly retrieve resources without making a network call to the Kubernetes API.
MyServiceLister(for Custom Resources): If you've generated typed client code for your Custom Resource,controller-genwill also generate aListerspecifically for yourMyServicetype. This lister will provide methods likeMyServices("namespace").Get(name)orList(selector)to fetchMyServiceobjects from the local cache.go // Assuming myServiceInformer is set up myServiceLister := myServiceInformer.Lister() // ... inside reconcile loop service, err := myServiceLister.MyServices(namespace).Get(name)Using listers is crucial for performance as it avoids repeated API calls for data that is already locally cached.
4. Workqueues: Decoupling and Resilience
As mentioned earlier, directly executing complex logic in informer event handlers can lead to problems: handlers might block the informer, events might arrive faster than they can be processed, or transient errors could cause data inconsistencies. Workqueues (k8s.io/client-go/util/workqueue) provide an elegant solution to these challenges.
workqueue.RateLimitingInterface: This interface offers a robust queue implementation that is designed for controller workloads. When an event handler is triggered, instead of directly processing the resource, it simply adds the key (typicallynamespace/name) of the affected resource to the workqueue.Multiple worker goroutines (often called "reconcilers") then concurrently pull items from the workqueue. This setup offers: * Decoupling: Informer event handling is fast, just adding to a queue. The actual complex reconciliation logic happens independently. * Concurrency: Multiple workers can process items in parallel, improving throughput. * Rate Limiting: If a particular item causes repeated errors or if events are flooding in, the workqueue can apply backoff delays before re-queuing the item, preventing resource starvation or cascading failures. * Retries: If a worker encounters a transient error, it canqueue.AddRateLimited(key)to have the item retried later. * Idempotency: Because keys are re-queued, your reconciliation logic must be idempotent, meaning processing the same key multiple times should yield the same consistent result. This is a fundamental principle in distributed systems.```go // Inside an informer AddFunc: key, err := cache.MetaNamespaceKeyFunc(obj) // "namespace/name" if err == nil { controller.workqueue.Add(key) }// Inside a worker goroutine: key, shutdown := controller.workqueue.Get() if shutdown { return false // shut down worker } defer controller.workqueue.Done(key)err := controller.reconcile(key.(string)) if err != nil { controller.workqueue.AddRateLimited(key) // Retry with backoff return true } controller.workqueue.Forget(key) // Item processed successfully ```
Summary of Core Concepts:
| Component | Purpose | Key Benefits |
|---|---|---|
| Client-Go | Official Go library to interact with Kubernetes API. | Provides structured (typed) and flexible (dynamic) interfaces for all Kubernetes operations. |
Clientset |
Type-safe clients for built-in Kubernetes resources (and custom ones if generated). | Compile-time type safety, clear API for resources, autocompletion. |
dynamic.Interface |
Untyped client for interacting with any Kubernetes resource (including CRs) without explicit Go types. | Flexibility to manage any CRD without code generation, useful for generic tools. |
| Informers | Efficiently watches resources, maintains an in-memory cache, and dispatches events. | Reduces API server load, provides real-time event notifications, fast local lookups. |
SharedInformerFactory |
Manages multiple informers and allows them to share a single API watch connection and cache. | Optimizes resource usage, prevents redundant API calls. |
| Listers | Provides a read-only interface to retrieve objects from the informer's in-memory cache. | Extremely fast read operations as no network calls are involved, avoids API server throttling. |
| Workqueues | Decouples event handling from reconciliation logic, manages task processing with retries and rate limiting. | Ensures controller resilience, prevents event storms, enables concurrent processing, handles transient errors gracefully with backoff, guarantees idempotent processing. |
By combining these powerful client-go primitives, you can construct a highly effective and resilient controller that watches for changes to your Custom Resources and automatically takes the necessary actions. This architecture forms the basis of virtually all production-grade Kubernetes operators and automation tools built in Golang. The robust interaction with the Kubernetes API facilitated by these components is what allows for the seamless extension of the platform's core capabilities.
Step-by-Step Implementation: Building a CRD Watcher
Now that we've covered the theoretical underpinnings, let's roll up our sleeves and build a practical Golang controller that watches for changes to our custom resources. We'll create a MyService Custom Resource Definition and then write a controller that logs changes to MyService instances.
Step 1: Define Your Custom Resource Definition (CRD)
First, we need to define our custom resource. Let's create a MyService CRD that allows us to specify an image for a container, the desired number of replicas, and a port.
Create a file named config/crd/bases/tutorial.example.com_myservices.yaml with the following content:
# config/crd/bases/tutorial.example.com_myservices.yaml
apiVersion: apiextensions.k8s.io/v1
kind: CustomResourceDefinition
metadata:
  name: myservices.tutorial.example.com
spec:
  group: tutorial.example.com
  versions:
    - name: v1
      served: true
      storage: true
      schema:
        openAPIV3Schema:
          type: object
          properties:
            apiVersion:
              type: string
            kind:
              type: string
            metadata:
              type: object
            spec:
              type: object
              properties:
                image:
                  type: string
                  description: The container image to use for the service.
                replicas:
                  type: integer
                  minimum: 1
                  description: The number of desired replicas.
                port:
                  type: integer
                  minimum: 1
                  maximum: 65535
                  description: The port the service listens on.
              required:
                - image
                - replicas
                - port
            status:
              type: object
              properties:
                availableReplicas:
                  type: integer
                  description: The number of currently available replicas.
                  minimum: 0
  scope: Namespaced
  names:
    plural: myservices
    singular: myservice
    kind: MyService
    shortNames: ["ms"]
Apply this CRD to your Kubernetes cluster:
kubectl apply -f config/crd/bases/tutorial.example.com_myservices.yaml
Verify that the CRD is installed:
kubectl get crd myservices.tutorial.example.com
Step 2: Define Go Types for Your CRD
Next, we need to define the Go structs that represent our MyService Custom Resource. These structs will be used by controller-gen to generate our client code.
Create the following directory structure: pkg/apis/myservice/v1/.
pkg/apis/myservice/v1/doc.go: This file provides API group-level information.go // pkg/apis/myservice/v1/doc.go // +k8s:deepcopy-gen=package // +groupName=tutorial.example.com package v1pkg/apis/myservice/register.go: Registers the types with the Kubernetes API scheme.```go // pkg/apis/myservice/register.go package myserviceimport ( "tutorial.example.com/golang-cr-watcher/pkg/apis/myservice/v1" metav1 "k8s.io/apimachinery/pkg/apis/meta/v1" "k8s.io/apimachinery/pkg/runtime" "k8s.io/apimachinery/pkg/runtime/schema" )const GroupName = "tutorial.example.com" const Version = "v1"var SchemeGroupVersion = schema.GroupVersion{Group: GroupName, Version: Version}// Kind takes an unqualified kind and returns a Group qualified GroupKind func Kind(kind string) schema.GroupKind { return SchemeGroupVersion.WithKind(kind).GroupKind() }// Resource takes an unqualified resource and returns a Group qualified GroupResource func Resource(resource string) schema.GroupResource { return SchemeGroupVersion.WithResource(resource).GroupResource() }var ( SchemeBuilder = runtime.NewSchemeBuilder(addKnownTypes) AddToScheme = SchemeBuilder.AddToScheme )// addKnownTypes adds our types to the API scheme func addKnownTypes(scheme *runtime.Scheme) error { scheme.AddKnownTypes(SchemeGroupVersion, &v1.MyService{}, &v1.MyServiceList{}, ) metav1.AddToGroupVersion(scheme, SchemeGroupVersion) return nil } ```pkg/apis/register.go: Registers the API group for the entire project.```go // pkg/apis/register.go package apisimport ( "k8s.io/apimachinery/pkg/runtime" )// AddToSchemes may be used to add all resources defined in the project to a Scheme var AddToSchemes runtime.SchemeBuilder// AddToScheme adds all Resources to the Scheme func AddToScheme(s *runtime.Scheme) error { return AddToSchemes.AddToScheme(s) } ```
pkg/apis/myservice/v1/types.go: This file defines the Go structs for MyService.```go // pkg/apis/myservice/v1/types.go package v1import ( metav1 "k8s.io/apimachinery/pkg/apis/meta/v1" )// +genclient // +k8s:deepcopy-gen:interfaces=k8s.io/apimachinery/pkg/runtime.Object// MyService is the Schema for the myservices API type MyService struct { metav1.TypeMeta json:",inline" metav1.ObjectMeta json:"metadata,omitempty"
Spec   MyServiceSpec   `json:"spec,omitempty"`
Status MyServiceStatus `json:"status,omitempty"`
}// MyServiceSpec defines the desired state of MyService type MyServiceSpec struct { Image string json:"image" Replicas int32 json:"replicas" Port int32 json:"port" }// MyServiceStatus defines the observed state of MyService type MyServiceStatus struct { AvailableReplicas int32 json:"availableReplicas" }// +k8s:deepcopy-gen:interfaces=k8s.io/apimachinery/pkg/runtime.Object// MyServiceList contains a list of MyService type MyServiceList struct { metav1.TypeMeta json:",inline" metav1.ListMeta json:"metadata,omitempty" Items []MyService json:"items" } `` The+genclientand+k8s:deepcopy-gen:interfacescomments are crucial forcontroller-gen` to generate the necessary client code and deepcopy methods.
Step 3: Generate Client Code
Now it's time to generate all the client-go boilerplate code for our MyService CRD. This includes the typed clientset, informers, and listers.
From your project root, run controller-gen. You might need to adjust the paths based on your go.mod module name.
controller-gen object:headerFile="hack/boilerplate.go.txt" \
crd:trivialVersions=true \
paths="./pkg/apis/..." \
output:crd:dir=./config/crd/bases \
output:stdout
Create a dummy hack/boilerplate.go.txt if you don't have one, it can just be empty or contain a copyright notice.
Then, for the client code:
controller-gen \
  crd:trivialVersions=true \
  paths="./pkg/apis/..." \
  output:crd:dir=./config/crd/bases \
  output:client:dir=./pkg/client \
  output:informer:dir=./pkg/informers \
  output:lister:dir=./pkg/listers \
  object
This command will generate several files: * pkg/client/clientset/versioned/...: Your typed MyService clientset. * pkg/informers/externalversions/...: Informers for your MyService CRD. * pkg/listers/myservice/v1/...: Listers for your MyService CRD. * Updated CRD YAMLs in config/crd/bases/.
Go through the generated files to familiarize yourself with the structure. The pkg/client directory now contains the Go API that allows type-safe interactions with your custom resources.
Step 4: Implement the Main Controller Logic
Now, let's write the core of our controller. Create main.go in the project root.
// main.go
package main

import (
    "context"
    "flag"
    "fmt"
    "log"
    "os"
    "os/signal"
    "syscall"
    "time"

    // Import our API types
    myservicev1 "tutorial.example.com/golang-cr-watcher/pkg/apis/myservice/v1"
    myserviceclientset "tutorial.example.com/golang-cr-watcher/pkg/client/clientset/versioned"
    myserviceinformers "tutorial.example.com/golang-cr-watcher/pkg/informers/externalversions"
    myservicelisters "tutorial.example.com/golang-cr-watcher/pkg/listers/myservice/v1"

    "k8s.io/apimachinery/pkg/api/errors"
    metav1 "k8s.io/apimachinery/pkg/apis/meta/v1"
    "k8s.io/apimachinery/pkg/util/runtime"
    "k8s.io/apimachinery/pkg/util/wait"
    "k8s.io/client-go/kubernetes"
    "k8s.io/client-go/rest"
    "k8s.io/client-go/tools/cache"
    "k8s.io/client-go/tools/clientcmd"
    "k8s.io/client-go/util/workqueue"
)

const (
    // maxRetries is the number of times a MyService will be retried before dropping it.
    // This is meant to prevent us from requeuing items indefinitely and hitting a bug.
    maxRetries = 5
)

// Controller demonstrates how to implement a controller with client-go.
type Controller struct {
    kubeClientset      kubernetes.Interface
    myserviceClientset myserviceclientset.Interface

    myserviceLister myservicelisters.MyServiceLister
    myserviceSynced cache.InformerSynced

    workqueue workqueue.RateLimitingInterface
}

// NewController returns a new MyService controller
func NewController(
    kubeClientset kubernetes.Interface,
    myserviceClientset myserviceclientset.Interface,
    myserviceInformer cache.SharedIndexInformer) *Controller {

    controller := &Controller{
        kubeClientset:      kubeClientset,
        myserviceClientset: myserviceclientset,
        myserviceLister:    myservicelisters.NewMyServiceLister(myserviceInformer.GetIndexer()),
        myserviceSynced:    myserviceInformer.HasSynced,
        workqueue:          workqueue.NewNamedRateLimitingQueue(workqueue.DefaultControllerRateLimiter(), "MyServices"),
    }

    log.Println("Setting up event handlers for MyService")

    // Set up an event handler for when MyService resources change
    myserviceInformer.AddEventHandler(cache.ResourceEventHandlerFuncs{
        AddFunc: controller.handleAddMyService,
        UpdateFunc: func(old, new interface{}) {
            controller.handleUpdateMyService(old, new)
        },
        DeleteFunc: controller.handleDeleteMyService,
    })

    return controller
}

// Run will set up the event handlers for types we are interested in, as well
// as syncing informer caches and starting workers. It will block until ctx.Done() is closed.
func (c *Controller) Run(ctx context.Context, workers int) error {
    defer runtime.HandleCrash()
    defer c.workqueue.ShutDown()

    log.Println("Starting MyService controller")

    // Wait for the caches to be synced before starting workers
    log.Println("Waiting for informer caches to sync")
    if ok := cache.WaitForCacheSync(ctx.Done(), c.myserviceSynced); !ok {
        return fmt.Errorf("failed to wait for caches to sync")
    }
    log.Println("Informer caches synced")

    // Start N worker goroutines to process workqueue items
    for i := 0; i < workers; i++ {
        go wait.UntilWithContext(ctx, c.runWorker, time.Second)
    }

    log.Println("Started workers")
    <-ctx.Done()
    log.Println("Shutting down workers")

    return nil
}

// runWorker is a long-running function that will continually call the
// processNextItem function in order to read and process a message off the workqueue.
func (c *Controller) runWorker(ctx context.Context) {
    for c.processNextItem(ctx) {
    }
}

// processNextItem will read a single item from the workqueue and
// attempt to process it, by calling the reconcile function.
func (c *Controller) processNextItem(ctx context.Context) bool {
    obj, shutdown := c.workqueue.Get()
    if shutdown {
        return false
    }

    // We call Done here so the workqueue knows we have finished
    // processing this item. We also call Forget if we do not want this item
    // to be re-queued. For example, we do not want to retry a MyService
    // that we're deleting.
    defer c.workqueue.Done(obj)

    var key string
    var ok bool
    if key, ok = obj.(string); !ok {
        // As the item in the workqueue is actually a string, we cannot cast it to the MyService's key.
        // This item is invalid, and we should retrieve it.
        runtime.HandleError(fmt.Errorf("expected string in workqueue but got %#v", obj))
        c.workqueue.Forget(obj)
        return true
    }

    // Run the reconcile logic for the MyService resource
    if err := c.reconcile(ctx, key); err != nil {
        // Put the item back on the workqueue to handle any transient errors.
        c.handleReconcileError(key, err)
        return true
    }

    c.workqueue.Forget(obj) // item processed successfully
    return true
}

// handleReconcileError handles errors during reconciliation, with retry logic.
func (c *Controller) handleReconcileError(key string, err error) {
    if c.workqueue.NumRequeues(key) < maxRetries {
        log.Printf("Error reconciling MyService %s: %v. Retrying...", key, err)
        c.workqueue.AddRateLimited(key)
        return
    }
    runtime.HandleError(fmt.Errorf("dropping MyService %q out of the workqueue: %v", key, err))
    c.workqueue.Forget(key)
}

// reconcile compares the actual state with the desired, and attempts to
// converge the two. It returns an error if the controller should be retried.
func (c *Controller) reconcile(ctx context.Context, key string) error {
    namespace, name, err := cache.SplitMetaNamespaceKey(key)
    if err != nil {
        runtime.HandleError(fmt.Errorf("invalid resource key: %s", key))
        return nil
    }

    // Get the MyService resource from the lister's cache
    myService, err := c.myserviceLister.MyServices(namespace).Get(name)
    if err != nil {
        // The MyService resource may no longer exist, in which case we stop processing.
        if errors.IsNotFound(err) {
            log.Printf("MyService %s/%s in work queue no longer exists. Nothing to do.", namespace, name)
            return nil
        }
        return err // Requeue item on transient error
    }

    // --- THIS IS WHERE YOUR CUSTOM LOGIC GOES ---
    // For this tutorial, we'll just log the details of the MyService.
    // In a real controller, you would create/update/delete other Kubernetes resources
    // (e.g., Deployments, Services) based on the MyService's spec.

    log.Printf("Reconciling MyService: %s/%s", myService.Namespace, myService.Name)
    log.Printf("  Image: %s", myService.Spec.Image)
    log.Printf("  Replicas: %d", myService.Spec.Replicas)
    log.Printf("  Port: %d", myService.Spec.Port)
    log.Printf("  Observed Available Replicas: %d", myService.Status.AvailableReplicas)

    // Example of updating status (in a real scenario, this would be based on actual observed state)
    if myService.Status.AvailableReplicas != myService.Spec.Replicas {
        log.Printf("  Updating status for MyService %s/%s: setting AvailableReplicas to %d",
            myService.Namespace, myService.Name, myService.Spec.Replicas)

        // Create a copy to modify
        myServiceCopy := myService.DeepCopy()
        myServiceCopy.Status.AvailableReplicas = myService.Spec.Replicas
        _, err = c.myserviceClientset.TutorialV1().MyServices(myService.Namespace).UpdateStatus(ctx, myServiceCopy, metav1.UpdateOptions{})
        if err != nil {
            log.Printf("  Failed to update status for MyService %s/%s: %v", myService.Namespace, myService.Name, err)
            return err // Requeue for retry
        }
        log.Printf("  Status for MyService %s/%s updated successfully.", myService.Namespace, myService.Name)
    }

    log.Printf("Successfully reconciled MyService: %s/%s", myService.Namespace, myService.Name)
    return nil
}

// handleAddMyService is an event handler for when a MyService is added
func (c *Controller) handleAddMyService(obj interface{}) {
    var key string
    var err error
    if key, err = cache.MetaNamespaceKeyFunc(obj); err != nil {
        runtime.HandleError(err)
        return
    }
    log.Printf("MyService Added: %s", key)
    c.workqueue.Add(key) // Add the key to the workqueue for processing
}

// handleUpdateMyService is an event handler for when a MyService is updated
func (c *Controller) handleUpdateMyService(oldObj, newObj interface{}) {
    oldMs := oldObj.(*myservicev1.MyService)
    newMs := newObj.(*myservicev1.MyService)

    if oldMs.ResourceVersion == newMs.ResourceVersion {
        // Periodic resync will send update events for objects that have not changed.
        // We do not want to process these.
        return
    }

    var key string
    var err error
    if key, err = cache.MetaNamespaceKeyFunc(newObj); err != nil {
        runtime.HandleError(err)
        return
    }
    log.Printf("MyService Updated: %s (ResourceVersion: %s -> %s)", key, oldMs.ResourceVersion, newMs.ResourceVersion)
    c.workqueue.Add(key) // Add the key to the workqueue for processing
}

// handleDeleteMyService is an event handler for when a MyService is deleted
func (c *Controller) handleDeleteMyService(obj interface{}) {
    var key string
    var err error
    if key, err = cache.MetaNamespaceKeyFunc(obj); err != nil {
        runtime.HandleError(err)
        return
    }
    log.Printf("MyService Deleted: %s", key)
    c.workqueue.Add(key) // Add the key to the workqueue for processing (e.g., to clean up associated resources)
}

func main() {
    var kubeconfig *string
    if home := os.Getenv("HOME"); home != "" {
        kubeconfig = flag.String("kubeconfig", filepath.Join(home, ".kube", "config"), "(optional) absolute path to the kubeconfig file")
    } else {
        kubeconfig = flag.String("kubeconfig", "", "absolute path to the kubeconfig file")
    }
    flag.Parse()

    // Set up signals so we can handle a graceful shutdown
    ctx, cancel := context.WithCancel(context.Background())
    defer cancel()

    sigCh := make(chan os.Signal, 1)
    signal.Notify(sigCh, syscall.SIGINT, syscall.SIGTERM)
    go func() {
        <-sigCh
        log.Println("Received termination signal, shutting down gracefully...")
        cancel()
    }()

    // Build the Kubernetes configuration
    config, err := clientcmd.BuildConfigFromFlags(*kubeconfig, *kubeconfig)
    if err != nil {
        // If running inside a cluster, use InClusterConfig
        config, err = rest.InClusterConfig()
        if err != nil {
            log.Fatalf("Error building kubeconfig: %v", err)
        }
    }

    // Create a Kubernetes clientset for standard resources
    kubeClientset, err := kubernetes.NewForConfig(config)
    if err != nil {
        log.Fatalf("Error building kubernetes clientset: %v", err)
    }

    // Create a clientset for our custom MyService resources
    myserviceClientset, err := myserviceclientset.NewForConfig(config)
    if err != nil {
        log.Fatalf("Error building MyService clientset: %v", err)
    }

    // Create a SharedInformerFactory for our custom resources
    // The resync period determines how often the informer will re-list all objects
    // from the API server even if no events have been detected. This is a safeguard
    // against missed events, though it generates more API traffic.
    // For most cases, a longer period (e.g., 30s-5m) is sufficient, or even 0 (disabled)
    // if your system is robust against missed events and only relies on watches.
    myserviceInformerFactory := myserviceinformers.NewSharedInformerFactory(myserviceClientset, time.Minute*2)

    // Get the informer for MyService objects
    myserviceInformer := myserviceInformerFactory.Tutorial().V1().MyServices()

    // Create and run the controller
    controller := NewController(kubeClientset, myserviceClientset, myserviceInformer.Informer())

    // Start the informers. This will kick off the LIST and WATCH operations.
    go myserviceInformerFactory.Start(ctx.Done())

    // Run the controller with N workers
    if err = controller.Run(ctx, 2); err != nil {
        log.Fatalf("Error running controller: %v", err)
    }
}
Now, let's break down the main.go file:
- Imports: We import
client-gopackages, our generated client, informer, and lister packages forMyService, and standard Go libraries. Controllerstruct: This struct holds all the necessary clients, informers, listers, and the workqueue that our controller will use.NewController: This function initializes our controller.- It takes
kubernetes.Interface(for built-in resources),myserviceclientset.Interface(for our CRs), andcache.SharedIndexInformer(forMyServiceevents). - It creates a
MyServiceListerfrom the informer's indexer. - It initializes a
workqueue.RateLimitingInterfaceto handle reconciliation items. - Crucially, it calls
myserviceInformer.AddEventHandlerto register our callback functions (handleAddMyService,handleUpdateMyService,handleDeleteMyService). These functions will simply add the resource's key to the workqueue.
- It takes
Runmethod: This method starts the controller's main loop.- It calls
cache.WaitForCacheSyncto ensure that all informers have populated their caches before the controller starts processing events. This is vital to prevent the controller from making decisions based on incomplete data. - It then starts multiple
runWorkergoroutines, which will continuously pull items from the workqueue. - It blocks until the
ctx.Done()channel is closed (e.g., onSIGINT/SIGTERM), indicating a shutdown request.
- It calls
runWorkerandprocessNextItem: These functions implement the workqueue pattern.runWorkerrepeatedly callsprocessNextItemto get an item from the queue, processes it usingreconcile, and handles retries or marks the item as done.reconcilemethod: This is the heart of our controller's logic.- It takes the
key(e.g., "default/my-first-service") from the workqueue. - It uses
cache.SplitMetaNamespaceKeyto get the namespace and name. - It retrieves the
MyServiceobject from themyserviceLister(our local cache). This is an efficient read, avoiding a call to the API server unless absolutely necessary. - It checks for
IsNotFounderrors, which means the resource was deleted while it was in the workqueue (a common scenario). - Custom Logic Here: In this tutorial, we simply log the
MyService's spec details. In a real-world scenario, this is where you would implement the core operational logic:- Create a Kubernetes
Deploymentif one doesn't exist for thisMyService. - Update the
Deployment's image or replica count if theMyService.Specchanges. - Create a
Serviceto expose theDeployment. - Update the
MyService.Statusfield (e.g.,AvailableReplicas) based on the actual observed state of theDeployment. This allows users to see the current state of their custom resource.
- Create a Kubernetes
- It returns an error if a transient issue occurred, prompting the workqueue to retry the item with backoff.
- It takes the
handleAddMyService,handleUpdateMyService,handleDeleteMyService: These are the actual event handlers registered with the informer. They simply extract the resource key and add it to the workqueue.handleUpdateMyServicealso includes a check forResourceVersionto ignore spurious update events (which can happen during periodic resyncs even if no real change occurred).mainfunction:- Parses command-line flags for
kubeconfig(allowing the controller to run outside the cluster for development). - Sets up signal handling for graceful shutdown.
- Builds
rest.Configusingclientcmd.BuildConfigFromFlags(for external access) orrest.InClusterConfig(for running inside a cluster). - Creates both a standard
kubernetes.Clientsetand our custommyserviceClientset. - Initializes a
myserviceinformers.NewSharedInformerFactoryand obtains themyserviceInformer. - Creates and runs our
Controller, passing it thekubeClientset,myserviceClientset, andmyserviceInformer. - Starts the informer factory in a goroutine (
go myserviceInformerFactory.Start(ctx.Done())). This kicks off the LIST and WATCH operations for ourMyServiceresources.
- Parses command-line flags for
Running and Testing Your Controller
Compile your controller:
go build -o my-controller main.go
Now, run your controller:
./my-controller
You should see logs indicating the controller starting up and caches syncing.
Test 1: Create a MyService
Create a my-service-test.yaml file:
apiVersion: tutorial.example.com/v1
kind: MyService
metadata:
  name: test-nginx-service
  namespace: default
spec:
  image: "nginx:1.23.4"
  replicas: 2
  port: 8080
Apply it:
kubectl apply -f my-service-test.yaml
Observe your controller's logs. You should see an "MyService Added" event, followed by the reconciliation logic printing the details of test-nginx-service, and then an update to its status:
...
MyService Added: default/test-nginx-service
Reconciling MyService: default/test-nginx-service
  Image: nginx:1.23.4
  Replicas: 2
  Port: 8080
  Observed Available Replicas: 0
  Updating status for MyService default/test-nginx-service: setting AvailableReplicas to 2
  Status for MyService default/test-nginx-service updated successfully.
Successfully reconciled MyService: default/test-nginx-service
...
Check the status of your CR:
kubectl get myservice test-nginx-service -o yaml
You should see status.availableReplicas: 2.
Test 2: Update a MyService
Edit my-service-test.yaml to change the image and replicas:
apiVersion: tutorial.example.com/v1
kind: MyService
metadata:
  name: test-nginx-service
  namespace: default
spec:
  image: "nginx:latest" # Changed image
  replicas: 4         # Changed replicas
  port: 8080
Apply the changes:
kubectl apply -f my-service-test.yaml
Again, observe the controller logs. You should see an "MyService Updated" event, followed by reconciliation:
...
MyService Updated: default/test-nginx-service (ResourceVersion: 478640 -> 478641)
Reconciling MyService: default/test-nginx-service
  Image: nginx:latest
  Replicas: 4
  Port: 8080
  Observed Available Replicas: 2
  Updating status for MyService default/test-nginx-service: setting AvailableReplicas to 4
  Status for MyService default/test-nginx-service updated successfully.
Successfully reconciled MyService: default/test-nginx-service
...
Test 3: Delete a MyService
kubectl delete -f my-service-test.yaml
The controller logs should show "MyService Deleted" and the subsequent reconciliation loop for cleanup:
...
MyService Deleted: default/test-nginx-service
MyService default/test-nginx-service in work queue no longer exists. Nothing to do.
...
Congratulations! You have successfully built a Golang controller that watches for changes to your custom resources and reacts to them. This forms the foundation for building powerful operators that can automate complex application lifecycle management within Kubernetes.
Best Practices and Considerations
Building a Kubernetes controller, especially one that manages Custom Resources, is a powerful way to extend the platform. However, it comes with a set of responsibilities and best practices that ensure your controller is robust, efficient, and well-behaved within the Kubernetes ecosystem. Adhering to these principles will save you from debugging headaches and ensure your operator is a reliable component of your infrastructure.
1. Idempotency in Reconciliation
This is arguably the most critical principle for any controller. Your reconcile function must be idempotent. This means that executing the reconcile function multiple times with the same input (the state of the Custom Resource) should produce the same outcome and side effects as executing it once. Kubernetes does not guarantee that your reconcile loop will be called exactly once per event; it might be called multiple times due to network issues, controller restarts, or even periodic resyncs.
To achieve idempotency: * Check Existence Before Creation: When creating resources (e.g., a Deployment for your MyService), check if the Deployment already exists. If it does, don't create a new one; instead, update the existing one if necessary. * Compare Current State to Desired State: Always compare the actual state of the managed resources (e.g., the running Deployment) with the desired state specified in the CR's spec. Only perform actions if there's a discrepancy. * Use CreateOrUpdate logic: Many Kubernetes client operations implicitly or explicitly follow a "get, modify, update/create" pattern. When updating, ensure you are not clobbering fields managed by other components.
2. Error Handling and Retry Mechanisms
Distributed systems are inherently unreliable. Network outages, temporary API server unavailability, or resource conflicts are common. Your controller must gracefully handle these transient errors.
- Exponential Backoff for Retries: The
workqueue.RateLimitingInterfacewe used automatically provides this. When an error occurs inreconcile, re-queue the item usingAddRateLimitedto have it retried later with an increasing delay. This prevents hammering the API server and allows the system to recover. - Distinguish Permanent vs. Transient Errors: Some errors (e.g., an invalid
imagename in the CR) are permanent. Re-queuing these indefinitely is wasteful. AftermaxRetries(as we defined), consider logging the error and dropping the item from the queue, potentially updating the CR'sstatusto reflect the error. - Use
runtime.HandleError: Thek8s.io/apimachinery/pkg/util/runtimepackage providesHandleErrorfor logging errors that don't warrant crashing the controller, ensuring proper visibility.
3. Resource Versioning for Optimistic Concurrency
When updating a Kubernetes resource, it's crucial to use optimistic concurrency control to prevent "lost updates." The metadata.resourceVersion field is key here.
- When you
GETa resource, Kubernetes provides aresourceVersion. - When you later
UPDATEthat resource, you must include theresourceVersionyou originally fetched. - If the resource on the API server has been modified by another entity since you fetched it (i.e., its
resourceVersionhas changed), yourUPDATEwill fail with a conflict error. Your controller should catch this, re-fetch the latest version, re-apply its changes, and try the update again. This is typically handled byclient-go'sretry.RetryOnConflictutility, though in simple cases, a workqueue retry might suffice.
4. Performance Considerations
Efficiently watching and reconciling resources is paramount, especially in large clusters.
- Informer Resync Periods: Our
SharedInformerFactorywas created with atime.Minute * 2resync period. This means every two minutes, the informer will re-list allMyServiceobjects from the API server, even if no changes occurred. While a safeguard against missed events, a very short resync period can put unnecessary load on the API server. For most production controllers, relying solely on watches (by setting the resync period to 0) is preferred, assuming your system is robust enough to handle the rare missed event. - Limit API Calls: Use listers to read from the local cache whenever possible. Only make direct API server calls (e.g.,
client.Get,client.Create,client.Update) when performing an action that modifies the cluster state. - Rate Limiting:
workqueue.DefaultControllerRateLimiter()provides sensible defaults, but for high-throughput controllers, you might need to tune the rate limits to balance responsiveness and API server load.
5. Testing Your Controller
Thorough testing is essential for robust controllers.
- Unit Tests: Test individual functions (e.g., reconciliation logic) in isolation without a Kubernetes cluster.
- Integration Tests: Test the controller's interaction with a real (or mock) Kubernetes API server. Tools like
envtest(fromcontroller-runtime) allow you to run a lightweight API server locally, making integration testing much faster and more reliable than testing against a full cluster. - End-to-End (E2E) Tests: Deploy your controller to a test cluster and verify its behavior by creating/updating/deleting CRs and observing the resulting Kubernetes resources.
6. Security: RBAC for Your Controller
Your controller will need appropriate Role-Based Access Control (RBAC) permissions to interact with the Kubernetes API.
- Least Privilege: Grant your controller only the permissions it absolutely needs. If it manages
MyServiceCRs andDeployments, it needsget,list,watch,create,update,deletepermissions on these resource types. Avoid granting broad*permissions. - ServiceAccount: Your controller will run as a Pod, which uses a
ServiceAccount. You'll need to create aRole(orClusterRoleif it manages cluster-scoped CRs) and aRoleBinding(orClusterRoleBinding) to grant the necessary permissions to its ServiceAccount.
7. Observability: Logging and Metrics
For troubleshooting and understanding your controller's behavior in production:
- Structured Logging: Use structured logging (e.g.,
zaporlogrus) to output machine-readable logs that can be easily parsed and analyzed by logging systems (like Elastic Stack or Loki). Include context like resource namespace/name, event type, and error details. - Metrics: Expose Prometheus-compatible metrics. These can include:
- Number of reconciliation loops executed.
- Reconciliation duration.
- Number of items in the workqueue.
- Number of successful/failed reconciliations.
- Counts of specific resource creations/updates/deletions.
The Importance of a Well-Defined API for Custom Resources
Just as robust API management platforms like APIPark standardize and secure interactions for diverse services, designing your CRD's API contract with clarity and foresight is paramount. Your Custom Resource's spec is essentially the API that users (and other controllers) will interact with. A well-designed CRD API should be:
- Intuitive: Easy for users to understand what the fields mean and what effects they will have.
- Stable: Avoid frequent breaking changes to field names, types, or semantics across versions.
- Minimal: Include only the necessary fields, abstracting away internal complexities.
- Validated: Leverage OpenAPI v3 schema in your CRD to enforce data types, ranges, and required fields. This provides immediate feedback to users and prevents invalid configurations from even entering the system.
- Extensible: Consider how future requirements might evolve and design the API to allow for non-breaking extensions. This might involve using maps for arbitrary parameters or having well-defined extension points.
A clear and well-documented Custom Resource API reduces cognitive load for users and simplifies controller development, much like how a well-managed API gateway simplifies integration for microservices. APIPark, for instance, provides a unified format for AI invocation, ensuring that changes in underlying AI models don't break applications. Similarly, a thoughtfully designed CRD API insulates users from the internal complexity of your operator, making it a joy to use and manage. This parallel underscores that whether it's an external service API or an internal Kubernetes Custom Resource API, good design principles are universal for enhancing usability, stability, and maintainability.
By keeping these best practices and considerations in mind, you can elevate your Golang controller from a functional script to a production-ready, highly reliable component that seamlessly extends the capabilities of your Kubernetes cluster.
Conclusion
Our journey through building a Golang controller for watching Custom Resources has taken us deep into the heart of Kubernetes extensibility. We began by demystifying Custom Resources (CRs) and CustomResourceDefinitions (CRDs), understanding how they empower us to extend the Kubernetes API with domain-specific objects, treating our unique application components as first-class citizens within the cluster. We then explored the crucial role of controllers and the Operator pattern, recognizing them as the intelligent agents that continuously observe and reconcile the state of our resources, bringing our desired reality into existence.
The core of our implementation leveraged the powerful client-go library, showcasing how SharedInformerFactory provides an efficient, cached view of the cluster state, how Listers enable lightning-fast local reads, and how workqueue.RateLimitingInterface offers a resilient and concurrent processing model for handling events. We walked through the practical steps of defining Go types for our CRD, generating the necessary typed client code using controller-gen, and finally, implementing the controller's main logic—from setting up event handlers to the robust reconciliation loop that forms the brains of our operator. We even touched upon updating the status of our custom resource, providing vital feedback to the user on the observed state of their custom abstraction.
Through this comprehensive tutorial, you've gained not only the technical skills to write a Golang controller but also a deeper appreciation for the architectural patterns that underpin Kubernetes' declarative nature. You've learned how to harness these patterns to automate complex operational tasks, reduce manual toil, and build self-healing, intelligent systems. The ability to extend the Kubernetes API with your own definitions and then programmatically react to changes in those definitions is one of the most powerful features of the platform, enabling a level of automation previously unattainable.
As you venture forth, remember the best practices: embrace idempotency, implement robust error handling with retries, consider performance, secure your controller with appropriate RBAC, and always strive for clarity in your CRD's API contract. Just as effective API management is critical for external services, a well-designed Custom Resource API is crucial for internal cluster automation. The skills you've acquired here are foundational for contributing to the vast ecosystem of Kubernetes operators, automating infrastructure management, and building the next generation of cloud-native applications. The path to building truly autonomous systems in Kubernetes begins with mastering the art of watching and reacting, a skill you now possess.
Frequently Asked Questions (FAQ)
- What is the difference between a Custom Resource (CR) and a CustomResourceDefinition (CRD)? A CustomResourceDefinition (CRD) is the schema or blueprint that defines a new custom resource type, including its name, scope (namespaced or cluster), versions, and OpenAPI v3 validation schema. Think of it as defining a new table in a database. A Custom Resource (CR) is an actual instance of that custom resource type, much like a row in that database table. You create CRDs first, and then you can create CRs based on those definitions.
- Why do I need a controller for my Custom Resource? A Custom Resource (CR) itself is just a passive data object stored in Kubernetes' etcd key-value store. It defines a "desired state." A controller is an active component that continuously watches for changes to your CRs (and other related resources). When it detects a change, it executes a "reconciliation loop" to compare the CR's desired state with the actual state of the cluster and then takes actions (like creating pods, deployments, services, or updating external systems) to bring the actual state into alignment with the desired state. Without a controller, your CR would just sit there, doing nothing.
- What is the purpose of
client-go's Informers and Listers? Informers provide an efficient way for controllers to watch Kubernetes resources. Instead of constantly polling the API server, an informer establishes a long-lived watch connection and maintains an in-memory cache of the resources it's watching. This significantly reduces the load on the Kubernetes API server and allows your controller to react to changes in real-time. Listers are then used to quickly retrieve objects from this local, in-memory cache, avoiding direct API server calls for read operations and improving controller performance. - How does a
workqueuehelp in controller development? Aworkqueuedecouples the event handling logic (which should be fast) from the complex reconciliation logic (which can be slower and involve API calls). When an informer detects a change, it simply adds the affected resource's key to the workqueue. Separate worker goroutines then pick items from the queue for processing. This pattern provides several benefits: it prevents event storms from overwhelming the controller, allows for graceful retries with exponential backoff for transient errors, and enables concurrent processing, making the controller more robust and scalable. - What is the Operator pattern and how does it relate to Custom Resources and controllers? The Operator pattern extends the concept of a Kubernetes controller to automate the management of complex, stateful applications. An Operator is a domain-specific controller that understands how to deploy, manage, scale, and upgrade a specific application (e.g., a database like PostgreSQL or Cassandra) on Kubernetes. It achieves this by defining Custom Resources that represent the application's configuration (e.g., a
PostgreSQLClusterCR) and then implementing a controller that watches these CRs and translates their desired state into the necessary Kubernetes primitives (StatefulSets, Services, PersistentVolumeClaims, etc.) and application-specific commands. Custom Resources provide the user-facing API for the Operator, encapsulating operational knowledge into software.
🚀You can securely and efficiently call the OpenAI API on APIPark in just two steps:
Step 1: Deploy the APIPark AI gateway in 5 minutes.
APIPark is developed based on Golang, offering strong product performance and low development and maintenance costs. You can deploy APIPark with a single command line.
curl -sSO https://download.apipark.com/install/quick-start.sh; bash quick-start.sh

In my experience, you can see the successful deployment interface within 5 to 10 minutes. Then, you can log in to APIPark using your account.

Step 2: Call the OpenAI API.