How to Access Your XGateway Router: A Complete Guide


In the interconnected world of today, a reliable and well-configured home or office network is no longer a luxury but a fundamental necessity. At the heart of this network lies your router, a critical piece of hardware that acts as the central orchestrator, directing traffic, assigning IP addresses, and, most importantly, serving as your primary gateway to the vast expanse of the internet. For many, the router is a mysterious black box that simply provides Wi-Fi, but understanding how to access and manage it unlocks a world of control, security, and optimization. This comprehensive guide will walk you through every step of accessing your XGateway router, empowering you to configure its settings, troubleshoot issues, and ensure your network is robust, secure, and performing at its best.
Accessing your XGateway router's administration interface is the first crucial step towards truly owning your network experience. This interface, typically a web-based portal, allows you to change Wi-Fi passwords, set up port forwarding, update firmware, monitor connected devices, and implement vital security measures. Without this access, you're at the mercy of default settings, which are often less secure and less efficient than they could be. This guide aims to demystify the process, providing clear, detailed instructions suitable for both novice users and those looking to deepen their understanding of network management. We will delve into everything from identifying your router's IP address to navigating its complex menus, ensuring you gain the confidence to manage your digital gateway effectively.
Understanding Your XGateway Router: More Than Just a Wi-Fi Box
Before we dive into the mechanics of access, it's essential to appreciate what your XGateway router truly represents within your network infrastructure. It's not just a device that broadcasts a wireless signal; it's a sophisticated network appliance performing multiple vital functions simultaneously. Firstly, it acts as a router, intelligently directing data packets between your local network (LAN) and the wider internet (WAN). This involves managing IP addresses for all connected devices, ensuring data reaches its intended destination without collision or loss. Secondly, it often incorporates a modem, especially in all-in-one units provided by Internet Service Providers (ISPs), which translates the digital signals from your network into a format that can be transmitted over the internet infrastructure, whether that's cable, DSL, or fiber optics.
Furthermore, your XGateway router is typically equipped with a firewall, a critical security component that inspects incoming and outgoing network traffic, blocking unauthorized access attempts and protecting your internal network from external threats. It also usually hosts a DHCP server, automatically assigning unique IP addresses to every device that connects to your network, eliminating the need for manual configuration and simplifying network management. Lastly, it provides the Wi-Fi access point functionality that most users associate with a router, allowing devices to connect wirelessly. Each of these components plays a crucial role, and understanding their functions underscores the importance of being able to access and configure your router's settings. Your XGateway router is, in essence, the central nervous system of your digital life, making its proper management paramount for both performance and security.
Step 1: Essential Preparations Before Accessing Your Router
Embarking on the journey to access your XGateway router's administrative interface requires a few preliminary steps. These preparations are vital to ensure a smooth and successful login process, minimizing potential frustrations and troubleshooting later on. Neglecting these initial checks can lead to common pitfalls, such as inability to connect, incorrect credentials, or general confusion about your network setup. Taking a moment to confirm these prerequisites will save you considerable time and effort in the long run, setting a solid foundation for network management.
Physical Connection and Power Status
First and foremost, ensure your XGateway router is properly powered on and functioning. Look for indicator lights, typically on the front or top panel, that signal power, internet connectivity, and Wi-Fi activity. If any essential lights are off or blinking irregularly, consult your router's manual or ISP documentation for troubleshooting steps. A stable power supply and proper initialization are non-negotiable for accessing the device.
Next, consider your connection method. While it's possible to access the router wirelessly, a wired Ethernet connection is always recommended for initial setup and critical configurations. An Ethernet cable provides a more stable and reliable connection, eliminating potential wireless interference or signal dropouts that could disrupt the configuration process. Connect one end of an Ethernet cable to one of the LAN ports on your XGateway router (typically labeled 1, 2, 3, or 4) and the other end to the Ethernet port on your computer. If you must use Wi-Fi, ensure your device is currently connected to the XGateway router's network. Verify this by checking your device's Wi-Fi settings; you should see the router's SSID (Wi-Fi network name) as the connected network.
Locating Default Credentials and Router Information
Every router comes with a set of default login credentials – a username and password – that allow initial access to its administrative interface. These are crucial for your first login. The most common place to find these defaults is on a sticker located on the bottom, back, or side of your XGateway router itself. This sticker usually also contains the router's default IP address (which we'll discuss next) and the default Wi-Fi network name (SSID) and password (WPA2 key).
Take a moment to carefully examine your XGateway router for this sticker. It might be small, so look closely. Note down the "Username," "Password," and "Router IP" or "Default Gateway" information. Common default usernames include "admin," "user," or sometimes none at all (leave blank). Common default passwords are "admin," "password," "1234," or simply blank. It is paramount to record this information accurately, as even a minor typo can prevent successful login. If you cannot find a sticker, or if you suspect the default credentials have been changed (perhaps by your ISP), you might need to consult your router's user manual or perform a factory reset as a last resort (a process we'll cover later, with appropriate warnings).
Ensuring Your Device is on the Same Network
For your computer or mobile device to communicate with your XGateway router's administrative interface, it must be part of the same local area network (LAN) that the router manages. If you're using an Ethernet cable, this connection automatically places your computer on the router's network. If you're connecting wirelessly, double-check that your device is connected to the Wi-Fi network broadcast by your XGateway router, not a neighbor's Wi-Fi or a mobile hotspot. Incorrect network connectivity is a frequent cause of "page cannot be displayed" errors when trying to access the router's login page. This fundamental network principle is key to successful access, as the router's interface is typically only accessible from within its own local network for security reasons.
Step 2: Finding Your XGateway Router's IP Address (The Default Gateway)
The router's IP address, often referred to as the default gateway IP, is the numerical address you'll type into your web browser to access its configuration interface. Think of it as the street address for your router's control panel. Without this specific address, your browser won't know where to send your request. While many routers share common default IP addresses, it's always best to confirm the exact one for your specific XGateway model. This section will guide you through finding this crucial IP address on various operating systems.
What is a Default Gateway?
In networking, a default gateway is the path used to pass information to devices in other networks. More simply, it's the router on your local network that acts as the entry point to other networks, including the internet. When your computer or any device on your network needs to send data to a destination outside its immediate local network (e.g., a website on the internet), it sends that data to the default gateway (your XGateway router), which then forwards it appropriately. Therefore, the IP address of your XGateway router on your local network is known as your "Default Gateway."
Common Default Gateway IP Addresses
Many router manufacturers use a limited set of IP addresses for their devices. The most common default gateway IP addresses are:
- 192.168.1.1
- 192.168.0.1
- 192.168.1.254
- 10.0.0.1
- 192.168.2.1
Your XGateway router will likely use one of these. However, it's still important to verify it using the methods below.
Finding the Default Gateway IP on Windows
- Open Command Prompt: Press
Win + R, typecmd, and press Enter. - Type
ipconfig: In the Command Prompt window, typeipconfigand press Enter. - Locate "Default Gateway": Scroll through the output. Under the "Ethernet adapter" (for wired connections) or "Wireless LAN adapter Wi-Fi" (for wireless connections) section, you will find an entry labeled "Default Gateway." The IP address listed next to it is your router's IP address.``` Wireless LAN adapter Wi-Fi:Connection-specific DNS Suffix . : Link-local IPv6 Address . . . . . : fe80::xxxx:xxxx:xxxx:xxxx%xx IPv4 Address. . . . . . . . . . . : 192.168.1.100 Subnet Mask . . . . . . . . . . . : 255.255.255.0 Default Gateway . . . . . . . . . : 192.168.1.1
`` In this example, the XGateway router's IP address is192.168.1.1`.
Finding the Default Gateway IP on macOS
- Open System Settings/Preferences: Click the Apple menu in the top-left corner, then select "System Settings" (macOS Ventura and later) or "System Preferences" (earlier versions).
- Go to Network: Click on "Network."
- Select Your Connection: In the left sidebar, select your active network connection (e.g., "Wi-Fi" or "Ethernet").
- Click "Details" / "Advanced": Click the "Details..." button (macOS Ventura and later) or "Advanced..." button (earlier versions).
- Go to TCP/IP Tab: In the new window, select the "TCP/IP" tab.
- Locate "Router": The IP address listed next to "Router" is your XGateway router's IP address.
Finding the Default Gateway IP on Linux
- Open Terminal: Use your distribution's method to open a terminal (e.g., Ctrl+Alt+T).
- Type
ip routeornetstat -rn:bash $ ip route | grep default default via 192.168.1.1 dev wlp4s0 proto dhcp metric 600Here,192.168.1.1is the XGateway router's IP.- Using
ip route: Typeip route | grep defaultand press Enter. The IP address after "default via" is your router's IP. - Using
netstat -rn: Typenetstat -rn | grep defaultand press Enter. The IP address in the "Gateway" column is your router's IP.
- Using
Finding the Default Gateway IP on Mobile Devices (iOS/Android)
On iOS: 1. Go to "Settings" > "Wi-Fi." 2. Tap the "i" icon next to the Wi-Fi network your XGateway router is broadcasting. 3. Look for the "Router" field. The IP address listed there is your router's IP.
On Android: 1. Go to "Settings" > "Network & internet" > "Wi-Fi." 2. Tap on the Wi-Fi network your XGateway router is broadcasting. 3. Tap on "Advanced" or a similar option. 4. Look for "Gateway" or "Router." The IP address displayed is your router's IP.
Once you have identified your XGateway router's IP address, make a note of it. This address, along with your login credentials, is your key to accessing the router's configuration interface.
Step 3: Logging In to the XGateway Router Interface
With your XGateway router's IP address and login credentials in hand, you are now ready to access its administrative interface. This is where the real work of managing and configuring your network begins. The process is straightforward, but attention to detail is crucial to avoid common login errors.
Opening Your Web Browser
- Launch a Web Browser: Open any standard web browser on your computer or device that is connected to the XGateway router's network. Popular choices include Google Chrome, Mozilla Firefox, Microsoft Edge, or Apple Safari. While most modern browsers are compatible, if you encounter issues, try a different browser or ensure your current browser is updated to the latest version. Sometimes, older routers might have quirks with newer browser features, but this is increasingly rare.
Entering the Router's IP Address
- Type the IP Address into the Address Bar: In the address bar of your web browser (the area where you typically type website URLs like
google.com), type the XGateway router's IP address you found in Step 2. Do not includehttp://orhttps://unless specifically instructed by your router's documentation, as the browser will usually addhttp://automatically.- Example: If your router's IP is
192.168.1.1, simply type192.168.1.1and press Enter.
- Example: If your router's IP is
- Await the Login Page: After pressing Enter, your browser will attempt to connect to your XGateway router. If successful, you should see a login page appear. This page will typically have fields for "Username" and "Password." The appearance of this page varies significantly between router manufacturers, but the core functionality remains the same. It might feature the router brand's logo, such as XGateway, or your ISP's branding if it's a modem-router combo provided by them.
Entering Username and Password
- Input Credentials: Carefully enter the username and password you noted down from your XGateway router's sticker (from Step 1).
- Case Sensitivity: Most passwords are case-sensitive. Ensure you type them exactly as they appear.
- Special Characters: If your password contains special characters, make sure your keyboard layout is correct.
- Common Defaults: If you are unsure, try common defaults like
admin/admin,admin/password,user/user, or leave one or both fields blank. Refer to the table below for common defaults.
| Router Brand (Generic/Common) | Default Username | Default Password | Common IP Address | Notes |
|---|---|---|---|---|
| XGateway (Generic) | admin |
password |
192.168.1.1 |
Always check your device's sticker first! |
| Cisco / Linksys | admin |
admin |
192.168.1.1 |
Newer models may have unique passwords. |
| TP-Link | admin |
admin |
192.168.0.1 |
Or 192.168.1.1. |
| Netgear | admin |
password |
192.168.1.1 |
Or 192.168.0.1. |
| D-Link | admin |
(leave blank) |
192.168.0.1 |
Or 192.168.1.1. |
| ASUS | admin |
admin |
192.168.1.1 |
|
| Ubiquiti | ubnt |
ubnt |
192.168.1.1 |
|
| Huawei | admin |
admin |
192.168.1.1 |
Often provided by ISP; custom credentials common. |
| Verizon Fios | admin |
(on sticker) | 192.168.1.1 |
Specific to router model, check sticker. |
| Spectrum / TWC | admin |
(on sticker) | 192.168.1.1 |
Often admin for username, password or mso or on sticker. |
| AT&T U-verse | admin |
(on sticker) | 192.168.1.254 |
Access code on sticker. |
Note: This table provides common defaults. For your specific XGateway router, always prioritize the information found on the physical sticker on the device or in its user manual. ISPs often change default credentials.
- Click "Login" / "Sign In": After entering the credentials, click the "Login" or "Sign In" button.
Troubleshooting Login Issues
If you encounter difficulties logging in, here are some common reasons and solutions:
- "Page cannot be displayed" or "Connection timed out":
- Incorrect IP Address: Double-check the IP address you typed. A single digit error can prevent access.
- Network Connectivity: Ensure your device is correctly connected to the XGateway router's network (wired or wireless). Run
ipconfig(Windows) or check network settings (macOS/Linux) to confirm you have an IP address from your router's range (e.g.,192.168.1.x). - Router Not Fully Booted: Wait a few more minutes after powering on your router before attempting to log in.
- Browser Issues: Try a different web browser or clear your current browser's cache and cookies.
- Firewall/Antivirus: Temporarily disable your computer's firewall or antivirus software, as they might be blocking access to the local IP. Remember to re-enable them afterward.
- "Incorrect Username or Password":
- Typos: Re-enter the username and password very carefully, paying attention to case sensitivity.
- Caps Lock: Ensure Caps Lock is off unless your password specifically requires it.
- Changed Defaults: If you or someone else previously changed the default credentials, you'll need to use the new ones.
- ISP Customization: If your router was provided by an ISP, they might have set custom credentials. Check any documentation they provided.
- Factory Reset (Last Resort): If all else fails and you've exhausted all possible credentials, a factory reset will revert the router to its original default settings, including login credentials. This will, however, erase all your custom configurations (Wi-Fi name, passwords, port forwarding, etc.), requiring you to reconfigure everything from scratch. To perform a factory reset, locate a small, recessed "Reset" button on your XGateway router (often on the back or bottom). With the router powered on, use a paperclip or pen tip to press and hold this button for 10-15 seconds until the lights flicker or the router reboots.
Once you've successfully logged in, you'll be greeted by your XGateway router's main administrative interface, ready to explore and configure its many options.
APIPark is a high-performance AI gateway that allows you to securely access the most comprehensive LLM APIs globally on the APIPark platform, including OpenAI, Anthropic, Mistral, Llama2, Google Gemini, and more.Try APIPark now! 👇👇👇
Step 4: Navigating the XGateway Router Interface: A Deep Dive into Settings
Congratulations! You've successfully gained access to your XGateway router's administrative control panel. This is where you can truly take command of your network. Router interfaces can vary significantly in appearance and layout depending on the manufacturer and model, but they generally share a common set of functionalities, organized into logical sections. This section will guide you through the most common and important settings you'll find, providing detailed explanations to help you understand and configure your network effectively.
Navigating these menus might seem daunting at first due to the sheer volume of options, but by understanding the core purpose of each section, you can confidently make adjustments. Remember that your XGateway router serves as the central gateway for all your network traffic, and thus, its settings directly impact every connected device and your internet experience.
Main Dashboard or Status Page
Upon logging in, you'll usually land on a "Status," "Dashboard," or "Home" page. This page provides a quick overview of your XGateway router's current operational state. You'll typically find information such as:
- Internet Status: Whether your router is connected to the internet, IP address assigned by your ISP, DNS servers in use, and connection uptime.
- Wireless Status: Current Wi-Fi network names (SSIDs), security types, and channels.
- LAN Status: The router's local IP address and subnet mask.
- Connected Devices: A list of devices currently connected to your network, sometimes including their IP and MAC addresses.
- Firmware Version: The current software version running on your router.
- System Uptime: How long the router has been running since its last reboot.
This page is an excellent starting point for quick diagnostics if you suspect a network issue, providing a snapshot of your network's health.
Network Settings
This is arguably one of the most critical sections, dealing with how your XGateway router connects to the internet and how it manages your local network.
- WAN (Wide Area Network) / Internet Settings:
- This section configures how your XGateway router connects to your Internet Service Provider (ISP). Common connection types include:
- Dynamic IP (DHCP): Most common for residential users. The router automatically obtains an IP address from your ISP.
- PPPoE (Point-to-Point Protocol over Ethernet): Often used for DSL connections, requiring a username and password provided by your ISP.
- Static IP: Less common for homes, used when your ISP assigns you a fixed public IP address. Requires manual input of IP address, subnet mask, gateway, and DNS servers.
- Here you might also find options for MAC Clone (if your ISP requires your router's WAN MAC address to match a specific one) or changing DNS Servers (allowing you to use public DNS servers like Google DNS or Cloudflare DNS for potentially faster and more secure browsing).
- This section configures how your XGateway router connects to your Internet Service Provider (ISP). Common connection types include:
- LAN (Local Area Network) Settings:
- This section defines your local network.
- Router's IP Address: You can change your XGateway router's internal IP address (e.g., from
192.168.1.1to192.168.10.1). Be cautious when changing this, as it will require all devices on your network to get new IP addresses, and you'll need to use the new IP to access the router. - Subnet Mask: Defines the size of your local network. For most home networks,
255.255.255.0is standard. - DHCP Server: This is usually enabled by default. It assigns IP addresses to devices on your network automatically. You can configure the DHCP IP Address Range (e.g.,
192.168.1.100to192.168.1.199) to control which IP addresses your devices receive. You can also configure DHCP Lease Time, which is how long a device keeps its assigned IP address. - DHCP Reservation / Static IP Assignment: Allows you to assign a specific, permanent IP address to a device based on its MAC address. This is useful for devices like servers, network printers, or gaming consoles where a consistent IP address is beneficial for port forwarding or remote access.
- Router's IP Address: You can change your XGateway router's internal IP address (e.g., from
- This section defines your local network.
Wireless Settings (Wi-Fi)
This is where you manage your XGateway router's Wi-Fi networks. Proper configuration here is vital for both connectivity and security.
- Wireless Network Name (SSID): This is the name your Wi-Fi network broadcasts. You can change it to something unique and recognizable.
- Security Mode/Type: This defines the encryption method for your Wi-Fi. Always use the strongest available option:
- WPA2-PSK (AES): Still very common and secure.
- WPA3-Personal: The latest and most secure standard. If your router and devices support it, enable it.
- Avoid WEP and WPA-PSK (TKIP) as they are outdated and vulnerable.
- Wireless Password / Pre-shared Key: Set a strong, unique password for your Wi-Fi network. Combine uppercase and lowercase letters, numbers, and symbols.
- Wireless Channel: Your router automatically selects a channel, but if you experience interference or slow speeds, you can manually change the channel (e.g., 1, 6, or 11 for 2.4 GHz, or various non-overlapping channels for 5 GHz).
- Wireless Mode: Choose between 802.11 b/g/n/ac/ax. For optimal performance, select a mode that matches your newest devices (e.g.,
802.11nor802.11ac/axmixed mode). - Guest Network: Many XGateway routers offer the option to create a separate guest Wi-Fi network. This allows guests to access the internet without having access to your main network resources (e.g., shared drives, printers), enhancing your network's security.
- SSID Broadcast: You can usually disable SSID broadcast to hide your Wi-Fi network name from casual scanners. However, this is more of an inconvenience than a strong security measure, as your network can still be discovered.
Security Features
Your XGateway router acts as your first line of defense against cyber threats. This section allows you to configure its built-in security mechanisms.
- Firewall: Most routers have a built-in Network Address Translation (NAT) firewall and a Stateful Packet Inspection (SPI) firewall.
- NAT (Network Address Translation): Hides your internal network's IP addresses from the outside world, presenting only your router's public IP.
- SPI (Stateful Packet Inspection): Monitors incoming and outgoing traffic to determine if a packet belongs to an established connection, blocking suspicious ones. Ensure both are enabled.
- Port Forwarding / Virtual Servers: This feature allows specific incoming internet traffic to bypass the firewall and be directed to a particular device on your local network. It's essential for online gaming, hosting servers (e.g., a personal web server, a remote access server), or using specific applications that require direct incoming connections. You specify an external port, an internal IP address, and an internal port.
- DMZ (Demilitarized Zone): Placing a device in the DMZ exposes it directly to the internet, bypassing the router's firewall. While this can resolve connectivity issues for certain applications, it significantly reduces the security of the device and should only be used as a last resort and with extreme caution, ideally for non-critical devices.
- MAC Filtering: Allows you to create a list of approved MAC addresses (unique hardware identifiers) that are permitted to connect to your network, or a blacklist of MAC addresses to deny. While it adds a layer of security, it's not foolproof, as MAC addresses can be spoofed.
- Parental Controls / Access Control: Allows you to block specific websites, set internet access schedules for certain devices, or restrict internet usage for children.
- Remote Management: By default, remote management should be disabled. If enabled, it allows you to access your XGateway router's interface from outside your local network (e.g., from a different location via the internet). Only enable this if absolutely necessary and ensure you use a very strong password and, if possible, restrict access to specific IP addresses.
Advanced Settings
This section typically contains more specialized configurations for advanced users.
- VPN Passthrough / VPN Client/Server:
- VPN Passthrough: Allows VPN client connections from within your network to pass through the router to an external VPN server.
- VPN Client/Server: Some advanced XGateway routers can act as a VPN client (connecting your entire network to a VPN service) or a VPN server (allowing you to securely access your home network from outside).
- QoS (Quality of Service): Allows you to prioritize certain types of network traffic (e.g., video streaming, online gaming) over others to ensure a smoother experience, even when the network is busy.
- Dynamic DNS (DDNS): If you host services on your home network and your ISP provides a dynamic public IP address (which changes periodically), DDNS services can link a fixed hostname (e.g.,
myhome.ddns.net) to your dynamic IP, making your services consistently accessible. - Static Routing: For complex networks, this allows you to manually define routes for traffic to reach specific subnets.
- UPnP (Universal Plug and Play): Allows devices on your network to automatically configure port forwarding and other network settings without manual intervention. While convenient, it can pose a security risk as it bypasses manual authorization. Consider disabling it if you don't use it.
- IPv6: Configure settings for the newer IPv6 protocol, which is gradually replacing IPv4.
Administration / Management / System Tools
This section handles the maintenance and general management of your XGateway router.
- Router Password: This is one of the most important settings to change. It refers to the username and password used to log in to the router's administrative interface itself, not your Wi-Fi password. Always change this from the default immediately after your first successful login. Use a strong, unique password.
- Firmware Upgrade: Check for and install new firmware versions. Firmware updates often include bug fixes, performance improvements, and crucial security patches, making this a vital maintenance task. Download firmware from the official XGateway website or your ISP.
- Backup and Restore: Allows you to save your router's current configuration to a file on your computer and restore it later. This is invaluable before making major changes or performing a factory reset.
- Reboot: Restarts your XGateway router. A simple reboot can often resolve minor network glitches or connectivity issues.
- Factory Reset: As mentioned, this reverts all settings to their original factory defaults. Use with caution.
- System Log / Event Log: Provides a record of your router's activities, including connection attempts, security events, and system errors. Useful for troubleshooting.
Navigating these settings gives you unprecedented control over your XGateway router, which acts as the intelligent gateway between your personal devices and the global network. Understanding each option empowers you to customize your network to your specific needs, improve performance, and significantly enhance security. Always remember to save your changes after modifying any settings.
Step 5: Essential Configurations After Initial Access
Once you've successfully logged into your XGateway router's interface, there are a few critical steps you should take immediately. These initial configurations are not just about personalizing your network; they are fundamental for establishing a secure and efficient digital environment. Skipping these steps leaves your network vulnerable and potentially underperforming. Think of this as laying the groundwork for a robust and private online experience, leveraging your gateway to its full potential.
1. Change the Default Admin Credentials (Router Login Password)
This is, without a doubt, the most important step. Default usernames and passwords for routers are widely known and easily guessed by malicious actors, making your XGateway router a prime target for unauthorized access. If someone gains access to your router's administration interface, they could change your DNS settings to redirect you to malicious websites, snoop on your traffic, or even lock you out of your own network.
- How to do it: Navigate to the "Administration," "Management," or "System Tools" section of your router's interface. Look for an option like "Router Password," "Account Settings," or "Admin Password."
- Best Practice: Create a strong, unique password that includes a mix of uppercase and lowercase letters, numbers, and symbols. It should be at least 12-16 characters long. Do not use easily guessable information like your name, pet's name, or birthdate. Store this new password securely, perhaps in a password manager.
2. Update Your Wi-Fi Network Name (SSID) and Password
While changing your Wi-Fi password might seem obvious, many users stick with the default SSID, which often reveals the router's brand or even your ISP, giving potential attackers valuable information.
- How to do it: Go to the "Wireless Settings" or "Wi-Fi" section. Change the "Wireless Network Name" (SSID) to something personal but not revealing (avoid using your address or family name). Then, update the "Wireless Password" or "Pre-shared Key."
- Best Practice:
- SSID: Choose a unique SSID.
- Password: Use a strong, unique Wi-Fi password, distinct from your router login password.
- Security Type: Ensure your Wi-Fi security is set to WPA2-PSK (AES) at a minimum, or WPA3-Personal if your XGateway router and all your devices support it. Avoid WEP and WPA (TKIP).
3. Update Your Router's Firmware
Router firmware is the operating system that runs your XGateway router. Like any software, it can contain bugs or security vulnerabilities that are discovered over time. Manufacturers regularly release firmware updates to address these issues, improve performance, and add new features.
- How to do it: Navigate to "Administration," "System Tools," or "Firmware Update" in your router's interface. Check your current firmware version (usually displayed on the Status page). Visit the official XGateway website (or your ISP's support page for ISP-provided routers) to see if a newer version is available for your specific model. Download the firmware file to your computer.
- Important: Follow the manufacturer's instructions carefully when performing a firmware update. Do not interrupt the process, as it can brick your router. It's often recommended to perform a firmware update via a wired Ethernet connection to ensure stability.
4. Enable a Guest Network (If Available and Needed)
If your XGateway router supports a guest network, enabling it is an excellent security practice. A guest network provides internet access to visitors without giving them access to your main local network, which contains your private devices, shared files, and network-attached storage.
- How to do it: Look for "Guest Network" settings under the "Wireless Settings" section. Enable it and set a separate SSID and password for your guests. Many guest networks also allow you to isolate guests from each other and restrict their bandwidth.
- Benefit: This segmentation enhances the security of your primary network, preventing potential vulnerabilities from guest devices affecting your critical systems.
5. Review and Disable Unnecessary Services (e.g., WPS, Remote Management)
Many routers come with features enabled by default that you might not need and which could pose security risks.
- WPS (Wi-Fi Protected Setup): While convenient for connecting devices with a button press, WPS has known security vulnerabilities. It's generally recommended to disable it. Look for "WPS" settings in the "Wireless" or "Security" section.
- Remote Management: This feature allows you to log in to your XGateway router from outside your home network. Unless you specifically require this functionality (and understand the risks), it should be disabled to prevent unauthorized external access. Find this in the "Administration" or "Security" section.
- UPnP (Universal Plug and Play): As mentioned earlier, UPnP allows devices to automatically open ports on your firewall. While convenient, it can be a security risk as it bypasses manual authorization. If you don't rely on it for specific applications, consider disabling it.
By meticulously going through these essential configurations, you're not just customizing your XGateway router; you're actively strengthening the security posture of your entire home network. Your router, as your critical gateway, demands this level of attention to protect your digital life. These steps form the foundation of responsible network management and will contribute significantly to a safer and more reliable online experience.
Step 6: Troubleshooting Common Access Issues
Even with the best preparation, you might encounter issues when trying to access or manage your XGateway router. Don't be discouraged; many common problems have straightforward solutions. This section provides a structured approach to diagnosing and resolving typical access difficulties, ensuring you can regain control over your network's gateway.
"Page Cannot Be Displayed" / "Connection Timed Out" / "This Site Can't Be Reached"
This is arguably the most common issue. It means your browser can't establish a connection with your router at the specified IP address.
- Verify Router's Power and Status Lights: Ensure your XGateway router is powered on and its indicator lights (power, internet, Wi-Fi) are behaving normally (steady or slowly blinking, not rapidly flashing in an error pattern).
- Check Physical Connections: If using Ethernet, ensure the cable is securely plugged into both your computer's Ethernet port and one of the LAN ports on your XGateway router. Try a different Ethernet cable if you suspect the current one is faulty.
- Confirm Wi-Fi Connection: If connecting wirelessly, ensure your device is actively connected to your XGateway router's Wi-Fi network. Sometimes devices jump to a stronger Wi-Fi signal from a neighbor or a public hotspot.
- Double-Check IP Address: Re-enter the router's IP address (e.g.,
192.168.1.1) very carefully into the browser's address bar. A single incorrect digit will prevent access. - Verify Your Device's IP Address and Default Gateway:
- Windows: Open Command Prompt (
cmd), typeipconfig, and press Enter. Look under your active adapter (Ethernet or Wi-Fi) for "IPv4 Address" and "Default Gateway." Your device's IP address should be in the same subnet as the router (e.g., if router is192.168.1.1, your device should be192.168.1.X). The "Default Gateway" should match your router's IP. - macOS/Linux/Mobile: Refer to Step 2 for instructions to check your device's network configuration.
- If your device doesn't have an IP address, or it's a self-assigned IP (e.g.,
169.254.x.x), it indicates a problem with the router's DHCP server or your device's ability to obtain an IP. Try rebooting both your device and the router.
- Windows: Open Command Prompt (
- Try a Different Browser: Browser extensions, cache, or specific browser settings can sometimes interfere. Try accessing the XGateway router using a different web browser (e.g., if you're using Chrome, try Firefox or Edge). Clear your browser's cache and cookies.
- Temporarily Disable Firewall/Antivirus: On your computer, security software can sometimes block access to local network devices. Temporarily disable your firewall and antivirus (remember to re-enable them immediately after testing).
- Reboot Router: A simple reboot can often clear up transient network issues. Unplug your XGateway router from power for 30 seconds, then plug it back in and wait a few minutes for it to fully boot up before trying again.
"Incorrect Username or Password"
This message indicates your browser successfully reached the XGateway router's login page, but the credentials you entered were not accepted.
- Review Your Notes: Carefully re-enter the username and password you noted down from your router's sticker. Pay close attention to case sensitivity.
- Check Caps Lock: Ensure your Caps Lock key is not accidentally enabled, unless your password explicitly uses uppercase letters.
- Try Common Defaults: If you're unsure if the password was changed, try the common default credentials listed in Step 3 (e.g.,
admin/admin,admin/password). - ISP Custom Credentials: If your XGateway router was provided by your ISP, they might have set a unique password. Check any documentation from your ISP.
- Factory Reset (Last Resort): If you've tried all possible known and default passwords and still can't log in, you may need to perform a factory reset. This will revert the router to its out-of-the-box state, including default login credentials. WARNING: This will erase all your custom settings (Wi-Fi names/passwords, port forwarding, etc.), and you will need to reconfigure your entire network. Locate the small "Reset" button (often recessed) on your XGateway router, use a paperclip to press and hold it for 10-15 seconds while the router is powered on, then release. Wait for the router to reboot fully before attempting to log in with the default credentials.
Interface Appears Glitchy or Unresponsive
Sometimes, the XGateway router's web interface might load, but elements are missing, links don't work, or it's generally slow.
- Clear Browser Cache: This is a common solution. Your browser might be holding onto old or corrupted data for the router's interface. Clear your browser's cache and cookies, then try again.
- Try a Different Browser: As with connection issues, an alternative browser can often bypass rendering problems specific to one browser.
- Reboot Router: A router reboot can often clear up temporary software glitches that affect the web interface.
- Check for Firmware Updates: Outdated firmware can sometimes lead to interface instability. If you can access the firmware update section (even if it's slow), check for and apply any available updates.
By systematically working through these troubleshooting steps, you'll significantly increase your chances of resolving access issues and successfully managing your XGateway router, reaffirming its role as your reliable network gateway. Patience and methodical testing are key.
Step 7: Security Best Practices for Your XGateway Router
Your XGateway router is the gateway through which all your internet traffic flows, and as such, it's a prime target for cybercriminals. Securing it is not merely a recommendation; it's an imperative for safeguarding your privacy, data, and overall network integrity. Neglecting router security can expose your entire home or office network to a myriad of threats, from unauthorized access and data theft to malware infections and denial-of-service attacks. Implementing a robust security posture for your XGateway router is a continuous process, not a one-time setup.
1. Change Default Admin Credentials Immediately
As discussed in Step 5, this is the absolute foundational step. Default passwords are public knowledge. If you haven't changed your XGateway router's login username and password, you're leaving the front door to your network wide open. Use strong, unique passwords for both your router's admin interface and your Wi-Fi network. Never use the same password for both.
2. Keep Firmware Updated
Router firmware is like the operating system of your XGateway router. Manufacturers frequently release updates that patch security vulnerabilities, improve performance, and add new features. Running outdated firmware is akin to using old software with known security holes.
- Action: Regularly check the XGateway manufacturer's website (or your ISP's support page) for firmware updates specific to your router model. Download and install them according to the provided instructions. This proactive measure is one of the most effective ways to protect your router from newly discovered exploits.
3. Use Strong Wi-Fi Encryption (WPA2-AES or WPA3-Personal)
Your Wi-Fi network's security protocol determines how effectively your wireless communications are encrypted, preventing unauthorized parties from intercepting your data.
- Action: Configure your XGateway router to use WPA2-PSK (AES) at a minimum. If your router and all your connected devices support it, upgrade to WPA3-Personal for the highest level of security available for home networks. Avoid WEP and WPA (TKIP) at all costs, as they are severely outdated and easily crackable.
4. Disable Wi-Fi Protected Setup (WPS)
WPS is a feature designed for easy connection of devices to Wi-Fi by pressing a button or entering a PIN. However, WPS has a critical design flaw that makes it vulnerable to brute-force attacks, allowing attackers to potentially guess your Wi-Fi password in a matter of hours.
- Action: Access your XGateway router's wireless settings and disable WPS. The convenience it offers does not outweigh the significant security risk.
5. Disable Remote Management
Remote management allows you to access your XGateway router's administration interface from outside your local network (i.e., from the internet). While useful for managing your network remotely, it significantly increases your attack surface.
- Action: Ensure this feature is disabled by default. If you absolutely need remote access, configure it to allow access only from specific, known IP addresses (if your router supports this) and use HTTPS for encryption. Otherwise, keep it off.
6. Consider Using a Guest Network
For visitors, a guest network offers internet access without granting them entry to your main local network. This isolates their devices, preventing potential malware or vulnerabilities on their devices from affecting your personal computers, smart home devices, or network storage.
- Action: If your XGateway router supports it, enable the guest network, give it a unique name and password, and ensure it's configured to isolate guests from your main network.
7. Regularly Review Connected Devices
Periodically check the list of connected devices in your XGateway router's interface. This helps you identify any unauthorized devices that might have joined your network.
- Action: Look for a "Connected Devices," "DHCP Clients," or "Client List" section. If you see an unfamiliar device, you can usually block its MAC address from accessing your network. This is another reason to use strong Wi-Fi passwords, as it makes unauthorized entry much harder.
8. Use Strong DNS Servers
While not directly a router security feature, changing your DNS servers can enhance privacy and sometimes block malicious websites. Your XGateway router typically uses DNS servers provided by your ISP.
- Action: Consider configuring your router to use reputable public DNS servers like Cloudflare DNS (1.1.1.1, 1.0.0.1) or Google DNS (8.8.8.8, 8.8.4.4). These often offer better performance, enhanced privacy, and sometimes built-in security features that block known phishing or malware sites.
9. Backup Your Router Configuration
After meticulously configuring your XGateway router to your preferences and implementing all security measures, it's wise to save your settings.
- Action: Most routers have a "Backup" or "Save Configuration" option in the "Administration" or "System Tools" section. Save this configuration file to a secure location on your computer. This allows you to quickly restore your settings if you need to perform a factory reset or replace your router.
10. Understanding Beyond the Home Gateway: The Rise of API Gateways
While securing your XGateway router is paramount for your home or small office network, the concept of a "gateway" extends far beyond residential network infrastructure. In the realm of enterprise IT and modern software development, particularly with the proliferation of cloud services, microservices, and artificial intelligence, an entirely different kind of gateway has become essential: the API Gateway.
For developers and enterprises managing a multitude of services, especially modern AI and REST services, the simple functions of a home router might not suffice. This is where advanced solutions like an API gateway become indispensable. For instance, APIPark is an open-source AI gateway and API management platform. It offers an all-in-one solution for managing, integrating, and deploying AI and REST services, providing capabilities far beyond what a typical XGateway router offers in terms of service management, security, and scalability for applications.
APIPark, unlike your XGateway router which manages network traffic for internet access, acts as a single entry point for all API calls from clients to backend services. It centralizes functionalities such as authentication, rate limiting, logging, and monitoring for a complex web of APIs, including those powering AI models. Imagine a scenario where an application needs to interact with dozens of AI models from different providers or a hundred custom REST APIs. Without an API gateway like APIPark, each application would need to handle authentication, data transformation, and error handling for every individual API, leading to a sprawling, unmanageable mess.
APIPark simplifies this by offering features like: * Quick Integration of 100+ AI Models: Providing a unified management system for authentication and cost tracking across diverse AI services. * Unified API Format for AI Invocation: Standardizing how applications interact with AI models, reducing complexity and maintenance when models change. * Prompt Encapsulation into REST API: Allowing users to quickly turn AI prompts into callable REST APIs, making advanced AI capabilities accessible and manageable. * End-to-End API Lifecycle Management: Guiding APIs from design to deployment and deprecation, ensuring robust governance. * Performance Rivaling Nginx: Capable of handling over 20,000 transactions per second (TPS) with modest hardware, demonstrating its robust capacity for large-scale enterprise use.
So, while your XGateway router secures your household's access to the internet, solutions like APIPark extend the "gateway" concept into the intricate world of application and AI service management, solving complex challenges for developers and businesses. It's a testament to how the fundamental idea of a "gateway" evolves to meet different technological demands, from basic network routing to sophisticated API orchestration.
By implementing these security best practices for your XGateway router, you significantly bolster your network's resilience against cyber threats, ensuring that your digital gateway remains a secure and reliable portal to the internet, rather than an open invitation to unwanted intrusions. Continuous vigilance and regular updates are key to maintaining this security over time.
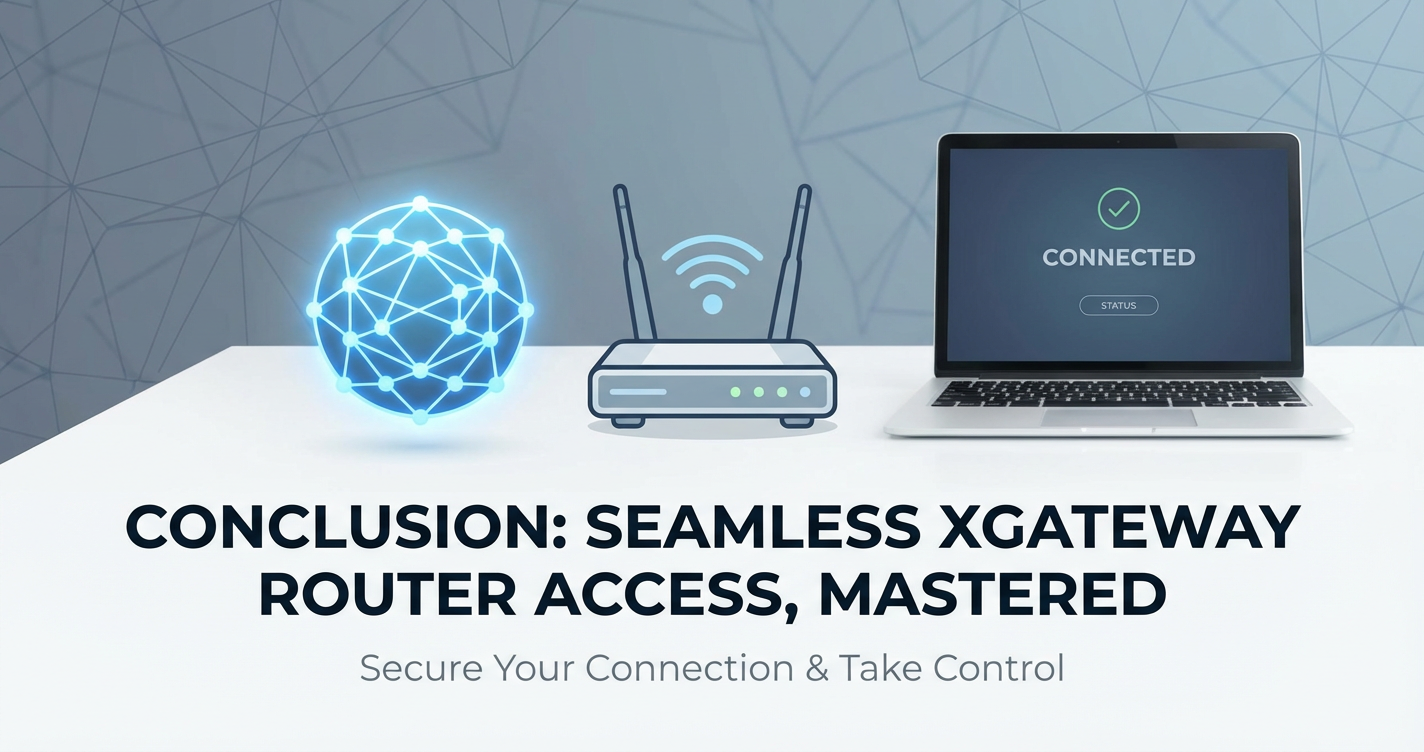
Conclusion: Mastering Your Network's Gateway
Mastering the art of accessing and managing your XGateway router is not merely a technical skill; it's a fundamental aspect of modern digital literacy. Your router is more than just a device that emits a Wi-Fi signal; it is the unwavering gateway that connects your entire digital life to the global internet. Understanding its functions and knowing how to navigate its administrative interface empowers you with unparalleled control over your network's performance, security, and overall reliability.
Throughout this comprehensive guide, we've dissected the process into manageable steps: from the initial preparations like finding your router's IP address and default credentials, to the crucial login process, and then into the intricate details of navigating the various settings panels. We've explored everything from basic Wi-Fi configuration and LAN settings to advanced security features, port forwarding, and system maintenance like firmware updates. Each configuration choice you make within your XGateway router's interface has a direct impact on the speed, stability, and security of your home or office network.
Moreover, we've highlighted the critical importance of implementing robust security best practices. Changing default credentials, updating firmware, and employing strong Wi-Fi encryption are not optional recommendations but essential safeguards against a constantly evolving landscape of cyber threats. These measures ensure that your XGateway router remains a secure barrier, protecting your personal data and devices from unauthorized access and malicious intent.
Finally, we broadened our perspective to understand how the concept of a "gateway" scales beyond your home network, introducing sophisticated solutions like API gateways such as APIPark. This illustrates that while your XGateway router is the linchpin of your personal network, the underlying principle of managing and securing traffic at a central ingress point is a universal necessity in both consumer and enterprise technology environments.
By internalizing the knowledge and putting into practice the steps outlined in this guide, you transform your XGateway router from a mysterious black box into a powerful, transparent, and controllable component of your digital ecosystem. You are no longer just a user of the internet but a confident manager of your personal gateway, capable of optimizing its performance, enhancing its security, and proactively troubleshooting any issues that may arise. Embrace this control; it is the cornerstone of a truly empowered and secure online experience.
Frequently Asked Questions (FAQ)
1. What is the "Default Gateway" and why is it important for accessing my XGateway router?
The "Default Gateway" is the IP address of your XGateway router on your local network. It's the point through which all devices on your local network communicate with the internet and other external networks. It's crucial for accessing your router's administrative interface because you type this IP address into your web browser to reach the login page. Without knowing this address, you cannot connect to your router's internal configuration panel.
2. I forgot my XGateway router's login password. What can I do?
If you've forgotten the password for your XGateway router's administrative interface, your primary option is to perform a factory reset. This will revert all of your router's settings, including the login password, back to their original factory defaults (which can usually be found on a sticker on the router). However, be aware that a factory reset will erase all your custom configurations, such as your Wi-Fi name and password, port forwarding rules, and any other settings you've changed. You will need to reconfigure your router from scratch after a reset.
3. My browser shows "This site can't be reached" when I type the router's IP address. What's wrong?
This error usually indicates that your device cannot establish a connection with the XGateway router at the specified IP address. Common causes include: * Incorrect IP address: Double-check the IP address you're typing. * No network connection: Ensure your computer is physically connected to the router via Ethernet or wirelessly connected to its Wi-Fi network. * Router is off or unresponsive: Check if your router is powered on and its indicator lights are normal. * Browser issues: Try a different web browser or clear your current browser's cache and cookies. * Firewall/Antivirus: Temporarily disable your computer's firewall or antivirus to see if they are blocking the connection. Often, a simple reboot of both your computer and the XGateway router can resolve transient connectivity issues.
4. Is it safe to disable WPS on my XGateway router?
Yes, it is generally recommended to disable WPS (Wi-Fi Protected Setup) on your XGateway router. While WPS is designed for convenience, allowing devices to connect to Wi-Fi with a simple button press or PIN, it has known security vulnerabilities that can be exploited by attackers to guess your Wi-Fi password. Disabling WPS removes this potential entry point, enhancing your network's security without significantly impacting usability, as you can still connect devices manually using your Wi-Fi password.
5. Why should I update my XGateway router's firmware regularly?
Updating your XGateway router's firmware is crucial for several reasons: * Security Patches: Firmware updates often include fixes for newly discovered security vulnerabilities, protecting your router from potential attacks. * Performance Improvements: Updates can enhance your router's speed, stability, and overall performance. * Bug Fixes: They address software bugs that might cause crashes, connectivity issues, or erratic behavior. * New Features: Sometimes, firmware updates introduce new functionalities or improve existing ones. Regularly updating your firmware ensures that your XGateway router, as your critical network gateway, operates with the latest security and performance enhancements, providing a more reliable and secure internet experience.
🚀You can securely and efficiently call the OpenAI API on APIPark in just two steps:
Step 1: Deploy the APIPark AI gateway in 5 minutes.
APIPark is developed based on Golang, offering strong product performance and low development and maintenance costs. You can deploy APIPark with a single command line.
curl -sSO https://download.apipark.com/install/quick-start.sh; bash quick-start.sh

In my experience, you can see the successful deployment interface within 5 to 10 minutes. Then, you can log in to APIPark using your account.

Step 2: Call the OpenAI API.