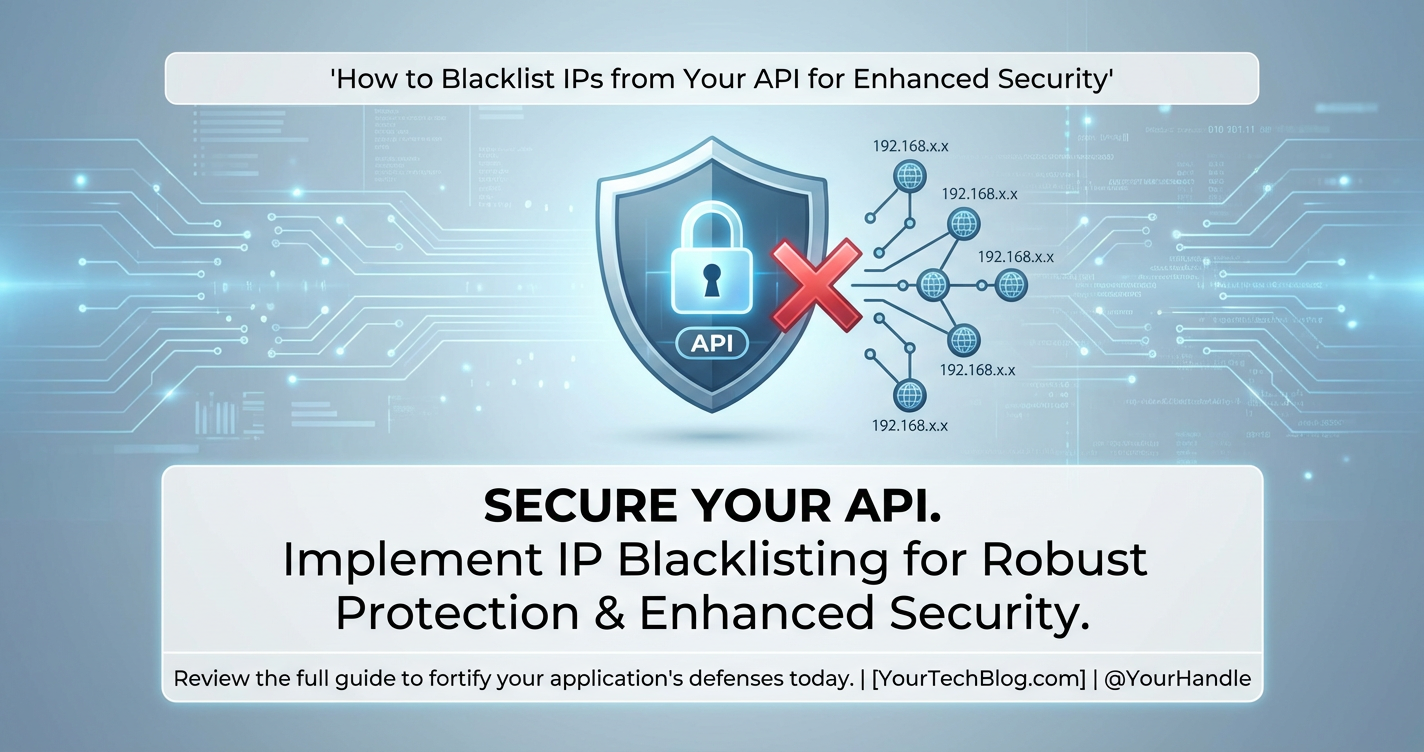
How to Blacklist IPs from Your API for Enhanced Security


In the intricate tapestry of modern digital infrastructure, Application Programming Interfaces (APIs) serve as the fundamental connective tissue, enabling disparate systems to communicate, share data, and deliver functionality across a vast array of applications and services. From mobile apps interacting with backend servers to microservices orchestrating complex business processes, the reliability and security of these APIs are paramount. However, this omnipresence also makes APIs prime targets for malicious actors seeking to exploit vulnerabilities, disrupt services, or gain unauthorized access to sensitive data. The relentless barrage of threats, ranging from distributed denial-of-service (DDoS) attacks and brute-force login attempts to sophisticated data scraping and credential stuffing, necessitates a robust and multi-layered security posture. Among the foundational defenses available to developers and system administrators, IP blacklisting stands out as a crucial, albeit often underestimated, first line of defense. It provides a direct and effective mechanism to block known malicious sources from ever reaching your valuable API resources.
This comprehensive article will delve into the critical role of IP blacklisting as an essential component of API security. We will dissect the "why" and "how" of this technique, exploring its necessity in safeguarding your digital assets, detailing various implementation methods across different layers of your infrastructure – from server-level firewalls to dedicated API Gateways and application-specific logic. Furthermore, we will illuminate the best practices, critical considerations, and potential pitfalls associated with blacklisting, ensuring you can deploy this strategy effectively and responsibly. By understanding how to identify, block, and manage malicious IP addresses, organizations can significantly enhance the resilience and integrity of their APIs, protecting their services and their users from an ever-evolving threat landscape. Embracing a proactive approach to IP blacklisting is not merely about blocking undesirable traffic; it's about fortifying the very foundations of your digital ecosystem against the persistent tide of cyber threats.
The Landscape of API Security Threats: Why IP Blacklisting is Indispensable
The digital frontier is a battlefield, and APIs are often at the front lines, bearing the brunt of various malicious assaults. Understanding the nature of these threats is crucial to appreciating why IP blacklisting remains an indispensable tool in the API security arsenal. One of the most prevalent and disruptive threats is the Distributed Denial of Service (DDoS) attack, where an attacker floods an API with an overwhelming volume of requests from multiple compromised sources, rendering it unavailable to legitimate users. These attacks often originate from botnets – networks of hijacked computers – each with its own IP address. While a single IP might not cripple an API, thousands or millions of concurrent requests from distinct IPs can easily overwhelm server resources, bandwidth, or application logic, leading to service degradation or complete outages. Blacklisting can selectively cut off these identified attacker IPs.
Beyond sheer volume, APIs face more insidious threats. Brute-force attacks involve an attacker systematically trying numerous combinations of usernames and passwords to gain unauthorized access. Each attempt often originates from a specific IP address. Similarly, credential stuffing, which leverages leaked username/password pairs from data breaches on other platforms, also manifests as a series of login attempts from various IPs. Without mechanisms to identify and block these offending IPs, an attacker could relentlessly probe your authentication endpoints until a successful login occurs. Data scraping, where automated bots systematically extract information from your API, also often involves repetitive requests from specific IP ranges, draining resources and potentially exposing data that isn't intended for bulk public consumption. Even more sophisticated attacks like SQL injection, cross-site scripting (XSS), and deserialization vulnerabilities might involve reconnaissance phases or repeated exploit attempts originating from a determined attacker's IP, making early identification and blocking critical.
Traditional security measures, such as strong authentication, robust input validation, and encryption, are undoubtedly vital. However, they operate at a different layer. Authentication verifies who is making the request, input validation ensures the request content is safe, and encryption protects the data in transit. IP blacklisting, on the other hand, operates at a network or transport layer, focusing on where the request is coming from. It acts as an early gatekeeper, preventing known bad actors from even reaching these deeper security layers, thereby reducing the load on your systems and minimizing the attack surface. In a world where attackers constantly pivot, disguise their origins using proxies, and deploy sophisticated botnets, a multi-layered defense strategy is non-negotiable. IP blacklisting serves as a powerful initial filter, catching many common and persistent threats before they can even begin to probe your API's deeper defenses, thus safeguarding your valuable resources and ensuring the availability and integrity of your services.
Understanding IP Blacklisting: A Foundational Defense Mechanism
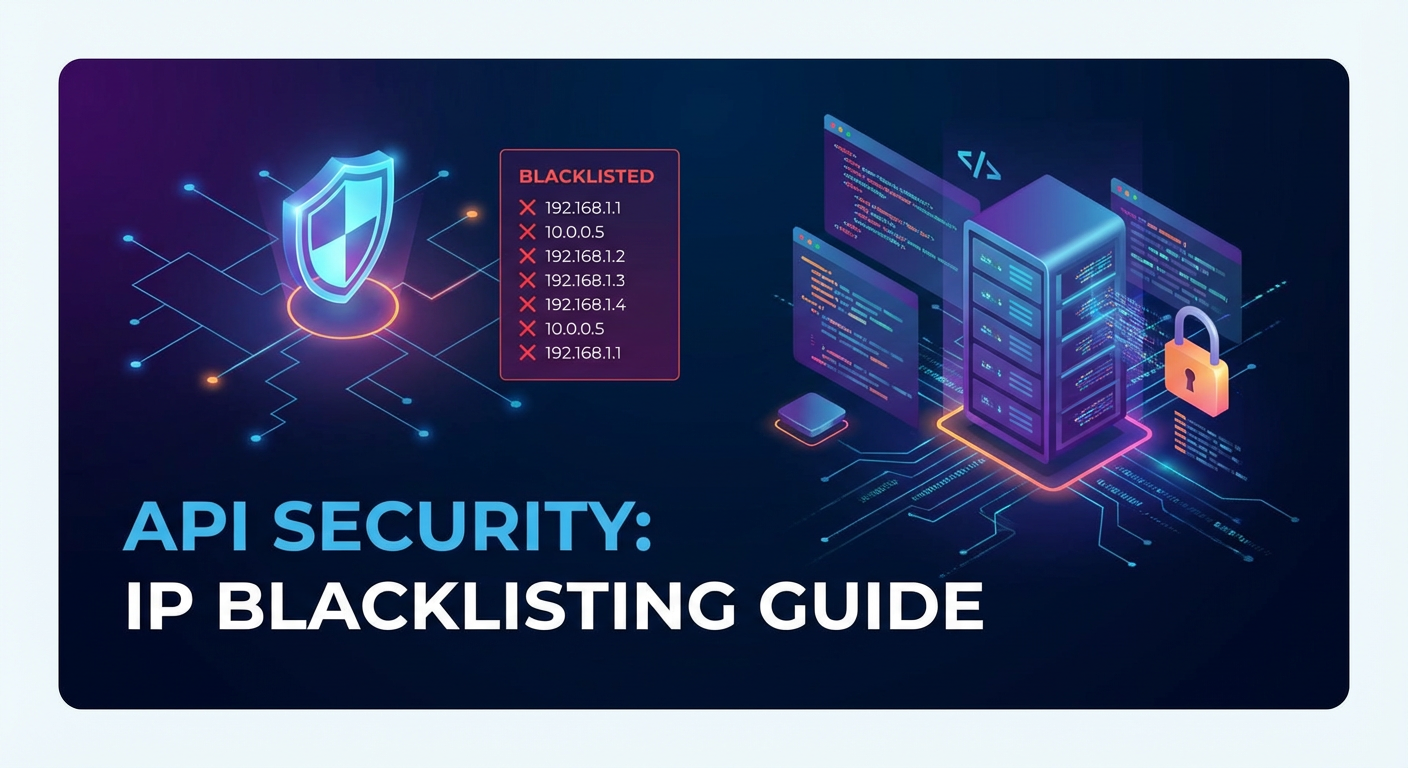
At its core, IP blacklisting is a security practice that involves compiling a list of specific Internet Protocol (IP) addresses that are identified as malicious, suspicious, or otherwise undesirable, and then configuring your network devices, servers, or applications to deny any incoming connections or requests originating from those addresses. Think of it as putting certain unwelcome guests on a "do not enter" list for your digital premises. This mechanism functions as a critical first line of defense, proactively preventing known threats from interacting with your valuable api endpoints and underlying infrastructure. The rationale is straightforward: if an IP address has been associated with harmful activities in the past, such as launching DDoS attacks, conducting brute-force attempts, engaging in spamming, or attempting unauthorized access, it is prudent to block any further traffic from that source.
The primary purpose of IP blacklisting is to enhance the security posture of your api by reducing the attack surface. By blocking known malicious IPs at the earliest possible point in the request lifecycle, you mitigate the risk of these entities consuming your server resources, probing for vulnerabilities, or successfully executing attacks. This not only protects your services but also frees up your legitimate users' bandwidth and processing power. For instance, if a botnet is relentlessly hammering your login api endpoint, blacklisting the IPs participating in that botnet can immediately halt the attack without requiring your application to process each invalid login attempt, thereby conserving resources and preventing potential account lockouts for legitimate users caught in the crossfire.
It's important to differentiate IP blacklisting from its counterpart, whitelisting. While blacklisting identifies and blocks undesirable IPs, whitelisting identifies and only allows traffic from desirable IPs, explicitly denying all others. Whitelisting is typically employed in scenarios requiring extremely high security and a very limited, well-defined set of legitimate clients, such as internal APIs accessed only by trusted partners or specific enterprise applications. In such cases, the list of allowed IPs is usually small and static. Blacklisting, conversely, is more flexible and commonly used for public or semi-public APIs where the vast majority of traffic is legitimate, but a small percentage of known malicious actors needs to be excluded. The challenge with blacklisting is its reactive nature: an IP must first be identified as malicious before it can be added to the list. However, its effectiveness in stopping recurring threats and established attack patterns makes it an invaluable tool. In essence, blacklisting offers a practical, scalable way to harden your api against a broad spectrum of external threats without unduly restricting access for legitimate users, making it a cornerstone of any comprehensive cybersecurity strategy.
Methods for IP Blacklisting: A Layered Approach to Security
Effectively blacklisting IPs from your api involves understanding and implementing strategies at various layers of your infrastructure. Each method offers distinct advantages and is suitable for different scenarios, contributing to a robust, multi-layered defense. From the foundational operating system level to specialized api gateway solutions, a comprehensive approach often combines several of these techniques.
A. Server-Level Blacklisting (Operating System/Firewall)
Implementing IP blacklisting at the server's operating system level or through an integrated firewall is often the most fundamental and immediate line of defense. This method intercepts unwanted traffic before it even reaches your web server or application, conserving resources and providing a highly efficient block. It's particularly effective for broad, persistent attacks or blocking entire geographic regions known for malicious activity.
iptables (Linux)
For Linux-based servers, iptables is the default and extremely powerful command-line firewall utility. It allows administrators to define rules that inspect and manipulate network packets, making it ideal for blocking IP addresses at a very low level. iptables rules are processed in order, so the placement of your blocking rules can be crucial. When an IP is blacklisted via iptables, any incoming connection attempts from that IP are dropped immediately, often without even sending a rejection notice, making the attacking machine believe the service is simply unavailable.
To block a single IP address, you might use a command like this:
sudo iptables -A INPUT -s 192.168.1.100 -j DROP
Here, -A INPUT appends the rule to the INPUT chain (for incoming traffic), -s 192.168.1.100 specifies the source IP address to be blocked, and -j DROP instructs iptables to silently discard any packets from this source. For blocking an entire subnet, you can specify a CIDR range:
sudo iptables -A INPUT -s 192.168.1.0/24 -j DROP
This would block all IPs from 192.168.1.0 to 192.168.1.255. To make these rules persistent across reboots, you typically need to save them using tools like iptables-save and iptables-restore, or by installing a package like iptables-persistent. While powerful, managing a large number of iptables rules manually can become cumbersome, requiring careful scripting and version control to avoid accidental misconfigurations that could block legitimate traffic. The order of rules is critical; a general ALLOW rule placed before a specific DROP rule for an attacker's IP would negate the DROP rule's effect.
ufw (Ubuntu Firewall)
ufw (Uncomplicated Firewall) is a user-friendly interface for iptables on Ubuntu and other Debian-based distributions. It simplifies firewall management significantly, making it accessible even for those less familiar with the intricate syntax of iptables. To block an IP address using ufw, the command is straightforward:
sudo ufw deny from 192.168.1.100
And for a subnet:
sudo ufw deny from 192.168.1.0/24
ufw automatically handles the underlying iptables configuration and persistence, making it an excellent choice for quick and easy server-level IP blocking. While less granular than raw iptables, it serves its purpose exceptionally well for common blacklisting tasks.
Windows Firewall
On Windows servers, the built-in Windows Firewall (part of Windows Defender Firewall with Advanced Security) offers robust capabilities for blocking IP addresses. This can be configured graphically via the Firewall snap-in in the Microsoft Management Console (MMC) or programmatically using netsh commands or PowerShell.
To block an IP via the GUI: 1. Open "Windows Defender Firewall with Advanced Security." 2. Go to "Inbound Rules" and select "New Rule..." 3. Choose "Custom" rule type. 4. Specify "All programs." 5. Set "Protocol type" to "Any." 6. Under "Scope," select "These IP addresses" for "Remote IP address" and add the specific IP address or range you wish to block. 7. Choose "Block the connection" as the action. 8. Give the rule a name and description.
Using netsh from the command prompt:
netsh advfirewall firewall add rule name="Block Malicious IP" dir=in action=block remoteip=192.168.1.100
To block a range:
netsh advfirewall firewall add rule name="Block Malicious Range" dir=in action=block remoteip=192.168.1.0/24
Windows Firewall provides a highly integrated and effective means of server-level IP blacklisting, particularly useful in Windows-centric environments.
Cloud Provider Firewalls (AWS, Azure, GCP)
In cloud environments, security groups (AWS), network security groups (Azure), and firewall rules (Google Cloud) act as virtual firewalls that control inbound and outbound traffic to your instances, containers, and serverless functions. These are highly scalable and integrated directly into the cloud infrastructure, offering centralized management for security policies.
- AWS Security Groups: You can define rules to allow or deny traffic based on IP addresses, ranges, and even other security groups. To blacklist an IP, you'd typically modify the inbound rules for the security group associated with your api's instances or load balancers, adding a "DENY" rule for the specific source IP or CIDR. While security groups primarily operate on an "allow" basis (you explicitly allow traffic), you can effectively block specific IPs by ensuring no "allow" rule grants them access, or by utilizing Network ACLs (NACLs) which support explicit deny rules at the subnet level.
- Azure Network Security Groups (NSGs): NSGs allow you to filter network traffic to and from Azure resources in an Azure Virtual Network. You can create inbound security rules specifying source IP addresses/ranges and set the action to "Deny." NSG rules are processed by priority, so a higher priority (lower number) deny rule for a malicious IP will override any lower priority allow rules.
- Google Cloud Firewall Rules: GCP firewall rules are global and applied to your entire network or specific tags. You can create ingress (inbound) rules that specify source IP ranges and set the action to "Deny." Like Azure, rule priority is key.
Cloud firewalls offer immense advantages: they are managed centrally, scale automatically with your infrastructure, and integrate seamlessly with other cloud services. They provide an excellent layer for blacklisting, especially when dealing with attacks targeting your entire cloud-deployed api infrastructure rather than just a single instance.
B. Web Server Level Blacklisting (Nginx, Apache)
Web servers like Nginx and Apache are often the first point of contact for external requests before they reach your api application. Implementing IP blacklisting at this level offers a flexible and efficient way to filter traffic, leveraging the web server's high performance and dedicated configuration capabilities.
Nginx
Nginx is a popular, high-performance web server and reverse proxy, often used in front of api applications. It provides direct, efficient directives for IP blacklisting.
To block a single IP address or an entire CIDR range, you can use the deny directive within your http, server, or location block in the Nginx configuration file (nginx.conf or a site-specific configuration file):
# Block a single IP address
deny 192.168.1.100;

# Block an entire subnet
deny 192.168.1.0/24;

# Allow all other IPs (important to ensure legitimate traffic isn't blocked)
allow all;
The order of deny and allow directives matters. Nginx processes them sequentially. If an IP matches a deny rule, access is denied immediately. If it matches an allow rule, access is permitted. If it matches neither, the default action is usually to allow, but it's good practice to explicitly include allow all; after your deny rules.
For more dynamic or extensive blacklisting, Nginx can load IP lists from external files using the include directive:
# In nginx.conf or a server block
include /etc/nginx/blocked_ips.conf;
The blocked_ips.conf file would then contain a list of deny directives:
# /etc/nginx/blocked_ips.conf
deny 10.0.0.1;
deny 172.16.0.0/16;
deny 192.0.2.0/24;
This approach makes managing large blacklists much easier, as you can update the blocked_ips.conf file without needing to modify the main Nginx configuration directly. After making changes, you must reload Nginx for the new rules to take effect: sudo nginx -s reload.
Nginx also offers the geo module, which can be used for more advanced blocking scenarios, such as blocking entire countries or regions, or dynamically creating variables based on client IP for use in other access rules. This is particularly useful for apis that are not intended for global access or are experiencing attacks from specific geographical locations.
Apache (.htaccess or configuration files)
Apache HTTP Server, another widely used web server, also provides robust mechanisms for IP blacklisting, primarily through .htaccess files or directly in the main server configuration files (httpd.conf or virtual host configurations).
Using .htaccess (which must be enabled for the directory):
# Block a single IP
Order Deny,Allow
Deny from 192.168.1.100
Allow from all
Or for a subnet:
Order Deny,Allow
Deny from 192.168.1.0/24
Allow from all
The Order directive specifies the order in which Deny and Allow directives are evaluated. Deny,Allow means Deny rules are evaluated first, then Allow rules. If an IP matches a Deny rule, it's denied unless it also matches an Allow rule (in which case it's allowed). Allow,Deny is the reverse. For blacklisting, Order Deny,Allow is generally preferred with a final Allow from all to ensure legitimate traffic gets through.
A more modern and recommended approach in Apache (especially for performance reasons and avoiding the overhead of .htaccess file processing) is to use Require ip directives within <Directory>, <Location>, or <Files> blocks in your main Apache configuration:
<Directory /var/www/html/my_api>
    Require all granted
    Require not ip 192.168.1.100
    Require not ip 192.168.1.0/24
</Directory>
Here, Require all granted is the default, and then Require not ip explicitly denies specific IPs or ranges. Changes to Apache configuration files typically require a server restart (sudo systemctl restart apache2 or sudo service apache2 restart). While flexible, be mindful that large .htaccess files or deeply nested directories with many .htaccess files can introduce performance overhead, making server-level configuration a better choice for extensive blacklists.
C. Application-Level Blacklisting
Implementing IP blacklisting directly within your api application code offers the most granular control, allowing for highly specific and context-aware blocking rules. This method can be invaluable for reacting to specific attack patterns that are only detectable after some application logic has been processed, such as multiple failed login attempts for a specific user, unusual request sequences, or attempts to access non-existent resources.
Logic within your api code
At the application level, blacklisting typically involves: 1. Extracting the client IP: This is usually done from the X-Forwarded-For header (if behind a proxy/load balancer) or the direct connection IP. Careful handling is needed to prevent IP spoofing through this header. 2. Checking against a blacklist: The extracted IP is compared against a dynamic list of blacklisted IPs stored in a database (e.g., PostgreSQL, MongoDB), an in-memory cache (e.g., Redis), or even a simple file. 3. Denying access: If a match is found, the application immediately returns an error response (e.g., HTTP 403 Forbidden) and terminates the request.
Pros: * Granular Control: You can implement complex logic, such as blocking an IP only after N failed login attempts within X minutes, or based on specific API endpoint abuse. * Context-Aware Blocking: The application can factor in user IDs, specific API keys, or even the type of request being made, which is impossible at lower levels. * Rapid Response: New IPs can be added to the blacklist in real-time by your application's monitoring or security modules, allowing for immediate reaction to emerging threats. * Integrated with Business Logic: Blocking can be tied directly into your application's security policies.
Cons: * Performance Overhead: Each request from a potentially malicious IP still consumes application resources (CPU, memory, database/cache queries) to process the request header and perform the blacklist lookup before being denied. This can become a significant bottleneck during large-scale DDoS attacks. * Application Specific: Blacklist logic needs to be implemented and maintained across potentially multiple api services, leading to redundancy and increased development effort. * Security Concerns: Poorly implemented application-level blacklisting could introduce new vulnerabilities if not handled carefully (e.g., improper IP parsing, insecure storage of the blacklist).
Example (Conceptual Python/Flask Middleware):
from flask import Flask, request, abort
import redis

app = Flask(__name__)
r = redis.Redis(host='localhost', port=6379, db=0)

# In a real app, this would be populated dynamically or from a database
BLACKLIST_KEY = "api:ip_blacklist"

@app.before_request
def check_ip_blacklist():
    client_ip = request.remote_addr # Get the client's IP
    # If behind a proxy, use request.headers.get('X-Forwarded-For', request.remote_addr)
    # but be cautious of spoofing.

    if r.sismember(BLACKLIST_KEY, client_ip):
        # Log the attempt, maybe increment a counter
        app.logger.warning(f"Blocked blacklisted IP: {client_ip} from accessing {request.path}")
        abort(403) # Forbidden

@app.route('/api/data')
def get_data():
    return "Sensitive data accessed."

@app.route('/api/admin/blacklist', methods=['POST'])
def add_to_blacklist():
    # Admin endpoint to dynamically add an IP to the blacklist
    ip_to_block = request.json.get('ip')
    if ip_to_block:
        r.sadd(BLACKLIST_KEY, ip_to_block)
        return {"message": f"IP {ip_to_block} added to blacklist"}, 200
    return {"message": "Invalid IP"}, 400

if __name__ == '__main__':
    # For demonstration, add an initial IP to blacklist
    r.sadd(BLACKLIST_KEY, "127.0.0.1") # Blocking localhost for example
    app.run(debug=True)
While powerful, application-level blacklisting is generally best suited for dynamic, short-term blocks triggered by specific behavior, complementing the more performant, static blocks implemented at lower levels.
D. API Gateway and API Management Platform Blacklisting
For organizations managing a large number of apis, particularly in microservices architectures, an API Gateway or a full-fledged API Management Platform offers the most sophisticated, scalable, and centralized solution for IP blacklisting and a host of other security measures. An API Gateway acts as a single entry point for all client requests, routing them to the appropriate backend services. This strategic position makes it an ideal place to enforce security policies universally.
The Power of an API Gateway
An API Gateway intercepts every request to your APIs, providing a choke point where policies can be applied before traffic reaches your backend services. This centralization is a significant advantage: instead of configuring blacklisting rules on dozens or hundreds of individual servers or applications, you configure them once on the gateway, and they apply to all managed APIs. This dramatically simplifies management, ensures consistency, and reduces the chance of misconfigurations.
Key Features for IP Blacklisting and Security: * IP Filtering/Access Control Lists (ACLs): Most API Gateways provide built-in functionality to define lists of IP addresses or CIDR ranges that should be explicitly denied access. These rules are processed at the very edge of your network, much like a firewall, but with more context about the api request itself. * Rate Limiting: While distinct from blacklisting, rate limiting is often implemented alongside it on an API Gateway. It restricts the number of requests a client can make within a given time frame, effectively mitigating abuse and certain types of DDoS attacks. If an IP repeatedly hits rate limits, it might automatically be added to a temporary blacklist. * Bot Detection: Advanced API Gateways integrate with or offer modules for identifying and blocking automated bot traffic, often going beyond simple IP analysis to look at request patterns, user agents, and behavioral heuristics. * Authentication & Authorization: The gateway can handle API key validation, OAuth token introspection, and user authentication, denying unauthorized access before it even reaches your backend. * Unified Policy Enforcement: All security policies, including IP blacklisting, can be defined, managed, and audited from a single control plane, ensuring consistency across your entire api ecosystem.
How API Gateways Simplify Management
The fundamental advantage of an API Gateway lies in decoupling security and traffic management concerns from your backend microservices. Your backend developers can focus on business logic, knowing that the gateway is handling the heavy lifting of security at the perimeter. This architectural pattern promotes agility, resilience, and maintainability. For instance, if an attacker shifts their IP range, updating the blacklist on the gateway takes minutes and protects all apis instantly, without requiring deployments or restarts of individual services.
For robust, enterprise-grade API management and security, solutions like APIPark offer comprehensive capabilities. As an open-source AI gateway and API management platform, APIPark provides end-to-end API lifecycle management, including traffic forwarding, load balancing, and crucial security features like access control and detailed logging, which are essential for effective IP blacklisting strategies. Its ability to centralize API services and enforce security policies across multiple tenants makes it an invaluable tool for modern API infrastructures. APIPark's design to integrate 100+ AI models and standardize API invocation means that security measures applied at its gateway level can protect a very diverse set of services, from traditional REST APIs to cutting-edge AI endpoints, all from a unified management console. Furthermore, with its performance rivaling Nginx and comprehensive API call logging, APIPark provides the visibility and speed required to quickly identify and blacklist malicious IPs, maintaining system stability and data security.
Advantages Over Other Methods
- Scalability and Performance: API Gateways are designed for high throughput and low latency. They can handle a massive volume of requests and apply blacklisting rules with minimal performance impact, often leveraging optimized network layers or specialized hardware.
- Unified Policies: A single point of control for all security policies ensures consistency and simplifies auditing.
- Integration with Advanced Features: Gateways often integrate seamlessly with Web Application Firewalls (WAFs), bot management systems, and identity providers, allowing for a truly multi-layered security approach where IP blacklisting is just one component.
- Decoupling: Security enforcement is separated from business logic, making both parts easier to develop, test, and deploy independently.
- Visibility: Detailed logging and monitoring capabilities within API Gateways provide a clear picture of all incoming traffic, including blocked attempts, which is invaluable for threat intelligence and incident response.
In summary, while server-level and web server blacklisting provide crucial initial barriers, and application-level blacklisting offers granular control, leveraging an API Gateway like APIPark provides the most sophisticated, scalable, and manageable solution for IP blacklisting within a modern api ecosystem. It consolidates security efforts, enhances performance, and seamlessly integrates with a broader security strategy, offering unparalleled protection for your digital assets.
Identifying IPs for Blacklisting: The Art of Threat Detection
Effective IP blacklisting is not merely about reactively adding an IP after an incident; it's a proactive process that requires diligent monitoring, analysis, and intelligence gathering to identify potential threats before they escalate. Pinpointing which IP addresses to blacklist is a critical step, demanding a keen eye for suspicious patterns and leveraging a variety of tools and methodologies.
Logs Analysis
The most fundamental source of intelligence for identifying malicious IPs lies within your server and application logs. Every interaction with your api leaves a digital footprint, and by meticulously analyzing these logs, you can uncover patterns indicative of nefarious activities.
- Web Server Logs (e.g., Nginx access logs, Apache access logs): These logs record every request, including the source IP address, HTTP method, requested URL, response status code, and user agent string. Look for:
- High Request Rates from a Single IP: An unusual surge in requests from one IP within a short timeframe often signals a brute-force attack, a DDoS attempt, or aggressive scraping. Tools like
awk,grep,sort, anduniq -ccan help summarize request counts by IP. - Multiple Failed Login Attempts: Repeated HTTP 401 (Unauthorized) or 403 (Forbidden) responses from a single IP, especially targeting authentication endpoints, are strong indicators of brute-force or credential stuffing attacks.
- Access to Non-Existent Resources: Repeated 404 (Not Found) errors, particularly for suspicious paths or file names, could indicate an attacker probing for vulnerabilities or attempting directory traversal.
- Unusual User Agents: Bots often use generic or outdated user agent strings, or custom ones that don't mimic legitimate browsers.
- Specific Error Codes: Frequent server errors (5xx codes) from a particular IP might suggest an attempt to exploit a vulnerability causing application crashes.
- High Request Rates from a Single IP: An unusual surge in requests from one IP within a short timeframe often signals a brute-force attack, a DDoS attempt, or aggressive scraping. Tools like
API GatewayLogs: If you are using an API Gateway like APIPark, its detailed call logging capabilities become an invaluable resource. APIPark records every detail of each api call, providing a centralized and rich data source for security analysis. These logs often include more context about the API call itself, such as the specific API endpoint invoked, associated API keys, and policy enforcement results, making it easier to pinpoint malicious activity related to specific API services. The powerful data analysis features of APIPark can analyze historical call data to display long-term trends and performance changes, which can also highlight anomalous behavior from specific IPs over time.- Application Logs: Your application's internal logs can provide deeper insights into the nature of suspicious requests. For instance, logs detailing failed database queries due to malformed input could point to SQL injection attempts, or repeated attempts to perform privileged actions without proper authorization might come from a specific IP.
Monitoring Tools
While manual log analysis is foundational, it's often too slow for real-time threat detection. Dedicated monitoring and security information and event management (SIEM) tools are essential for automated identification.
- ELK Stack (Elasticsearch, Logstash, Kibana): This powerful suite allows for centralized log collection, parsing, storage, and visualization. You can create dashboards to monitor API traffic, set up alerts for suspicious IP patterns (e.g., more than 100 requests from a single IP in a minute, 5 failed logins from the same IP), and quickly drill down into specific events.
- Prometheus & Grafana: These tools are excellent for collecting and visualizing metrics. You can monitor request rates per IP, error rates, and latency, setting up alerts for spikes that could indicate an attack.
- Commercial SIEM Solutions (e.g., Splunk, IBM QRadar): These enterprise-grade platforms aggregate security-related data from across your entire infrastructure, correlate events, and use advanced analytics and machine learning to detect complex threats that might be invisible to simpler monitoring tools.
Threat Intelligence Feeds
Leveraging external threat intelligence feeds can provide a proactive layer to your blacklisting strategy. These feeds are curated lists of known malicious IP addresses, domains, and URLs compiled by security researchers, industry consortia, and government agencies.
- Publicly Available Feeds: Sources like Spamhaus, SANS DShield, Proofpoint's Emerging Threats, and various open-source intelligence (OSINT) lists frequently publish IPs associated with botnets, spam, malware distribution, and other cybercrimes.
- Commercial Threat Intelligence Services: Companies specialize in aggregating, enriching, and delivering high-quality, real-time threat intelligence. Subscribing to such services can provide access to highly current lists of active attackers.
Integrating these feeds into your api gateway, firewall, or application-level blacklisting system allows you to block IPs before they even attempt to interact with your services, providing a significant advantage in defense. However, these feeds must be used with caution, as they can sometimes contain false positives or stale entries.
Honeypots
A honeypot is a security mechanism that acts as a decoy, mimicking a real system or api to attract and trap attackers. By deploying a honeypot, you can observe attacker behavior, gather intelligence on their methods, and most importantly, identify their source IP addresses without risking your actual production systems. Traffic hitting a honeypot is by definition suspicious, making any originating IP a prime candidate for blacklisting. This method is highly effective for identifying new or unknown threats and gaining insights into attacker tactics, techniques, and procedures.
Combining these detection methods – vigilant log analysis, real-time monitoring, leveraging external intelligence, and even employing honeypots – creates a robust framework for identifying malicious IP addresses. The better you are at detecting these threats early, the more effective your IP blacklisting strategy will be in protecting your apis from harm.
APIPark is a high-performance AI gateway that allows you to securely access the most comprehensive LLM APIs globally on the APIPark platform, including OpenAI, Anthropic, Mistral, Llama2, Google Gemini, and more.Try APIPark now! 👇👇👇
Best Practices and Considerations for IP Blacklisting
While IP blacklisting is a powerful security tool, its effective and responsible implementation requires adherence to best practices and careful consideration of potential pitfalls. A poorly managed blacklist can inadvertently block legitimate users, degrade performance, or become ineffective against sophisticated attackers.
Granularity: Single IPs vs. CIDR Blocks
Deciding whether to block a single IP address or an entire CIDR (Classless Inter-Domain Routing) block is a crucial decision. * Single IPs: Best for individual, persistent attackers identified through specific malicious activity. This is precise and minimizes the risk of blocking legitimate users. * CIDR Blocks: Useful for blocking entire subnets known to be associated with an attack (e.g., a specific data center, cloud provider region, or ISP range heavily used by a botnet). However, blocking large CIDR blocks carries a higher risk of false positives, especially if legitimate users share IP ranges with attackers (e.g., VPNs, shared hosting providers, large ISPs that dynamically assign IPs). Always exercise extreme caution when blocking anything larger than a /24 (256 addresses) or /22 (1024 addresses) range. Geographically blocking entire countries, while sometimes necessary, should be a last resort and based on clear business requirements or overwhelming threat intelligence, as it significantly impacts legitimate users.
Automation: The Key to Scalability
Manually adding IPs to a blacklist is sustainable for a small number of threats, but it quickly becomes unmanageable when facing high-volume attacks or needing to process dynamic threat intelligence feeds. * Automated Detection & Blocking: Tools like Fail2Ban (for Linux) can automatically parse logs for specific patterns (e.g., failed SSH logins, repeated HTTP 401s from the same IP) and then automatically add those IPs to iptables rules for a temporary period. * Custom Scripts: For more complex scenarios, custom scripts can be developed to parse application or api gateway logs, identify suspicious patterns, and then interact with your firewall, web server, or api gateway's API to dynamically update blacklists. * Integration with SIEM/SOAR: Security Information and Event Management (SIEM) systems can detect anomalies and trigger automated responses, including updating blacklists. Security Orchestration, Automation, and Response (SOAR) platforms take this a step further, orchestrating complex workflows to respond to threats without human intervention.
Temporary vs. Permanent Bans
Not all blacklisting needs to be permanent. * Temporary Bans: Ideal for IPs exhibiting transient suspicious behavior, such as exceeding rate limits, making a few failed login attempts, or probing common vulnerabilities. These blocks might last minutes, hours, or days. This allows for self-correction if the IP was legitimately misbehaving or if it's a dynamic IP that gets reassigned to a legitimate user later. * Permanent Bans: Reserved for IPs with a clear, persistent history of malicious activity, confirmed involvement in botnets, or originating from regions where your api should never receive traffic. These should be reviewed periodically.
False Positives: The Greatest Risk
The inadvertent blocking of legitimate users (false positives) is the most significant drawback and risk of IP blacklisting. This can lead to: * Disrupted User Experience: Legitimate users are denied access to your api, leading to frustration and potential loss of business. * Customer Support Burden: Users will contact support, consuming resources to troubleshoot and unblock them. * Reputational Damage: Widespread false positives can harm your brand's reputation for reliability and accessibility.
Mitigation Strategies: * Careful Rule Crafting: Be as specific as possible with your blocking criteria. * Whitelisting Known Good IPs: Always whitelist your own internal IPs, partner IPs, and any known legitimate services that interact with your api. This ensures they are never accidentally caught by a broad blacklist rule. * Monitoring and Feedback Loops: Implement monitoring that can detect a surge in blocked requests from previously legitimate-looking IPs. Provide channels for users to report access issues. * Layered Approach: Combine blacklisting with other security measures like rate limiting, CAPTCHAs, and strong authentication. An IP that triggers a temporary rate limit might not need to be immediately blacklisted, but consistent rate limit violations could lead to a temporary block.
Proxies and VPNs: Blacklisting's Limitations
Sophisticated attackers often use proxies, VPNs, or Tor to obscure their true IP addresses and rotate through many different IPs. This means: * Blacklisting is Not a Silver Bullet: Relying solely on IP blacklisting against such attackers is ineffective, as they can simply switch their exit node. * Layered Security is Key: Blacklisting must be part of a broader security strategy that includes WAFs, bot detection, behavioral analytics, strong authentication, and rate limiting to identify and block such attackers based on patterns beyond just their IP. Blocking IPs known to belong to common VPN or proxy services might be considered, but again, with a high risk of false positives.
Dynamic IPs: The Evolving Challenge
Many Internet Service Providers (ISPs) assign dynamic IP addresses to their customers, meaning an IP address can change over time. * Stale Blacklist Entries: An IP blacklisted today might be assigned to a legitimate user tomorrow. Permanent, long-term bans on dynamic IPs can lead to false positives down the line. * Regular Review: Blacklists, especially those with temporary bans, need to be reviewed and pruned regularly to remove stale entries and prevent unintended consequences.
Integration with WAFs (Web Application Firewalls)
While IP blacklisting blocks traffic at a basic network level, a Web Application Firewall (WAF) inspects the content of HTTP requests for malicious payloads (e.g., SQL injection attempts, XSS attacks, known attack signatures). * Complementary Defense: Blacklisting and WAFs are highly complementary. The WAF provides deeper application-layer protection, while blacklisting efficiently drops known bad actors at an earlier stage, reducing the load on the WAF. Many modern API Gateways integrate WAF capabilities.
Performance Impact
Large blacklist files or complex rule sets, especially at the web server or application level, can introduce performance overhead. * Optimize Rule Sets: Keep blacklists as concise and efficient as possible. * Leverage Dedicated Solutions: For very large blacklists, prefer solutions designed for high performance, such as network firewalls or API Gateways, which are optimized for rapid lookup. Storing blacklists in fast caching systems like Redis for application-level checks can also mitigate performance impact.
By carefully considering these best practices and potential issues, organizations can deploy and manage IP blacklisting as a highly effective and sustainable component of their overall api security strategy, protecting their digital assets while minimizing negative impacts on legitimate users.
Comparison of IP Blacklisting Methods
To summarize the various approaches to IP blacklisting, a comparative table can illuminate their distinct characteristics, advantages, disadvantages, and optimal use cases. This helps in making informed decisions about where and how to implement blacklisting within your infrastructure.
| Method | Location/Layer | Pros | Cons | Best Use Case |
|---|---|---|---|---|
| Server-Level Firewall | Operating System (e.g., iptables, ufw, Windows Firewall), Cloud Provider Firewalls (AWS Security Groups, Azure NSGs) |
- Earliest Block: Stops traffic before it reaches web server/application, saving resources. - High Performance: Very efficient at dropping packets. - Infrastructure-Wide: Can protect all services on a server/network. - Static/Persistent: Rules typically survive reboots. |
- Less Granular: Limited context beyond IP and port. - Manual/Complex Management: Can be difficult to manage large lists across many servers. - No Application Context: Cannot react to application-specific events (e.g., failed logins). - Hard to Automate: Integration with application logic often requires custom scripting. |
Blocking persistent, high-volume threats; denying access from known malicious networks or entire geographical regions at the network edge. |
| Web Server Level | Nginx, Apache (deny, Require not ip, .htaccess) |
- Good Performance: Efficiently drops connections before reaching application code. - Easier Management: Configuration files are often centralized and version-controlled. - Some Context: Can be tied to specific virtual hosts or URL paths. - Scalable File Inclusion: Can manage large IP lists from external files. |
- Still Limited Context: Cannot react to deep application logic. - Requires Web Server Reload: Changes usually need a reload/restart. - Performance Impact: Very large lists or many .htaccess files can cause overhead. |
Blocking common scanners, specific bot traffic, or known attackers targeting specific API endpoints or web server resources. |
| Application-Level | Within api code (e.g., Python, Node.js middleware, custom logic) | - Highest Granularity: Can implement complex, context-aware rules based on user behavior, failed attempts, specific API calls. - Real-time Reaction: Can dynamically add/remove IPs based on immediate application events. - Custom Logic: Tailored to specific business logic and security policies. |
- Performance Overhead: Consumes application resources for every request from a potential attacker. - Scalability Challenges: Can become a bottleneck during DDoS attacks. - Complexity: Requires careful coding and maintenance. - Distributed Management: Must be implemented in each relevant service. |
Dynamic, short-term blocking based on specific application behavior (e.g., repeated failed login attempts for a user, unusual request sequences). |
API Gateway / API Management Platform |
Dedicated gateway (e.g., APIPark, Kong, Apigee) | - Centralized Management: Single point of control for all APIs. - High Performance & Scalability: Designed for high throughput with minimal overhead. - Rich Feature Set: Integrates with WAFs, rate limiting, authentication, bot detection. - Decoupled Security: Separates security from business logic. - Unified Visibility: Comprehensive logging and monitoring. |
- Cost/Complexity: Can be more expensive and complex to set up initially than basic firewalls. - Vendor Lock-in: Depending on the solution. - Requires Dedicated Platform: Adds an architectural layer. |
Managing security for a large, complex api ecosystem; enterprise-level security, performance, and compliance requirements; centralized policy enforcement and threat intelligence integration. |
This table underscores that the "best" method often depends on the specific threat, the scale of your api infrastructure, and the resources available. In many cases, a robust security posture will involve a combination of these methods, with higher-level solutions like API Gateways providing the primary, centralized defense, complemented by server-level firewalls for absolute network-level blocks, and application-level logic for nuanced behavioral detection.
Beyond Blacklisting: A Multi-Layered Security Strategy for APIs
While IP blacklisting is an undeniably powerful and essential tool, it is crucial to recognize that it is but one component of a holistic, multi-layered security strategy for apis. Relying solely on blacklisting is akin to guarding a fortress with just a single drawbridge; a determined attacker will eventually find another way in. A truly resilient api security posture involves a comprehensive array of defenses that work in concert to protect your digital assets from various angles.
Rate Limiting
One of the most effective complementary measures is rate limiting. This technique restricts the number of api requests a user or client can make within a specified time frame (e.g., 100 requests per minute). Unlike blacklisting, which blocks known bad actors, rate limiting aims to prevent abuse, mitigate DDoS attacks by legitimate but overzealous clients, and slow down brute-force attempts. When a client exceeds the defined rate limit, the api gateway or application typically returns an HTTP 429 (Too Many Requests) error. Implementing rate limiting at the api gateway level (like APIPark offers) is highly efficient, as it intercepts and manages traffic before it can strain backend services.
Authentication & Authorization
Robust authentication and authorization mechanisms are the bedrock of api security. * Authentication: Verifies the identity of the client making the api request. This often involves api keys, OAuth 2.0 tokens, or OpenID Connect. Strong authentication ensures that only legitimate users or applications can access your apis. * Authorization: Determines what an authenticated client is allowed to do. Even if authenticated, a client should only have access to resources and operations for which they have explicit permissions (e.g., a "read-only" user should not be able to perform "write" operations). Proper authorization prevents privilege escalation and unauthorized data access.
Input Validation
The vast majority of api vulnerabilities, such as SQL injection, cross-site scripting (XSS), and command injection, stem from insufficient input validation. Every piece of data received by your api from external sources must be meticulously validated against expected formats, types, lengths, and allowed character sets. Sanitizing and escaping input before processing or storing it is non-negotiable to prevent malicious data from being injected into your systems or impacting other users.
Encryption (TLS/SSL)
All api communication should be encrypted in transit using TLS (Transport Layer Security), often referred to by its older name, SSL. This protects data from eavesdropping and tampering as it travels between the client and your api. Without TLS, sensitive information (like credentials, personal data) can be intercepted and compromised. Ensure you use strong TLS versions (e.g., TLS 1.2 or 1.3) and robust cipher suites.
API Key Management
If your apis use api keys for identification, robust management practices are essential. This includes: * Key Rotation: Regularly changing api keys to mitigate the risk of compromise. * Key Revocation: The ability to instantly revoke a compromised or suspected api key. * Key Scoping: Assigning minimal necessary permissions to each key (e.g., a key for a mobile app might have different permissions than a key for a partner integration). * Secure Storage: Ensuring api keys are stored securely, both on the client and server side, and never hardcoded into client applications.
Monitoring and Alerting
Real-time monitoring and alerting are critical for detecting suspicious activity and responding quickly. This involves: * Logging: Comprehensive logging of all api requests, responses, errors, and security events (as offered by solutions like APIPark). * Metric Collection: Tracking api performance metrics (request rates, error rates, latency, resource utilization). * Anomaly Detection: Implementing systems to automatically detect deviations from normal behavior (e.g., sudden spikes in error rates, unusual request patterns, access from new geographic regions). * Alerting: Configuring alerts to notify security teams immediately when predefined thresholds or suspicious patterns are detected, enabling rapid incident response.
Security Audits and Penetration Testing
Proactive security audits and penetration testing are vital for uncovering vulnerabilities before attackers exploit them. * Code Reviews: Regular security-focused code reviews of your api implementation. * Automated Scanners: Utilizing static and dynamic api security testing tools. * Penetration Testing: Engaging ethical hackers to simulate real-world attacks against your apis, identifying weaknesses in your security posture, configuration, and code.
By weaving these various layers of defense together, organizations can build a truly formidable security framework around their apis. IP blacklisting acts as an initial bouncer, rate limiting controls the flow, authentication verifies identity, authorization restricts access, input validation cleans data, encryption protects in transit, and continuous monitoring and testing ensure vigilance. This multi-faceted approach transforms your apis from potential vulnerabilities into robust, trustworthy gateways for your digital services.
Conclusion
In the increasingly interconnected digital landscape, where apis serve as the crucial backbone of modern applications and services, the imperative for robust security cannot be overstated. The constant threat of malicious actors seeking to exploit vulnerabilities, disrupt operations, or pilfer sensitive data necessitates a comprehensive and adaptive defense strategy. Within this multifaceted approach, IP blacklisting emerges as a foundational and highly effective security measure, acting as a crucial first line of defense against a wide array of cyber threats.
Throughout this extensive discussion, we have explored the intricate details of IP blacklisting, from its fundamental purpose in preventing known malicious entities from accessing your apis to its diverse implementation methods across various layers of your infrastructure. Whether deployed at the operating system level via firewalls like iptables or Windows Firewall, configured within web servers such as Nginx and Apache, integrated directly into application logic for nuanced behavioral analysis, or centrally managed through powerful API Gateways and API Management Platforms like APIPark, blacklisting offers a direct and efficient mechanism to curtail unwanted traffic. The strategic advantage of leveraging a dedicated API Gateway becomes particularly evident in complex, scalable environments, where it provides a unified control plane for enforcing security policies, managing traffic, and integrating with advanced threat detection capabilities, all while preserving the performance and resilience of your api ecosystem.
However, the efficacy of IP blacklisting is inextricably linked to diligent threat identification. Leveraging comprehensive log analysis, real-time monitoring tools, external threat intelligence feeds, and even honeypots are indispensable practices for accurately pinpointing IPs that pose a genuine threat. Furthermore, responsible implementation demands careful adherence to best practices, including thoughtful granularity in blocking, strategic automation, judicious use of temporary versus permanent bans, and rigorous attention to minimizing false positives. The dynamic nature of IP addresses and the sophistication of modern attackers utilizing proxies and VPNs remind us that blacklisting is not a silver bullet but rather a vital component that thrives within a broader, multi-layered security framework.
Ultimately, safeguarding your apis requires an ongoing commitment to vigilance and adaptation. By thoughtfully integrating IP blacklisting with other critical security measures such as rate limiting, strong authentication and authorization, robust input validation, comprehensive encryption, vigilant monitoring, and regular security audits, organizations can construct a formidable defense. This multi-faceted approach ensures that your apis remain secure, reliable, and available, fostering trust and enabling the seamless digital interactions that drive today's economy. The journey of securing apis is continuous, but with a well-orchestrated strategy that includes the judicious application of IP blacklisting, you are well-equipped to navigate the evolving threat landscape and protect your invaluable digital assets.
Frequently Asked Questions (FAQs)
1. What is the primary purpose of IP blacklisting for an API? The primary purpose of IP blacklisting is to enhance api security by proactively denying access to known malicious or suspicious IP addresses. This prevents attackers from consuming server resources, probing for vulnerabilities, launching DDoS attacks, or attempting unauthorized access, thereby safeguarding the api's integrity and availability for legitimate users.
2. What are the main drawbacks of relying solely on IP blacklisting? Relying solely on IP blacklisting has several drawbacks. It is reactive, meaning an IP must first exhibit malicious behavior to be blacklisted. It's ineffective against sophisticated attackers who can rotate IP addresses using proxies, VPNs, or botnets. There's also a significant risk of false positives, where legitimate users might be inadvertently blocked due to dynamic IP assignments or shared network infrastructure.
3. How can I identify IPs that should be blacklisted? IPs for blacklisting can be identified through various methods, including: * Logs Analysis: Examining web server, api gateway (e.g., APIPark), and application logs for suspicious patterns like high request rates, multiple failed login attempts, or requests for non-existent resources from a specific IP. * Monitoring Tools: Using SIEM solutions, Prometheus/Grafana, or other monitoring systems to detect anomalies and alert on unusual traffic originating from specific IPs. * Threat Intelligence Feeds: Subscribing to external lists of known malicious IPs compiled by security organizations. * Honeypots: Deploying decoy systems to attract attackers and capture their source IPs.
4. Is an API Gateway the best place to implement IP blacklisting? For organizations managing multiple apis, an API Gateway is generally considered the most effective and scalable place to implement IP blacklisting. It acts as a centralized enforcement point, allowing for consistent policy application across all apis, high-performance traffic filtering, and seamless integration with other advanced security features like rate limiting, WAFs, and comprehensive logging. Solutions like APIPark exemplify this capability.
5. What's the difference between IP blacklisting and rate limiting? IP blacklisting blocks all traffic from specific, identified malicious IP addresses, effectively denying them any access to the api. Rate limiting, on the other hand, restricts the number of requests any client (identified by IP or other means) can make within a given time frame. Rate limiting aims to prevent abuse and slow down attacks, while blacklisting completely blocks known bad actors. They are complementary; an IP that consistently exceeds rate limits might eventually be added to a temporary blacklist.
🚀You can securely and efficiently call the OpenAI API on APIPark in just two steps:
Step 1: Deploy the APIPark AI gateway in 5 minutes.
APIPark is developed based on Golang, offering strong product performance and low development and maintenance costs. You can deploy APIPark with a single command line.
curl -sSO https://download.apipark.com/install/quick-start.sh; bash quick-start.sh

In my experience, you can see the successful deployment interface within 5 to 10 minutes. Then, you can log in to APIPark using your account.

Step 2: Call the OpenAI API.