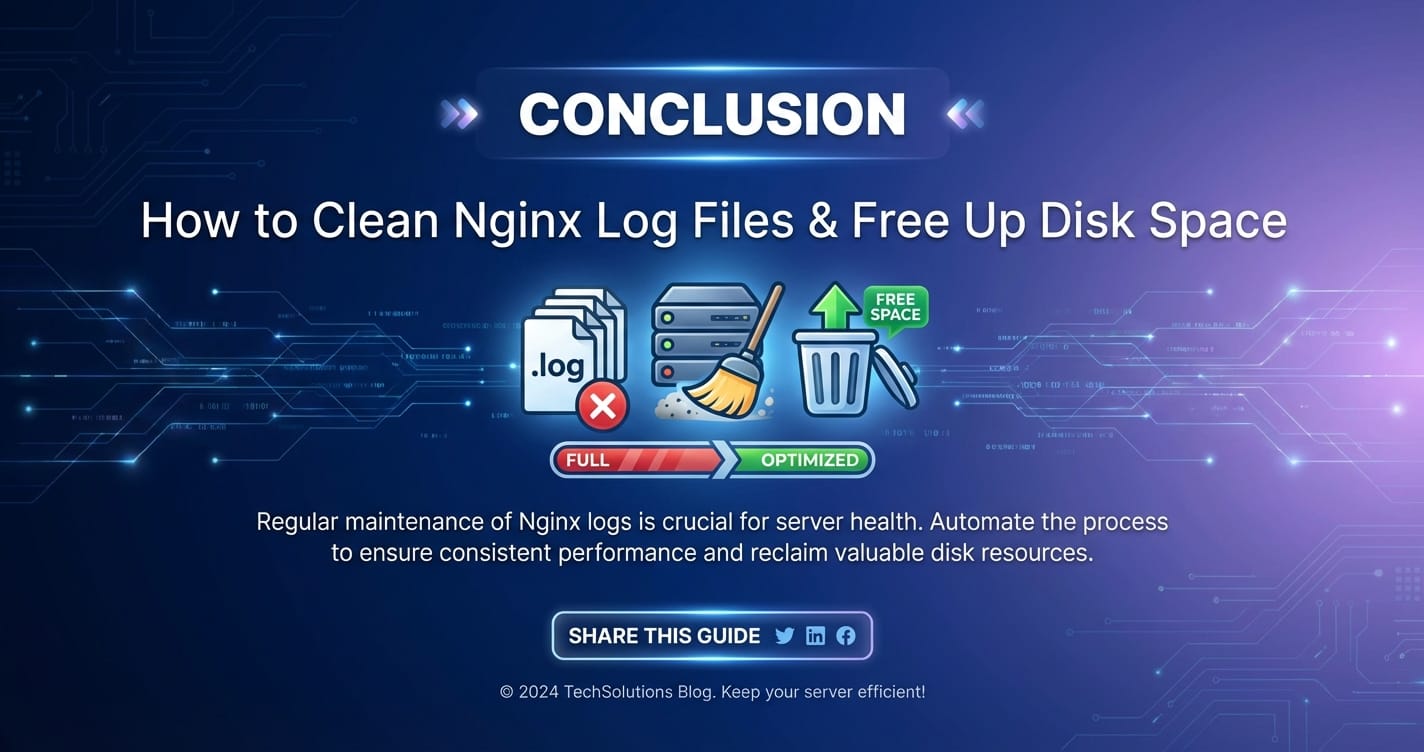
How to Clean Nginx Log Files & Free Up Disk Space
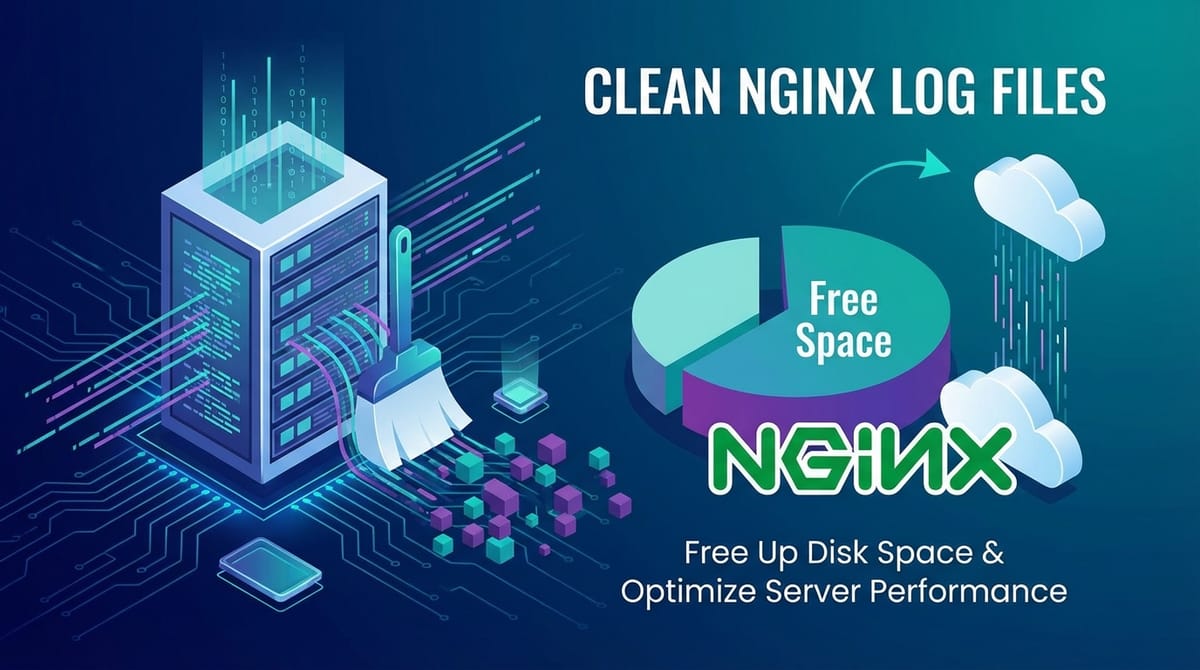


In the intricate world of web infrastructure, Nginx stands as a ubiquitous and highly performant web server and reverse proxy, powering a substantial portion of the internet. Its efficiency, scalability, and robust feature set make it a cornerstone for applications ranging from small personal blogs to large-scale enterprise platforms. However, even the most finely tuned Nginx installations require vigilant maintenance, particularly when it comes to managing the voluminous log files it generates. These logs, while indispensable for monitoring, troubleshooting, and security analysis, can rapidly accumulate, silently devouring precious disk space and, if left unchecked, lead to significant server performance degradation or even outright system failures.
This comprehensive guide delves deep into the critical practice of cleaning Nginx log files and reclaiming valuable disk space. We will not merely scratch the surface with quick fixes but instead explore the underlying principles, best practices, and advanced strategies that form the bedrock of sustainable server health. From understanding the different types of Nginx logs and the perils of their unchecked growth to implementing robust log rotation mechanisms and integrating with sophisticated centralized logging solutions, our journey will equip you with the knowledge to maintain a lean, efficient, and resilient Nginx environment. Our objective is to empower you to prevent common pitfalls, optimize your server's resources, and ensure that your web applications continue to operate smoothly without being hampered by an overflowing log directory. Embrace this journey towards proactive log management, and transform a potential operational headache into a streamlined aspect of your server administration routine.
Understanding Nginx Log Files: The Digital Footprint of Your Web Server
Every interaction with your Nginx server, every request processed, and every error encountered leaves an indelible mark in its log files. These files are not just arbitrary text documents; they are a rich tapestry of operational data, offering unparalleled insights into your server's behavior, user activity, and potential vulnerabilities. To effectively manage them, one must first comprehend their nature and purpose. Nginx primarily generates two types of log files: access logs and error logs. Each serves a distinct function and carries unique importance.
Access Logs: The Story of Every Request
Nginx access logs, often found at /var/log/nginx/access.log by default on Linux systems, are meticulously maintained records of every client request that reaches your Nginx server. Think of them as a detailed ledger, documenting each visitor's journey through your web application. Each line in an access log typically represents a single request and contains a wealth of information that is invaluable for understanding traffic patterns, analyzing user behavior, and conducting security audits.
A standard access log entry, formatted using Nginx's combined log format, usually includes:
- Remote IP Address: The IP address of the client making the request. This is crucial for geographical analysis and identifying potential malicious actors.
- Request Time: The exact date and time the request was received by the server. Essential for chronological analysis of events.
- Request Method and URL: The HTTP method (GET, POST, PUT, DELETE, etc.) and the specific URL path the client requested. This helps understand which resources are being accessed most frequently.
- HTTP Protocol: The version of the HTTP protocol used (e.g., HTTP/1.1, HTTP/2).
- HTTP Status Code: A three-digit number indicating the outcome of the request (e.g., 200 OK, 404 Not Found, 500 Internal Server Error). This is a primary indicator of application health and client-side issues.
- Bytes Sent: The size of the response sent back to the client, excluding HTTP headers. Useful for bandwidth usage analysis.
- Referer Header: The URL of the page that referred the client to the current request. Provides insights into traffic sources.
- User-Agent Header: Information about the client's browser, operating system, and device. Critical for understanding audience demographics and browser compatibility issues.
- Request Processing Time: The time it took Nginx to process the request, measured in seconds with millisecond precision. This is vital for performance monitoring and identifying bottlenecks.
The utility of access logs extends far beyond mere record-keeping. Web analytics tools frequently parse these logs to generate reports on website traffic, popular pages, visitor demographics, and conversion rates. Security teams scrutinize them to detect suspicious activity, brute-force attacks, or attempts to exploit vulnerabilities. Furthermore, developers and operations teams use access logs to confirm that new features are being accessed as expected or to identify patterns preceding application errors. Without a comprehensive understanding of what these logs contain, one would be operating blindly, lacking the data necessary for informed decision-making and proactive problem-solving.
Error Logs: The Chronicles of Server Distress
In stark contrast to access logs, Nginx error logs are the solemn records of problems, warnings, and critical failures encountered by your Nginx server. Typically located at /var/log/nginx/error.log, these files are the first place administrators turn when something goes awry with their web services. Unlike the high volume of access logs, error logs should ideally be sparse, indicating a healthy and stable server. A frequent stream of error messages, however, signals underlying issues that demand immediate attention.
An entry in the error log typically provides:
- Timestamp: The exact time the error occurred.
- Severity Level: Indicates the criticality of the event. Nginx supports several levels, from
debug(most verbose) tocrit(critical conditions) andemerg(emergencies, system unusable). Common levels seen arewarn,error, andcrit. - Process ID (PID) and Thread ID (TID): Identifiers for the Nginx worker process that encountered the error. Useful for debugging in multi-process environments.
- Client IP Address: The IP address of the client whose request triggered the error (if applicable).
- Error Message: A descriptive text explaining the nature of the problem. This might include system error codes, file paths, or specific Nginx module messages.
- File and Line Number: Often, Nginx will specify the source file and line number within its code where the error originated, aiding developers in deeper investigations.
Error logs are the troubleshooting backbone for Nginx administrators. They pinpoint issues such as:
- Configuration Syntax Errors: Mistakes in
nginx.confthat prevent Nginx from starting or reloading correctly. - File Permission Issues: Nginx failing to read necessary files (e.g., HTML, CSS, JavaScript, SSL certificates) due to incorrect permissions.
- Upstream Server Connectivity Problems: Nginx being unable to connect to backend application servers (e.g., PHP-FPM, Node.js applications, other microservices).
- Resource Exhaustion: Warnings about reaching connection limits or memory constraints.
- Module-Specific Errors: Issues arising from specific Nginx modules not functioning as expected.
Regularly reviewing error logs is a fundamental aspect of server maintenance. It allows administrators to proactively identify and rectify problems before they escalate into major outages. Neglecting error logs is akin to ignoring warning lights on a car's dashboard; it's a recipe for unexpected breakdowns and costly repairs.
Log Locations and Naming Conventions
While /var/log/nginx/ is the conventional directory for Nginx logs on most Linux distributions, especially those using systemd, it's essential to understand that these paths are configurable. The nginx.conf file, typically located in /etc/nginx/ or /etc/nginx/conf.d/, dictates the exact paths for both access and error logs. Within the http block, server block, or location block, you'll find directives such as access_log and error_log specifying these locations.
For example:
http {
    # ...
    access_log /var/log/nginx/access.log combined;
    error_log /var/log/nginx/error.log warn;
    # ...
}
Or, for specific virtual hosts (server blocks):
server {
    listen 80;
    server_name example.com;
    access_log /var/log/nginx/example.com_access.log combined;
    error_log /var/log/nginx/example.com_error.log error;
    # ...
}
Understanding these configurations is crucial because log management tasks, particularly those involving automated rotation, depend on correctly identifying these paths. A misconfigured path can lead to logs accumulating in unexpected locations or, worse, rotation scripts failing to manage the correct files.
The Impact of Unmanaged Logs: A Ticking Time Bomb
The insidious nature of unmanaged log growth often goes unnoticed until it's too late. While a few megabytes of log files pose no threat, the continuous stream of data from a busy Nginx server can quickly swell these files into gigabytes, and eventually, terabytes, especially on high-traffic websites or those with extensive debugging enabled. This unchecked growth has several severe implications for server stability and performance.
Firstly, the most immediate and tangible impact is disk space exhaustion. A full disk partition, particularly the one hosting your root filesystem or /var/log, can bring an entire server to a grinding halt. Nginx itself might fail to write new log entries, leading to cryptic errors or even crashes. Other applications relying on temporary files or requiring write access to the filesystem will also fail. The operating system might become unstable, preventing new processes from starting or existing ones from functioning correctly, ultimately resulting in an unresponsive server and extended downtime.
Secondly, large log files significantly degrade disk I/O performance. Every write operation to a massive log file requires the disk head to seek to the end of the file, which becomes increasingly inefficient as the file grows. This constant disk activity can contend with other critical server operations, such as serving static assets, reading application data, or database transactions. The cumulative effect is slower page load times, increased latency for API requests, and a general sluggishness that impacts user experience and application responsiveness.
Thirdly, the sheer volume of data makes troubleshooting an arduous and time-consuming task. Manually sifting through gigabytes of text for a specific error message or request pattern is impractical. Even automated tools like grep can struggle with such large files, taking an inordinate amount of time to execute and consuming significant CPU and memory resources. This delay in diagnosis translates directly into longer resolution times for critical issues, increasing the cost of downtime and operational overhead.
Finally, unmanaged logs can pose significant security and compliance risks. Log files often contain sensitive information, including client IP addresses, user agent strings, requested URLs, and sometimes even parts of request headers or query parameters if improperly configured. If these files are not regularly pruned, secured with appropriate permissions, and eventually deleted, they become a growing repository of potentially exploitable data. Data retention policies, particularly under regulations like GDPR or HIPAA, mandate specific handling and deletion timelines for personal data, making diligent log management a legal and ethical imperative.
In summary, understanding Nginx logs is not just about knowing where they are; it's about appreciating their value as diagnostic tools and recognizing the critical necessity of managing their lifecycle. Neglecting this aspect of server administration is a precarious gamble that almost always results in unforeseen problems, diminished performance, and increased operational headaches.
The Perils of Unmanaged Log Growth: Why Proactive Cleanup is Non-Negotiable
The insidious creep of log file accumulation often goes unnoticed until a server begins to exhibit alarming symptoms. What starts as a minor oversight can rapidly escalate into a critical incident, paralyzing services and forcing emergency interventions. Understanding the full spectrum of risks associated with unmanaged log growth is the first step towards embracing a proactive and robust log management strategy. It's not just about running out of space; it's about the cascading failures and operational chaos that a full disk can unleash.
Disk Space Exhaustion: The Server's Existential Threat
Imagine your server's disk as a bustling city's infrastructure. Log files are like daily records of every transaction, every movement, every event. Initially, they are small, manageable archives. However, without a proper waste management system, these archives quickly turn into towering piles of refuse, eventually engulfing the very streets and buildings they were meant to document. In the digital realm, this translates to disk space exhaustion, a condition where one or more disk partitions reach their maximum capacity.
When the partition hosting Nginx logs (often /var/log or the root partition /) becomes full, the immediate consequences are severe and multifaceted:
- Nginx Failure to Log: The most direct impact is Nginx's inability to write new access or error log entries. This means you lose crucial visibility into your server's activities and any emerging problems. New errors might occur but remain unrecorded, leaving you blind to their existence and making troubleshooting impossible.
- Application Crashes and Unavailability: Many applications and services running on your server rely on temporary files, caches, or the ability to write data to their respective directories. A full disk prevents these write operations, causing applications to crash, freeze, or become unresponsive. Your web application, backend databases, and other critical services will likely cease functioning correctly, leading to significant downtime and frustrated users.
- Operating System Instability: The operating system itself requires free disk space for various operations, including swap space management, creating temporary files, and even starting new processes. A completely full disk can destabilize the OS, making it unresponsive, prone to kernel panics, or unable to execute basic commands. Even logging into the server via SSH might become impossible if there's no space for shell history or temporary session files.
- Inability to Perform Basic Administration: Simple tasks like restarting services, installing updates, or even running diagnostic tools might fail due to the lack of temporary disk space. This can trap an administrator in a Catch-22 situation, making it exceedingly difficult to resolve the very problem that's causing the issue.
- Data Corruption Risks: While less common than direct failures, a disk at its absolute limit, especially if combined with unexpected power loss or system crashes, can increase the risk of filesystem corruption. This is because the OS might not be able to write critical metadata updates cleanly.
The recovery from a completely full disk can be a high-stress, time-sensitive operation, often requiring direct console access and careful manual cleanup to free up just enough space to regain control. Prevention, in this scenario, is unequivocally better than cure.
Performance Degradation: The Silent Resource Drain
Beyond outright failures, accumulating log files wage a subtle but persistent war on your server's performance. This degradation manifests in several interconnected ways:
- Increased Disk I/O: Every time Nginx writes an entry to an access or error log, it performs a disk write operation. When log files grow to gigabytes or terabytes, these write operations become less efficient. The disk head has to traverse a greater distance to append data to the end of a massive file, increasing seek times. On busy servers, this constant, inefficient disk I/O contention can monopolize disk resources, starving other critical processes that also require disk access (e.g., serving static files, reading from databases, caching). This leads to higher disk utilization, longer queue times for I/O operations, and ultimately, slower overall server response times.
- Slower File Operations: Any operation involving these massive log files—from running simple
grepcommands for troubleshooting to copying them for backups—will take significantly longer. This impacts operational efficiency and increases the time required for maintenance tasks. - Memory Consumption: While log files reside on disk, tools or processes that attempt to read or parse them can consume substantial amounts of RAM. A
grepcommand on a multi-gigabyte log file might temporarily allocate significant memory, potentially pushing the system into using swap space, which further exacerbates performance issues due to slower disk-based memory operations. - CPU Overhead: Parsing, compressing, or even just managing extremely large files can consume CPU cycles. While typically less impactful than I/O contention, it's an additional drain on resources that could otherwise be dedicated to serving web traffic or running applications.
The cumulative effect of this performance degradation is a slower, less responsive server, directly impacting user experience, SEO rankings, and the overall efficiency of your web services.
Troubleshooting Headaches: Lost in a Sea of Data
Imagine searching for a specific needle, not in a haystack, but in a mountain of hay. That's the challenge of troubleshooting with unmanaged log files. The sheer volume of data makes it incredibly difficult to:
- Identify Relevant Entries: Critical error messages or suspicious access patterns can be buried under millions of routine log entries. Without effective filtering or a manageable scope, finding the "smoking gun" becomes a monumental task.
- Use Standard Tools Inefficiently: Tools like
tail,head,grep,awk, andsedare powerful, but they operate on the premise of manageable file sizes. Runninggrep "error"on a 50GB file can take minutes, even tens of minutes, hogging CPU and I/O resources during its execution. This drastically slows down the diagnostic process, especially during a critical incident. - Analyze Trends: Identifying long-term trends or recurring issues is nearly impossible with sprawling, undifferentiated log files. You lose the ability to see patterns across days or weeks when all data is consolidated into a single, ever-growing file.
- Collaborative Debugging: Sharing and analyzing massive log files with a team is impractical. Transferring large files across networks is slow, and independent analysis of the same monolithic file is cumbersome.
Effective troubleshooting relies on timely access to relevant information. Unmanaged log growth creates an information overload, transforming a valuable resource into an impediment.
Security and Compliance Implications: A Digital Trail of Risk
Log files are not just technical data; they are often repositories of sensitive information that, if mishandled, can lead to significant security breaches and compliance failures.
- Exposure of Sensitive Data: Access logs contain client IP addresses, user agent strings, and requested URLs. Error logs might contain file paths, system error messages, and even snippets of data if an application crashes. In some configurations, or with specific application errors, even more sensitive data could inadvertently be logged. If these log files are not adequately secured with proper permissions or are accessible to unauthorized individuals, they can become a treasure trove for attackers seeking information about your infrastructure, user base, or potential vulnerabilities.
- Forensic Impairment: In the event of a security incident, log files are paramount for forensic analysis—understanding how a breach occurred, what data was accessed, and how to mitigate future risks. If logs are unmanaged, overwritten, or incomplete due to disk exhaustion, your ability to conduct a thorough forensic investigation is severely compromised, hindering your incident response efforts.
- Compliance Violations: Numerous data protection regulations (e.g., GDPR, CCPA, HIPAA, PCI DSS) impose strict requirements on how personal data is handled, stored, and retained. Log files, by their nature, often contain personally identifiable information (PII). Failing to implement proper retention policies, secure storage, and timely deletion of logs can lead to hefty fines, reputational damage, and legal repercussions. For example, storing IP addresses indefinitely without a clear purpose might violate data minimization principles.
The perils of unmanaged Nginx log growth are not merely theoretical; they are tangible threats to your server's stability, performance, and the very security and integrity of your operations. Proactive log management is therefore not a luxury but an indispensable pillar of responsible server administration.
Before You Begin: Preparation and Best Practices for Log Management
Embarking on a mission to clean and manage Nginx log files without proper preparation is akin to performing surgery without sterilization – potentially more harmful than helpful. A methodical approach, grounded in best practices, ensures that your log management efforts are effective, risk-free, and aligned with your operational requirements. This preparatory phase is crucial for avoiding data loss, service interruptions, and unforeseen complications.
1. Backup Critical Logs: Your Safety Net
The most fundamental rule of server administration, especially when dealing with data deletion or modification, is backup, backup, backup. Before you initiate any log cleaning or rotation strategy, particularly if you are experimenting or dealing with historically important logs, ensure you have a reliable backup.
- Why it's crucial: Logs contain invaluable historical data for troubleshooting, auditing, and compliance. Accidentally deleting or corrupting them without a backup can erase critical evidence needed for post-mortem analysis or legal obligations.
- How to do it:
- Simple Copy: For immediate needs, a simple
cpcommand can suffice:sudo cp /var/log/nginx/access.log /var/log/nginx/access.log.bakandsudo cp /var/log/nginx/error.log /var/log/nginx/error.log.bak. - Archiving: For larger logs or long-term storage, consider archiving them:
sudo tar -czvf /path/to/backup/nginx_logs_$(date +%Y%m%d).tar.gz /var/log/nginx/. - Off-server Backup: For truly critical logs, especially those needed for compliance or forensics, consider sending them to an off-site storage solution (e.g., S3, Google Cloud Storage, a dedicated backup server). This protects against local disk failures.
- Simple Copy: For immediate needs, a simple
Always verify your backups to ensure they are complete and restorable. The time spent on a backup is a small investment compared to the cost of lost data.
2. Understand Your Requirements: Define Your Log Retention Policy
Before deciding how to clean your logs, you must first determine why you're cleaning them and what your retention needs are. This involves defining a clear log retention policy.
- Operational Needs: How long do you typically need logs for immediate troubleshooting? For many, a few days to a week of detailed logs might be sufficient, with older logs being summarized or moved to archival storage.
- Security Audits: For security monitoring, you might need to retain detailed logs for several weeks or months to detect persistent attack patterns or investigate breaches.
- Compliance Regulations: This is often the most stringent requirement. Regulations like GDPR, HIPAA, PCI DSS, SOX, etc., dictate specific retention periods for certain types of data (which may be present in your logs) and how that data must be secured and eventually destroyed. For instance, PCI DSS requires audit logs to be retained for at least one year, with three months immediately available for analysis.
- Business Intelligence/Analytics: If you use access logs for long-term traffic analysis or business intelligence, you might need to archive them for much longer, possibly years, though typically in a compressed or aggregated form.
Documenting your retention policy is crucial. It informs the configuration of your log rotation tools, the design of your archiving strategy, and your overall approach to data lifecycle management.
3. Identify Exact Log Locations: Know Where Your Logs Reside
As mentioned, Nginx log paths can vary. Relying on default assumptions can lead to managing the wrong files or missing crucial ones.
- Check Nginx Configuration: The definitive source for log locations is your Nginx configuration. Typically, this is
/etc/nginx/nginx.confand any files included via theincludedirective (e.g.,/etc/nginx/conf.d/*.conf,/etc/nginx/sites-enabled/*). grepfor log directives: Usegrep -r "access_log" /etc/nginx/andgrep -r "error_log" /etc/nginx/to find allaccess_loganderror_logdirectives across your configuration files. Pay attention to specificserverorlocationblocks that might override global settings.- Verify with
lsof(for active files): If Nginx is running, you can usesudo lsof | grep nginx | grep logto see all open log file handles, confirming which files Nginx is actively writing to. This is particularly useful if logs are configured dynamically or if you suspect Nginx isn't writing to the expected location.
Accurately identifying all Nginx log files is paramount for ensuring your cleanup and rotation scripts target the correct files and manage all log-generating processes.
4. Check Current Disk Usage: Assess the Urgency
Before making changes, understand the current state of your disk space. This helps prioritize actions and gauge the effectiveness of your cleanup efforts.
df -h: This command provides a human-readable summary of disk space usage by filesystem. Pay close attention to the/(root) or/var/logpartitions, or any custom mounted partitions where Nginx logs might reside. Look at the "Use%" column to see how full they are.du -sh /path/to/log/directory: This command (Disk Usage, Summarize, Human-readable) gives you the total size of a specific directory. Use it on/var/log/nginx/to see how much space Nginx logs are currently consuming. You can also rundu -h /var/log/nginx/*to see the size of individual log files.
Understanding the current disk pressure helps you determine if you need an immediate intervention (e.g., manual truncation) or if you can proceed with a more controlled, automated rotation setup.
5. Review Permissions: Ensure Smooth Operation
Log files and their directories require specific permissions for Nginx to write to them and for log management utilities (like logrotate) to modify them. Incorrect permissions are a common source of log rotation failures.
- Nginx User: Nginx worker processes typically run as a non-privileged user (e.g.,
www-dataon Debian/Ubuntu,nginxon CentOS/RHEL). This user must have write permissions to the log files and their parent directories. logrotateUser:logrotateusually runs asroot(via cron), which bypasses most permission issues. However, if you configurelogrotatetosuto a specific user for post-rotation scripts, that user must have the necessary permissions.- Check Permissions: Use
ls -l /var/log/nginx/to see the current permissions, ownership, and group ownership of your log files and directories. Ensure Nginx's user can write, andlogrotate(or your custom script) can read/write/delete as needed.
6. Test in a Non-Production Environment: Prevent Surprises
Never implement significant changes directly on a production server without testing them first. This applies especially to log management, where misconfigurations can lead to data loss or service outages.
- Staging/Development Server: If you have a staging or development environment that mirrors your production setup, test your log rotation configurations there.
- Virtual Machine/Docker: Even a local virtual machine or a Docker container running Nginx can serve as a testbed for verifying your
logrotatescripts or custom solutions.
Observe the behavior: Does logrotate run correctly? Are logs being rotated, compressed, and deleted as expected? Does Nginx continue to write to the new log files without errors? Does your web application remain unaffected? Testing reduces the risk of unexpected issues in your live environment.
By diligently completing these preparatory steps, you lay a solid foundation for implementing effective and safe Nginx log cleaning and management strategies, ensuring that your server remains healthy, performant, and compliant.
Methods for Cleaning Nginx Log Files: From Manual Intervention to Automated Rotation
Once you've completed your preparatory steps, you're ready to implement strategies for cleaning your Nginx log files. These methods range from urgent, manual interventions to highly automated, scheduled processes. The choice depends on the severity of your current disk space issue, your operational philosophy, and your desired level of automation.
Manual Deletion: The Emergency Brake (with caution)
Manual deletion is the quickest way to free up disk space in an emergency, but it's a blunt instrument that must be wielded with extreme care. Simply running rm /var/log/nginx/access.log on a live log file can lead to unexpected issues.
The Pitfalls of Naive rm
When Nginx is actively writing to access.log, and you simply delete the file using rm, the file's entry in the directory structure is removed. However, Nginx still holds an open file descriptor to the original (now deleted) inode on the disk. This means:
- Disk Space Not Immediately Freed: The disk space occupied by the deleted file will not be released until Nginx closes its file descriptor or restarts. This often defeats the purpose of an emergency
rmif you're trying to free up space instantly. You'll seedf -hstill showing the disk as full. - Ghost Files: Nginx continues to write to the "deleted" file, effectively creating a "ghost file" that consumes disk space without being visible in the directory listing. This can be confusing and makes subsequent troubleshooting harder.
- New File Creation: If Nginx is later signaled to reopen its logs or restarted, it will create a new
access.logfile, but the old, "deleted" one might still be consuming space until the Nginx process is terminated.
To identify processes still holding open file descriptors to deleted files, use sudo lsof | grep deleted | grep log.
The Correct Manual Approach: Truncation
If you need to clear a log file manually and immediately without restarting Nginx (which might interrupt services), the safest method is to truncate the file. Truncation empties the file's content while preserving the file itself and Nginx's open file descriptor.
- Truncate using
truncatecommand:bash sudo truncate -s 0 /var/log/nginx/access.log sudo truncate -s 0 /var/log/nginx/error.logThe-s 0argument sets the file size to zero bytes, effectively emptying its contents. This immediately frees up the disk space and Nginx continues writing to the now-empty file. - Truncate using
echoredirection (alternative):bash sudo sh -c 'echo "" > /var/log/nginx/access.log' sudo sh -c 'echo "" > /var/log/nginx/error.log'This method also empties the file.sh -cis used withsudobecause direct redirection (>) doesn't typically work withsudofor permissions reasons.
After truncation, the disk space should be immediately freed, and Nginx will continue logging into the now empty file. Manual truncation should be reserved for emergencies and not as a routine log management strategy.
Log Rotation: The Recommended and Automated Approach
Log rotation is the industry-standard, automated, and safest method for managing log files. Instead of simply deleting old logs, log rotation involves a systematic process of:
- Renaming the current log file.
- Creating a new, empty log file for Nginx to write to.
- Compressing old log files to save space.
- Archiving or Deleting compressed logs after a specified retention period.
- Signaling Nginx to start writing to the new log file.
This process ensures continuous logging, preserves historical data, frees up disk space, and makes logs manageable for analysis.
Using logrotate: The Linux Standard
logrotate is a powerful and flexible system utility designed specifically for managing logs. It typically runs daily via a cron job (usually cron.daily or /etc/cron.daily/logrotate). Its configuration files define how different log files should be rotated.
- Main Configuration File:
/etc/logrotate.confcontains global settings and includes other configuration files. - Application-Specific Configurations:
/etc/logrotate.d/contains individual configuration files for various applications, including Nginx. This modular approach makes management easier.
A typical Nginx logrotate configuration file, often found at /etc/logrotate.d/nginx, might look like this:
/var/log/nginx/*.log {
    daily
    missingok
    rotate 7
    compress
    delaycompress
    notifempty
    create 0640 nginx adm
    sharedscripts
    postrotate
        if [ -f /var/run/nginx.pid ]; then
            kill -USR1 `cat /var/run/nginx.pid`
        fi
    endscript
}
Let's break down these directives:
/var/log/nginx/*.log: This specifies the log files to be rotated. The*acts as a wildcard, meaning all files ending with.login that directory will be rotated.daily: Logs will be rotated once every day. Other options includeweekly,monthly,yearly, orsize(e.g.,size 100Mto rotate when a file reaches 100MB).missingok: If the log file is missing, do not issue an error message. Useful for logs that might not always exist.rotate 7: Keep 7 rotated log files. After 7 rotations, the oldest compressed log file will be deleted. Fordailyrotation, this means logs for the past 7 days will be kept.compress: Compress the rotated log files usinggzip.delaycompress: Delay compression until the next rotation cycle. This means the immediately rotated log file (e.g.,access.log.1) will remain uncompressed for one day, allowing any processes still holding a handle to it (though Nginx should release it) or any immediate post-processing scripts to access it easily. The log file from two rotations ago (e.g.,access.log.2) will then be compressed.notifempty: Do not rotate the log file if it's empty.create 0640 nginx adm: After rotation, a new, empty log file will be created with specified permissions (0640), owned by thenginxuser andadmgroup. This ensures Nginx has proper write access. (Theadmgroup is common on Debian/Ubuntu for logging tasks;syslogornginxmight be used on RHEL/CentOS).sharedscripts: If multiple log files match the pattern (*.log), run theprerotateandpostrotatescripts only once, after all log files have been rotated. Without this, the scripts would run for each individual log file.postrotate ... endscript: This block defines commands to be executed after the log files have been rotated. This is critical for Nginx.if [ -f /var/run/nginx.pid ]; then ... fi: Checks if the Nginx PID file exists, ensuring Nginx is running.kill -USR1cat /var/run/nginx.pid`: This command sends aUSR1signal to the Nginx master process (whose PID is read from/var/run/nginx.pid). TheUSR1` signal tells Nginx to re-open its log files. The master process will instruct its worker processes to close their current log file descriptors and open new ones. This allows Nginx to start writing to the newly created, empty log file without restarting the Nginx service, thus avoiding any service interruption.- Alternatively,
nginx -s reopencan be used ifnginxis in your system's PATH and you're confident it's the correct way to signal your Nginx installation.
Testing logrotate Configuration
Before relying on logrotate in production, you can test its configuration to ensure it behaves as expected:
sudo logrotate -d /etc/logrotate.d/nginx
The -d flag runs logrotate in debug mode. It will show you exactly what actions it would take without actually performing them. This is invaluable for troubleshooting your configuration.
To force a rotation (e.g., to see the postrotate script run and verify Nginx re-opens logs), you can use the -f flag (use with caution in production):
sudo logrotate -f /etc/logrotate.d/nginx
After a forced rotation, check your /var/log/nginx/ directory to see the newly created log files (e.g., access.log.1, access.log.2.gz) and verify Nginx is writing to access.log.
Integrating logrotate with Cron
On most Linux systems, logrotate is automatically set up to run daily via cron. You can usually find a symlink in /etc/cron.daily/logrotate pointing to the /usr/sbin/logrotate executable. If, for some reason, logrotate isn't running, you might need to check your cron configuration (e.g., crontab -e for user cron jobs, or /etc/cron.d/, /etc/crontab for system-wide jobs).
Properly configured logrotate is a "set it and forget it" solution that ensures your Nginx logs are managed effectively, preventing disk space issues and providing a clean set of logs for daily analysis.
Custom Nginx Configuration for Log Rotation (Less Common)
While logrotate is the preferred tool, it is technically possible to implement a custom log rotation strategy using Nginx's own signaling capabilities combined with shell scripting and cron. This is generally only pursued in highly specialized environments where logrotate cannot be used for some reason, or where very specific rotation logic is required.
The core idea is:
- A Cron Job: A cron job runs a custom shell script at a specified interval (e.g., daily).
- Script Actions:
- The script renames the current
access.logtoaccess.log.YYYYMMDD(or similar). - It then compresses the renamed log file.
- Finally, it sends the
USR1signal to the Nginx master process (usingkill -USR1 $(cat /path/to/nginx.pid)) to tell Nginx to reopen its log files. Nginx will then automatically create a new, emptyaccess.logfile. - The script can also handle the deletion of old compressed logs based on a retention policy.
- The script renames the current
Example Custom Script (/usr/local/bin/nginx_log_rotate.sh):
#!/bin/bash

LOG_DIR="/techblog/en/var/log/nginx"
PID_FILE="/techblog/en/var/run/nginx.pid"
DATE_FORMAT=$(date +%Y%m%d)
RETENTION_DAYS=7

# Step 1: Rename the current log files
for LOG_FILE in $(ls $LOG_DIR/*.log | grep -v ".gz$"); do
    BASENAME=$(basename "$LOG_FILE" .log)
    mv "$LOG_FILE" "$LOG_DIR/${BASENAME}_${DATE_FORMAT}.log"
done

# Step 2: Signal Nginx to reopen logs
if [ -f "$PID_FILE" ]; then
    kill -USR1 $(cat "$PID_FILE")
    echo "Nginx signaled to reopen logs."
else
    echo "Nginx PID file not found at $PID_FILE. Nginx might not be running or PID file path is incorrect."
fi

# Step 3: Compress older logs
find "$LOG_DIR" -type f -name "*.log" ! -name "*_$(date +%Y%m%d).log" -print0 | xargs -0 -r gzip

# Step 4: Delete old compressed logs
find "$LOG_DIR" -type f -name "*.gz" -mtime +$RETENTION_DAYS -delete

echo "Nginx log rotation script finished at $(date)"
Cron Entry (e.g., in /etc/cron.daily/ or crontab -e for root):
0 0 * * * /usr/local/bin/nginx_log_rotate.sh > /dev/null 2>&1
This script would run daily at midnight. While functional, it's more complex to maintain and less feature-rich than logrotate. For most environments, logrotate remains the superior and more robust choice.
By implementing either a robust logrotate configuration or a well-tested custom script, you ensure that your Nginx log files are consistently managed, preventing uncontrolled growth and maintaining optimal server performance and stability.
APIPark is a high-performance AI gateway that allows you to securely access the most comprehensive LLM APIs globally on the APIPark platform, including OpenAI, Anthropic, Mistral, Llama2, Google Gemini, and more.Try APIPark now! 👇👇👇
Advanced Log Management Strategies: Beyond Basic Rotation
While basic log rotation with logrotate effectively handles the immediate concerns of disk space and manageable log file sizes, modern web environments often demand more sophisticated approaches to log management. These advanced strategies focus on centralizing logs for easier analysis, reducing log volume at the source, and implementing long-term archiving policies. Such methods are particularly relevant for complex infrastructures, microservices architectures, and environments with strict compliance requirements.
Centralized Log Management: The Power of Aggregation
For single servers, reviewing local log files is feasible. However, in environments with multiple Nginx servers, load balancers, application servers, and databases, logs become scattered across numerous machines. This distributed nature makes comprehensive monitoring, correlation of events, and rapid troubleshooting an enormous challenge. Centralized log management solves this by aggregating logs from all sources into a single, searchable repository.
Why Centralize Logs?
- Unified Visibility: A single pane of glass to view logs from all your Nginx instances, application servers, databases, and other infrastructure components. This provides a holistic view of your system's health.
- Faster Troubleshooting: When an issue arises, you can quickly search across all logs to identify related events, pinpoint the root cause, and reduce Mean Time To Resolution (MTTR). For instance, an Nginx 502 Bad Gateway error can be correlated with an upstream application server error log to determine if the backend failed.
- Powerful Analysis and Alerting: Centralized logging platforms offer advanced querying, filtering, visualization, and dashboarding capabilities. You can create custom dashboards to monitor key metrics, track trends, and set up alerts for specific error patterns or security events.
- Security and Compliance: Centralizing logs makes it easier to conduct security audits, detect intrusions, and comply with data retention and immutability requirements. Offloading logs from individual servers also means that even if a server is compromised, its logs might still be safely stored elsewhere.
- Reduced Server Load: By shipping logs off the local Nginx server, you reduce local disk I/O, freeing up resources for serving web traffic.
Popular Centralized Logging Tools
- ELK Stack (Elasticsearch, Logstash, Kibana): A widely adopted open-source solution. Logstash collects, processes, and ships logs; Elasticsearch stores and indexes them for fast searching; Kibana provides visualization and dashboarding.
- Splunk: A powerful commercial solution known for its comprehensive capabilities in log management, security information and event management (SIEM), and operational intelligence.
- Graylog: Another open-source option with robust log collection, analysis, and alerting features, offering an intuitive web interface.
- Loki/Grafana: Part of the Grafana ecosystem, Loki is a log aggregation system designed to be highly scalable and cost-effective, integrating seamlessly with Grafana for visualization.
- Cloud-Native Solutions: AWS CloudWatch Logs, Google Cloud Logging, Azure Monitor Logs offer managed logging services for cloud-based deployments.
Nginx Configuration for Remote Logging (Syslog)
To send Nginx logs to a centralized logging system, you typically configure Nginx to send logs to a syslog daemon, which then forwards them to your chosen centralized platform.
In your nginx.conf:
http {
    # ...
    log_format combined_syslog '$remote_addr - $remote_user [$time_local] "$request" '
                               '$status $body_bytes_sent "$http_referer" '
                               '"$http_user_agent" "$http_x_forwarded_for"';

    # Send access logs to a local syslog daemon (e.g., rsyslog, syslog-ng) on UDP port 514
    # The 'server=127.0.0.1:514' specifies the syslog server and port.
    # 'facility=local7' assigns a custom facility.
    # 'tag=nginx_access' adds a tag for easier identification.
    # 'severity=info' sets the syslog severity level.
    access_log syslog:server=127.0.0.1:514,facility=local7,tag=nginx_access,severity=info combined_syslog;

    # Send error logs to syslog as well
    error_log syslog:server=127.0.0.1:514,facility=local7,tag=nginx_error,severity=error;
    # ...
}
You would then configure your local syslog daemon (e.g., rsyslog.conf) to forward these incoming Nginx logs to your centralized log management system's collector (e.g., Logstash, Graylog input, Splunk forwarder). This setup effectively offloads the long-term storage and intensive analysis tasks from your Nginx server, making local log files smaller and less critical.
It's worth noting how essential robust logging is across all components of a modern web infrastructure. Just as Nginx meticulously records web traffic, powerful API gateways and management platforms also rely on comprehensive logging. For instance, platforms like APIPark, an open-source AI gateway and API management platform, provide "Detailed API Call Logging" and "Powerful Data Analysis" features. These capabilities thrive in an environment where underlying components, including Nginx, maintain healthy and efficiently managed log files. Ensuring that your Nginx infrastructure is well-maintained, with logs rotated and potentially centralized, creates a seamless and performant foundation for advanced services like APIPark to deliver granular insights into API usage and AI model invocations without encountering performance bottlenecks due to log accumulation. This synergy between foundational server management and higher-level service monitoring is key to maintaining a resilient and observable system.
Log Filtering and Sampling: Reducing Verbosity at the Source
Even with centralized logging, the sheer volume of logs can be overwhelming and costly to store and process. Sometimes, you don't need to log every single request or event in full detail. Log filtering and sampling allow you to reduce the log volume at the Nginx level, before logs are even written or shipped.
Techniques for Filtering:
- Filtering by Status Code: You might only want to log requests that result in errors (4xx or 5xx) or successful responses (2xx), or exclude specific success codes (e.g., 204 No Content).
nginx http { map $status $log_by_status { ~^[23] 0; # Don't log 2xx or 3xx responses default 1; } access_log /var/log/nginx/access.log combined if=$log_by_status; }This example would only log 4xx and 5xx errors to the access log. - Filtering by User-Agent: Exclude logs from known bots or specific automated clients if their traffic is not relevant for analysis.
nginx http { map $http_user_agent $exclude_agent { "~*(bot|spider|crawl)" 0; default 1; } access_log /var/log/nginx/access.log combined if=$exclude_agent; }
Ignoring Health Check Requests: Many monitoring systems frequently ping your server with health check requests. These often don't need to be logged. ```nginx http { map $uri $loggable { ~^/(health|status|ping)$ 0; # URLs to ignore default 1; }
access_log /var/log/nginx/access.log combined if=$loggable;
} `` Themapdirective creates a variable$loggablethat is0for health check URLs and1for others. Theif=$loggablecondition onaccess_logmeans logs are only written if$loggableis1`.
Log Sampling:
While Nginx doesn't have a direct "sample this percentage of logs" directive, you can achieve a similar effect by combining map with random number generation or other heuristics, though this can be more complex and might not be suitable for critical logging. Usually, filtering by specific criteria is more practical than random sampling.
By judiciously applying filtering, you can significantly reduce the volume of data being written and processed, saving disk space, I/O, and potentially logging costs for centralized solutions.
Log Archiving and Deletion Policies: Long-Term Data Management
Beyond rotating live logs, a comprehensive strategy includes policies for long-term archiving and eventual deletion of historical log data. This is crucial for compliance, forensic needs, and managing storage costs.
- Retention Period Definition: Based on your operational, security, and compliance requirements, define exactly how long different types of logs should be retained in different states (e.g., live, compressed, archived, deleted).
- Hot Storage (Days/Weeks): Uncompressed or lightly compressed logs immediately available for troubleshooting (e.g., 7 days of
logrotate's active rotations). - Warm Storage (Weeks/Months): Compressed logs kept on fast storage for quick access if needed (e.g.,
logrotate's compressed files for 30-90 days). - Cold Storage (Months/Years): Highly compressed, possibly encrypted logs moved to cheaper, slower archival storage (e.g., AWS S3 Glacier, Google Cloud Archive, tape backups).
- Deletion: Logs are permanently deleted after their retention period expires.
- Hot Storage (Days/Weeks): Uncompressed or lightly compressed logs immediately available for troubleshooting (e.g., 7 days of
- Automated Archiving:
logrotate: Can move old compressed logs to a different directory if configured.- Custom Cron Scripts: For cold storage, you'll often write custom shell scripts that run periodically (e.g., monthly). These scripts:
- Identify compressed log files older than a certain age (e.g.,
find /var/log/nginx/ -type f -name "*.gz" -mtime +90). - Move these files to a designated archive directory.
- Optionally upload them to cloud storage using tools like
aws s3 cporgsutil cp. - Delete the local copies after successful upload.
- Identify compressed log files older than a certain age (e.g.,
- Secure Deletion: When logs reach the end of their retention period, ensure they are securely deleted. For local files,
rmis generally sufficient for most purposes. For highly sensitive data on physical disks, specialized secure deletion tools might be considered, though this is less common for transient log data. For cloud storage, configure lifecycle rules to automatically transition old objects to cheaper tiers and eventually delete them.
By integrating these advanced strategies, you move beyond mere cleanup to a holistic log management ecosystem that is efficient, cost-effective, secure, and compliant with regulatory mandates. This comprehensive approach ensures that log data, while invaluable, never becomes a burden on your server resources or an operational liability.
Troubleshooting Common Log-Related Issues: Diagnosing and Resolving Problems
Even with the best intentions and carefully crafted configurations, log management can present its share of unexpected challenges. Understanding common pitfalls and how to diagnose them is crucial for maintaining a healthy and smoothly operating Nginx environment. This section covers typical issues you might encounter and provides practical steps for resolution.
1. Disk Full Errors Despite logrotate Configuration
This is arguably the most critical and frustrating issue. You've set up logrotate, but your disk keeps filling up, often with Nginx logs.
Symptoms: * df -h shows / or /var partition at 100% usage. * Nginx fails to write new log entries, or the server becomes unresponsive. * du -sh /var/log/nginx/ shows massive log files.
Possible Causes and Solutions:
logrotateNot Running:- Check cron: Ensure
logrotateis actually being executed by cron. Look for entries in/var/log/syslogor/var/log/cron(depending on your OS) related tologrotateruns. Check/etc/cron.daily/logrotateand/etc/crontabto ensure it's scheduled. - Permissions: Make sure the
logrotateexecutable and its configuration files have correct permissions. - Manual Test: Run
sudo logrotate -f /etc/logrotate.d/nginxand check for errors.
- Check cron: Ensure
logrotateConfiguration Errors:- Incorrect Log Path: The path in your
/etc/logrotate.d/nginxfile might be wrong or not match the actual log paths Nginx is using (e.g., Nginx logs toaccess.log, butlogrotatelooks fornginx_access.log). Double-check withgrep -r "access_log" /etc/nginx/. notifemptySkipping Rotation: If logs are very low volume,notifemptymight prevent rotation indefinitely. Consider removing it if you need rotation regardless of content.rotateValue Too High: You might be retaining too many old log files. Adjust therotatedirective (e.g.,rotate 7for 7 days,rotate 4for 4 weeks ifweekly).- Missing
compress: Ifcompressis omitted,logrotatewill keep uncompressed old logs, which still take up a lot of space. - Syntax Errors: Run
sudo logrotate -d /etc/logrotate.d/nginxto check for syntax issues in debug mode.
- Incorrect Log Path: The path in your
- Nginx Not Reopening Logs (after
postrotate):- If
logrotateworks, butaccess.logkeeps growing andaccess.log.1is also growing (or not appearing), Nginx might not be reopening logs correctly. - Incorrect PID file: Verify the
nginx.pidfile path in yourpostrotatescript. It should match what Nginx is configured to use (checknginx.confforpiddirective, usually/run/nginx.pidor/var/run/nginx.pid). - Nginx User Permissions: Ensure the user running Nginx (e.g.,
nginx,www-data) has permissions to write to the newly created log files. Thecreatedirective inlogrotate(create 0640 nginx adm) is crucial here. - Nginx Not Running: If Nginx isn't running, the
postrotatesignal won't do anything. Checksudo systemctl status nginx.
- If
- Other Large Files on Disk: Nginx logs might not be the only culprit. Use
sudo du -h / --max-depth=1to find large directories on your root filesystem andsudo du -h /var --max-depth=1for/var. Look for large databases, caches, backups, or other application logs.
Immediate Fix for Full Disk: 1. Identify: Use du -sh /var/log/nginx/*.log to pinpoint the largest Nginx logs. 2. Truncate: sudo truncate -s 0 /var/log/nginx/access.log (and error.log) to immediately free up space. 3. Address Root Cause: Once space is freed, systematically debug logrotate or other issues.
2. logrotate Not Running or Not Working
Symptoms: * Log files are growing indefinitely. * No rotated files (e.g., access.log.1, access.log.2.gz) appear in /var/log/nginx/. * No logrotate entries in syslog/cron logs.
Possible Causes and Solutions:
- Cron Job Missing/Disabled:
- Check
/etc/cron.daily/logrotateand ensure it's executable (ls -l). - Verify that
/etc/crontaboranacron(if used) is configured to run daily cron jobs. - Check
systemctl status cronorsystemctl status anacron.
- Check
- Permissions Issues:
logrotateneeds permission to read and write to the log files and their directories. If it runs as root, this is less common, butpostrotatescripts might fail if they switch user (su) without proper permissions. - Syntax Errors in Configuration: Run
sudo logrotate -d /etc/logrotate.confto check the main config and then specific configs in/etc/logrotate.d/. Errors in one file might preventlogrotatefrom processing subsequent files. - SELinux/AppArmor Restrictions: On systems with enhanced security, SELinux or AppArmor might prevent
logrotatefrom performing certain actions (e.g., renaming files, killing processes). Check/var/log/audit/audit.log(for SELinux) ordmesg(for AppArmor) for denial messages. Adjust policies as needed.
3. Nginx Not Reopening Logs After Rotation
Even if logrotate successfully renames access.log to access.log.1 and creates a new empty access.log, Nginx might continue writing to the old (now access.log.1) file. This leads to access.log remaining empty while access.log.1 continues to grow, consuming space.
Symptoms: * access.log is empty or very small. * access.log.1 is actively growing. * lsof | grep nginx | grep log shows Nginx processes holding an open file descriptor to access.log.1.
Possible Causes and Solutions:
- Incorrect
postrotateCommand:- Ensure
kill -USR1 $(cat /var/run/nginx.pid)(ornginx -s reopen) is correct for your Nginx installation. - Verify the PID file path
/var/run/nginx.pid(or wherever yourpiddirective points innginx.conf). - Check if the Nginx master process is actually running.
- Ensure
- No
sharedscripts: If you have multipleaccess_logdirectives (e.g., per virtual host) andsharedscriptsis missing, thepostrotatecommand might be run multiple times, or at the wrong time, causing issues. Ensuresharedscriptsis present if you manage multiple log files with a singlelogrotateentry. - Permissions for New Log File: The Nginx user needs write permissions to the new
access.logfile created bylogrotate. Ensure thecreatedirective (e.g.,create 0640 nginx adm) gives the Nginx user/group appropriate permissions. If not, Nginx might fall back to writing to its old file descriptor. - SELinux/AppArmor: As above, security modules might prevent the
killcommand or Nginx from creating/reopening files.
4. Inode Exhaustion: A Subtle Disk Problem
Even if df -h shows plenty of free space, df -i might show 100% inode usage. Inodes are data structures that store information about files and directories (metadata). Each file, regardless of size, consumes one inode. If you have millions of very small files (which can happen with poorly managed logs that rotate too frequently and retain too many, or applications generating many tiny files), you can run out of inodes before running out of disk space.
Symptoms: * df -h shows available disk space. * df -i shows inode usage at 100%. * Cannot create new files or directories, even small ones. * Server behaves erratically.
Possible Causes and Solutions:
- Too Many Small Log Files: While
logrotatehelps, if you rotate very frequently and keep too many small, uncompressed log chunks, this can contribute. - Other Application Issues: Applications generating excessive numbers of small temporary files or caches are more common culprits.
- Solution:
- Reduce Log Retention: Decrease the
rotatevalue inlogrotateto keep fewer old log files. - Consolidate/Compress More Aggressively: Ensure logs are compressed promptly (
compress, avoiddelaycompressif inode issues are severe) and delete older compressed files. - Increase
minfreespace: This is an extreme measure usually done at filesystem creation time and not recommended for active systems. - Find Culprit: Use
for i in /*; do echo $i; find $i | wc -l; done(start from root, then drill down) to find directories with an unusually high number of files.
- Reduce Log Retention: Decrease the
Troubleshooting these issues requires a systematic approach, starting with checking logs (syslog, cron logs, Nginx error logs), verifying configurations, inspecting permissions, and monitoring resource usage. Patience and attention to detail are key to restoring log management to its optimal state.
Monitoring Disk Space and Log Activity: Staying Ahead of the Curve
Proactive monitoring is the bedrock of robust server administration. Merely setting up log rotation and hoping for the best is an insufficient strategy. Continuously tracking disk space, observing log file growth, and setting up alerts ensures you're informed of potential issues before they escalate into critical problems. This allows for timely intervention and prevents unexpected downtime.
Essential Command-Line Tools for Spot Checks
For quick assessments, the Linux command line offers powerful utilities:
df -h(Disk Free, Human-readable): This command is your first line of defense. It shows the amount of available and used disk space on your mounted filesystems.bash df -hOutput Example:Filesystem Size Used Avail Use% Mounted on /dev/vda1 98G 45G 48G 48% / tmpfs 3.9G 0 3.9G 0% /dev/shmPay close attention to theUse%column for partitions where your Nginx logs reside (typically/or/var). A high percentage (e.g., over 80-90%) should trigger investigation.du -sh /path/to/directory(Disk Usage, Summarize, Human-readable): Oncedfindicates a full disk,duhelps pinpoint which directories are consuming the most space.bash sudo du -sh /var/log/nginx/This will show the total size of your Nginx log directory. To see the size of individual log files:bash sudo du -h /var/log/nginx/*.log*This helps identify if a specific log file (e.g.,access.logitself, or an uncompressed rotated log) is the primary culprit. For drilling down into large directories:bash sudo du -h /var --max-depth=1This shows the size of all top-level directories within/var, helping you quickly identify the largest consumers (e.g.,/var/log,/var/lib).ls -lrt(List, Long, Reverse Time Order): To see which files are most recently modified or are growing rapidly:bash ls -lrt /var/log/nginx/The-tsorts by modification time, and-rreverses it, showing the newest files last. This can quickly highlight active, rapidly growing log files.
Monitoring Agents and Centralized Solutions
While command-line tools are great for spot checks, a robust production environment demands continuous, automated monitoring and alerting. This is where dedicated monitoring agents and centralized solutions shine.
- Prometheus and Grafana:
- Prometheus: An open-source monitoring system that collects metrics from configured targets at given intervals. You can use the
node_exporteragent on your Nginx server to expose filesystem metrics (including disk usage) to Prometheus. - Grafana: A powerful open-source visualization and dashboarding tool. You can connect Grafana to Prometheus to create dashboards that display disk space usage over time, allowing you to visualize trends and predict when disk space might become an issue.
- Alerting: Prometheus's Alertmanager can be configured to send notifications (email, Slack, PagerDuty) when disk usage exceeds predefined thresholds.
- Prometheus: An open-source monitoring system that collects metrics from configured targets at given intervals. You can use the
- Zabbix/Nagios:
- These are mature, enterprise-grade monitoring systems that can monitor virtually any aspect of your servers, including disk space, I/O performance, and log file sizes.
- They typically use agents installed on the server to collect data and can trigger highly customizable alerts based on complex conditions.
- Cloud-Native Monitoring (AWS CloudWatch, Google Cloud Monitoring, Azure Monitor):
- If your Nginx servers are in the cloud, these services offer integrated monitoring solutions. You can install their agents (e.g., CloudWatch Agent) to collect disk usage metrics and configure dashboards and alerts directly within the cloud provider's console.
- They often integrate seamlessly with other cloud services and offer robust alerting mechanisms.
- Custom Scripts with Cron and Email: For smaller setups or specific needs, a simple custom script can monitor disk usage and email an alert. ```bash #!/bin/bash THRESHOLD=85 # Percentage PARTITION="/techblog/en/" # Partition to checkCURRENT_USAGE=$(df -h $PARTITION | awk 'NR==2 {print $5}' | sed 's/%//g')if (( CURRENT_USAGE > THRESHOLD )); then echo "High Disk Usage Alert on $(hostname): Partition $PARTITION is at $CURRENT_USAGE%." | mail -s "Disk Alert" your_email@example.com fi ``` This script could be run daily or hourly via cron.
Setting Up Alerts for High Disk Usage
The true value of monitoring comes from alerting. Simply logging metrics isn't enough; you need to be notified when thresholds are breached.
- Define Thresholds:
- Warning Threshold (e.g., 80%): Triggers an informational alert, indicating that you should investigate log growth or overall disk usage soon.
- Critical Threshold (e.g., 90-95%): Triggers an urgent alert, indicating immediate action is required to prevent an outage.
- Choose Notification Channels: Email, SMS, Slack, Microsoft Teams, PagerDuty, Opsgenie, etc. Integrate with your existing incident management workflows.
- Consider Trends: Advanced monitoring systems can alert not just on current usage, but also on the rate of growth. If disk usage is suddenly increasing much faster than usual, it could indicate a runaway process or a logging misconfiguration, even if the absolute percentage is still low.
Regularly reviewing your monitoring dashboards and acting on alerts ensures that Nginx log accumulation never becomes an unmanageable crisis. Proactive detection and intervention are far less stressful and costly than reactive firefighting.
Security Considerations for Nginx Logs: Protecting Your Data and Compliance
Nginx logs, while essential for operational insights, are also repositories of potentially sensitive information. Neglecting their security can expose your server to vulnerabilities, aid attackers, and lead to serious compliance violations. Integrating security best practices into your log management strategy is therefore non-negotiable.
1. Access Control: Restricting Who Can See Your Logs
The most fundamental security measure is to control who can read, write, or modify your log files.
- File Permissions (
chmod):- Log files should typically be readable only by the Nginx user/group, the
rootuser, and potentially a dedicated logging group (e.g.,admon Debian/Ubuntu,syslogon RHEL/CentOS) forlogrotateor log collection agents. - A common permission for log files is
0640(owner read/write, group read, others no access) or0600(owner read/write, others no access). - Example:
sudo chmod 0640 /var/log/nginx/*.log
- Log files should typically be readable only by the Nginx user/group, the
- Ownership (
chown):- Log files should be owned by the Nginx user (e.g.,
nginx,www-data) and a group that has access to logs (e.g.,adm,syslog, ornginx). - Example:
sudo chown nginx:adm /var/log/nginx/*.log
- Log files should be owned by the Nginx user (e.g.,
- Directory Permissions: The
/var/log/nginx/directory itself also needs careful permissions. It should allow the Nginx user to write and list files, androotorlogrotateto perform management tasks. Typically0750or0770with appropriate group ownership. - Principle of Least Privilege: Only grant the minimum necessary permissions. Avoid
0777or0666at all costs.
2. Sensitive Data Masking or Anonymization
Nginx access logs, by default, record client IP addresses. Depending on your location and the data you handle, IP addresses might be considered Personally Identifiable Information (PII) under regulations like GDPR. If your Nginx configuration logs request bodies or query strings (e.g., log_format including $request_body or sensitive query parameters), you could inadvertently be logging even more sensitive data.
- Avoid Logging Sensitive Data: Review your
log_formatdirectives. Do not include variables that might expose sensitive query parameters ($args), request bodies ($request_body), or sensitive headers ($http_cookie,$http_authorization) unless absolutely necessary for debugging and with extreme caution and explicit consent. If you must log them, ensure they are masked or truncated.
Anonymize IP Addresses: For compliance and privacy, you can configure Nginx to anonymize the last octet of IP addresses. This maintains geographical information without identifying individual users. ```nginx http { # ... # Add the 'geo_ip' module if not already enabled. # This example requires the HttpGeoIpModule (or a custom module). # A simpler way often involves post-processing or a custom module.
# Example using a custom variable (requires HttpCoreModule's map)
# This example uses a simplified approach often employed in post-processing.
# For Nginx, true anonymization usually involves custom modules or careful log_format.
# A common way to anonymize is to mask the last octet or last two octets.
# Nginx doesn't have a built-in anonymization for IPs in access_log.
# Typically, a log processing tool (like Logstash, rsyslog, fluentd) is used downstream.
# If forced to do in Nginx, you'd need lua-nginx-module or a custom module.

# A less robust, but Nginx-only approach might be:
# map $remote_addr $anonymized_remote_addr {
#     "~^(?P<ip>\d{1,3}\.\d{1,3}\.\d{1,3})\.\d{1,3}$" "$ip.0";
#     default $remote_addr;
# }
# log_format combined_anon '$anonymized_remote_addr - $remote_user [$time_local] "$request" '
#                            '$status $body_bytes_sent "$http_referer" '
#                            '"$http_user_agent" "$http_x_forwarded_for"';
# access_log /var/log/nginx/access.log combined_anon;
# This map solution is basic and might not cover all edge cases or IPv6.
# Downstream processing is generally preferred for robust anonymization.
# ...
} `` *Better solutions involve centralized log processors (e.g., Logstash filters,rsyslog` rules) that can reliably mask or hash IPs before storage.*
3. Log Integrity: Protecting Against Tampering
For auditing and security forensics, it's crucial that log files cannot be tampered with. An attacker might try to modify or delete logs to cover their tracks.
- Centralized Logging: Shipping logs immediately to a remote, read-only centralized log management system (as discussed in advanced strategies) is one of the most effective ways to ensure integrity. If logs are captured off-server in real-time, even if the local server is compromised, the original logs remain untouched.
- Immutable Logs: Some advanced logging systems offer features for immutability, cryptographic signing, or blockchain-based logging to guarantee that logs, once written, cannot be altered.
- Strict Permissions: As discussed, restrict write access to log files to the absolute minimum necessary.
4. Off-Site Storage and Retention Policies: Disaster Recovery and Auditability
Beyond live server security, consider the long-term security and availability of your archived logs.
- Disaster Recovery: Store critical archived logs in an off-site location (e.g., cloud storage, separate datacenter) to protect against local disasters (fire, hardware failure).
- Encrypted Storage: Encrypt archived logs at rest, especially if they contain sensitive data. Cloud storage services often offer built-in encryption options.
- Defined Retention and Deletion: Adhere strictly to your log retention policy, especially for compliance. This means not only retaining logs for the required period but also securely deleting them once that period expires. Indefinite retention of PII can be a compliance liability.
- Audit Trails for Log Management: Log actions performed on log files themselves (e.g., by
logrotateor custom scripts). This creates an audit trail for log management activities.
By thoughtfully integrating these security considerations into your Nginx log management workflow, you transform your log files from potential liabilities into secure, reliable resources that bolster your server's overall security posture and ensure compliance with critical regulations. Neglecting log security is an open invitation for future headaches, ranging from data breaches to hefty fines.
Conclusion: Mastering Nginx Log Management for Peak Performance and Reliability
The journey through Nginx log management, from understanding the nuanced differences between access and error logs to implementing sophisticated centralized logging solutions, underscores a fundamental truth in server administration: what gets measured gets managed, and what gets managed correctly thrives. Nginx, a powerful and indispensable component of modern web infrastructure, generates a continuous stream of operational data that is both a priceless resource for insights and a potential liability if left untamed.
We've explored the critical importance of proactive log management, highlighting the tangible perils of unmanaged growth—from the immediate threat of disk space exhaustion and its cascading failures to the subtle yet persistent drag on server performance and the profound challenges it poses for troubleshooting. The security implications and compliance mandates surrounding log data further cement the necessity of a diligent approach, transforming log files from mere operational records into a cornerstone of a secure and auditable infrastructure.
The core solution lies in log rotation, primarily through the robust and battle-tested logrotate utility. By systematically renaming, compressing, and pruning old logs, logrotate ensures that your Nginx servers maintain a lean footprint while preserving historical data. Beyond this foundational step, we delved into advanced strategies such as centralized log management, which aggregates data from disparate sources into a unified platform for powerful analysis and rapid troubleshooting. We also discussed techniques for filtering and sampling logs at the source to reduce unnecessary data volume, and the crucial practice of defining comprehensive archiving and deletion policies for long-term data lifecycle management. The brief mention of platforms like APIPark serves as a reminder that robust foundational logging, like that provided by Nginx, perfectly complements advanced systems designed for detailed API and AI invocation monitoring, creating a truly observable and efficient ecosystem.
Finally, we emphasized the non-negotiable role of monitoring and alerting in staying ahead of potential issues, coupled with stringent security considerations to protect sensitive data within logs and ensure regulatory compliance.
Mastering Nginx log management is not merely about preventing disk full errors; it is about building a more resilient, observable, and efficient web server environment. It's about empowering your operations teams with the data they need, ensuring your applications perform optimally, and safeguarding your data against security threats. By embracing the principles and practices outlined in this guide, you equip yourself to transform a potential administrative burden into a streamlined process, contributing significantly to the overall stability, performance, and reliability of your entire digital presence. Make log management an integral, non-negotiable part of your server administration routine, and watch your Nginx deployments perform at their peak.
Frequently Asked Questions (FAQs)
1. What is log rotation and why is it essential for Nginx? Log rotation is an automated process of archiving, compressing, and periodically deleting old log files while creating new, empty ones for continuous logging. It's essential for Nginx because Nginx generates large volumes of access and error logs. Without rotation, these files would rapidly consume disk space, degrade server performance due to excessive disk I/O, make troubleshooting difficult by creating massive log files to parse, and pose security/compliance risks. Log rotation ensures disk space is freed up, logs remain manageable, and historical data is preserved efficiently.
2. What's the safest way to clear an Nginx log file immediately if my disk is full? The safest and most immediate way to clear an Nginx log file without stopping the Nginx service is to truncate it. Use the command sudo truncate -s 0 /var/log/nginx/access.log (and similarly for error.log). This empties the file's content, freeing up disk space, while preserving the file and Nginx's open file handle, allowing Nginx to continue writing to the now-empty file seamlessly. Avoid simply rming the file, as Nginx might continue writing to the deleted inode, not freeing up space immediately.
3. How often should Nginx logs be rotated, and how many old logs should I keep? The frequency of rotation (e.g., daily, weekly, monthly) and the number of old logs to keep (rotate N) depend heavily on your server's traffic volume, disk space availability, and compliance requirements. For busy servers, daily rotation is common, keeping 7 to 30 days (rotate 7 to rotate 30) of compressed logs. For less busy servers, weekly rotation might suffice. Compliance regulations (e.g., PCI DSS) might mandate retaining logs for specific periods (e.g., 1 year for audit logs), requiring longer rotate values or an archiving strategy. Always balance your operational needs with storage capacity and regulatory obligations.
4. Can I send Nginx logs to a centralized logging system, and why would I do that? Yes, you can configure Nginx to send logs to a centralized logging system (e.g., ELK Stack, Splunk, Graylog) using the syslog directive in your Nginx configuration. You would typically send them to a local syslog daemon (like rsyslog or syslog-ng), which then forwards them to your centralized platform. You would do this to gain unified visibility across multiple servers, facilitate faster troubleshooting, leverage powerful analysis and alerting tools, enhance security and compliance by offloading logs from individual servers, and reduce local server load. Centralized logging is crucial for complex, distributed environments.
5. My logrotate is configured correctly, but Nginx is still writing to old log files after rotation. What could be wrong? This usually indicates that Nginx has not been correctly signaled to reopen its log files after logrotate renames them. Check the postrotate script block in your /etc/logrotate.d/nginx configuration. Ensure it contains a command like kill -USR1 $(cat /var/run/nginx.pid) (or nginx -s reopen). Verify that the Nginx PID file path (/var/run/nginx.pid is common) is correct and that the Nginx master process is running. Also, confirm that the create directive in logrotate sets appropriate permissions (e.g., create 0640 nginx adm) for the newly created log files, allowing the Nginx user to write to them. If Nginx cannot write to the new file, it might revert to writing to its old, renamed file handle.
🚀You can securely and efficiently call the OpenAI API on APIPark in just two steps:
Step 1: Deploy the APIPark AI gateway in 5 minutes.
APIPark is developed based on Golang, offering strong product performance and low development and maintenance costs. You can deploy APIPark with a single command line.
curl -sSO https://download.apipark.com/install/quick-start.sh; bash quick-start.sh

In my experience, you can see the successful deployment interface within 5 to 10 minutes. Then, you can log in to APIPark using your account.

Step 2: Call the OpenAI API.