How to Create Proxy in Mulesoft: A Step-by-Step Guide


In the rapidly evolving landscape of digital transformation, Application Programming Interfaces (APIs) have emerged as the foundational pillars connecting disparate systems, enabling seamless data exchange, and fostering innovation across enterprises. From mobile applications interacting with backend services to intricate microservices architectures communicating across cloud boundaries, APIs are the invisible threads weaving together the fabric of modern software. However, the proliferation of APIs also introduces significant challenges, particularly concerning security, governance, performance, and management. Directly exposing backend services to external consumers or even internal applications can lead to vulnerabilities, uncontrolled access, and operational complexities that can quickly spiral out of control.
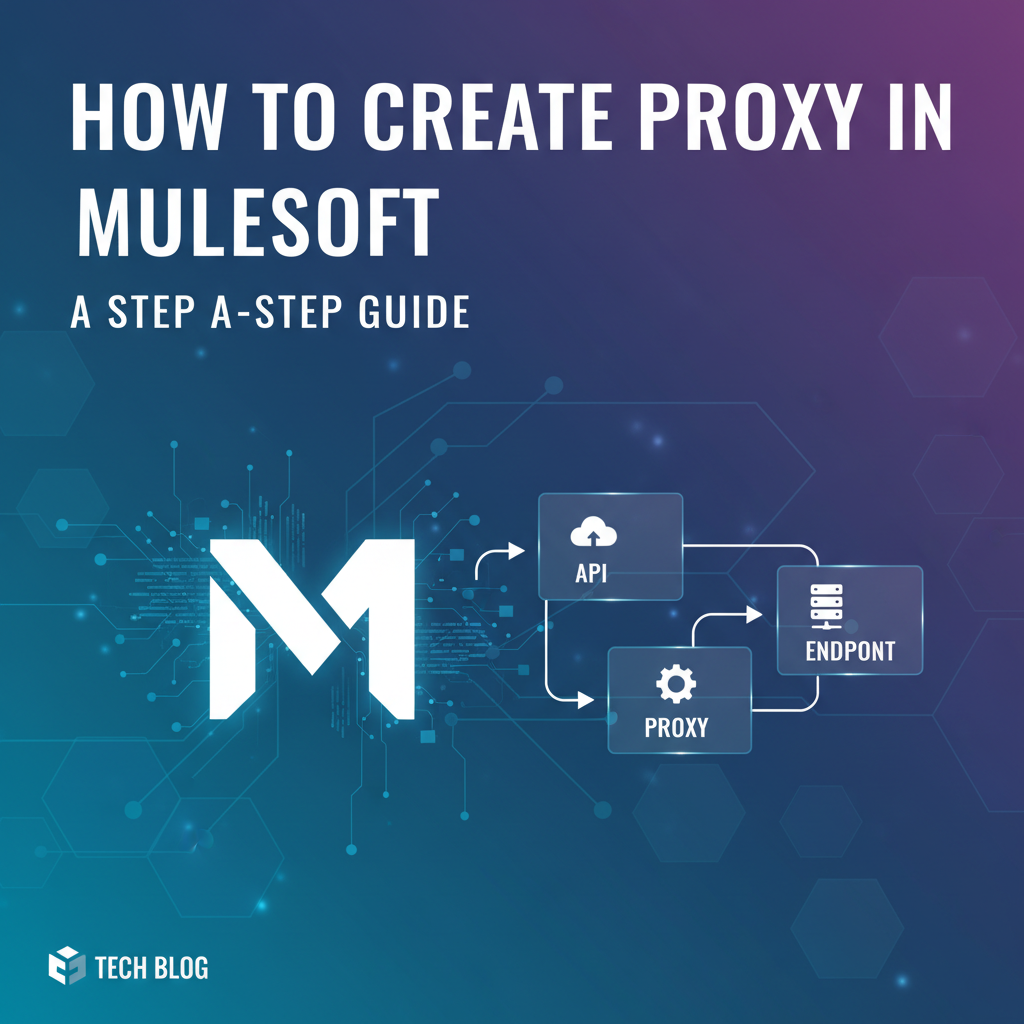
This is precisely where the concept of an API proxy, and more broadly, an API gateway, becomes indispensable. An API proxy acts as an intelligent intermediary, a sophisticated shield positioned in front of your core backend services. It intercepts incoming requests, applies a myriad of policies and transformations, routes them to the appropriate backend, and then processes the responses before sending them back to the original caller. This architectural pattern not only enhances the security posture of your systems but also provides a centralized point for managing, monitoring, and scaling your API ecosystem.
MuleSoft, with its Anypoint Platform, stands as a leading unified platform for API design, development, deployment, and management. It empowers organizations to build robust integration solutions and implement sophisticated API strategies. Within this powerful ecosystem, creating API proxies is a core capability, allowing developers and architects to exert granular control over how their services are exposed and consumed. This comprehensive guide will take you on an in-depth journey through the process of creating API proxies in MuleSoft, covering everything from fundamental concepts and various implementation methods to advanced configurations and best practices. We will delve into the nuances of both quick, policy-driven proxies via API Manager and highly customized, logic-rich proxies developed in Anypoint Studio, ensuring you gain a holistic understanding of how to leverage MuleSoft's capabilities to build a resilient and secure gateway for your digital assets.
Understanding API Proxies and Their Indispensable Role
Before we dive into the technicalities of building proxies in MuleSoft, it's crucial to solidify our understanding of what an API proxy is and why it has become an essential component in virtually every modern enterprise architecture. Far from being a mere passthrough mechanism, a well-designed API proxy embodies a strategic layer that addresses numerous challenges inherent in exposing backend services.
What Exactly is an API Proxy?
At its core, an API proxy is an abstraction layer that sits between API consumers (applications, users, other services) and the actual backend API implementation. When a consumer sends a request, it doesn't directly hit the backend service. Instead, it targets the API proxy. The proxy then takes charge: it receives the request, potentially performs some processing (like authentication, rate limiting, or data transformation), forwards the request to the real backend service, receives the response, processes that response (e.g., sanitization, format conversion), and finally sends it back to the original consumer.
Think of it as a vigilant doorman for your digital services. Instead of guests directly entering a building and wandering around, they interact with the doorman who verifies their identity, checks their invitation, directs them to the correct floor, and ensures they adhere to house rules. This doorman (the proxy) protects the building (backend service) and provides a consistent experience for all guests (API consumers).
The Multifaceted Benefits of Leveraging API Proxies
The adoption of API proxies is driven by a compelling set of advantages that significantly enhance the security, manageability, and agility of an API landscape. These benefits extend across various facets of an organization's IT operations and business objectives.
1. Enhanced Security and Threat Protection
Security is paramount when exposing services over a network. An API proxy provides a critical line of defense, shielding your backend services from direct exposure to the internet or untrusted networks. This isolation is fundamental in mitigating various cyber threats. * Masking Backend Endpoints: Proxies conceal the actual network location and internal architecture of your backend services. Consumers only interact with the proxy's URL, preventing them from discovering sensitive information about your internal infrastructure. * Centralized Authentication and Authorization: Instead of scattering security logic across multiple backend services, the proxy can enforce authentication (e.g., OAuth 2.0, API keys, JWT validation) and authorization rules centrally. This ensures consistent security policies and simplifies auditing. For instance, if a backend API relies on basic authentication, the proxy can upgrade this to a more robust OAuth 2.0 flow for external consumers, translating the token into the appropriate credentials before forwarding. * Threat Protection and Input Validation: Proxies can inspect incoming requests for malicious patterns, such as SQL injection attempts, cross-site scripting (XSS), or excessively large payloads, blocking them before they reach the backend. They can also enforce strict schema validation, rejecting malformed requests at the gateway layer, thereby reducing the attack surface on your core services. * IP Whitelisting/Blacklisting: You can configure the proxy to only allow requests from specific IP addresses or ranges, or to block requests from known malicious sources, adding another layer of network security.
2. Robust Policy Enforcement and Governance
Effective API governance ensures that APIs are consumed in a controlled, predictable, and fair manner. Proxies are instrumental in implementing and enforcing these policies across your API portfolio. * Rate Limiting and Spike Arrest: To prevent abuse, manage resource consumption, and ensure fair usage among consumers, proxies can enforce rate limits (e.g., 100 requests per minute per client). Spike arrest policies protect your backend from sudden, overwhelming traffic surges by smoothing out bursts of requests. * Service Level Agreements (SLAs): Proxies can enforce different policies based on the consumer's SLA. Premium subscribers might get higher rate limits, while basic users face stricter throttling, enabling tiered service offerings. * Auditing and Compliance: All requests passing through the proxy can be logged, providing a detailed audit trail. This is crucial for compliance requirements (e.g., GDPR, HIPAA) and for understanding API usage patterns.
3. Comprehensive Analytics and Monitoring
Visibility into API usage and performance is vital for operational excellence and strategic decision-making. Proxies serve as a central point for collecting invaluable telemetry data. * Centralized Logging: Every request and response can be logged, providing a single source of truth for troubleshooting, security investigations, and usage analysis. This eliminates the need to aggregate logs from disparate backend services. * Performance Metrics: Proxies can track latency, error rates, request volumes, and other key performance indicators (KPIs) for each API. This data is critical for identifying bottlenecks, capacity planning, and ensuring your APIs meet performance targets. * Usage Analytics: By tracking which APIs are consumed, by whom, and how frequently, organizations can gain insights into the value of their APIs, identify popular endpoints, and make informed decisions about future API development.
4. Abstraction, Decoupling, and Versioning
API proxies promote a loosely coupled architecture, allowing backend services to evolve independently without impacting API consumers. * Decoupling Consumers from Backend Implementations: If a backend service needs to be refactored, moved, or replaced, the proxy can be updated to point to the new service without requiring consumers to change their integration code. The proxy acts as a stable contract. * API Versioning: Proxies simplify the management of multiple API versions. You can maintain older versions (e.g., v1, v2) through separate proxy endpoints while directing new consumers to the latest version, ensuring backward compatibility during transitions. This prevents breaking changes for existing applications. * Service Orchestration: For complex use cases, a proxy can even orchestrate calls to multiple backend services, aggregating responses before returning a unified result to the consumer, simplifying the consumer's integration logic.
5. Traffic Management and Optimization
Proxies can intelligently manage traffic flow, optimizing performance and resilience. * Load Balancing: Distribute incoming requests across multiple instances of a backend service to prevent overload and ensure high availability. * Caching: Cache frequently requested responses at the proxy level. This reduces the load on backend services, significantly improves response times for consumers, and lowers operational costs. * Request/Response Transformation: Proxies can transform request payloads (e.g., from JSON to XML or vice versa) or modify response structures to meet the specific requirements of different consumers, reducing the burden on backend services to support multiple formats. This is invaluable when integrating legacy systems with modern applications.
MuleSoft's Role as a Premier API Gateway
MuleSoft Anypoint Platform is not just an integration platform; it's a comprehensive API gateway and management solution. It provides all the necessary tools and functionalities to implement the benefits of API proxies described above. * API Manager: This component of Anypoint Platform is the control center for your API proxies. It allows you to define, secure, and manage APIs, apply policies (rate limiting, security, QoS), and monitor their performance without writing a single line of code for basic proxy functions. * Mule Runtime: The core engine that executes your proxy logic, whether it's an auto-generated proxy application or a custom-built Mule application. It can run on CloudHub (MuleSoft's cloud platform), on-premises, or in a hybrid deployment model. * Anypoint Studio / Design Center: Integrated development environments for designing and building highly custom API proxy applications with complex business logic, data transformations, and integration patterns. * Anypoint Exchange: A central repository for discovering, sharing, and governing all your API assets, including API specifications for your proxies.
By leveraging these components, MuleSoft enables organizations to transform their raw backend services into managed, secure, and discoverable API products, thereby establishing a robust API gateway that truly empowers digital innovation.
Prerequisites for Creating a MuleSoft Proxy
Before embarking on the practical steps of creating an API proxy in MuleSoft, ensure you have the necessary environment set up and a basic understanding of some core concepts. These prerequisites will streamline your development and deployment process.
- MuleSoft Anypoint Platform Account: This is the absolute foundation. You need an active Anypoint Platform account to access API Manager, Runtime Manager, Exchange, and other essential services. If you don't have one, you can sign up for a free trial on the MuleSoft website.
- MuleSoft Runtime:
- CloudHub: For most users, deploying proxies to CloudHub (MuleSoft's fully managed cloud environment) is the simplest and recommended option. You'll need access to deploy applications to CloudHub.
- Hybrid/On-Premise: If your organization uses a hybrid deployment model or deploys Mule applications on-premises, ensure you have a Mule runtime installed and configured, and that you have the necessary permissions to deploy applications to it.
- An Existing Backend API (or a Mock API): A proxy needs something to proxy! You'll need an operational backend service that the proxy can forward requests to. This could be:
- A simple RESTful service (e.g., a "Hello World" endpoint).
- A legacy SOAP service.
- A public API you wish to secure and manage (e.g., a weather API, a public data service).
- For testing purposes, you can even use a mock API service (like Mockable.io, Postman Mock Servers, or even a simple Mule app acting as a backend). For the examples in this guide, we will assume a simple HTTP GET endpoint is available.
- Basic Understanding of RESTful Concepts: Familiarity with HTTP methods (GET, POST, PUT, DELETE), status codes, request/response headers, and common data formats like JSON or XML will be beneficial.
- Anypoint Studio (Optional but Recommended for Custom Proxies): While some proxy types can be created entirely within the Anypoint Platform web interface, Anypoint Studio (MuleSoft's IDE) is essential for developing custom proxy logic, complex transformations, and intricate integration flows. Download and install the latest version if you plan on building custom proxies.
- API Specification (RAML/OAS/Swagger) (Recommended): While not strictly mandatory for all proxy types, having an API specification defined in RAML (RESTful API Modeling Language) or OpenAPI Specification (OAS/Swagger) is a best practice. It provides a clear contract for your API, which can then be used to generate proxy definitions, enforce validation, and publish to Exchange.
By confirming these prerequisites, you'll be well-prepared to follow the detailed steps outlined in the subsequent sections, ensuring a smooth and successful experience in creating your MuleSoft API proxies.
Delving into the Types of API Proxies in MuleSoft
MuleSoft offers flexibility in how you implement API proxies, catering to different levels of complexity and control required. Understanding these different approaches is key to choosing the right method for your specific use case. Primarily, there are two main types: API Manager-managed proxies (often leveraging auto-discovery) and custom Mule applications developed in Anypoint Studio or Design Center.
1. API Manager Proxies (Auto-Discovery Method)
This is the fastest and often preferred method for quickly applying policies and managing existing backend APIs without writing any code. API Manager does most of the heavy lifting.
How it Works:
When you create an API proxy in API Manager using this method, MuleSoft essentially generates a lightweight, minimal Mule application behind the scenes. This application acts as the "proxy" and is deployed to a Mule runtime (typically CloudHub). This auto-generated proxy application is then linked to the API instance in API Manager. The magic lies in "auto-discovery" – a mechanism where the deployed Mule application registers itself with API Manager. This registration allows API Manager to push policies directly to the running proxy application.
Key Characteristics:
- Policy-Driven: The primary strength of this method is the ability to apply out-of-the-box policies from API Manager's extensive library. These include security policies (e.g., Client ID enforcement, OAuth 2.0 validation), quality of service policies (e.g., rate limiting, spike arrest), caching policies, and more. All are configured through a user-friendly web interface without needing to touch code.
- Rapid Deployment: Creating and deploying these proxies is a matter of minutes, making it ideal for quickly bringing existing services under API gateway management.
- No Code Required: For standard proxy functionalities (forwarding, basic security, rate limiting), you don't need to write any Mule code. This significantly reduces development time and complexity.
- Centralized Management: All aspects of the proxy (policies, deployment status, analytics) are managed directly from the Anypoint Platform's API Manager and Runtime Manager dashboards.
- Limited Customization: While powerful for policy enforcement, these auto-generated proxies offer minimal scope for custom business logic or complex data transformations within the proxy itself. If you need to manipulate payloads extensively, call multiple backend services, or implement intricate routing, this method might be insufficient.
- Deployment Target: Typically deployed to CloudHub, but can also be deployed to customer-hosted runtimes (on-premises or hybrid).
When to Use:
- You need to quickly secure an existing backend API with standard authentication (e.g., API Key).
- You want to enforce rate limiting or other quality-of-service policies on an API.
- You need to gather usage analytics and monitor an API's performance.
- You have a simple pass-through scenario where no complex data transformation or routing logic is required.
- You are looking for a quick win to bring an API under governance.
2. Custom Mule Applications (Anypoint Studio/Design Center Method)
This method involves developing a full-fledged Mule application in Anypoint Studio (or designing flows in Design Center) that explicitly acts as your API proxy. This approach offers unparalleled flexibility and control over the proxy's behavior.
How it Works:
You design and implement the proxy logic as a standard Mule application. This application includes an HTTP Listener to receive requests, various Mule components to process the requests (e.g., DataWeave for transformations, custom security logic), and an HTTP Request connector to forward the requests to the actual backend API. The response from the backend is then processed by the Mule application before being sent back to the client. Crucially, even custom Mule proxies can still leverage API Manager for policy enforcement and analytics by configuring API auto-discovery within the application, linking it to an API instance in API Manager.
Key Characteristics:
- Maximum Flexibility and Control: You have full programmatic control over every aspect of the proxy's behavior. This allows for complex routing logic, sophisticated data transformations using DataWeave, integration with multiple backend systems, custom error handling, and advanced security implementations.
- Complex Business Logic: Ideal for scenarios where the proxy needs to perform more than just simple forwarding. For example, it might need to enrich requests with data from another service, translate data formats across different backend versions, or implement multi-step orchestration.
- Integration Capabilities: As a full Mule application, the proxy can leverage MuleSoft's vast array of connectors to integrate with almost any system (databases, SaaS applications, messaging queues, etc.) as part of its proxy logic.
- Custom Security Flows: While API Manager provides many security policies, a custom proxy allows you to implement highly specific or unique authentication/authorization schemes that might not be covered by standard policies.
- Higher Development Effort: Building a custom Mule application requires development time, understanding of MuleSoft's development paradigm, and typically involves coding (especially with DataWeave).
- Deployment Target: Can be deployed to CloudHub, on-premises, or in a hybrid model, just like any other Mule application.
When to Use:
- You need to perform significant request or response payload transformations (e.g., complex mapping, data enrichment, format conversion).
- You require custom authentication or authorization logic not available as a standard API Manager policy.
- The proxy needs to aggregate data from multiple backend services or orchestrate calls to different endpoints.
- You need to implement advanced routing logic based on dynamic conditions (e.g., route to different backend versions based on a request header).
- You desire granular control over the proxy's runtime behavior and internal processing.
- You are looking to build an API gateway that serves as a composition layer, creating new, higher-value APIs from existing ones.
The choice between an API Manager proxy and a custom Mule application proxy depends heavily on the specific requirements of your use case. Often, organizations start with API Manager proxies for simpler needs and graduate to custom Mule applications when more sophisticated logic or integration patterns become necessary. It's also common for custom Mule applications to be managed by API Manager to benefit from its centralized policy enforcement and analytics capabilities.
Step-by-Step Guide: Creating an API Manager Proxy (Method 1 - Auto-Discovery)
This method is the quickest way to put an API proxy in front of an existing backend service using MuleSoft's Anypoint Platform. It requires minimal configuration and no coding, making it ideal for rapidly applying security, governance, and monitoring policies.
Scenario: We have a simple backend HTTP service running at http://api.example.com/greeting which returns a "Hello, World!" message. We want to expose this service through a MuleSoft proxy, add an API Key enforcement policy, and monitor its usage.
Step 1: Define Your API in Anypoint Exchange
While not strictly mandatory for creating a proxy, defining your API in Anypoint Exchange is a best practice. It serves as a central catalog for all your API assets, fostering discoverability and consistent governance.
- Log in to Anypoint Platform: Navigate to
anypoint.mulesoft.comand log in with your credentials. - Go to Exchange: From the main Anypoint Platform navigation, select "Exchange."
- Add New API: Click the "Add new API" button.
- Create from API Specification: Select "Create new API from API specification."
- Upload/Define Specification:
- Choose "Define a new API in Exchange."
- Provide an API name (e.g.,
MyGreetingAPI). - Select the API type (e.g.,
REST). - Choose the API specification language (e.g.,
OAS 2.0orRAML 1.0). - You can then either type or paste your specification. For our simple greeting API, an OAS 2.0 (Swagger) definition might look like this:
yaml swagger: '2.0' info: title: MyGreetingAPI version: 1.0.0 description: A simple API that returns a greeting message. host: localhost:8081 # This host will be replaced by the actual backend URL during proxy configuration basePath: /greeting schemes: - http paths: /: get: summary: Get a greeting description: Returns a simple "Hello, World!" greeting. produces: - application/json responses: '200': description: Successful response schema: type: string example: "Hello, World!"* Click "Save." Your API is now in Exchange, providing a contract.
Step 2: Register the API with API Manager
This is where you tell MuleSoft that you want to manage an existing API and apply policies to it via a proxy.
- Navigate to API Manager: From the Anypoint Platform navigation, select "API Manager."
- Add API: Click the "Add API" button, then choose "Add new API."
- Select API and Gateway:
- "Manage an existing API": Select this option.
- "Pick an API from Exchange": Choose the
MyGreetingAPIyou defined in Step 1. - "Deployment Target": Select
Mule Gateway. - "Gateway type": Select
API Proxy. - Click "Next."
- Configure API Instance:
- Name: A descriptive name for your API instance (e.g.,
MyGreetingAPI-Proxy-v1). - Asset Type: This should pre-populate from Exchange.
- API Version:
1.0.0(from Exchange). - Instance Label: Can be a friendly name (e.g.,
Production). - Implementation URL: This is the URL of your actual backend service. For our example, let's use a mock endpoint like
http://httpbin.org/getor if you have your own simple serverhttp://localhost:8081/greeting. Make sure this backend is accessible from your Mule runtime. For the purpose of this guide, let's assumehttp://httpbin.org/getas it's a publicly available test endpoint that reflects request details back. - Advanced options (Optional): You can specify additional details like the custom inbound path for the proxy or base path. For simplicity, we'll keep the defaults for now.
- Click "Next."
- Name: A descriptive name for your API instance (e.g.,
- Configure Proxy Deployment:
- Deployment Target: Choose where the proxy application will run. For CloudHub, select
CloudHub. - Application Name: This will be the name of the auto-generated Mule application deployed to CloudHub. API Manager usually suggests one, like
mygreetingapi-proxy-v1-runtime. You can customize it if needed, but ensure it's unique within your organization. - Runtime Version: Select a compatible Mule runtime version (e.g.,
4.4.0or4.5.0). - Worker Size: Choose the appropriate worker size (e.g.,
0.1 vCore). For simple proxies, a small worker size is usually sufficient. - Workers:
1worker is generally fine for initial setup. - Click "Deploy Proxy."
- Deployment Target: Choose where the proxy application will run. For CloudHub, select
API Manager will now generate a Mule application and deploy it to your chosen CloudHub environment. This process might take a few minutes. Once deployed, the status in API Manager will change from "Unregistered" to "Active."
Step 3: Deploy the Proxy Application
While Step 2 initiates the deployment, it's worth understanding what happens here. API Manager automatically: 1. Creates a basic Mule application project. 2. Configures it with an HTTP Listener to receive requests and an HTTP Request connector to forward them to your specified Implementation URL. 3. Includes the API auto-discovery module, which registers this application with API Manager, allowing policy enforcement. 4. Deploys this application to CloudHub (or your specified runtime).
You can verify the deployment status in Runtime Manager by navigating there and finding the application named mygreetingapi-proxy-v1-runtime (or whatever you named it). It should show a "Running" status.
The proxy's URL will be displayed in API Manager once it's active. It typically follows the pattern http://[app-name].us-e2.cloudhub.io. Make a note of this URL.
Step 4: Apply Policies
Now that our proxy is deployed and active, we can start adding policies to govern its behavior. Let's add an "API Key enforcement" policy.
- Select API Instance: In API Manager, click on your
MyGreetingAPI-Proxy-v1instance. - Go to Policies: Click on the "Policies" tab.
- Add Policy: Click "Apply New Policy."
- Choose Policy Type: Select "API Key enforcement" from the list of available policies.
- Configure Policy:
- Key Location: Choose where the API key will be expected. Common options are
Header(e.g.,x-api-key) orQuery parameter(e.g.,apiKey). Let's selectHeader. - Header Name: Enter
x-api-key. - Advanced options (Optional): You can configure whether to allow empty keys, etc. For now, leave defaults.
- Click "Apply."
- Key Location: Choose where the API key will be expected. Common options are
The policy will be applied to your running proxy application almost immediately. You'll see it listed under the "Policies" tab.
Step 5: Test the Proxy
Now, let's test our deployed proxy and verify that the API Key policy is working.
- Retrieve Proxy URL: From the API Manager dashboard for your API instance, copy the "Proxy Endpoint" URL (e.g.,
http://mygreetingapi-proxy-v1-runtime.us-e2.cloudhub.io). - Use a REST Client (e.g., Postman, cURL):
- Attempt 1: Call without API Key (Expected to Fail)
bash curl -X GET http://mygreetingapi-proxy-v1-runtime.us-e2.cloudhub.ioYou should receive a401 Unauthorizedor403 Forbiddenresponse, indicating the policy blocked the request. The error message will typically indicate "Client ID required" or "Unauthorized." - Attempt 2: Create a Client Application and API Key To get an API key, you need to create a client application in Exchange and request access to your API.
- Go to Exchange.
- Find your
MyGreetingAPI. - Click "Request Access" button.
- If no application exists, click "Create a new application." Give it a name (e.g.,
TestApp), a brief description, and click "Create Application." - Select your
TestAppfrom the list. - Click "Request Access."
- You'll be presented with a Client ID and Client Secret. For the API Key enforcement policy, the
Client IDtypically acts as the API key. Copy the Client ID.
- Attempt 3: Call with API Key (Expected to Succeed) Now, send the request again, but include the
x-api-keyheader with your Client ID.bash curl -X GET -H "x-api-key: YOUR_CLIENT_ID_HERE" http://mygreetingapi-proxy-v1-runtime.us-e2.cloudhub.io(ReplaceYOUR_CLIENT_ID_HEREwith the actual Client ID you copied). You should now receive a successful200 OKresponse from your backend (e.g., a JSON object reflecting thehttpbin.org/getrequest details, or "Hello, World!" if your actual backend returns that).
- Attempt 1: Call without API Key (Expected to Fail)
Step 6: Monitor and Analyze
Once your proxy is operational and receiving traffic, you can monitor its performance and usage.
- API Manager Analytics:
- In API Manager, select your
MyGreetingAPI-Proxy-v1instance. - Go to the "Analytics" tab. Here you'll find dashboards showing request counts, average response times, error rates, and client usage patterns. This data is invaluable for understanding API performance and identifying potential issues.
- In API Manager, select your
- Runtime Manager Logs:
- In Anypoint Platform, go to "Runtime Manager."
- Find your deployed application (e.g.,
mygreetingapi-proxy-v1-runtime). - Go to the "Logs" tab. You'll see detailed logs from your proxy application, which can be helpful for debugging and troubleshooting.
This concludes the process of creating a simple yet effective API proxy using the API Manager's auto-discovery method. This approach provides a powerful foundation for managing and securing your APIs with minimal effort.
APIPark is a high-performance AI gateway that allows you to securely access the most comprehensive LLM APIs globally on the APIPark platform, including OpenAI, Anthropic, Mistral, Llama2, Google Gemini, and more.Try APIPark now! 👇👇👇
Step-by-Step Guide: Creating a Custom Mule Application Proxy (Method 2 - Anypoint Studio/Design Center)
For scenarios demanding intricate request/response transformations, custom security logic, or advanced routing, a custom Mule application proxy offers the flexibility required. This method involves developing a Mule application in Anypoint Studio (or Design Center) and then linking it to API Manager for centralized governance.
Scenario: We want to create a proxy for a backend service that returns user details (e.g., http://mybackend.com/users/{id}). Our custom proxy will: 1. Receive a GET request at /proxy/users/{id}. 2. Perform custom validation on the id parameter. 3. Add an Authorization header to the backend request (e.g., a hardcoded token for simplicity, but in reality, this could come from a secure vault or an identity service call). 4. Transform the backend JSON response to a simpler format before sending it back to the client. 5. Link to API Manager for policy application and analytics.
Step 1: Design the API Interface (RAML/OAS)
Even for custom proxies, it's a best practice to define your API contract. We'll use Anypoint Design Center for this, which can also generate a basic Mule project.
- Log in to Anypoint Platform and navigate to Design Center.
- Create New API Specification: Click "Create new" -> "API specification."
- Name and Language: Give it a name (e.g.,
UserProxyAPI) and chooseRAML 1.0(orOAS). Click "Create."
Define the API: Enter your RAML definition.```raml
%RAML 1.0
title: UserProxyAPI version: v1 baseUri: http://localhost:8081/proxy # This will be the listener path in our Mule app mediaType: application/json/users: displayName: User Resources /{userId}: get: description: Get details for a specific user. responses: 200: body: application/json: example: | { "user_id": 123, "user_name": "John Doe", "email_address": "john.doe@example.com" } 404: body: application/json: example: | { "message": "User not found" } uriParameters: userId: type: integer required: true description: Unique identifier for the user. ``` 5. Save: Save your specification.
Step 2: Create a New Mule Project in Anypoint Studio
Now, we'll build the actual proxy application.
- Open Anypoint Studio: Launch Anypoint Studio.
- Import API from Design Center:
- Go to
File->New->Mule Project. - In the "New Mule Project" wizard:
- Project Name:
UserProxyApplication - "Populate project from API definition": Check this box.
- "Import from Design Center": Click "..." and log in to your Anypoint Platform account. Select your
UserProxyAPIfrom the list. - The wizard will automatically configure the base path, port, and auto-discovery details based on your RAML.
- Project Name:
- Click "Finish."
- Go to
Studio will generate a basic project with a userproxyapi.xml flow, an APIKit Router, and configuration files.
Step 3: Implement the Proxy Logic
This is the core of our custom proxy. We'll modify the generated flow to add our custom logic.
A. Configure HTTP Listener
The generated APIKit router already has an HTTP Listener. By default, it might be on localhost:8081. We'll ensure it listens for requests on /proxy/*.
- Open
userproxyapi.xml. - Locate the
HTTP Listenerconfiguration. Ensure itsPathis set to/proxy/*andPortis8081(or another available port). - The APIKit Router will then route
/users/{userId}to the appropriate flow based on the RAML.
B. Implement the /users/{userId} Flow
Locate the flow corresponding to GET /users/{userId} (it will likely be named get:\users\(userId):api-config).
- Parameter Validation (Optional but good practice): Before calling the backend, we can add a validator. The APIKit Router provides basic validation based on the RAML, but you might need more specific checks. For example, ensuring the
userIdis positive.- Add a
Choicerouter immediately after the APIKit Routerget:\users\(userId):api-config(or at the beginning of the flow it routes to). - When condition:
#[[attributes.uriParams.userId as Number > 0]](or add a customregexor avalidation:is-numbercomponent). - Default (if not valid): Set a
Set Payloadcomponent with an error message and aRaise Errorcomponent to return a400 Bad Request.
- Add a
- Add Authorization Header (Request Transformation): Before calling the backend, we need to add an authorization header.
- Drag and drop a
Transform Message (DataWeave)component onto the canvas, just before theHTTP Requestconnector.
- Drag and drop a
- Call the Backend API (HTTP Request): We'll configure the
HTTP Requestconnector to call our actual backend service. Assume the backend ishttp://api.mybackend.com/users/{id}.- Drag and drop an
HTTP Requestconnector to the flow. - Basic Settings:
- Connector Configuration: Create a new
HTTP Request configuration.- Host:
api.mybackend.com - Port:
80(or443for HTTPS) - Base Path:
/users
- Host:
- Path:
/{userId}(this will dynamically take theuserIdfrom the incoming request's URI parameters). - Method:
GET
- Connector Configuration: Create a new
- Headers:
- Crucially, you need to merge the incoming headers (if any) and the
Authorizationheader we just created. - In the
HTTP Requestconnector, under the "Headers" tab, use DataWeave:xml %dw 2.0 output application/java --- // Merge existing incoming headers with our custom Authorization header if (vars.headers != null) vars.headers else {} ++ attributes.headers -- ["host"] ++ {Authorization: "Bearer your_hardcoded_backend_token"}(Self-correction: The previous DataWeave was just setting headers. Here, we should merge the custom header withattributes.headersorvars.headersif we preserved them. A simpler approach if the previous transform message set avars.headerswould be#[vars.headers ++ attributes.headers -- ["host"]]for all headers, or simply#[vars.headers]ifvars.headerscontains only the custom one we want. For just the custom one it's#[vars.headers.Authorization]for the authorization header, but if we have other policies the easiest is to just set one specific header. Let's simplify this for the guide and assume we are adding just the Auth header.)Let's clarify the Header setting more cleanly: In theHTTP Requestconnector, under the "Headers" tab, you can specify theAuthorizationheader directly, or use aSet Headerscomponent before theHTTP Requestand then pass#[vars.allHeaders]whereallHeadersis a variable holding combined headers. For simplicity, just settingAuthorizationheader at this step within the HTTP Request: * Header Name:Authorization* Value:Bearer your_hardcoded_backend_token(This is fine if this is the ONLY header you're adding. If you need to pass ALL incoming headers and add this one, you'd use aSet Headerscomponent earlier to combine them into a variable.)
- Crucially, you need to merge the incoming headers (if any) and the
- Drag and drop an
- Transform Response Payload: The backend might return a verbose JSON. We want to simplify it.
- Add another
Transform Message (DataWeave)component after theHTTP Requestconnector.
- Add another
- Error Handling: Add a global error handler or specific error handlers within the flow to gracefully manage issues like backend unavailability or invalid responses. For instance, catch
HTTP:CONNECTIVITYerrors for backend down scenarios and return a500 Internal Server Error.- Drag an
On Error PropagateorOn Error Continuescope into the "Error Handling" section of your flow. - Configure it to catch specific errors (e.g.,
HTTP:CONNECTIVITY). - Add a
Set Payloadcomponent with a custom error message (e.g.,{"message": "Backend service unavailable"}). - Add a
Set Variablecomponent to sethttpStatus(e.g.,500). - Set the response status code in the HTTP Listener's error response.
- Drag an
Configure it to extract and rename fields:```xml %dw 2.0 output application/json
{ userId: payload.id, // Assuming backend has 'id' fullName: payload.name, // Assuming backend has 'name' contactEmail: payload.email // Assuming backend has 'email' } `` Adjustpayload.id,payload.name,payload.email` based on your actual backend response structure.
Configure it to set the Authorization header:```xml %dw 2.0 output application/java
{ headers: { Authorization: "Bearer your_hardcoded_backend_token" // Replace with your actual token } } ``` This example uses a hardcoded token for simplicity. In a real-world scenario, you would retrieve this token from a secure vault (e.g., Anypoint Secret Manager), an OAuth client credentials flow, or another identity service.
Step 4: Configure API Auto-Discovery (for Custom Apps)
To allow API Manager to apply policies and collect analytics for your custom Mule application, you need to configure API Auto-Discovery.
- Retrieve API ID:
- Go back to Anypoint Platform -> API Manager.
- Click "Add API" -> "Add new API".
- Select "Manage an existing API" -> "Pick an API from Exchange" -> your
UserProxyAPI. - Select "Mule Gateway" -> "Mule 4 Application" (since we are deploying a custom Mule app).
- Follow the prompts to create an API instance. You will get an "API ID" (a UUID). Copy this ID.
- Do NOT deploy a proxy from here; we are just getting the API ID.
- Configure Auto-Discovery in Anypoint Studio:
- In your
userproxyapi.xmlflow, find theAPI Autodiscoverycomponent. It should have been generated by APIKit. - Ensure the
API IDproperty is set to#[p('api.id')]. This tells MuleSoft to look for the API ID in your application's deployment properties. - The
Flow Nameshould point to the main flow that exposes your API (e.g.,main-userproxyapi-flowor whatever APIKit named it).
- In your
Step 5: Deploy the Custom Proxy Application
Now, deploy your UserProxyApplication to CloudHub.
- Export JAR: In Anypoint Studio, right-click on your
UserProxyApplicationproject in Package Explorer ->Anypoint Platform->Deploy to CloudHub. - Login: Log in to your Anypoint Platform account if prompted.
- Deployment Target: Select
CloudHub. - Application Name: Enter a unique name (e.g.,
user-proxy-application-v1). - Runtime Version, Worker Size, Workers: Configure as appropriate (e.g.,
Mule 4.x.x,0.1 vCore,1 worker). - Properties: This is crucial for auto-discovery.
- Add a new property:
- Name:
api.id - Value: Paste the API ID you copied from API Manager in Step 4.
- Name:
- You might also want to externalize your backend URL here:
- Name:
backend.users.url - Value:
http://api.mybackend.com/users - Then, in your
HTTP Requestconnector, use#[p('backend.users.url')]for the base path. This makes your application more configurable.
- Name:
- Add a new property:
- Click "Deploy Application."
Monitor the deployment in Runtime Manager. Once it's "Running," your custom proxy is live.
Step 6: Apply Policies (via API Manager)
Even with a custom Mule application, you can still leverage API Manager to apply additional policies like rate limiting or OAuth 2.0 enforcement on top of your custom logic.
- Navigate to API Manager: Find your
UserProxyAPIinstance. - Go to Policies: Click the "Policies" tab.
- Apply New Policy: Apply any desired policies (e.g., Rate Limiting). Since your application is auto-discovered, these policies will be pushed to it.
Step 7: Test and Monitor
- Retrieve Proxy URL: The URL will be
http://user-proxy-application-v1.us-e2.cloudhub.io/proxy/users/123(replace app name and user ID). - Test: Use Postman or cURL to send requests.
bash curl -X GET http://user-proxy-application-v1.us-e2.cloudhub.io/proxy/users/123- Verify that custom validation works (e.g., trying
userId=0should fail). - Verify that the response payload is transformed as expected.
- Verify any API Manager policies applied (e.g., if you added rate limiting, exceeding the limit should result in a 429 error).
- Verify that custom validation works (e.g., trying
- Monitor: Check analytics in API Manager and logs in Runtime Manager for insights into your proxy's performance and behavior.
This detailed guide showcases the power and flexibility of building custom API proxies in MuleSoft, allowing you to tailor the API gateway behavior precisely to your business requirements.
Advanced Proxy Configurations and Best Practices
Once you've mastered the basics of creating MuleSoft proxies, you can explore advanced configurations and adhere to best practices to build more resilient, performant, and secure API gateways. These techniques elevate your API management strategy, ensuring your services are not just available, but also efficient and protected.
1. Caching Strategies for Performance Optimization
Caching is a critical technique to improve the performance of your APIs by storing frequently accessed data closer to the consumer, thereby reducing the load on backend services and decreasing response times.
- HTTP Caching Policy (API Manager): For API Manager proxies, you can easily apply the "HTTP Caching" policy. This policy caches responses based on standard HTTP caching headers (Cache-Control, Expires) or custom configurations. You can define the caching duration, key expression (what makes a request unique for caching), and cache scope. This is ideal for GET requests to static or semi-static data.
- Object Store (Custom Mule Applications): In custom Mule applications, you can leverage MuleSoft's Object Store connector. This allows for fine-grained control over caching logic. You can store and retrieve data programmatically, implement custom cache eviction policies (e.g., time-to-live, max entries), and use it for caching data that is not directly tied to HTTP responses but perhaps internal lookup tables or aggregated data.
- Client-Side Caching: Encourage API consumers to implement client-side caching by including appropriate HTTP caching headers in your proxy's responses. This can significantly reduce traffic reaching your proxy.
2. Implementing Load Balancing
Load balancing ensures that incoming requests are distributed evenly across multiple instances of your backend service, preventing any single instance from becoming a bottleneck and improving overall availability and scalability.
- Round-Robin DNS: If your backend service is exposed via a DNS entry that resolves to multiple IP addresses, the client's DNS resolver will automatically perform basic load balancing.
- External Load Balancer: For on-premises deployments, you would typically use an external load balancer (e.g., F5, NGINX) in front of your backend services, and your MuleSoft proxy would point to the load balancer's URL.
- MuleSoft's Built-in Load Balancing (Advanced): While MuleSoft's HTTP Request connector doesn't have an explicit "load balancing" policy in the same way as an API Manager policy, you can achieve similar effects in custom Mule applications.
- Target URL List: For simple cases, you could use a DataWeave expression to dynamically select a backend URL from a list of targets (e.g.,
#[if (flowVars.requestId % 2 == 0) "http://backend1.com" else "http://backend2.com"]). - Failover Logic: Implement
Choicerouters orTryscopes to attempt calling multiple backend instances in sequence until one succeeds, providing basic failover.
- Target URL List: For simple cases, you could use a DataWeave expression to dynamically select a backend URL from a list of targets (e.g.,
- Cloud-Native Load Balancing: When deploying microservices behind your proxy in a cloud environment (e.g., AWS EC2, Kubernetes), the cloud provider's load balancing services (e.g., AWS ALB, K8s Services) are typically used for the backend services. Your proxy then interacts with the load balancer's endpoint.
3. Circuit Breaker Pattern for Resiliency
The circuit breaker pattern prevents a single failing backend service from cascading failures throughout your system. It works by monitoring calls to a service and, if failures reach a certain threshold, "tripping" the circuit, meaning subsequent calls fail immediately without hitting the broken service. After a timeout, the circuit allows a few test requests to see if the service has recovered.
- MuleSoft Circuit Breaker (Custom Apps): In custom Mule applications, you can implement the circuit breaker pattern using the
Circuit Breakerscope. You configure thresholds for failures (e.g., percentage of errors over a time window), timeout durations for open/half-open states, and a fallback mechanism to execute when the circuit is open (e.g., return a cached response or a default error message). This significantly improves the resilience of your gateway. - Error Handling: Complement the circuit breaker with robust error handling to gracefully manage different types of exceptions, ensuring a consistent experience for consumers even when backends are struggling.
4. Correlation IDs for Distributed Tracing
In complex microservices architectures, a single user request might traverse multiple services. A correlation ID is a unique identifier generated at the start of a request and passed along to every subsequent service call. This allows for end-to-end tracing, which is invaluable for debugging, monitoring, and auditing.
- Generation: Your MuleSoft proxy, acting as the API gateway, is the ideal place to generate a unique correlation ID (e.g., using a UUID generator) if one isn't provided by the client.
- Propagation: Use a
Set Variablecomponent to store the ID and then include it in a custom HTTP header (e.g.,X-Correlation-ID) for all outbound calls to backend services. - Logging: Ensure all logs produced by your proxy and backend services include this correlation ID, making it easy to search and filter logs for a specific transaction.
5. API Versioning Strategies
Managing multiple versions of an API is crucial for ensuring backward compatibility while allowing for evolution. Your proxy can play a central role in implementing versioning strategies.
- URI Versioning (
/v1/users): The version is part of the URL path. Your proxy's HTTP Listener or APIKit Router can easily map different URI paths to different backend services or different transformation logic. - Header Versioning (
Accept: application/vnd.myapi.v2+json): The version is specified in a custom HTTP header. Your custom Mule proxy can inspect this header and route the request accordingly. - Query Parameter Versioning (
/users?version=2): The version is passed as a query parameter. Similar to header versioning, your custom proxy can inspect this parameter for routing. - Hybrid Approach: A combination of these, often starting with URI versioning for major changes and header versioning for minor revisions.
- MuleSoft Implementation: For API Manager proxies, creating separate API instances for each version and configuring different
Implementation URLsis straightforward. For custom proxies, DataWeave andChoicerouters can handle complex version-based routing and transformations.
6. Service Level Agreements (SLAs) and Tiered Access
MuleSoft's API Manager enables you to define and enforce different SLAs for various client applications, allowing you to offer tiered access to your APIs.
- SLA Tiers: Define different tiers (e.g., "Free," "Silver," "Gold") with varying rate limits, access permissions, or even response times.
- Client Applications: When developers register their applications in Anypoint Exchange and request access to your API, they can subscribe to a specific SLA tier.
- SLA-based Policies: In API Manager, you can apply policies (like Rate Limiting) that vary based on the client application's subscribed SLA tier. This allows you to monetize your APIs and control resource consumption dynamically.
7. Centralized Error Handling
Consistent error responses are vital for API consumers. Your proxy should provide a single, standardized format for errors, regardless of the underlying backend service's error structure.
- Global Error Handler: In custom Mule applications, define a global error handler that catches exceptions from any flow, transforms them into a standard error format (e.g., JSON with
code,message,details), and sets an appropriate HTTP status code. - HTTP Status Codes: Always use appropriate HTTP status codes (e.g., 200 OK, 201 Created, 400 Bad Request, 401 Unauthorized, 403 Forbidden, 404 Not Found, 500 Internal Server Error, 503 Service Unavailable).
- Masking Backend Errors: Never expose raw backend error messages or stack traces to API consumers. Your proxy should sanitize these and return a generic, user-friendly error.
8. Security Considerations Beyond Policies
While API Manager policies cover many security aspects, custom Mule proxies allow for deeper security implementations.
- Input Validation: Beyond basic schema validation, implement business-logic-specific validation to prevent invalid data from reaching the backend.
- Threat Protection: Use MuleSoft's Security components to detect and mitigate common web vulnerabilities like SQL injection, XML External Entity (XXE) attacks, and cross-site scripting (XSS).
- Data Masking/Encryption: If sensitive data needs to pass through the proxy, consider masking or encrypting it at the proxy level before it reaches the backend, or decrypting it upon return, if the backend cannot handle encrypted data directly.
- OWASP Top 10: Always refer to the OWASP Top 10 list of critical web application security risks and ensure your proxy implementation addresses them.
- Token Revocation: If using JWTs, implement a mechanism to check token revocation lists at the proxy level.
9. Performance Tuning and Optimization
Optimizing your proxy's runtime performance is crucial for handling high traffic volumes.
- Worker Size and vCores: Select appropriate worker sizes and vCores for your CloudHub deployments based on expected load. Start small and scale up as needed.
- Heap Memory: Monitor heap usage and adjust the JVM arguments if necessary to prevent
OutOfMemoryErrors. - Connection Pooling: Configure connection pooling for your HTTP Request connectors to efficiently reuse connections to backend services, reducing overhead.
- Asynchronous Processing: For long-running operations or when calling multiple independent services, consider using
Asyncscopes or message queues to decouple and speed up the response to the client.
10. DevOps and CI/CD for Proxies
Treat your MuleSoft proxies like any other application in your software development lifecycle.
- Version Control: Store all custom proxy code (Anypoint Studio projects) in a version control system (Git, SVN).
- Automated Testing: Implement unit tests (MUnit) for custom logic and integration tests for end-to-end functionality.
- CI/CD Pipeline: Automate the build, test, and deployment process using CI/CD tools (Jenkins, GitLab CI, GitHub Actions, Azure DevOps). This ensures consistency, reduces manual errors, and speeds up releases.
- Infrastructure as Code: Manage your MuleSoft environments (e.g., API Manager configurations, runtime deployments) using tools like Terraform or MuleSoft's Anypoint CLI for consistent and repeatable infrastructure provisioning.
By integrating these advanced configurations and best practices, your MuleSoft API proxies transform from simple pass-through mechanisms into robust, intelligent, and resilient components of your enterprise API gateway strategy.
For organizations looking to further enhance their API management capabilities, particularly with a focus on AI integration and advanced API gateway features, platforms like APIPark offer specialized solutions that complement MuleSoft's offerings. APIPark, as an open-source AI gateway and API management platform, excels in simplifying the integration of 100+ AI models with a unified management system for authentication and cost tracking. It standardizes the request data format across all AI models, ensuring changes in AI models or prompts do not affect the application, thereby simplifying AI usage and maintenance. Moreover, APIPark provides end-to-end API lifecycle management, API service sharing within teams, and robust performance rivaling traditional gateway solutions, making it an excellent choice for enterprises with evolving AI and API governance needs. While MuleSoft provides robust enterprise integration and API proxy capabilities, APIPark focuses on providing specialized functionalities for AI API management that can extend your existing API gateway infrastructure.
Comparing MuleSoft Proxies with Other API Gateway Solutions
While MuleSoft offers a powerful and comprehensive solution for creating API proxies and establishing an API gateway, it's beneficial to understand how it stands in comparison to other prominent API gateway solutions available in the market. Each platform has its strengths, target audience, and specific features that make it suitable for different use cases.
The market for API gateway solutions is diverse, with offerings ranging from cloud-native services to open-source software and full-fledged enterprise platforms. Here's a brief comparison:
- Cloud-Native API Gateways (e.g., AWS API Gateway, Azure API Management, Google Cloud Apigee Edge):
- Strengths: Deep integration with their respective cloud ecosystems, serverless execution models, excellent scalability and reliability (managed by the cloud provider), pay-as-you-go pricing, and often simpler setup for basic proxy functionalities within their cloud.
- MuleSoft Comparison: MuleSoft's Anypoint Platform is cloud-agnostic and offers hybrid deployment flexibility, allowing proxies to run anywhere (CloudHub, on-premises, other clouds). While cloud gateways excel within their specific cloud, MuleSoft shines in complex enterprise integration scenarios spanning hybrid and multi-cloud environments, and its API gateway is tightly coupled with its robust integration capabilities. MuleSoft often requires more upfront configuration and understanding of its specific components compared to a click-and-deploy experience for a basic proxy in a cloud console, but offers significantly more power and customizability for integration logic.
- Open-Source API Gateways (e.g., Kong, Apache APISIX, NGINX as an API Gateway):
- Strengths: Cost-effective (no licensing fees for core functionality), highly customizable through plugins (Kong) or custom code, strong community support, often lightweight and performant, ideal for organizations with strong DevOps capabilities and a preference for open-source stacks.
- MuleSoft Comparison: MuleSoft is a commercial platform with comprehensive enterprise-grade support, a GUI-driven development experience (Anypoint Studio), and a unified platform for the entire API lifecycle (design, build, deploy, manage, monitor). Open-source gateways typically require more manual integration with other tools for monitoring, analytics, and full lifecycle management. While open-source gateways provide flexibility for customization, MuleSoft's DataWeave and extensive connector ecosystem offer powerful out-of-the-box integration capabilities that are harder to replicate in purely open-source gateways without significant custom development.
- Specialized API Gateways (e.g., APIPark):
- Strengths: These platforms often target specific niches or advanced use cases. For instance, APIPark is an open-source AI gateway and API management platform. Its strength lies in providing a unified management system for integrating and invoking 100+ AI models, standardizing API formats for AI, and encapsulating prompts into REST APIs. It offers robust performance and detailed logging tailored for AI service governance.
- MuleSoft Comparison: MuleSoft is a general-purpose integration and API gateway platform capable of handling diverse integration patterns, including connecting to AI services. However, if an organization's primary need revolves around managing a large portfolio of AI APIs, standardizing their invocation, and tracking costs specifically for AI models, APIPark provides a more tailored and specialized solution. MuleSoft can certainly act as an upstream gateway for APIPark-managed AI APIs, or APIPark can be seen as a complementary solution to manage a specific subset (AI) of APIs, while MuleSoft handles broader enterprise integration and API exposure.
MuleSoft's Unique Selling Proposition
MuleSoft's strength as an API gateway and proxy solution lies in its API-led connectivity approach and its unified platform:
- API-led Connectivity: MuleSoft advocates for organizing APIs into layers (System, Process, Experience) to promote reuse and agility. Its platform is built from the ground up to support this architectural pattern, where proxies are key components at each layer.
- Unified Platform: Anypoint Platform provides a single ecosystem for:
- Design: API specifications (RAML/OAS) in Design Center/Exchange.
- Build: Integration and proxy logic in Anypoint Studio/Design Center.
- Deploy: To CloudHub, on-premises, or hybrid via Runtime Manager.
- Manage: Policy enforcement, SLA tiers, and security via API Manager.
- Monitor: Real-time analytics and logging via Anypoint Monitoring/Runtime Manager. This end-to-end consistency reduces complexity and accelerates development and governance.
- Powerful Integration Capabilities: Unlike many pure API gateways, MuleSoft's core strength is enterprise integration. This means its proxies can not only forward requests but also perform deep data transformations (DataWeave), orchestrate calls to multiple backend systems, connect to virtually any endpoint (databases, SaaS applications, ERPs, messaging queues) using its vast connector library, and implement complex business logic directly within the proxy layer.
- Hybrid Flexibility: MuleSoft's runtime can be deployed across various environments, offering unparalleled flexibility for organizations with complex IT landscapes that span on-premises data centers and multiple cloud providers.
In conclusion, while other API gateway solutions offer compelling features, MuleSoft provides a robust, integrated, and highly flexible platform particularly well-suited for enterprises navigating complex integration challenges alongside comprehensive API gateway management. The choice often depends on the existing technology stack, specific integration needs, and the desired level of control and customization.
Troubleshooting Common Proxy Issues
Even with the most meticulous planning and execution, issues can arise when deploying and operating API proxies. Understanding common problems and how to troubleshoot them effectively is crucial for maintaining the stability and reliability of your API gateway.
Here's a breakdown of frequent issues and their resolutions:
1. Connectivity Errors
These are often the most straightforward but frustrating issues, indicating that the proxy cannot reach either the client or the backend.
- Symptom: Client receives
502 Bad Gatewayor504 Gateway Timeout. MuleSoft logs showHTTP:CONNECTIVITY,Connection refused, orSocket timeouterrors. - Possible Causes & Solutions:
- Incorrect Backend URL: Double-check the
Implementation URLconfigured in API Manager for auto-discovery proxies, or theHost,Port, andBase Pathin theHTTP Requestconnector for custom proxies. Even a trailing slash can sometimes cause issues. - Backend Service Down/Unreachable: Ensure the backend service is running and accessible from the Mule runtime where your proxy is deployed.
- If deployed on CloudHub, verify backend network accessibility (firewall rules, VPN/VPC connectivity).
- If on-premises, check network connectivity, firewall rules, and the backend service's status.
- Firewall Issues: Verify that no firewalls (on-premises, cloud security groups, network ACLs) are blocking traffic between the Mule runtime and the backend service, or between the client and the proxy.
- DNS Resolution Problems: Ensure the hostname of your backend service can be resolved by the Mule runtime.
- Proxy Endpoint Configuration: Verify that the proxy's own URL (e.g., CloudHub application URL) is correct and accessible to clients.
- Incorrect Backend URL: Double-check the
2. Policy Enforcement Failures
When policies don't behave as expected, requests might be incorrectly rejected or allowed.
- Symptom: Requests are unexpectedly blocked (
401 Unauthorized,403 Forbidden,429 Too Many Requests), or allowed when they should be blocked. - Possible Causes & Solutions:
- Incorrect Policy Configuration:
- API Key Enforcement: Is the
Header NameorQuery Parameter Namecorrectly specified? Is the client providing theClient IDin the expected location? Is the client application registered and approved in Exchange? - OAuth 2.0 Enforcement: Is the
OAuth providerconfigured correctly? Are the scopes in the token matching the required scopes? Is thePolicy ID(for custom policies) correctly set? - Rate Limiting: Are the
rate,time unit, andkey expressioncorrectly defined? Is the client application hitting the limit?
- API Key Enforcement: Is the
- Policy Order: In API Manager, the order of policies matters. Ensure that security policies (e.g., Client ID enforcement) are applied before other policies if they depend on client identification.
- Auto-Discovery Issues (for Custom Apps): Ensure the
api.idproperty is correctly set during deployment of your custom Mule application and that theAPI Autodiscoverycomponent in your flow is pointing to the correctAPI IDandFlow Name. If auto-discovery fails, policies won't be applied. - Client Credential Mismatch: The
Client IDorClient Secretused by the client application might be incorrect or expired.
- Incorrect Policy Configuration:
3. Data Transformation Issues (DataWeave)
When payloads are not transformed as expected, leading to incorrect data sent to the backend or incorrect responses to the client.
- Symptom: Backend receives malformed requests, or clients receive incorrect/incomplete responses. MuleSoft logs show DataWeave errors like
Cannot coerce value,Key not found, orUnexpected character. - Possible Causes & Solutions:
- Incorrect Input/Output Type: DataWeave expects specific input and output types. Verify that the incoming payload's format (e.g.,
application/json,application/xml) matches what DataWeave expects, and that the output type is correct for the next component. - Schema Mismatch: The DataWeave script might be trying to access fields that don't exist in the incoming payload or are named differently. Use the
Debugperspective in Anypoint Studio to inspect the payload at various stages. - Syntax Errors: DataWeave is powerful but sensitive to syntax. Check for typos, missing commas, or incorrect bracket usage. Studio's syntax highlighting and error markers are helpful.
- Null Values: If a field might be null, use default values or conditional logic (e.g.,
payload.someField default "N/A") to prevent errors.
- Incorrect Input/Output Type: DataWeave expects specific input and output types. Verify that the incoming payload's format (e.g.,
4. Deployment Errors
Problems during the deployment phase, preventing the proxy application from starting.
- Symptom: Application fails to deploy or immediately restarts in Runtime Manager. Logs show
Deployment failed,Port conflict,Configuration error, orOut of memory. - Possible Causes & Solutions:
- Invalid Application Name: On CloudHub, application names must be globally unique. If your deployment fails, try a different name.
- Port Conflict: If deploying to an on-premises runtime, ensure the HTTP Listener port is not already in use by another application.
- Missing Properties: For custom apps, ensure all required properties (e.g.,
api.id,backend.url, database credentials) are correctly configured in the deployment properties. - Insufficient Resources: If deploying to CloudHub, ensure the chosen
Worker SizeandWorkersare sufficient for your application's memory and CPU needs.OutOfMemoryErrorin logs indicates a need for more resources or code optimization. - Configuration Errors: Syntax errors in your Mule configuration XML files (e.g.,
flow.xml) can prevent deployment. Studio will usually highlight these errors before deployment.
5. Performance Degradation
Proxy performance is slow, leading to increased response times.
- Symptom: High latency, requests timing out, or backend services becoming overloaded.
- Possible Causes & Solutions:
- Backend Latency: The most common cause. The proxy is only as fast as its slowest dependency. Use monitoring tools to check backend response times.
- Insufficient Proxy Resources: Your Mule runtime might be under-provisioned (e.g., too few vCores or workers). Scale up resources in Runtime Manager.
- Inefficient DataWeave: Complex or unoptimized DataWeave transformations can consume significant CPU. Profile your DataWeave scripts for bottlenecks.
- Lack of Caching: For frequently accessed static data, implement caching at the proxy level (API Manager policy or Object Store in custom apps).
- Network Latency: Ensure the Mule runtime is deployed geographically close to your API consumers and/or backend services to minimize network hops.
- Connection Pooling: Ensure
HTTP Requestconnectors are configured with appropriate connection pooling settings to avoid connection overhead.
General Troubleshooting Approach
- Check Logs First: The Anypoint Platform's Runtime Manager logs are your first and best line of defense. Filter by application name and time range. Look for
ERRORmessages, stack traces, and relevant context. - Use Anypoint Monitoring/Analytics: For deployed applications, these tools provide real-time metrics on CPU, memory, request counts, and error rates, helping identify trends or sudden drops in performance.
- Test Incrementally: When developing custom proxies, test each component or flow segment individually (e.g., using MUnit or a simple
Loggercomponent) before integrating everything. - Local Debugging: Use Anypoint Studio's Debugger to step through your custom Mule application flows locally, inspecting payloads, variables, and connector outputs at each step.
- Revert Changes: If an issue appears after recent changes, revert to a previous working version to isolate the problem.
- Consult Documentation/Community: MuleSoft's extensive documentation and its vibrant community forums are excellent resources for finding solutions to known issues.
- Contact Support: For enterprise users, MuleSoft Support is available for more complex or persistent issues.
By systematically approaching troubleshooting with these methods, you can efficiently diagnose and resolve problems with your MuleSoft API proxies, ensuring your API gateway operates smoothly and reliably.
Conclusion
The journey through creating API proxies in MuleSoft, from foundational concepts to advanced configurations, underscores their pivotal role in modern enterprise architecture. We've established that an API proxy is far more than a simple pass-through mechanism; it's a sophisticated layer that sits at the heart of your API gateway strategy, offering a myriad of benefits spanning security, governance, performance, and operational agility. Whether you opt for the rapid deployment and policy-driven approach of API Manager proxies or the deep customization afforded by custom Mule applications, MuleSoft's Anypoint Platform provides a powerful, unified ecosystem to implement these critical components.
We've explored the comprehensive advantages that proxies bring to the table, including masking backend services, enforcing stringent security policies like API Key enforcement or OAuth 2.0, applying quality of service measures such as rate limiting and spike arrest, and providing invaluable insights through centralized analytics and monitoring. Furthermore, proxies enable critical architectural patterns like abstraction, decoupling, and sophisticated versioning, ensuring that your backend services can evolve without disrupting consuming applications. By centralizing these functionalities, organizations can significantly reduce the complexity of managing a sprawling API landscape, streamline compliance efforts, and accelerate the delivery of new digital services.
The step-by-step guides for both API Manager proxies and custom Mule applications in Anypoint Studio have demonstrated the flexibility and control MuleSoft offers. From configuring a basic API gateway with just a few clicks to building an intricate proxy application that performs complex data transformations, custom authentication, and dynamic routing, MuleSoft empowers developers to tailor their API exposure precisely to their business needs. The discussion on advanced configurations, including caching, load balancing, circuit breaker patterns, and correlation IDs, further highlights how to build resilient, high-performing, and observable API systems. These best practices are not merely technical considerations but strategic imperatives that ensure the long-term success and scalability of your digital initiatives.
In an era where APIs are the lifeblood of digital business, a robust API gateway is no longer a luxury but a necessity. MuleSoft's Anypoint Platform, with its comprehensive suite of tools for API design, development, deployment, and management, stands as a leading solution for building and operating these critical gateways. It enables organizations to connect disparate systems, unlock data, and orchestrate complex business processes with unparalleled efficiency and security. As the digital landscape continues to evolve, the ability to create, manage, and scale API proxies effectively will remain a cornerstone for driving innovation and maintaining a competitive edge. By mastering the techniques outlined in this guide, you are well-equipped to leverage MuleSoft to build a secure, high-performing, and future-proof API gateway that truly empowers your enterprise's digital aspirations.
Frequently Asked Questions (FAQs)
1. What is the fundamental difference between an API Proxy and an API Gateway?
An API Proxy is essentially a service that sits in front of a single backend API or microservice, forwarding requests and responses. It primarily focuses on isolating and adding a layer of control (like security or rate limiting) for that specific service. An API Gateway, on the other hand, is a broader architectural pattern or a product that acts as a single entry point for a collection of APIs. It typically encompasses multiple API proxies and provides advanced features such as request routing, composition, protocol translation, centralized policy enforcement across many APIs, analytics, and developer portals. In MuleSoft, an API Proxy is a core component you build or configure, which then operates as part of the broader API Gateway functionality offered by the Anypoint Platform.
2. When should I choose an API Manager Proxy versus a Custom Mule Application Proxy?
Choose an API Manager Proxy when you need to quickly secure, govern, and monitor an existing backend API with standard, out-of-the-box policies (like API Key enforcement, rate limiting, or HTTP caching) and require minimal or no custom logic or data transformation. It's ideal for simple pass-through scenarios and rapid deployment. Opt for a Custom Mule Application Proxy when your proxy needs to perform complex data transformations (e.g., changing JSON to XML, enriching payloads), implement intricate routing logic, integrate with multiple backend services, or apply highly customized security and business logic that is not available as a standard API Manager policy. This method offers maximum flexibility but requires more development effort.
3. Can I apply API Manager policies to a custom Mule application proxy?
Yes, absolutely. This is a common and recommended best practice. Even when you develop a custom Mule application proxy in Anypoint Studio or Design Center, you should configure API auto-discovery within that application. This mechanism allows the custom Mule application to register itself with API Manager. Once registered and active, you can then leverage API Manager's centralized interface to apply, manage, and monitor its performance using the same rich set of policies (e.g., rate limiting, OAuth 2.0 enforcement, IP whitelisting) as you would for an auto-generated API Manager proxy. This combines the power of custom logic with the ease of centralized governance.
4. How does MuleSoft ensure the security of APIs exposed through proxies?
MuleSoft provides multiple layers of security for APIs managed via proxies: * Backend Isolation: Proxies hide the direct backend endpoint, protecting internal infrastructure. * Centralized Policy Enforcement: API Manager offers a wide range of security policies (Client ID enforcement, OAuth 2.0, JWT validation, IP whitelisting, HTTP security policies) that can be applied to proxies. * Custom Security Logic: For complex scenarios, custom Mule applications allow for the implementation of bespoke authentication and authorization flows. * Threat Protection: Proxies can perform input validation, schema validation, and inspect requests for malicious patterns, blocking potential attacks before they reach backend services. * Data Masking/Encryption: Custom proxies can implement data masking or encryption for sensitive information. * Auditability: All requests passing through the proxy can be logged and monitored for compliance and security audits.
5. What are the key benefits of using caching in a MuleSoft API proxy?
Caching in a MuleSoft API proxy offers several significant benefits: * Improved Performance: By serving frequently requested responses from the cache, the proxy can respond much faster, reducing API latency and improving the overall user experience. * Reduced Load on Backend Services: Caching prevents redundant calls to the backend, significantly lowering the processing load on your underlying services, especially for static or semi-static data. This frees up backend resources for more complex or dynamic operations. * Cost Savings: For cloud-deployed backends or services with usage-based billing, reducing backend calls through caching can lead to substantial operational cost savings. * Increased Resilience: In scenarios where the backend service experiences temporary outages or slowdowns, a cache can continue to serve stale (but still useful) data, maintaining a degree of service availability and enhancing fault tolerance.
🚀You can securely and efficiently call the OpenAI API on APIPark in just two steps:
Step 1: Deploy the APIPark AI gateway in 5 minutes.
APIPark is developed based on Golang, offering strong product performance and low development and maintenance costs. You can deploy APIPark with a single command line.
curl -sSO https://download.apipark.com/install/quick-start.sh; bash quick-start.sh

In my experience, you can see the successful deployment interface within 5 to 10 minutes. Then, you can log in to APIPark using your account.

Step 2: Call the OpenAI API.