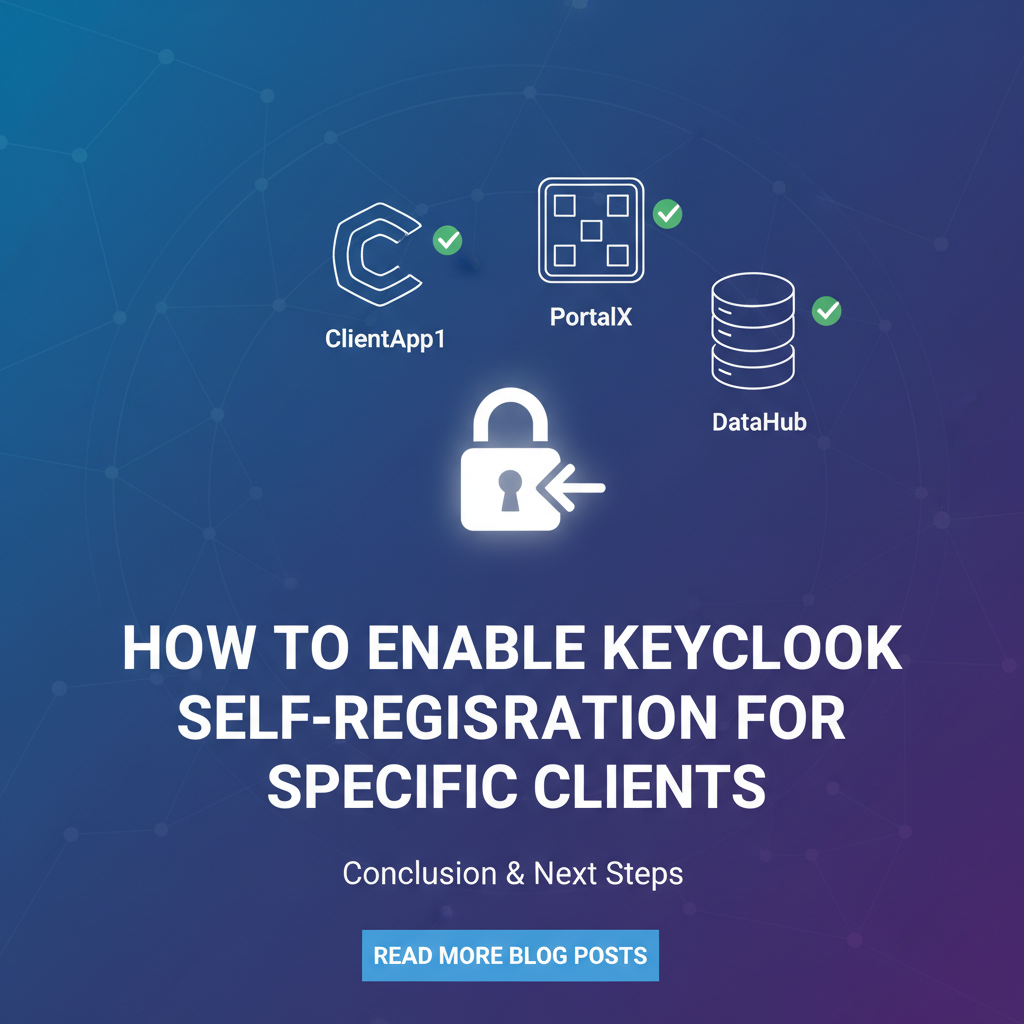
How to Enable Keycloak Self-Registration for Specific Clients


The digital landscape of modern applications and services is increasingly complex, demanding robust, flexible, and secure identity and access management (IAM) solutions. At the heart of many such architectures lies Keycloak, a powerful open-source IAM solution that offers a wide array of features, from single sign-on (SSO) to fine-grained authorization. One of its most commonly used features is user self-registration, which allows users to create their accounts directly through a web interface, streamlining user onboarding. However, in many sophisticated enterprise environments, a blanket "enable self-registration for everyone" policy is often insufficient or even undesirable. There's a growing need to restrict or tailor the self-registration process, making it available only to specific clients or under particular conditions. This article delves into the intricacies of enabling Keycloak self-registration exclusively for designated clients, exploring various architectural patterns, technical implementations, and best practices to achieve this granular control, ensuring both security and usability.
The Imperative for Granular Self-Registration Control
While open self-registration is convenient for public-facing applications, many business models and security postures necessitate a more controlled approach. Imagine a scenario where a company offers multiple services: a public-facing blog, a partner portal, and an internal employee application. While the blog might benefit from open self-registration for comments, the partner portal requires a vetted onboarding process, and the internal application might rely solely on enterprise identity providers. Applying a single self-registration policy across all these clients within the same Keycloak realm would lead to either security vulnerabilities or unnecessary administrative overhead.
Furthermore, compliance requirements (such as GDPR, HIPAA, or local data privacy laws) often mandate precise control over who can register and what data is collected during registration. Without the ability to differentiate between clients, an organization risks non-compliance or forces itself into managing multiple Keycloak realms, which can introduce its own set of complexities in terms of synchronization and management overhead. This need for specific client registration flows extends to scenarios involving multi-tenancy, specialized APIs offered through an API gateway, or environments where user attributes collected during registration vary significantly depending on the client application initiating the process.
The ability to control self-registration per client allows organizations to: * Enhance Security: Prevent unauthorized access to sensitive client applications by limiting who can create accounts. * Improve Data Quality: Tailor registration forms to collect relevant information specific to each client's needs, avoiding irrelevant or missing data. * Streamline User Experience: Provide a customized onboarding journey that aligns with the specific application context, reducing friction. * Meet Compliance Requirements: Implement different data handling and consent mechanisms for various user populations or application types. * Optimize Resource Allocation: Focus administrative efforts on managing users who are truly relevant to specific client applications. * Support Multi-tenant Architectures: Offer distinct registration experiences for different tenants or partner organizations operating within the same Keycloak instance.
Understanding these motivations is crucial before diving into the technical solutions, as the chosen implementation path will often depend heavily on the specific business requirements and security considerations driving the need for this granular control.
Keycloak Fundamentals: A Prerequisite Understanding
Before we embark on the journey of tailoring self-registration, a brief review of Keycloak's core concepts is essential. Keycloak operates on a hierarchical structure that helps organize users, applications, and security policies.
Realms: At the highest level, Keycloak organizes everything into "realms." A realm is essentially a tenant or a security domain. It manages a set of users, roles, applications (clients), and identity providers. Think of a realm as an isolated container for your security configurations. Users within one realm cannot log in to clients in another realm unless explicitly configured through cross-realm trust. For most organizations, a single realm might suffice for all internal applications, while others might opt for separate realms for distinct business units or external partners. The decision to use one or multiple realms heavily influences how you manage user identities and client-specific registrations. If all your clients reside within a single realm, then client-specific registration becomes a necessity rather than simply using different realm configurations.
Clients: In Keycloak, a "client" is an entity that requests authentication of a user. This can be a web application, a mobile application, a backend service, or even a command-line utility. Each client is registered within a specific realm and has its own set of configurations, including redirect URIs, access type (public, confidential), and allowed scopes. When a user attempts to log in or register, they are doing so through a specific client. This client context is what we will leverage to implement our selective self-registration logic.
Users and Roles: Users are the individuals or entities that access clients. Each user has an account within a realm, associated with attributes (e.g., email, first name, last name) and credentials. Roles, on the other hand, represent a set of permissions. Users can be assigned roles, which then dictate what resources they can access within the client applications. While self-registration primarily deals with user creation, post-registration actions often involve assigning default roles or groups based on the client that initiated the registration.
Authentication Flows: Keycloak uses "authentication flows" to define the steps a user goes through during authentication, registration, or password reset. These flows are composed of "authenticators," which are individual steps like checking credentials, displaying a form, or verifying an OTP. This powerful mechanism is central to customizing the self-registration process. We can create custom flows or modify existing ones to introduce our client-specific logic.
Themes: Keycloak allows for extensive customization of its user-facing pages (login, registration, account management) through "themes." A theme is a collection of templates (FTL files), stylesheets (CSS), and scripts (JavaScript) that define the look and feel. Overriding the default register.ftl template within a custom theme is a common method for injecting client-specific conditional logic into the registration form.
Identity Providers (IDPs): Keycloak can integrate with external identity providers like Google, Facebook, or corporate LDAP/AD. While not directly tied to self-registration for specific clients, understanding IDPs is relevant because a client might offer self-registration or social login or both. The choice of which IDPs are available could also be made client-specific, further refining the onboarding experience.
By understanding these fundamental building blocks, we gain the necessary context to appreciate the different strategies for implementing client-specific self-registration, ranging from simple theme modifications to complex custom authenticators.
Standard Keycloak Self-Registration: The Baseline
By default, Keycloak offers a straightforward self-registration feature at the realm level. When enabled, any user accessing the Keycloak login page (typically redirected from a client application) will see an option to "Register" or "Sign up." This functionality is controlled within the Keycloak Admin Console.
To enable standard self-registration: 1. Navigate to your target Realm in the Keycloak Admin Console. 2. Go to Realm Settings > Login tab. 3. Toggle the User registration switch to "ON." 4. Optionally, configure other settings like "Email as username," "Verify email," "Edit username," and "Remember me."
Once enabled, any client within that realm that redirects to Keycloak for authentication will present the user with the option to register. The registration form will typically ask for a username, email, first name, last name, and password. Upon successful registration, the user is created in the realm's user store and automatically logged in, then redirected back to the client application.
This default behavior, while highly convenient for many applications, is precisely what we aim to transcend. It offers a "one-size-fits-all" approach, which is often inadequate for complex enterprise ecosystems where different clients demand different user onboarding experiences or even strict control over who can register. For instance, a public marketing website might allow anyone to register, while an internal partner portal might require self-registration only for users coming from specific partner api applications. The goal now is to refine this broad capability into a finely tuned instrument.
The Challenge: Client-Specific Self-Registration
The core challenge lies in the fact that Keycloak's "User registration" setting is a realm-wide configuration. It's either on or off for all clients within a given realm. There is no out-of-the-box setting that says, "Allow self-registration for Client A, but not for Client B." This limitation necessitates custom solutions that leverage Keycloak's extensibility points.
Consider an organization running multiple applications: * Public E-commerce Site: Open self-registration for new customers. * Partner API Gateway Portal: Self-registration allowed only for invited partners who access specific APIs, perhaps with an approval workflow. * Internal Employee Dashboard: No self-registration; users are provisioned via an HR system (e.g., LDAP/AD federation).
If all these clients reside in the same Keycloak realm, enabling realm-wide self-registration would allow employees or random internet users to register for the partner portal, potentially exposing sensitive information or creating unnecessary user accounts. Conversely, disabling realm-wide self-registration would prevent new customers from signing up for the e-commerce site. This is the dilemma we seek to resolve.
The solution requires a mechanism to identify the requesting client during the registration process and conditionally display or process the self-registration form based on that identification. Keycloak provides several powerful hooks that allow us to intercept and customize this flow, but each approach comes with its own trade-offs in terms of complexity, flexibility, and maintainability. We must carefully evaluate these options to choose the one best suited for our specific requirements. The journey ahead involves delving into these technical strategies, transforming a realm-wide setting into a granular, client-specific policy.
Approaches to Client-Specific Self-Registration
Achieving client-specific self-registration in Keycloak requires ingenuity and leveraging its powerful customization capabilities. There isn't a single "check-this-box" solution, but rather several architectural patterns, each with varying levels of complexity and flexibility. We will explore the most common and effective methods, discussing their implementation details and suitability for different scenarios.
Approach 1: Custom Registration Form with Client Parameter (Theme Customization)
This is often the most straightforward and commonly implemented approach for simple conditional display of the registration form. It leverages Keycloak's themeing capabilities to modify the register.ftl template.
How it works: 1. Client Identification: When a client application redirects to Keycloak for authentication, it can include custom parameters in the URL (e.g., kc_idp_hint=client_specific_id). Alternatively, Keycloak provides the client.clientId variable directly within the FreeMarker template. 2. Theme Customization: A custom Keycloak theme is created. Within the register.ftl template, FreeMarker logic is used to check for the presence and value of the client ID or a custom parameter. 3. Conditional Display: Based on the check, the self-registration form is either displayed or hidden, perhaps replaced with an informational message or a redirection.
Implementation Steps:
Step 1: Create a Custom Theme * Create a new folder structure within your Keycloak deployment: themes/<your_custom_theme_name>/login. * Copy the default Keycloak login theme files from themes/keycloak/login into your custom theme's login folder. The most critical file is register.ftl. You'll also need theme.properties and potentially messages for localization.
Step 2: Modify register.ftl * Open themes/<your_custom_theme_name>/login/register.ftl. * At the top of the file, you can access the current client's ID via ${client.clientId}. * Introduce FreeMarker conditional logic to control the display of the registration form.
```html <#-- Check if client ID is allowed for self-registration --> <#assign allowedClients = ["my-public-client", "another-allowed-client"]> <#if allowedClients?seq_contains(client.clientId)> <#-- Display the original registration form content here -->
${msg("username")}<input type="text" id="username" class="${properties.kcInputClass!}" name="username" value="${(register.formData.username!'')}" autocomplete="username" aria-invalid="<#if messagesPerField.printIfExists('username', false)>true</#if>" /> <#if messagesPerField.printIfExists('username', false)> ${messagesPerField.get('username')} </#if>
       <#-- ... rest of the registration form fields ... -->

       <div class="${properties.kcFormGroupClass!} ${properties.kcFormSettingClass!}">
           <div id="kc-form-options" class="${properties.kcFormOptionsClass!}">
               <div class="${properties.kcFormOptionsWrapperClass!}">
                   <span><a href="${url.loginUrl}">${kcSanitize(msg("backToLogin"))?no_esc}</a></span>
               </div>
           </div>

           <div id="kc-form-buttons" class="${properties.kcFormButtonsClass!}">
               <input class="${properties.kcButtonClass!} ${properties.kcButtonPrimaryClass!} ${properties.kcButtonBlockClass!} ${properties.kcButtonLargeClass!}" type="submit" value="${msg("doRegister")}"/techblog/en/>
           </div>
       </div>
   </form>
<#else>
${msg("registerNoAccessTitle")}
${msg("registerNoAccess")}
${kcSanitize(msg("backToLogin"))?no_esc}
</#if> `` You would need to defineregisterNoAccessTitleandregisterNoAccessin your theme'smessages/messages_en.properties` file.
Step 3: Configure Realm to Use Custom Theme * In the Keycloak Admin Console, go to Realm Settings > Themes tab. * Select your custom theme name from the Login Theme dropdown. * Save changes.
Pros: * Relatively simple to implement for basic conditional display. * No custom Java code required, only FreeMarker templates. * Easy to modify and test directly within the theme files.
Cons: * Security by Obscurity: While the form is hidden, the underlying registration endpoint is still accessible if the realm-wide self-registration is enabled. A savvy user could potentially bypass the UI by directly POSTing to the registration endpoint. This means it's not a strong security control on its own for preventing all registrations. * Limited functionality: Only controls what's displayed on the page. It cannot alter the registration flow logic (e.g., add new steps, custom validations). * Maintenance overhead: Any Keycloak upgrade might require merging changes from the default register.ftl into your custom one.
Approach 2: Event Listener for Post-Registration Filtering
This approach allows registration to proceed but intervenes after a user has attempted to register, based on the client ID.
How it works: 1. Register as Normal: The standard self-registration form is displayed and processed. 2. Event Listener Trigger: Keycloak emits events for various actions, including REGISTER. 3. Custom Logic: A custom Keycloak event listener (implemented in Java) intercepts the REGISTER event. It can inspect the client (event.getClientId()) and the registered user. 4. Post-Registration Action: Based on the client, the listener can perform actions like: * Deactivating the user (user.setEnabled(false)). * Adding the user to specific groups or roles. * Sending an email to an administrator for manual approval. * Deleting the user if the client is not allowed.
Implementation Steps:
Step 1: Develop a Custom Event Listener (Java) * Create a Maven project. * Add Keycloak dependencies (e.g., org.keycloak:keycloak-server-spi, org.keycloak:keycloak-core). * Implement EventListenerProvider and EventListenerProviderFactory.
```java package com.example.keycloak.listener;
import org.keycloak.events.Event; import org.keycloak.events.EventListenerProvider; import org.keycloak.events.EventType; import org.keycloak.events.admin.AdminEvent; import org.keycloak.models.KeycloakSession; import org.keycloak.models.RealmModel; import org.keycloak.models.UserModel;
import java.util.Arrays; import java.util.List; import org.jboss.logging.Logger;
public class ClientSpecificRegistrationListener implements EventListenerProvider {
   private static final Logger LOG = Logger.getLogger(ClientSpecificRegistrationListener.class);
   private final KeycloakSession session;

   private static final List<String> ALLOWED_REG_CLIENTS = Arrays.asList("my-public-client", "another-allowed-client");

   public ClientSpecificRegistrationListener(KeycloakSession session) {
       this.session = session;
   }

   @Override
   public void onEvent(Event event) {
       if (event.getType() == EventType.REGISTER) {
           LOG.info("Register event received for user: " + event.getUserId() + " from client: " + event.getClientId());

           String registeredClientId = event.getClientId();
           if (!ALLOWED_REG_CLIENTS.contains(registeredClientId)) {
               LOG.warn("Client " + registeredClientId + " is not allowed to self-register users. Disabling user " + event.getUserId());
               RealmModel realm = session.realms().getRealm(event.getRealmId());
               UserModel user = session.users().getUserById(realm, event.getUserId());

               if (user != null) {
                   // Option 1: Disable the user (most common)
                   user.setEnabled(false);
                   LOG.info("User " + user.getUsername() + " disabled as registration came from unallowed client.");

                   // Option 2: Delete the user (be careful with this, might leave orphaned data)
                   // session.users().removeUser(realm, user);
                   // LOG.info("User " + user.getUsername() + " deleted as registration came from unallowed client.");

                   // Option 3: Send an admin notification (requires integration with email service)
                   // sendAdminNotification(user, registeredClientId);
               }
           } else {
               LOG.info("User " + event.getUserId() + " successfully registered from allowed client " + registeredClientId);
               // Optionally, add user to a specific group or role for allowed clients
               // RealmModel realm = session.realms().getRealm(event.getRealmId());
               // UserModel user = session.users().getUserById(realm, event.getUserId());
               // GroupModel defaultGroup = realm.getGroupByName("Default Registered Users");
               // if (defaultGroup != null && user != null) {
               //     user.joinGroup(defaultGroup);
               // }
           }
       }
   }

   @Override
   public void onEvent(AdminEvent adminEvent, boolean includeRepresentation) {
       // Not relevant for this use case
   }

   @Override
   public void close() {
       // No resources to close
   }
} ```
```java package com.example.keycloak.listener;
import org.keycloak.Config; import org.keycloak.events.EventListenerProvider; import org.keycloak.events.EventListenerProviderFactory; import org.keycloak.models.KeycloakSession; import org.keycloak.models.KeycloakSessionFactory; import org.jboss.logging.Logger;
public class ClientSpecificRegistrationListenerFactory implements EventListenerProviderFactory {
   private static final Logger LOG = Logger.getLogger(ClientSpecificRegistrationListenerFactory.class);
   public static final String PROVIDER_ID = "client-specific-registration-listener";

   @Override
   public EventListenerProvider create(KeycloakSession session) {
       return new ClientSpecificRegistrationListener(session);
   }

   @Override
   public void init(Config.Scope config) {
       LOG.info("ClientSpecificRegistrationListenerFactory initialized.");
   }

   @Override
   public void postInit(KeycloakSessionFactory factory) {
       LOG.info("ClientSpecificRegistrationListenerFactory postInit.");
   }

   @Override
   public void close() {
       LOG.info("ClientSpecificRegistrationListenerFactory closed.");
   }

   @Override
   public String getId() {
       return PROVIDER_ID;
   }
} `` * Package it as a JAR. * Place the JAR in Keycloak'sprovidersdirectory (e.g.,/opt/keycloak/providers). * Rebuild/restart Keycloak (kc.sh buildthenkc.sh start`).
Step 2: Enable the Event Listener * In the Keycloak Admin Console, go to Realm Settings > Events tab. * Under Event Listeners, add your PROVIDER_ID (e.g., client-specific-registration-listener) to the list. * Save changes.
Pros: * Stronger Security: Actually prevents unauthorized registrations from becoming active users. * Allows for more complex post-registration logic (e.g., automatic group assignment, external system calls). * Decouples the logic from the UI.
Cons: * Requires custom Java development and deployment. * User still sees the registration form and completes the process, only to find their account disabled/deleted afterwards, which can be a poor user experience without clear feedback. * Requires careful handling of error messages to inform the user why their registration failed or was disabled.
Approach 3: Custom Authenticator Flow (Most Flexible and Recommended for Robust Control)
This is the most powerful and flexible approach, allowing complete control over the registration process, including conditional display of the form and custom validation logic before the user is created. It replaces the default registration flow.
How it works: 1. Custom Authenticator: Develop a custom Keycloak Authenticator (Java) that specifically checks the client.clientId or other context variables. 2. Custom Flow: Create a new authentication flow in the Keycloak Admin Console. This flow will incorporate your custom authenticator. 3. Conditional Registration: The custom authenticator can decide whether to allow the registration form to be displayed, redirect the user, or deny access based on the client. It can also be configured to collect additional client-specific attributes. 4. Binding to Client: The custom flow can then be bound to the "Registration Flow" for specific clients or realms.
Implementation Steps:
Step 1: Develop a Custom Authenticator (Java) * Create a Maven project with Keycloak dependencies. * Implement Authenticator and AuthenticatorFactory.
```java package com.example.keycloak.authenticator;
import org.keycloak.authentication.AuthenticationFlowContext; import org.keycloak.authentication.AuthenticationFlowError; import org.keycloak.authentication.Authenticator; import org.keycloak.models.ClientModel; import org.keycloak.models.UserModel; import org.keycloak.models.AuthenticationExecutionModel.Requirement; import org.jboss.logging.Logger;
import java.util.Arrays; import java.util.List;
public class ClientSpecificRegistrationAuthenticator implements Authenticator {
   private static final Logger LOG = Logger.getLogger(ClientSpecificRegistrationAuthenticator.class);
   private static final List<String> ALLOWED_REG_CLIENTS = Arrays.asList("my-public-client", "another-allowed-client");
   public static final String BLOCKED_MESSAGE_KEY = "registrationBlockedForClient";

   @Override
   public void authenticate(AuthenticationFlowContext context) {
       ClientModel client = context.getAuthenticationSession().getClient();
       if (client == null) {
           LOG.warn("No client found in authentication session. Denying registration.");
           context.challenge(context.form().setError(BLOCKED_MESSAGE_KEY).createErrorPage());
           return;
       }

       String clientId = client.getClientId();
       if (!ALLOWED_REG_CLIENTS.contains(clientId)) {
           LOG.warn("Registration attempted by unallowed client: " + clientId + ". Denying access.");
           // Display an error message and block registration
           context.challenge(context.form().setError(BLOCKED_MESSAGE_KEY, clientId).createErrorPage());
           // Or redirect to an info page:
           // context.challenge(context.form().setStatus(Response.Status.FORBIDDEN).createForm("registration-blocked.ftl"));
       } else {
           LOG.info("Client " + clientId + " is allowed to self-register. Continuing flow.");
           context.success(); // Proceed to the next step in the flow (e.g., display registration form)
       }
   }

   @Override
   public void action(AuthenticationFlowContext context) {
       // No action needed for this authenticator if it's placed before the registration form
       // If it were a form authenticator, this method would handle form submissions.
       context.success();
   }

   @Override
   public boolean requires );

   @Override
   public void setRequiredActions(KeycloakSession session, RealmModel realm, UserModel user) {
       // Not applicable
   }
} ```
```java package com.example.keycloak.authenticator;
import org.keycloak.Config; import org.keycloak.authentication.Authenticator; import org.keycloak.authentication.AuthenticatorFactory; import org.keycloak.models.AuthenticationExecutionModel.Requirement; import org.keycloak.models.KeycloakSession; import org.keycloak.models.KeycloakSessionFactory; import org.jboss.logging.Logger; import java.util.List; import java.util.ArrayList;
public class ClientSpecificRegistrationAuthenticatorFactory implements AuthenticatorFactory {
   private static final Logger LOG = Logger.getLogger(ClientSpecificRegistrationAuthenticatorFactory.class);
   public static final String PROVIDER_ID = "client-specific-registration-authenticator";

   @Override
   public String getDisplayType() {
       return "Client Specific Registration Check";
   }

   @Override
   public String getReferenceCategory() {
       return "Registration";
   }

   @Override
   public boolean is    Credential
}

   @Override
   public String getId() {
       return PROVIDER_ID;
   }

   @Override
   public Authenticator create(KeycloakSession session) {
       return new ClientSpecificRegistrationAuthenticator();
   }

   @Override
   public void init(Config.Scope config) {
       LOG.info("ClientSpecificRegistrationAuthenticatorFactory initialized.");
   }

   @Override
   public void postInit(KeycloakSessionFactory factory) {
       LOG.info("ClientSpecificRegistrationAuthenticatorFactory postInit.");
   }

   @Override
   public void close() {
       LOG.info("ClientSpecificRegistrationAuthenticatorFactory closed.");
   }

   @Override
   public List<Requirement> get) {
       List<Requirement> list = new ArrayList<>();
       list.add(Requirement.REQUIRED);
       list.add(Requirement.ALTERNATIVE);
       list.add(Requirement.DISABLED);
       return list;
   }

   @Override
   public String getHelpText() {
       return "Allows or denies self-registration based on the client application initiating the request.";
   }

   @Override
   public boolean isUserSetupAllowed() {
       return false;
   }
} `` * Package as a JAR and deploy to Keycloak'sproviders` directory. * Restart Keycloak.
Step 2: Create a Custom Authentication Flow * In the Keycloak Admin Console, go to Authentication > Flows tab. * Click Copy on the "Registration" flow (or create a new one from scratch). Give it a meaningful name, e.g., "Client Specific Registration Flow." * Click on your new flow. * Add a new Execution at the very top. Select your custom authenticator (e.g., "Client Specific Registration Check"). Set its Requirement to "REQUIRED." * Crucially: After your custom authenticator, add the "Registration User Creation" authenticator, followed by other necessary steps like "Verify Email" or "Registration Profile." The order matters. Your custom authenticator should precede the actual user creation step.
Step 3: Configure Realm and Client to Use Custom Flow * Realm-wide (for default clients): In Realm Settings > Authentication tab, set the Registration Flow to your custom flow ("Client Specific Registration Flow"). This will apply to all clients that don't have a specific override. * Client-specific override: For a particular client (e.g., "my-public-client"), go to Clients > [your_client] > Authentication tab. Override the Registration flow dropdown to select your "Client Specific Registration Flow." * Note: If you want to disable registration for a client, you can create another custom flow (e.g., "No Registration Flow") that only contains your authenticator, and if the client is not allowed, it simply blocks and exits. Then, set that flow as the registration flow for clients that shouldn't allow registration.
Pros: * Highly Secure: Completely prevents unauthorized users from even initiating the registration process at the server level. * Maximum Flexibility: Can implement complex logic, integrate with external systems, add custom validation rules, or modify user attributes during registration. * Excellent User Experience: Can provide immediate, specific feedback to the user about why registration is not allowed for the client they are using. * Centralized Control: Logic resides within Keycloak's authentication subsystem, making it robust.
Cons: * Requires Java development and deployment of custom JARs. * More complex to set up and maintain compared to theme customization. * Requires a good understanding of Keycloak's authentication flows.
Table: Comparison of Client-Specific Self-Registration Approaches
| Feature/Approach | Theme Customization (Approach 1) | Event Listener (Approach 2) | Custom Authenticator Flow (Approach 3) |
|---|---|---|---|
| Complexity | Low | Medium | High |
| Security Level | Low (UI-based hiding, endpoint still open) | Medium (Post-registration filtering) | High (Pre-registration blocking at server level) |
| Requires Custom Code | No (FreeMarker only) | Yes (Java) | Yes (Java) |
| User Experience | Can be good (if hidden/message shown) | Potentially poor (user registers, then account disabled) | Excellent (immediate feedback, controlled flow) |
| Flexibility | Limited (UI only) | Moderate (post-registration actions) | High (full control over flow, validation, attributes) |
| Maintenance | Merging theme updates, client list in template | Updating JARs, client list in code | Updating JARs, client list in code, flow management |
| Best For | Simple display conditions, non-critical apps | Auditing, secondary actions after registration, less critical apps | Critical applications, strict access control, complex onboarding workflows |
Approach 4: Dedicated Realm (Less Ideal for Specific Clients within a Single Realm)
While not a direct client-specific registration within a realm, it's worth mentioning. For organizations with distinct applications that have vastly different user bases and security requirements, separating them into different Keycloak realms is an option. Each realm can then have its own self-registration policy.
Pros: * Complete isolation: Users, clients, and policies are entirely separate. * Simpler per-realm configuration.
Cons: * Overkill for a few clients: If you only have a handful of clients that need different registration rules but otherwise share the same user base or identity providers, managing multiple realms can be cumbersome. * User synchronization: If a user needs access to clients in different realms, you'd need to set up realm federation or duplicate user accounts, which adds complexity. * Increased administrative overhead for managing multiple Keycloak instances or realms.
This approach is more suitable for true multi-tenancy scenarios where each tenant operates within its own security domain, rather than for granular control over self-registration for a few distinct clients within a logically unified ecosystem.
Approach 5: Custom User Federation Provider (More Complex, Specific Use Cases)
This approach is highly specialized and is generally not used solely for client-specific self-registration. However, if your registration process needs to involve an external system for user creation, validation, or specific attribute mapping (e.g., an existing CRM, a partner management system), a custom User Federation Provider can be implemented.
How it works: 1. External System Integration: The custom provider connects Keycloak to an external user store or system. 2. User Creation/Validation Logic: During user creation (including self-registration, if enabled and configured), the provider's logic dictates how users are created or validated against the external system. 3. Client-specific Logic: The provider can potentially inspect the client context and apply different rules for user creation based on the originating client.
Pros: * Deep integration with external systems. * Ultimate flexibility for complex user provisioning scenarios.
Cons: * Highest complexity, requiring significant Java development. * Overkill for simple client-specific registration rules. * More difficult to debug and maintain.
For the vast majority of use cases concerning client-specific self-registration, the Custom Authenticator Flow (Approach 3) offers the best balance of security, flexibility, and maintainability. It provides server-side enforcement and allows for a clean, configurable authentication journey. The Theme Customization (Approach 1) can serve as a quick visual deterrent for less critical applications, but it should be paired with other security measures if robust protection is needed.
Implementing Security Best Practices in Self-Registration
Enabling self-registration, even for specific clients, introduces potential attack vectors. It's crucial to implement security best practices to protect your Keycloak instance and user data.
- CAPTCHA/reCAPTCHA: Protect against bot registrations and brute-force attacks. Keycloak supports integration with reCAPTCHA (both v2 and v3).
- Configuration: Go to Realm Settings > Login tab. Enable "Recaptcha" and configure your Site Key and Secret Key obtained from Google. This will add reCAPTCHA to the registration form.
- Email Verification: Ensure that registered email addresses are valid and belong to the user. This helps prevent spam accounts and provides a recovery mechanism.
- Configuration: Go to Realm Settings > Login tab. Enable "Verify email." Keycloak will send a verification email after registration. You also need to configure an SMTP server under Realm Settings > Email tab.
- Strong Password Policies: Enforce strong password requirements to protect user accounts from dictionary attacks and brute force.
- Configuration: Go to Authentication > Password Policy tab. Define rules for length, complexity (uppercase, lowercase, digits, special characters), history, and expiration.
- Rate Limiting: Protect the registration endpoint from excessive requests, which could indicate a denial-of-service attempt. While Keycloak itself doesn't offer built-in rate limiting per endpoint, this is typically handled by an API gateway positioned in front of Keycloak. An API gateway can inspect incoming requests, apply rate limits based on IP address, client ID, or other criteria, and block suspicious traffic before it even reaches Keycloak. This is a critical layer of defense, especially for public-facing registration endpoints.
- Audit Logging and Monitoring: Log all registration attempts, successes, and failures. Regularly review these logs for unusual patterns. Keycloak's event logging (as discussed in Approach 2) is invaluable here. Integrate Keycloak logs with a centralized logging system (e.g., ELK stack, Splunk) for effective monitoring and alerting.
- Secure Headers: Ensure your Keycloak instance is serving appropriate security headers (e.g., Content Security Policy, X-Frame-Options, X-Content-Type-Options) to mitigate common web vulnerabilities. This is often handled by the reverse proxy or API gateway in front of Keycloak.
- Least Privilege Principle: If your custom authenticators or event listeners interact with other systems, ensure they use credentials with the minimum necessary permissions.
- Regular Updates: Keep your Keycloak instance and underlying infrastructure up to date to patch known vulnerabilities.
By diligently applying these security measures, you can significantly enhance the resilience and trustworthiness of your self-registration process, even as you extend its availability to specific clients.
Monitoring and Auditing Keycloak Registrations
Effective monitoring and auditing are non-negotiable for any identity management system, and Keycloak is no exception. Tracking user registrations is vital for security, compliance, and operational insights. Keycloak provides robust mechanisms for logging events, which can then be integrated into broader monitoring solutions.
Keycloak Event Logging: Keycloak generates events for various actions, including user registration. These events contain valuable metadata: * EventType.REGISTER: Indicates a successful user registration. * userId: The ID of the newly registered user. * username: The username of the new user. * clientId: The client that initiated the registration. This is especially important for our client-specific registration scenarios. * ipAddress: The IP address from which the registration originated. * realmId: The realm in which the user registered. * error: If there was an error during registration.
Accessing Event Logs: 1. Keycloak Admin Console: Go to Realm Settings > Events tab. You can view a summary of recent events under the "User Events" sub-tab. While useful for quick checks, it's not scalable for long-term auditing. 2. Database: Keycloak persists events to its database (in the EVENT_ENTITY table by default). This provides a historical record, but direct database querying is generally not the best practice for real-time monitoring. 3. Event Listeners: As demonstrated in Approach 2, custom event listeners can intercept events in real-time. This is the most flexible approach for integrating with external systems. A custom listener can forward registration events to: * SIEM (Security Information and Event Management) Systems: Tools like Splunk, ELK Stack (Elasticsearch, Logstash, Kibana), or QRadar can ingest Keycloak events for security analysis, threat detection, and compliance reporting. * Monitoring Dashboards: Custom dashboards (e.g., Grafana) can visualize registration trends, geographical distribution, or identify spikes in activity. * Alerting Systems: Trigger alerts (email, Slack, PagerDuty) on unusual registration patterns, such as a high volume of failed registrations or registrations from unexpected clients.
Integrating with External Logging Systems: For large-scale deployments, it's highly recommended to configure Keycloak to output its events to a centralized logging infrastructure. * Built-in JSON file listener: Keycloak can log events to a local JSON file, which can then be picked up by a log shipper (e.g., Filebeat, Fluentd) and sent to your SIEM. This is enabled in the Realm Settings > Events > Event Listeners section by adding jboss-logging and configuring eventsStoreEnabled=true. * Custom Event Listener (as per Approach 2): Develop a custom Java event listener that directly publishes events to a message queue (e.g., Kafka, RabbitMQ) or an external API endpoint for ingestion by your monitoring systems. This offers the most flexibility and real-time processing capabilities.
Auditing Best Practices: * Retention Policies: Define clear retention policies for event logs based on compliance requirements. * Access Control: Restrict access to event logs to authorized personnel only. * Regular Review: Conduct periodic reviews of registration logs to identify suspicious activity, potential policy violations, or system anomalies. * Anomaly Detection: Implement automated tools to detect deviations from normal registration patterns (e.g., sudden increase in registrations from a new IP range).
By establishing a robust monitoring and auditing framework around Keycloak's event system, organizations can gain invaluable insights into user onboarding, proactively detect security threats, and maintain a high level of compliance and operational integrity.
Integration with Other Systems: The Role of the API Gateway
Keycloak, as an identity provider, rarely operates in isolation. It forms a critical component within a broader microservices or enterprise architecture. A common and essential component in such an architecture is the API gateway. The API gateway acts as the single entry point for all client requests, routing them to the appropriate backend services, and performing cross-cutting concerns like authentication, authorization, rate limiting, and traffic management.
When discussing client-specific self-registration, the API gateway plays a complementary role to Keycloak, especially in managing and securing APIs.
How Keycloak and API Gateway Work Together:
- Authentication Delegation: An API gateway typically offloads authentication to Keycloak. When a client application makes an API call, the API gateway first validates the access token (e.g., JWT) issued by Keycloak. If the token is valid, the request proceeds. If not, the API gateway can redirect the client to Keycloak's login/registration page.
- Client Identification: The API gateway can pass client context (e.g., originating client ID, custom headers) to Keycloak during authentication or registration flows. This information can then be used by Keycloak's custom authenticators (as discussed in Approach 3) to enforce client-specific self-registration rules. For example, the API gateway might add a specific header indicating the partner API gateway portal, which Keycloak's authenticator then reads.
- Rate Limiting and Throttling: While Keycloak provides some internal protection, an API gateway is the ideal place to implement comprehensive rate limiting for all API endpoints, including the Keycloak-protected ones. This prevents abuse, denial-of-service attacks, and ensures fair usage, particularly crucial for public-facing registration endpoints.
- Traffic Management: Load balancing, routing, and versioning of APIs are all handled by the API gateway. This ensures high availability and scalability of services, including the Keycloak authentication services.
- Security Policies: Beyond authentication, an API gateway can enforce additional security policies such as IP whitelisting/blacklisting, WAF (Web Application Firewall) rules, and header validation, providing another layer of defense in front of Keycloak.
- Observability: The API gateway provides a central point for logging all API traffic, offering insights into who is accessing which APIs, from where, and how frequently. This complements Keycloak's event logging for a complete picture of user and API interactions.
APIPark - An Open Source AI Gateway & API Management Platform
In this context, a powerful and flexible API gateway solution like ApiPark becomes indispensable. APIPark, as an open-source AI gateway and API management platform, excels at managing, integrating, and deploying AI and REST services. It offers features crucial for modern API ecosystems, making it an excellent complement to Keycloak's identity management capabilities.
For instance, when you have multiple client applications or partner portals leveraging Keycloak for identity, and these clients need access to various APIs (including AI models integrated via APIPark), a unified API gateway is essential. APIPark can:
- Enforce Security: It can act as the first line of defense, routing authentication requests to Keycloak and then enforcing access based on the tokens Keycloak issues. This ensures that only properly authenticated and authorized users (who might have registered through a client-specific Keycloak flow) can access sensitive APIs.
- Manage Client Context: APIPark can capture and forward client-specific information as part of API requests, which Keycloak can consume for its client-specific registration logic or authorization decisions.
- Unified API Management: It provides end-to-end API lifecycle management, from design and publication to invocation and decommissioning. This means that even as you implement complex client-specific self-registration in Keycloak, APIPark ensures that the downstream APIs are managed efficiently and securely.
- Performance and Scalability: With its high-performance capabilities (over 20,000 TPS with 8-core CPU and 8GB memory), APIPark can handle large-scale traffic for all your APIs, including those involved in the authentication and registration process.
- Detailed Logging and Analytics: APIPark provides comprehensive logging of every API call and powerful data analysis tools, offering deep insights into API usage that complements Keycloak's event logs. This comprehensive observability is vital for troubleshooting and security.
By leveraging an advanced API gateway like ApiPark alongside Keycloak, organizations can build a robust, scalable, and secure architecture that effectively manages identities, controls access to APIs, and provides a seamless experience for both developers and end-users, even with highly granular self-registration requirements. This synergy ensures that the complex identity logic implemented in Keycloak is effectively integrated and protected within the broader API ecosystem.
Troubleshooting Common Issues
Implementing client-specific self-registration, especially with custom code, can introduce various challenges. Here's a guide to common issues and their troubleshooting steps:
1. Custom Theme Not Loading/Applying: * Issue: Changes in register.ftl are not reflected, or Keycloak reverts to the default theme. * Checks: * Theme Name: Is the folder name themes/<your_custom_theme_name> exactly matching the name configured in Realm Settings > Themes > Login Theme? * File Location: Are your theme files in the correct directory structure (e.g., themes/<your_custom_theme_name>/login/register.ftl)? * Theme Properties: Does themes/<your_custom_theme_name>/login/theme.properties exist and is it correctly configured (e.g., parent=keycloak)? * Server Restart: After placing new theme files, a Keycloak server restart is often necessary, especially in production deployments. For development, ensure the theme cache is cleared. * Theme Caching: In Realm Settings > Themes, try disabling "Cache Themes" and "Cache Templates" temporarily during development. Remember to re-enable them for production.
2. Custom Authenticator/Event Listener Not Recognized: * Issue: Your custom provider doesn't appear in the Keycloak Admin Console (e.g., in Authentication Flows or Event Listeners list). * Checks: * JAR Placement: Is the JAR file containing your provider correctly placed in Keycloak's providers directory (e.g., /opt/keycloak/providers)? * Service Loader File: Is META-INF/services/org.keycloak.authentication.AuthenticatorFactory (or org.keycloak.events.EventListenerProviderFactory) correctly configured within your JAR? This file should contain the fully qualified class name of your factory class. * Keycloak Build/Restart: Did you run kc.sh build (for Quarkus distribution) or restart the Keycloak server after placing the JAR? This step is crucial for Keycloak to discover new providers. * Logs: Check Keycloak server logs for any errors during startup related to loading providers (e.g., ERROR Failed to load provider ...). * Dependencies: Ensure all necessary Keycloak (and other) dependencies are included in your JAR or are available in Keycloak's classpath. Avoid shading Keycloak core dependencies into your provider JAR, as this can cause conflicts.
3. Authentication Flow Errors (Custom Authenticator): * Issue: Users get stuck in a loop, see a generic error, or the flow doesn't proceed as expected. * Checks: * Flow Order: In your custom authentication flow, is the order of authenticators correct? Your client-specific check should typically be before the "Registration User Creation" authenticator. * Authenticator Requirements: Are the Requirement settings (REQUIRED, ALTERNATIVE, DISABLED, CONDITIONAL) correct for each authenticator in the flow? A common mistake is setting your custom authenticator to "DISABLED." * context.success()/context.challenge()/context.failure(): Ensure your authenticator correctly calls these methods to transition the flow. A missing context.success() will halt the flow. * Logs: Keycloak server logs will provide detailed stack traces and error messages from your custom Java code. Use LOG.info() and LOG.debug() statements liberally in your authenticator for debugging. * Client Binding: Is the custom flow correctly bound to the realm's "Registration Flow" or the specific client's "Registration Flow" override?
4. User Experience Issues (e.g., Account Disabled, No Feedback): * Issue: Users register but their account is disabled (Approach 2), or they're denied registration without a clear message (Approach 1 or 3). * Checks: * Theme Customization (Approach 1): Ensure your register.ftl displays a clear, user-friendly message when registration is not allowed. Add custom messages to messages_en.properties. * Event Listener (Approach 2): If you disable accounts post-registration, consider redirecting the user to a custom info page or displaying a message on the login page explaining that their account requires activation or was not permitted. Keycloak's built-in email verification can also be leveraged to send custom "account disabled" notifications. * Custom Authenticator (Approach 3): Your authenticator should use context.form().setError(messageKey).createErrorPage() or context.challenge(context.form().createForm("custom-error-template.ftl")) to provide specific feedback. Define messageKey in your theme's messages_en.properties.
5. Performance Degradation: * Issue: Keycloak performance suffers after implementing custom logic. * Checks: * Expensive Operations: Are there any database queries, external API calls, or CPU-intensive computations within your custom authenticators or event listeners? Optimize these. * Caching: Ensure your custom code doesn't bypass Keycloak's caching mechanisms unnecessarily. * Logging Level: Too much DEBUG logging can impact performance in production. Adjust log levels. * API Gateway Metrics: Monitor the API gateway (like APIPark) in front of Keycloak. High latency at the gateway often points to issues downstream, possibly within Keycloak or your custom providers. APIPark's powerful data analysis features can help pinpoint performance bottlenecks.
Thorough testing, starting with simple configurations and gradually adding complexity, is key to successful implementation. Leverage Keycloak's extensive logging capabilities and the debugging tools of your chosen IDE to resolve issues efficiently.
Future Considerations and Scalability
As your application ecosystem grows and evolves, the initial implementation of client-specific self-registration in Keycloak will need to adapt. Here are some future considerations and aspects related to scalability:
- Configuration Management:
- Hardcoding vs. Dynamic Configuration: In the examples, allowed client IDs were hardcoded. For a large number of clients or frequently changing policies, this becomes unmanageable.
- Solution: Consider making the allowed client list configurable. For custom authenticators, this can be done via
config.Scopein theAuthenticatorFactory(reading from Keycloak's configuration file) or by adding configuration properties directly to the authenticator in the Keycloak Admin Console. This allows administrators to manage which clients are allowed to self-register without redeploying code. - External Configuration: For very dynamic scenarios, the client list could even be fetched from an external service (e.g., a configuration server or a dedicated API).
- Multi-tenancy:
- Shared Realm, Different Policies: If your organization operates a multi-tenant application where each tenant uses a different client within the same Keycloak realm, then client-specific self-registration is paramount. Each tenant (client) might have its own branding, registration fields, or approval workflows.
- Solution: The custom authenticator approach is highly suitable here, allowing you to dynamically adapt the registration flow based on the tenant's client ID, potentially fetching tenant-specific configurations from an external source.
- Advanced Approval Workflows:
- Manual Approval: Some client registrations might require manual administrative approval.
- Solution: Combine the custom authenticator (to mark a user as pending approval) with an event listener (to send notifications) and potentially a custom Keycloak required action (for the administrator to approve). The custom authenticator could create a user in a "pending" state (
user.setEnabled(false)or add a specific attribute) and redirect to an "awaiting approval" page. An admin could then use the Keycloak Admin Console or a custom administration tool to enable the user.
- Attribute Management:
- Client-Specific User Attributes: Different clients might require different user attributes during registration. For example, a partner portal might need
company_name, while a public API access client might only needapi_key_purpose. - Solution: Custom authentication flows can be designed to include client-specific "Registration Profile" forms or custom authenticators that dynamically add or remove fields based on the
client.clientId.
- Client-Specific User Attributes: Different clients might require different user attributes during registration. For example, a partner portal might need
- Internationalization (i18n):
- Ensure all custom messages, errors, and UI elements are properly internationalized using Keycloak's message bundles (
messages_en.properties,messages_fr.properties, etc.) within your custom theme. This is important for global deployments.
- Ensure all custom messages, errors, and UI elements are properly internationalized using Keycloak's message bundles (
- Scalability of Keycloak Infrastructure:
- Cluster Deployment: For high availability and performance, Keycloak should be deployed in a cluster with a shared database and cache. This ensures that custom authenticators and event listeners are available across all Keycloak nodes.
- Database Performance: Monitor the performance of your Keycloak database, especially if your custom providers involve frequent database operations.
- API Gateway in Front: As previously emphasized, placing an API gateway like ApiPark in front of your Keycloak cluster is crucial. It acts as a load balancer, rate limiter, and security shield, distributing traffic effectively and protecting Keycloak from direct exposure, thereby enhancing its scalability and resilience.
- Continuous Integration/Continuous Deployment (CI/CD):
- Automate the build and deployment of your custom Keycloak providers and themes. This reduces manual errors and ensures consistent deployments across environments.
- Include automated tests for your custom logic to catch regressions.
By anticipating these future needs and designing your client-specific self-registration solution with flexibility and scalability in mind, you can build a robust identity management system that supports the evolving requirements of your enterprise architecture and its diverse client applications. The foundational work of implementing granular control over self-registration is an investment that pays dividends in security, user experience, and operational efficiency.
Conclusion
In the intricate world of modern identity and access management, the ability to tailor user onboarding processes is no longer a luxury but a strategic imperative. While Keycloak provides powerful realm-wide self-registration, the demands of diverse applications, security postures, and compliance regulations often necessitate a more granular approach, restricting or customizing self-registration for specific clients. We have explored various architectural patterns to achieve this, from the visual control offered by theme customization to the robust, server-side enforcement of custom authenticators within Keycloak's authentication flows.
The custom authenticator flow stands out as the most flexible and secure method, empowering organizations to implement complex logic, dynamically control form display, and enforce pre-registration validations based on the client initiating the request. This approach ensures that only authorized users from designated client applications can create accounts, aligning perfectly with principles of least privilege and zero trust. Alongside these technical implementations, adhering to security best practices such as CAPTCHA, email verification, strong password policies, and comprehensive auditing is paramount to safeguarding the integrity of your identity system.
Furthermore, integrating Keycloak with an advanced API gateway like ApiPark elevates the entire architecture. An API gateway acts as a crucial frontline defense, managing traffic, enforcing rate limits, and orchestrating requests to Keycloak and other backend services. This synergy ensures that the finely tuned identity logic within Keycloak is not only robust but also seamlessly integrated and protected within the broader ecosystem of APIs and microservices. APIPark’s capabilities in unified API management, performance, and detailed analytics provide the necessary operational context and control for a secure and efficient API landscape.
The journey to client-specific self-registration in Keycloak is an investment in a more secure, compliant, and user-friendly identity experience. By carefully selecting the appropriate approach, implementing it with precision, and integrating it within a resilient API gateway architecture, organizations can unlock the full potential of Keycloak, empowering their diverse client applications with tailored, secure, and efficient user onboarding. This level of control is not just about security; it's about building a foundation for scalable, adaptable, and future-proof digital services.
Frequently Asked Questions (FAQs)
1. Why would I need client-specific self-registration in Keycloak instead of just realm-wide settings? Realm-wide self-registration treats all clients equally, which is often insufficient for diverse enterprise environments. You might need client-specific self-registration to: * Enhance Security: Prevent unauthorized users from registering for sensitive client applications (e.g., partner portals, internal tools) while allowing open registration for public-facing ones (e.g., e-commerce sites). * Improve User Experience: Tailor registration forms and workflows to the specific needs of each client, collecting only relevant information. * Meet Compliance: Implement different data handling and consent mechanisms based on the user group or application type initiating the registration. * Support Multi-tenancy: Offer distinct registration experiences for different tenants within the same Keycloak realm.
2. Which is the most secure method for client-specific self-registration: Theme Customization, Event Listener, or Custom Authenticator Flow? The Custom Authenticator Flow is generally considered the most secure and robust method. * Theme Customization (Approach 1) only hides the registration form in the UI; the underlying endpoint remains accessible, making it less secure for preventing determined attackers. * Event Listeners (Approach 2) intervene after registration, meaning a user account might briefly exist before being disabled or deleted, which can be a poor user experience and less ideal from a pure security standpoint. * Custom Authenticator Flows (Approach 3) intercept the request at the server level before user creation, allowing you to completely block unauthorized registrations and provide immediate, tailored feedback.
3. Does implementing client-specific self-registration require custom Java development? * Theme Customization (Approach 1) generally does not require custom Java code, relying instead on FreeMarker template logic. * Event Listeners (Approach 2) and Custom Authenticator Flows (Approach 3) both require custom Java development to implement the logic for identifying clients and enforcing registration rules. This involves creating Keycloak provider JARs and deploying them to the Keycloak server.
4. Can an API Gateway help with client-specific self-registration? Yes, an API gateway like ApiPark plays a complementary and crucial role. While Keycloak handles the identity logic, an API gateway can: * Route Context: Pass client-specific information (e.g., custom headers, query parameters) to Keycloak, which your custom Keycloak authenticators can then use. * Rate Limit: Protect Keycloak's registration endpoints from abuse (e.g., bot attacks, DoS) by rate-limiting incoming requests. * Security: Provide an additional layer of security (WAF, IP filtering) in front of Keycloak, ensuring only legitimate requests reach your identity provider. * Observability: Centralize logging and monitoring for all API calls, including those to Keycloak, giving you a holistic view of user and API interactions.
5. What are the key steps to implement a Custom Authenticator Flow for client-specific self-registration? The key steps involve: 1. Develop a Custom Authenticator in Java: This code will inspect the current client ID and decide whether to allow or deny registration, calling context.success() or context.challenge() accordingly. 2. Package and Deploy: Compile your Java code into a JAR and place it in Keycloak's providers directory, then restart Keycloak. 3. Create a Custom Authentication Flow: In the Keycloak Admin Console, create a new flow (e.g., by copying the default "Registration" flow). 4. Add Custom Authenticator to Flow: Insert your custom authenticator as a "REQUIRED" step at the beginning of your new flow. Ensure it comes before the "Registration User Creation" authenticator. 5. Configure Realm/Client: Set this new custom flow as the "Registration Flow" in Realm Settings (for realm-wide default) or specifically for individual clients under their Authentication tab (to override the realm default). 6. Update Theme (Optional but Recommended): Customize your register.ftl (or a custom error page) to display user-friendly messages if registration is blocked.
🚀You can securely and efficiently call the OpenAI API on APIPark in just two steps:
Step 1: Deploy the APIPark AI gateway in 5 minutes.
APIPark is developed based on Golang, offering strong product performance and low development and maintenance costs. You can deploy APIPark with a single command line.
curl -sSO https://download.apipark.com/install/quick-start.sh; bash quick-start.sh

In my experience, you can see the successful deployment interface within 5 to 10 minutes. Then, you can log in to APIPark using your account.

Step 2: Call the OpenAI API.