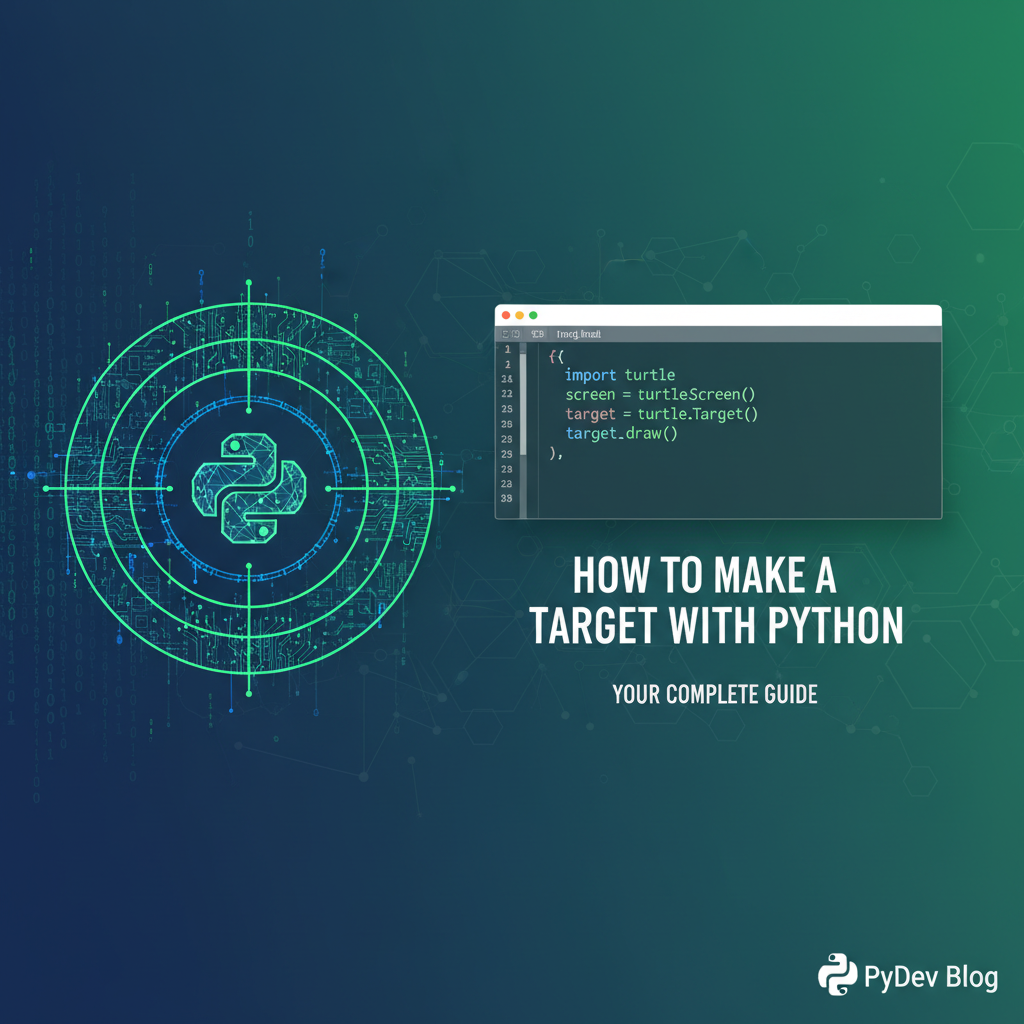
How to Make a Target with Python: Your Complete Guide


The digital realm, much like the physical world, often revolves around the concept of a "target." Whether it's a bullseye in a video game, a critical sales metric for a business, a performance benchmark for an algorithm, or a specific network endpoint to reach, defining and "making" a target is a fundamental step in countless Python applications. Python, with its unparalleled versatility and extensive ecosystem of libraries, stands as an ideal language for constructing, monitoring, and interacting with these targets, irrespective of their abstract or concrete nature. This comprehensive guide will delve deep into the multifaceted ways one can conceptualize and implement "targets" using Python, transforming abstract goals into tangible, actionable code.
From the foundational principles of graphical rendering to the sophisticated nuances of data acquisition and real-time system interaction, we will meticulously explore the techniques that empower developers to craft robust and intelligent target-driven systems. We will journey through various interpretations of "target," demonstrating how Python can bring each to life, offering a holistic perspective on its application in diverse scenarios. Along the way, we will encounter situations where our Python applications need to interact with external services, pulling data or triggering actions through Application Programming Interfaces (APIs), and understanding the critical role that API gateways play in ensuring these interactions are secure, efficient, and well-managed.
Part 1: Graphical Targets – Visualizing Success on Screen
One of the most immediate and intuitive understandings of a "target" comes from the visual domain: a bullseye, a point to hit, an object to interact with in a graphical environment. Python offers several powerful libraries to create such graphical targets, from simple shapes on a canvas to complex interactive elements within a game.
Chapter 1: Basic Shapes and Canvas with Tkinter and Pygame
Building a graphical target often starts with a canvas – an area where shapes can be drawn and manipulated. Python's standard library includes Tkinter, a GUI toolkit that allows for straightforward creation of windows, canvases, and basic geometric shapes. For more dynamic and game-oriented targets, Pygame provides a more robust and performance-oriented framework.
1.1 Tkinter: Crafting Static and Interactive Bullseyes
Tkinter is Python's de-facto standard GUI (Graphical User Interface) package, offering a simple yet effective way to build desktop applications. For creating a target, a Tkinter Canvas widget is the perfect foundation. Imagine a simple bullseye target: concentric circles of different colors.
To begin, we initiate a Tkinter window and a canvas within it. The create_oval method is particularly useful here, as it allows us to draw ellipses (which become circles when their bounding box is square). By drawing multiple ovals, each slightly smaller than the last and centered at the same point, we can achieve the classic bullseye effect. The process involves calculating the coordinates for the bounding box of each circle. For instance, if our canvas is 400x400 pixels and we want the center at (200, 200), a circle with radius r would have a bounding box from (200-r, 200-r) to (200+r, 200+r).
import tkinter as tk

def create_bullseye(canvas, center_x, center_y, max_radius, num_rings):
    colors = ["red", "white", "blue", "yellow", "black"] # Example colors
    ring_width = max_radius / num_rings

    for i in range(num_rings, 0, -1): # Draw from largest to smallest
        radius = i * ring_width
        x1, y1 = center_x - radius, center_y - radius
        x2, y2 = center_x + radius, center_y + radius
        color_index = (num_rings - i) % len(colors)
        canvas.create_oval(x1, y1, x2, y2, fill=colors[color_index], outline="black", width=2)

def on_click(event):
    print(f"Clicked at: ({event.x}, {event.y})")
    # Here you could add logic to check if the click was "on target"

root = tk.Tk()
root.title("Tkinter Bullseye Target")

canvas_width = 600
canvas_height = 600
canvas = tk.Canvas(root, width=canvas_width, height=canvas_height, bg="lightgray")
canvas.pack()

center_x, center_y = canvas_width // 2, canvas_height // 2
max_radius = 250
num_rings = 5
create_bullseye(canvas, center_x, center_y, max_radius, num_rings)

# Add event binding for interaction
canvas.bind("<Button-1>", on_click) # Bind left-click

root.mainloop()
This simple example demonstrates how to draw a static target. The real power of Tkinter comes with event handling, allowing us to make these targets interactive. By binding a function (on_click in the example) to a mouse click event (<Button-1>), we can detect when a user "hits" the target area. Inside the on_click function, we can then implement logic to determine which part of the bullseye was clicked (e.g., using distance from the center) and assign points or trigger other actions accordingly. This foundational interaction is crucial for any game or simulation where accuracy is key. The event.x and event.y attributes provide the precise coordinates of the mouse click relative to the canvas, enabling granular hit detection. We could calculate the distance from the click point to the target's center, distance = ((event.x - center_x)**2 + (event.y - center_y)**2)**0.5, and then compare this distance against the radii of the individual rings to determine the score. This level of detail ensures that our interactive target accurately reflects the user's precision.
1.2 Pygame: Dynamic Targets for Game Development
While Tkinter is excellent for general GUI applications, Pygame shines when it comes to creating games and multimedia applications that require more fluid animations, robust sprite management, and real-time rendering. If our "target" is an object that moves across the screen, a character to shoot at, or an item to collect, Pygame provides a much richer toolkit.
A typical Pygame application operates within a main game loop. In each iteration of this loop, the application handles user input, updates the state of game objects (like moving a target), and then redraws everything on the screen. This continuous cycle gives the illusion of motion and interactivity. To create a target with Pygame, we would typically represent it as a pygame.Surface (an image or a drawn shape) and track its position using a pygame.Rect object.
Consider a moving target that the player needs to click or "shoot."
import pygame
import random

# Initialize Pygame
pygame.init()

# Screen dimensions
SCREEN_WIDTH = 800
SCREEN_HEIGHT = 600
screen = pygame.display.set_mode((SCREEN_WIDTH, SCREEN_HEIGHT))
pygame.display.set_caption("Pygame Moving Target")

# Colors
WHITE = (255, 255, 255)
RED = (255, 0, 0)
BLUE = (0, 0, 255)
BLACK = (0, 0, 0)

# Target properties
target_radius = 30
target_color = RED
target_speed = 5
target_x = random.randint(target_radius, SCREEN_WIDTH - target_radius)
target_y = random.randint(target_radius, SCREEN_HEIGHT - target_radius)
target_direction_x = random.choice([-1, 1])
target_direction_y = random.choice([-1, 1])

# Game loop
running = True
clock = pygame.time.Clock()
score = 0
font = pygame.font.Font(None, 36)

while running:
    for event in pygame.event.get():
        if event.type == pygame.QUIT:
            running = False
        if event.type == pygame.MOUSEBUTTONDOWN:
            mouse_x, mouse_y = event.pos
            # Check if mouse click is on target
            distance = ((mouse_x - target_x)**2 + (mouse_y - target_y)**2)**0.5
            if distance < target_radius:
                score += 1
                print(f"Hit! Score: {score}")
                # Relocate target after hit
                target_x = random.randint(target_radius, SCREEN_WIDTH - target_radius)
                target_y = random.randint(target_radius, SCREEN_HEIGHT - target_radius)
                target_direction_x = random.choice([-1, 1])
                target_direction_y = random.choice([-1, 1]) # Also randomize direction
            else:
                print("Miss!")

    # Update target position
    target_x += target_speed * target_direction_x
    target_y += target_speed * target_direction_y

    # Bounce off walls
    if target_x + target_radius > SCREEN_WIDTH or target_x - target_radius < 0:
        target_direction_x *= -1
    if target_y + target_radius > SCREEN_HEIGHT or target_y - target_radius < 0:
        target_direction_y *= -1

    # Drawing
    screen.fill(BLUE) # Clear screen
    pygame.draw.circle(screen, target_color, (int(target_x), int(target_y)), target_radius)

    # Display score
    score_text = font.render(f"Score: {score}", True, BLACK)
    screen.blit(score_text, (10, 10))

    pygame.display.flip() # Update the full display Surface to the screen
    clock.tick(60) # Limit frame rate to 60 FPS

pygame.quit()
In this Pygame example, the "target" is a red circle that moves around the screen, bouncing off the edges. The game loop continuously updates its position, and mouse clicks are checked against the target's current coordinates and radius for hit detection. This demonstrates a more dynamic form of graphical target, where motion and real-time interaction are paramount. The scorekeeping and relocation of the target upon a hit add game-like mechanics, illustrating how a simple concept can be expanded into a playable experience. The pygame.time.Clock().tick(60) ensures a consistent frame rate, which is critical for smooth animations and predictable game physics, making the target's movement feel natural and responsive to user input. The careful management of target's position, speed, and direction, combined with boundary checks, ensures that the target behaves realistically within the defined screen space, offering a challenging yet fair interaction for the player.
Chapter 2: Dynamic Targets and Animations with Enhanced Interaction
Building upon the foundations of Tkinter and Pygame, we can elevate our graphical targets with more sophisticated animations, user feedback, and scoring mechanisms. The key to engaging graphical targets lies in their responsiveness and visual appeal, often achieved through continuous updates and thoughtful design.
2.1 Implementing Advanced Target Movement and Feedback
For a truly dynamic target, its movement should not be confined to simple linear paths or bouncing. We can introduce more complex trajectories, such as sinusoidal movement, circular paths, or even AI-driven evasion patterns. In Pygame, this involves modifying the target_x and target_y update logic to incorporate mathematical functions or pathfinding algorithms. For instance, a target might follow a sine wave pattern as it moves horizontally, adding a layer of unpredictability.
Visual and auditory feedback are also crucial for reinforcing the "hit" or "miss" action. When a target is hit, it could briefly change color, emit a particle effect, or play a sound effect. In Pygame, this means drawing additional shapes (e.g., small exploding circles) for a few frames, or loading and playing sound files (pygame.mixer.Sound). For example, when a target is hit, instead of just relocating it, we could:
- Flash Color: Temporarily change the target's color to green for a few milliseconds, then revert it. This requires a timer or a frame counter.
- Particle Effect: Spawn a small collection of particles (tiny circles or squares) that radiate outwards from the hit point and fade away. Each particle would have its own position, velocity, and lifespan, managed in a list.
- Sound Effect: Play a short "ping" or "explosion" sound.
# ... (inside Pygame game loop, after a hit is detected) ...
                score += 1
                # Trigger visual/auditory feedback
                hit_sound.play() # Assuming hit_sound is loaded
                # Create temporary particles at hit location
                for _ in range(10): # Spawn 10 particles
                    particles.append({
                        'x': target_x, 'y': target_y,
                        'vx': random.uniform(-5, 5), 'vy': random.uniform(-5, 5),
                        'life': 30, # Lifespan in frames
                        'color': (random.randint(200, 255), random.randint(100, 200), 0) # Orange-ish
                    })

                # ... (relocate target) ...

# ... (inside Pygame game loop, before screen.flip()) ...
    # Update and draw particles
    for particle in list(particles): # Iterate over a copy to allow removal
        particle['x'] += particle['vx']
        particle['y'] += particle['vy']
        particle['life'] -= 1
        if particle['life'] <= 0:
            particles.remove(particle)
        else:
            pygame.draw.circle(screen, particle['color'], (int(particle['x']), int(particle['y'])), 2)
Such additions significantly enhance the user experience by making the interaction feel more responsive and rewarding. For an even more immersive experience, a countdown timer or a limited number of "shots" can be introduced, turning a simple target practice into a timed challenge or a skill-based game. This requires tracking time using pygame.time.get_ticks() and managing game states (e.g., "playing", "game over").
2.2 Advanced Scoring Systems and Persistence
A simple "score +1" is often just the beginning. Advanced target systems can incorporate:
- Multipliers: Hitting specific parts of a target (e.g., the exact center of a bullseye) could award more points.
- Combo Bonuses: Hitting multiple targets in quick succession could trigger a combo bonus.
- Time Bonuses: Faster hits might yield more points.
- Accuracy Tracking: Calculating accuracy percentages (hits / total attempts).
To implement multipliers in a bullseye, for example, the on_click function in Tkinter or the MOUSEBUTTONDOWN event handler in Pygame would need to calculate the distance from the center and assign points based on which concentric ring was hit.
# Example scoring logic for a bullseye target
def calculate_score(click_x, click_y, center_x, center_y, ring_radii):
    distance = ((click_x - center_x)**2 + (click_y - center_y)**2)**0.5
    if distance <= ring_radii[0]: # Innermost ring
        return 100
    elif distance <= ring_radii[1]:
        return 50
    elif distance <= ring_radii[2]:
        return 20
    else:
        return 0 # Miss or outermost ring with no points
For score persistence, especially for high scores, Python can easily save data to a file. A simple text file, CSV, or JSON file can store high scores along with player names.
import json

def save_high_score(name, score, filename="highscores.json"):
    try:
        with open(filename, 'r') as f:
            highscores = json.load(f)
    except (FileNotFoundError, json.JSONDecodeError):
        highscores = []

    highscores.append({"name": name, "score": score})
    highscores.sort(key=lambda x: x['score'], reverse=True) # Sort descending

    # Keep only top N scores, e.g., top 10
    highscores = highscores[:10]

    with open(filename, 'w') as f:
        json.dump(highscores, f, indent=4)

def get_high_scores(filename="highscores.json"):
    try:
        with open(filename, 'r') as f:
            return json.load(f)
    except (FileNotFoundError, json.JSONDecodeError):
        return []

# Example usage:
# if current_score > min(score for score in get_high_scores()):
#     player_name = input("New high score! Enter your name: ")
#     save_high_score(player_name, current_score)
This ensures that achievements are not lost when the application closes, adding a competitive and long-term engagement aspect to the target system. The use of JSON format makes the data human-readable and easily extensible for future additions, such as timestamps or other game statistics, underscoring Python's capabilities in managing persistent application data effectively.
Part 2: Data-Driven Targets – Setting and Achieving Goals with Information
Beyond visual elements, the concept of a "target" frequently extends into the realm of data and metrics. In business, science, or personal tracking, a target often represents a specific value or state that an entity aims to achieve or maintain. Python, with its powerful data analysis and manipulation libraries, is exceptionally well-suited for defining, tracking, and visualizing these data-driven targets.
Chapter 3: Defining and Tracking Numerical Targets
Numerical targets are ubiquitous: a sales team's quarterly quota, a sensor's desired temperature range, a machine learning model's accuracy threshold, or even a personal fitness goal. Python provides the tools to programmatically set these targets, collect relevant data, and monitor progress.
3.1 Setting Goals and Aggregating Data with Pandas and NumPy
The first step in tracking numerical targets is to define the target itself and then acquire the data needed to measure progress against it. Let's consider a sales target: achieve $100,000 in monthly revenue. We would then need to collect daily or weekly sales figures.
Libraries like pandas and NumPy are indispensable here. NumPy provides efficient numerical operations on arrays, while pandas offers high-level data structures like DataFrames, perfect for handling tabular data (e.g., sales records from a CSV file or database).
import pandas as pd
import numpy as np
import datetime

# 1. Define the target
monthly_revenue_target = 100000

# 2. Simulate or load sales data
# In a real scenario, this would come from a database, API, or CSV
data = {
    'date': pd.to_datetime(['2023-10-01', '2023-10-02', '2023-10-03', '2023-10-04',
                            '2023-10-05', '2023-10-06', '2023-10-07', '2023-10-08',
                            '2023-10-09', '2023-10-10', '2023-10-11', '2023-10-12']),
    'revenue': [5000, 7500, 3000, 12000, 6000, 9000, 4500, 10000, 8000, 11000, 7000, 9500]
}
df = pd.DataFrame(data)

# Ensure 'date' is datetime type for time-series operations
df['date'] = pd.to_datetime(df['date'])
df.set_index('date', inplace=True)

# 3. Aggregate data to track progress (e.g., cumulative monthly revenue)
# Get data for the current month
current_month_data = df[df.index.month == datetime.date.today().month]
# (For Oct 2023, assuming today is Oct)

cumulative_revenue = current_month_data['revenue'].cumsum()
current_revenue = cumulative_revenue.iloc[-1] if not cumulative_revenue.empty else 0

print(f"Monthly Revenue Target: ${monthly_revenue_target:,.2f}")
print(f"Current Cumulative Revenue: ${current_revenue:,.2f}")
print(f"Remaining to Target: ${max(0, monthly_revenue_target - current_revenue):,.2f}")

if current_revenue >= monthly_revenue_target:
    print("Target Achieved!")
else:
    print("Still working towards the target.")

# Example of more advanced aggregation: daily average
daily_average = current_month_data['revenue'].mean()
print(f"Daily Average Revenue this month: ${daily_average:,.2f}")
This script demonstrates how to load data into a pandas DataFrame, calculate cumulative metrics, and compare them against a predefined target. The ability of pandas to handle time-series data makes it exceptionally powerful for tracking targets over time, allowing for calculations like month-to-date, quarter-to-date, or year-to-date progress, as well as identifying trends and anomalies. The clear, concise syntax allows for complex data manipulations to be expressed elegantly, making it an ideal choice for any data-driven target system.
3.2 Visualization of Progress with Matplotlib and Seaborn
Tracking progress against a target is significantly enhanced through visualization. Charts and graphs can quickly convey the current status, trends, and the gap remaining to reach the target. Matplotlib is the foundational plotting library in Python, while Seaborn builds on top of Matplotlib to provide a higher-level interface for drawing attractive and informative statistical graphics.
For our sales target example, we could visualize the cumulative revenue over time and overlay the target line.
import matplotlib.pyplot as plt
import seaborn as sns

# ... (Previous code to define df, monthly_revenue_target, cumulative_revenue) ...

plt.figure(figsize=(12, 6))
sns.lineplot(x=cumulative_revenue.index, y=cumulative_revenue.values, marker='o', label='Cumulative Revenue')

# Plot the target line
plt.axhline(y=monthly_revenue_target, color='r', linestyle='--', label='Monthly Target')

plt.title('Monthly Revenue Progress Towards Target')
plt.xlabel('Date')
plt.ylabel('Cumulative Revenue ($)')
plt.grid(True)
plt.legend()
plt.tight_layout()
plt.show()

# A second visualization: comparing daily revenue to a hypothetical daily target
daily_target = monthly_revenue_target / 30 # Simple average
plt.figure(figsize=(12, 6))
sns.barplot(x=current_month_data.index.day, y=current_month_data['revenue'], color='skyblue', label='Daily Revenue')
plt.axhline(y=daily_target, color='orange', linestyle=':', label='Avg Daily Target')
plt.title('Daily Revenue vs. Average Daily Target')
plt.xlabel('Day of Month')
plt.ylabel('Revenue ($)')
plt.grid(axis='y')
plt.legend()
plt.tight_layout()
plt.show()
These visualizations provide immediate insights: whether the current pace is sufficient to hit the target, if there are specific days or periods of high or low performance, and how close the current total is to the ultimate goal. The combination of pandas for data preparation and Matplotlib/Seaborn for visualization forms a powerful toolkit for managing any data-driven target. Such clear visual representations are invaluable for stakeholders, enabling quick decision-making and strategic adjustments to ensure targets are met. The flexibility of these libraries allows for creating custom dashboards that can be updated in real-time, providing an always-on view of target performance.
Chapter 4: Real-time Data Targets and Monitoring
In many modern applications, targets aren't static; they need to be tracked against data that changes constantly. This often involves fetching data from various sources in real-time – be it sensor readings, stock prices, social media feeds, or operational metrics from other systems. Python's capabilities for network communication and integration become critical here.
4.1 Fetching Data from External Sources: The Role of APIs and API Gateways
When a Python application needs to interact with services beyond its local environment, it typically does so through an API (Application Programming Interface). An API acts as a contract, defining how different software components should interact. For instance, if our target is to monitor the performance of a microservice, we might fetch its health metrics via a REST API endpoint.
Consider a scenario where our Python application monitors a target metric (e.g., server load, number of active users, success rate of transactions) that is exposed by another service. This service likely provides a RESTful API that our Python script can consume using the requests library.
import requests
import time
import json

def get_service_metric(api_endpoint, headers=None):
    try:
        response = requests.get(api_endpoint, headers=headers, timeout=5)
        response.raise_for_status() # Raise HTTPError for bad responses (4xx or 5xx)
        return response.json()
    except requests.exceptions.RequestException as e:
        print(f"Error fetching data from API: {e}")
        return None

# --- Keyword Integration: API, Gateway, API Gateway ---
# In a real-world enterprise setting, multiple services might expose different APIs.
# To manage these APIs effectively, a central API gateway is often used.
# An API gateway acts as a single entry point for all clients, routing requests
# to the appropriate microservice, handling authentication, rate limiting, and
# logging. This simplifies client-side code and enhances security and manageability.
# Our Python application would then interact with the API gateway, not directly
# with individual microservice APIs.

# Hypothetical API gateway endpoint for our metrics
# In a production environment, this would be secured and managed by a solution
# like APIPark, which serves as an Open Source AI Gateway & API Management Platform.
# APIPark helps in quickly integrating 100+ AI models and managing the lifecycle
# of all APIs, ensuring unified API formats and robust security.
# More details can be found on its official website: [ApiPark](https://apipark.com/)
api_gateway_endpoint = "https://api.your-company.com/metrics/service_load"
# Example: https://apipark.com/api/v1/metrics/service_load

# For demonstration, let's use a public test API or a mock endpoint
# E.g., a simple JSON API for demonstration purposes
mock_api_endpoint = "https://api.publicapis.org/entries" # Placeholder for a public API

# Define a target for the number of entries
target_entry_count = 1500

print(f"Monitoring target: total entries > {target_entry_count}")

# We would poll this endpoint periodically
while True:
    data = get_service_metric(mock_api_endpoint) # In reality, use api_gateway_endpoint
    if data and 'count' in data: # Assuming the API returns a 'count' field
        current_entries = data['count']
        print(f"Current entry count: {current_entries}")

        if current_entries > target_entry_count:
            print(f"Target HIT! Entry count ({current_entries}) exceeded {target_entry_count}.")
            # Trigger an alert or action
        else:
            print(f"Target NOT yet met. Remaining: {target_entry_count - current_entries} entries.")
    else:
        print("Failed to retrieve current entries data.")

    time.sleep(10) # Wait for 10 seconds before polling again
The mention of APIs and API gateways here is natural because real-time data for targets often originates from distributed services. An API gateway provides a critical layer of abstraction and management, especially in microservices architectures. Python's requests library simplifies the consumption of these APIs, allowing applications to fetch the necessary data to evaluate against real-time targets. Using a robust API management platform like APIPark can significantly streamline the process of integrating and securing these diverse data sources, particularly when dealing with AI models or a multitude of internal and external APIs. This not only enhances the stability of data acquisition but also ensures that the target monitoring system is resilient and scalable.
4.2 Implementing Basic Monitoring Scripts and Alerting
Once we can fetch real-time data, the next step is to continuously monitor it against our defined targets and trigger alerts or actions when thresholds are crossed. This forms the core of an automated monitoring system.
Python can implement simple polling mechanisms (as shown above with time.sleep) or more sophisticated event-driven architectures. When a target condition is met (or breached), various alerting mechanisms can be employed:
- Email Notifications: Using Python's
smtplibfor sending emails. - SMS Alerts: Integrating with services like Twilio.
- Chat Platform Notifications: Sending messages to Slack, Microsoft Teams, or Discord via their respective
APIs (often using webhooks). - Logging: Writing critical events to log files for later analysis.
- Triggering Automated Actions: Invoking other scripts or services.
import requests
import time
import smtplib
from email.mime.text import MIMEText
import logging

# Configure logging
logging.basicConfig(filename='target_monitor.log', level=logging.INFO,
                    format='%(asctime)s - %(levelname)s - %(message)s')

# Email configuration (for alerting)
EMAIL_SENDER = "your_email@example.com"
EMAIL_RECEIVER = "alert_recipient@example.com"
EMAIL_PASSWORD = "your_email_password" # Use environment variables or secure storage in production
SMTP_SERVER = "smtp.example.com"
SMTP_PORT = 587 # or 465 for SSL

def send_email_alert(subject, body):
    try:
        msg = MIMEText(body)
        msg['Subject'] = subject
        msg['From'] = EMAIL_SENDER
        msg['To'] = EMAIL_RECEIVER

        with smtplib.SMTP(SMTP_SERVER, SMTP_PORT) as server:
            server.starttls() # Enable TLS encryption
            server.login(EMAIL_SENDER, EMAIL_PASSWORD)
            server.send_message(msg)
        logging.info(f"Email alert sent: {subject}")
    except Exception as e:
        logging.error(f"Failed to send email alert: {e}")

# ... (rest of the get_service_metric function from above) ...

# Define the target metric and threshold
metric_name = "service_error_rate"
error_rate_threshold = 0.05 # 5% error rate target
api_endpoint_for_errors = "https://api.your-company.com/metrics/error_rate"

# Keep track of alert status to avoid spamming
alert_triggered = False

while True:
    try:
        metric_data = get_service_metric(api_endpoint_for_errors)
        if metric_data and metric_name in metric_data:
            current_error_rate = metric_data[metric_name]
            logging.info(f"Current {metric_name}: {current_error_rate:.2f}")

            if current_error_rate > error_rate_threshold:
                if not alert_triggered:
                    subject = f"CRITICAL ALERT: {metric_name} Exceeded Target!"
                    body = f"The {metric_name} is currently {current_error_rate:.2f}, exceeding the target of {error_rate_threshold:.2f}."
                    send_email_alert(subject, body)
                    alert_triggered = True
                    logging.warning(f"Target breached! Alert sent for {metric_name}.")
            else:
                if alert_triggered:
                    subject = f"RESOLVED: {metric_name} Back Within Target."
                    body = f"The {metric_name} has returned to {current_error_rate:.2f}, which is within the target of {error_rate_threshold:.2f}."
                    send_email_alert(subject, body)
                    alert_triggered = False
                    logging.info(f"Target resolved. Resolution alert sent for {metric_name}.")
        else:
            logging.error(f"Could not retrieve '{metric_name}' from API response.")

    except Exception as e:
        logging.critical(f"Monitoring script crashed: {e}", exc_info=True)

    time.sleep(60) # Check every 60 seconds
This extended example integrates logging and email alerting, demonstrating a more complete monitoring system. It also includes logic to prevent alert spamming by only sending an alert when the status changes (e.g., from 'within target' to 'breached' or vice-versa). Such robust monitoring is essential for any critical data-driven target, ensuring that deviations are promptly detected and addressed. The integration of logging provides a comprehensive audit trail, while email alerts ensure that relevant personnel are immediately notified of significant events. This proactive approach to target management is vital for maintaining system health and achieving desired operational outcomes. The API management platform mentioned previously, APIPark, also provides detailed API call logging and powerful data analysis features, which would significantly aid in understanding historical trends and performance changes related to these metrics, potentially helping with preventive maintenance before targets are consistently breached.
Part 3: Interactive Targets – Responding to Engagement
The concept of a target can also manifest as an interactive element within a broader system, particularly in web applications. Here, a "target" might be a specific user action (e.g., clicking a button, submitting a form, reaching a certain page view count) or a data point within a web dashboard that reflects a goal. Python, with its popular web frameworks like Flask and Django, is exceptionally capable of building web-based systems that define, track, and respond to such interactive targets.
Chapter 5: Web-based Targets with Flask and Django
Building web applications with Python allows for the creation of targets that are accessible from any browser, offering broad reach and flexibility. These targets can be simple static indicators or complex dynamic dashboards.
5.1 Creating a Simple Web Application with Flask
Flask is a lightweight and flexible micro-framework for Python web development, ideal for creating simple, single-purpose web applications or APIs. We can use Flask to build a web page that displays a target and allows for user interaction to influence its status.
Imagine a target system where users need to increment a counter by clicking a button. The "target" is to reach a certain number of clicks.
from flask import Flask, render_template, request, redirect, url_for, session
import os

app = Flask(__name__)
app.secret_key = os.urandom(24) # Secret key for session management

# Global (or database-backed) target state
TARGET_CLICKS = 10
current_clicks = 0

@app.route('/')
def index():
    global current_clicks
    # Store current_clicks in session for multi-user context if needed,
    # or keep global for a single shared target.
    # For a multi-user system, this would typically come from a database.

    # Let's make it per-session for a more interactive demo
    session_clicks = session.get('clicks', 0)

    return render_template('index.html',
                           target_clicks=TARGET_CLICKS,
                           current_clicks=session_clicks,
                           target_reached=(session_clicks >= TARGET_CLICKS))

@app.route('/click', methods=['POST'])
def click_target():
    session_clicks = session.get('clicks', 0)
    if session_clicks < TARGET_CLICKS:
        session_clicks += 1
    session['clicks'] = session_clicks
    return redirect(url_for('index'))

if __name__ == '__main__':
    # For simplicity, we use a global counter. In a real app, use a database
    # to persist the target state across server restarts and multiple users.
    app.run(debug=True)
And the corresponding templates/index.html file:
<!DOCTYPE html>
<html lang="en">
<head>
    <meta charset="UTF-8">
    <meta name="viewport" content="width=device-width, initial-scale=1.0">
    <title>Click Target with Flask</title>
    <style>
        body { font-family: sans-serif; text-align: center; margin-top: 50px; }
        .container { max-width: 600px; margin: auto; padding: 20px; border: 1px solid #ccc; border-radius: 8px; box-shadow: 0 0 10px rgba(0,0,0,0.1); }
        .target-status { font-size: 1.2em; margin-bottom: 20px; }
        .target-reached { color: green; font-weight: bold; }
        .button-area { margin-top: 30px; }
        button { padding: 10px 20px; font-size: 1.1em; cursor: pointer; background-color: #007bff; color: white; border: none; border-radius: 5px; }
        button:hover { background-color: #0056b3; }
        button:disabled { background-color: #cccccc; cursor: not-allowed; }
    </style>
</head>
<body>
    <div class="container">
        <h1>Reach the Click Target!</h1>
        <div class="target-status">
            Target: <span id="target-value">{{ target_clicks }}</span> clicks
        </div>
        <div class="target-status">
            Current Clicks: <span id="current-clicks">{{ current_clicks }}</span>
        </div>

        {% if target_reached %}
            <p class="target-reached">🎉 Target Reached! You clicked {{ current_clicks }} times! 🎉</p>
        {% else %}
            <p>Keep clicking to reach the target!</p>
        {% endif %}

        <div class="button-area">
            <form action="{{ url_for('click_target') }}" method="post">
                <button type="submit" {% if target_reached %}disabled{% endif %}>Click Me!</button>
            </form>
        </div>
    </div>
</body>
</html>
This Flask application provides a web interface where users can interact with a click counter. The "target" is a specific number of clicks. When the target is reached, the button becomes disabled, and a celebratory message appears. This illustrates a simple interactive target, where user actions directly influence the target's status, providing immediate feedback. For more complex, multi-user scenarios, the current_clicks would be stored in a database (like SQLite, PostgreSQL, or MongoDB) rather than a global variable or session, allowing for persistence and concurrent access. The Flask framework is robust enough to handle more intricate routing and data processing, making it suitable for dashboards that display various metrics or user-specific targets.
5.2 Backend Logic for Targets with Flask/Django
While Flask is excellent for rapid development, Django offers a more batteries-included approach, providing an ORM (Object-Relational Mapper), an admin interface, and a robust project structure suitable for larger applications. Both frameworks allow for sophisticated backend logic to manage targets.
The backend logic for a web-based target might involve:
- Database Integration: Storing target definitions, user progress, and historical data. Django's ORM (and Flask with SQLAlchemy) makes this seamless.
- User Authentication: Ensuring only authorized users can set, modify, or interact with specific targets.
- Real-time Updates: Using WebSockets (e.g., Flask-SocketIO, Django Channels) to push target progress updates to client browsers without requiring a page refresh.
- Complex Calculations: Performing aggregations or machine learning inferences on target-related data.
Consider a project management application where each task has a "completion target" (e.g., 100% completion).
# Django model example (models.py)
from django.db import models
from django.contrib.auth.models import User

class Project(models.Model):
    name = models.CharField(max_length=200)
    description = models.TextField()
    start_date = models.DateField()
    end_date_target = models.DateField() # A target date for project completion
    owner = models.ForeignKey(User, on_delete=models.CASCADE)

    def is_overdue(self):
        return self.end_date_target < models.DateField.today() and not self.is_completed()

    def get_progress_percentage(self):
        total_tasks = self.task_set.count()
        if total_tasks == 0:
            return 0
        completed_tasks = self.task_set.filter(status='completed').count()
        return (completed_tasks / total_tasks) * 100

    def is_completed(self):
        return self.get_progress_percentage() == 100

class Task(models.Model):
    project = models.ForeignKey(Project, on_delete=models.CASCADE)
    name = models.CharField(max_length=200)
    status = models.CharField(max_length=50,
                              choices=[('pending', 'Pending'), ('in_progress', 'In Progress'), ('completed', 'Completed')],
                              default='pending')
    assigned_to = models.ForeignKey(User, on_delete=models.SET_NULL, null=True, blank=True)
    due_date_target = models.DateField() # A target date for task completion

    def is_due_soon(self):
        # Example logic for alerting when target due date is approaching
        return self.due_date_target <= (models.DateField.today() + datetime.timedelta(days=3)) and self.status != 'completed'

# Django view example (views.py)
from django.shortcuts import render, get_object_or_404
from django.contrib.auth.decorators import login_required

@login_required
def project_detail(request, pk):
    project = get_object_or_404(Project, pk=pk, owner=request.user)

    context = {
        'project': project,
        'progress': project.get_progress_percentage(),
        'target_date': project.end_date_target,
        'is_overdue': project.is_overdue(),
        'tasks_due_soon': project.task_set.filter(due_date_target__lte=datetime.date.today() + datetime.timedelta(days=3), status='in_progress')
    }
    return render(request, 'projects/project_detail.html', context)
In this Django example, a "target" is implicitly defined by the end_date_target of a Project and the due_date_target of individual Tasks. The get_progress_percentage method on the Project model calculates a numerical target (100% completion) based on the status of its associated tasks. The project_detail view then renders this information, potentially highlighting overdue projects or tasks due soon, serving as interactive targets for project managers to address. This demonstrates how Python web frameworks facilitate the creation of complex, multi-layered target systems that integrate business logic, data persistence, and user interaction within a robust architecture. The use of an ORM abstractifies database interactions, allowing developers to focus on the logical representation of targets rather than raw SQL, greatly speeding up development and reducing errors.
Chapter 6: Integrating External Services for Enhanced Targets
Modern web applications rarely exist in isolation. To create truly rich and dynamic interactive targets, Python applications often need to communicate with external services. This might involve sending notifications, triggering actions in other platforms, or fetching specialized data that the Python application itself doesn't generate. The underlying mechanism for this integration is, again, through APIs, and managing these interactions reliably often involves API gateways.
6.1 Using Webhooks and Third-Party APIs to Extend Target Functionality
Webhooks are a simple yet powerful way for applications to send real-time information to other applications. Instead of continuously polling an API (which can be inefficient and rate-limited), a service can "push" data to a predefined URL (the webhook endpoint) when a specific event occurs.
Imagine our Flask click target from before. When the target of 10 clicks is reached, we want to send a congratulatory message to a Slack channel. Slack provides an incoming webhook API for this purpose.
# ... (Flask app from Chapter 5) ...
import requests

SLACK_WEBHOOK_URL = "https://hooks.slack.com/services/T00000000/B00000000/XXXXXXXXXXXXXXXXXXXXXXXX" # Replace with your actual Slack webhook URL

def send_slack_notification(message):
    payload = {
        "text": message,
        "username": "TargetBot",
        "icon_emoji": ":bullseye:"
    }
    try:
        response = requests.post(SLACK_WEBHOOK_URL, json=payload)
        response.raise_for_status()
        print("Slack notification sent successfully!")
    except requests.exceptions.RequestException as e:
        print(f"Failed to send Slack notification: {e}")

@app.route('/click', methods=['POST'])
def click_target():
    session_clicks = session.get('clicks', 0)
    target_reached_before = (session_clicks >= TARGET_CLICKS)

    if session_clicks < TARGET_CLICKS:
        session_clicks += 1
    session['clicks'] = session_clicks

    target_reached_now = (session_clicks >= TARGET_CLICKS)

    # Check if target was just reached (and not already reached)
    if target_reached_now and not target_reached_before:
        send_slack_notification(f"🎯 CONGRATULATIONS! The click target of {TARGET_CLICKS} has been reached by a user!")

    return redirect(url_for('index'))
This simple addition transforms a local interaction into a shared event. When the target is hit, a notification is dispatched to a team channel, making the achievement visible and shareable. This demonstrates how Python can act as an orchestrator, integrating various services to extend the reach and impact of a target event. Beyond Slack, the same principle applies to payment APIs (e.g., Stripe), weather APIs, social media APIs, or any other service that exposes an API. The flexibility of Python's requests library makes interacting with virtually any RESTful API straightforward.
6.2 Discussing Authentication and Secure API Consumption; Reinforcing API Gateways
When interacting with third-party APIs or internal services via an API gateway, security is paramount. Most APIs require authentication to ensure that only authorized applications or users can access data or trigger actions. Common authentication methods include:
- API Keys: A simple token sent in a header or query parameter.
- OAuth 2.0: A more complex, token-based system for delegated authorization, widely used for social logins and service-to-service communication.
- JSON Web Tokens (JWTs): Compact, URL-safe means of representing claims to be transferred between two parties.
Python libraries like requests can easily handle these methods, by including headers with API keys or by integrating with oauthlib for OAuth flows.
The role of an API gateway becomes even more critical in this context. Rather than each Python application managing direct connections to potentially dozens of backend services, it interacts with a single, unified API gateway. This gateway can then:
- Centralize Authentication: The gateway authenticates incoming requests once and passes validated requests to backend services, simplifying security for backend developers.
- Implement Rate Limiting: Prevent abuse and ensure fair usage by controlling how many requests a client can make in a given period.
- Manage Traffic and Load Balancing: Route requests efficiently to multiple instances of a backend service.
- Provide Centralized Logging and Monitoring: Aggregate logs from all
APIcalls, offering a single pane of glass for operational insights. This is a core feature of platforms like APIPark. - Transform Requests/Responses: Modify
APIcalls or responses to ensure compatibility or enforce standards.
Consider a Python application that fetches data from several internal microservices to compile a dashboard (our "target" for displaying comprehensive metrics). Instead of each microservice having its own authentication and endpoint, the Python app calls a single API gateway endpoint.
# Python code interacting with an API gateway for authenticated access
GATEWAY_BASE_URL = "https://your-company-gateway.com/v1"
API_KEY = "your_secure_api_key_here" # Stored securely, e.g., in environment variables

headers = {
    "Authorization": f"Bearer {API_KEY}", # Or "x-api-key": API_KEY
    "Content-Type": "application/json"
}

def get_dashboard_data_via_gateway():
    endpoints = {
        "sales_metrics": "/techblog/en/metrics/sales",
        "user_activity": "/techblog/en/metrics/users",
        "inventory_status": "/techblog/en/inventory/status"
    }

    dashboard_data = {}
    for key, path in endpoints.items():
        try:
            response = requests.get(f"{GATEWAY_BASE_URL}{path}", headers=headers, timeout=10)
            response.raise_for_status()
            dashboard_data[key] = response.json()
        except requests.exceptions.RequestException as e:
            print(f"Error fetching {key} via gateway: {e}")
            dashboard_data[key] = {"error": str(e)}
    return dashboard_data

# Example usage:
# dashboard_info = get_dashboard_data_via_gateway()
# print(json.dumps(dashboard_info, indent=2))
This interaction demonstrates the benefit of an API gateway: the Python application doesn't need to know the specific authentication details or locations of each backend service. It just interacts with the gateway, which handles the complexities. This level of abstraction and centralized management is crucial for scalable and secure target systems, particularly in enterprise environments. An API management platform like APIPark specifically offers features like end-to-end API lifecycle management, API service sharing within teams, and independent API and access permissions for each tenant, which would greatly benefit the development and deployment of such secure and robust interactive target systems. Its ability to manage traffic forwarding, load balancing, and versioning of published APIs ensures that the Python application always has a reliable and performant endpoint to connect to, regardless of the underlying complexity.
Part 4: Advanced Concepts and Best Practices
To build truly robust, scalable, and intelligent target systems with Python, it's essential to move beyond basic implementations and embrace advanced programming concepts and best practices. This includes optimizing performance, ensuring data integrity, and leveraging cutting-edge technologies like Artificial Intelligence.
Chapter 7: Optimizing Performance and Scalability
When targets involve real-time monitoring or high-volume interactions, the performance and scalability of the Python application become critical. Sluggish responses or failures under load can severely compromise the effectiveness of the target system.
7.1 Asynchronous Programming (asyncio) for Responsive Targets
Traditional Python code executes synchronously, meaning one operation must complete before the next one begins. This can be a bottleneck when dealing with I/O-bound operations like network requests (e.g., fetching data from an API gateway) or file operations, as the program waits idly. Asynchronous programming, particularly with Python's asyncio library, allows for concurrent execution of I/O-bound tasks, making applications far more responsive.
For a target monitoring system that polls multiple APIs or external data sources, asyncio can dramatically reduce the total time spent waiting. Instead of fetching data from API_1, then API_2, then API_3 sequentially, asyncio allows initiating all requests almost simultaneously and processing results as they become available.
import asyncio
import aiohttp # Asynchronous HTTP client for Python
import time
import json

async def fetch_metric_async(session, url, headers=None):
    try:
        async with session.get(url, headers=headers, timeout=aiohttp.ClientTimeout(total=5)) as response:
            response.raise_for_status()
            return await response.json()
    except aiohttp.ClientError as e:
        print(f"Error fetching data from {url}: {e}")
        return None

async def monitor_multiple_targets_async(api_endpoints, target_thresholds, interval=10):
    async with aiohttp.ClientSession() as session:
        while True:
            tasks = []
            for name, url in api_endpoints.items():
                tasks.append(fetch_metric_async(session, url))

            results = await asyncio.gather(*tasks) # Run all fetches concurrently

            print(f"\n--- Monitoring Cycle at {time.ctime()} ---")
            for i, (name, url) in enumerate(api_endpoints.items()):
                data = results[i]
                if data and 'value' in data: # Assuming a 'value' field for the metric
                    current_value = data['value']
                    target = target_thresholds.get(name)
                    print(f"  {name}: Current = {current_value}, Target = {target}")
                    if target is not None:
                        if current_value > target: # Example: greater than target is a breach
                            print(f"    ALERT: {name} ({current_value}) exceeded target ({target})!")
                        else:
                            print(f"    {name} is within target.")
                else:
                    print(f"  {name}: Data unavailable or invalid.")

            await asyncio.sleep(interval) # Wait asynchronously

if __name__ == "__main__":
    # Example mock API endpoints (replace with actual API gateway endpoints)
    mock_api_endpoints = {
        "service_load": "https://api.example.com/load",
        "cpu_usage": "https://api.example.com/cpu",
        "memory_usage": "https://api.example.com/memory"
    }

    # Simulate different data for demonstration
    async def mock_fetch_metric_async(session, url, headers=None):
        await asyncio.sleep(random.uniform(0.5, 2)) # Simulate network delay
        metric_name = url.split('/')[-1]
        if metric_name == "load":
            return {"value": random.uniform(0.5, 1.5)} # Load between 0.5 and 1.5
        elif metric_name == "cpu":
            return {"value": random.uniform(30, 90)} # CPU between 30 and 90
        elif metric_name == "memory":
            return {"value": random.uniform(60, 95)} # Memory between 60 and 95
        return {"value": 0} # Default

    # Overwrite the actual fetch with the mock for testing
    fetch_metric_async = mock_fetch_metric_async

    target_thresholds = {
        "service_load": 1.0,
        "cpu_usage": 80,
        "memory_usage": 90
    }

    asyncio.run(monitor_multiple_targets_async(mock_api_endpoints, target_thresholds))
This asyncio example demonstrates how to concurrently fetch data from multiple endpoints, significantly improving the responsiveness of a monitoring script. For applications that require high concurrency, like web servers or real-time data processing pipelines that feed into target systems, asyncio is an indispensable tool. It ensures that the application doesn't become a bottleneck itself when interacting with various external services, including those managed by an API gateway, thereby maintaining a high degree of availability and efficiency.
7.2 Database Integration (SQLAlchemy) for Persistent Target Data
For any serious target system, especially those tracking complex or long-term goals, persistent storage is essential. Relational databases are a robust choice for storing target definitions, historical progress, user-specific targets, and audit trails. SQLAlchemy is a powerful and flexible SQL toolkit and Object-Relational Mapper (ORM) for Python, offering a high-level API to interact with various database systems (PostgreSQL, MySQL, SQLite, etc.).
Using SQLAlchemy allows developers to define database schemas using Python classes and interact with database records as Python objects, abstracting away the complexities of SQL queries. This makes it easier to manage the lifecycle of target data.
from sqlalchemy import create_engine, Column, Integer, String, Float, DateTime, Boolean
from sqlalchemy.ext.declarative import declarative_base
from sqlalchemy.orm import sessionmaker
import datetime

# Define the database connection string
DATABASE_URL = "sqlite:///targets.db" # Using SQLite for simplicity

# Base class for declarative models
Base = declarative_base()

# Define a Target model
class Target(Base):
    __tablename__ = 'targets'
    id = Column(Integer, primary_key=True)
    name = Column(String, unique=True, nullable=False)
    description = Column(String)
    target_value = Column(Float, nullable=False)
    current_value = Column(Float, default=0.0)
    last_updated = Column(DateTime, default=datetime.datetime.now, onupdate=datetime.datetime.now)
    achieved = Column(Boolean, default=False)

    def __repr__(self):
        return f"<Target(id={self.id}, name='{self.name}', target_value={self.target_value}, current_value={self.current_value}, achieved={self.achieved})>"

# Setup database engine and create tables
engine = create_engine(DATABASE_URL)
Base.metadata.create_all(engine) # Creates tables if they don't exist

# Create a session to interact with the database
Session = sessionmaker(bind=engine)
session = Session()

def create_or_update_target(name, target_value, description="", current_value=0.0):
    target = session.query(Target).filter_by(name=name).first()
    if target:
        # Update existing target
        target.target_value = target_value
        target.description = description
        target.current_value = current_value
        target.achieved = (current_value >= target_value) # Or other logic
        print(f"Updated target: {target}")
    else:
        # Create new target
        target = Target(name=name, target_value=target_value, description=description,
                        current_value=current_value, achieved=(current_value >= target_value))
        session.add(target)
        print(f"Created new target: {target}")
    session.commit()
    return target

def get_all_targets():
    return session.query(Target).all()

def update_target_progress(target_name, new_value):
    target = session.query(Target).filter_by(name=target_name).first()
    if target:
        target.current_value = new_value
        target.achieved = (new_value >= target.target_value)
        target.last_updated = datetime.datetime.now()
        session.commit()
        print(f"Progress updated for '{target_name}': Current value = {new_value}, Achieved = {target.achieved}")
    else:
        print(f"Target '{target_name}' not found.")

# Example Usage:
if __name__ == "__main__":
    # Create some targets
    sales_target = create_or_update_target("Monthly Sales Goal", 100000.0, "Aim for $100K in revenue.")
    user_signup_target = create_or_update_target("New User Signups", 5000.0, "Get 5000 new users this quarter.")

    # Update progress
    update_target_progress("Monthly Sales Goal", 75500.0)
    update_target_progress("New User Signups", 4800.0)
    update_target_progress("New User Signups", 5001.0) # Achieve it!

    # Retrieve and display all targets
    print("\nAll Targets:")
    for target in get_all_targets():
        print(target)

    # Close the session
    session.close()
This SQLAlchemy example shows how to define a Target model, create a database, add new targets, and update their progress. This ensures that all target-related data is durably stored, allowing for complex queries, historical analysis, and recovery from application restarts. Persistent storage is foundational for building reliable and stateful target systems, enabling features like dashboards that display long-term trends and performance changes, which aligns with the powerful data analysis capabilities offered by platforms like APIPark.
Chapter 8: Robust Error Handling and Logging
In any complex system, errors are inevitable. How a Python application handles these errors and logs relevant information is crucial for maintaining stability, diagnosing problems, and ensuring the reliability of target monitoring and interaction.
8.1 Ensuring Your Target System is Resilient
Resilience refers to the ability of a system to recover gracefully from failures and continue operating. For target systems, this means:
- Graceful Degradation: If an external
APIis down (perhaps one managed by anAPI gatewaytemporarily experiencing issues), the system should not crash but perhaps display stale data or a "data unavailable" message. - Retries with Backoff: When making
APIcalls that might experience transient network issues, implementing retry logic (e.g., trying again after a short delay, with increasing delays for subsequent retries) can improve robustness. Thetenacitylibrary is excellent for this. - Circuit Breakers: Prevent a system from repeatedly trying to access a failing service, allowing it to recover. This is often handled by
API gatewaysat a higher level, but Python applications can implement client-side circuit breakers. - Validation: Always validate incoming data (from
APIs, user input, files) to prevent unexpected errors.
import requests
import time
from tenacity import retry, wait_fixed, stop_after_attempt, retry_if_exception_type
import logging

logging.basicConfig(level=logging.INFO, format='%(asctime)s - %(levelname)s - %(message)s')

# Configure retry decorator for API calls
@retry(wait=wait_fixed(2), stop=stop_after_attempt(3), retry=retry_if_exception_type(requests.exceptions.ConnectionError))
def call_external_api_with_retry(url, headers=None):
    logging.info(f"Attempting to call API: {url}")
    response = requests.get(url, headers=headers, timeout=5)
    response.raise_for_status() # Raise HTTPError for bad responses (4xx or 5xx)
    return response.json()

def safe_get_metric(api_url):
    try:
        data = call_external_api_with_retry(api_url)
        return data.get('metric_value') # Assuming a 'metric_value' key
    except requests.exceptions.HTTPError as e:
        logging.error(f"HTTP Error calling {api_url}: {e.response.status_code} - {e.response.text}")
        return None
    except requests.exceptions.RequestException as e:
        logging.error(f"Network/Request Error calling {api_url}: {e}")
        return None
    except Exception as e:
        logging.error(f"An unexpected error occurred: {e}", exc_info=True)
        return None

# Example usage (mocking a URL that might fail or return bad data)
# This could be an API managed by an API gateway
mock_api_url = "http://mock-failing-api.com/status" # Or a known reliable API
metric = safe_get_metric(mock_api_url)

if metric is not None:
    print(f"Retrieved metric: {metric}")
else:
    print("Failed to retrieve metric after retries.")
This snippet showcases tenacity for retrying API calls, a common pattern for increasing resilience against transient network issues or temporary service unavailability. Such mechanisms are vital when consuming APIs, especially from external providers or microservices that might not guarantee 100% uptime.
8.2 Monitoring API Calls and Gateway Interactions
Comprehensive logging is the eyes and ears of any application, especially when it involves interactions with external services or internal APIs. Python's built-in logging module is highly configurable and should be used extensively.
Key aspects to log for target systems:
- API Request/Response Details: Log the URL, method, headers (sanitized), and status code for all
APIcalls. - Target State Changes: Record when a target is set, updated, breached, or achieved.
- Errors and Exceptions: Capture full traceback for errors, warnings for potential issues.
- Performance Metrics: Log the duration of
APIcalls or complex calculations.
import logging
import requests
import time

# Configure a custom logger for API interactions
api_logger = logging.getLogger('api_interactions')
api_logger.setLevel(logging.INFO)
# Handler for console output
ch = logging.StreamHandler()
formatter = logging.Formatter('%(asctime)s - %(name)s - %(levelname)s - %(message)s')
ch.setFormatter(formatter)
api_logger.addHandler(ch)
# Handler for file output (optional)
# fh = logging.FileHandler('api_interactions.log')
# fh.setFormatter(formatter)
# api_logger.addHandler(fh)

def make_api_call(url, method="GET", headers=None, data=None):
    start_time = time.time()
    try:
        api_logger.info(f"Initiating {method} request to {url}")
        response = requests.request(method, url, headers=headers, json=data, timeout=10)
        end_time = time.time()
        duration = (end_time - start_time) * 1000 # milliseconds

        api_logger.info(f"Received response from {url} - Status: {response.status_code}, Duration: {duration:.2f}ms")
        response.raise_for_status() # Check for HTTP errors
        return response.json()
    except requests.exceptions.RequestException as e:
        end_time = time.time()
        duration = (end_time - start_time) * 1000
        api_logger.error(f"API call to {url} failed. Error: {e}, Duration: {duration:.2f}ms")
        if hasattr(e, 'response') and e.response is not None:
            api_logger.error(f"Response content: {e.response.text}")
        raise # Re-raise the exception after logging for further handling
    except Exception as e:
        api_logger.critical(f"An unexpected error occurred during API call to {url}: {e}", exc_info=True)
        raise

# Example usage (using a public API for demonstration)
try:
    public_api_url = "https://api.publicapis.org/entries"
    data = make_api_call(public_api_url)
    # Process data for target tracking
    # ...
    api_logger.info(f"Successfully processed data for {len(data.get('entries', []))} entries.")
except Exception:
    api_logger.error("Main application logic encountered an API error.")
This structured logging approach provides invaluable insights into the behavior of the application, particularly its interactions with the API gateway and other services. Detailed API call logging is a prominent feature of APIPark, which records every detail of each API call, enabling businesses to quickly trace and troubleshoot issues. This complements the application-level logging, providing a comprehensive view of system health and target adherence. The ability to correlate application logs with API gateway logs offers a powerful diagnostic capability, ensuring that target systems remain operational and performant.
Chapter 9: The Role of AI in Target Systems
The integration of Artificial Intelligence and Machine Learning can elevate target systems from reactive monitoring tools to proactive, predictive, and even prescriptive engines. Python, being the dominant language for AI/ML development, is perfectly positioned to infuse intelligence into target management.
9.1 Using AI/ML Models to Predict Target Outcomes and Optimize Settings
AI models can be employed in several ways to enhance target systems:
- Predictive Targets: Instead of fixed numerical targets, an ML model can predict optimal target values based on historical data, market trends, or other factors. For instance, an AI might predict a realistic sales target for the next quarter given current economic conditions.
- Anomaly Detection: Identify unusual deviations in real-time data that might indicate a target is about to be missed or has been breached in an unexpected way. This goes beyond simple thresholding.
- Performance Optimization: An AI model could suggest adjustments to operational parameters (e.g., resource allocation, marketing spend) to help achieve a performance target more efficiently.
- Root Cause Analysis: When a target is missed, AI can help analyze various data points to suggest potential reasons.
Python libraries like scikit-learn for traditional ML, and TensorFlow or PyTorch for deep learning, provide the framework for building these models.
import pandas as pd
from sklearn.model_selection import train_test_split
from sklearn.linear_model import LinearRegression
from sklearn.metrics import mean_absolute_error
import numpy as np
import datetime

# 1. Simulate historical data for a target metric (e.g., website traffic)
# Features: marketing spend, number of blog posts, social media engagement score
# Target: monthly website visitors
data = {
    'month': pd.to_datetime(pd.date_range(start='2022-01-01', periods=24, freq='M')),
    'marketing_spend': np.random.randint(1000, 5000, 24),
    'blog_posts': np.random.randint(2, 10, 24),
    'social_engagement': np.random.uniform(5, 20, 24),
    'visitors': np.random.randint(10000, 50000, 24) # Base visitors
}
df = pd.DataFrame(data)

# Introduce some correlation to make it realistic
df['visitors'] = (df['visitors'] +
                  df['marketing_spend'] * 5 +
                  df['blog_posts'] * 500 +
                  df['social_engagement'] * 300)

# 2. Train a simple regression model to predict visitors
X = df[['marketing_spend', 'blog_posts', 'social_engagement']]
y = df['visitors']

X_train, X_test, y_train, y_test = train_test_split(X, y, test_size=0.2, random_state=42)

model = LinearRegression()
model.fit(X_train, y_train)

y_pred = model.predict(X_test)
print(f"Mean Absolute Error for visitor prediction: {mean_absolute_error(y_test, y_pred):,.2f}")

# 3. Use the model to predict a future target or optimize current settings
# Suppose we want to predict visitors for next month with planned activities:
next_month_features = pd.DataFrame([[4500, 8, 18]],
                                   columns=['marketing_spend', 'blog_posts', 'social_engagement'])
predicted_visitors = model.predict(next_month_features)[0]
print(f"\nPredicted visitors for next month: {int(predicted_visitors):,}")

# 4. Use AI to suggest optimized inputs for a desired target
desired_visitors_target = 60000 # Hypothetical ambitious target

# This would typically involve more complex optimization algorithms (e.g., gradient descent)
# or simulation. For simplicity, let's just show how we could use the model.
# If we knew the desired visitors, we could try to 'invert' the model or run iterations
# to find required marketing spend for a fixed blog posts/engagement.
# E.g., if blog_posts=8, social_engagement=18, what marketing_spend gets 60K visitors?
# marketing_spend_required = (desired_visitors - (model.intercept_ + model.coef_[1]*8 + model.coef_[2]*18)) / model.coef_[0]
# print(f"Marketing spend needed for {desired_visitors_target:,} visitors: ${marketing_spend_required:,.2f}")
This example demonstrates how a Python-based ML model can predict future target values. In a real application, these models would be continuously retrained with new data and deployed as services.
9.2 How Python Applications Can Invoke AI Models via an API Gateway (APIPark)
Once AI models are trained, they often need to be deployed and made accessible to other applications. This is typically done by encapsulating them within a service that exposes an API. A Python application can then invoke these AI models by making API calls.
This is where APIPark, the Open Source AI Gateway & API Management Platform, becomes highly relevant. APIPark is specifically designed to simplify the integration and management of AI models. It offers:
- Quick Integration of 100+ AI Models: APIPark provides a unified management system for authentication and cost tracking across a wide range of AI models. This means your Python application doesn't need to know the specifics of each AI model's
API. - Unified API Format for AI Invocation: It standardizes the request data format, ensuring that changes in AI models or prompts do not affect your Python application or microservices. This simplifies AI usage and reduces maintenance costs significantly.
- Prompt Encapsulation into REST API: Users can quickly combine AI models with custom prompts to create new
APIs, such as sentiment analysis, translation, or data analysisAPIs. These newAPIs can then serve as intelligent components of your target system.
So, if our Python application needs to use an AI model (e.g., one deployed through APIPark) to: 1. Analyze target performance: Send current target metrics to an AI model for deeper insights. 2. Generate alerts based on AI predictions: Receive an AI's prediction about an impending target breach. 3. Optimize target settings: Query an AI for recommended adjustments.
Our Python code would interact with APIPark's API gateway endpoint, which then routes the request to the appropriate AI model.
import requests
import json
import logging

logging.basicConfig(level=logging.INFO, format='%(asctime)s - %(levelname)s - %(message)s')

# --- Leveraging APIPark for AI Model Invocation ---
# Assuming an AI model for anomaly detection or prediction is exposed via APIPark
# APIPark's gateway provides a single, unified endpoint for various AI services.
APIPARK_AI_GATEWAY_URL = "https://apipark.com/api/v1/ai-models/predict-anomaly" # Example APIPark endpoint
APIPARK_API_KEY = "your_apipark_api_key" # Obtain from APIPark dashboard

def invoke_ai_model_via_apipark(data_for_ai_model):
    headers = {
        "Authorization": f"Bearer {APIPARK_API_KEY}",
        "Content-Type": "application/json"
    }

    try:
        logging.info(f"Invoking AI model via APIPark at {APIPARK_AI_GATEWAY_URL}")
        response = requests.post(APIPARK_AI_GATEWAY_URL, headers=headers, json=data_for_ai_model, timeout=20)
        response.raise_for_status()
        ai_result = response.json()
        logging.info("AI model invocation successful.")
        return ai_result
    except requests.exceptions.RequestException as e:
        logging.error(f"Failed to invoke AI model via APIPark: {e}")
        if hasattr(e, 'response') and e.response is not None:
            logging.error(f"APIPark Response: {e.response.text}")
        return {"error": str(e)}
    except Exception as e:
        logging.critical(f"An unexpected error occurred during APIPark AI invocation: {e}", exc_info=True)
        return {"error": str(e)}

if __name__ == '__main__':
    # Example data to send to an AI model for anomaly detection on a target metric
    current_target_metrics = {
        "metric_series": [10, 12, 11, 15, 14, 13, 100, 16], # '100' is an anomaly
        "metric_name": "temperature_sensor_1"
    }

    ai_response = invoke_ai_model_via_apipark(current_target_metrics)

    if "prediction" in ai_response:
        print(f"\nAI Prediction for target anomaly: {ai_response['prediction']}")
        if ai_response['prediction'] == 'anomaly_detected':
            print("Action: Trigger alert for immediate investigation!")
        else:
            print("Target metric appears normal.")
    elif "error" in ai_response:
        print(f"\nError from AI model: {ai_response['error']}")
    else:
        print("\nUnexpected response from AI model.")
This table illustrates key features of APIPark that are highly beneficial for managing AI and other APIs in a target-driven Python application:
| Feature Category | APIPark Feature | Benefit for Python Target Systems |
|---|---|---|
| AI Integration | Quick Integration of 100+ AI Models | Python apps can easily access diverse AI models (e.g., for predictive targets, anomaly detection) without complex individual integrations. |
| Unified API Format for AI Invocation | Simplifies Python client code for AI interactions; no need to adapt to different AI model APIs, reducing maintenance. | |
| Prompt Encapsulation into REST API | Python apps can invoke custom AI-driven APIs (e.g., sentiment analysis of target-related feedback) as standard REST calls. | |
| API Management | End-to-End API Lifecycle Management | Ensures stable and versioned APIs for Python to consume; supports design, publication, and decommissioning of APIs relevant to target data. |
| Performance Rivaling Nginx | Guarantees high throughput and low latency for Python apps fetching real-time target data or invoking AI models, even under heavy load. | |
| Detailed API Call Logging | Critical for troubleshooting when Python apps fail to fetch target data or interact with APIs, providing full visibility into API transactions. | |
| Powerful Data Analysis | Helps Python developers understand long-term trends and performance changes related to APIs, aiding in proactive maintenance of target monitoring systems. | |
| Security & Access | Independent API and Access Permissions | Allows secure, multi-tenant access to different target-related APIs, ensuring data isolation and controlled access for various teams or partners. |
| API Resource Access Requires Approval | Prevents unauthorized Python applications or users from accessing sensitive target data or AI models without explicit administrator approval. |
By interacting with APIPark, Python applications gain a standardized, secure, and performant way to leverage advanced AI capabilities, transforming static targets into dynamic, intelligent, and predictive goals. APIPark significantly reduces the operational overhead of managing these complex AI and REST APIs, allowing developers to focus on the core logic of their target systems.
Conclusion: Python, The Master Key to Diverse Targets
Our journey through "How to Make a Target with Python" has unveiled the language's incredible breadth and depth, demonstrating its prowess in defining, tracking, and interacting with targets across various domains. From the tactile satisfaction of hitting a graphical bullseye to the strategic imperative of achieving complex data metrics and the nuanced interaction with intelligent AI systems, Python provides the elegant and robust tools needed for each endeavor.
We began with the visual, exploring how Tkinter and Pygame enable the creation of responsive graphical targets, offering immediate feedback and engaging user experiences. Transitioning to the realm of data, we saw how pandas and NumPy empower the aggregation and analysis of information, while Matplotlib and Seaborn vividly bring progress towards numerical goals to life. The critical role of APIs and API gateways emerged as we delved into real-time data acquisition, highlighting how Python applications seamlessly integrate with external services to keep targets current and actionable. The discussion naturally led to the mention of solutions like APIPark, anOpen Source AI Gateway & API Management Platform, which streamlines the complex process of connecting Python applications to diverse AI models and APIs, ensuring security, performance, and simplified management.
Our exploration extended into the interactive web, where Flask and Django stand as pillars for building dynamic target dashboards and user-driven goal systems, emphasizing how Python can orchestrate user input and backend logic. We further enhanced these interactive targets by integrating third-party services via webhooks and discussing the vital importance of secure API consumption, reinforcing the indispensable role of robust API gateways in modern distributed architectures.
Finally, we ventured into advanced concepts, focusing on optimizing performance with asyncio, ensuring data persistence with SQLAlchemy, and fortifying systems with resilient error handling and comprehensive logging. The transformative potential of AI in predicting outcomes and optimizing target settings underscored Python's position at the forefront of intelligent system development, with platforms like APIPark serving as the critical infrastructure for making AI models accessible and manageable.
Python's expansive ecosystem, coupled with its clear syntax and strong community support, makes it an unparalleled choice for any developer or organization looking to "make a target." Whether your target is a simple game element, a demanding business metric, or a sophisticated AI-driven objective, Python provides the complete guide and the powerful tools to not only define these targets but to empower you to reach them effectively and intelligently. The future of target-driven systems is undoubtedly intertwined with the continued evolution of Python, offering limitless possibilities for innovation and achievement.
Frequently Asked Questions (FAQ)
Q1: What exactly does "making a target with Python" mean, as covered in this guide? A1: In this comprehensive guide, "making a target with Python" is interpreted broadly across several dimensions. It encompasses creating: * Graphical targets: Like a bullseye in a game using libraries such as Tkinter or Pygame. * Data-driven targets: Defining and tracking numerical goals (e.g., sales quotas, performance metrics) using libraries like Pandas, NumPy, Matplotlib, and SQLAlchemy. * Interactive targets: Elements in web applications (built with Flask or Django) that users interact with to achieve a goal, or dashboards that display progress towards targets. * System targets: Monitoring specific metrics from external services, often accessed via APIs, with Python scripts, and even leveraging AI for predictive targets.
Q2: How do API gateways, like APIPark, fit into making a target with Python? A2: API gateways are crucial when your Python application needs to interact with external services or internal microservices to fetch data, trigger actions, or invoke AI models, all of which can be integral to tracking or achieving a "target." An API gateway acts as a single entry point, handling tasks like authentication, rate limiting, traffic management, and logging for multiple APIs. This simplifies your Python application's code, enhances security, and improves the reliability and scalability of your target system. APIPark, specifically as an Open Source AI Gateway & API Management Platform, further specializes in integrating and managing diverse AI models and provides unified API formats, significantly simplifying how Python applications can leverage AI for advanced target systems.
Q3: What Python libraries are most essential for creating interactive graphical targets? A3: For creating interactive graphical targets, two prominent Python libraries are highly recommended: * Tkinter: This is Python's standard GUI library, suitable for simpler desktop applications and basic interactive elements. It's great for drawing shapes on a canvas and handling mouse events. * Pygame: This library is a powerful choice for 2D game development. It offers more robust features for dynamic animations, sprite management, and real-time interaction, making it ideal for moving targets or game-like scenarios.
Q4: How can Python help in monitoring real-time data against a target and sending alerts? A4: Python is excellent for real-time data monitoring. You can use: * The requests library to fetch data from APIs (potentially through an API gateway) at regular intervals. * Libraries like asyncio with aiohttp for efficient concurrent fetching from multiple sources. * Standard conditional logic to compare fetched data against predefined targets or thresholds. * Python's built-in smtplib for email alerts, or integrate with third-party APIs (like Twilio for SMS, Slack for messages) to send notifications when a target is breached or achieved. The logging module is also crucial for tracking events and errors.
Q5: What role does AI play in advanced Python target systems, and how can APIPark facilitate this? A5: AI can significantly enhance target systems by transforming them from reactive to proactive. Python, with libraries like scikit-learn, TensorFlow, or PyTorch, can be used to: * Predict optimal target values based on historical data. * Detect anomalies that indicate impending target breaches. * Suggest optimizations to achieve targets more efficiently. When these AI models are deployed as services, Python applications can invoke them via API calls. APIPark serves as a specialized AI gateway that simplifies this process by providing a unified API format for over 100 AI models, managing their lifecycle, and encapsulating prompts into standard REST APIs. This makes it easier for your Python application to seamlessly integrate and leverage advanced AI capabilities for smarter, more dynamic target management.
🚀You can securely and efficiently call the OpenAI API on APIPark in just two steps:
Step 1: Deploy the APIPark AI gateway in 5 minutes.
APIPark is developed based on Golang, offering strong product performance and low development and maintenance costs. You can deploy APIPark with a single command line.
curl -sSO https://download.apipark.com/install/quick-start.sh; bash quick-start.sh

In my experience, you can see the successful deployment interface within 5 to 10 minutes. Then, you can log in to APIPark using your account.

Step 2: Call the OpenAI API.