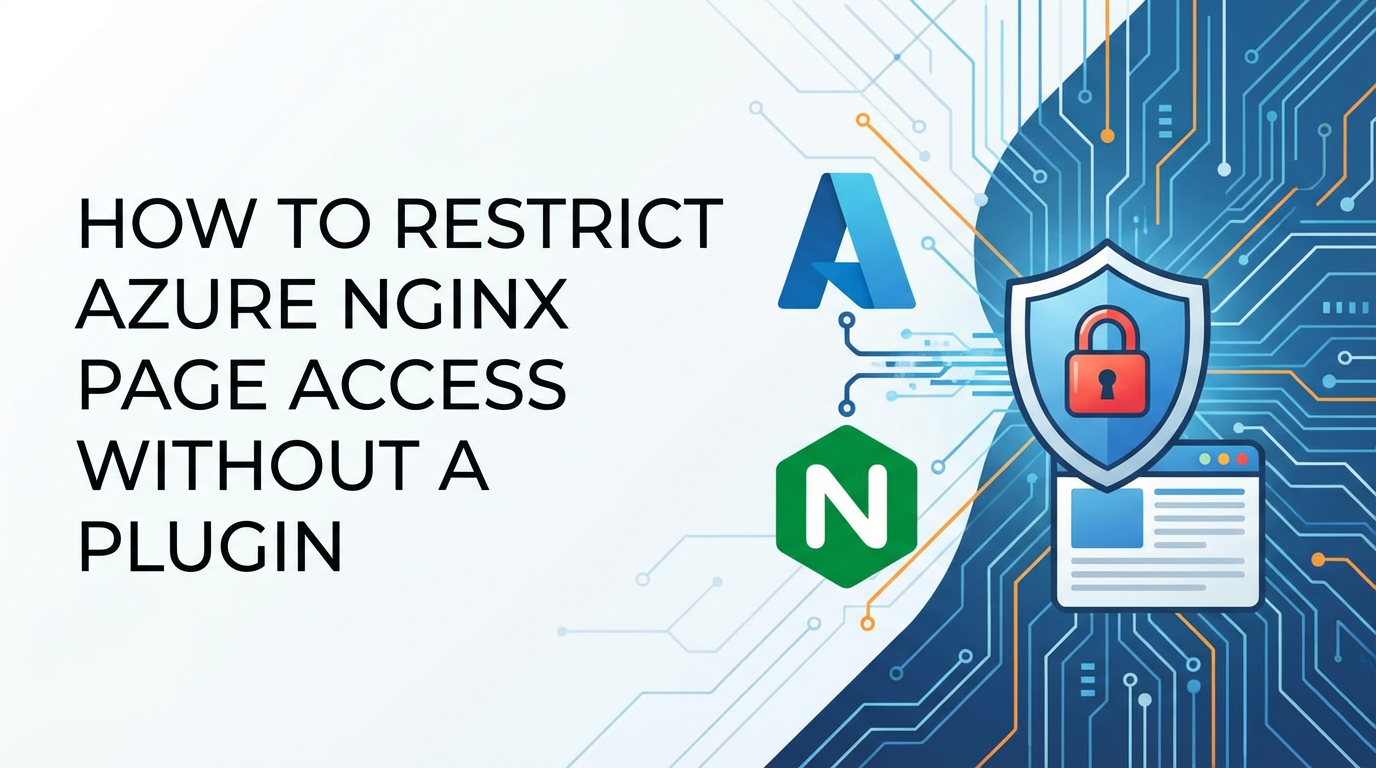
How to Restrict Azure Nginx Page Access Without a Plugin


In the intricate landscape of modern web infrastructure, safeguarding critical applications and sensitive data is paramount. As organizations increasingly leverage cloud platforms like Microsoft Azure for hosting their services, and Nginx continues to serve as a ubiquitous web server and reverse proxy, the need for robust access control mechanisms becomes undeniable. While numerous third-party Nginx plugins exist to enhance security, many enterprises and developers prefer to harness Nginx's powerful native capabilities, often complemented by Azure's inherent security features, to achieve granular page access restrictions. This approach not only minimizes dependencies and potential attack vectors associated with external modules but also offers a deeper understanding and control over the security posture.
This comprehensive guide delves into the methodologies for restricting access to Nginx-served pages specifically within an Azure environment, entirely bypassing the need for additional plugins. We will explore Nginx's built-in directives for IP-based filtering, HTTP basic authentication, and more sophisticated token-based checks. Furthermore, we will integrate these Nginx-level controls with Azure's robust networking and security services, such as Network Security Groups (NSGs) and Application Gateways, to forge a multi-layered defense strategy. Our aim is to equip system administrators, DevOps engineers, and security professionals with the knowledge and practical steps required to implement secure, efficient, and maintainable access restrictions, ensuring that only authorized entities can reach designated web resources hosted on Azure Nginx instances. This detailed exploration will empower you to build a resilient and secure web presence without complicating your stack with unnecessary external components, focusing instead on the powerful, inherent capabilities at your disposal.
Understanding the Azure Nginx Environment: A Foundation for Security
Before diving into the specifics of access restriction, it's crucial to grasp the context of Nginx deployment within the Microsoft Azure ecosystem. Nginx, renowned for its high performance, stability, rich feature set, and low resource consumption, is a popular choice for serving web content, reverse proxying applications, load balancing traffic, and acting as an API gateway. Its flexibility allows it to be deployed in various Azure contexts, each presenting unique considerations for access control.
Typically, Nginx might be running on an Azure Virtual Machine (VM), either directly installed on a Linux distribution or containerized within Docker and orchestrated by Azure Kubernetes Service (AKS) or Azure Container Instances (ACI). In more advanced setups, it could be part of an Azure App Service with custom Nginx configurations, or even an internal component within a larger microservices architecture. Regardless of the deployment model, the fundamental role of Nginx remains consistent: to efficiently handle incoming requests and serve the appropriate content or forward requests to backend services.
The decision to restrict access to certain Nginx-served pages or API endpoints is driven by a multitude of factors, primarily centered around security, compliance, and operational integrity. Unauthorized access to administrative interfaces, sensitive data reports, internal APIs, or even specific static content can lead to data breaches, service disruptions, or regulatory non-compliance. For instance, an internal dashboard that displays real-time system metrics should only be accessible to operations teams, or an API endpoint used for processing customer payments must be tightly secured against external exploitation. Without proper access controls, these resources become vulnerable targets, potentially compromising the entire application stack and the business operations it supports. Therefore, implementing stringent and effective access restrictions directly contributes to maintaining data confidentiality, integrity, and availability, reinforcing the overall security posture of your Azure-hosted applications. This foundational understanding sets the stage for exploring the specific Nginx and Azure mechanisms that enable such critical safeguards.
Core Nginx Mechanisms for Access Restriction
Nginx provides a powerful and flexible set of directives that allow administrators to control access to resources at various levels, from entire servers to specific locations. These native capabilities are often sufficient for implementing robust access restrictions without needing external plugins, offering a lean and efficient security layer. Let's delve into the primary mechanisms Nginx offers.
1. IP Address-Based Restriction (allow / deny Directives)
One of the most straightforward and fundamental methods for restricting access in Nginx is based on the client's IP address. The allow and deny directives enable you to whitelist or blacklist specific IP addresses or IP ranges. This is particularly effective when you have a known set of trusted IP addresses (e.g., your corporate network, VPN endpoints, or specific Azure services) from which access should be permitted.
How it Works: The allow directive specifies IP addresses or CIDR blocks that are permitted to access a given resource, while the deny directive explicitly blocks them. When both are used, Nginx processes them in the order they appear in the configuration file. The last matching rule typically takes precedence. However, a common best practice is to define allow rules for permitted IPs and then a final deny all; to block everything else.
Granularity and Configuration Examples: These directives can be placed within http, server, or location blocks, allowing for very granular control: * http block: Applies to all servers defined within the Nginx configuration. Less common for specific page access, but useful for broad network policies. * server block: Applies to all locations within a specific virtual host (server). Useful for restricting an entire application. * location block: The most common and powerful placement, allowing you to restrict access to specific URLs, paths, or file types.
Example 1: Restricting an Entire Virtual Host to a Specific IP Range
server {
    listen 80;
    server_name internal-app.yourdomain.com;

    # Allow access only from IPs within your corporate network (e.g., 192.168.1.0/24)
    # and a specific administrative IP.
    allow 192.168.1.0/24;
    allow 203.0.113.42; # Your admin workstation IP
    deny all;          # Deny all other IP addresses

    root /var/www/internal_app;
    index index.html index.htm;

    location / {
        try_files $uri $uri/ =404;
    }

    # You can add more specific location blocks here if needed
}
In this example, only requests originating from 192.168.1.0/24 or the specific IP 203.0.113.42 will be served by internal-app.yourdomain.com. All other requests will receive a 403 Forbidden error.
Example 2: Restricting a Specific Admin Page
server {
    listen 80;
    server_name yourwebsite.com;

    root /var/www/html;
    index index.html;

    location / {
        # General access allowed for the main site
        try_files $uri $uri/ =404;
    }

    location /admin_panel/ {
        # Restrict access to /admin_panel/ and its sub-paths
        allow 192.168.1.0/24;
        allow 203.0.113.42;
        deny all;

        # Add specific configurations for the admin panel here
        # For instance, if it's a PHP application:
        # include snippets/fastcgi-php.conf;
        # fastcgi_pass unix:/var/run/php/php8.1-fpm.sock;
    }

    location ~ \.php$ {
        # General PHP processing, possibly with different access rules
        # include snippets/fastcgi-php.conf;
        # fastcgi_pass unix:/var/run/php/php8.1-fpm.sock;
    }
}
Here, the main site is publicly accessible, but the /admin_panel/ directory is restricted to specific IPs. This demonstrates granular control over sensitive sections of a website.
Pros and Cons: * Pros: * Simplicity: Very easy to configure and understand. * Effectiveness: Highly effective for known, static IP sets. * Performance: Nginx processes these rules very quickly, with minimal overhead. * Early Blocking: Access can be denied at a very early stage of the request processing. * Cons: * Static Nature: Not suitable for users with dynamic IP addresses (e.g., mobile users, remote workers without VPN). * Limited User Management: Doesn't support individual user authentication or roles. * Spoofing Concerns: While the immediate client IP is usually reliable, more sophisticated attackers might attempt IP spoofing (though harder at the network layer directly facing Nginx). * Scalability for Large Whitelists: Managing extremely long lists of individual IPs can become cumbersome.
Integration with Azure: When Nginx runs in Azure, it's often behind an Azure Load Balancer, Application Gateway, or API Management service. These services act as proxies, meaning the direct client IP seen by Nginx might be the IP of the proxy itself, not the original client. To correctly identify the client's IP for allow/deny rules, Nginx needs to be configured to read the X-Forwarded-For header, which proxies typically populate with the original client's IP.
http {
    # ... other http configurations ...

    # Set real IP from X-Forwarded-For header if behind a trusted proxy
    set_real_ip_from 10.0.0.0/8;    # Example: Azure VNet IP range for internal proxies
    set_real_ip_from 172.16.0.0/12; # Another common internal range
    set_real_ip_from 192.168.0.0/16; # Another common internal range
    real_ip_header X-Forwarded-For;
    real_ip_recursive on;

    # ... server blocks ...
}
By configuring set_real_ip_from for the IP ranges of your Azure Load Balancer, Application Gateway, or other trusted proxies, Nginx will correctly use the IP address from X-Forwarded-For for its allow/deny directives, ensuring accurate access control based on the actual client. The real_ip_recursive on; directive ensures Nginx processes multiple X-Forwarded-For entries if there are multiple proxies.
2. HTTP Basic Authentication (auth_basic / auth_basic_user_file)
For scenarios requiring individual user or group authentication, HTTP Basic Authentication offers a simple yet effective solution. This method prompts users for a username and password before granting access to protected resources.
How it Works: When a user tries to access a resource protected by HTTP Basic Auth, Nginx sends a WWW-Authenticate header to the browser. The browser then displays a login dialog. The user enters credentials, which are base64-encoded and sent back to Nginx in the Authorization header. Nginx verifies these credentials against a password file (typically created with htpasswd).
Steps: 1. Generate Password File: Use the htpasswd utility (part of the Apache utilities, often available on Linux systems) to create a password file. ```bash # Install htpasswd if not already present (e.g., on Debian/Ubuntu) sudo apt update sudo apt install apache2-utils
# Create the first user and file
sudo htpasswd -c /etc/nginx/.htpasswd_admin adminuser

# Add additional users to the existing file (without -c)
sudo htpasswd /etc/nginx/.htpasswd_admin anotheruser
```
This creates or updates a file like `/etc/nginx/.htpasswd_admin` containing `username:hashed_password` entries. Ensure this file is readable by the Nginx user but not world-readable for security.
- Configure Nginx: Use the
auth_basicandauth_basic_user_filedirectives within your Nginx configuration.
Configuration Examples:
Example 1: Protecting an Entire Server Block
server {
    listen 80;
    server_name secure-app.yourdomain.com;

    # Require basic authentication for all requests to this server
    auth_basic "Restricted Access"; # Message displayed in the login prompt
    auth_basic_user_file /etc/nginx/.htpasswd_admin; # Path to your htpasswd file

    root /var/www/secure_app;
    index index.html index.htm;

    location / {
        try_files $uri $uri/ =404;
    }
}
Example 2: Protecting a Specific Location
server {
    listen 80;
    server_name yourwebsite.com;

    root /var/www/html;
    index index.html;

    location / {
        # Publicly accessible content
        try_files $uri $uri/ =404;
    }

    location /secret_data/ {
        # Protect specific directory
        auth_basic "Private Data";
        auth_basic_user_file /etc/nginx/.htpasswd_users; # A different password file

        # You can combine with IP restrictions for an extra layer
        # allow 192.168.1.0/24;
        # deny all;

        try_files $uri $uri/ =404;
    }
}
Security Considerations: * HTTPS is Crucial: Basic authentication transmits credentials encoded in Base64, which is trivial to decode. Never use HTTP Basic Authentication over unencrypted HTTP. Always ensure your Nginx server is configured with SSL/TLS (HTTPS) for any protected resources to prevent credentials from being intercepted in plain text. In Azure, this typically involves using Azure Key Vault for certificates and configuring Nginx with ssl_certificate and ssl_certificate_key directives, or offloading SSL to an Azure Application Gateway. * No Central User Management: htpasswd files are local to the Nginx server. Managing users across multiple Nginx instances can become cumbersome. This is not a centralized identity management solution. * Brute-Force Attacks: Basic authentication is susceptible to brute-force attacks if not adequately protected by other means (e.g., rate limiting in Nginx or WAF policies in Azure Application Gateway).
Pros and Cons: * Pros: * Simple User-Based Access: Easy to set up for a small number of users. * Native Nginx Feature: No external modules required. * Browser Support: Universally supported by web browsers. * Cons: * Security Risk (Without HTTPS): Highly insecure if not used with SSL/TLS. * No Central User Management: Difficult to scale for many users or multiple servers. * Limited Features: No lockout mechanisms, password expiry, or role-based access control. * User Experience: Browser-native dialogs are not customizable.
Nginx Authentication in Azure: When deploying Nginx on an Azure VM, the htpasswd file should be secured with appropriate file system permissions. For containerized Nginx (e.g., AKS, ACI), the .htpasswd file can be injected as a Kubernetes Secret or mounted as a configuration file, ensuring it's not baked directly into the image. If using Azure App Service with Nginx, you might need to find ways to persist this file or embed it in the deployment script.
3. Token-Based / Header-Based Authentication (using map and if directives)
For more flexible and custom authentication schemes, Nginx can inspect request headers for specific tokens or API keys. This method is particularly useful for securing API endpoints where clients might be other applications or services rather than human users interacting through a browser.
How it Works: Nginx can be configured to check for the presence and validity of a specific header (e.g., X-API-Key, Authorization: Bearer <token>). If the header is missing or its value doesn't match a predefined token, Nginx can deny access. This approach often involves the map directive for dynamic value lookups and if (used with caution) or return directives for conditional access control.
Example Scenario: API Key Authentication
Let's say you want to protect an API endpoint /api/v1/data and require a valid X-API-Key header.
http {
    # Define a map for allowed API keys.
    # The 'default' value in the map will be used if the header is not found
    # or if the key is not in the map.
    map $http_x_api_key $api_key_valid {
        "your-secret-api-key-12345" 1;
        "another-valid-key-67890"   1;
        default                     0; # Default to invalid
    }

    server {
        listen 80; # For demonstration, but HTTPS is mandatory for real APIs
        server_name api.yourdomain.com;

        location /api/v1/data {
            # Check if the API key is valid based on the map
            if ($api_key_valid = 0) {
                return 403 "Invalid API Key"; # Deny access with a specific message
            }

            # If the API key is valid, proxy the request to your backend service
            proxy_pass http://backend_service;
            proxy_set_header Host $host;
            proxy_set_header X-Real-IP $remote_addr;
            proxy_set_header X-Forwarded-For $proxy_add_x_forwarded_for;
            # ... other proxy configurations ...
        }

        location / {
            # Other parts of the site or API are publicly accessible or protected differently
            return 200 "Welcome to the API!";
        }
    }
}
Explanation: 1. map $http_x_api_key $api_key_valid { ... }: This directive defines a mapping from the value of the X-API-Key header ($http_x_api_key) to a new variable $api_key_valid. If the header value matches your-secret-api-key-12345 or another-valid-key-67890, $api_key_valid is set to 1. Otherwise, it defaults to 0. 2. if ($api_key_valid = 0) { return 403 "Invalid API Key"; }: Inside the /api/v1/data location block, an if statement checks the value of $api_key_valid. If it's 0 (meaning an invalid or missing API key), Nginx immediately returns a 403 Forbidden status with a custom message. 3. proxy_pass http://backend_service;: If the key is valid, the request is proxied to the actual backend service.
Important Note on if Directive: While the if directive is used here for a straightforward conditional check and return, Nginx's if directive can be problematic in other contexts, especially when combined with rewrite rules or other complex logic, as it can lead to unexpected behavior. For simple return statements based on a condition, it's generally acceptable. For more complex logic, consider using a combination of map and error_page or other Nginx modules if available (though this article focuses on no plugins). In more complex API gateway scenarios, a dedicated solution like APIPark would provide robust token validation, JWT authentication, and advanced policy management with significantly less configuration effort and greater scalability than Nginx's native map/if approach alone.
Pros and Cons: * Pros: * Flexibility: Highly customizable to various token formats (API keys, simple bearer tokens). * Integrates with External Systems: Can be used in conjunction with tokens generated by an external authentication service. * No User Interface: Ideal for machine-to-machine communication. * Cons: * Complexity: More complex to configure than IP-based or basic authentication. * Manual Key Management: If keys are hardcoded in the Nginx config, managing many keys or rotating them frequently becomes challenging. * Security Risk (Without HTTPS): Similar to basic auth, tokens in headers must be transmitted over HTTPS to prevent interception. * Limited Built-in Logic: Nginx is not an Identity Provider; it simply checks for token presence/value. It doesn't handle token generation, expiry, or revocation inherently.
4. Referer-Based Restriction (valid_referers)
The Referer HTTP header (note the misspelling in the standard) indicates the URL of the page that linked to the current request. Nginx can use this header to restrict access, primarily to prevent "hotlinking" (where other sites embed your images or files directly) or to ensure requests originate from specific domains.
How it Works: The valid_referers directive checks the Referer header against a list of allowed sources. If the Referer header doesn't match an allowed source (or is missing if none is not specified), the $invalid_referer variable is set to 1, which can then be used with an if block to deny access.
Use Cases: * Preventing Hotlinking: Ensure images, videos, or other media files are only loaded when requested from your own website. * Restricting Embedded Content: Allow embedding of content only on specific partner sites. * Basic Security Layer: As a supplementary check, not a primary security mechanism.
Configuration Example:
server {
    listen 80;
    server_name yourwebsite.com;

    root /var/www/html;

    location /images/ {
        # Allow requests for images if the referer is from yourwebsite.com,
        # or if the referer is empty (e.g., direct access, or first request).
        valid_referers none blocked server_names *.yourwebsite.com;

        # If the referer is invalid, return a 403 Forbidden.
        if ($invalid_referer) {
            return 403;
        }

        # Otherwise, serve the image
        # You might also want to serve a placeholder image instead:
        # rewrite ^ /images/hotlink-placeholder.jpg break;
        # return 403; # Or just deny as above
    }

    location / {
        try_files $uri $uri/ =404;
    }
}
Explanation: * valid_referers none blocked server_names *.yourwebsite.com;: * none: Allows requests where the Referer header is empty (e.g., directly typed URLs, some private browsing modes). * blocked: Allows requests where the Referer header is malformed or blocked by a firewall/proxy. * server_names: Allows requests where the Referer matches the server_name of the current server block. * *.yourwebsite.com: Allows requests from any subdomain of yourwebsite.com. * if ($invalid_referer) { return 403; }: If the Referer doesn't match any of the allowed patterns, Nginx denies access.
Limitations: * Easily Spoofed: The Referer header can be easily manipulated or faked by malicious users or bots. Therefore, it should never be relied upon as a primary security control. * Privacy Concerns: Some users or browsers might disable sending Referer headers for privacy reasons, which could inadvertently block legitimate users if none is not included in valid_referers. * Browser Behavior: Different browsers and extensions might handle the Referer header differently, leading to inconsistent behavior.
Conclusion on Nginx Native Mechanisms: These native Nginx features provide a powerful toolkit for access restriction. IP-based controls offer simple, high-performance network-level filtering, ideal for internal or known-source traffic. HTTP Basic Auth provides a quick, user-friendly login for smaller groups, critically requiring HTTPS. Token-based authentication, while more complex, offers flexibility for API security. Referer-based restriction is best used as a supplementary defense against specific threats like hotlinking. The key to effective security lies in understanding their strengths and weaknesses and strategically combining them.
Integrating Azure Security Features with Nginx Restrictions
While Nginx provides powerful native capabilities for access control, deploying Nginx in Azure allows for an even more robust, multi-layered security posture by integrating with Azure's comprehensive networking and security services. These Azure-level controls act as upstream gates, filtering traffic before it even reaches your Nginx instance, complementing Nginx's internal rules.
1. Azure Network Security Groups (NSGs)
Azure Network Security Groups (NSGs) are a fundamental component of Azure's network security strategy. They provide a foundational layer of network access control, allowing or denying inbound and outbound traffic to network interfaces (NICs) or subnets within an Azure Virtual Network (VNet). NSGs operate at Layer 4 (Transport layer) of the OSI model, controlling traffic based on source/destination IP address, port, and protocol.
How NSGs Complement Nginx Rules: NSGs act as a "first line of defense," filtering traffic at the network boundary before it reaches your Nginx VM or container. This means that even if an attacker manages to bypass Nginx's own rules, the traffic might still be blocked by an NSG. * Pre-filtering: NSGs can block malicious or unauthorized traffic entirely from reaching your Nginx instance, reducing the load on Nginx and preventing it from even processing unwanted requests. For example, if your Nginx instance serves an internal application, you can configure an NSG to only allow traffic from your corporate VPN gateway's IP range or other internal Azure subnets, effectively isolating it from the public internet. * Protection Against Nginx Vulnerabilities: Should Nginx itself have a vulnerability that allows for bypassing internal access controls, a restrictive NSG would still prevent external attackers from exploiting it if their IP is not whitelisted at the network level. * Defense in Depth: Combining NSGs with Nginx's allow/deny directives creates a robust defense-in-depth strategy. An IP might be allowed by an NSG but denied by Nginx for a specific path, or vice-versa.
Applying NSGs to Nginx VMs or Subnets: * VM-Level NSGs: You can associate an NSG directly with the network interface of your Nginx VM. This applies rules specifically to that VM. * Subnet-Level NSGs: More commonly, NSGs are associated with the subnet where your Nginx VMs or containers reside. This applies the rules to all resources within that subnet. Subnet-level NSGs are generally preferred for better management and consistent policy application across multiple resources.
Example NSG Rules for Nginx:
Consider an Nginx server on an Azure VM that needs to: * Allow HTTP (port 80) and HTTPS (port 443) traffic from anywhere (for public websites). * Allow SSH (port 22) from your administrative workstation's public IP only. * Allow an internal API endpoint on port 8080 only from a specific internal application subnet.
| Priority | Name | Port | Protocol | Source | Destination | Action |
|---|---|---|---|---|---|---|
| 100 | Allow_SSH_Admin | 22 | TCP | YourAdminPublicIP | Any | Allow |
| 110 | Allow_HTTPS | 443 | TCP | Any | Any | Allow |
| 120 | Allow_HTTP | 80 | TCP | Any | Any | Allow |
| 130 | Allow_InternalAPI | 8080 | TCP | AppSubnet_CIDR | Any | Allow |
| 65000 | Deny_All_Inbound | Any | Any | Any | Any | Deny |
Note: Azure's default NSGs often have DenyAll rules at lower priorities (higher numbers), so explicit Allow rules must have lower priority numbers.
This table illustrates how NSGs can segment network access, ensuring that even if Nginx is configured to serve content on port 8080, only traffic from AppSubnet_CIDR can reach it, regardless of Nginx's internal rules. This significantly enhances security.
2. Azure Application Gateway / Load Balancer
Azure offers several services to manage and distribute incoming network traffic to your Nginx instances, with Application Gateway and Load Balancer being prominent examples. These services sit in front of your Nginx servers and provide additional layers of security and functionality.
- Azure Load Balancer: This is a Layer 4 (TCP/UDP) load balancer that distributes incoming traffic across healthy backend instances. While it doesn't provide application-level security, it's crucial for high availability and scalability. For Nginx access rules, the Load Balancer preserves the client's source IP address by default for TCP connections, which simplifies Nginx's
allow/denyconfigurations. However, if using Source Network Address Translation (SNAT) or certain health probe configurations, the client IP might be masked, requiring theX-Forwarded-Forhandling in Nginx as discussed earlier. - Azure Application Gateway: This is a Layer 7 (HTTP/HTTPS) load balancer that provides more advanced features, including:
- SSL/TLS Termination: Application Gateway can offload SSL/TLS encryption and decryption, allowing your Nginx servers to handle unencrypted (and thus less CPU-intensive) traffic internally. This simplifies certificate management on your Nginx instances.
- Web Application Firewall (WAF): A critical security feature, Application Gateway's WAF protects your Nginx applications from common web vulnerabilities and exploits (e.g., SQL injection, cross-site scripting) based on OWASP Core Rule Set. This provides a robust, pre-Nginx security layer that Nginx itself would not natively offer without plugins.
- URL-Based Routing: Can route traffic to different backend pools based on the URL path, allowing you to direct specific requests to different Nginx instances or services.
- Rewrites and Redirects: Can perform URL rewrites and redirects before traffic reaches Nginx.
Role in Nginx Access Restrictions: * IP Identification: When Application Gateway is used, it typically forwards the original client IP in the X-Forwarded-For header. Your Nginx configuration must correctly parse this header using set_real_ip_from and real_ip_header to apply IP-based restrictions accurately. * WAF as a Pre-Nginx Filter: The WAF layer significantly reduces the amount of malicious traffic reaching Nginx, acting as an intelligent filter against common attack patterns. This offloads a substantial security burden from Nginx. * Centralized SSL: By offloading SSL to Application Gateway, Nginx's basic authentication becomes more secure without requiring individual certificate management on each Nginx instance.
3. Azure Private Link / Private Endpoints
For internal-facing Nginx instances that should never be exposed to the public internet, Azure Private Link and Private Endpoints offer a highly secure solution. Private Link enables you to access Azure PaaS services (like Azure Storage, Azure SQL Database) and customer-owned/partner services (like your Nginx instances) over a private endpoint in your virtual network.
How it Works: A Private Endpoint is a network interface that connects you privately and securely to a service powered by Azure Private Link. The private endpoint uses a private IP address from your VNet, effectively bringing the service into your VNet.
Securing Nginx Access with Private Link: If your Nginx instance is deployed in a subnet and is meant to serve only internal applications or APIs, you can expose it via an Azure Private Link service. Other services or applications within your Azure VNet or peered VNets can then access your Nginx through its private endpoint, bypassing the public internet entirely. * Enhanced Isolation: This ensures that your Nginx traffic never traverses the public internet, drastically reducing the attack surface. * Simplified IP Whitelisting: With Private Link, Nginx's allow directives can focus solely on internal Azure VNet IP ranges, as external access is fundamentally prevented at the network level. * Secure Inter-Service Communication: Ideal for microservices architectures where one service (e.g., an internal API gateway running Nginx) needs to securely communicate with another, without public exposure.
By strategically combining Nginx's native access control directives with Azure's robust networking and security services, you can architect a resilient, multi-layered defense. NSGs provide network-level filtering, Application Gateway adds WAF capabilities and SSL offloading, and Private Link ensures private, secure access for internal workloads. This synergistic approach maximizes security while simplifying Nginx configurations, all without resorting to third-party Nginx plugins.
Advanced Scenarios and Best Practices
Securing Nginx access within Azure goes beyond initial configuration; it involves considering advanced scenarios, adopting best practices for automation, monitoring, and continuous improvement. These elements are crucial for maintaining a robust and scalable security posture.
1. Combining Multiple Restriction Methods: Layered Security
The most effective security strategy is often a layered one, where multiple controls are implemented to protect the same resource. No single mechanism is foolproof, but combining them significantly increases the effort and complexity for an attacker.
Examples of Layered Security for Nginx in Azure: * NSG + IP-Based Nginx Rules: * Azure NSG: Restricts inbound traffic to the Nginx VM's subnet to only allow requests from specific trusted public IP ranges (e.g., your corporate office VPN) and internal Azure VNet subnets. * Nginx allow/deny: Further refines access within Nginx. For instance, the NSG might allow all traffic from your VPN range, but Nginx might deny access to a specific /debug endpoint for all but a single admin workstation IP within that VPN range. * Application Gateway WAF + HTTP Basic Auth: * Azure Application Gateway WAF: Provides protection against common web attacks (SQL injection, XSS) before traffic reaches Nginx. It also handles SSL termination. * Nginx HTTP Basic Authentication: Once traffic passes the WAF and SSL is offloaded, Nginx prompts for username/password, adding an authentication layer for legitimate users. This makes basic auth safer as credentials are encrypted from the client to the WAF. * Private Link + Token-Based Nginx Auth: * Azure Private Link: Ensures the Nginx API gateway is accessible only via a private endpoint within your VNet, preventing public exposure. * Nginx Token Validation: For internal services consuming the API, Nginx validates an X-API-Key or Authorization header to ensure only authorized internal services can call specific endpoints.
This layered approach ensures that even if one security control is bypassed or misconfigured, others are still in place to prevent unauthorized access, embodying the principle of "defense in depth."
2. Automating Nginx Configuration in Azure: Infrastructure as Code (IaC)
Manual configuration of Nginx and Azure resources is prone to errors and becomes unsustainable at scale. Adopting automation through Infrastructure as Code (IaC) is a best practice for consistency, repeatability, and version control.
- Azure Automation and Custom Script Extensions for VMs: For Nginx instances running on Azure VMs, you can use Azure Automation to deploy and configure Nginx. Custom Script Extensions allow you to execute scripts on Azure VMs during deployment or post-deployment, automating Nginx installation, configuration file placement (including access rules), and service restarts.
- CI/CD Pipelines for Container Deployments: If Nginx is containerized (e.g., in Docker, deployed to AKS or ACI), CI/CD pipelines (Azure DevOps, GitHub Actions, GitLab CI) are ideal. Nginx configuration files (like
nginx.confand included.confsnippets with access rules) are part of your application repository. The pipeline builds the Docker image, pushes it to Azure Container Registry (ACR), and then deploys it to AKS, ensuring that any changes to access rules are version-controlled and deployed consistently. - Infrastructure as Code (IaC) with ARM Templates, Bicep, or Terraform:
- ARM Templates/Bicep: Azure's native IaC tools. You can define your entire Azure infrastructure (VMs, VNets, NSGs, Application Gateways) and even custom script extensions for VM setup in declarative templates. This ensures that your Nginx environment and its surrounding Azure security configurations are deployed identically every time.
- Terraform: A cloud-agnostic IaC tool that supports Azure. Similar to ARM/Bicep, Terraform can provision and manage all your Azure resources, including NSGs and VM configurations for Nginx.
Automating these configurations ensures that security policies are consistently applied, reduce human error, and facilitate rapid deployments and updates.
3. Monitoring and Logging: The Eyes and Ears of Security
Effective monitoring and logging are indispensable for detecting unauthorized access attempts, identifying potential breaches, and troubleshooting issues related to access restrictions.
- Nginx Access Logs: Nginx meticulously records every incoming request in its access logs (typically
/var/log/nginx/access.log). These logs contain crucial information such as client IP, request method, URL, status code, user agent, andRefererheader. By analyzing these logs, you can spot patterns of suspicious activity (e.g., repeated 403 Forbidden errors from unknown IPs, unusual access patterns to protected pages). - Integrating Nginx Logs with Azure Monitor/Log Analytics:
- Azure Log Analytics: A service within Azure Monitor that collects and aggregates logs from various sources, including VMs. You can configure the Log Analytics agent on your Nginx VMs to stream Nginx access and error logs to a Log Analytics Workspace.
- Kusto Query Language (KQL): Once logs are in Log Analytics, you can use KQL to write powerful queries to analyze security events.
- Example: Find all 403 Forbidden errors from a specific IP:
AzureDiagnostics | where ResourceProvider == "MICROSOFT.COMPUTE" | where Category == "Linuxsyslog" | where TimeGenerated > ago(1h) | where RawData contains "nginx" and RawData contains "403" and RawData contains "1.2.3.4"(adjusting for actual Nginx log structure in Log Analytics).
- Example: Find all 403 Forbidden errors from a specific IP:
- Setting Up Alerts for Security Events: Configure Azure Monitor alerts based on KQL queries in Log Analytics. For instance, an alert can be triggered if:
- A high volume of 401 (Unauthorized) or 403 (Forbidden) errors occur within a short period from a single source.
- Attempts are made to access sensitive paths from unexpected IPs.
- Specific
X-API-Keyfailures are detected. These alerts can notify administrators via email, SMS, or integrate with incident management systems, enabling rapid response to potential security incidents.
4. HTTPS Everywhere: Non-Negotiable Security
The importance of HTTPS (SSL/TLS) cannot be overstated, especially when implementing access restrictions that involve any form of authentication (HTTP Basic Auth, token-based). * Data Encryption: HTTPS encrypts all communication between the client and Nginx, protecting sensitive information like credentials, API keys, and private data from eavesdropping during transmission. * Integrity: HTTPS ensures that data exchanged between the client and server has not been tampered with in transit. * Authentication: HTTPS verifies the identity of the server, preventing man-in-the-middle attacks where an attacker might impersonate your Nginx server.
Implementation in Azure: * Azure Application Gateway/Front Door: Can terminate SSL/TLS at the edge, offloading the cryptographic burden from Nginx. Certificates can be managed securely in Azure Key Vault. * Nginx Direct SSL: Configure Nginx with ssl_certificate and ssl_certificate_key directives, using certificates from a trusted CA, ideally stored securely and retrieved by Nginx at startup. For Azure VMs, certificates can be mounted from Azure Key Vault or managed through services like certbot (for Let's Encrypt).
Any Nginx instance serving public or sensitive content should always enforce HTTPS, redirecting all HTTP traffic to HTTPS.
5. Regular Security Audits: Continuous Improvement
Security is not a one-time setup; it's an ongoing process. Regular security audits are crucial to identify vulnerabilities, ensure compliance, and adapt to new threats. * Review Nginx Configurations: Periodically review nginx.conf and included configuration files for unintended open access, outdated allow/deny rules, or misconfigurations. * Audit Azure Network Rules: Review NSG rules, Application Gateway WAF policies, and Private Link configurations to ensure they align with current security requirements and that no unnecessary ports or IP ranges are open. * Penetration Testing: Conduct simulated attacks (penetration tests) against your Azure Nginx environment to uncover weaknesses in your access control mechanisms. * Stay Updated: Keep Nginx and the underlying operating system patched and updated to protect against known vulnerabilities.
By embracing these advanced scenarios and best practices, organizations can build a resilient, secure, and manageable Nginx environment within Azure that effectively restricts page access without relying on external plugins. This holistic approach ensures that security is woven into the fabric of the infrastructure, rather than being an afterthought.
APIPark is a high-performance AI gateway that allows you to securely access the most comprehensive LLM APIs globally on the APIPark platform, including OpenAI, Anthropic, Mistral, Llama2, Google Gemini, and more.Try APIPark now! 👇👇👇
Dedicated API Management: When Nginx Alone Isn't Enough (APIPark Mention)
While Nginx excels at providing performant web serving and basic access control, its capabilities can be stretched thin when dealing with complex, evolving API ecosystems, especially those incorporating diverse AI models and microservices. For advanced scenarios requiring sophisticated API governance, extensive analytics, and streamlined developer experience, a dedicated API management platform becomes not just a convenience, but a necessity.
When your needs extend beyond simple IP whitelisting or basic authentication, to include things like advanced routing based on request parameters, rate limiting per consumer, quota management, robust API versioning, comprehensive developer portals, detailed API analytics, or the seamless integration and orchestration of numerous AI models, Nginx's native configuration can become overwhelmingly complex and difficult to maintain. Imagine trying to manage authentication for hundreds of different API keys, apply different rate limits to different user tiers, or provide a unified interface for invoking a variety of large language models (LLMs) with custom prompts—all purely through Nginx configuration files. This is where the limitations of a general-purpose web server become apparent, highlighting the need for specialized tools.
This is precisely where a solution like APIPark shines. APIPark is an open-source AI gateway and API management platform designed to streamline the integration, deployment, and governance of both AI and traditional REST services. While Nginx handles basic access control admirably, scaling, advanced routing, analytics, and lifecycle management for hundreds of APIs and AI models quickly become cumbersome. APIPark extends far beyond Nginx's native capabilities by offering:
- Unified AI Model Integration: Easily integrate and manage over 100 AI models with a consistent API format, simplifying AI invocation and reducing maintenance costs.
- End-to-End API Lifecycle Management: From design and publication to invocation, monitoring, and decommissioning, APIPark provides tools to manage the entire API lifecycle. This includes features like traffic forwarding, load balancing, and API versioning, which are significantly more granular and user-friendly than Nginx's raw directives.
- Advanced Security Policies: While Nginx offers basic auth, APIPark provides enterprise-grade API security features, including robust token validation, JWT support, granular access control policies, and subscription approval workflows, ensuring that callers must be approved before invoking APIs.
- Comprehensive Analytics and Monitoring: Beyond Nginx's raw access logs, APIPark offers powerful data analysis capabilities, displaying long-term trends, performance changes, and detailed call logs, enabling proactive maintenance and troubleshooting.
- Developer Portal: APIPark provides a centralized developer portal where API services can be easily discovered, subscribed to, and consumed by different teams, fostering internal collaboration and accelerating development.
- Multi-Tenancy: Allows for the creation of multiple teams or tenants, each with independent applications, data, user configurations, and security policies, while sharing underlying infrastructure, which is crucial for large organizations.
While Nginx remains an excellent choice for its core strengths, organizations facing the complexities of managing a growing number of APIs, especially those venturing into AI service integration, will find that a specialized API gateway and management platform like APIPark significantly enhances efficiency, security, and scalability. It allows Nginx to focus on what it does best (high-performance proxying) while offloading the intricate world of API governance to a platform built specifically for that purpose. This strategic choice empowers developers and operations personnel to manage their API landscape with greater agility and control, ensuring that their services are not only secure but also discoverable, usable, and performant.
Step-by-Step Implementation Guide: IP-Based Restriction on Azure VM
To solidify the concepts discussed, let's walk through a practical step-by-step example of implementing IP-based access restriction for an Nginx server running on an Azure Virtual Machine. This will involve setting up the Azure infrastructure and configuring Nginx.
Scenario: We want to deploy a simple Nginx web server on an Azure VM. The main website (/) should be publicly accessible, but a specific administrative path (/admin/) should only be accessible from a defined set of trusted IP addresses (e.g., your office IP or a specific Azure VM used for management).
Prerequisites: * An Azure subscription. * Azure CLI installed and configured, or access to Azure Portal. * Basic familiarity with Linux command line.
Table: IP-Based Access Restriction Steps
| Step | Task | Azure Component / Nginx Directive | Description |
|---|---|---|---|
| 1 | Provision Azure Virtual Machine | Azure VM, VNet, Subnet | Create a Linux VM (e.g., Ubuntu) in a new or existing Virtual Network and Subnet. |
| 2 | Configure Azure Network Security Group | NSG | Create an NSG. Allow inbound SSH (port 22) from your specific public IP and HTTP/HTTPS (ports 80/443) from any. |
| 3 | Install Nginx on the VM | Nginx package manager | SSH into the VM and install Nginx. |
| 4 | Identify Client IP Configuration | set_real_ip_from, real_ip_header |
Configure Nginx to correctly identify the real client IP if behind Azure Load Balancer/Application Gateway. |
| 5 | Modify Nginx Configuration for Access Control | location, allow, deny |
Edit nginx.conf (or a site-specific config) to restrict the /admin/ path to trusted IPs. |
| 6 | Test Access Restrictions | Browser / curl |
Verify public access to / and restricted access to /admin/ from allowed and denied IPs. |
| 7 | Implement HTTPS (Recommended) | Nginx ssl_certificate / App Gateway |
(Optional but highly recommended) Configure SSL/TLS for secure communication. |
Step 1: Provision Azure Virtual Machine
Using Azure CLI (you can also use the Portal):
# Define variables
RESOURCE_GROUP="NginxSecurityRG"
LOCATION="eastus"
VM_NAME="NginxWebVM"
VM_USERNAME="azureuser"
VM_IMAGE="UbuntuLTS"
VNET_NAME="NginxVNet"
SUBNET_NAME="NginxSubnet"
NSG_NAME="NginxVM_NSG"

# Create a resource group
az group create --name $RESOURCE_GROUP --location $LOCATION

# Create a virtual network and subnet
az network vnet create \
    --resource-group $RESOURCE_GROUP \
    --name $VNET_NAME \
    --address-prefix 10.0.0.0/16 \
    --subnet-name $SUBNET_NAME \
    --subnet-prefix 10.0.0.0/24

# Create a public IP address for the VM
az network public-ip create \
    --resource-group $RESOURCE_GROUP \
    --name ${VM_NAME}PublicIP \
    --allocation-method Static \
    --sku Standard

# Create the Nginx VM
az vm create \
    --resource-group $RESOURCE_GROUP \
    --name $VM_NAME \
    --image $VM_IMAGE \
    --admin-username $VM_USERNAME \
    --generate-ssh-keys \
    --vnet-name $VNET_NAME \
    --subnet $SUBNET_NAME \
    --public-ip-address ${VM_NAME}PublicIP \
    --nsg $NSG_NAME # Automatically creates and attaches NSG
Note: az vm create with --nsg will create a basic NSG. We will customize it in the next step.
Step 2: Configure Azure Network Security Group
Get your current public IP address (search "what is my ip" on Google or use curl ifconfig.me). Replace YOUR_PUBLIC_IP_ADDRESS with your actual public IP.
# Get the NSG ID
NSG_ID=$(az network nsg show --resource-group $RESOURCE_GROUP --name $NSG_NAME --query id -o tsv)

# Add inbound rule for SSH from your public IP
az network nsg rule create \
    --resource-group $RESOURCE_GROUP \
    --nsg-name $NSG_NAME \
    --name AllowSSHFromMyIP \
    --priority 100 \
    --direction Inbound \
    --access Allow \
    --protocol Tcp \
    --source-address-prefixes YOUR_PUBLIC_IP_ADDRESS \
    --source-port-ranges "*" \
    --destination-address-prefixes "*" \
    --destination-port-ranges 22

# Add inbound rule for HTTP from anywhere
az network nsg rule create \
    --resource-group $RESOURCE_GROUP \
    --nsg-name $NSG_NAME \
    --name AllowHTTP \
    --priority 110 \
    --direction Inbound \
    --access Allow \
    --protocol Tcp \
    --source-address-prefixes "*" \
    --source-port-ranges "*" \
    --destination-address-prefixes "*" \
    --destination-port-ranges 80

# Add inbound rule for HTTPS from anywhere (if you plan for SSL later)
az network nsg rule create \
    --resource-group $RESOURCE_GROUP \
    --nsg-name $NSG_NAME \
    --name AllowHTTPS \
    --priority 120 \
    --direction Inbound \
    --access Allow \
    --protocol Tcp \
    --source-address-prefixes "*" \
    --source-port-ranges "*" \
    --destination-address-prefixes "*" \
    --destination-port-ranges 443

# (Optional) Remove default deny inbound rule if it's too restrictive, or ensure your allow rules have lower priority.
# Azure's default NSG has a DenyAllInbound rule at priority 65500. Your rules will take precedence.
Step 3: Install Nginx on the VM
Get the public IP of your VM:
VM_PUBLIC_IP=$(az vm show -d -g $RESOURCE_GROUP -n $VM_NAME --query publicIps -o tsv)
echo "VM Public IP: $VM_PUBLIC_IP"
SSH into your VM:
ssh $VM_USERNAME@$VM_PUBLIC_IP
Inside the VM, install Nginx:
sudo apt update
sudo apt install nginx -y
sudo systemctl enable nginx
sudo systemctl start nginx
Test Nginx: Open your browser and navigate to http://$VM_PUBLIC_IP. You should see the Nginx default welcome page.
Step 4: Identify Client IP Configuration (if behind a proxy)
If your Nginx VM is directly exposed to the internet (as in this simple example), $remote_addr will usually contain the client's real IP. However, if you later place an Azure Load Balancer or Application Gateway in front of Nginx, you'll need this. Let's add it as a best practice.
Open Nginx's main configuration file (or a site-specific one):
sudo nano /etc/nginx/nginx.conf
Inside the http { ... } block, add these lines, replacing TRUSTED_PROXY_CIDR_RANGE with the CIDR of your Azure Load Balancer/Application Gateway if applicable. For a simple VM directly exposed, you can omit set_real_ip_from for now, but if the VM is in a subnet with a gateway, it might still be needed. A common range for Azure VNets is 10.0.0.0/8.
http {
    # ... other http configurations ...

    # Set real IP from X-Forwarded-For header if behind a trusted proxy
    # For VMs in an Azure VNet behind an Azure Load Balancer or App Gateway
    # If using Azure Load Balancer, it might preserve the client IP unless SNAT is used.
    # If using Azure Application Gateway, it will pass X-Forwarded-For.
    # Replace 10.0.0.0/8 with the actual VNet CIDR range of your proxies if any.
    set_real_ip_from 10.0.0.0/8; # Example: Azure VNet IP range for internal proxies
    real_ip_header X-Forwarded-For;
    real_ip_recursive on;

    # ... server blocks ...
}
Save and exit.
Step 5: Modify Nginx Configuration for Access Control
We'll modify the default Nginx site configuration.
sudo nano /etc/nginx/sites-available/default
Inside the server { ... } block, add a new location block for /admin/ and apply the allow/deny rules. Replace YOUR_PUBLIC_IP_ADDRESS with the IP you want to allow (e.g., your office public IP, or another Azure VM's public IP).
server {
    listen 80 default_server;
    listen [::]:80 default_server;

    root /var/www/html;
    index index.html index.htm index.nginx-debian.html;

    server_name _;

    location / {
        # Publicly accessible content
        try_files $uri $uri/ =404;
    }

    # Restrict access to the /admin/ path
    location /admin/ {
        allow YOUR_PUBLIC_IP_ADDRESS; # Your trusted IP (e.g., office IP)
        allow 192.168.1.0/24;         # Another trusted private network range if applicable
        deny all;                     # Deny all other IPs

        # You might want a different root or index for the admin area
        # root /var/www/admin;
        # index admin.html;

        try_files $uri $uri/ =404;
    }
}
Create a simple index.html file in /var/www/html/admin/ to test:
sudo mkdir /var/www/html/admin
echo "<h1>Welcome to the Admin Panel!</h1>" | sudo tee /var/www/html/admin/index.html
Save the Nginx configuration file and exit. Test the configuration for syntax errors and reload Nginx:
sudo nginx -t
sudo systemctl reload nginx
Step 6: Test Access Restrictions
- Public Access: From any browser (or your current IP), navigate to
http://$VM_PUBLIC_IP/. You should see the Nginx welcome page. - Restricted Access (Allowed IP): From
YOUR_PUBLIC_IP_ADDRESS(or an IP you explicitly allowed), navigate tohttp://$VM_PUBLIC_IP/admin/. You should see "Welcome to the Admin Panel!". - Restricted Access (Denied IP): From an IP not in your
allowlist (e.g., your mobile phone's data connection, or a different network), navigate tohttp://$VM_PUBLIC_IP/admin/. You should receive a "403 Forbidden" error.
Step 7: Implement HTTPS (Recommended)
For any production system, HTTPS is essential. 1. Acquire an SSL Certificate: Obtain a certificate from a trusted CA (e.g., Let's Encrypt using Certbot, or purchase one). For production, use Azure Key Vault to store and manage certificates. 2. Configure Nginx for SSL: ```nginx server { listen 443 ssl default_server; listen [::]:443 ssl default_server;
    # Replace with your domain
    server_name yourdomain.com www.yourdomain.com;

    # SSL configuration
    ssl_certificate /etc/nginx/ssl/yourdomain.com.crt; # Path to your certificate
    ssl_certificate_key /etc/nginx/ssl/yourdomain.com.key; # Path to your private key
    ssl_session_cache shared:SSL:10m;
    ssl_protocols TLSv1.2 TLSv1.3;
    ssl_ciphers "ECDHE-ECDSA-AES128-GCM-SHA256:ECDHE-RSA-AES128-GCM-SHA256:ECDHE-ECDSA-AES256-GCM-SHA384:ECDHE-RSA-AES256-GCM-SHA384:DHE-RSA-AES128-GCM-SHA256:DHE-RSA-AES256-GCM-SHA384";
    ssl_prefer_server_ciphers on;

    root /var/www/html;
    index index.html;

    location / {
        try_files $uri $uri/ =404;
    }

    location /admin/ {
        allow YOUR_PUBLIC_IP_ADDRESS;
        deny all;
        try_files $uri $uri/ =404;
    }
}

# Redirect HTTP to HTTPS
server {
    listen 80;
    listen [::]:80;
    server_name yourdomain.com www.yourdomain.com;
    return 301 https://$host$request_uri;
}
```
Don't forget to open port 443 in your Azure NSG (Step 2).
This step-by-step guide demonstrates how to implement IP-based access restrictions using Nginx's native capabilities in an Azure VM environment, effectively securing sensitive parts of your web application without relying on third-party plugins. Remember to replace placeholder IPs and domain names with your actual values.
Troubleshooting Common Issues
Implementing Nginx access restrictions in Azure can sometimes present challenges. Understanding common pitfalls and how to diagnose them is key to effective problem-solving.
1. Incorrect IP Detection (Due to Proxies)
Symptom: Your IP-based allow/deny rules are not working as expected. You're trying to allow your public IP, but Nginx is blocking you, or it's allowing an unexpected IP.
Cause: This is almost always due to Nginx not correctly identifying the original client's IP address because it's sitting behind one or more proxies (like an Azure Load Balancer, Application Gateway, or API Management). Nginx sees the proxy's IP address ($remote_addr) instead of the true client IP, which is typically passed in the X-Forwarded-For header.
Diagnosis: * Check Nginx access logs: Look at the $remote_addr field (the first IP in the log entry, if using default log_format). Is it the proxy's IP instead of the client's? * Verify proxy headers: If using X-Forwarded-For, check if that header is present and correctly populated in the logs or by inspecting network traffic.
Solution: * Configure set_real_ip_from and real_ip_header: As discussed in previous sections, add or adjust these directives in your Nginx http block. nginx http { # ... set_real_ip_from 10.0.0.0/8; # Example: Your Azure VNet range for proxies set_real_ip_from 172.16.0.0/12; # Common internal range set_real_ip_from YOUR_PROXY_PUBLIC_IP; # If proxy has a known public IP real_ip_header X-Forwarded-For; real_ip_recursive on; # ... } Ensure set_real_ip_from includes the CIDR ranges of all trusted proxies that might be forwarding traffic to Nginx. * Restart/Reload Nginx: After making changes, always run sudo nginx -t to check for syntax errors and sudo systemctl reload nginx to apply.
2. Syntax Errors in Nginx Configuration
Symptom: Nginx fails to start or reload after you modify its configuration files. You might see messages like "nginx: [emerg] unknown directive" or "nginx: [emerg] invalid argument."
Cause: Typos, missing semicolons, incorrect directive placement, or malformed values in the nginx.conf or included files.
Diagnosis: * nginx -t: This command is your best friend. It tests the Nginx configuration for syntax errors without reloading the service. It will pinpoint the file and line number where the error occurred. bash sudo nginx -t * Nginx Error Logs: Check the Nginx error log (typically /var/log/nginx/error.log). It often provides more detailed context for why a configuration failed.
Solution: * Carefully review the reported line: Go to the specified file and line number and meticulously check for typos, missing characters, or incorrect syntax. Compare against Nginx documentation for the specific directive. * Use a linter/editor with Nginx support: If you're frequently editing Nginx configs, a text editor with syntax highlighting and linting for Nginx can prevent many errors.
3. Permissions Issues for htpasswd File
Symptom: HTTP Basic Authentication prompts for credentials, but even correct credentials are rejected, or Nginx returns a 500 Internal Server Error when trying to access the protected path. Nginx error logs might show "permission denied" when trying to read the .htpasswd file.
Cause: The Nginx worker process (which typically runs as a low-privileged user like www-data or nginx) does not have sufficient read permissions to the .htpasswd file.
Diagnosis: * Check Nginx error log: This is the primary place to find "permission denied" messages related to the .htpasswd file path. * Check file permissions: Use ls -l on the .htpasswd file and its parent directories. bash ls -l /etc/nginx/.htpasswd_admin
Solution: * Set appropriate permissions: The .htpasswd file should be readable by the Nginx user and group, but ideally not world-readable. ``bash # Find Nginx user (e.g., www-data on Debian/Ubuntu, nginx on CentOS/RHEL) # Checkuser` directive in /etc/nginx/nginx.conf, usually 'user www-data;'
sudo chown root:www-data /etc/nginx/.htpasswd_admin # Or 'root:nginx'
sudo chmod 640 /etc/nginx/.htpasswd_admin
```
This sets ownership to `root:www-data` and grants read/write to owner, read to group, and no access to others.
4. Azure Network Rules Blocking Traffic Before Nginx
Symptom: You cannot access your Nginx server at all (e.g., browser timeout, connection refused), even for publicly accessible paths. Nginx logs show no incoming requests.
Cause: Azure Network Security Groups (NSGs), Azure Firewall, or other Azure networking components are blocking the traffic before it ever reaches your Nginx VM or container.
Diagnosis: * Check NSG flow logs: If enabled, NSG flow logs in Azure Monitor can tell you if traffic is being allowed or denied at the NSG level. * Verify NSG rules: * Ensure there are inbound Allow rules for the ports Nginx is listening on (e.g., 80, 443, 22 for SSH). * Check the Source and Destination for these rules. For public access, Source should be Any or Internet. For SSH, Source should be your specific public IP. * Review rule priorities. Lower numbers take precedence. A Deny All rule at a higher priority than your Allow rules will block traffic. * Check Azure Firewall rules (if applicable): If you have an Azure Firewall, ensure its rules permit traffic to your Nginx's VNet/subnet.
Solution: * Adjust NSG rules: Go to the Azure Portal (or use Azure CLI) and modify the NSG associated with your Nginx VM's NIC or subnet. Add/modify Inbound security rules to allow the necessary ports from the correct sources with appropriate priorities. * Verify Public IP assignment: Ensure your Nginx VM actually has a public IP assigned if it's meant to be publicly accessible. * Check VNet peering (if applicable): If accessing Nginx from a peered VNet, ensure the peering is correctly configured and NSGs on both sides allow traffic.
By systematically going through these troubleshooting steps, you can effectively diagnose and resolve most issues related to Nginx access restrictions within an Azure environment. Remember that security is a multi-layered approach, and issues can arise at any layer, from the network edge to the application itself.
Conclusion
Securing web applications and API endpoints deployed on Azure Nginx instances is a critical endeavor in today's threat landscape. This extensive guide has demonstrated that robust page access restrictions can be achieved effectively and efficiently by leveraging Nginx's powerful native capabilities, seamlessly integrated with Azure's comprehensive suite of networking and security services. We have explored the nuances of IP-based filtering with allow/deny directives, implemented user-level authentication through HTTP Basic Auth, and delved into more flexible token-based header checks using Nginx's map and if directives. Each of these mechanisms, devoid of external plugins, offers distinct advantages for different use cases, empowering administrators to choose the most suitable control.
Beyond the Nginx configuration, we underscored the indispensable role of Azure's security features. Network Security Groups provide a fundamental, network-level defense, filtering traffic even before it reaches your web server. Azure Application Gateway, with its integrated Web Application Firewall, adds another crucial layer of protection against common web vulnerabilities and enables secure SSL/TLS termination. For purely internal services, Azure Private Link ensures that Nginx endpoints remain isolated from the public internet, accessible only over secure private connections. The synergy between these Azure-level controls and Nginx's internal rules creates a formidable, multi-layered defense-in-depth strategy.
Furthermore, we emphasized advanced best practices, including combining multiple restriction methods for enhanced resilience, automating configurations through Infrastructure as Code (IaC) to ensure consistency and scalability, and implementing rigorous monitoring and logging to detect and respond to security incidents proactively. The non-negotiable importance of HTTPS was highlighted, ensuring all sensitive communications are encrypted and authenticated. Finally, the role of a dedicated API management platform like APIPark was discussed for scenarios where Nginx's native capabilities for API governance, advanced routing, and AI model orchestration become insufficient for large or complex API ecosystems.
By mastering these techniques and adhering to the recommended best practices, developers and system administrators can build a secure, high-performing, and resilient web presence on Azure using Nginx, all while maintaining a lean and manageable technology stack. The absence of third-party plugins not only simplifies maintenance and reduces potential attack surfaces but also fosters a deeper understanding and control over your infrastructure's security posture, ensuring that your Azure Nginx deployments are protected against unauthorized access and potential threats.
Frequently Asked Questions (FAQs)
1. Why should I avoid using Nginx plugins for access restriction if they exist? Avoiding plugins for access restriction, especially when native Nginx features or Azure's services can accomplish the task, offers several benefits. It reduces dependencies, which simplifies maintenance, patching, and troubleshooting. Fewer components generally mean a smaller attack surface and fewer potential vulnerabilities introduced by third-party code. Furthermore, relying on Nginx's built-in directives and Azure's native security features ensures better compatibility, stability, and often higher performance, as these are core, optimized functionalities. It gives you direct control and a deeper understanding of your security mechanisms.
2. Is HTTP Basic Authentication secure for production use in Azure Nginx? HTTP Basic Authentication itself transmits credentials in a trivially decodable Base64 format. Therefore, it is only secure when used exclusively over HTTPS (SSL/TLS). In an Azure Nginx setup, this means ensuring your Nginx server is configured for HTTPS or that an upstream service like Azure Application Gateway handles SSL termination. Without HTTPS, credentials can be easily intercepted in transit, making it highly insecure. Even with HTTPS, it offers basic, non-granular authentication; for advanced user management, role-based access, or strong identity providers, more sophisticated solutions are recommended.
3. How can I ensure Nginx sees the correct client IP if it's behind an Azure Application Gateway or Load Balancer? When Nginx is behind an Azure Application Gateway or Load Balancer, the $remote_addr variable in Nginx will typically show the IP address of the proxy, not the original client. To get the real client IP, you need to configure Nginx to read the X-Forwarded-For header, which these proxies populate with the original client's IP. This is done by adding set_real_ip_from <proxy_ip_range>;, real_ip_header X-Forwarded-For;, and real_ip_recursive on; directives within your Nginx http block. The <proxy_ip_range> should be the CIDR range of your Azure Application Gateway's subnet or Load Balancer's internal IP(s).
4. Can Azure Network Security Groups (NSGs) replace Nginx's internal access rules? No, NSGs complement Nginx's internal access rules; they do not replace them. NSGs operate at the network level (Layer 4), controlling traffic based on IP address, port, and protocol to your VM or subnet. They are excellent for broad network segmentation and preventing unwanted traffic from even reaching your Nginx instance. Nginx's internal rules, however, operate at the application layer (Layer 7), allowing for much more granular control based on specific URL paths, HTTP headers, authentication credentials, and application-specific logic. A robust security posture combines both: NSGs provide the first line of defense, and Nginx refines access at the application level.
5. When should I consider an API Management platform like APIPark instead of just Nginx for access control? You should consider an API Management platform when your needs for API governance extend beyond basic access control. Nginx is excellent for simple IP-based restrictions, basic auth, and proxying. However, for scenarios involving: * Hundreds of APIs or AI models requiring unified management. * Advanced routing policies (e.g., dynamic routing based on request content). * Fine-grained rate limiting, throttling, and quota management per API consumer. * Robust authentication (JWT validation, OAuth2) and authorization. * Centralized API versioning and lifecycle management. * Developer portals for API discovery, documentation, and subscription. * Comprehensive analytics, monitoring, and logging tailored for APIs. * Multi-tenancy and team-based API sharing. A dedicated platform like APIPark provides the specialized tools and features necessary to manage these complexities efficiently and securely, offering a much richer set of capabilities than Nginx's native configuration can provide for large-scale API ecosystems.
🚀You can securely and efficiently call the OpenAI API on APIPark in just two steps:
Step 1: Deploy the APIPark AI gateway in 5 minutes.
APIPark is developed based on Golang, offering strong product performance and low development and maintenance costs. You can deploy APIPark with a single command line.
curl -sSO https://download.apipark.com/install/quick-start.sh; bash quick-start.sh

In my experience, you can see the successful deployment interface within 5 to 10 minutes. Then, you can log in to APIPark using your account.

Step 2: Call the OpenAI API.