How to Restrict Page Access on Azure Nginx Without Plugin


In the intricate landscape of modern web applications, ensuring robust security is paramount. Businesses and individual developers alike constantly strive to protect sensitive information, proprietary content, and critical functionalities from unauthorized access. While various commercial solutions and Nginx plugins offer advanced security features, understanding and leveraging Nginx's native capabilities to restrict page access, especially when deployed on a resilient platform like Azure, provides a powerful and often more efficient path. This comprehensive guide delves deep into the methodologies for implementing stringent access controls on Azure-hosted Nginx instances, purely relying on its core configuration directives, without the need for additional third-party plugins. Our journey will explore several effective techniques, ranging from IP-based restrictions to sophisticated token and certificate-based authentication, all while maintaining the integrity and performance that Nginx is renowned for.
The decision to avoid plugins often stems from a desire for minimal dependencies, enhanced performance, and a deeper understanding of the underlying security mechanisms. This approach grants unparalleled control over every aspect of access management, allowing for tailor-made solutions that perfectly fit specific security requirements and architectural constraints. By focusing on Nginx's built-in features, we gain a lean, efficient, and highly customizable security posture that integrates seamlessly with the dynamic and scalable environment of Azure. This article will equip you with the knowledge and practical examples to master page access restriction, transforming your Azure Nginx deployment into a fortified bastion against unwelcome intrusion.
The Foundation: Understanding Nginx on Azure and Native Security Principles
Before we embark on the specifics of access restriction, it's crucial to solidify our understanding of the environment we're operating within and the core principles that guide Nginx's security architecture. Nginx, a high-performance HTTP server and reverse proxy, has become an indispensable component in countless web infrastructures globally. Its event-driven, asynchronous architecture allows it to handle a massive number of concurrent connections with minimal resource consumption, making it an ideal choice for serving web content and acting as an API gateway. When deployed on Azure, Nginx benefits from the cloud platform's scalability, reliability, and global reach, allowing applications to serve users across the world with consistent performance.
Azure offers various ways to deploy and run Nginx. The most common methods involve deploying Nginx on a Virtual Machine (VM), as part of an Azure Kubernetes Service (AKS) cluster acting as an Ingress controller, or within an Azure Container Instance or Azure App Service using custom containers. For the purposes of this guide, which emphasizes direct configuration without plugins, we will primarily focus on scenarios where Nginx is deployed on a dedicated Azure VM or within a container environment where its configuration files are directly accessible and manageable. This direct control is fundamental to implementing the native security directives discussed herein.
The "without plugin" constraint is not merely an arbitrary limitation; it's a deliberate choice to leverage Nginx's inherent power. Nginx is designed with a modular architecture, where many of its functionalities are built into its core or standard modules. These modules are compiled directly into the Nginx binary or loaded dynamically, meaning they are considered "native" to Nginx's operation. When we speak of avoiding plugins, we are specifically referring to third-party extensions or add-ons that are not part of the standard Nginx distribution, which might introduce unforeseen dependencies, performance overheads, or security vulnerabilities. Our strategy will therefore concentrate on manipulating Nginx's configuration directives that are available out-of-the-box, ensuring a lean and robust security layer.
Security, at its core, involves a dual concept: authentication and authorization. Authentication is the process of verifying a user's identity ("Who are you?"), while authorization is the process of determining what an authenticated user is permitted to do or access ("What are you allowed to see or do?"). Nginx, through its various directives, can effectively handle both aspects, albeit with different levels of sophistication. A well-designed access control strategy also embraces the principle of layered security, where multiple defense mechanisms are stacked, so if one layer fails, another can still provide protection. This holistic approach ensures comprehensive coverage against a diverse range of threats.
Understanding Nginx's configuration hierarchy is also essential. The nginx.conf file is the primary configuration file, often including other configuration files from directories like conf.d or sites-enabled. Directives can be applied at different levels: http block (global settings), server block (for specific virtual hosts), and location block (for specific URI paths). The placement of your access control directives will dictate their scope and precedence, allowing for granular control over different parts of your web application or an API endpoint.
Method 1: IP-Based Access Restriction with allow and deny Directives
One of the most straightforward and fundamental ways to restrict access to web pages or specific resources on Nginx is by controlling access based on the client's IP address. This method is particularly effective for internal tools, administrative interfaces, or content intended only for specific partners or regions. Nginx provides the allow and deny directives for this purpose, offering a simple yet powerful first line of defense.
The allow directive specifies IP addresses or networks that are permitted to access a given resource, while the deny directive explicitly blocks them. When used together within a location, server, or http block, Nginx processes these rules sequentially based on their order. The first matching rule takes precedence. A common best practice is to first deny all and then explicitly allow specific IPs, creating a whitelist approach. Conversely, one can allow all and then deny specific problematic IPs, though this is generally less secure for truly restricted content.
Consider a scenario where you have an administrative dashboard for your application deployed on Azure, and you only want your team members, who operate from a known set of office IP addresses, to access it. Any other IP address should be blocked.
http {
    # ... other http settings ...

    server {
        listen 80;
        server_name admin.yourdomain.com;

        # Redirect HTTP to HTTPS for security
        return 301 https://$host$request_uri;
    }

    server {
        listen 443 ssl;
        server_name admin.yourdomain.com;

        ssl_certificate /etc/nginx/ssl/admin.yourdomain.com.crt;
        ssl_certificate_key /etc/nginx/ssl/admin.yourdomain.com.key;

        # Define specific location for the admin dashboard
        location / {
            # Deny access to everyone by default
            deny all;

            # Allow access from your office IP addresses
            allow 203.0.113.42;     # Example: Your first office IP
            allow 198.51.100.0/24;  # Example: Your office network subnet
            allow 192.168.1.0/24;   # Example: Private network range if Nginx is behind a proxy that forwards original client IP

            # You can also allow specific Azure internal IPs if Nginx is fronted by other Azure services
            # allow 10.0.0.0/8; # Example: Allowing all IPs from a specific Azure VNet

            # If the client IP is not in the allowed list, it will be denied.
            # Nginx returns a 403 Forbidden error.
        }

        # Another location block, e.g., for public API endpoints
        # This part of your service might function as an API gateway for your backend services.
        # It's crucial to distinguish between web page access and API access.
        location /api/public/ {
            # This API endpoint is public and does not require IP restriction
            # However, for API access, other forms of authentication (like API keys or tokens) are often preferred.
            # In some cases, Nginx can be configured to act as a preliminary gateway for APIs,
            # passing requests to a dedicated API management platform.
            proxy_pass http://backend_api_service;
            # No specific allow/deny here, as it's meant to be public
        }
    }
}
In this configuration, any request to admin.yourdomain.com originating from an IP address not listed in the allow directives will receive a 403 Forbidden response. The deny all; directive acts as a catch-all, ensuring that only explicitly permitted IPs can proceed.
Use Cases: * Internal Tools: Protecting tools like Jenkins, Grafana, Kibana, or custom admin panels. * Development/Staging Environments: Limiting access to pre-production environments to specific developer teams or QA personnel. * Partner Portals: Granting access to sensitive sections only to known IP ranges of business partners. * Geographic Restrictions (less common for allow, more for deny): While primarily used for explicit whitelisting, you could also use deny for specific countries' IP ranges if such data is available and static enough.
Limitations: * Dynamic IP Addresses: This method becomes problematic if your authorized users have dynamic IP addresses (e.g., remote workers without static IPs or VPNs). In such cases, the allowed list would need frequent updates, which is impractical. * IP Spoofing: While more difficult at the network level, IP addresses can be spoofed, though typically this doesn't bypass TCP/IP handshakes for sustained connections. * Proxy Servers: If users access your Nginx server through a reverse proxy (like Azure Application Gateway or a CDN), Nginx might see the proxy's IP address instead of the client's actual IP. To mitigate this, ensure your proxy forwards the original client IP in a header (e.g., X-Forwarded-For), and configure Nginx to trust specific proxy IPs using set_real_ip_from and real_ip_header. * Scalability: Managing a large list of individual IPs or subnets can become cumbersome for many users or frequent changes.
Integration with Azure Network Security Groups (NSGs): For an even stronger initial layer of defense, especially when Nginx is deployed on an Azure VM, you should integrate NSGs. NSGs operate at the network layer, filtering traffic before it even reaches your Nginx instance. You can configure NSG rules to allow inbound traffic on ports 80 and 443 only from the same set of trusted IP addresses you've specified in your Nginx allow directives. This creates a dual-layer IP-based restriction, where Nginx handles the application-level check and NSGs handle the network-level check, significantly bolstering security. This synergy ensures that unauthorized IPs are dropped at the Azure network perimeter, conserving Nginx's resources for legitimate requests.
# Azure NSG Inbound Security Rule Example
Priority: 100
Name: AllowAdminAccess
Source: IP Addresses (203.0.113.42, 198.51.100.0/24)
Source port ranges: *
Destination: Any
Destination port ranges: 80, 443
Protocol: TCP
Action: Allow

Priority: 200
Name: DenyAllOtherInbound
Source: Any
Source port ranges: *
Destination: Any
Destination port ranges: 80, 443
Protocol: TCP
Action: Deny
This NSG configuration complements the Nginx rules perfectly, preventing even the initial connection attempt from unauthorized sources.
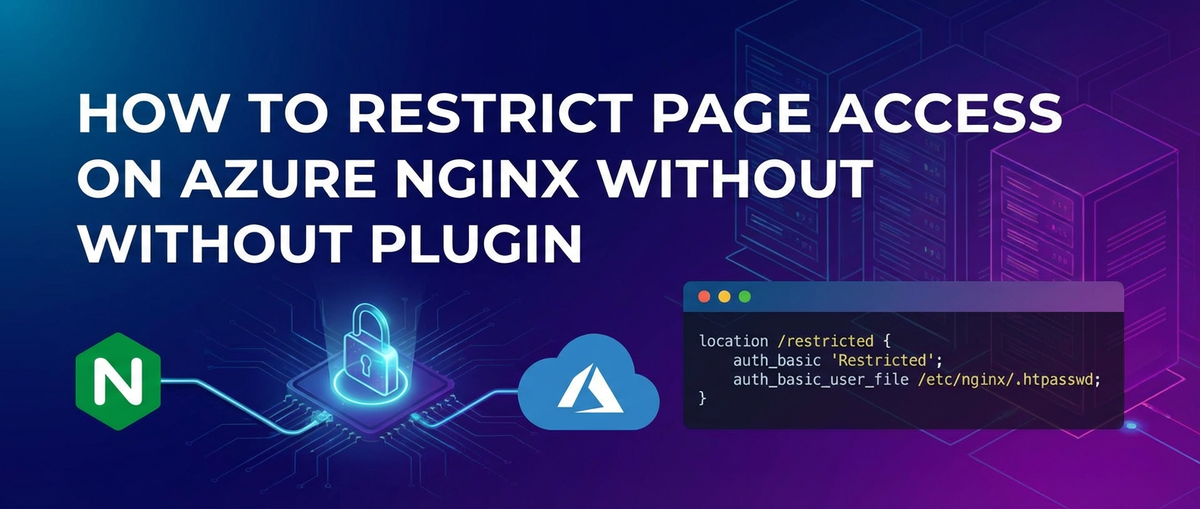
Method 2: HTTP Basic Authentication with auth_basic and auth_basic_user_file
When IP-based restrictions are insufficient, perhaps because your users have dynamic IPs or you need a more granular, user-specific approach, HTTP Basic Authentication offers a simple and widely supported solution. Nginx can be configured to prompt users for a username and password before granting access to a protected resource. This method relies on the auth_basic and auth_basic_user_file directives.
HTTP Basic Authentication works by sending a WWW-Authenticate header to the client, prompting the browser to display a login dialog. Once the user enters credentials, the browser sends them back in an Authorization header, encoded in Base64. Nginx then verifies these credentials against a stored user file.
Steps to Implement HTTP Basic Authentication:
Configure Nginx: Once the password file is created, you can configure Nginx to use it for specific location blocks.```nginx http { # ... other http settings ...
server {
    listen 443 ssl;
    server_name secure.yourdomain.com;

    ssl_certificate /etc/nginx/ssl/secure.yourdomain.com.crt;
    ssl_certificate_key /etc/nginx/ssl/secure.yourdomain.com.key;

    # Protect a specific path, e.g., a "reports" section
    location /reports/ {
        # Enable HTTP Basic Authentication
        auth_basic "Restricted Reports Area"; # This message appears in the login prompt
        auth_basic_user_file /etc/nginx/.htpasswd; # Path to the password file

        # Proxy requests to your backend application or serve static files
        # For a backend web service:
        proxy_pass http://backend_reports_service;
        proxy_set_header Host $host;
        proxy_set_header X-Real-IP $remote_addr;
        proxy_set_header X-Forwarded-For $proxy_add_x_forwarded_for;
        proxy_set_header X-Forwarded-Proto $scheme;

        # Or for static files:
        # root /var/www/secure_reports;
        # index index.html;
    }

    # Another protected area, perhaps an API endpoint used by an internal application
    # When Nginx acts as an API gateway, basic auth can be a simple method for internal APIs.
    location /internal_api/v1/ {
        auth_basic "Internal API Access Required";
        auth_basic_user_file /etc/nginx/.htpasswd;
        proxy_pass http://internal_api_backend;
        proxy_set_header Host $host;
        # Further API-specific headers or transformations can be applied here.
        # While suitable for simpler internal APIs, more sophisticated API management platforms
        # like APIPark offer advanced features such as rate limiting, analytics, and a developer portal.
    }

    # Publicly accessible pages
    location / {
        # No authentication required for the main site
        proxy_pass http://your_main_app_backend;
        proxy_set_header Host $host;
        proxy_set_header X-Real-IP $remote_addr;
        proxy_set_header X-Forwarded-For $proxy_add_x_forwarded_for;
        proxy_set_header X-Forwarded-Proto $scheme;
    }
}
} ```
Generate a Password File: Nginx does not store passwords in plain text. Instead, it uses a utility called htpasswd (part of the Apache httpd-tools package) to create an encrypted password file. You'll need to install this utility on your Azure VM if it's not already present.```bash
Install Apache2 Utils (if not already installed)
sudo apt update sudo apt install apache2-utils -y
Create the password file and add the first user
sudo htpasswd -c /etc/nginx/.htpasswd admin_user
Enter and confirm password when prompted. The '-c' flag creates the file.
Add subsequent users (omit -c to append to existing file)
sudo htpasswd /etc/nginx/.htpasswd another_user
Enter and confirm password for another_user
`` Ensure the.htpasswd` file has appropriate permissions, typically readable only by the Nginx user and root.
Use Cases: * Small Teams/Internal Tools: Ideal for small groups needing access to specific resources without setting up a full-fledged identity provider. * Staging/Development Environments: Quickly secure environments during development and testing phases. * Protecting Static Assets: Safeguarding confidential documents, images, or archives. * Simple Internal APIs: For APIs not exposed to the public and used by a limited, known set of clients.
Security Considerations: * HTTPS is MANDATORY: HTTP Basic Authentication sends credentials in Base64 encoding, which is trivial to decode. Therefore, it must always be used over HTTPS (SSL/TLS) to encrypt the entire communication channel, preventing eavesdropping and man-in-the-middle attacks. If used over plain HTTP, credentials are sent in clear text, rendering this method useless for security. * Brute-Force Attacks: Without additional measures, basic authentication is vulnerable to brute-force attacks. Nginx's rate limiting directives (limit_req_zone, limit_req) should be used in conjunction to mitigate this risk. * Lack of Centralized User Management: Managing users via htpasswd files is suitable for a small number of users. For larger user bases or dynamic user management, it quickly becomes unwieldy, necessitating more advanced authentication systems. * No Fine-Grained Roles: Basic authentication only grants "all or nothing" access. It doesn't support different user roles or permissions for various parts of the application.
While effective for simpler scenarios, HTTP Basic Authentication is often a stepping stone to more sophisticated methods for public-facing or large-scale applications. It offers an immediate and accessible layer of security without external dependencies.
Method 3: Token-Based Authentication via Nginx auth_request Module
For more dynamic and sophisticated authentication requirements, especially when dealing with a larger user base, single sign-on (SSO), or integrating with existing identity providers, Nginx's auth_request module provides an elegant solution. This module allows Nginx to offload the actual authentication and authorization decision to an external service, acting as a policy enforcement point. Nginx intercepts incoming requests, makes a subrequest to an external authentication service, and then proceeds or denies the original request based on the subrequest's response. This approach is highly flexible and widely used for implementing token-based authentication schemes like JSON Web Tokens (JWTs) or OAuth2.
The auth_request module does not itself perform authentication; rather, it delegates the task. This means you need to develop or deploy an independent service (often called an "authentication microservice," "policy agent," or "identity provider connector") that can validate tokens, session cookies, or other credentials. This external service is responsible for determining if a user is authenticated and authorized for a particular resource.
How it works with JWTs (Conceptual Flow):
- Client Request: A client sends a request to Nginx, typically including an access token (e.g., a JWT in the
Authorization: Bearerheader). - Nginx Interception: Nginx receives the request for a protected resource.
- Subrequest to Auth Service: Nginx sends an internal subrequest to a specially configured authentication endpoint within your external service. It passes relevant headers (like the
Authorizationheader) from the original client request to this auth service. - Auth Service Validation: The external authentication service validates the JWT (e.g., checks signature, expiration, issuer, audience, and potentially user roles/permissions).
- Auth Service Response:
- If valid: The auth service responds with a
2xxstatus code (e.g.,200 OK). It might also include additional headers (e.g., user ID, roles) that Nginx can then forward to the upstream application. - If invalid: The auth service responds with a
401 Unauthorizedor403 Forbiddenstatus code.
- If valid: The auth service responds with a
- Nginx Action:
- If
2xx: Nginx allows the original request to proceed to the upstream application, potentially adding headers from the auth service's response. - If
4xx: Nginx denies the original request, returning the401or403status to the client.
- If
Nginx Configuration for auth_request:
This setup requires two key location blocks in your Nginx configuration: one for the protected resources and another for the internal authentication endpoint.
http {
    # ... other http settings ...

    # Upstream definition for your external authentication service
    upstream auth_service {
        server 127.0.0.1:8081; # Or an internal Azure IP/hostname for your auth service
        # If running in Kubernetes, this could be a service name: server auth-service.your-namespace.svc.cluster.local;
    }

    server {
        listen 443 ssl;
        server_name api.yourdomain.com; # This Nginx could serve as an API gateway for your applications

        ssl_certificate /etc/nginx/ssl/api.yourdomain.com.crt;
        ssl_certificate_key /etc/nginx/ssl/api.yourdomain.com.key;

        # Location block for protected API endpoints or web pages
        location /protected-data/ {
            # Direct Nginx to send a subrequest to the '/auth' endpoint
            auth_request /auth;

            # If the auth service returns 2xx, Nginx will add these headers
            # The auth service can return specific headers (e.g., X-User-ID) that Nginx captures
            # and forwards to the backend.
            auth_request_set $auth_user_id $upstream_http_x_user_id;
            auth_request_set $auth_user_roles $upstream_http_x_user_roles;

            # Proxy the original request to the actual backend application
            proxy_pass http://your_backend_application;
            proxy_set_header Host $host;
            proxy_set_header X-Real-IP $remote_addr;
            proxy_set_header X-Forwarded-For $proxy_add_x_forwarded_for;
            proxy_set_header X-Forwarded-Proto $scheme;
            proxy_set_header X-User-ID $auth_user_id;       # Pass auth service data to backend
            proxy_set_header X-User-Roles $auth_user_roles; # Pass auth service data to backend
        }

        # Internal location block for the authentication subrequest
        # This endpoint should NOT be publicly accessible.
        location = /auth {
            # Internal directive means this location can only be accessed by subrequests (like auth_request)
            # or from the same server itself, preventing external clients from directly hitting it.
            internal;

            # Proxy the subrequest to the external authentication service
            proxy_pass http://auth_service/validate_jwt;

            # Forward necessary headers from the original client request to the auth service
            proxy_set_header Content-Type "";
            proxy_set_header Accept "";
            proxy_set_header Host $http_host; # Original Host header
            proxy_set_header Authorization $http_authorization; # Crucial: Pass the JWT!
            proxy_set_header X-Real-IP $remote_addr;
            proxy_set_header X-Forwarded-For $proxy_add_x_forwarded_for;
            proxy_set_header X-Forwarded-Proto $scheme;

            # Do not buffer the response from the auth service to ensure quick decision
            proxy_pass_request_body off;
            proxy_set_header Content-Length "";
        }

        # Publicly accessible pages or APIs
        location / {
            # No authentication required
            proxy_pass http://your_public_backend;
            proxy_set_header Host $host;
            proxy_set_header X-Real-IP $remote_addr;
            proxy_set_header X-Forwarded-For $proxy_add_x_forwarded_for;
            proxy_set_header X-Forwarded-Proto $scheme;
        }
    }
}
Benefits: * Centralized Authentication Logic: All authentication logic resides in a single, dedicated service, making it easier to manage, update, and scale. * Decoupling: Separates authentication concerns from the application logic, promoting a cleaner architecture. * Scalability: The authentication service can be scaled independently of Nginx or the main application. * Flexibility: Supports various authentication schemes (JWT, OAuth2, session-based) by simply changing the logic within the auth service. * Rich Authorization: The auth service can return user roles or permissions, allowing Nginx to conditionally route or inject headers for fine-grained access control in the backend.
Complexities: * Requires an External Service: You need to develop, deploy, and maintain an additional service for authentication. * Increased Latency: Each protected request incurs an additional internal HTTP subrequest, adding a small amount of latency. * Error Handling: Proper error handling and fallback mechanisms for the auth service are crucial.
Natural Integration with APIPark: This is an excellent point to introduce APIPark. While Nginx's auth_request is powerful for controlling web page access by validating tokens against a custom service, managing a vast ecosystem of APIs (especially those integrating with AI models) requires a specialized platform. APIPark, an Open Source AI Gateway & API Management Platform, is designed precisely for such advanced scenarios.
Consider the role of Nginx as a primary web gateway for your entire application, handling static content and initial web page loads, potentially using auth_request for certain sensitive front-end sections. However, when it comes to the backend API services, particularly those involving complex logic, AI model integration, or requiring robust lifecycle management, Nginx, while capable, might not offer the breadth of features of a dedicated API Gateway like APIPark.
APIPark can function as the sophisticated API gateway for your backend services. Instead of building a custom auth_service, you could potentially integrate with APIPark or have APIPark manage the authentication for the underlying APIs directly. For example, your Nginx instance could protect the front-end web pages, and then proxy specific api calls to APIPark. APIPark would then handle: * Unified API Format for AI Invocation: Standardizing how requests reach various AI models, a task far beyond Nginx's scope. * Prompt Encapsulation into REST API: Allowing users to quickly turn AI models into usable APIs, a core function of an AI Gateway. * End-to-End API Lifecycle Management: Beyond mere access control, APIPark helps with design, publication, invocation, and decommission of APIs, which is vital for a robust API strategy. * Performance Rivaling Nginx: APIPark's claim of over 20,000 TPS with modest resources indicates it's built for high-performance api traffic management, complementing Nginx's efficiency for web traffic. * Detailed API Call Logging and Powerful Data Analysis: Crucial for monitoring and optimizing API usage, which Nginx's generic logging might not provide with the same level of granularity.
So, while Nginx effectively restricts web page access using auth_request and a custom service, for a comprehensive API strategy, particularly involving AI and complex management, APIPark offers a specialized and highly performant solution. Nginx and APIPark can coexist, with Nginx handling the initial web entry point and APIPark acting as the dedicated, feature-rich API gateway for your backend services and AI models. This layered approach combines Nginx's web serving strength with APIPark's specialized API management prowess.
Method 4: Referer-Based Access Control with valid_referers
Referer-based access control is a method to restrict access to resources based on the Referer HTTP header, which indicates the URL of the page that linked to the current request. While not a strong security mechanism due to its susceptibility to spoofing, it can be useful for preventing hotlinking of images, media files, or protecting certain resources from being embedded or loaded by unauthorized external websites. It serves more as a deterrent and a way to manage resource consumption rather than a robust security measure.
Nginx's valid_referers directive allows you to specify a list of allowed referrers. If the Referer header of an incoming request does not match any of the allowed entries, Nginx sets the $invalid_referer variable to 1. You can then use an if condition to deny access or redirect the request.
http {
    # ... other http settings ...

    server {
        listen 443 ssl;
        server_name cdn.yourdomain.com; # Often used for CDN or static asset servers

        ssl_certificate /etc/nginx/ssl/cdn.yourdomain.com.crt;
        ssl_certificate_key /etc/nginx/ssl/cdn.yourdomain.com.key;

        # Protect a folder containing images or other assets
        location ~* \.(gif|jpg|png|jpeg|webp|js|css)$ {
            # Define valid referers.
            # 'none' allows requests with no Referer header (e.g., direct access, private browsing).
            # 'blocked' allows requests where the Referer header has been intentionally blocked (e.g., by some proxies).
            # 'server_names' allows referers matching any of the server names defined in this block.
            # Specific domains: list the domains that are allowed to embed/link these assets.
            valid_referers none blocked server_names
                           yourdomain.com
                           www.yourdomain.com
                           app.yourdomain.com; # Your main application domain

            # If the referer is invalid, return a 403 Forbidden error.
            if ($invalid_referer) {
                return 403;
            }

            # If referer is valid, serve the files
            root /var/www/cdn_assets;
            expires 30d; # Cache for 30 days
            add_header Cache-Control "public";
        }

        # For your main web application acting as a web gateway,
        # referer-based protection might be less critical for HTML pages
        # but could be applied to specific downloadable content.
        location /downloadable-docs/ {
            valid_referers none blocked server_names
                           internal.yourdomain.com; # Only allow downloads from your internal portal

            if ($invalid_referer) {
                return 403;
            }
            root /var/www/docs;
            # Ensure proper content-disposition headers for downloads
            add_header Content-Disposition "attachment; filename=$uri";
        }
    }
}
Use Cases: * Preventing Hotlinking: Stopping other websites from directly embedding your images or videos, saving your bandwidth and preventing unauthorized content use. * Resource Protection: Ensuring that specific stylesheets, JavaScript files, or downloadable documents are only loaded/accessed when coming from an authorized page of your application. * Basic Anti-Scraping: Making it slightly harder for simple scrapers that might not bother to spoof referer headers.
Limitations: * Referer Spoofing: The Referer header can be easily spoofed by malicious users, making this method unreliable for true security. * Browser/Client Behavior: Some browsers, proxies, or privacy extensions might strip or alter the Referer header, leading to legitimate users being blocked (none and blocked help mitigate this, but it's still a concern). * Not a Security Solution: It should never be relied upon as the sole security measure for sensitive content. It's more of a resource management and anti-hotlinking tool.
While valid_referers provides a quick way to control superficial access, it's crucial to understand its limitations and employ it judiciously, primarily for content delivery optimization rather than strict security.
APIPark is a high-performance AI gateway that allows you to securely access the most comprehensive LLM APIs globally on the APIPark platform, including OpenAI, Anthropic, Mistral, Llama2, Google Gemini, and more.Try APIPark now! 👇👇👇
Method 5: Limiting Access by User Agent with map and if Directives
Controlling access based on the client's User-Agent HTTP header allows Nginx to identify the type of client (browser, mobile app, bot, crawler) making the request. This method is primarily used for filtering unwanted traffic, blocking known malicious bots, or enforcing specific client requirements. Like referer-based control, it is not a robust security mechanism against determined attackers, as the User-Agent header can be easily spoofed. However, for managing legitimate traffic and simple bot mitigation, it can be quite effective.
Nginx's map directive is particularly useful here, as it allows you to create variables based on the value of another variable. This provides a cleaner and more efficient way to handle multiple User-Agent conditions compared to chaining multiple if statements.
http {
    # ... other http settings ...

    # Define a map to identify unwanted user agents
    # The 'hostnames' parameter in 'map' improves efficiency for string matching.
    map $http_user_agent $bad_user_agent {
        default 0;  # By default, not a bad user agent
        "~*搜索引擎机器人" 1; # Example: Block common search engine bots (if you don't want them indexing certain areas)
        "~*Bytespider" 1;  # Example: Block specific aggressive crawlers
        "~*AhrefsBot" 1;
        "~*MJ12bot" 1;
        "~*HTTrack" 1;    # Example: Block site mirroring tools
        "~*curl" 1;       # Example: Block direct curl requests (can be useful for specific APIs if not desired)
        "~*Wget" 1;       # Example: Block wget
        # Add more patterns as needed. '~*' makes the match case-insensitive.
    }

    server {
        listen 443 ssl;
        server_name www.yourdomain.com;

        ssl_certificate /etc/nginx/ssl/www.yourdomain.com.crt;
        ssl_certificate_key /etc/nginx/ssl/www.yourdomain.com.key;

        # Apply user agent filtering to a specific location, e.g., a login page vulnerable to bot attacks
        location /login {
            # If the user agent is identified as bad, return 403 Forbidden
            if ($bad_user_agent) {
                return 403;
                # Alternatively, you could redirect:
                # rewrite ^ /blocked_by_ua.html break;
            }

            # Process legitimate requests
            proxy_pass http://your_app_backend;
            proxy_set_header Host $host;
            # ... other proxy headers ...
        }

        # Protecting specific API endpoints from unwanted automated access
        # If this Nginx acts as an API gateway for certain public-facing APIs,
        # blocking generic tools like curl or wget can prevent simple automated scraping.
        location /public_api/data {
            if ($bad_user_agent) {
                return 403;
            }
            proxy_pass http://your_api_backend;
            # For complex API access, a dedicated API management platform like APIPark provides
            # more robust bot protection, rate limiting, and API key management,
            # which are far more effective than simple user-agent checks.
        }

        # Default behavior for other locations
        location / {
            proxy_pass http://your_main_app;
            proxy_set_header Host $host;
            # ...
        }
    }
}
Use Cases: * Blocking Known Bots/Scrapers: Preventing bandwidth consumption or data extraction by unwanted crawlers and scraping tools. * Mitigating Spam: Blocking bots from accessing contact forms or comment sections. * Enforcing Client Requirements: Denying access to very old or unsupported browser versions (though feature detection is generally better for this). * Protecting Specific API Endpoints: Preventing simple automated scripts from hitting public APIs if the User-Agent is a distinguishing factor (e.g., blocking curl if API should only be accessed via a specific client application).
Limitations: * User-Agent Spoofing: Attackers can easily change their User-Agent header, rendering this method ineffective against sophisticated threats. * Maintenance Overhead: The map list of "bad" user agents needs constant updating as new bots emerge or old ones change their signatures. * False Positives/Negatives: Overly aggressive blocking might inadvertently block legitimate users or useful services (e.g., accessibility tools), while too lenient a list will miss new threats. * Not for Security-Critical Data: Never use User-Agent filtering as the primary security measure for sensitive data or critical application functions.
While limiting access by User-Agent can be a useful tool for traffic management and basic bot filtering, its inherent vulnerability to spoofing means it should always be considered a superficial layer, complementing stronger access control mechanisms.
Method 6: Client Certificate-Based Authentication (Mutual TLS)
Client certificate-based authentication, also known as Mutual TLS (mTLS), provides the highest level of trust and security among the Nginx-native methods. Unlike server certificates, which only authenticate the server to the client, mTLS requires both the server and the client to present and validate each other's certificates. This means that not only does the client verify the server's identity, but the server also verifies the client's identity. This method is exceptionally strong because it relies on cryptographic proof of identity rather than passwords or tokens that can be stolen or guessed.
Implementing mTLS requires Nginx to be configured to request and verify a client certificate during the TLS handshake. If the client fails to present a valid certificate (issued by a trusted Certificate Authority that Nginx recognizes), the connection is terminated before any application data is exchanged.
Key Components: 1. Server Certificate & Key: Standard TLS setup for Nginx. 2. Client Certificate: A certificate (and its corresponding private key) issued to the client. Each client needing access will have one. 3. Certificate Authority (CA): A trusted entity (can be internal/private CA or public CA) that issues and signs the client certificates. Nginx needs a copy of this CA's public certificate to verify client certificates.
Steps to Implement Client Certificate Authentication:
Configure Nginx: Place the ca.crt file (your CA's public certificate) on your Nginx server, then configure Nginx to request and verify client certificates.```nginx http { # ... other http settings ...
server {
    listen 443 ssl;
    server_name mtls.yourdomain.com;

    # Server's own certificate and key
    ssl_certificate /etc/nginx/ssl/mtls.yourdomain.com.crt;
    ssl_certificate_key /etc/nginx/ssl/mtls.yourdomain.com.key;

    # Specify the CA certificate file that Nginx will use to verify client certificates
    ssl_client_certificate /etc/nginx/ssl/ca.crt;

    # Require client certificates:
    # 'on' = required. Connection will fail if no cert or invalid cert.
    # 'optional' = not required, but if provided, it will be validated.
    # 'optional_no_verify' = not required, and if provided, it's not validated.
    ssl_verify_client on;

    # Set the verification depth for client certificates (how many CAs in chain)
    ssl_verify_depth 2; # Adjust based on your CA hierarchy

    # If client certificate verification fails, Nginx can redirect or return an error.
    # This example just returns a 403 by default from ssl_verify_client on.

    # Nginx can extract information from the client certificate for logging or routing
    # For example, the subject DN (Distinguished Name) from the client certificate:
    # ssl_c_s_dn is available after successful verification.
    log_format mTLS_access '$remote_addr - $remote_user [$time_local] '
                           '"$request" $status $body_bytes_sent '
                           '"$http_referer" "$http_user_agent" '
                           '$ssl_protocol $ssl_cipher $ssl_c_s_dn';
    access_log /var/log/nginx/mtls_access.log mTLS_access;

    # Protected location
    location / {
        # Only clients with valid certificates issued by our CA can reach here
        proxy_pass http://your_mtls_backend_service;
        proxy_set_header Host $host;
        proxy_set_header X-Real-IP $remote_addr;
        proxy_set_header X-Forwarded-For $proxy_add_x_forwarded_for;
        proxy_set_header X-Forwarded-Proto $scheme;

        # Pass client certificate details to the backend if needed for application-level authorization
        proxy_set_header X-Client-Cert-Subject "$ssl_c_s_dn";
        proxy_set_header X-Client-Cert-Serial "$ssl_c_serial";
    }

    # If you have an internal API endpoint that *also* requires client certs
    # this Nginx can function as a strong API gateway for such interactions.
    location /internal_mtls_api/ {
        # Inherits ssl_verify_client on; from the server block
        proxy_pass http://internal_api_mtls_backend;
        proxy_set_header X-Client-Cert-Subject "$ssl_c_s_dn";
        # ... other API-specific headers
        # This ensures that even internal API calls are strongly authenticated at the gateway level.
    }
}
} }
Generate Client Certificates and Keys: For each client (user or machine) that needs access, you'll generate a certificate signing request (CSR) and then sign it with your CA.```bash
Example: Generate client certificate for 'user1'
1. Generate Client Private Key
openssl genrsa -out user1.key 2048
2. Generate Client CSR
openssl req -new -key user1.key -out user1.csr -subj "/techblog/en/CN=user1@yourdomain.com"
3. Sign Client CSR with your CA
openssl x509 -req -in user1.csr -CA ca.crt -CAkey ca.key -CAcreateserial -out user1.crt -days 365
4. (Optional) Combine key and cert into PKCS#12 for easy import into browsers
openssl pkcs12 -export -out user1.p12 -inkey user1.key -in user1.crt -certfile ca.crt `` Distributeuser1.p12(oruser1.crtanduser1.key) touser1, along with a secure password for the.p12` file.
Set up a Certificate Authority (CA): For production, you'd typically use an enterprise CA or a well-managed internal CA. For testing or small deployments, you can create a simple self-signed CA.```bash
Example: Create a self-signed CA (for testing purposes only)
1. Generate CA Private Key
openssl genrsa -out ca.key 2048
2. Generate CA Certificate (Self-signed)
openssl req -new -x509 -days 3650 -key ca.key -out ca.crt -subj "/techblog/en/CN=My Test CA" ```
**Use Cases:**
*   **Machine-to-Machine Communication (m2m):** Ideal for securing communication between microservices, backend systems, or IoT devices, where automated, highly secure authentication is critical.
*   **Highly Sensitive Applications:** Protecting critical administrative portals, financial data systems, or classified information.
*   **Internal Corporate Applications:** Ensuring only corporate-issued devices or users with specific certificates can access internal resources.
*   **API Security:** Providing robust authentication for sensitive APIs that require absolute assurance of the client's identity. This complements the broader `API Gateway` functions of platforms like APIPark by providing a strong foundation for client identification.

**Benefits:**
*   **Strongest Authentication:** Cryptographically verifiable identity provides superior security compared to passwords or tokens alone.
*   **No Password Fatigue:** Users don't need to remember or type passwords for each access.
*   **Resistant to Phishing/Brute-Force:** No credentials to phish or brute-force.
*   **Granular Control:** Certificates can be revoked individually, providing fine-grained control over access.

**Complexities:**
*   **Certificate Management:** Requires robust infrastructure for generating, distributing, and revoking client certificates (a dedicated Public Key Infrastructure - PKI). This can be complex to set up and maintain.
*   **Client-Side Setup:** Users need to import their certificates into their browsers or client applications, which can be challenging for non-technical users.
*   **Browser Support:** While most modern browsers support client certificates, the user experience can vary.

Client certificate authentication is a powerful tool for scenarios demanding the highest levels of security and trust. While it introduces operational complexity in certificate management, the security benefits often outweigh these challenges for critical systems.

## Advanced Considerations & Best Practices for Azure Nginx Security

Implementing access restrictions on Nginx is just one piece of a comprehensive security strategy. To ensure the overall resilience and protection of your web applications hosted on Azure with Nginx, several other critical aspects and best practices must be considered.

### 1. HTTPS Everywhere

This cannot be overstated: **always enforce HTTPS**. All the access control methods discussed, especially HTTP Basic Authentication, rely heavily on the underlying transport layer security provided by TLS/SSL. Without HTTPS, credentials can be intercepted, and sensitive information exposed. Configure Nginx to redirect all HTTP traffic to HTTPS, obtain valid SSL certificates (e.g., from Let's Encrypt, Azure Key Vault integrated with Nginx), and use strong TLS configurations (modern ciphers, HSTS). Azure Application Gateway or Azure Front Door can also handle TLS termination for your Nginx instances, offloading the cryptographic burden.

### 2. Logging and Monitoring

Effective security is impossible without comprehensive logging and vigilant monitoring. Nginx provides excellent access logs and error logs.
*   **Access Logs:** Configure detailed access logs (`log_format`) to capture client IP, user agent, request URI, response status, referer, and any custom headers related to authentication (e.g., client certificate subject DN).
*   **Error Logs:** Monitor error logs (`error_log`) for anomalies, failed access attempts, or configuration issues.
*   **Integration with Azure Monitor/Log Analytics:** Ship Nginx logs to Azure Monitor or a centralized logging solution (like ELK stack or Splunk). This allows for real-time analysis, alerting on suspicious activities (e.g., repeated `401` or `403` responses from a single IP, unusual request patterns), and long-term auditing. Azure's capabilities make log aggregation and analysis highly scalable.

### 3. Rate Limiting (`limit_req_zone`, `limit_req`)

Rate limiting is crucial for protecting against brute-force attacks, Denial of Service (DoS) attacks, and ensuring fair resource usage. Nginx's `limit_req_zone` and `limit_req` directives allow you to define rules based on IP address, request method, or other variables to limit the rate of requests.

```nginx
http {
    # Define a rate limiting zone in the http block
    # 'client_ip' as key, 10m (10 megabytes) for storage, rate=1r/s (1 request per second)
    limit_req_zone $binary_remote_addr zone=mylimit:10m rate=1r/s;

    server {
        listen 443 ssl;
        server_name yourdomain.com;

        # Protect a login endpoint from brute-force
        location /login {
            # Apply the rate limit defined earlier
            # 'burst=5' allows 5 requests to exceed the rate temporarily
            # 'nodelay' ensures requests exceeding burst are immediately denied
            limit_req zone=mylimit burst=5 nodelay;

            # ... proxy_pass to login backend ...
        }

        # Apply rate limit to all API endpoints for general protection
        # If your Nginx serves as an API gateway, rate limiting is essential.
        location /api/ {
            limit_req zone=mylimit burst=10; # Allow a bit more burst for APIs

            # ... proxy_pass to API backend ...
            # For highly advanced API rate limiting, quota management, and monetization,
            # platforms like APIPark offer sophisticated controls beyond Nginx's basic capabilities.
        }
    }
}
4. Web Application Firewall (WAF) Integration
While Nginx can perform some basic filtering, it is not a full-fledged Web Application Firewall. For deep packet inspection, protection against common web vulnerabilities (SQL injection, XSS, etc.), and advanced bot protection, consider integrating a dedicated WAF. Azure Application Gateway offers an integrated WAF, or you can deploy third-party WAF solutions. A WAF provides an additional, specialized layer of defense, sitting in front of your Nginx instance.
5. DevOps and Automation
Managing Nginx configurations manually for large or frequently updated applications is prone to errors. Implement DevOps practices: * Version Control: Store Nginx configuration files in a Git repository. * CI/CD: Automate the testing, deployment, and rollback of Nginx configurations. Tools like Ansible, Chef, Puppet, or custom scripts within Azure DevOps pipelines can push validated configurations to your Nginx instances. * Infrastructure as Code (IaC): Manage your Azure VMs, NSGs, and other infrastructure components using tools like Terraform or Azure Bicep to ensure consistent and reproducible deployments.
6. Regular Security Audits
Security is an ongoing process, not a one-time setup. Periodically review your Nginx configurations, access control rules, and overall security posture. * Policy Review: Ensure access policies still align with business requirements. * Vulnerability Scans: Regularly scan your applications and infrastructure for known vulnerabilities. * Penetration Testing: Engage security experts to conduct penetration tests to uncover weaknesses in your defenses. * Keep Nginx Updated: Regularly apply security patches and updates to your Nginx installation to benefit from the latest fixes.
By adopting these advanced considerations and best practices, you can build a highly secure and resilient web application environment on Azure, fortified by the power and flexibility of Nginx. Each layer adds to the overall strength, minimizing the attack surface and enhancing your ability to detect and respond to threats.
Comparing Nginx-Native vs. Plugin/Managed Solutions
The core premise of this article is to demonstrate how to restrict page access using Nginx's native capabilities, without plugins. It's valuable to understand the trade-offs involved in this choice compared to using Nginx plugins or fully managed solutions.
| Feature Area | Nginx Native (No Plugins) | Nginx with Plugins (e.g., Lua modules, specific auth plugins) | Managed Solutions (e.g., Azure Application Gateway WAF, Commercial API Gateway) |
|---|---|---|---|
| Control & Customization | High: Complete control over every directive and flow. Deeply tailored solutions. | Medium-High: Extends Nginx capabilities, but relies on plugin's features and implementation. | Low-Medium: Pre-defined features, configurations, and often limited direct Nginx config access. |
| Performance | Excellent: Lean, minimal overhead. Highly optimized. | Good-Varies: Can introduce some overhead depending on plugin efficiency and complexity. | Good-Excellent: Optimized for specific functions (WAF, load balancing), but may add latency at the gateway layer. |
| Complexity of Setup | Medium: Requires deep understanding of Nginx configuration. Manual htpasswd or auth service development. |
Medium-High: Plugin integration, configuration, and potential scripting (e.g., Lua). | Low: Configuration via portal/API, often abstracting underlying complexity. |
| Maintenance | Medium-High: Manual config updates, security patching, managing external auth services. | Medium-High: Plugin updates, compatibility, potential custom code maintenance. | Low: Vendor handles infrastructure, patching, and often feature updates. |
| Feature Set | Basic/Core (IP, Basic Auth, mTLS, auth_request, rate limiting). |
Extends Nginx with specialized functions (e.g., advanced WAF, complex JWT processing, custom logic). | Comprehensive (advanced WAF, DDoS, bot protection, rich analytics, developer portal, billing). |
| Dependencies | Minimal (possibly an external auth service). | Plugin-specific dependencies, potentially more runtime libraries. | External vendor/cloud provider. |
| Cost | Low (infra cost, in-house expertise). | Low-Medium (plugin cost, dev time). | High (service fees, potentially higher infra costs). |
| Best For | Specific, well-defined access control needs; performance-critical applications; environments prioritizing control. | Extending Nginx for moderately complex, recurring tasks where existing plugins fit well. | Large enterprises, complex security needs, compliance, reducing operational burden, comprehensive API management. |
This comparison highlights that while Nginx's native features provide a robust and highly performant foundation for access control, they demand a deeper level of expertise and manual effort. For very complex, dynamic authorization logic, or comprehensive API management beyond basic routing and authentication, a dedicated API Gateway or a specialized security solution might be more appropriate. This is where platforms like APIPark shine, offering specialized capabilities that complement Nginx's strengths without necessarily replacing its core web serving functions.
Conclusion: Mastering Azure Nginx for Secure Page Access
The journey through Nginx's native access restriction capabilities on Azure reveals a powerful suite of tools at your disposal, capable of securing your web pages and resources without relying on external plugins. From the simplicity of IP-based restrictions to the robust security of client certificate authentication and the flexibility of token-based schemes facilitated by the auth_request module, Nginx offers a spectrum of solutions to meet diverse security requirements. Each method, when understood and implemented correctly, forms a critical layer in your overall security architecture, meticulously guarding your digital assets on the scalable and reliable Azure platform.
We've explored how directives like allow/deny, auth_basic/auth_basic_user_file, valid_referers, and advanced ssl_verify_client configurations empower you with precise control over who can access what. Furthermore, the strategic use of Nginx as an API gateway for specific functionalities, or as a preliminary gateway for backend services, allows for efficient traffic management alongside security. While Nginx excels at these tasks, remember that for comprehensive API lifecycle management, integration with AI models, advanced analytics, and a full-fledged developer experience, specialized platforms such as APIPark provide a deeper and more feature-rich solution that can work in concert with your Nginx deployment. Nginx can handle the initial web requests and basic page access, while APIPark manages the complexities of your API ecosystem, including AI-driven functionalities and sophisticated policy enforcement.
The "without plugin" approach, while requiring a deeper dive into Nginx's configuration intricacies, ultimately grants unparalleled control, minimizes dependencies, and often results in a leaner, more performant deployment. By combining these Nginx-native techniques with essential best practices like ubiquitous HTTPS, vigilant logging and monitoring, rate limiting, and a proactive security audit cycle, you can construct a formidable defense.
In the ever-evolving threat landscape, security is not a one-time configuration but a continuous process of learning, adaptation, and refinement. Mastering Nginx's native access control mechanisms on Azure provides you with the foundational knowledge to build and maintain secure, high-performance web applications that stand resilient against unauthorized access and malicious intent. Embrace the power of Nginx, integrate it wisely within your Azure infrastructure, and fortify your digital presence with confidence.
Frequently Asked Questions (FAQ)
Q1: Why should I choose Nginx's native access restriction methods over using plugins?
A1: Opting for Nginx's native methods offers several compelling advantages: 1. Reduced Dependencies: Less reliance on third-party code means fewer potential points of failure, security vulnerabilities, or compatibility issues that can arise with plugin updates. 2. Enhanced Performance: Native Nginx directives are highly optimized and integrated into Nginx's core, typically offering superior performance with minimal overhead compared to external plugins. 3. Complete Control: You gain granular control over every aspect of your access control logic, allowing for highly customized solutions tailored precisely to your application's unique requirements. 4. Simplified Troubleshooting: Without additional layers introduced by plugins, debugging and understanding configuration behavior become more straightforward. 5. Long-Term Stability: Native features are part of Nginx's core development and are generally more stable and consistently supported across versions.
Q2: Is HTTP Basic Authentication secure enough for sensitive data?
A2: HTTP Basic Authentication can be secure enough for moderately sensitive data, but only when used exclusively over HTTPS (SSL/TLS). Without HTTPS, credentials are sent in easily decodable Base64 encoding, making them vulnerable to interception. While it's simple to implement and manage for small teams or internal tools, it lacks fine-grained authorization, centralized user management for large user bases, and is susceptible to brute-force attacks if not paired with rate limiting. For highly sensitive data, or large-scale public applications, more robust methods like token-based (via auth_request) or client certificate authentication are generally preferred.
Q3: How can Nginx's auth_request module be integrated with existing Identity Providers (IdPs) like Azure AD or Okta?
A3: Nginx's auth_request module provides a flexible mechanism to integrate with various IdPs, including Azure AD or Okta. The key is to develop or deploy a small, external authentication service (often a microservice) that acts as an intermediary. This service would receive the Authorization header (containing a JWT or session cookie) from Nginx, then validate it against your chosen IdP. For Azure AD, this might involve validating an Azure AD issued JWT. For Okta, it could involve calling Okta's introspection endpoint or validating an Okta-issued JWT. The external service performs the actual token validation and responds to Nginx with a 2xx status for success or 4xx for failure, potentially forwarding user details in custom headers back to Nginx. This decouples the authentication logic from Nginx while still allowing Nginx to enforce the access policy at the edge.
Q4: Can Nginx replace a dedicated API Gateway for my API services?
A4: Nginx can function as a powerful API gateway for many basic to moderately complex scenarios, handling tasks like routing, load balancing, SSL termination, and basic authentication/authorization (as discussed in this article). It's an excellent choice for straightforward API proxies. However, a dedicated API Gateway platform, especially one like APIPark, offers a much broader and deeper feature set specifically designed for comprehensive API management. These features include: * Advanced Rate Limiting & Quotas: More sophisticated than Nginx's native capabilities. * API Lifecycle Management: Design, publishing, versioning, and deprecation. * Developer Portal: Self-service for API consumers, documentation, testing. * Monetization & Analytics: Tracking usage, billing, deep insights into API performance. * Security Policies: Fine-grained access control, threat protection, robust authentication schemes. * Integration with AI Models: Unified format, prompt encapsulation (a key feature of APIPark). While Nginx can be your initial gateway for web traffic and even some simpler APIs, platforms like APIPark are built to manage the full complexity of an API ecosystem, providing specialized tools that Nginx doesn't natively offer. They often work together, with Nginx acting as the perimeter and the dedicated API Gateway handling the intricacies of the backend API services.
Q5: What are the main challenges when implementing client certificate authentication with Nginx on Azure?
A5: Implementing client certificate authentication (mTLS) offers strong security but comes with specific challenges: 1. PKI Management: Setting up and maintaining a robust Public Key Infrastructure (PKI) to issue, revoke, and manage client certificates is complex. This includes secure key management for the Certificate Authority (CA) and handling certificate revocation lists (CRLs) or Online Certificate Status Protocol (OCSP). 2. Client-Side Configuration: Distributing client certificates and guiding end-users or client applications on how to install and use them can be challenging, especially for non-technical users or diverse client environments. 3. Operational Overhead: Revoking compromised certificates, issuing new ones, and ensuring all clients have valid, unexpired certificates adds significant operational overhead. 4. Debugging: Troubleshooting mTLS issues can be complex, as failures can occur at various stages of the TLS handshake, requiring detailed logging and network analysis. 5. Scalability of CA: For very large-scale deployments with many clients, the CA infrastructure itself needs to be highly available and scalable.
Despite these challenges, mTLS remains the gold standard for high-security, machine-to-machine, or highly sensitive internal access scenarios due to its cryptographic strength.
🚀You can securely and efficiently call the OpenAI API on APIPark in just two steps:
Step 1: Deploy the APIPark AI gateway in 5 minutes.
APIPark is developed based on Golang, offering strong product performance and low development and maintenance costs. You can deploy APIPark with a single command line.
curl -sSO https://download.apipark.com/install/quick-start.sh; bash quick-start.sh

In my experience, you can see the successful deployment interface within 5 to 10 minutes. Then, you can log in to APIPark using your account.

Step 2: Call the OpenAI API.