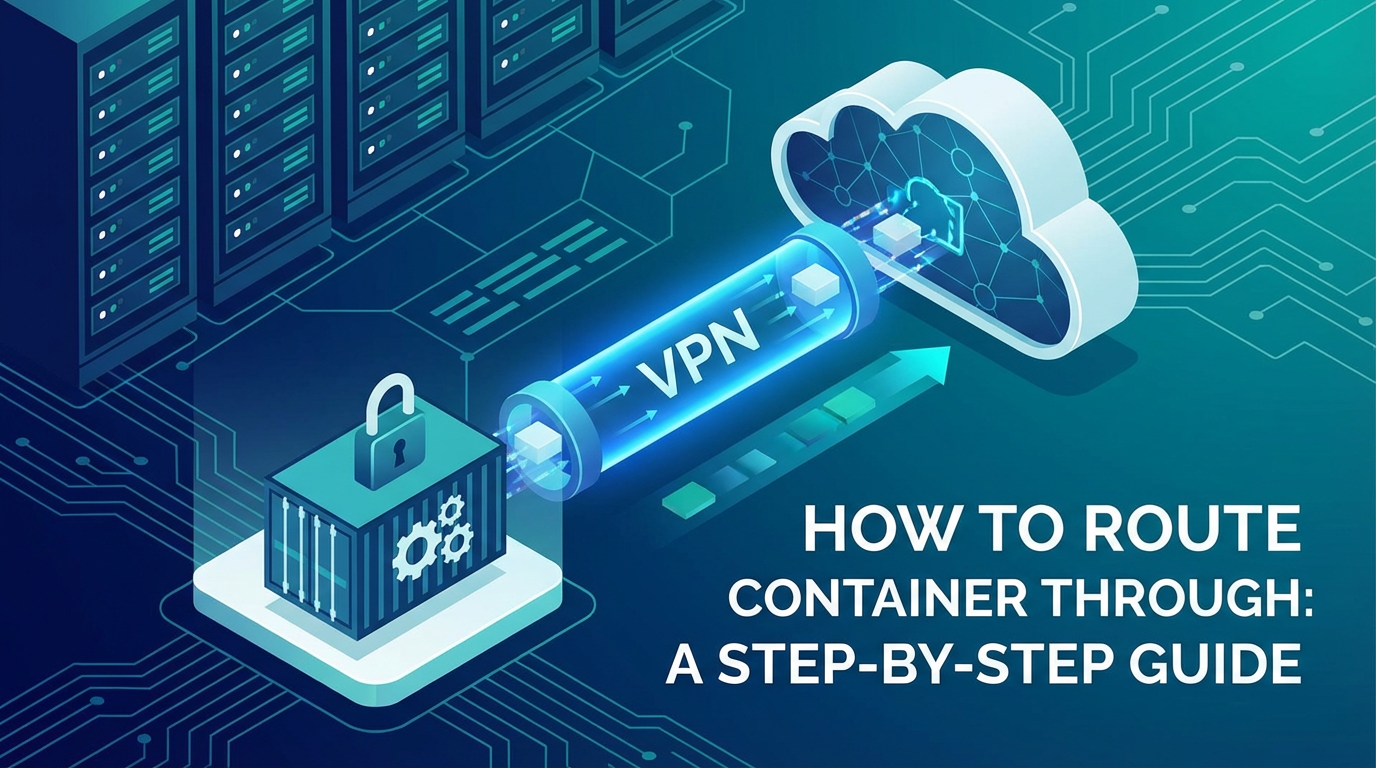
How to Route Container Through VPN: A Step-by-Step Guide


The landscape of modern application development is increasingly dominated by containerization, with Docker leading the charge in providing isolated, portable environments for software. Containers have revolutionized deployment strategies, enabling developers to package applications and their dependencies into self-contained units that run consistently across diverse environments. However, while containers offer unparalleled agility and efficiency, they also introduce unique networking challenges, particularly when it comes to ensuring security, privacy, and access to restricted networks. One such critical challenge is routing container traffic through a Virtual Private Network (VPN).
In an era where data privacy is paramount and cybersecurity threats are ever-present, leveraging a VPN for containerized applications offers a powerful layer of protection. Whether you need to securely access sensitive internal resources, bypass geographical restrictions for testing or deployment, encrypt data in transit over untrusted networks, or simply ensure that your application's outbound traffic remains anonymous, directing container traffic through a VPN is an indispensable technique. Yet, for many, the seemingly straightforward task of connecting a host machine to a VPN often doesn't extend automatically to the containers running on it. Containers, with their isolated network stacks, frequently bypass the host's VPN tunnel by default, leading to potential data leaks or access failures.
This comprehensive guide is designed to demystify the process of routing container traffic through a VPN. We will embark on a detailed exploration, starting with the fundamental concepts of container networking and VPNs, dissecting why containers often sidestep the host’s VPN, and then diving into multiple strategies for achieving secure VPN integration. From simpler host-level configurations to more advanced and robust dedicated VPN container gateways, we will provide step-by-step instructions, practical examples using Docker and docker-compose, and critical insights into best practices for security, performance, and reliability. We will also address common pitfalls and equip you with the knowledge to troubleshoot effectively. By the end of this guide, you will possess a profound understanding and the practical skills necessary to confidently route your containerized applications through a VPN, enhancing their security, privacy, and operational flexibility within complex network environments. The goal is to ensure your containerized applications communicate securely and effectively, leveraging the power of a gateway when necessary, and managing their exposed apis with precision.
I. Understanding the Fundamentals
Before we delve into the intricacies of routing containers through a VPN, it's crucial to lay a solid foundation by understanding the core components involved: containers, their networking models, and the essentials of VPN technology. A clear grasp of these underlying principles will not only make the subsequent implementation steps more comprehensible but also empower you to troubleshoot effectively and adapt solutions to diverse scenarios.
A. Containers and Docker Networking
At its heart, a container is a lightweight, standalone, executable package of software that includes everything needed to run an application: code, runtime, system tools, system libraries, and settings. Unlike traditional virtual machines, containers share the host operating system's kernel, making them significantly more resource-efficient and faster to start. Docker, as the leading containerization platform, orchestrates the creation, deployment, and management of these containers.
The isolation provided by containers extends to their networking capabilities. Each container, by default, operates within its own network namespace, which is an isolated stack of network interfaces, IP addresses, routing tables, and firewall rules. This isolation is key to preventing conflicts between applications and ensuring portability.
Docker offers several network modes that dictate how containers communicate with each other and with the outside world:
bridgeNetwork (Default): This is the most common and default network mode for Docker containers. When Docker is installed, it creates a default bridge network nameddocker0. Containers connected to this bridge network receive an IP address from a private range (e.g., 172.17.0.0/16 by default) and can communicate with each other on the same bridge. Docker uses Network Address Translation (NAT) andiptablesrules on the host to allow outbound communication from containers to the internet and to enable inbound access to exposed container ports from the host or external networks. Thedocker0interface acts as a gateway for containers on this network.hostNetwork: In this mode, a container shares the host's network namespace entirely. It means the container uses the host's network stack directly, including its IP addresses, routing tables, and network interfaces. This mode offers excellent performance as it avoids network address translation, but it sacrifices network isolation and can lead to port conflicts if both the host and container try to use the same port.noneNetwork: Containers in this mode are completely isolated from the network, possessing only a loopback interface. They cannot communicate with other containers or the external network. This mode is useful for batch jobs or security-sensitive tasks where network access is explicitly not required.overlayNetwork: Used in Docker Swarm or Kubernetes, overlay networks facilitate communication between containers distributed across multiple Docker daemon hosts.- Custom Bridge Networks: Developers can create their own user-defined bridge networks. These offer better isolation and provide automatic DNS resolution between containers connected to the same custom network, unlike the default
docker0bridge.
The underlying mechanism for Docker networking relies heavily on Linux network namespaces and virtual Ethernet (veth) pairs. When a container is launched, Docker creates a veth pair, essentially a virtual cable connecting two network interfaces. One end is placed inside the container's network namespace (e.g., eth0), and the other end is attached to a bridge on the host (e.g., docker0 or a custom bridge). This setup allows traffic to flow between the container and the host's network. The host's iptables rules then manage the routing and NAT operations, directing traffic to and from the correct interfaces.
B. VPN Essentials
A Virtual Private Network (VPN) creates a secure, encrypted tunnel over a less secure network, such as the internet. It allows users and devices to send and receive data as if they were directly connected to a private network, even when they are not. This offers several benefits, including enhanced security, privacy, and the ability to bypass geographical restrictions.
Key components and concepts of VPNs include:
- Encrypted Tunnel: All data passing through the VPN connection is encrypted, protecting it from eavesdropping, censorship, and tampering.
- Virtual Network Adapter: When a VPN client connects, it typically creates a virtual network interface (e.g.,
tun0ortap0) on the client machine. All traffic intended for the VPN server's network is routed through this virtual interface. - VPN Protocols: Different protocols govern how VPNs establish and maintain connections, each with its own trade-offs in terms of security, speed, and compatibility.
- OpenVPN: An open-source, robust, and highly configurable VPN protocol known for its strong encryption and flexibility. It typically uses TLS/SSL for key exchange and supports various authentication methods.
- WireGuard: A modern, fast, and simple VPN protocol designed for simplicity and efficiency. It boasts a smaller codebase and often offers better performance than OpenVPN due to its cryptographic primitives and kernel-space implementation.
- IPsec: A suite of protocols used for securing IP communications, commonly used for site-to-site VPNs but also for remote access.
- Client-side vs. Server-side VPN: A VPN setup involves a VPN server (which provides access to the private network) and VPN clients (which connect to the server). When we talk about routing container traffic through a VPN, we are primarily concerned with the client-side configuration, where a VPN client runs on the host or within a container to establish a connection to an external VPN server.
- Routing Tables: A crucial aspect of VPN operation is how it manipulates the host's routing table. When a VPN connection is established, new routes are added to the host's routing table. These routes direct traffic destined for the VPN server's network or for the internet through the virtual VPN interface (e.g.,
tun0), ensuring that all data flows through the encrypted tunnel. This change in routing is precisely why integrating containers with a VPN requires careful consideration, as containers often have their own default routes that may not automatically respect the host's new VPN-specific routes.
C. Linux Network Concepts for VPN Routing
A deeper dive into fundamental Linux networking utilities and concepts is indispensable for successfully managing container VPN routing. These tools provide the granular control needed to direct network traffic as desired.
iptables: This is the Linux kernel's packet filtering firewall and a powerful tool for manipulating network packets.iptablesallows administrators to define rules that control how network traffic flows into, out of, and through the system. It operates on tables (filter, nat, mangle, raw) and chains (INPUT, OUTPUT, FORWARD, PREROUTING, POSTROUTING).- NAT (Network Address Translation): This table is critical for VPN routing. The
POSTROUTINGchain is often used to perform Source NAT (SNAT) or Masquerading, where the source IP address of outgoing packets is changed to that of the host's outgoing interface (e.g., the VPN tunnel interface). This is essential for containers to appear as if their traffic originates from the VPN server. - FORWARD: This chain in the
filtertable controls whether packets are allowed to pass through the host from one interface to another (e.g., from a Docker bridge to the VPN tunnel interface).
- NAT (Network Address Translation): This table is critical for VPN routing. The
- IP Forwarding (
net.ipv4.ip_forward): This kernel parameter, when enabled, allows the Linux host to act as a router. It permits the forwarding of network packets between different network interfaces. For traffic to flow from a Docker container (on a Docker bridge network) through the host's VPN tunnel, IP forwarding must be enabled on the host. This can be checked and enabled via/proc/sys/net/ipv4/ip_forwardor usingsysctl. - Routing Tables (
ip route): The routing table on a Linux system defines the paths that network packets take to reach their destinations. When a VPN connection is established, it adds specific routes to the table, directing traffic through the VPN tunnel interface. Understanding and verifying these routes is critical for diagnosing connectivity issues. For instance, a default route might be changed to point to the VPN's virtual interface, ensuring all internet-bound traffic traverses the tunnel. - DNS Resolution: DNS (Domain Name System) translates human-readable domain names into IP addresses. When using a VPN, it's crucial that DNS queries also go through the VPN tunnel to prevent "DNS leaks," where your ISP or a third party could still see your browsing activity. VPN clients typically configure the system to use DNS servers provided by the VPN service. Containers also need to be configured to use these VPN-specific DNS servers.
By mastering these foundational concepts, you'll be well-equipped to navigate the complexities of container networking and VPN integration, leading to robust and secure deployments.
II. The Challenge: Containers and Host VPNs
A common misconception among users new to container networking is that once the host machine is connected to a VPN, all containers running on it will automatically have their traffic routed through that VPN tunnel. Unfortunately, this is often not the case, and understanding why this happens is crucial for implementing effective solutions. The core of the challenge lies in the distinct network isolation that containers provide and how Docker manages their network stacks.
When a host machine connects to a VPN service, the VPN client software typically performs two primary actions: 1. Creates a Virtual Network Interface: A new virtual network interface (e.g., tun0 for a tunnel device or tap0 for a virtual Ethernet adapter) is established. This interface acts as the entry and exit point for encrypted VPN traffic. 2. Modifies the Host's Routing Table: The VPN client adds or alters entries in the host's kernel routing table. Typically, a new default route is added, directing all outbound internet traffic through the tun0 interface into the encrypted VPN tunnel. This ensures that any application running directly on the host, using the host's default network stack, will send its traffic via the VPN.
However, Docker containers, by default, do not inherit the host's complete network configuration, including its routing table. When you launch a container using the default bridge network mode (which is most common), Docker performs the following: * Independent Network Namespace: Each container receives its own isolated network namespace, complete with its own network interfaces (like eth0 inside the container), IP address, and a separate routing table. * Virtual Ethernet Pair (veth): As discussed, Docker connects the container's eth0 interface to a virtual bridge on the host (like docker0 or a custom bridge) using a veth pair. * Container's Default Gateway: The container's default route points to the Docker bridge interface (e.g., docker0) as its gateway. Traffic from the container exits through its eth0, hits the docker0 bridge, and from there, the host's iptables rules perform NAT to route it to the host's primary physical network interface (e.g., eth0 or wlan0), which then sends it to the internet.
The critical disconnect happens here: the container's routing table still directs its default traffic towards the Docker bridge, which in turn hands it off to the host's physical interface, not necessarily the host's VPN tunnel interface. Unless specifically configured, the host's iptables rules that manage traffic from docker0 typically route it out through the primary physical interface, completely bypassing the tun0 VPN interface. This means that while your host's browser might show a VPN IP address, a curl ifconfig.me command run inside a container might reveal your real, public IP address, indicating a potential data leak.
Diagrammatic View of the Challenge:
[Container App]
    |
    | (Container's eth0)
    V
[Container's Network Namespace & Routing Table]
    | Default Route -> Docker Bridge IP (e.g., 172.17.0.1)
    V
[Host: Docker Bridge (e.g., docker0)]
    |
    | (Host iptables NAT rules)
    V
[Host: Physical Network Interface (e.g., eth0/wlan0)]
    |                                   ^
    |                                   | (VPN Client on Host - NOT USED BY CONTAINER)
    V                                   |
[Internet (REAL IP)] <------------------ [Host: VPN Tunnel Interface (e.g., tun0)]
This fundamental architectural difference necessitates explicit configuration to force container traffic through the VPN tunnel. Simply connecting the host to a VPN is insufficient for containers. We need methods to either make the container's network stack aware of the VPN, or, more commonly, to ensure that the host's routing and NAT rules specifically direct traffic originating from Docker bridges into the VPN's virtual interface. The following sections will explore various strategies to overcome this challenge and achieve secure container-VPN integration.
III. Strategies for Routing Container Traffic Through a VPN
Successfully routing container traffic through a VPN requires careful configuration that bridges the gap between the container's isolated network and the host's VPN tunnel. There isn't a single "one-size-fits-all" solution, as the best approach depends on your specific needs regarding isolation, complexity, and performance. In this section, we'll explore three primary strategies, detailing their pros, cons, and step-by-step implementation.
A. Strategy 1: Host-Level VPN with Specific Container Network Configuration
This strategy is arguably the simplest in concept, where the host machine establishes a VPN connection, and then containers are configured to leverage this connection, either directly or indirectly. It aims to make containers use the host's altered network routing.
Description: In this approach, you establish a VPN connection directly on your host machine. Once the host is connected, its entire network stack (including its routing table) is configured to send all internet-bound traffic through the VPN tunnel. For containers to utilize this, you either run them in host network mode (sacrificing isolation) or, more practically, use iptables rules to explicitly force traffic from Docker's default bridge network through the host's VPN tunnel interface.
Pros: * Relatively Straightforward: For simple setups, especially if running a single container, it can be quick to implement. * No VPN Client in Container: Application containers don't need to be modified to include VPN client software. * Full Host VPN Protection: All host traffic is also secured by the VPN.
Cons: * Less Granular Control: If you only want some containers to use the VPN, this method becomes cumbersome. All host traffic goes through the VPN. * Security Concerns with host Network Mode: Sacrifices network isolation, potentially exposing container processes to the host's network. * iptables Complexity: Requires manual iptables configuration on the host, which can be challenging to manage and ensure persistence.
Implementation Steps (using bridge network mode with iptables):
This approach avoids the isolation compromise of host mode while still routing container traffic via the host's VPN.
- Install and Configure VPN Client on Host: First, ensure your host machine is connected to your VPN service. For OpenVPN, this typically involves installing the
openvpnclient and connecting using your.ovpnconfiguration file.bash # Example for Ubuntu/Debian sudo apt update sudo apt install openvpn resolvconf -y # resolvconf helps manage DNS sudo cp /path/to/your/config.ovpn /etc/openvpn/client.conf sudo systemctl start openvpn@client sudo systemctl enable openvpn@client # Autostart on bootVerify your host's public IP address after connection:curl ifconfig.me. Also, check the new network interface:ip a | grep tun. It should showtun0(or similar). - Enable IP Forwarding on the Host: For the host to act as a router and forward packets between the Docker bridge and the VPN tunnel, IP forwarding must be enabled.
bash sudo sysctl -w net.ipv4.ip_forward=1 # To make it persistent across reboots: echo "net.ipv4.ip_forward=1" | sudo tee -a /etc/sysctl.conf sudo sysctl -p - Identify Docker Network Details: You'll need to know the name of your Docker bridge interface and its IP subnet. By default, it's
docker0with a subnet like172.17.0.0/16.bash ip a show docker0 # Output will show the bridge IP, e.g., 172.17.0.1/16Note down the bridge interface name (e.g.,docker0) and the IP range (e.g.,172.17.0.0/16). Let's also assume your VPN tunnel interface istun0.- MASQUERADE/NAT traffic coming from the Docker bridge (
docker0) and going out through the VPN tunnel (tun0). - FORWARD traffic from the Docker bridge interface to the VPN tunnel interface.
- MASQUERADE/NAT traffic coming from the Docker bridge (
- Persist
iptablesRules (Highly Recommended):iptablesrules are volatile and reset on reboot. Usenetfilter-persistent(Debian/Ubuntu) oriptables-services(CentOS/RHEL) to save and restore them.bash # For Debian/Ubuntu sudo apt install netfilter-persistent -y sudo netfilter-persistent save sudo systemctl enable netfilter-persistent - Verify from within a Container: Run a simple test container and check its public IP.
bash docker run --rm alpine/git wget -qO- ifconfig.meThe output should match the public IP address of your VPN connection.
Configure iptables Rules: This is the crucial step. You need to tell the host to:```bash
IMPORTANT: Adjust 'docker0' and 'tun0' if your interfaces are named differently.
Adjust '172.17.0.0/16' to your Docker bridge's subnet if it's different.
1. Allow forwarding from Docker bridge to VPN tunnel
sudo iptables -I FORWARD -i docker0 -o tun0 -j ACCEPT
2. Allow forwarding from VPN tunnel back to Docker bridge
sudo iptables -I FORWARD -i tun0 -o docker0 -j ACCEPT
3. MASQUERADE (NAT) traffic from Docker bridge when it exits through tun0
This makes packets from containers appear to originate from the VPN tunnel's IP.
sudo iptables -t nat -A POSTROUTING -o tun0 -j MASQUERADE
Optional: If you had previous Docker MASQUERADE rules for the physical interface,
you might need to ensure this new rule takes precedence or remove/modify old ones.
Docker usually adds its own MASQUERADE rule:
iptables -t nat -A POSTROUTING -s 172.17.0.0/16 ! -o docker0 -j MASQUERADE
You might want to modify this to exclude tun0 if you only want some traffic via VPN,
or ensure the tun0 rule is hit first. For simplicity, the above rule should work
as it's specifically for tun0.
```
This strategy effectively routes all container traffic through the host's VPN by leveraging iptables to bridge the Docker network to the VPN tunnel.
B. Strategy 2: Dedicated VPN Container as a Network Gateway (Recommended)
This strategy is generally considered the most flexible, secure, and robust method for routing container traffic through a VPN. It involves running a separate, dedicated container that acts solely as a VPN client and then configuring your application containers to route their traffic through this VPN gateway container.
Description: Instead of having the host connect to the VPN, a specific Docker container is launched with the VPN client inside. This container establishes the VPN connection. Other application containers are then connected to a shared custom Docker network, and their default gateway is set to be the VPN container. This architecture keeps the host's network clean, offers precise control over which containers use the VPN, and provides excellent network isolation.
Pros: * Granular Control: You can selectively route only specific application containers through the VPN. * Clean Host Network: The host's iptables rules and network configuration remain largely untouched (apart from enabling IP forwarding and potentially one MASQUERADE rule for the VPN container itself). * Isolation: The VPN client is isolated within its own container. Application containers don't need VPN software. * Portability: The entire setup (VPN container + application containers) can be easily managed and deployed using docker-compose. * Ideal for Microservices: Each service needing VPN access can simply connect to this shared VPN network.
Cons: * Increased Complexity: More steps involved in the initial setup compared to simply connecting the host to a VPN. * Requires docker-compose: While possible with docker run, docker-compose significantly simplifies orchestration.
Implementation Steps (Detailed Walkthrough using docker-compose and OpenVPN):
This walkthrough assumes you have Docker and Docker Compose installed.
Step 1: Prepare VPN Configuration Files
Obtain your VPN configuration files from your VPN provider. For OpenVPN, this is typically a .ovpn file and potentially separate ca.crt, client.crt, client.key, and ta.key files, along with username/password. Create a directory for your VPN configuration, for example, vpn-config/. Place all necessary files inside. If your .ovpn file has auth-user-pass without a specified file, you might need to create a auth.txt file containing your username on the first line and password on the second.
Example vpn-config/auth.txt:
your_vpn_username
your_vpn_password
Step 2: Create a Docker Network for VPN-Routed Containers
This custom bridge network will host both your VPN gateway container and any application containers that need to route their traffic through the VPN.
docker network create vpn_network
This command creates a new Docker bridge network, distinct from the default docker0.
Step 3: Build the VPN Gateway Container
We'll use a docker-compose.yml file to define our services. For the VPN container, we'll leverage a pre-built image like dperson/openvpn-client which is well-suited for this gateway purpose, or create a custom one. For simplicity and reliability, dperson/openvpn-client is an excellent choice.
Create a docker-compose.yml file in your project root:
version: '3.8'

networks:
  vpn_network:
    external: true # Referencing the network created in Step 2

services:
  vpn_gateway:
    image: dperson/openvpn-client
    cap_add:
      - NET_ADMIN # Required for VPN to modify network interfaces
    devices:
      - /dev/net/tun # Required to create the tun device
    volumes:
      - ./vpn-config:/vpn # Mount your VPN config directory
      - /etc/localtime:/etc/localtime:ro # Sync timezone
    environment:
      - "VPN_CONFIG=config.ovpn" # Name of your .ovpn file in /vpn
      # If your .ovpn uses auth-user-pass and points to a file:
      - "VPN_AUTH=/vpn/auth.txt"
      # If your .ovpn doesn't specify auth file, but uses auth-user-pass:
      # - "OPENVPN_OPTS=--auth-user-pass /vpn/auth.txt" # Use this if your .ovpn doesn't specify auth-user-pass file
      - "ROUTE_LOCALNET=true" # Ensure traffic to local networks is routed
      - "ROUTE_RESET=false" # Prevent the container from resetting host routes
      - "KILL_SWITCH=false" # Only if you want to avoid stopping containers on disconnect
    sysctls:
      - net.ipv4.ip_forward=1 # Enable IP forwarding inside the container
    networks:
      - vpn_network
    restart: always # Ensure the VPN reconnects if it drops
    container_name: vpn_gateway
    # Optional: Expose a port if you want to test VPN connectivity from host
    # ports:
    #   - "8080:8080"
Explanation of vpn_gateway service configuration: * image: dperson/openvpn-client: Uses a robust, pre-built OpenVPN client image. * cap_add: NET_ADMIN: Grants the container the necessary capabilities to modify network interfaces and routing tables within its namespace. * devices: /dev/net/tun: Provides the container with access to the tun device, which is essential for creating the VPN tunnel. * volumes: ./vpn-config:/vpn: Mounts your local vpn-config directory (containing .ovpn, auth.txt, etc.) into the container at /vpn. * environment: Configures the OpenVPN client. VPN_CONFIG specifies your .ovpn file. VPN_AUTH points to your credentials file. ROUTE_LOCALNET=true and ROUTE_RESET=false are important for ensuring proper routing within the Docker network and preventing unwanted changes to the host. * sysctls: - net.ipv4.ip_forward=1: Crucially, this enables IP forwarding inside the VPN container. This allows the VPN container to act as a gateway for other containers. * networks: - vpn_network: Connects the VPN gateway container to the vpn_network we created. * restart: always: Ensures the VPN client automatically restarts if it crashes or the host reboots.
Step 4: Configure iptables on the Host for the VPN Gateway Container
Unlike Strategy 1, where many iptables rules were needed, here the host's iptables primarily needs to handle traffic between the host's physical interface and the vpn_network for the VPN container itself. However, because our application containers will be forwarding through the VPN gateway container, and that container is connected to vpn_network, we need to make sure the host allows this forwarding and performs NAT for the VPN container before the application container's traffic gets encapsulated.
The vpn_gateway container will establish the tunnel. Other containers will send traffic to vpn_gateway, which then sends it out tun0. The host mainly needs net.ipv4.ip_forward=1 and potentially a MASQUERADE rule for the vpn_network to handle the vpn_gateway's initial connection, though Docker often adds a default MASQUERADE rule for its bridge networks anyway.
Crucial Host iptables Rule: The main rule you need is to ensure traffic from the vpn_network (which includes both your app containers and the vpn_gateway itself) is routed correctly. When the vpn_gateway sends its own traffic (to establish the VPN connection) out through the Docker bridge, it needs to be able to reach the internet. Docker usually sets up a MASQUERADE rule for docker0 and user-defined bridges like vpn_network. However, sometimes a specific rule is required to ensure packets from vpn_network go to tun0.
The simplest way to manage this is to:
- Enable IP Forwarding on the Host: (If you haven't already from Strategy 1)
bash sudo sysctl -w net.ipv4.ip_forward=1 echo "net.ipv4.ip_forward=1" | sudo tee -a /etc/sysctl.conf sudo sysctl -p - Ensure Docker's NAT rules for
vpn_networkare active. Docker typically addsiptablesrules automatically for user-defined bridge networks. When thevpn_gatewaycontainer connects, it creates itstun0interface inside the container. Traffic from other containers onvpn_networkwill go intovpn_gatewayand then outvpn_gateway's internaltun0. The host'siptableswill see traffic coming from thevpn_gateway'stun0and then needs to route that. The most directiptablesinteraction with the host here is enablingIP_FORWARD. Thedperson/openvpn-clientimage is designed to manage its own routing within the container.
Step 5: Connect Application Containers to the VPN Network and use the VPN Gateway
Now, define your application container in the same docker-compose.yml file, making sure it's on the vpn_network and uses the vpn_gateway as its default route.
version: '3.8'

networks:
  vpn_network:
    external: true

services:
  vpn_gateway:
    image: dperson/openvpn-client
    cap_add:
      - NET_ADMIN
    devices:
      - /dev/net/tun
    volumes:
      - ./vpn-config:/vpn
      - /etc/localtime:/etc/localtime:ro
    environment:
      - "VPN_CONFIG=config.ovpn"
      - "VPN_AUTH=/vpn/auth.txt" # Or OPENVPN_OPTS=...
      - "ROUTE_LOCALNET=true"
      - "ROUTE_RESET=false"
      - "KILL_SWITCH=false"
    sysctls:
      - net.ipv4.ip_forward=1
    networks:
      - vpn_network
    restart: always
    container_name: vpn_gateway

  my_app_container:
    image: alpine/git # Example: a simple image to test internet access
    networks:
      vpn_network:
        ipv4_address: 172.20.0.10 # Assign a static IP for easier gateway setup (optional but recommended for gateway)
    command: ["tail", "-f", "/techblog/en/dev/null"] # Keep container running for testing
    environment:
      # Crucial: Set the VPN_GATEWAY_IP for the application container
      # The IP of the vpn_gateway container within the vpn_network
      # This assumes the vpn_gateway gets the first available IP on vpn_network
      # You might need to check 'docker inspect vpn_gateway' after it's up to get its actual IP on vpn_network
      # For simplicity, if vpn_network subnet is 172.20.0.0/16, the gateway will likely be 172.20.0.1
      - "VPN_GATEWAY_IP=172.20.0.1" # Adjust based on your vpn_network's gateway IP

    # We need to tell the app container to use the vpn_gateway as its default route.
    # The 'dperson/openvpn-client' image automatically pushes routes, but for custom apps:
    # Option 1: Explicitly set gateway in the container's /etc/resolv.conf and /etc/hosts/ (complex)
    # Option 2: Use an entrypoint script within your app container to modify its routing table.
    # Option 3: Use network-mode "service:vpn_gateway" (This directly reuses the network namespace)

    # The simplest way is to use `network_mode: "service:vpn_gateway"` if you want *full* VPN connectivity
    # for `my_app_container` with the `vpn_gateway` acting as its direct network provider.
    # This places `my_app_container` in the same network namespace as `vpn_gateway`.
    # However, this sacrifices some isolation and might not be what you want for *routing*.
    # For routing, the `dperson/openvpn-client` image typically sets up routing for *other* containers
    # on the same network that it acts as a gateway for.

    # Let's use the explicit routing approach for better isolation between VPN client and app.
    # The `dperson/openvpn-client` container, when `ROUTE_LOCALNET=true`, should configure itself
    # to route traffic for other containers on the same Docker network.
    # Application containers generally get their default gateway from Docker, which is the bridge IP.
    # We need to *override* this default gateway for the app container.
    # This usually requires a custom entrypoint for the app container or setting `network_mode: "service:vpn_gateway"`
    # for full network sharing (which is not true routing).

    # A more robust way to ensure routing without sharing network namespace is to use an
    # init container or a custom entrypoint for `my_app_container`.
    # Example using custom entrypoint for `my_app_container` to set its default gateway:
    command: >
      /bin/sh -c "
        ip route del default;
        ip route add default via 172.20.0.1; # Replace with the actual IP of vpn_gateway on vpn_network
        wget -qO- ifconfig.me;
        tail -f /dev/null
      "
    # Make sure to give the app container a static IP for the gateway to work consistently.
    # And ensure `vpn_gateway` is the first IP on the `vpn_network` or explicitly assign it.
    # The `vpn_network` automatically assigns the first IP as the gateway (e.g., 172.20.0.1)
    # to the container connected first which is `vpn_gateway` in this `docker-compose.yml`.
Understanding the my_app_container configuration: * networks: vpn_network: Connects my_app_container to the vpn_network. * ipv4_address: 172.20.0.10: Assigning a static IP to the application container on vpn_network is good practice for consistent routing. Note: You need to define the subnet for vpn_network if you specify static IPs, e.g., in networks section: vpn_network: driver: bridge; ipam: config: [{subnet: 172.20.0.0/16}]. * command: This entrypoint command is critical. * ip route del default: Removes the default gateway that Docker automatically sets for the container (which points to the vpn_network bridge interface). * ip route add default via 172.20.0.1: Adds a new default route, explicitly telling the container to send all internet-bound traffic to the IP address of the vpn_gateway container within the vpn_network. (Assuming 172.20.0.1 is the vpn_gateway's IP on vpn_network). * wget -qO- ifconfig.me: This is for immediate testing to show the VPN IP. * tail -f /dev/null: Keeps the container running for further inspection.
To make vpn_network have a predictable subnet for static IPs:
version: '3.8'

networks:
  vpn_network:
    driver: bridge
    ipam:
      config:
        - subnet: 172.20.0.0/24 # Define your desired subnet for vpn_network

services:
  vpn_gateway:
    image: dperson/openvpn-client
    cap_add:
      - NET_ADMIN
    devices:
      - /dev/net/tun
    volumes:
      - ./vpn-config:/vpn
      - /etc/localtime:/etc/localtime:ro
    environment:
      - "VPN_CONFIG=config.ovpn"
      - "VPN_AUTH=/vpn/auth.txt"
      - "ROUTE_LOCALNET=true"
      - "ROUTE_RESET=false"
      - "KILL_SWITCH=false"
    sysctls:
      - net.ipv4.ip_forward=1
    networks:
      vpn_network:
        ipv4_address: 172.20.0.2 # Assign the vpn_gateway a static IP (e.g., .2 instead of .1 for clarity)
    restart: always
    container_name: vpn_gateway

  my_app_container:
    image: alpine/git
    networks:
      vpn_network:
        ipv4_address: 172.20.0.10 # Assign a static IP for easier gateway setup
    command: >
      /bin/sh -c "
        # It's crucial for the default gateway IP (172.20.0.2) to be correct!
        # This IP belongs to the vpn_gateway container *on the vpn_network*.
        ip route del default;
        ip route add default via 172.20.0.2;
        echo 'Testing VPN IP from my_app_container:';
        wget -qO- ifconfig.me;
        echo 'Testing DNS from my_app_container:';
        nslookup example.com 1.1.1.1; # Test with external DNS to confirm general connectivity
        tail -f /dev/null
      "
    # Ensure DNS resolution. You might need to add DNS servers if VPN doesn't push them or they aren't forwarded.
    # dns:
    #   - 8.8.8.8
    #   - 1.1.1.1
Important Note on DNS: While the VPN client pushes DNS servers to itself, the my_app_container will typically use the Docker daemon's configured DNS or whatever it inherits from the host. If the VPN container doesn't explicitly forward DNS or configure dnsmasq, you might need to set dns: in your my_app_container's definition to use reliable public DNS servers or the VPN's DNS servers if known.
Step 6: Verify Connectivity and IP Leakage
- Bring up the services:
bash docker-compose up -d - Check VPN gateway logs: Ensure the VPN connection is established successfully.
bash docker logs vpn_gateway # Look for "Initialization Sequence Completed" or similar success messages. - Inspect
my_app_containeroutput (ifcommandhaswget):bash docker logs my_app_container # The output from ifconfig.me should show your VPN's public IP. - Execute commands directly in
my_app_container:bash docker exec my_app_container ip route # Verify the default route is via 172.20.0.2 docker exec my_app_container wget -qO- ifconfig.me # Double-check VPN IPIf everything is configured correctly, yourmy_app_container's outbound traffic will now be routed through thevpn_gatewayand exit via the VPN tunnel.
C. Strategy 3: VPN Client Inside the Application Container (Less Recommended)
This strategy involves embedding the VPN client directly within your application's Docker image. While it might seem convenient for self-contained applications, it often introduces more complexity and potential security concerns than benefits.
Description: In this approach, you build a custom Docker image for your application that includes both your application code and the VPN client software (e.g., OpenVPN client). The container's entrypoint script is then responsible for starting the VPN connection before or concurrently with your application.
Pros: * Self-Contained: The application and its VPN client are bundled together, simplifying deployment to environments where custom Docker networks or host iptables modifications are difficult. * No Host iptables Changes (Mostly): The VPN client within the container handles its own routing within its network namespace.
Cons: * Increased Image Size: Adding a VPN client (and its dependencies) significantly bloats your application's Docker image. * Complex Dockerfile: Requires a more intricate Dockerfile to install the VPN client, copy configuration, and manage its startup. * Security Implications: VPN configuration files (including credentials) are embedded or mounted directly into the application container, potentially increasing the attack surface if the container is compromised. * Tight Coupling: The application becomes tightly coupled with the VPN client, making it harder to update or switch VPN providers. * Resource Overhead: Each application container running its own VPN client consumes additional CPU and memory. * Requires Privileged Container: The container typically needs NET_ADMIN capability and access to /dev/net/tun, which are privileged settings and a security risk.
Implementation Considerations: 1. Dockerfile: * Start with a base image (e.g., alpine or ubuntu) and install the VPN client (openvpn, wireguard-tools). * Copy VPN configuration files and credentials into the image (or mount them as volumes during runtime, which is more secure). * Ensure /dev/net/tun is accessible (by requiring --device /dev/net/tun when running). * Add cap_add: NET_ADMIN to the docker run command or docker-compose.yml. 2. Entrypoint Script: * Your container's ENTRYPOINT script needs to first start the VPN client in the background. * Then, it should wait for the VPN connection to establish (e.g., by polling ip a show tun0 or checking logs). * Finally, it should start your application. * It also needs to handle DNS resolution within the container to prevent leaks. 3. docker-compose.yml (Example Snippet): yaml version: '3.8' services: my_vpn_app: build: . # Refers to a Dockerfile in the current directory cap_add: - NET_ADMIN devices: - /dev/net/tun volumes: - ./vpn-config:/vpn_client_config # Mount config securely environment: - VPN_CONFIG_FILE=/vpn_client_config/my_app_vpn.ovpn # The entrypoint in the Dockerfile will handle starting VPN and app restart: always And a highly simplified Dockerfile for my_vpn_app: dockerfile FROM alpine/git:latest # Or your app's base image RUN apk add --no-cache openvpn COPY entrypoint.sh /usr/local/bin/entrypoint.sh RUN chmod +x /usr/local/bin/entrypoint.sh ENTRYPOINT ["/techblog/en/usr/local/bin/entrypoint.sh"] CMD ["my_actual_app_command"] # Or whatever your app needs to run With entrypoint.sh something like: bash #!/bin/sh openvpn --config "$VPN_CONFIG_FILE" --daemon # Wait for VPN to connect (e.g., check tun0 exists and has an IP) until ip a show tun0 | grep -q 'inet '; do sleep 1; done # Update DNS to use VPN's DNS or a public secure DNS echo "nameserver 1.1.1.1" > /etc/resolv.conf exec "$@" # Run the actual application command
This strategy is generally discouraged for production environments due to the inherent complexities and security trade-offs. The dedicated VPN container gateway approach (Strategy 2) offers a much cleaner separation of concerns, better security, and easier management for most use cases.
| Feature | Strategy 1: Host-Level VPN + iptables | Strategy 2: Dedicated VPN Container Gateway | Strategy 3: VPN Client in App Container |
|---|---|---|---|
| VPN Location | Host Machine | Separate Docker Container | Inside Application Container |
Host iptables |
Extensive changes required | Minimal (IP forwarding, Docker default NAT) | Minimal (IP forwarding if needed for tun) |
| Isolation | Moderate (app containers separate, but all host traffic uses VPN) | High (VPN client isolated from app) | Low (VPN client tightly coupled to app) |
| Granular Control | Low (all traffic) | High (per-container/service) | High (per-app container) |
| Image Size | N/A (VPN on host) | Dedicated VPN container has client | Bloated (app + VPN client) |
| Complexity | Moderate (iptables can be tricky) |
Moderate to High (initial setup, docker-compose) |
High (Dockerfile, entrypoint scripts) |
| Security | Host VPN config exposed to host | VPN config isolated, less host impact | VPN config directly with app, privileged container |
| Recommended for | Simple, single-host setups where all traffic needs VPN | Multi-service deployments, granular control, robust production | Niche cases where extreme self-containment is critical, but generally avoided |
APIPark is a high-performance AI gateway that allows you to securely access the most comprehensive LLM APIs globally on the APIPark platform, including OpenAI, Anthropic, Mistral, Llama2, Google Gemini, and more.Try APIPark now! 👇👇👇
IV. Advanced Considerations and Best Practices
Having implemented one of the routing strategies, it's essential to consider advanced configurations and best practices to ensure your containerized VPN setup is not only functional but also secure, performant, and reliable. Ignoring these aspects can lead to DNS leaks, connection drops, or even expose your data.
A. DNS Resolution
DNS (Domain Name System) is the internet's phonebook, translating domain names (like google.com) into IP addresses. When routing container traffic through a VPN, ensuring that DNS queries also traverse the VPN tunnel is paramount to prevent "DNS leaks." A DNS leak occurs when your system uses its default DNS servers (often provided by your ISP) instead of the VPN provider's secure DNS servers, potentially revealing your browsing activity despite your IP address being hidden by the VPN.
Preventing DNS Leaks:
- VPN Provider's DNS: Most VPN services provide their own DNS servers (or configure public, privacy-focused ones like Cloudflare's 1.1.1.1 or Google's 8.8.8.8) when a connection is established.
- Host-Level VPN: Ensure your host's
resolv.confis updated by the VPN client. For containers, they usually inherit DNS from Docker's daemon configuration. You might need to explicitly configure Docker to use specific DNS servers. Edit/etc/docker/daemon.json:json { "dns": ["1.1.1.1", "8.8.8.8"] }Then restart Docker:sudo systemctl restart docker. - Dedicated VPN Container Gateway: The
dperson/openvpn-clientimage (and similar) often handles DNS resolution within the VPN container. For application containers, they will typically inherit the Docker bridge's DNS. If you configured yourvpn_networkwith a static IP and routed traffic through thevpn_gateway, you might need to manually set DNS formy_app_containerto point to thevpn_gateway's IP or public DNS.yaml services: my_app_container: # ... dns: - 172.20.0.2 # IP of vpn_gateway on vpn_network, if it runs a DNS resolver - 1.1.1.1 # Fallback to public secure DNSThedperson/openvpn-clientcan often forward DNS requests or act as adnsmasqserver if configured to do so. Otherwise, direct application containers to a reliable public DNS that is reachable through the VPN.
- Host-Level VPN: Ensure your host's
- Verify DNS from within a Container: After setting up, run:
docker exec <container_name> nslookup example.com. The "Server" field should reflect your VPN's DNS or a public DNS you explicitly configured. You can also use online DNS leak test tools (e.g.,dnsleaktest.com) by running a browser within a VPN-routed container, if applicable, or by runningcurlcommands to these sites from your container.
B. Persistence and Automation
iptables rules, once added, are volatile and disappear after a reboot. VPN connections can also drop. Ensuring persistence and automation is vital for a robust setup.
- Persisting
iptablesRules:- Debian/Ubuntu: Use
netfilter-persistent. After adding rules,sudo netfilter-persistent saveandsudo systemctl enable netfilter-persistent. - CentOS/RHEL: Use
iptables-services. After adding rules,sudo iptables-save > /etc/sysconfig/iptablesandsudo systemctl enable iptables.service. - Custom Script: You can write a shell script to add all your
iptablesrules and configure it to run at boot (e.g., viasystemdunit file or/etc/rc.local).
- Debian/Ubuntu: Use
- Docker Restart Policies: Always use
restart: always(oron-failure,unless-stopped) in yourdocker-compose.ymlfor both the VPN gateway container and critical application containers. This ensures they automatically restart if they crash or after a host reboot.yaml services: vpn_gateway: # ... restart: always - Automating Deployment with
docker-compose: Thedocker-compose.ymlfile is your single source of truth for defining and running your multi-container application. It simplifies starting, stopping, and managing your services with a single command:docker-compose up -d.
C. Security Implications and Firewall Rules
Integrating VPNs with containers introduces several security considerations that must be addressed to protect your data and network.
- Enable Host Firewall: Even with a VPN, a host firewall (like UFW on Ubuntu or
firewalldon CentOS) is essential.- Restrict Access: Only allow necessary inbound connections to your host. For example, if Docker exposes ports, ensure your firewall permits them.
- Protect VPN Port: If your VPN client uses a specific port (e.g., UDP 1194 for OpenVPN), ensure your host firewall allows outbound connections on this port.
- Block Non-VPN Traffic (Kill Switch): A kill switch ensures that if the VPN connection drops, no traffic leaves your host or containers over the unencrypted internet.
- Host-Level Kill Switch: Implement
iptablesrules on the host that drop all traffic not routed throughtun0or destined for the VPN server's IP. This can be complex to set up correctly and maintain. - VPN Client Kill Switch: Some VPN clients (like
dperson/openvpn-clientviaKILL_SWITCH=trueenvironment variable) offer an internal kill switch that will stop the container if the VPN disconnects. This is an excellent feature for the dedicated VPN container gateway strategy.
- Host-Level Kill Switch: Implement
- Manage Privileges: Running containers with
cap_add: NET_ADMINor--privilegedgrants them extensive network control. While necessary for VPN clients, minimize their use for application containers. The dedicated VPN container gateway strategy is preferred because only the VPN container needs these elevated privileges, not your application containers. - Secure VPN Credentials: Never hardcode sensitive VPN credentials (usernames, passwords, private keys) directly into Dockerfiles or
docker-compose.ymlfiles.- Volume Mounts: Mount configuration files (
.ovpn,auth.txt) as volumes from the host. - Docker Secrets/Environment Variables: Use Docker Secrets or environment variables for credentials, especially in production environments or orchestration platforms like Kubernetes.
- Volume Mounts: Mount configuration files (
D. Performance and Reliability
VPNs introduce an overhead due to encryption/decryption and routing through an additional hop.
- VPN Provider Choice: Choose a reputable VPN provider known for speed, reliability, and privacy. The performance of your VPN connection will directly impact your container's network performance.
- VPN Protocol: WireGuard typically offers better performance than OpenVPN due to its leaner design and modern cryptography. If available and supported by your provider, consider using WireGuard.
- Resource Allocation: Ensure your host machine has sufficient CPU and memory, especially if running multiple VPN-routed containers or high-bandwidth applications. The VPN client itself consumes resources.
- Monitoring: Monitor your VPN connection's status and the network performance of your containers. Look for connection drops, high latency, or low throughput. Tools like
iftopornethogson the host, orpingandtraceroutefrom within containers, can help.
E. Orchestration with Kubernetes (Brief Mention)
While this guide focuses heavily on Docker and docker-compose, it's worth noting how these concepts extend to Kubernetes. In a Kubernetes environment, routing specific Pods through a VPN typically involves:
- Sidecar Pattern: A common approach is to deploy a VPN client container as a sidecar alongside your application container within the same Pod. Since containers in a Pod share the same network namespace, the application container will automatically route its traffic through the VPN client. This mirrors Strategy 3 but within the more controlled Kubernetes environment.
- Custom Network Policies: Kubernetes Network Policies can restrict traffic flow, but they primarily focus on controlling which Pods can communicate with each other, not on forcing outbound traffic through a specific tunnel.
- DaemonSets: For host-level VPNs in Kubernetes, you might deploy a VPN client as a DaemonSet, ensuring a VPN client runs on every node, and then configure node-level routing. This is more complex and less common for specific application VPN routing.
F. Managing Containerized Services with an API Gateway
While outbound traffic routing through a VPN is crucial for security and access, managing the inbound access to the services within these containers is equally vital, especially when those services expose APIs. This is where an API gateway becomes indispensable. An API gateway acts as a single entry point for all API calls, providing centralized management for authentication, authorization, rate limiting, and traffic routing to various backend services, which are often running as containers.
For organizations grappling with numerous containerized microservices and diverse AI models, solutions like ApiPark offer comprehensive API lifecycle management. APIPark, an open-source AI gateway and API management platform, excels at quickly integrating over 100 AI models, unifying API formats, and encapsulating prompts into REST APIs. It streamlines the deployment and management of both AI and traditional REST services, enhancing security and efficiency for developers and enterprises alike, regardless of whether their backend services are behind a VPN or publicly accessible. By providing end-to-end API lifecycle management, APIPark helps regulate API management processes, manage traffic forwarding, load balancing, and versioning of published APIs. This means that while your containers are securely routing their outbound traffic through a VPN, an API gateway like APIPark can precisely control and secure all inbound requests, ensuring that your containerized services are both protected and professionally managed from the API perspective. It offers powerful data analysis and detailed API call logging, critical features for monitoring the health and usage of your container-backed services.
V. Troubleshooting Common Issues
Even with the most careful planning and implementation, you might encounter issues when routing container traffic through a VPN. Here are some common problems and their solutions, designed to help you diagnose and resolve connectivity and routing failures.
A. No Internet Access in Container
This is the most frequent issue. Your container starts, but it can't reach any external websites.
- Check Host VPN Status:
- Is your host's VPN client connected? Check the VPN client's status or logs.
- Verify your host's public IP (
curl ifconfig.me) and ensure it's the VPN IP. - Check for the VPN tunnel interface (
ip a | grep tun).
- Verify IP Forwarding on Host:
- Ensure
net.ipv4.ip_forwardis enabled:cat /proc/sys/net/ipv4/ip_forward. It should output1. If not,sudo sysctl -w net.ipv4.ip_forward=1.
- Ensure
- Inspect
iptablesRules (Especially for Strategy 1):- Use
sudo iptables -t nat -vnL POSTROUTINGandsudo iptables -vnL FORWARDto examine your NAT and FORWARD chains. - Look for rules that
MASQUERADEtraffic from your Docker bridge (docker0orvpn_network's bridge interface) out through the VPN tunnel interface (tun0). - Ensure
FORWARDrules permit traffic between the Docker bridge and thetun0interface. - If you're using
docker-compose, ensure thevpn_gatewaycontainer hassysctls: - net.ipv4.ip_forward=1.
- Use
- Check Container's Routing Table:
- Access the problematic container:
docker exec <container_name> ip route. - For Strategy 2, ensure the
default viaentry points to the IP address of yourvpn_gatewaycontainer on the shared Docker network (e.g.,default via 172.20.0.2 dev eth0). If it points to the Docker bridge IP, your custom routing didn't take effect.
- Access the problematic container:
- Ping Internal/External IPs:
- From within the container:
ping 8.8.8.8. If this works butping google.comfails, it's likely a DNS issue. - If
ping 8.8.8.8fails, it's a fundamental routing or firewall problem.
- From within the container:
B. DNS Leaks
Your container shows the VPN IP, but nslookup (or a DNS leak test site) reveals your real DNS server or ISP.
- Verify Container's
resolv.conf:- Inside the container:
docker exec <container_name> cat /etc/resolv.conf. - It should list DNS servers that are either provided by your VPN or explicitly configured secure public DNS (like 1.1.1.1). If it shows your ISP's DNS, that's the leak.
- Inside the container:
- Check Docker Daemon DNS Configuration:
- As described in Section IV.A, ensure
/etc/docker/daemon.jsoncontains appropriate DNS servers and Docker has been restarted.
- As described in Section IV.A, ensure
- Explicitly Set Container DNS:
- For
docker-compose, use thednsoption for your application containers, pointing to known secure DNS servers or the IP of yourvpn_gatewayif it's acting as a DNS resolver.
- For
- VPN Client DNS Push:
- Ensure your VPN client (host-level or in
vpn_gateway) is correctly pushing DNS server configurations. Check the VPN client logs for messages about DNS. Thedperson/openvpn-clientimage has options (DNS=true) to force DNS updates.
- Ensure your VPN client (host-level or in
C. VPN Connection Drops
The VPN connection frequently disconnects, leading to intermittent connectivity.
- VPN Client Logs:
- Check the logs of your VPN client (on the host or in
vpn_gatewaycontainer):sudo systemctl status openvpn@clientordocker logs vpn_gateway. Look for error messages, authentication failures, or network instability.
- Check the logs of your VPN client (on the host or in
restart: alwaysPolicy:- Ensure your
vpn_gatewayservice indocker-compose.ymlhasrestart: alwaysto automatically attempt reconnection.
- Ensure your
- VPN Provider Reliability:
- Sometimes, the issue is with the VPN provider's server stability. Try switching to a different VPN server location or contacting support.
- Network Stability:
- Check your underlying internet connection. An unstable host connection will naturally lead to VPN drops.
D. Performance Degradation
Slower-than-expected network speeds within VPN-routed containers.
- VPN Overhead:
- A VPN inherently adds overhead due to encryption/decryption and routing through a remote server. Some speed reduction is normal.
- VPN Server Load/Distance:
- Try connecting to a VPN server closer to your physical location or one known to be less congested.
- VPN Protocol:
- WireGuard is generally faster than OpenVPN. If your provider supports it, consider switching.
- Host Resources:
- Monitor CPU and memory usage on your host. If the VPN client or Docker daemon is resource-constrained, it can impact performance.
- Network Bandwidth:
- Ensure your host's internet connection has sufficient bandwidth.
E. Firewall Blocks
Specific traffic is blocked, even when the VPN seems connected.
- Host Firewall (UFW/Firewalld):
- Check your host's firewall rules (
sudo ufw status verboseorsudo firewall-cmd --list-all). - Ensure traffic related to Docker bridge networks, the VPN client's connection (e.g., UDP 1194 for OpenVPN), and any exposed container ports are explicitly allowed.
- Temporarily disable the host firewall for testing (
sudo ufw disableorsudo systemctl stop firewalld) to confirm if it's the culprit. Remember to re-enable it.
- Check your host's firewall rules (
iptablesRules Order:- The order of
iptablesrules matters. ADROPorREJECTrule placed too early can block legitimate traffic. Ensure yourMASQUERADEandFORWARDrules for Docker and VPN are correctly positioned.
- The order of
- VPN Provider Firewall:
- Some VPN providers block certain ports or traffic types on their servers. If you're trying to reach an unusual port or service, verify your VPN provider's policies.
By systematically going through these troubleshooting steps, you can pinpoint the source of most container VPN routing issues and restore proper, secure network connectivity for your applications.
VI. Conclusion
The journey of routing container traffic through a VPN, while initially fraught with potential complexities, ultimately culminates in a powerful enhancement to the security, privacy, and operational flexibility of your containerized applications. We’ve meticulously traversed the foundational concepts of Docker networking and VPN essentials, demystified the reasons why containers often bypass host VPNs, and rigorously explored three distinct strategies for achieving secure routing. From the simpler host-level iptables adjustments to the more robust and recommended dedicated VPN container gateway approach, and even the less-favored in-app VPN client method, you now possess a diverse toolkit to tackle various deployment scenarios.
The dedicated VPN container gateway stands out as the most versatile and secure strategy, offering granular control over which containers utilize the VPN, maintaining a clean host network configuration, and providing excellent isolation between the VPN client and your application logic. This modularity is particularly beneficial in modern microservices architectures, where managing numerous interconnected services and their respective network requirements can become incredibly intricate. By centralizing the VPN client in a dedicated container, you establish a clear and manageable network gateway for your sensitive application traffic, ensuring consistency and ease of maintenance across your deployments.
Beyond initial setup, we delved into critical advanced considerations and best practices. DNS leak prevention, ensuring the persistence of your iptables rules and VPN connections, and implementing robust host firewall policies are not mere afterthoughts but fundamental pillars of a truly secure and reliable VPN-container integration. Understanding the security implications of privileged containers and diligently protecting your VPN credentials are paramount to safeguarding your application data from potential vulnerabilities. The mention of APIPark highlights the continuous evolution of containerized environments: while a VPN secures the outbound flow, a sophisticated API gateway manages the inbound exposure of services, providing essential layers for access control, traffic management, and lifecycle governance for the APIs your containers expose. This holistic approach to network and service management is crucial in today's interconnected digital landscape.
As containerization continues its rapid ascent, integrating secure network practices becomes increasingly non-negotiable. The knowledge and practical steps outlined in this guide empower you to confidently navigate the intricacies of container networking, ensuring your applications communicate securely and privately, irrespective of the underlying network environment. By applying these techniques and embracing the best practices for security and reliability, you are not just solving a technical challenge; you are building a resilient, private, and capable infrastructure for your next generation of containerized applications.
Frequently Asked Questions (FAQs)
1. Why can't my container simply use the host's VPN connection by default? Containers operate within their own isolated network namespaces, which include independent routing tables. When your host connects to a VPN, it modifies its own routing table to direct traffic through the VPN tunnel. However, containers, by default, send their traffic to a Docker bridge interface (like docker0), which then typically routes to the host's physical network interface, bypassing the VPN tunnel. Explicit configuration (either through iptables or a dedicated VPN container) is required to redirect container traffic into the VPN tunnel.
2. What's the main advantage of using a dedicated VPN container as a gateway? The primary advantage is granular control and isolation. A dedicated VPN container runs the VPN client and acts as a network gateway for other application containers on a shared Docker network. This means: * Only the VPN container requires elevated privileges (NET_ADMIN), not your application containers. * You can selectively route specific application containers through the VPN, leaving others or the host's traffic un-VPN'd. * It keeps your host's network configuration cleaner, with fewer iptables rules to manage directly on the host. * It's highly portable and can be easily managed with docker-compose.
3. How do I prevent DNS leaks when routing containers through a VPN? To prevent DNS leaks, ensure that all DNS queries from your containers also go through the VPN tunnel or use secure, non-logging DNS servers. This involves: * Configuring your Docker daemon to use specific DNS servers (e.g., your VPN provider's DNS, 1.1.1.1, or 8.8.8.8) in /etc/docker/daemon.json. * Explicitly setting the dns: option for individual services in your docker-compose.yml, pointing to secure DNS servers. * For the dedicated VPN gateway approach, sometimes the VPN container can act as a DNS forwarder, or you might configure your app containers to use a public DNS reachable via the VPN. Always verify inside the container using docker exec <container_name> cat /etc/resolv.conf and nslookup.
4. Are there performance implications when routing container traffic through a VPN? Yes, routing traffic through a VPN introduces an overhead. This is due to: * Encryption and Decryption: Data must be encrypted before sending and decrypted upon receiving, consuming CPU resources. * Additional Hops: Traffic travels to the VPN server and then to its final destination, potentially increasing latency. * VPN Server Load: The performance of the VPN server itself can impact your speeds. To mitigate this, choose a reputable VPN provider, select servers geographically closer to you, consider using faster protocols like WireGuard, and ensure your host machine has adequate resources.
5. Is it secure to put my VPN configuration files inside a Docker image? Generally, it is less secure to embed VPN configuration files (especially those containing credentials or private keys) directly into a Docker image. If the image is compromised or accessible, these sensitive files could be exposed. Best practices include: * Volume Mounting: Mount your VPN configuration files from the host into the container at runtime. This keeps them off the image layer. * Docker Secrets: For production environments, use Docker Secrets (or Kubernetes Secrets) to inject credentials into your containers securely without exposing them in files or environment variables. This provides a more robust and managed approach to sensitive data.
🚀You can securely and efficiently call the OpenAI API on APIPark in just two steps:
Step 1: Deploy the APIPark AI gateway in 5 minutes.
APIPark is developed based on Golang, offering strong product performance and low development and maintenance costs. You can deploy APIPark with a single command line.
curl -sSO https://download.apipark.com/install/quick-start.sh; bash quick-start.sh

In my experience, you can see the successful deployment interface within 5 to 10 minutes. Then, you can log in to APIPark using your account.

Step 2: Call the OpenAI API.