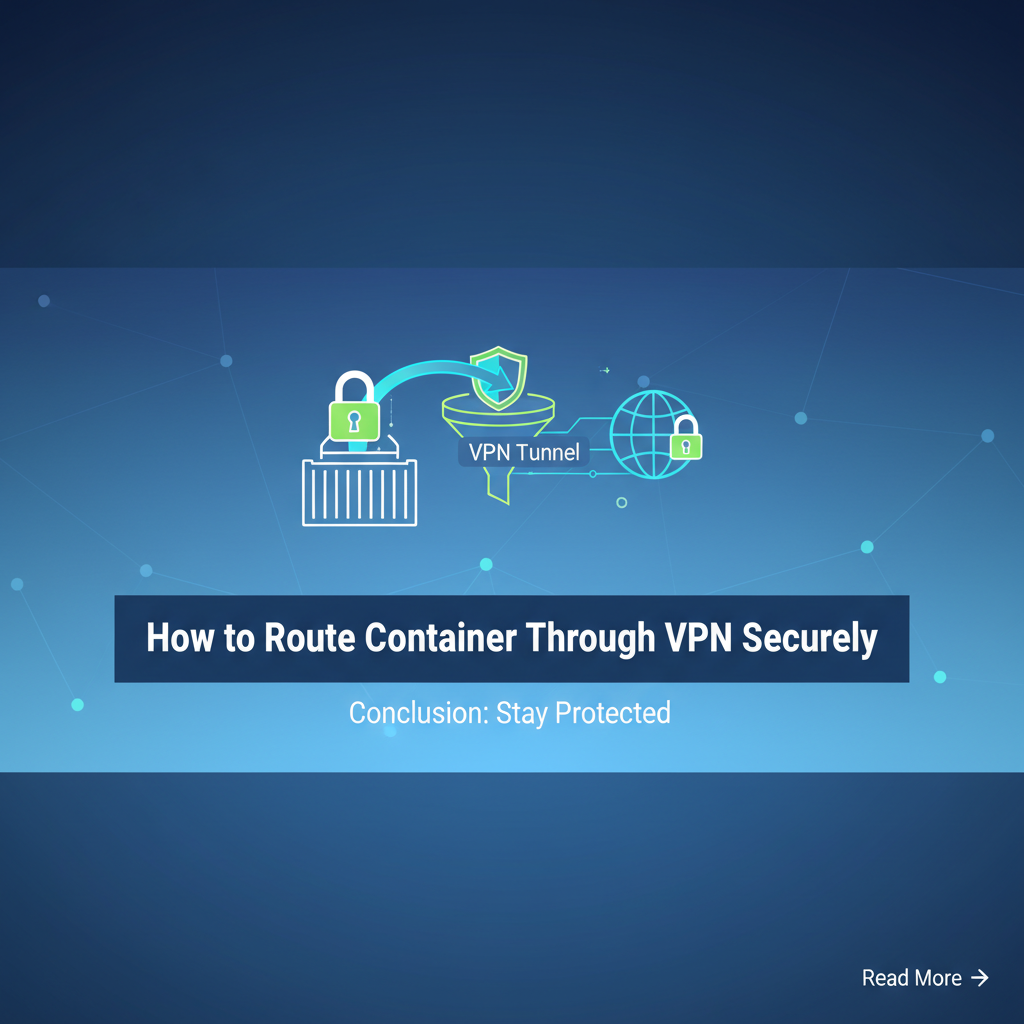
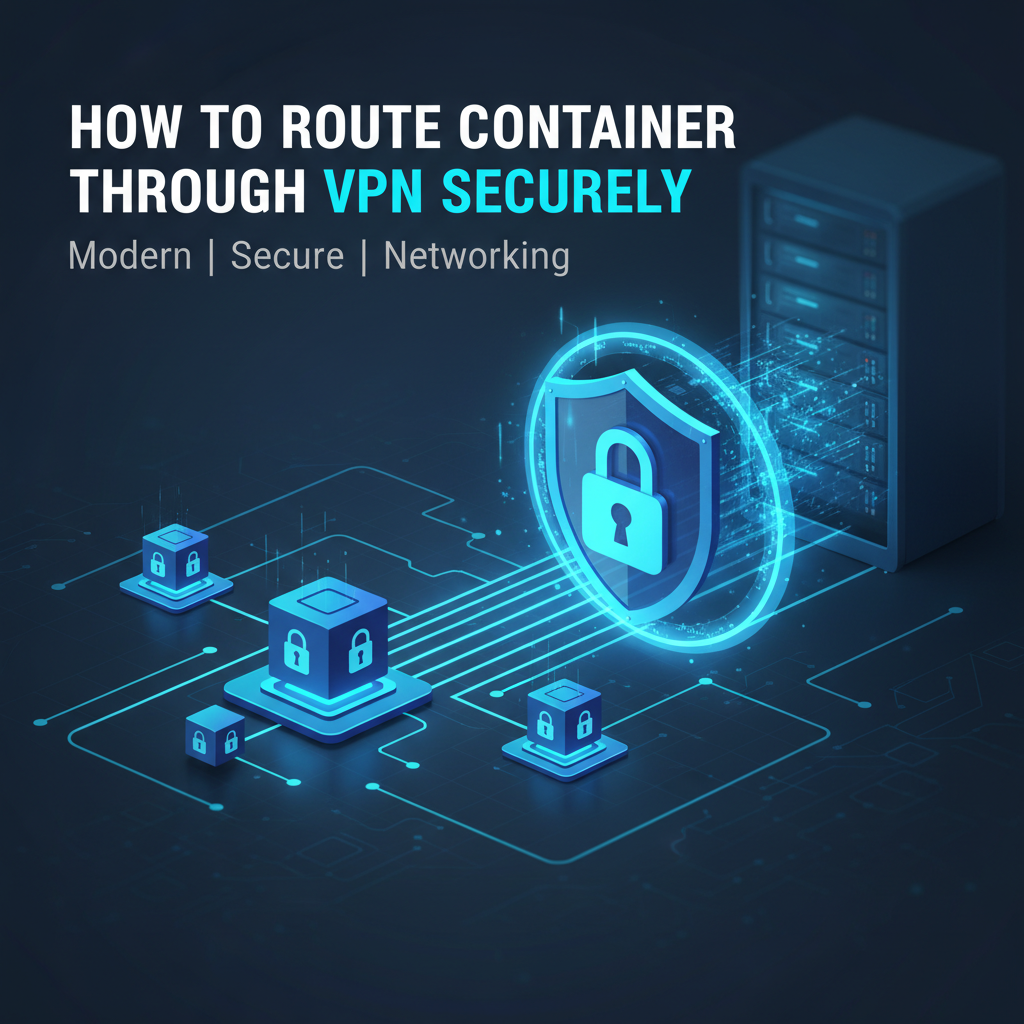
How to Route Container Through VPN Securely


In the contemporary digital landscape, where agility and resilience are paramount, containerization has emerged as a cornerstone technology for modern application development and deployment. From microservices architectures to machine learning workloads, containers provide an isolated, portable, and efficient environment for running applications. However, this inherent portability and network flexibility also introduce a complex challenge: how to ensure that containerized applications communicate securely, especially when interacting with sensitive internal resources or operating in environments where privacy and data integrity are non-negotiable. This is where the integration of Virtual Private Networks (VPNs) with containerized deployments becomes not just a feature, but a critical security imperative.
Routing container traffic through a VPN is a nuanced process that demands a deep understanding of both container networking and VPN technologies. It's about more than just encrypting data; it's about establishing secure tunnels, preventing IP leaks, managing network policies, and ensuring that only authorized traffic traverses the intended secure pathways. Enterprises and developers alike seek robust solutions to protect their containerized applications from eavesdropping, data interception, and unauthorized access, particularly when these applications handle confidential information or operate across public networks. This comprehensive guide will delve into the intricacies of securely routing containers through a VPN, exploring fundamental concepts, practical implementation strategies, essential security best practices, and the challenges inherent in such advanced network configurations. By the end, readers will possess the knowledge to architect and deploy secure container environments that leverage the full power of VPN technology, enhancing both operational integrity and data protection.
Section 1: Understanding the Fundamentals of Containerization and VPNs
Before diving into the mechanics of integrating containers with VPNs, it's crucial to establish a solid understanding of the underlying technologies. This section will elaborate on the nature of containers, their networking paradigms, and the foundational principles of Virtual Private Networks, setting the stage for subsequent discussions on secure routing.
1.1 The Container Ecosystem: Isolation, Portability, and Networking
Containers represent a lightweight, standalone, executable package of software that includes everything needed to run an application: code, runtime, system tools, system libraries, and settings. Unlike traditional virtual machines, containers share the host OS kernel, leading to significantly reduced overhead and faster startup times. This inherent efficiency and portability have fueled their widespread adoption in modern software development.
Key Characteristics of Containers:
- Isolation: Each container operates in its own isolated environment, preventing conflicts between applications and ensuring dependencies do not interfere with one another. This isolation is achieved through Linux kernel features like namespaces (for process IDs, network interfaces, mount points, etc.) and cgroups (for resource allocation like CPU, memory, I/O).
- Portability: A containerized application can run consistently across various environments, from a developer’s laptop to a testing server, to a production cloud, eliminating the dreaded "it works on my machine" problem. This consistency is a major driver for DevOps practices.
- Efficiency: Sharing the host kernel means containers are significantly lighter than VMs, consuming fewer resources and enabling higher density on a single host.
Container Networking Explained (Focus on Docker):
Docker, being the most prominent container runtime, provides sophisticated networking capabilities that are central to understanding VPN integration. By default, Docker creates a bridge network (docker0) on the host machine. When a container is launched without specific network configurations, it connects to this bridge network, receiving an IP address from the bridge's subnet. Docker uses Network Address Translation (NAT) to allow containers to access external networks and for external traffic to reach exposed container ports.
Beyond the default bridge, Docker offers several network drivers:
- Bridge Network (Default): As described, containers on the same bridge can communicate, and traffic to/from the outside world is handled via NAT.
- Host Network: A container shares the network namespace with the host. This means the container's processes appear directly on the host's network interfaces, bypassing Docker's network isolation. While it offers performance benefits, it reduces isolation and can lead to port conflicts.
- Overlay Network: Used for multi-host container communication, especially in Docker Swarm or Kubernetes clusters, allowing containers on different hosts to communicate seamlessly as if they were on the same local network.
- Macvlan Network: Allows a container to be assigned a MAC address, making it a first-class citizen on the physical network. This can be useful for legacy applications or when containers need direct access to a physical network without NAT.
- None Network: The container gets a loopback interface only, making it completely isolated from any network.
Understanding these networking options is fundamental, as the choice of network configuration heavily influences how a VPN can be integrated to secure container traffic.
1.2 The Role of Virtual Private Networks (VPNs): Secure Tunnels for Data
A Virtual Private Network (VPN) creates a secure, encrypted connection (a "tunnel") over a less secure network, such as the internet. Its primary purpose is to provide a secure and private means for users or devices to connect to a remote network or to browse the web anonymously and securely. By encrypting data in transit and masking the user's IP address, VPNs safeguard sensitive information from interception and surveillance.
Core Principles of VPNs:
- Tunneling: VPNs encapsulate network packets within another protocol, creating a "tunnel." This tunnel can carry data securely from one endpoint to another.
- Encryption: Data transmitted through the VPN tunnel is encrypted, rendering it unreadable to anyone who might intercept it without the proper decryption key. Common encryption standards include AES-256.
- Authentication: VPNs authenticate both the client and the server to ensure that only authorized entities can establish a connection and exchange data. This often involves certificates, pre-shared keys, or username/password combinations.
- Data Integrity: VPNs use hashing algorithms to verify that data has not been tampered with during transmission.
Types of VPN Protocols:
- OpenVPN: An open-source SSL/TLS-based VPN protocol known for its strong encryption, flexibility, and ability to traverse NATs and firewalls. It operates on both UDP and TCP.
- IPsec (Internet Protocol Security): A suite of protocols used for securing IP communications. It's often used for site-to-site VPNs but can also be configured for remote access. IPsec can be complex to set up but offers robust security.
- WireGuard: A newer, leaner, and faster VPN protocol designed for simplicity and efficiency. It uses modern cryptographic primitives and aims to outperform OpenVPN and IPsec in terms of speed and ease of configuration.
- L2TP/IPsec (Layer 2 Tunneling Protocol with IPsec): L2TP provides the tunneling, and IPsec provides the encryption. While widely supported, L2TP itself doesn't offer encryption, relying on IPsec for security.
- PPTP (Point-to-Point Tunneling Protocol): An older protocol that is largely considered insecure due to known vulnerabilities. It should be avoided for any scenario requiring strong security.
For routing container traffic, OpenVPN and WireGuard are often preferred due to their robust security, performance, and flexibility in containerized environments. The choice of VPN protocol will influence the configuration steps and the overall security posture of the container network.
1.3 Why Route Containers Through a VPN?
The motivation behind integrating VPNs with containerized applications stems from a combination of security requirements, operational necessities, and compliance mandates.
- Enhanced Security and Data Protection:
- Protecting Data in Transit: When containers communicate over untrusted networks (like the public internet), a VPN encrypts their traffic, protecting sensitive data (credentials, personal identifiable information, financial data) from eavesdropping and man-in-the-middle attacks.
- Preventing Data Exfiltration: For containers that handle confidential data, a VPN acts as a controlled egress point, ensuring that all outbound traffic is routed through a monitored and secured channel, reducing the risk of unauthorized data leaks.
- Mitigating Network-Based Threats: By funneling container traffic through a secure VPN tunnel, the attack surface is reduced, making it harder for external malicious entities to directly target container network interfaces.
- Accessing Restricted Resources:
- Internal Corporate Networks: Containers often need to access databases, legacy systems, or other services residing within a private corporate network. A VPN can establish a secure bridge, allowing containerized applications to access these internal resources as if they were on the local network, without exposing the internal network directly to the internet.
- Geo-Restricted Services: For applications that need to interact with services restricted by geographical location, a VPN can provide an IP address from the required region, enabling access. This is common for content scraping, market research, or testing geo-specific features.
- Compliance and Privacy:
- Regulatory Requirements: Industries subject to stringent regulations (e.g., HIPAA, GDPR, PCI DSS) often require robust data protection measures. Routing container traffic through a VPN can help meet compliance mandates by ensuring data privacy and security during transmission.
- Anonymity and Privacy: For specific use cases, such as web scraping, competitive intelligence, or research, routing traffic through a VPN provides an additional layer of anonymity, obscuring the source IP address of the container.
In essence, integrating VPNs with containers adds a crucial layer of network security and flexibility, enabling organizations to deploy and operate containerized applications with greater confidence in diverse and challenging network environments.
Section 2: Core Methods for VPN Integration with Containers
Integrating VPN functionality with containerized applications can be approached through several distinct methods, each with its own advantages, disadvantages, and suitability for different scenarios. This section explores the primary strategies for VPN integration, from the simplest host-level setup to more complex and isolated container-level configurations.
2.1 Host-Level VPN Integration (Simplest Approach)
The most straightforward method for routing container traffic through a VPN involves running the VPN client directly on the host machine that manages the containers. In this setup, the host initiates a VPN connection, and all network traffic originating from the host, including traffic from containers running on it, is automatically routed through the established VPN tunnel.
Description:
When a VPN client is active on the host operating system, it typically modifies the host's routing table to direct all or specific outbound traffic through the VPN tunnel. Since Docker containers, by default, often leverage the host's underlying network stack (via NAT or direct bridging), their traffic naturally flows through the same network interfaces as the host. If the host's default route points to the VPN tunnel, then container traffic will follow suit.
Pros:
- Simplicity: This is the easiest method to set up. You simply install and configure your VPN client on the host OS (e.g., Ubuntu, CentOS, Windows, macOS), connect to your VPN server, and all running containers will automatically inherit the VPN connection. No specific container-level configuration is required for VPN routing.
- Minimal Overhead: There's no additional container dedicated solely to VPN functionality, potentially saving some resources.
- Broad Coverage: All containers on the host, regardless of their individual network configurations (unless explicitly isolated), will have their traffic routed through the VPN.
Cons:
- Lack of Granular Control: This method is an "all-or-nothing" approach. You cannot selectively route only certain containers through the VPN while others use the direct internet connection. This can be problematic if some applications require direct internet access for performance or legal reasons.
- Single Point of Failure: If the host's VPN connection drops, all containers lose their secure connection. Moreover, if the host's VPN client or configuration is compromised, all container traffic becomes vulnerable.
- Security Isolation Issues: From a security perspective, it breaks the principle of least privilege. If one container is compromised, it could potentially manipulate the host's VPN connection or routing, affecting other containers.
- DNS Leaks: The host's DNS resolution might not be configured to use the VPN's DNS servers, leading to potential DNS leaks where DNS queries bypass the VPN tunnel, revealing browsing activity.
When to Use:
This approach is suitable for simple development environments, personal projects, or small-scale deployments where all containerized applications uniformly require VPN access and granular control isn't a critical concern. It's a quick way to get all your local services behind a VPN, for example, when developing an application that needs to access geo-restricted APIs or when you want to protect all outbound traffic from your development machine.
2.2 Container-Level VPN Integration (Dedicated VPN Container)
For scenarios demanding greater control, isolation, and security, running the VPN client inside a dedicated container is the preferred method. This approach allows specific containers to leverage the VPN connection, leaving other containers or host traffic unaffected. This offers a more robust and flexible solution, aligning better with the containerization paradigm of isolation.
Description:
In this strategy, a separate Docker container is created whose sole purpose is to run the VPN client (e.g., OpenVPN, WireGuard). This "VPN container" establishes and maintains the secure tunnel to the VPN server. Other application containers are then configured to route their traffic through this VPN container. This typically involves sharing the network namespace or using network aliasing. The VPN container effectively acts as a secure gateway for the application containers, channeling their network requests through the encrypted tunnel.
Pros:
- Granular Control: You can precisely control which application containers use the VPN and which do not. This enables mixed environments where some services require VPN access while others operate directly.
- Enhanced Isolation: The VPN client is isolated within its own container, separating it from the host and other application containers. This improves security by minimizing the impact of a potential compromise in any single component.
- Portability: The entire VPN setup, including client configuration, can be packaged into a Docker image, making it highly portable and easy to deploy across different hosts or environments.
- Improved Security Posture: By dedicating a container to the VPN, you can apply specific security policies, resource limits, and monitoring to the VPN component itself.
Cons:
- Increased Complexity: Setting up this method requires more advanced Docker networking knowledge, including understanding network namespaces,
--networkflags, and potentiallyiptablesrules within the VPN container. - Configuration Challenges: Managing VPN configuration files (e.g.,
.ovpnfiles, certificates) securely within a container environment (e.g., using Docker secrets or volume mounts) adds another layer of complexity. - Potential Performance Overhead: Introducing an additional container and possibly more complex routing can introduce a slight performance overhead compared to the host-level approach, though often negligible for most applications.
Methods for Routing Through a Dedicated VPN Container:
- Sharing Network Namespace (
--network container:vpn_container_name): This is the most common and often simplest way to route an application container's traffic through a dedicated VPN container. By using--network container:vpn_container_namein thedocker runcommand (or thenetwork_mode: service:vpn_service_namein Docker Compose), the application container shares the network stack of the VPN container. This means the application container effectively uses the VPN container's network interfaces, including thetunortapinterface created by the VPN client. All network traffic from the application container will thus exit through the VPN tunnel established by the VPN container. - Using the VPN Container as a Proxy/Gateway: In more advanced scenarios, especially when fine-grained control over traffic or specific protocols is needed, the VPN container can be configured to act as a proxy (e.g., SOCKS5 or HTTP proxy) or a network gateway that forwards traffic.
- Proxy Approach: The VPN container runs a proxy server (like
tinyproxyorsquidfor HTTP/S, ordante-serverfor SOCKS5). Application containers are then configured to use this proxy for their outbound connections. This requires the application itself to support proxy configuration. - Gateway Approach (IP Forwarding/NAT): The VPN container can be configured with
iptablesrules to enable IP forwarding and perform NAT for traffic originating from a separate Docker network. Application containers are connected to this separate network, and their default gateway is set to the VPN container's IP on that network. This turns the VPN container into a true network gateway for a specific subnet of containers. This method offers the most flexibility but is also the most complex to set up and maintain.
- Proxy Approach: The VPN container runs a proxy server (like
When considering which method to use, the shared network namespace (--network container:) offers a good balance of simplicity and effective VPN integration for many use cases.
2.3 Docker Compose and Orchestration Tools for VPN Integration
For multi-service container applications, manually managing docker run commands for VPN integration quickly becomes cumbersome. Docker Compose and orchestration platforms like Kubernetes provide powerful abstractions to define, link, and manage complex container deployments, making VPN integration more manageable and repeatable.
Docker Compose for Multi-Container VPN Setups:
Docker Compose is a tool for defining and running multi-container Docker applications. With a single docker-compose.yml file, you can configure your application's services, networks, volumes, and dependencies. This greatly simplifies the deployment of a dedicated VPN container alongside your application containers.
Example docker-compose.yml Snippet for Shared Network Mode:
version: '3.8'
services:
  vpn_client:
    image: my_openvpn_client_image # A custom image with OpenVPN client configured
    container_name: vpn_client
    cap_add:
      - NET_ADMIN # Required for VPN to modify network interfaces
    devices:
      - /dev/net/tun # Required for OpenVPN
    volumes:
      - ./vpn_config:/etc/openvpn # Mount your .ovpn config and credentials
    environment:
      - VPN_USER=your_vpn_username
      - VPN_PASS=your_vpn_password
      # Or use Docker secrets for production
    restart: unless-stopped

  app_service:
    image: your_application_image
    container_name: app_service
    network_mode: service:vpn_client # This is the key: share VPN client's network stack
    depends_on:
      - vpn_client # Ensure VPN client starts before the app
    environment:
      - SOME_APP_VAR=value
    # No port mapping needed here if app only makes outbound connections through VPN
    # If app needs to receive inbound traffic via VPN, ports must be exposed by vpn_client
In this Compose example, app_service directly uses the network stack of vpn_client, meaning all its outbound traffic will automatically go through the VPN tunnel established by vpn_client. depends_on ensures proper startup order.
Kubernetes and VPN Integration:
In a Kubernetes environment, integrating VPNs with containers introduces additional layers of complexity due to its inherent networking model (CNI plugins, Pods, Services, Ingress). While host-level VPNs can still work for entire worker nodes, granular control for specific Pods often involves:
- Sidecar Pattern: The most common approach is to deploy a VPN client container as a sidecar alongside the application container within the same Pod. Since containers in a Pod share the same network namespace, the application container's traffic will naturally route through the VPN tunnel established by the sidecar. This offers excellent isolation at the Pod level.
- NetworkPolicy: Kubernetes
NetworkPolicycan be used to control ingress and egress traffic for Pods, which is complementary to VPN routing. While not directly routing traffic through a VPN, it helps secure the network within the cluster. - Custom CNI Plugins: For highly specific or large-scale requirements, custom Container Network Interface (CNI) plugins could be developed or utilized to enforce VPN routing at the network layer for Pods, though this is a very advanced and rare use case.
For most Kubernetes deployments, the sidecar pattern provides the best balance of flexibility, isolation, and manageability for routing specific application Pods through a VPN. This approach aligns well with Kubernetes' design principles and allows for declarative configuration of secure network access.
Section 3: Practical Implementation Guides & Configuration Details
This section transitions from theoretical methods to practical, actionable steps for implementing container-level VPN integration. We will focus on a common scenario using OpenVPN as the VPN client within a dedicated container and demonstrate how to route other application containers through it.
3.1 Setting Up a Dedicated VPN Container (Example with OpenVPN)
To create a dedicated VPN container, you typically need an OpenVPN client installed within the container, along with its configuration files. While you can build a Dockerfile from scratch, many pre-built images are available (e.g., kylemanna/openvpn for a server, or various client images on Docker Hub). For a client, we'll outline the general process.
Step-by-Step Guide:
- Prepare OpenVPN Configuration: You'll need your OpenVPN client configuration file (e.g.,
client.ovpn) and any associated certificate and key files (e.g.,client.crt,client.key,ca.crt,ta.key). Place these files in a dedicated directory on your host, for example,./vpn_config/. Ensure the.ovpnfile is correctly configured to connect to your VPN server and references the certificate/key files. If your VPN requires a username and password, you might create a file namedlogin.confwithin./vpn_config/containing two lines:your_usernameandyour_password. Update your.ovpnfile to useauth-user-pass login.conf. - Run the VPN Client Container:
bash docker run -d \ --name vpn_client \ --cap-add=NET_ADMIN \ --device=/dev/net/tun \ --volume $(pwd)/vpn_config:/etc/openvpn:ro \ --env "OPENVPN_CONFIG=/etc/openvpn/client.ovpn" \ --restart unless-stopped \ dperson/openvpn-client # Replace with your chosen OpenVPN client imageExplanation of Flags: *-d: Run the container in detached mode (background). *--name vpn_client: Assign a recognizable name to the container. *--cap-add=NET_ADMIN: Grants the container network administration capabilities, essential for modifying network interfaces and routing tables (which a VPN client does). *--device=/dev/net/tun: Provides the container with access to thetundevice, which OpenVPN needs to create its virtual network interface. *--volume $(pwd)/vpn_config:/etc/openvpn:ro: Mounts your host'svpn_configdirectory into the container's/etc/openvpndirectory as read-only. This is where your.ovpnand credential files should be. *--env "OPENVPN_CONFIG=/etc/openvpn/client.ovpn": (Specific todperson/openvpn-clientimage) Tells the image where to find the config. *--restart unless-stopped: Ensures the VPN client restarts automatically if it crashes or the Docker daemon restarts.After running, you should checkdocker logs vpn_clientto confirm the VPN connection is established successfully. Look for messages indicating "Initialization Sequence Completed" or similar.
Create a Dockerfile for the VPN Client (Optional but Recommended): While you can use generic images, creating your own Dockerfile provides more control and ensures only necessary components are present.```dockerfile
Dockerfile for a dedicated OpenVPN client container
FROM alpine/openvpn-client:latest # Or a similar slim base image with OpenVPN client
Copy OpenVPN configuration files into the container
It's better to mount these as a volume for secrets management,
but for a self-contained image (less secure for prod), you could copy.
We will assume volume mounting for production readiness.
Expose any ports if the VPN server needs to initiate connections back
or if you expect services exposed through the VPN to be accessed externally.
In most client setups, this is not needed.
Set entrypoint to run OpenVPN
CMD ["ovpn_client_run", "--config", "/techblog/en/etc/openvpn/client.ovpn"] ``` Self-correction: For security and flexibility, it's generally better to use a general OpenVPN client image and mount the configuration and credentials as volumes, rather than baking them into the image.Revised approach: Using an existing OpenVPN client image: Many Docker Hub images like dperson/openvpn-client or ghcr.io/linuxserver/openvpn-client are well-maintained. We'll simulate dperson/openvpn-client for brevity, but the principle applies. The critical components are NET_ADMIN capability, /dev/net/tun device, and the mounted VPN config.
3.2 Routing Other Containers Through the VPN Container
Once your dedicated VPN client container is up and running, the next step is to configure your application containers to route their traffic through it. The most robust and simplest method for this is to use the shared network namespace approach.
- Stop and Remove Existing Application Containers (if running): If your application container is already running, you'll need to stop and remove it before re-creating it with the new network configuration.
docker stop my_app_container && docker rm my_app_container - Run Your Application Container with Shared Network:
bash docker run -d \ --name my_app_container \ --network container:vpn_client \ your_application_image_nameExplanation of Flags: *--network container:vpn_client: This is the crucial flag. It tells Docker to makemy_app_containershare the network stack of thevpn_clientcontainer. This meansmy_app_containerwill use the same IP address, network interfaces (including thetun0interface created by OpenVPN), and routing table asvpn_client. Consequently, all its outbound traffic will automatically go through the VPN tunnel. - Verify the Setup:DNS Considerations: When using
--network container:vpn_client, your application container will inherit the DNS resolution settings of thevpn_clientcontainer. It's vital that yourvpn_client's OpenVPN configuration either pushes DNS servers from the VPN provider or is configured to use secure, non-logging DNS servers that are resolved through the VPN tunnel. A common OpenVPN client configuration includes directives likedhcp-option DNS ...to ensure DNS traffic also uses the VPN.- Check IP Address: From inside
my_app_container, you can attempt to fetch your external IP address.docker exec my_app_container curl ifconfig.meThe IP address returned should be the public IP address of your VPN server, not your host machine's public IP. - Verify DNS: DNS leaks are a common concern. You can test for them from inside your application container. Many online services (e.g.,
dnsleaktest.com) can help. If your VPN client is configured correctly, the DNS servers should also be routed through the VPN.
- Check IP Address: From inside
3.3 Advanced Routing with Custom Networks and Proxies
While sharing the network namespace is effective, there might be scenarios where it's not ideal. For instance, if your application needs to expose ports directly to the host while still routing some internal traffic through a VPN, or if you need finer-grained control over which connections use the VPN. In these cases, using custom Docker networks and potentially a proxy within the VPN container offers more flexibility.
- Using a Custom Docker Network with VPN Container as Gateway: This method involves creating a dedicated Docker bridge network for your application containers. The VPN container then connects to this network and is configured to forward traffic from it through its VPN tunnel.
- Create a Custom Bridge Network:
docker network create --subnet=172.19.0.0/24 --gateway=172.19.0.1 my_secure_networkNote: The gateway specified here172.19.0.1will typically be the IP address assigned to thevpn_clientcontainer on thismy_secure_network. - Run VPN Client Connected to Custom Network: The VPN client container needs to connect to
my_secure_networkand be configured to perform IP forwarding and NAT for traffic originating from this network. This is significantly more complex than the shared network namespace. The VPN container needs to act as a full-fledged network gateway.bash docker run -d \ --name vpn_client_gateway \ --cap-add=NET_ADMIN \ --device=/dev/net/tun \ --volume $(pwd)/vpn_config:/etc/openvpn:ro \ --env "OPENVPN_CONFIG=/etc/openvpn/client.ovpn" \ --sysctl net.ipv4.ip_forward=1 \ # Enable IP forwarding on the gateway container --network my_secure_network \ dperson/openvpn-client # Or a custom image with iptables configurationInside thisvpn_client_gatewaycontainer, you would typically need additional setup to configureiptablesrules to: * Masquerade (NAT) outgoing traffic frommy_secure_networkthrough thetun0interface. * Set up routing rules to directmy_secure_network's traffic throughtun0. This often requires a custom Dockerfile with an entrypoint script that executes theseiptablescommands after the VPN connection is established. This is a non-trivial configuration and often beyond the scope of simple use cases. - Run Application Container on Custom Network:
docker run -d --name my_app_on_vpn_network --network my_secure_network your_application_imageThe application container will now send its traffic to thevpn_client_gatewayonmy_secure_network, which then forwards it through the VPN.
- Create a Custom Bridge Network:
- Using a Proxy within the VPN Container: This approach is useful when you need to route specific types of traffic (e.g., HTTP/S requests, SOCKS5 connections) through the VPN, and your application is capable of being configured to use a proxy.Why a proxy might be needed: Using a proxy adds flexibility. If your application primarily makes HTTP API calls, configuring an HTTP proxy is often simpler than re-architecting the entire network stack. It allows specific services or individual API requests to be routed through the VPN without affecting other network traffic, providing highly granular control. This can be particularly useful when some API endpoints need VPN protection for data privacy or geo-specific access, while others operate on the public internet. Furthermore, an API gateway product could be configured to route specific backend API calls through such a proxy.
- Application Container Using the Proxy: The application container connects to the proxy exposed by the VPN container.
bash docker run -d \ --name my_app_with_proxy \ --env HTTP_PROXY=http://vpn_client_ip:3128 \ --env HTTPS_PROXY=http://vpn_client_ip:3128 \ --network my_custom_network # Connect to a network where vpn_client is visible your_application_imageThis requiresvpn_client_ipto be resolvable or directly configured. For example, if both are on a Docker bridge networkmy_custom_network,vpn_clientcan be used as the hostname.
- Application Container Using the Proxy: The application container connects to the proxy exposed by the VPN container.
VPN Container with Proxy: The VPN client container is modified to also run a proxy server (e.g., squid for HTTP/S, dante-server for SOCKS5). The proxy listens on a specific port within the VPN container.```bash
Example Dockerfile for VPN + Squid Proxy (simplified)
FROM ubuntu:latest RUN apt-get update && apt-get install -y openvpn squid && apt-get clean
Copy OpenVPN config and Squid config
COPY vpn_config/client.ovpn /etc/openvpn/ COPY squid.conf /etc/squid/
Ensure squid listens on an accessible port and forwards through tun0
(squid.conf would need configuration like cache_peer 127.0.0.1 parent 1080 0 no-query no-digest no-netdb-exchange default if tun0 is loopback accessible, or direct through tun0's IP)
Entrypoint to start OpenVPN and Squid
CMD /usr/sbin/openvpn --config /etc/openvpn/client.ovpn & /usr/sbin/squid -N -f /etc/squid/squid.conf ``` When running this container, you'd expose the proxy port (e.g., 3128 for Squid) to other containers or the host.
APIPark is a high-performance AI gateway that allows you to securely access the most comprehensive LLM APIs globally on the APIPark platform, including OpenAI, Anthropic, Mistral, Llama2, Google Gemini, and more.Try APIPark now! 👇👇👇
Section 4: Ensuring Robust Security & Best Practices
Beyond merely establishing a VPN connection, ensuring the security of container traffic routed through a VPN requires meticulous attention to detail and adherence to best practices. A misconfigured setup can inadvertently expose sensitive data or undermine the very purpose of the VPN.
4.1 Preventing IP Leaks: The Silent Threat
An IP leak occurs when a container's real IP address or DNS requests escape the VPN tunnel, compromising privacy and security. Preventing these leaks is paramount.
- DNS Leak Protection: As mentioned, DNS queries can reveal your true location even if IP traffic is routed through the VPN.
- VPN Configuration: Ensure your VPN client (e.g., OpenVPN's
.ovpnfile) is configured to use DNS servers provided by the VPN service (dhcp-option DNS ...) or trusted third-party privacy-focused DNS servers (e.g., Cloudflare 1.1.1.1, Quad9) that are routed through the VPN tunnel. - Host-level DNS: Prevent Docker from using the host's default DNS servers if they are outside the VPN. For containers in shared network mode, the VPN container's DNS settings will apply. For other container network configurations, specify
dns:indocker runordocker-compose.ymlto point to a DNS resolver accessible only through the VPN.
- VPN Configuration: Ensure your VPN client (e.g., OpenVPN's
iptables Rules (The "Kill Switch"): This is the most critical defense against IP leaks. Implement iptables rules on the host or, more effectively, within the VPN container itself, to block all traffic that does not go through the VPN tunnel. This acts as a "kill switch": if the VPN connection drops, all internet traffic from the protected containers is immediately blocked, preventing data exposure.Example iptables rules within the VPN container (simplified, needs refinement for specific use cases): ```bash
Assuming tun0 is the VPN interface and eth0 is the internal Docker network interface
DROP all outgoing traffic by default
iptables -P OUTPUT DROP
ALLOW traffic on the loopback interface
iptables -A OUTPUT -o lo -j ACCEPT
ALLOW traffic over the VPN tunnel (tun0)
iptables -A OUTPUT -o tun0 -j ACCEPT
ALLOW traffic to the VPN server's IP address (before tun0 is up)
You need to know your VPN server's public IP address.
This rule ensures the VPN client can establish the tunnel.
iptables -A OUTPUT -d-j ACCEPT
For shared network mode, ensure DNS traffic is handled by the VPN
These rules must be applied when the VPN tunnel is active.
The VPN client itself should be configured to push DNS to the tunnel.
On the host, you might need to ensure Docker's DNS configuration
doesn't bypass the VPN for containers NOT sharing network namespace.
`` Configuringiptables` correctly can be complex and depends heavily on your specific network topology and VPN client. It often requires custom scripts within your VPN container's entrypoint.
4.2 Authentication and Authorization: Securing Access
Properly managing credentials and access rights is fundamental to preventing unauthorized access to your VPN-protected resources.
- Secure Credential Management:
- Docker Secrets: For production environments, never hardcode VPN usernames, passwords, or private keys directly into Dockerfiles or environment variables. Use Docker Secrets (for Docker Swarm) or Kubernetes Secrets (for Kubernetes) to inject sensitive information securely at runtime.
- Volume Mounts (Read-Only): For configuration files like
.ovpnor certificates, mount them as read-only volumes (:ro) into the VPN container. This prevents the container from accidentally or maliciously modifying its own VPN configuration. - Environment Variables (Limited Use): While
ENVvariables are easy, they are not secure asdocker inspectcan reveal them. Use them sparingly for non-sensitive data or if absolutely necessary for a quick setup, but prioritize secrets management for sensitive data.
- Least Privilege Principle:
- Container User: Run processes inside containers as a non-root user whenever possible. This reduces the blast radius if a container is compromised.
- Capabilities: Grant containers only the necessary Linux capabilities. For VPN containers,
NET_ADMINis often essential, but avoid granting more than needed.
4.3 Monitoring and Logging: Vigilance is Key
Even with robust security measures, continuous monitoring and comprehensive logging are crucial for detecting anomalies, troubleshooting issues, and maintaining an auditable trail.
- Monitor VPN Tunnel Status: Implement monitoring tools to regularly check the health and status of your VPN connection. This includes verifying that the tunnel is active, checking bandwidth usage, and detecting disconnections. Tools like Prometheus and Grafana can be configured to scrape metrics from VPN clients or network interfaces.
- Log Container Network Activity: Enable comprehensive logging for network traffic originating from your VPN-routed containers. This can help identify suspicious outbound connections or unauthorized data transfers. Docker's built-in logging drivers can send container logs to external logging aggregators (e.g., ELK stack, Splunk).
- Alerting: Set up alerts for critical events, such as VPN disconnections, excessive bandwidth usage from unusual sources, or attempts to bypass VPN routing. Timely alerts enable quick response to potential security incidents.
4.4 Regular Updates and Patching: Staying Ahead of Threats
Software vulnerabilities are constantly discovered. Keeping your systems up-to-date is a fundamental security practice.
- Container Images: Regularly update the base images for your VPN client and application containers. Use trusted, official images and rebuild your custom images frequently to incorporate the latest security patches.
- VPN Client Software: Ensure the VPN client software (e.g., OpenVPN, WireGuard) within your container is always the latest stable version.
- Host OS: Keep the host operating system patched and updated, as it forms the foundation upon which your containers run.
4.5 Network Segmentation: Isolating Threats
While a VPN secures external communication, network segmentation isolates internal container traffic, preventing lateral movement of attacks.
- Docker Networks: Use separate Docker bridge networks for different applications or tiers (e.g., frontend, backend, database). This limits direct communication between unrelated services.
- Kubernetes NetworkPolicy: In Kubernetes, leverage
NetworkPolicyto define rules that specify how Pods are allowed to communicate with each other and with external network endpoints. This creates a powerful layer of micro-segmentation within the cluster. - Firewalls: Configure host-level firewalls (e.g.,
ufw,firewalld) to restrict incoming traffic to only necessary ports and services, further protecting the Docker daemon and containers.
By diligently applying these security best practices, organizations can significantly enhance the integrity and confidentiality of their containerized applications when routing traffic through a VPN, building a truly resilient and secure operational environment.
Section 5: Challenges and Considerations in VPN-Container Routing
While routing containers through a VPN offers significant security advantages, it also introduces several challenges and considerations that need to be carefully managed for optimal performance, scalability, and operational efficiency.
5.1 Performance Overhead: The Cost of Security
Encryption and tunneling, while essential for security, are not without their performance implications.
- Encryption/Decryption Latency: Each packet that travels through the VPN tunnel must be encrypted by the sender and decrypted by the receiver. This cryptographic processing adds a small amount of latency to every network communication. While modern CPUs are highly optimized for these operations, for extremely high-throughput or low-latency applications, this overhead can become noticeable.
- Throughput Reduction: The encryption and decryption process consumes CPU cycles, which can limit the maximum data throughput achievable through the VPN tunnel, especially on resource-constrained hosts or with less efficient VPN protocols.
- Additional Network Hops: The VPN tunnel itself represents additional network routing. Traffic might travel to the VPN server and then to its final destination, potentially adding more network hops and increasing round-trip time, particularly if the VPN server is geographically distant from the container host or the target resource.
- Impact on DNS Resolution: If DNS queries are also routed through the VPN and use a remote DNS server, DNS resolution times might increase, leading to perceived slowness for initial connections.
To mitigate performance issues, consider: * Using efficient VPN protocols like WireGuard, which is designed for speed. * Choosing VPN servers geographically close to your container hosts and target resources. * Ensuring your host machine has sufficient CPU resources for both your containers and the VPN client. * For very demanding applications, exploring split-tunneling (if security allows) to route only necessary traffic through the VPN.
5.2 Complexity: A Double-Edged Sword
The flexibility and isolation offered by container-level VPN integration come at the cost of increased complexity in setup, configuration, and troubleshooting.
- Network Configuration Complexity: Managing Docker custom networks, IP addressing,
iptablesrules within containers, and ensuring proper DNS resolution across different network namespaces demands a deeper understanding of Linux networking. Debugging connectivity issues can be time-consuming. - Security Policy Management: Correctly configuring
iptableskill switches and ensuring no IP or DNS leaks requires precise rule sets that are easy to misconfigure. A single misplaced rule can either block legitimate traffic or, worse, compromise security. - Credential and Certificate Management: Securely provisioning VPN client configuration files, certificates, and user credentials into containers, especially in an automated, scalable manner, adds an operational burden.
- Troubleshooting: When network connectivity issues arise, diagnosing whether the problem lies with the application, the container's network, Docker networking, the VPN client, or the VPN server requires a methodical approach and specific diagnostic tools (e.g.,
tcpdump,netstat,ip routewithin containers).
Effective documentation, automation (using Docker Compose, Kubernetes manifests, and CI/CD pipelines), and specialized monitoring tools are essential for managing this complexity.
5.3 Scaling Considerations: From Single Host to Clusters
The complexity amplifies significantly when moving from a single-host Docker deployment to a clustered environment like Docker Swarm or Kubernetes.
- VPN Server Capacity: A single VPN server might become a bottleneck if a large number of container hosts or individual containers are trying to establish connections through it. Scalable VPN server architectures (e.g., load-balanced VPN servers, clustered VPN solutions) might be required.
- Orchestrator Integration:
- Docker Swarm: Deploying dedicated VPN containers for services across a Swarm cluster requires careful management of service dependencies and network modes, often leveraging
network_mode: service:withindocker-compose.ymlfor services on the same node. - Kubernetes: The sidecar pattern is generally preferred, but ensuring that each Pod requiring VPN access gets its own VPN sidecar (and managing the resources and connections for each) can add substantial overhead. For cluster-wide VPN enforcement, advanced CNI plugins or node-level VPN clients with network namespace manipulation might be considered, but these are highly specialized.
- Docker Swarm: Deploying dedicated VPN containers for services across a Swarm cluster requires careful management of service dependencies and network modes, often leveraging
- Dynamic IP Assignment: In dynamic container environments where containers are spun up and down frequently, managing the VPN connections and associated IP addresses can be challenging. The VPN server needs to be capable of handling a large number of ephemeral client connections.
- Network Latency Across Nodes: If a container on one node needs to communicate via VPN established on another node, additional network hops and potential latency are introduced, impacting inter-service communication performance.
For large-scale deployments, carefully evaluate if a container-level VPN is truly necessary for every service or if network policies and secure inter-cluster communication (e.g., IPsec between nodes) could provide sufficient security for internal traffic, reserving VPN for specific external egress.
5.4 Integrating with API Gateways: Managing the Edge
For organizations leveraging containerized services, especially microservices that expose APIs, the role of an API Gateway becomes critical. An API gateway acts as a single entry point for all client requests, routing them to the appropriate backend service. When containerized services are routed through a VPN, the API gateway needs to be thoughtfully integrated into the architecture.
- The Role of an API Gateway: An API gateway typically handles cross-cutting concerns such as authentication, authorization, rate limiting, traffic management (e.g., load balancing, routing), caching, and monitoring for external API calls. It sits at the edge of your network, protecting your backend services from direct exposure. This is crucial for managing the hundreds or even thousands of APIs that modern applications often consume or expose.
- VPN and API Gateway Synergy: If your containerized backend services are routed through a VPN to access sensitive internal resources or to egress securely to external services, the API gateway can act as a crucial layer before or after this VPN-protected segment.
- External Access to VPN-Protected Services: If your VPN-routed containers expose APIs that external clients need to consume, the API gateway would sit in front. Clients interact with the API gateway, which then securely routes requests to the VPN-protected containers. The API gateway handles external authentication and authorization, while the internal VPN routing ensures the confidentiality and integrity of the communication from the API gateway to the backend. This setup provides layered security: external access is managed by the gateway, and internal network communication is secured by the VPN.
- VPN-Protected Outbound API Calls: Conversely, if your containers (protected by VPN) are making outbound API calls to third-party services, the API gateway might not be directly involved in the outbound VPN tunnel. However, if these outbound calls are part of a larger business process initiated through an inbound API call, the API gateway still manages that initial request flow.
- Introducing APIPark: For services that expose APIs, especially those incorporating AI models, managing them effectively is paramount. Products like APIPark, an open-source AI gateway and API management platform, are designed to address these challenges. APIPark can integrate quickly with a variety of AI models (100+ AI Models) and standardize API formats, simplifying their invocation and maintenance. If your containerized AI services need to be securely routed through a VPN for accessing specific data sources (e.g., sensitive customer data in a private network) or for privacy reasons during inference, APIPark can sit at the edge of your system, managing the incoming and outgoing API traffic. This allows APIPark to handle authentication, traffic forwarding, load balancing, and ensure detailed API call logging, all while the underlying container routing infrastructure secures the communication through the VPN tunnel. This synergy ensures that both the external accessibility and internal secure routing of your AI and REST services are robustly managed. Furthermore, APIPark’s capability to encapsulate prompts into REST APIs means that even complex AI operations can be exposed through a standardized API interface, which can then be securely delivered via your VPN-routed containers, simplifying client integration without compromising on the underlying network security provided by the VPN. Its performance, rivaling Nginx, ensures that managing high volumes of VPN-routed API traffic remains efficient.
This integration highlights how a well-designed architecture combines various tools – VPNs for secure transport, container orchestrators for deployment, and API gateways for robust management – to create a cohesive, secure, and performant system.
Comparison Table: Host-Level vs. Container-Level VPN Integration
To summarize the key differences and help in choosing the right approach, here's a comparative table:
| Feature/Aspect | Host-Level VPN Integration | Container-Level VPN Integration (Dedicated Container) |
|---|---|---|
| Setup Complexity | Low (Install VPN client on host, connect) | Moderate to High (Requires Docker networking, potentially iptables) |
| Granular Control | Low (All or none for containers on host) | High (Select specific containers/services to use VPN) |
| Isolation | Low (VPN client shares host's environment) | High (VPN client isolated in its own container) |
| Portability | Low (Tied to host OS VPN client setup) | High (VPN container image is portable across hosts) |
| Security Incidents | Host VPN compromise affects all containers and host | VPN container compromise affects only associated application containers |
| IP Leak Protection | Relies on host's VPN client kill switch; potential for DNS leaks | Requires careful iptables and DNS config within VPN container for kill switch |
| Resource Overhead | Minimal additional container resources | One dedicated VPN container (small additional resource usage) |
| Use Case Suitability | Simple dev environments, personal projects, universal host-level VPN requirement | Production environments, microservices, mixed network access needs, multi-tenancy |
| Orchestration | Implicitly works with orchestrators (VPN on worker node) | Explicitly defined in Docker Compose/Kubernetes (e.g., sidecar pattern) |
Conclusion
Securing containerized applications is a multi-faceted endeavor, and routing their network traffic through a Virtual Private Network stands as a critical component of a robust security strategy. As applications become increasingly distributed and rely on diverse external and internal resources, the need to protect data in transit, ensure compliance, and control access becomes paramount. This guide has traversed the fundamental concepts of container networking and VPNs, delved into the practicalities of host-level and container-level integration, and illuminated the crucial security best practices required to prevent leaks and manage credentials effectively.
While the host-level approach offers simplicity for initial setups and less critical applications, the container-level integration, particularly with a dedicated VPN container, provides the granular control, isolation, and portability demanded by modern, scalable, and secure production environments. Whether through shared network namespaces, custom networks, or proxies, intelligently channeling container traffic through a VPN establishes a fortified perimeter around your application's communications.
However, the journey to a securely routed container environment is not without its challenges. Performance overhead, increased operational complexity, and the nuances of scaling across orchestrators like Kubernetes require careful planning and continuous monitoring. The integration with an API gateway like APIPark further illustrates how different layers of the application stack, from network transport security to API management, must synergize to deliver a comprehensive solution. By leveraging APIPark for managing the exposed APIs of your containerized services, you can ensure that traffic is not only securely routed through a VPN but also efficiently managed, authenticated, and logged at the application layer, creating a truly end-to-end secure ecosystem.
Ultimately, the choice of integration method and the rigor of security practices will depend on the specific requirements of your application, the sensitivity of the data involved, and the regulatory landscape. By understanding these options and diligently applying the best practices outlined, developers and organizations can confidently deploy containerized applications that leverage VPNs to achieve superior levels of security, privacy, and operational resilience in an ever-evolving digital world. The investment in securing container networks through VPNs is not merely a technical task; it is an essential commitment to safeguarding digital assets and maintaining trust.
Frequently Asked Questions (FAQs)
- Why is it necessary to route container traffic through a VPN, even if my application is behind a firewall? While firewalls protect against unauthorized access at the perimeter, they don't inherently encrypt data in transit across public networks. A VPN provides end-to-end encryption for your container's outbound and inbound traffic, protecting sensitive data from eavesdropping and man-in-the-middle attacks. It's especially crucial for accessing internal corporate resources from a public cloud, complying with data privacy regulations, or securing communication with third-party services over untrusted networks. It adds a layer of confidentiality and integrity that a firewall alone cannot provide for data actively moving outside the immediate network segment.
- What's the main difference between host-level and container-level VPN integration, and when should I choose each? Host-level integration involves running the VPN client directly on the host machine. All traffic originating from that host, including from all its containers, goes through the VPN. It's simpler to set up but offers no granular control. Choose this for development environments, personal projects, or when all containers on a host uniformly require VPN access without exception. Container-level integration involves running the VPN client inside a dedicated container, and then routing specific application containers through it (e.g., via shared network namespace). This offers granular control, better isolation, and portability. Choose this for production environments, microservices architectures, when some containers need VPN access and others don't, or for enhanced security where a compromise of one service should not affect the VPN connection of others.
- How can I prevent IP and DNS leaks when routing containers through a VPN? Preventing leaks requires careful configuration. For IP leaks, implement
iptablesrules (a "kill switch") within your VPN container to block all traffic that does not traverse the VPN tunnel (e.g.,tun0interface). For DNS leaks, ensure your VPN client is configured to use DNS servers provided by the VPN or trusted privacy-focused DNS servers, and critically, ensure these DNS queries are also routed through the VPN tunnel. In Docker Compose or Kubernetes, specify DNS servers explicitly for your application containers if they're not sharing the VPN container's network stack, pointing them to a resolver accessible only via the VPN. - Is there a performance impact when routing containers through a VPN? Yes, there is always some performance overhead. Encryption and decryption processes consume CPU resources, which can introduce slight latency and reduce maximum throughput. Additionally, traffic might take a longer route through the VPN server, potentially increasing network latency. The impact depends on the chosen VPN protocol (WireGuard is generally faster than OpenVPN), the strength of encryption, the geographical distance to the VPN server, and the available computing resources. For most applications, this overhead is acceptable, but for very high-throughput or low-latency critical systems, it needs careful consideration and benchmarking.
- How does an API Gateway like APIPark fit into an architecture where containers are routed through a VPN? An API gateway manages the entry points for client requests to your services, handling authentication, routing, and other cross-cutting concerns. If your containerized backend services are routed through a VPN (e.g., to access internal resources or to secure outbound traffic), the API gateway (like APIPark) would typically sit in front of these VPN-protected services. Clients communicate with the API gateway, which then securely routes requests to the VPN-protected containers. This setup provides layered security: the API gateway secures external access and manages your API lifecycle (including for AI models), while the VPN ensures the confidentiality and integrity of communication between the API gateway and your backend containers, or for your containers' outbound connections to other services. APIPark’s comprehensive features for API management, traffic forwarding, and detailed logging complement the network-level security provided by the VPN.
🚀You can securely and efficiently call the OpenAI API on APIPark in just two steps:
Step 1: Deploy the APIPark AI gateway in 5 minutes.
APIPark is developed based on Golang, offering strong product performance and low development and maintenance costs. You can deploy APIPark with a single command line.
curl -sSO https://download.apipark.com/install/quick-start.sh; bash quick-start.sh

In my experience, you can see the successful deployment interface within 5 to 10 minutes. Then, you can log in to APIPark using your account.

Step 2: Call the OpenAI API.