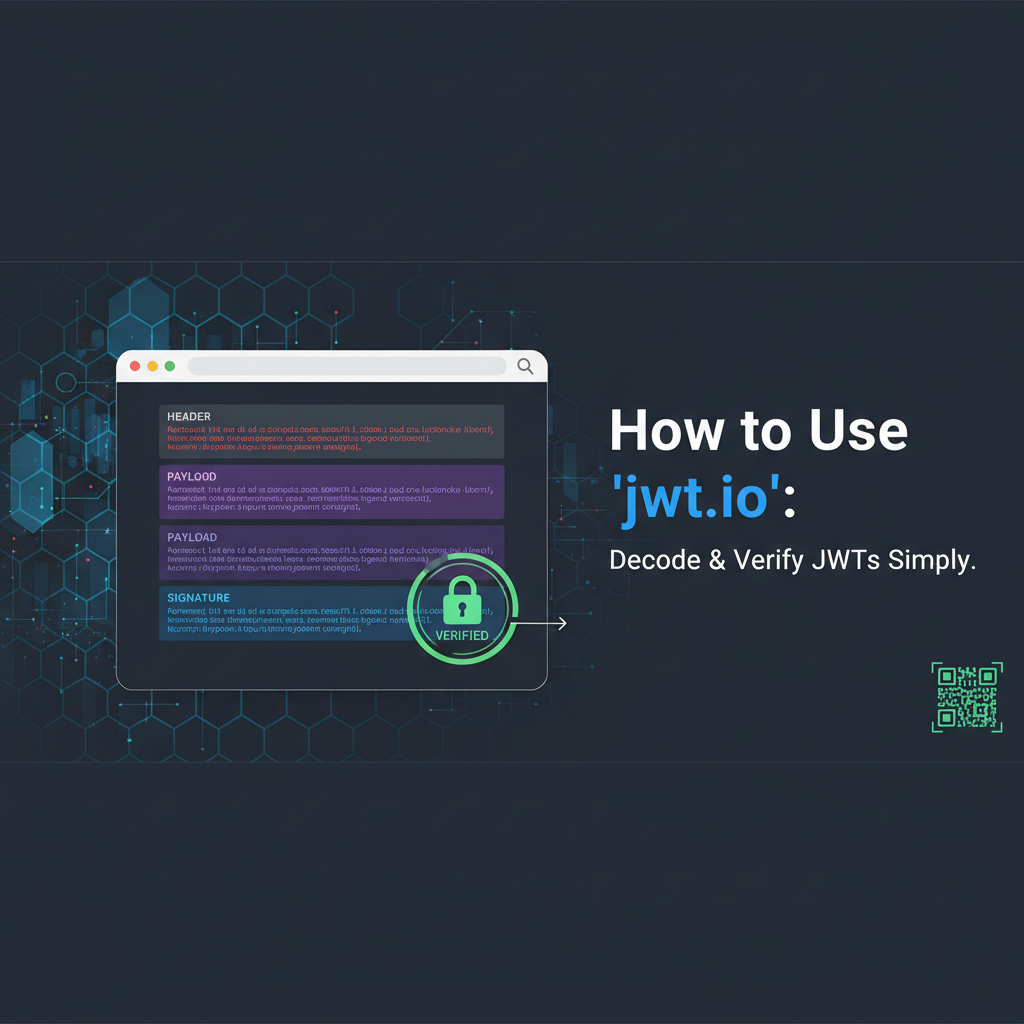
How to Use `jwt.io`: Decode & Verify JWTs Simply


In the vast and ever-evolving landscape of modern web development and distributed systems, the secure and efficient transmission of information between parties is paramount. From user authentication to microservice authorization, the need for a standardized, robust, and verifiable mechanism for securely conveying claims has led to the widespread adoption of JSON Web Tokens, commonly known as JWTs. These compact, URL-safe tokens have revolutionized how developers approach identity and access management, offering a powerful alternative to traditional session-based authentication methods.
The simplicity and versatility of JWTs, however, often mask their underlying complexity when it comes to understanding their structure, deciphering their contents, and, most critically, verifying their authenticity. While developers are equipped with libraries and frameworks that abstract much of this complexity, there frequently arises a need for a quick, intuitive, and readily accessible tool to inspect, debug, and validate JWTs directly. This is where jwt.io enters the picture, standing as the de facto online utility for anyone working with JSON Web Tokens. It serves as an invaluable resource, transforming what could be a convoluted, manual process into a simple, visual, and highly efficient operation. This comprehensive guide will delve deep into the mechanics of jwt.io, exploring its core functionalities, guiding you through the process of decoding and verifying JWTs, and providing a foundational understanding of why this tool has become an indispensable part of a developer's toolkit, especially when interacting with modern APIs.
The Foundation: Understanding JSON Web Tokens (JWTs)
Before we immerse ourselves in the practicalities of jwt.io, it's essential to solidify our understanding of what a JWT is and why it's structured the way it is. A JSON Web Token is an open standard (RFC 7519) that defines a compact and self-contained way for securely transmitting information between parties as a JSON object. This information can be verified and trusted because it is digitally signed. JWTs are commonly used for authentication and authorization in APIs, allowing clients to send a token to a server, which can then verify the token's authenticity and use the claims within it to determine the client's identity and permissions.
A JWT is fundamentally composed of three distinct parts, separated by dots (.): the Header, the Payload, and the Signature. Each part plays a crucial role in the token's overall functionality and security.
The Header: Setting the Stage
The first part of a JWT is the Header, typically a JSON object that specifies the type of the token (which is JWT) and the signing algorithm being used. Common algorithms include HMAC SHA256 (HS256) or RSA SHA256 (RS256). This header is then Base64Url encoded to form the first part of the JWT.
For instance, a typical header might look like this in its raw JSON form:
{
  "alg": "HS256",
  "typ": "JWT"
}
alg: Stands for "algorithm." This field declares the cryptographic algorithm used to sign the token.HS256indicates an HMAC using SHA-256, a symmetric algorithm where the same secret key is used for both signing and verification.RS256indicates RSA signature with SHA-256, an asymmetric algorithm requiring a private key for signing and a public key for verification. The choice of algorithm has significant security implications and depends heavily on the deployment environment and key management strategy.typ: Stands for "type." This field specifies that the token is a JSON Web Token. While oftenJWT, it could theoretically be other types of JWS (JSON Web Signature) or JWE (JSON Web Encryption) tokens.
The Base64Url encoding of this JSON object ensures that the header can be safely transmitted in URL-friendly contexts, avoiding characters that might be misinterpreted by systems handling URLs, such as +, /, or =. This encoding is not encryption; it's merely a transformation that makes binary data representable as text, easily reversible without a key.
The Payload: Carrying the Claims
The second part of the JWT is the Payload, another JSON object, which contains the "claims." Claims are statements about an entity (typically the user) and additional data. There are three types of claims:
- Registered Claims: These are a set of predefined claims that are not mandatory but are recommended for interoperability. They include:
iss(issuer): Identifies the principal that issued the JWT. For example,auth.example.com.sub(subject): Identifies the principal that is the subject of the JWT. This is often a user ID.aud(audience): Identifies the recipients that the JWT is intended for. The token must be rejected if the recipient is not in the audience value.exp(expiration time): The expiration time on or after which the JWT MUST NOT be accepted for processing. It's a Unix timestamp.nbf(not before): The time before which the JWT MUST NOT be accepted for processing. Also a Unix timestamp.iat(issued at): The time at which the JWT was issued. Again, a Unix timestamp.jti(JWT ID): A unique identifier for the JWT. Can be used to prevent replay attacks by ensuring a JWT is used only once.
- Public Claims: These can be defined by anyone using JWTs. However, to avoid collisions, they should be registered in the IANA JSON Web Token Claims Registry or be defined as a URI that contains a collision-resistant namespace.
- Private Claims: These are custom claims created to share information between parties that agree on their usage. They are neither registered nor public. For example, a
roleclaim might specifyadminoruser.
A typical payload might look like this:
{
  "sub": "1234567890",
  "name": "John Doe",
  "admin": true,
  "iat": 1516239022,
  "exp": 1516242622
}
Like the Header, the Payload is also Base64Url encoded to form the second part of the JWT. The claims within the payload are the core "information" that the token conveys, and their integrity is protected by the signature.
The Signature: Ensuring Authenticity
The third and most crucial part of a JWT is the Signature. This is what gives the JWT its security properties, ensuring that the token hasn't been tampered with and that it originates from a trusted source. The signature is created by taking the Base64Url encoded Header, the Base64Url encoded Payload, concatenating them with a dot, and then running the resulting string through the algorithm specified in the Header, using a secret key (for symmetric algorithms like HS256) or a private key (for asymmetric algorithms like RS256).
The formula for creating the signature looks something like this:
HMACSHA256(
  base64UrlEncode(header) + "." +
  base64UrlEncode(payload),
  secret
)
secret: For symmetric algorithms, this is a shared secret known only to the issuer and the verifier. It must be kept strictly confidential. For asymmetric algorithms, a private key is used for signing, and a corresponding public key is used for verification.
The signature serves two critical purposes: 1. Integrity: If any part of the header or payload is altered, the signature verification will fail, indicating tampering. 2. Authenticity: By successfully verifying the signature with the correct secret or public key, the verifier can be confident that the token was indeed issued by the legitimate issuer.
Without a valid signature, a JWT is merely a Base64Url encoded string carrying claims, and its contents cannot be trusted. The signature is the cryptographic lock that secures the information, and its verification is the key to unlocking trust in the token. This interplay of header, payload, and signature forms the robust foundation upon which JWTs operate, making them an ideal choice for stateless authentication and authorization across various distributed systems, including those that power modern API gateway solutions.
Introducing jwt.io: Your Go-To JWT Debugger
Having understood the intricate structure and cryptographic underpinnings of JSON Web Tokens, the next logical step is to explore the primary tool that simplifies their manipulation and inspection: jwt.io. This web-based utility has become an indispensable resource for developers, security professionals, and anyone needing to interact with JWTs outside of their application's code. It provides an intuitive, interactive interface for decoding, verifying, and even generating JWTs, making the often-abstract concepts of token structure and cryptography tangible and easy to understand.
At its core, jwt.io is a powerful debugger for JWTs. It allows you to paste a JWT into a text area and immediately visualize its constituent parts: the Header, the Payload, and the Signature. More than just a simple decoder, it also offers robust verification capabilities, enabling you to test the authenticity of tokens using various algorithms and secrets/keys. This dual functionality makes it invaluable for debugging authentication issues, understanding token contents, and verifying security configurations without needing to write a single line of code.
The jwt.io Interface: A Developer's Workbench
Upon navigating to jwt.io, you are greeted by a clean and highly functional interface, typically divided into several key sections:
- Encoded JWT Input: On the left-hand side, there's a large text area where you paste the complete, encoded JWT. As you type or paste, the tool instantly begins parsing and displaying information. This real-time feedback is one of its most powerful features, allowing for rapid iteration and debugging.
- Decoded Sections (Header & Payload): To the right of the input, the Header and Payload sections are prominently displayed. These sections present the Base64Url decoded JSON objects in a human-readable format, usually with syntax highlighting.
- Header (Alg & Typ): This pane clearly shows the
alg(algorithm) andtyp(type) fields, extracted directly from the first part of your JWT. This immediate visibility helps confirm that the token is indeed a JWT and what algorithm it purports to use. - Payload (Data): Below the header, the payload pane reveals all the claims contained within the token. Registered claims like
iss,sub,exp, andiatare often highlighted or presented with additional context (e.g., human-readable dates forexpandiat). Custom claims are also displayed, allowing developers to quickly ascertain the information being transmitted. This is particularly useful when debugging authorization logic, as you can see precisely which roles, permissions, or user identifiers are embedded within the token.
- Header (Alg & Typ): This pane clearly shows the
- Signature Verification: Further down on the right side, the Signature Verification section is arguably the most critical component. This area typically includes:
- Algorithm Selector: A dropdown or radio button group where you can explicitly select the signing algorithm (
HS256,RS256,ES256, etc.) that corresponds to your token.jwt.iooften attempts to auto-detect this from the header, but manual selection is sometimes necessary or preferred. - Secret/Key Input: A text area or file upload option where you provide the secret key (for symmetric algorithms) or the public key (for asymmetric algorithms) required to verify the token's signature. This is a crucial step; without the correct key, the signature cannot be validated.
- Verification Status: A clear visual indicator (e.g., a green checkmark and "Signature Verified" text or a red cross and "Invalid Signature" text) that immediately communicates whether the token's signature is valid against the provided key and algorithm. This instantaneous feedback is invaluable for troubleshooting invalid tokens, incorrect secrets, or tampered payloads.
- Algorithm Selector: A dropdown or radio button group where you can explicitly select the signing algorithm (
- Token Generation (Optional/Advanced): While primarily a debugger, some versions or advanced features of
jwt.iomight allow you to modify the header and payload directly and regenerate a new signed JWT using a provided secret. This is less commonly used for debugging existing tokens but can be helpful for testing scenarios or understanding how changes impact the final token structure and signature.
The intuitive layout and real-time processing capabilities of jwt.io significantly reduce the friction associated with working with JWTs. Instead of writing custom scripts or relying on command-line tools for every token inspection, jwt.io offers an immediate, visual representation of the token's state. This greatly speeds up development cycles, simplifies debugging authentication flows, and empowers developers to quickly grasp the implications of various JWT configurations and cryptographic choices. Whether you're integrating with a new API, troubleshooting a microservice authentication error, or simply trying to understand a token's claims, jwt.io provides the clarity and control you need, making it a cornerstone utility in the modern developer's arsenal.
Decoding JWTs with jwt.io: A Step-by-Step Guide
The most common initial use case for jwt.io is to simply decode a JWT and inspect its contents. This process is remarkably straightforward and requires no prior knowledge of cryptography or specialized tools, making it accessible to developers of all skill levels. Decoding a JWT means translating its Base64Url encoded parts back into human-readable JSON. It's a fundamental step in understanding what information a token carries before even attempting to verify its authenticity.
Let's walk through the process of decoding a JWT using jwt.io:
Step 1: Obtain Your JWT
The first step is to get the actual JSON Web Token you want to inspect. JWTs are typically received from an authentication server or API after a successful login or authorization grant. They are commonly found in:
- HTTP Authorization Headers: Often as a
Bearertoken (e.g.,Authorization: Bearer <your-jwt>). - Cookies: Less common but can be stored in browser cookies.
- URL Query Parameters: In some cases, for specific use cases, though this is generally discouraged due to security implications (e.g., exposure in browser history).
- Local Storage/Session Storage: Client-side JavaScript applications frequently store JWTs in the browser's local or session storage.
- Application Logs: During debugging, JWTs might appear in server-side or client-side logs.
For the purpose of this guide, let's use a sample JWT. You can generate one from any standard JWT library or obtain one from an API you are working with.
Example JWT: eyJhbGciOiJIUzI1NiIsInR5cCI6IkpXVCJ9.eyJzdWIiOiIxMjM0NTY3ODkwIiwibmFtZSI6IkpvaG4gRG9lIiwiaWF0IjoxNTE2MjM5MDIyfQ.SflKxwRJSMeKKF2QT4fwpMeJf36POk6yJV_adQssw5c
Step 2: Navigate to jwt.io
Open your web browser and go to https://jwt.io/. You will be presented with the interactive debugger interface, pre-populated with an example JWT.
Step 3: Paste Your JWT into the Input Field
Locate the large text area on the left side of the jwt.io page, typically labeled "Encoded" or simply displaying a JWT. Delete the existing example JWT (if any) and paste your obtained JWT into this field.
As soon as you paste the token, jwt.io automatically and instantly parses it. You'll notice the distinct sections of the token (Header, Payload, Signature) being color-coded and separated.
Step 4: Inspect the Decoded Header
Immediately to the right of the input field, you will see the "Header" section. This pane displays the Base64Url decoded JSON content of the JWT's header.
For our example JWT: eyJhbGciOiJIUzI1NiIsInR5cCI6IkpXVCJ9... The decoded header will appear as:
{
  "alg": "HS256",
  "typ": "JWT"
}
Here, you can quickly ascertain: * alg: The algorithm used for signing (e.g., HS256, RS256, none). This is crucial for subsequent signature verification. * typ: Confirms that the token is indeed a JWT.
Step 5: Inspect the Decoded Payload
Below the Header section, you'll find the "Payload" section, which displays the Base64Url decoded JSON content of the JWT's claims.
For our example JWT: ...eyJzdWIiOiIxMjM0NTY3ODkwIiwibmFtZSI6IkpvaG4gRG9lIiwiaWF0IjoxNTE2MjM5MDIyfQ... The decoded payload will appear as:
{
  "sub": "1234567890",
  "name": "John Doe",
  "iat": 1516239022
}
This is where the actual "information" of the token resides. You can observe: * Registered Claims: Such as sub (subject), iat (issued at). jwt.io often provides human-readable dates alongside the Unix timestamps for iat and exp (if present), which is incredibly helpful for quickly understanding token validity periods. * Public/Private Claims: Any custom data specific to your application (e.g., name, admin, roles, permissions) will be visible here.
Common Use Cases for Decoding:
- Debugging Authentication Issues: If a user reports they can't access a resource, decoding their JWT can reveal if expected claims (like roles or permissions) are missing or incorrect.
- Inspecting Token Contents: To confirm that the server is issuing tokens with the correct user ID, name, or other relevant data.
- Understanding Token Expiry: Quickly check the
expclaim to see when a token will become invalid, which is vital for managing user sessions and refresh token flows. - Auditing and Security: To ensure sensitive information is not accidentally included in the token payload, or that specific claims are formatted as expected.
- Learning JWT Structure: For newcomers to JWTs, decoding tokens visually on
jwt.ioprovides an excellent hands-on learning experience.
Decoding alone does not verify the token's authenticity; it only reveals its contents. Anyone can decode a JWT, as Base64Url encoding is not encryption. The real security comes from the signature. However, for a quick glance at a token's claims, decoding is often the first and most immediate step, and jwt.io streamlines this process perfectly. It's a crucial first step in understanding and troubleshooting the flow of secure information within any distributed system that relies on JWTs, from a simple web API to a complex microservices architecture protected by an API gateway.
Verifying JWTs with jwt.io: Ensuring Authenticity and Integrity
While decoding a JWT reveals its claims, it does not guarantee that the token is trustworthy. The true security power of a JWT lies in its signature, which assures both the authenticity of the issuer and the integrity of the token's contents. Verifying a JWT means checking that its signature is valid, using the algorithm specified in the header and the correct secret or public key. jwt.io provides an intuitive way to perform this critical verification step, transforming a potentially complex cryptographic operation into a few simple clicks and inputs.
Let's walk through the process of verifying a JWT using jwt.io:
Step 1: Ensure JWT is Decoded (Already Covered)
You should have already pasted your JWT into jwt.io as described in the decoding section. The Header and Payload panes should be displaying their decoded JSON content.
Step 2: Identify the Algorithm from the Header
Look at the "Header" section on jwt.io. The alg claim tells you which algorithm was used to sign the token. This is critical for selecting the correct verification method and providing the appropriate key type.
Common alg values: * HS256, HS384, HS512: HMAC with SHA-256, SHA-384, or SHA-512. These are symmetric algorithms, meaning the same secret string is used for both signing and verification. * RS256, RS384, RS512: RSA with SHA-256, SHA-384, or SHA-512. These are asymmetric algorithms, meaning a private key is used for signing and a public key for verification. * ES256, ES384, ES512: ECDSA (Elliptic Curve Digital Signature Algorithm) with SHA-256, SHA-384, or SHA-512. Also asymmetric, similar to RSA but using elliptic curve cryptography. * none: Indicates an unsigned token. This is generally highly discouraged for any security-sensitive context as it offers no integrity or authenticity protection. jwt.io will typically warn you about this.
Step 3: Provide the Correct Secret or Public Key
Scroll down to the "Signature Verification" section on the jwt.io page. This is where you'll provide the cryptographic material needed to verify the signature. The input field's label and behavior will change depending on the alg value.
Case 1: Symmetric Algorithms (e.g., HS256)
If your token's alg is HS256, HS384, or HS512, you need to provide the secret key that was used to sign the token. This is a shared secret, a string of characters that only the issuer and the verifying party should know.
- Select the Algorithm:
jwt.iousually auto-selects this based on the header, but confirm it's set to the correctHS*algorithm. - Enter the Secret: In the designated input field (often labeled "your-secret"), type or paste the exact secret string. If the secret contains special characters, ensure it's not being truncated or misinterpreted. Some secrets might be Base64 encoded themselves; if so, you might need to provide the raw Base64 string if the tool expects it, or decode it first.
Case 2: Asymmetric Algorithms (e.g., RS256, ES256)
If your token's alg is RS256, RS384, RS512, ES256, ES384, or ES512, you need to provide the public key corresponding to the private key used for signing. Public keys are typically shared and are not secret.
- Select the Algorithm: Confirm
jwt.iohas selected the correctRS*orES*algorithm. - Enter the Public Key: The input field will usually be labeled "Public Key" or "RSA Public Key". You need to paste the public key in a standard format, most commonly PEM (Privacy-Enhanced Mail) format, which often starts with
-----BEGIN PUBLIC KEY-----and ends with-----END PUBLIC KEY-----. Ensure you include the full key, including these delimiters and any line breaks. Sometimes,jwt.iomight also support JWK (JSON Web Key) format, but PEM is very common for direct pasting.
Step 4: Observe the Verification Status
Once you have provided the correct secret or public key, jwt.io will instantly perform the signature verification. You will see a clear status message, usually in the lower-right corner of the "Signature Verification" section:
- Green Checkmark & "Signature Verified": This indicates that the signature is valid. The token's header and payload have not been tampered with, and the token was signed by someone possessing the correct secret or private key. This signifies trust in the token's origin and integrity.
- Red Cross & "Invalid Signature": This indicates that the signature is invalid. This could be due to several reasons:
- Incorrect Secret/Public Key: The most common reason. Double-check that you've entered the exact secret or the correct public key. Pay attention to whitespace, case sensitivity, and full PEM formatting.
- Incorrect Algorithm: The algorithm selected on
jwt.iomight not match thealgin the token's header, or the issuer might have used a different algorithm than you expect. - Tampered Token: The header or payload of the token might have been altered after it was signed. This is the primary security concern that signature verification addresses.
- Encoding Issues: Less common, but sometimes issues with Base64Url encoding (e.g., extra padding characters) can cause signature mismatches.
Common Use Cases for Verification:
- Security Audit: Confirming that tokens issued by your system are indeed verifiable and haven't been compromised.
- Debugging Invalid Tokens: If an API client is consistently getting "invalid token" errors,
jwt.iohelps determine if the token itself is malformed, signed with the wrong key, or expired. - Interoperability Testing: When integrating with a third-party service that issues JWTs, verifying their tokens on
jwt.ioensures you can correctly process them with your own backend. - Learning and Experimentation: Understanding how different algorithms and secrets impact signature generation and verification.
- Testing
API GatewayConfiguration: Many API gateway solutions, such as APIPark, are responsible for validating incoming JWTs before forwarding requests to backend services. Usingjwt.ioallows developers and administrators to quickly verify tokens against the same keys and algorithms that the gateway is configured to use, ensuring seamless integration and robust security. APIPark, as an open-source AI gateway and API management platform, offers comprehensive API lifecycle management, including robust security features, which naturally encompasses JWT validation as a cornerstone of secure API access. This rapid verification capability onjwt.iocomplements such platforms by providing an immediate feedback loop during development and deployment, making it easier to troubleshoot access control issues.
Verifying a JWT's signature is the cornerstone of its security model. By confirming that the token is untampered and issued by a trusted entity, you establish a secure foundation for authentication and authorization decisions within your applications and APIs. jwt.io simplifies this critical process, providing immediate feedback and demystifying cryptographic operations for developers.
APIPark is a high-performance AI gateway that allows you to securely access the most comprehensive LLM APIs globally on the APIPark platform, including OpenAI, Anthropic, Mistral, Llama2, Google Gemini, and more.Try APIPark now! 👇👇👇
Advanced jwt.io Features and Troubleshooting Tips
While the primary functions of decoding and verifying JWTs are relatively straightforward with jwt.io, delving into some of its more advanced nuances and troubleshooting common pitfalls can further enhance your productivity and deepen your understanding of JWTs. The tool offers subtle features and implications that are worth exploring for complex scenarios or persistent debugging challenges.
Understanding Different Signing Algorithms
jwt.io supports a wide array of signing algorithms, each with its own cryptographic properties and key requirements. Beyond the commonly seen HS256 and RS256, you might encounter:
- HMAC (HSxxx): These require a shared secret. When providing the secret, be mindful of its encoding. Some systems might use a raw ASCII string, while others might Base64 encode the secret itself.
jwt.iotypically expects the raw secret forHS*algorithms. If your secret is Base64 encoded by your system, you might need to decode it first before pasting it intojwt.io. - RSA (RSxxx) & PSS (PSxxx): These are asymmetric algorithms using RSA key pairs.
jwt.iorequires the public key for verification. This public key is usually provided in PEM format (-----BEGIN PUBLIC KEY----- ... -----END PUBLIC KEY-----). Ensure the entire key, including headers and footers, is copied correctly. Differences betweenRS256andPS256(RSASSA-PSS) lie in their padding schemes, withPS256offering stronger security guarantees in some contexts. - ECDSA (ESxxx): These are also asymmetric, utilizing elliptic curve cryptography. Similar to RSA, they require a public key for verification, typically in PEM format. ECDSA keys are generally smaller and offer comparable security to RSA with smaller key sizes, making them efficient for mobile or constrained environments.
When a signature fails verification, the first step after checking the secret/key is to confirm that the alg specified in the JWT header matches the algorithm selected in jwt.io. A common mistake is to try verifying an RS256 token with an HS256 algorithm setting, which will always fail.
Handling none Algorithm
A special case is the none algorithm. If a JWT's header specifies "alg": "none", it means the token is unsigned. While jwt.io will still decode the header and payload, it will explicitly state that the signature is "Unsecured" or "Invalid Signature" because there's no cryptographic signature to verify. Using alg: none is a significant security risk and should generally be avoided in production environments for tokens carrying sensitive information or used for authentication, as it provides no integrity protection against tampering. It might be acceptable for completely public, non-sensitive data, but even then, it's rarely a best practice.
Time-Based Claims (exp, nbf, iat)
jwt.io is exceptionally helpful for debugging time-based claims:
exp(Expiration Time): Theexpclaim, when present, indicates the timestamp after which the JWT must not be accepted.jwt.iousually displays this Unix timestamp alongside a human-readable date and time, often highlighting if the token is already expired. This is invaluable for troubleshooting "token expired" errors.nbf(Not Before Time): Thenbfclaim specifies the timestamp before which the JWT must not be accepted. Similar toexp,jwt.iowill display this timestamp and its human-readable equivalent, helping to identify "token not yet valid" issues.iat(Issued At Time): This claim indicates the time when the JWT was issued. While not used for validation, it's useful for auditing and understanding token lifetimes.
If a token is failing in your application due to expiry or being used prematurely, jwt.io can instantly confirm if these claims are the root cause. It's particularly useful to verify that the system clocks of your issuer and verifier are synchronized, as clock skew can lead to premature expiration or "not yet valid" errors.
Troubleshooting Invalid Signatures
When jwt.io reports an "Invalid Signature," systematically troubleshoot using this checklist:
- Correct Algorithm: Does the
algin the JWT header match the selected algorithm injwt.io? - Correct Secret/Key:
- Symmetric (HSxxx): Is the secret exactly what was used to sign the token? No extra spaces, correct case, and full string. If the secret itself was Base64 encoded by your signing tool, ensure you're providing the raw secret or the correctly Base64 decoded form to
jwt.ioas it expects. - Asymmetric (RSxxx, ESxxx, PSxxx): Is the public key correct and complete? This includes
-----BEGIN PUBLIC KEY-----and-----END PUBLIC KEY-----lines, along with all intermediate characters and line breaks. If you're using a JWKS endpoint, ensure you've extracted the correct public key for thekid(Key ID) specified in your JWT header (if present).
- Symmetric (HSxxx): Is the secret exactly what was used to sign the token? No extra spaces, correct case, and full string. If the secret itself was Base64 encoded by your signing tool, ensure you're providing the raw secret or the correctly Base64 decoded form to
- Token Tampering: Although
jwt.iocan't directly tell you who tampered with it, an invalid signature due to an unchanged key indicates that the header or payload has been modified since it was signed. - Encoding Issues: While rare with standard JWTs, ensure there aren't any hidden characters or incorrect Base64Url padding if you're manually manipulating or transferring the token.
- Library Differences: Occasionally, different JWT libraries might handle subtle aspects of Base64Url encoding or algorithm specifics slightly differently.
jwt.iogenerally adheres to the RFC, so if it validates but your library doesn't, investigate your library's configuration.
Using jwt.io for Generating Tokens (Advanced)
While primarily a debugger, jwt.io can also be used to generate tokens. This is often done by:
- Modifying the decoded Header and Payload sections directly.
- Entering a secret or selecting a public/private key pair (if the feature is available or you're using a local version that allows private key input).
- The "Encoded" section will then dynamically update with the newly generated, signed JWT.
This capability is excellent for:
- Testing specific scenarios: Quickly creating a token with certain claims (e.g., an expired
expclaim or a specificroleclaim) to test how your API or application reacts. - Understanding signing: Seeing how changes in the header, payload, or secret affect the final signature.
- Creating dummy tokens: For rapid local development or integration testing where a full authentication flow is not yet implemented or desired.
Remember that generating tokens on a public website like jwt.io should only be done with non-sensitive data and for testing purposes. Never paste or generate tokens with actual production secrets or sensitive user data on any public online tool. For production-grade token generation, always rely on secure, server-side libraries within your trusted environment.
By mastering these advanced features and troubleshooting techniques, you can leverage jwt.io not just as a basic decoder but as a powerful, versatile tool for managing the complexities of JWTs in modern API development and security analysis, fitting perfectly into the ecosystem of robust API gateway and management solutions.
JWTs in Real-World Scenarios: Authentication, Authorization, and API Management
The true power of JSON Web Tokens manifests in their practical application across a myriad of real-world scenarios, fundamentally transforming how developers approach authentication, authorization, and the overall management of APIs. Their stateless nature, compactness, and verifiability make them an ideal choice for distributed systems, microservices architectures, and single-page applications. Understanding these contexts is crucial for appreciating jwt.io's role as a debugging and validation companion.
Authentication and Authorization in Modern APIs
At its core, a JWT is a mechanism for securely transmitting claims. In the context of APIs, these claims typically pertain to a user's identity (authentication) and what that user is allowed to do (authorization).
- Authentication Flow:
- A client (e.g., a web browser, mobile app) sends user credentials (username/password) to an authentication server.
- Upon successful verification, the authentication server generates a JWT containing claims about the user (e.g.,
user_id,email,roles). - This JWT is signed with a secret key (known only to the server) or a private key.
- The server sends the signed JWT back to the client.
- The client stores this JWT (e.g., in local storage, a secure cookie) and includes it in the
Authorizationheader (Bearer <token>) of subsequent requests to protected API endpoints.
- Authorization Flow:
- When a protected API receives a request with a JWT in the
Authorizationheader, it first validates the token. - Validation steps:
- Verify the signature using the known secret or public key. This ensures the token hasn't been tampered with and was issued by a trusted entity.
- Check
exp(expiration time) to ensure the token is still valid. - Check
nbf(not before time) if present. - Validate
iss(issuer) andaud(audience) claims to ensure the token was issued by the expected party for the intended recipient.
- If the token is valid, the API extracts the claims from the payload (e.g.,
user_id,roles). - Based on these claims, the API makes authorization decisions, determining if the user has permission to access the requested resource or perform the requested action.
- When a protected API receives a request with a JWT in the
This stateless approach means the API doesn't need to query a session database for every request, significantly improving scalability and performance, especially in microservices where multiple services might need to verify the same token.
The Critical Role of API Gateways in Handling JWTs
In complex, enterprise-grade architectures, particularly those employing microservices, an API Gateway often sits at the forefront of all incoming requests. Its role is pivotal in managing traffic, routing requests, applying policies, and, crucially, handling security. When it comes to JWTs, the API Gateway acts as the first line of defense and validation.
Key functions of an API Gateway regarding JWTs:
- Centralized JWT Validation: Instead of each microservice individually validating JWTs, the API Gateway can perform this task once. It intercepts the incoming request, extracts the JWT, verifies its signature, checks claims like
exp,iss, andaud. If valid, the gateway can then strip theAuthorizationheader, or inject validated claims into a new header, before forwarding the request to the appropriate backend service. This offloads authentication burden from individual services, simplifies their logic, and ensures consistent security policies. - Claims Transformation/Augmentation: A gateway can transform or augment the JWT's claims. For example, it might fetch additional user details from an internal identity store based on the
subclaim and add them as custom headers before forwarding to a backend service, providing richer context without modifying the original JWT. - Rate Limiting and Access Control: Beyond just verifying the token, the gateway can use claims within the JWT (e.g.,
user_id,role) to enforce fine-grained rate limits or access control policies, preventing abuse or unauthorized access to specific API endpoints. - Token Refresh/Revocation: While JWTs are typically short-lived and immutable, an API Gateway can participate in more advanced token management. It might manage refresh tokens or interact with a token revocation list for immediate invalidation of compromised JWTs (though true revocation for stateless tokens often involves a short expiry and blacklisting).
Platforms like APIPark, an open-source AI gateway and API management platform, provide comprehensive solutions for integrating, managing, and securing various types of APIs, including those leveraging JWTs for authentication and authorization. Their capabilities extend to unifying API formats, encapsulating prompts into REST APIs, and offering end-to-end API lifecycle management, all while ensuring high performance and detailed logging, which is vital for any enterprise relying on secure API interactions. APIPark, by centralizing management and security concerns, including robust JWT validation, significantly enhances the efficiency and security posture of organizations dealing with a diverse set of APIs, especially in the context of AI models.
Documenting JWT-Secured APIs with OpenAPI
For an API to be effectively consumed by clients, it needs clear and comprehensive documentation. This is where specifications like OpenAPI (formerly known as Swagger) come into play. OpenAPI provides a standard, language-agnostic interface description for RESTful APIs, allowing both humans and machines to discover and understand the capabilities of a service.
When an API is secured using JWTs, the OpenAPI specification must clearly describe how clients should authenticate. This is achieved through the securitySchemes and security objects:
securitySchemes: This section defines the types of security authentication used by the API. For JWTs, this typically involves ahttpscheme with abearerFormatset toJWT.yaml securitySchemes: bearerAuth: # A unique name for this security scheme type: http scheme: bearer bearerFormat: JWT # Indicates that JWT is used description: Provide a valid JWT token in the Authorization headersecurity: This section links the definedsecuritySchemesto specific API operations or to the entire API.```yaml security: - bearerAuth: [] # Apply bearerAuth to the entire APIpaths: /users/{id}: get: summary: Get user by ID security: - bearerAuth: [] # Alternatively, apply to specific operations parameters: - in: path name: id schema: type: string required: true description: ID of the user to retrieve responses: '200': description: User data ```
By explicitly defining JWT authentication within the OpenAPI specification, developers consuming the API instantly understand that they need to obtain a JWT and include it as a Bearer token in their requests. Tools that generate API client SDKs from OpenAPI definitions can then automatically incorporate the logic for handling JWTs, streamlining client integration.
This level of detailed documentation, coupled with the robust validation capabilities offered by API Gateways and the debugging power of jwt.io, creates a holistic and secure ecosystem for modern API development. It ensures that tokens are correctly issued, verified, and understood across all components of a distributed system, from the client application to the backend microservices.
Best Practices for JWT Usage and Security Considerations
While JWTs offer significant advantages in modern API architecture, their effective and secure implementation hinges on adhering to best practices and understanding inherent security considerations. Missteps in JWT handling can expose applications to serious vulnerabilities. This section outlines crucial guidelines to ensure your JWT implementations are robust and secure.
1. Keep Secrets Confidential and Strong
- Symmetric Algorithms (HS256): The secret key used to sign and verify tokens must be kept strictly confidential. It should be a long, cryptographically strong random string (e.g., 32 bytes or more for HS256). Hardcoding secrets, using weak or easily guessable secrets (like "secret"), or exposing them in public repositories are critical security flaws. Secrets should be stored securely (e.g., environment variables, secret management services) and rotated regularly.
- Asymmetric Algorithms (RS256, ES256): The private key used for signing must be kept confidential and secure. The public key, used for verification, can be shared, often via a JWKS (JSON Web Key Set) endpoint. Ensure key pairs are generated securely with sufficient bit strength (e.g., 2048-bit RSA or P-256 for ECDSA).
2. Always Validate the Signature
This is the most fundamental security control. Never trust the claims of a JWT without first verifying its signature. If the signature is invalid, the token's contents could have been tampered with or issued by an unauthorized entity. jwt.io makes this easy for debugging, but your application's API gateway or backend services must perform this check for every protected request.
3. Implement Robust Expiration (exp) and Not Before (nbf) Times
- Short Lifespans for Access Tokens: JWTs (especially access tokens used for API authorization) should have relatively short expiration times (e.g., 5-15 minutes). This limits the window of opportunity for attackers if a token is compromised.
- Use Refresh Tokens: For longer sessions, use a separate, long-lived refresh token (stored securely, often in an HTTP-only cookie) to obtain new, short-lived access tokens. Refresh tokens should be single-use and ideally bound to the client.
- Validate
expandnbf: Always check these claims on the server-side.jwt.iohelps you visualize these, but your code must enforce them.
4. Validate All Registered Claims
Beyond the signature and expiry, validate other relevant registered claims:
iss(Issuer): Ensure the token was issued by your expected identity provider.aud(Audience): Verify that the token is intended for your specific API or application. This prevents tokens issued for one service from being used against another.jti(JWT ID): If used, this unique identifier can help prevent replay attacks, especially if you maintain a blacklist of usedjtis.
5. Never Put Sensitive Data in the Payload
Remember that the JWT payload is only Base64Url encoded, not encrypted. This means anyone who intercepts the token can easily decode and read its contents.
- Avoid PII: Do not include Personally Identifiable Information (PII) like full names, addresses, social security numbers, or financial data directly in the payload.
- Minimal Claims: Only include claims absolutely necessary for authentication and authorization decisions. If more data is needed, use the
subclaim (user ID) to look up additional user information from a secure database on the server side.
6. Protect Against Algorithm Confusion Attacks
This is a specific type of attack where an attacker changes the alg in the JWT header (e.g., from RS256 to HS256) and then re-signs the token with your public key as the secret. If the server naively uses the alg from the header to verify, it might try to verify an HS256 token using your public key as the secret, which could validate a forged token.
- Mitigation: Your JWT library and server-side verification logic must not implicitly trust the
algclaim from the header. Instead, always explicitly specify the expected algorithm(s) when verifying the token, or whitelist allowed algorithms. Most modern JWT libraries protect against this by default, but always verify your chosen library's behavior.
7. Consider Token Revocation for Compromised Tokens
Since JWTs are stateless, revoking them before their natural expiry is challenging. However, for critical security scenarios:
- Short
expTimes: The primary mechanism. - Blacklisting/Denylist: Maintain a server-side denylist of compromised or logged-out JWT
jtis. Every request would then check this list, adding a small stateful lookup. - Forced Re-authentication: If a breach is detected, force all users to re-authenticate, effectively invalidating all current tokens.
8. Secure Token Storage on the Client-Side
How clients store JWTs is crucial:
- HTTP-only Cookies: Often recommended for refresh tokens to prevent XSS (Cross-Site Scripting) attacks from accessing them. Set
SecureandSameSiteattributes. - Local Storage/Session Storage: Common for access tokens in SPAs. While convenient, they are vulnerable to XSS if not handled carefully. Ensure your application has strong XSS prevention measures.
- Memory: For highly sensitive applications, tokens might only reside in memory for the duration of the request, requiring frequent re-authentication or very short lifespans.
9. Use HTTPS/TLS Everywhere
Always transmit JWTs over HTTPS/TLS. This encrypts the token in transit, protecting it from man-in-the-middle attacks that could intercept and read (or copy) the token. Without HTTPS, JWTs are exposed as plain text.
10. Implement Robust Logging and Monitoring
Log JWT validation failures, invalid signatures, and token expiration events. Monitor these logs for suspicious activity, which could indicate attempted attacks or configuration issues. Tools like APIPark provide detailed API call logging, which is invaluable for tracing and troubleshooting issues, including those related to JWTs, and performing powerful data analysis on historical call data to identify trends and potential security anomalies.
By diligently applying these best practices, developers can harness the power and flexibility of JWTs while building secure and resilient APIs, minimizing vulnerabilities and ensuring the integrity of their authentication and authorization systems.
Beyond jwt.io: Programmatic Decoding and Verification
While jwt.io is an indispensable online tool for quick inspection and debugging, real-world applications require programmatic handling of JWTs. This involves using dedicated JWT libraries in your chosen programming language to decode, verify, and generate tokens securely within your server-side APIs or client-side applications. Understanding the principles behind these programmatic operations reinforces the concepts learned with jwt.io and allows for robust, automated JWT management.
Programmatic Decoding
Decoding a JWT programmatically involves taking the Base64Url encoded string and transforming its header and payload back into JSON objects. This is typically the first step before any verification or claim processing. Most JWT libraries provide a function for this.
Example (Conceptual Python using PyJWT):
import jwt
import base64

# A sample JWT (for demonstration, usually obtained from a request)
token = "eyJhbGciOiJIUzI1NiIsInR5cCI6IkpXVCJ9.eyJzdWIiOiIxMjM0NTY3ODkwIiwibmFtZSI6IkpvaG4gRG9lIiwiaWF0IjoxNTE2MjM5MDIyfQ.SflKxwRJSMeKKF2QT4fwpMeJf36POk6yJV_adQssw5c"

# Decoding the header part (first segment)
header_encoded = token.split('.')[0]
header_decoded = base64.urlsafe_b64decode(header_encoded + "==").decode('utf-8') # Add padding if needed
print("Decoded Header:", header_decoded)

# Decoding the payload part (second segment)
payload_encoded = token.split('.')[1]
payload_decoded = base64.urlsafe_b64decode(payload_encoded + "==").decode('utf-8') # Add padding if needed
print("Decoded Payload:", payload_decoded)

# Using the library's decode (without verification, generally discouraged in prod)
# This is analogous to what jwt.io does purely for display without a secret
# In a real app, you would always verify immediately.
try:
    decoded_payload_library = jwt.decode(token, options={"verify_signature": False})
    print("Decoded Payload (Library):", decoded_payload_library)
except Exception as e:
    print(f"Error decoding: {e}")
In this conceptual example, we manually split and Base64Url decode the parts, mirroring the visual separation on jwt.io. A library's decode function (with verify_signature=False for raw decoding demonstration) simplifies this. However, it's crucial to understand that programmatic decoding without immediate verification is generally a bad practice in production, as it exposes the potentially untrusted claims.
Programmatic Verification
Programmatic verification is where the true security of JWTs is enforced. This process involves:
- Parsing the token: Splitting it into its three parts.
- Validating the signature: Recreating the signature using the header, payload, the algorithm specified in the header, and the configured secret/public key. Then comparing this generated signature with the signature provided in the token.
- Validating claims: Checking
exp,nbf,iss,aud, and any other critical claims.
Example (Conceptual Python using PyJWT):
import jwt
from datetime import datetime, timedelta, timezone

# Your secret key (MUST be kept confidential and strong in real apps!)
# For HS256, it's a shared secret.
YOUR_SECRET_KEY = "your-super-secret-key-that-is-at-least-32-chars-long"

# A sample JWT. For this example, let's create one that *would* be valid.
# In a real scenario, you'd receive this from a client.
payload_to_sign = {
    "sub": "user123",
    "name": "Jane Doe",
    "iat": datetime.now(timezone.utc),
    "exp": datetime.now(timezone.utc) + timedelta(minutes=5), # Token expires in 5 minutes
    "aud": "my-api-service"
}
# Generate a token with HS256 algorithm
valid_token = jwt.encode(payload_to_sign, YOUR_SECRET_KEY, algorithm="HS256")
print("Generated Token:", valid_token)

# --- Verification Step ---
try:
    # Verify the token
    # The 'audience' parameter is crucial for validating the 'aud' claim
    decoded_and_verified_payload = jwt.decode(
        valid_token,
        YOUR_SECRET_KEY,
        algorithms=["HS256"], # Explicitly specify allowed algorithms to prevent alg confusion attacks
        audience="my-api-service",
        leeway=timedelta(seconds=10) # Allows for slight clock skew for exp/iat checks
    )
    print("\nToken is valid!")
    print("Decoded and Verified Payload:", decoded_and_verified_payload)

    # Example of an invalid token (e.g., tampered payload)
    tampered_token = valid_token.split('.')[0] + ".eyJzdWIiOiJhbmF0dGFja2VyIiwibmFtZSI6IkpvZSBKb2huIiwiaWF0IjoxNTE2MjM5MDIyfQ." + valid_token.split('.')[2]
    print("\nAttempting to verify tampered token:", tampered_token)
    try:
        jwt.decode(tampered_token, YOUR_SECRET_KEY, algorithms=["HS256"])
    except jwt.InvalidSignatureError:
        print("Tampered token verification failed as expected (Invalid Signature).")
    except Exception as e:
        print(f"Other error for tampered token: {e}")

    # Example of an expired token (simulated)
    expired_payload = {
        "sub": "expired_user",
        "exp": datetime.now(timezone.utc) - timedelta(minutes=1), # Expired 1 minute ago
        "iat": datetime.now(timezone.utc) - timedelta(minutes=6),
        "aud": "my-api-service"
    }
    expired_token = jwt.encode(expired_payload, YOUR_SECRET_KEY, algorithm="HS256")
    print("\nAttempting to verify expired token:", expired_token)
    try:
        jwt.decode(expired_token, YOUR_SECRET_KEY, algorithms=["HS256"], audience="my-api-service")
    except jwt.ExpiredSignatureError:
        print("Expired token verification failed as expected (Expired Signature).")
    except Exception as e:
        print(f"Other error for expired token: {e}")


except jwt.InvalidSignatureError:
    print("Verification failed: Invalid Signature. Token might be tampered or signed with wrong secret.")
except jwt.ExpiredSignatureError:
    print("Verification failed: Token has expired.")
except jwt.InvalidAudienceError:
    print("Verification failed: Invalid Audience. Token not intended for this service.")
except jwt.InvalidIssuerError:
    print("Verification failed: Invalid Issuer. Token not issued by expected entity.")
except Exception as e:
    print(f"An unexpected error occurred during verification: {e}")
Key takeaways from programmatic verification:
- Explicit Algorithm List: Always provide a list of expected algorithms (
algorithms=["HS256"]) to your JWT library. This is a critical defense against algorithm confusion attacks. - Audience and Issuer Validation: Pass the expected
audienceandissuervalues to your library'sdecodefunction. Most libraries will automatically validate these claims. - Error Handling: Implement comprehensive
try-exceptblocks to catch specific JWT exceptions likeInvalidSignatureError,ExpiredSignatureError,InvalidAudienceError, etc. This allows your API to respond gracefully and securely to invalid tokens. - Leeway: Use
leeway(e.g.,timedelta(seconds=10)) forexpandiatclaims to account for minor clock skew between the issuing server and the verifying server. - Public Key Handling: For
RS256(asymmetric), you would provide the public key (e.g., a PEM string) instead of a shared secret. Libraries often have specific parameters for public key input.
Programmatic handling of JWTs is fundamental to building secure APIs. While jwt.io is an excellent diagnostic tool, your applications must embed the logic for secure token processing. By combining a deep understanding of JWT structure with robust library implementations, and leveraging tools like API Gateways for centralized management, developers can confidently deploy secure and scalable authentication and authorization systems.
Conclusion: Mastering JWTs in the Modern API Landscape
The journey through the intricacies of JSON Web Tokens, from their fundamental tripartite structure to their pivotal role in securing modern APIs, culminates in a clear understanding of their power and the tools that empower developers to wield them effectively. JWTs have undeniably reshaped the landscape of authentication and authorization, offering a stateless, compact, and highly verifiable method for conveying critical claims between disparate services. Their ability to streamline secure communication, particularly in distributed architectures, makes them an indispensable technology for today's web.
At the heart of demystifying JWTs for many developers stands jwt.io. This intuitive web-based utility acts as a vital bridge between the abstract cryptographic concepts and the tangible reality of token inspection. It transforms complex Base64Url encoded strings into human-readable JSON objects, revealing the identity of the token's issuer, the claims it carries, and the algorithm used to secure it. More importantly, jwt.io provides an immediate, visual feedback loop for signature verification, allowing developers to swiftly confirm the authenticity and integrity of a token using the correct secret or public key. This capability is invaluable for debugging frustrating authentication failures, validating security configurations, and ensuring that APIs receive only trusted information.
We've explored how JWTs are woven into the fabric of real-world API scenarios, from the initial authentication handshake to the ongoing authorization checks performed by backend services. The strategic placement of API gateway solutions, such as APIPark, further enhances this ecosystem by centralizing JWT validation, providing a robust first line of defense, and offloading security concerns from individual microservices. Such platforms, designed for comprehensive API management, leverage the inherent security of JWTs to control access, manage traffic, and ensure the seamless operation of complex API landscapes, including those powering cutting-edge AI services. Furthermore, the importance of clear and machine-readable documentation, facilitated by standards like OpenAPI, ensures that JWT-secured APIs are not only robust but also easily discoverable and consumable by developers.
However, the power of JWTs comes with a significant responsibility. Adhering to stringent best practices – from maintaining strong, confidential secrets and enforcing short token lifespans to rigorously validating all claims and protecting against sophisticated attacks like algorithm confusion – is paramount. While jwt.io serves as an excellent debugging and learning aid, the ultimate security of your applications rests on the robust, programmatic implementation of JWT handling within your server-side code, backed by the comprehensive features of an API gateway.
In essence, mastering JWTs involves a blend of conceptual understanding, practical application with tools like jwt.io, strategic deployment of infrastructure components, and an unwavering commitment to security best practices. By embracing these principles, developers can confidently build and deploy secure, scalable, and high-performance APIs that form the backbone of modern digital experiences.
Frequently Asked Questions (FAQs)
Q1: What is the primary difference between decoding and verifying a JWT?
A1: Decoding a JWT involves Base64Url-decoding its header and payload to reveal the claims inside. This process does not require a secret or key and anyone can do it. Verifying a JWT, on the other hand, involves cryptographically checking the token's signature using the correct secret (for symmetric algorithms) or public key (for asymmetric algorithms). Verification ensures that the token has not been tampered with and was issued by a trusted entity. While decoding shows you the token's contents, verification confirms its authenticity and integrity, which is crucial for security.
Q2: Why is it crucial to keep the JWT secret key confidential for HS256 tokens?
A2: For HS256 (HMAC SHA256) and other symmetric algorithms, the same secret key is used both to sign the JWT and to verify its signature. If an attacker gains access to this secret key, they can forge new JWTs or alter existing ones and sign them with the compromised key. Your APIs would then incorrectly validate these malicious tokens, granting unauthorized access or privileges. Therefore, the secret key must be treated with the highest level of confidentiality and protection, similar to a database password.
Q3: Can I store sensitive user data (like passwords or credit card numbers) directly in a JWT payload?
A3: Absolutely not. The JWT payload is only Base64Url encoded, not encrypted. This means anyone who intercepts the token can easily decode its contents and read any information stored within. Therefore, you should never store sensitive data, Personally Identifiable Information (PII), or confidential application secrets directly in a JWT payload. Instead, include only minimal, non-sensitive claims necessary for authentication and authorization decisions (e.g., a user ID) and retrieve any additional sensitive data from a secure backend database if needed.
Q4: How do API Gateways, like APIPark, leverage JWTs for API management and security?
A4: API Gateways play a critical role in managing and securing APIs that use JWTs. They typically act as the first point of contact for incoming requests, allowing for centralized JWT validation. The gateway intercepts requests, verifies the JWT's signature and claims (like expiration, issuer, and audience) against configured keys, and then makes routing decisions. If the token is valid, the request is forwarded to the appropriate backend service; otherwise, it's rejected. This approach offloads authentication and basic authorization logic from individual microservices, ensures consistent security policies, and enhances overall API performance and security. Platforms like APIPark extend this by providing comprehensive lifecycle management for various APIs, including AI services, streamlining integration and ensuring robust access control based on JWTs.
Q5: What is an "algorithm confusion attack" and how can it be mitigated?
A5: An "algorithm confusion attack" (also known as a "none" algorithm attack or "key confusion attack") occurs when an attacker manipulates the alg (algorithm) claim in a JWT's header to trick the verifying server. For instance, an attacker might take a token signed with an asymmetric algorithm like RS256, change its header to HS256, and then re-sign it using the victim's public key as the symmetric secret. If the server's JWT library blindly trusts the alg claim from the token header, it might attempt to verify the HS256 token using the public key as a secret, which would succeed and validate the forged token. To mitigate this, server-side JWT verification libraries must explicitly define and whitelist the allowed algorithms they expect. They should never implicitly trust the alg claim provided in the token's header.
🚀You can securely and efficiently call the OpenAI API on APIPark in just two steps:
Step 1: Deploy the APIPark AI gateway in 5 minutes.
APIPark is developed based on Golang, offering strong product performance and low development and maintenance costs. You can deploy APIPark with a single command line.
curl -sSO https://download.apipark.com/install/quick-start.sh; bash quick-start.sh

In my experience, you can see the successful deployment interface within 5 to 10 minutes. Then, you can log in to APIPark using your account.

Step 2: Call the OpenAI API.