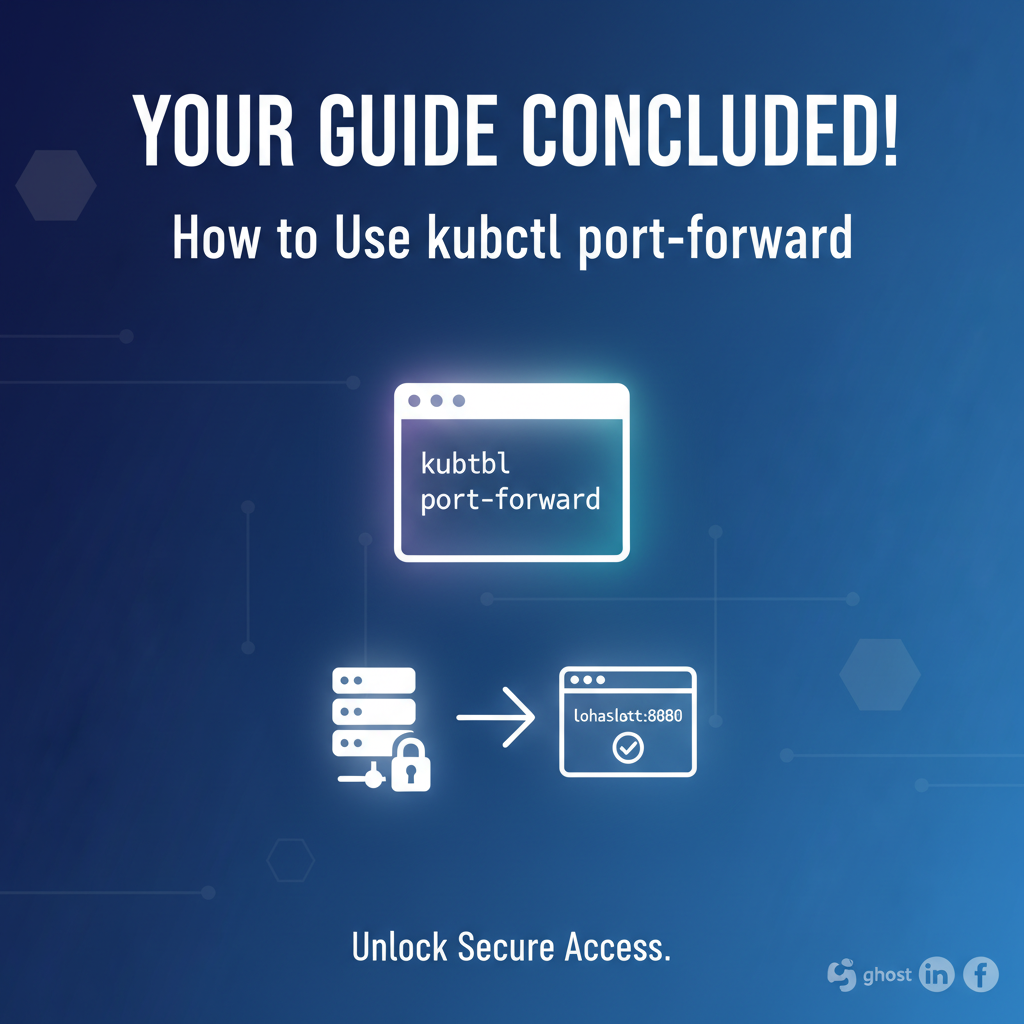
How to Use kubectl port-forward: A Practical Guide


Introduction: Bridging the Gap – Accessing Your Kubernetes Services
In the dynamic world of cloud-native development, Kubernetes has emerged as the de facto standard for orchestrating containerized applications. Its powerful features provide unparalleled scalability, resilience, and resource management. However, this robust isolation, a cornerstone of Kubernetes' strength, can sometimes present a challenge for developers. When your application components, databases, or internal tools are neatly packaged within Pods and tucked away behind Kubernetes Services, directly accessing them from your local development machine for debugging, testing, or mere inspection isn't always straightforward. It's like having a treasure chest safely locked within a fortified vault – you know it's there, but getting to it requires the right key and method.
This is precisely where kubectl port-forward steps in as an indispensable utility in every Kubernetes practitioner's toolkit. It provides a simple, yet incredibly powerful, mechanism to establish a secure, temporary connection from your local workstation directly to a specific port on a Pod, Service, or even a Deployment within your Kubernetes cluster. Think of it as creating a dedicated, private tunnel that bypasses the complex layers of network policies, firewalls, and ingress controllers, allowing you to interact with your remote services as if they were running locally. This guide will meticulously unravel the intricacies of kubectl port-forward, moving beyond basic syntax to explore its underlying mechanics, diverse use cases, advanced functionalities, crucial security considerations, and practical best practices. By the end, you'll not only understand how to use this command effectively but also appreciate its pivotal role in streamlining your Kubernetes development and debugging workflows.
Understanding the Kubernetes Network Model: The Foundation for port-forward
Before diving into the specifics of kubectl port-forward, it's essential to grasp the fundamental networking principles upon which Kubernetes operates. This foundational understanding illuminates why a tool like port-forward is so necessary and how it cleverly navigates the inherent network isolation.
At its core, Kubernetes assigns each Pod its own unique IP address within a flat network space. This means that Pods can communicate with each other directly, regardless of which node they reside on, provided network policies allow. However, these Pod IPs are ephemeral; they change if a Pod restarts or is rescheduled. Furthermore, these Pod IPs are typically internal to the cluster, meaning they are not directly reachable from outside your Kubernetes environment.
To provide a stable network endpoint for a set of Pods, Kubernetes introduces the concept of a "Service." A Service acts as an abstraction, a persistent IP address and DNS name that load-balances traffic across a group of identical Pods (usually managed by a Deployment or ReplicaSet). While Services offer internal cluster-wide discovery and load balancing, they don't automatically expose your applications to the outside world. For external access, you typically rely on NodePort, LoadBalancer, or Ingress resources, each with its own trade-offs regarding permanence, cost, and complexity.
The isolation provided by this networking model is a double-edged sword. On one hand, it enhances security by preventing unauthorized external access and promotes robust microservices architectures. On the other hand, it can complicate the development and debugging process. Imagine you're developing a new feature for your local frontend application that needs to interact with a backend api service running inside Kubernetes, or perhaps you need to inspect the data within a database Pod. Since these services are only accessible within the cluster, directly connecting from your laptop is not possible without a special mechanism. This is the precise problem that kubectl port-forward elegantly solves, creating a temporary, secure conduit through this network isolation for your immediate development needs.
What is kubectl port-forward? The Core Concept Explained
kubectl port-forward is a powerful command-line utility provided by the Kubernetes command-line interface (CLI) that enables a direct, secure connection between a port on your local machine and a port on a specific Pod, Service, Deployment, or ReplicaSet within your Kubernetes cluster. It effectively creates a temporary, single-point tunnel, allowing you to access a service running inside Kubernetes as if it were running on your localhost.
Consider it an on-demand, private network bridge. When you execute kubectl port-forward, the kubectl client initiates a connection to the Kubernetes API server. The API server then instructs the kubelet agent running on the node hosting the target Pod to establish a connection to the specified port within that Pod's container. The data then flows: your local application sends traffic to a local port, kubectl forwards it securely through the API server and kubelet to the target Pod's port, and the response travels back the same path. This entire process occurs over a secure channel, typically SPDY or HTTP/2, ensuring that your data is encapsulated and protected during transit.
Crucially, port-forward is designed for developer convenience and debugging, not for production-grade service exposure. It's a temporary, interactive process that runs in your terminal, and once terminated, the connection is severed. This temporary nature differentiates it significantly from other Kubernetes service exposure mechanisms like NodePort, LoadBalancer, or Ingress, which are intended for persistent, scalable, and publicly accessible service exposure. port-forward bypasses all those complexities, offering a direct "backdoor" for your immediate local access requirements. It doesn't modify any Kubernetes resources or networking rules; it merely establishes a transient data stream.
Key Characteristics:
- Temporary: The connection lasts only as long as the
kubectl port-forwardcommand is running. - Local-Centric: It facilitates access from your local machine to the cluster, not the other way around.
- Secure: The connection is established over the Kubernetes API and is typically authenticated and authorized based on your
kubeconfigcontext and RBAC permissions. - Target-Specific: You can forward to a Pod, a Service, a Deployment, or a ReplicaSet, giving you flexibility in targeting your desired application component.
- No Cluster Changes: It doesn't create any permanent network resources or modify your cluster's configuration.
By understanding these core concepts, you're well-equipped to leverage kubectl port-forward effectively and appreciate its role as a powerful, yet temporary, access mechanism in your Kubernetes development workflow.
Basic Syntax and First Steps: Getting Started with port-forward
Mastering kubectl port-forward begins with understanding its fundamental syntax and how to apply it to different Kubernetes resources. The command structure is remarkably intuitive, revolving around specifying a target resource and mapping ports.
The general syntax for kubectl port-forward is:
kubectl port-forward <RESOURCE_TYPE>/<RESOURCE_NAME> [LOCAL_PORT]:[REMOTE_PORT] -n <NAMESPACE>
Let's break down each component:
kubectl port-forward: The command itself, signaling your intent to establish a port forward.<RESOURCE_TYPE>/<RESOURCE_NAME>: This specifies the Kubernetes resource you wish to connect to. It's crucial to correctly identify the type and name of your target.pod/<POD_NAME>: The most common and direct way. You connect directly to a specific Pod.service/<SERVICE_NAME>: Connects to the stable IP of a Service.kubectlwill automatically pick one of the backing Pods to forward to. This is often preferred as it's more stable than a specific Pod name.deployment/<DEPLOYMENT_NAME>: Similar to a Service,kubectlwill pick a Pod managed by this Deployment.replicaset/<REPLICASET_NAME>: Similar to Deployment, targeting a Pod within a ReplicaSet.
[LOCAL_PORT]:[REMOTE_PORT]: This is the core of the port mapping.LOCAL_PORT: The port on your local machine that you want to listen on. When you accesslocalhost:LOCAL_PORTfrom your browser or application, the traffic will be forwarded. If omitted,kubectlwill often pick a random available local port.REMOTE_PORT: The port inside the target Pod or Service that your application is listening on. This is the port your Kubernetes application exposes. This can be a numerical port (e.g.,8080) or a named port defined in your Service (e.g.,http-port).
-n <NAMESPACE>: (Optional but highly recommended) Specifies the Kubernetes namespace where your target resource resides. If omitted,kubectluses the default namespace configured in yourkubeconfig.
Step-by-Step Example with an Nginx Pod:
Let's walk through a practical example to solidify your understanding. We'll deploy a simple Nginx web server and then use port-forward to access it.
1. Deploy an Nginx Pod (if you don't have one):
First, ensure you have an Nginx Pod running. If not, you can create one:
# nginx-deployment.yaml
apiVersion: apps/v1
kind: Deployment
metadata:
  name: nginx-deployment
spec:
  replicas: 1
  selector:
    matchLabels:
      app: nginx
  template:
    metadata:
      labels:
        app: nginx
    spec:
      containers:
      - name: nginx
        image: nginx:latest
        ports:
        - containerPort: 80
Apply this deployment:
kubectl apply -f nginx-deployment.yaml
Wait a moment for the Pod to start:
kubectl get pods -l app=nginx
You should see output similar to this, with your Pod in a Running state:
NAME                               READY   STATUS    RESTARTS   AGE
nginx-deployment-xxxxxxxxxx-xxxxx   1/1     Running   0          30s
2. Perform the Port Forward:
Now, let's forward port 80 (Nginx's default web port) from the Pod to port 8080 on your local machine. You'll need the exact Pod name from the previous kubectl get pods command.
kubectl port-forward pod/nginx-deployment-xxxxxxxxxx-xxxxx 8080:80
(Replace nginx-deployment-xxxxxxxxxx-xxxxx with your actual Pod name)
You will see output indicating the forward has been established:
Forwarding from 127.0.0.1:8080 -> 80
Forwarding from [::1]:8080 -> 80
3. Access Nginx Locally:
While the kubectl port-forward command is running in your terminal, open a web browser or use curl to access http://localhost:8080.
curl http://localhost:8080
You should see the default Nginx welcome page HTML, proving that your local request successfully traversed the tunnel to the Nginx Pod within Kubernetes.
4. Terminate the Forward:
To stop the port forward, simply press Ctrl+C in the terminal where the kubectl port-forward command is running. The connection will be immediately closed.
This basic example illustrates the simplicity and effectiveness of kubectl port-forward. From this foundation, we can now explore more advanced scenarios and use cases that make it such a valuable tool for developers working with Kubernetes.
Real-World Use Cases for Developers: Unleashing the Power of port-forward
kubectl port-forward is not just a theoretical concept; it's a practical workhorse that solves a multitude of common development and debugging challenges in a Kubernetes environment. Its ability to create a temporary, direct link to internal cluster services makes it indispensable for streamlining workflows.
1. Debugging Services and Applications:
One of the most frequent applications of port-forward is in debugging. When your application isn't behaving as expected within Kubernetes, port-forward offers a direct conduit for inspection.
- Accessing a Database: Imagine you have a PostgreSQL or MySQL database running in a Pod within your cluster. You need to quickly inspect its contents, run some queries, or troubleshoot connection issues. Instead of exposing the database publicly (which is a security risk) or setting up complex internal network routing, you can simply:
bash kubectl port-forward service/my-database-service 5432:5432Then, from your local machine, you can use your favorite SQL client (DBeaver, DataGrip, psql, mysql client) to connect tolocalhost:5432, and it will behave exactly as if the database were running on your laptop. This is invaluable for rapid iteration and problem-solving. - Interacting with Backend APIs: Your local frontend application might need to communicate with a backend api service running in Kubernetes. Rather than deploying and configuring an Ingress or LoadBalancer for every small change, you can use
port-forwardto establish a direct connection:bash kubectl port-forward service/my-backend-api 8000:80Your local frontend can then make requests tohttp://localhost:8000, which will be forwarded to your Kubernetes backend. This accelerates local development against remote services. - Using Local IDE Debuggers: Many modern IDEs (like IntelliJ, VS Code, Eclipse) allow you to attach a debugger to a remote process. If your application running in a Kubernetes Pod exposes a debugging port (e.g., JVM's remote debugging port 5005), you can forward this port to your local machine:
bash kubectl port-forward pod/my-app-pod 5005:5005Then, configure your IDE's remote debugger to connect tolocalhost:5005. This enables you to step through code, inspect variables, and set breakpoints in a running containerized application, significantly simplifying complex debugging scenarios.
2. Accessing Web UIs and Admin Panels:
Many internal tools, monitoring systems, and application administration interfaces are deployed within Kubernetes. These often aren't meant for public exposure but require occasional developer or operator access.
- Kubernetes Dashboard, Prometheus, Grafana: If you've deployed these tools in your cluster without a public Ingress,
port-forwardis the simplest way to reach their web interfaces:bash kubectl port-forward service/kubernetes-dashboard 8443:443 -n kubernetes-dashboard kubectl port-forward service/prometheus-k8s 9090:9090 -n monitoring kubectl port-forward service/grafana 3000:3000 -n monitoringYou can then access them viahttps://localhost:8443,http://localhost:9090, orhttp://localhost:3000respectively. - Custom Application Admin Interfaces: Any custom web-based administration panel for your microservices can be accessed similarly, offering a secure, on-demand view into your application's operational state.
3. Testing External Integrations:
Sometimes you need to test how an external service interacts with an internal Kubernetes service without exposing the internal service to the public internet. While port-forward doesn't directly expose to the public internet, you can use it to test integrations from another application on your local network. By binding port-forward to 0.0.0.0 (more on this in advanced sections), other machines on your local network could temporarily access the forwarded service via your machine's IP, though this is generally discouraged for security reasons. A more secure approach for local testing might involve mocking or dedicated test environments, but for quick sanity checks, port-forward can offer a direct route.
4. Developing Against Internal Services:
This is a recurring theme: local development often requires interaction with components that are already deployed in Kubernetes.
- Microservices Development: When working on a new microservice locally, you might need it to communicate with existing dependent services (e.g., a message queue, a user authentication service, or a configuration service) running in Kubernetes.
port-forwardallows your local microservice to make calls tolocalhost:<port>that seamlessly route to the corresponding service within the cluster, enabling a hybrid development environment. - Local Frontend with Remote Backend: As mentioned earlier, this is a prime use case. Develop your UI locally, enjoy fast hot-reloading, and point it to a
port-forward'd backend in the cluster for real data and logic, avoiding the overhead of deploying the entire stack locally or repeatedly pushing frontend changes to the cluster.
5. Temporary Exposure of Internal APIs (and where port-forward's limitations lead to advanced solutions):
While kubectl port-forward is incredibly useful for temporary, local access to internal services, it's crucial to understand its limitations. It creates a simple, unauthenticated, un-authorized tunnel. It provides no API management features like rate limiting, analytics, caching, or authentication beyond basic network access.
For robust, production-grade api management and exposure, especially for modern microservices and AI-driven applications, platforms specifically designed as API gateways are the industry standard. This is where solutions like APIPark become essential.
While port-forward is excellent for temporary, local access, for robust, production-grade API management and exposure, especially for AI services, platforms like APIPark provide comprehensive API gateway functionalities, offering features like unified API formats, prompt encapsulation, and full lifecycle management that port-forward isn't designed for. Imagine needing to securely expose a machine learning inference api to external consumers, manage its versions, apply rate limits, and monitor its usage. kubectl port-forward would be entirely inadequate for such a task. Instead, a dedicated API gateway like APIPark offers crucial features such as authentication, authorization, rate limiting, traffic management, and detailed logging – none of which kubectl port-forward provides. It acts as a single entry point for all API calls, enforcing policies and routing requests efficiently and securely. This distinction highlights port-forward's role as a developer-centric utility versus the enterprise-grade capabilities of a full-fledged API management platform.
By understanding these diverse use cases, developers can significantly enhance their productivity and debugging efficiency when working with Kubernetes. kubectl port-forward bridges the gap between the isolated cluster environment and the immediacy of local development.
Advanced port-forward Techniques and Options: Mastering the Command
Beyond the basic syntax, kubectl port-forward offers several advanced options and techniques that can further streamline your workflow and address more complex scenarios. Understanding these allows for greater flexibility and control.
1. Running in the Background:
For sustained debugging sessions or when you need your terminal for other tasks, running port-forward in the background is incredibly useful.
- Using
&(Ampersand): The simplest way to background a command on Linux/macOS.bash kubectl port-forward service/my-app 8080:80 &This will immediately return control to your terminal, and the port forward will continue running. You'll get a job ID (e.g.,[1] 12345). To bring it back to the foreground, usefg %<job-id>. To list background jobs, usejobs. To kill it, usekill %<job-id>orkill <pid>. - Using
nohup(No Hang Up): For more persistent backgrounding, especially if you might close your terminal session,nohupcombined with&is effective.bash nohup kubectl port-forward service/my-app 8080:80 > /dev/null 2>&1 &This command runsport-forwardin the background, redirects all its output to/dev/null(silencing it), and disassociates it from your terminal, meaning it won't be killed if you close the terminal. You'll need to find its process ID (PID) usingps aux | grep "kubectl port-forward"to kill it later withkill <PID>.
2. Specifying Namespace: -n <NAMESPACE_NAME>
While mentioned in the basic syntax, it's worth emphasizing the importance of -n for clarity and correctness. Always explicitly state the namespace to avoid ambiguity and accidental targeting of resources in the wrong namespace, especially in complex multi-tenant clusters.
kubectl port-forward service/my-backend-api 8000:80 -n development
3. Listening on a Specific Address: --address <IP_ADDRESS>
By default, kubectl port-forward binds the local port to 127.0.0.1 (localhost), meaning only applications on your local machine can access it. The --address flag allows you to change this behavior.
--address 0.0.0.0: This binds the local port to all available network interfaces on your machine. This means other devices on your local network (e.g., another computer on your home Wi-Fi) could potentially access the forwarded service using your machine's IP address and the local port.bash kubectl port-forward service/my-app 8080:80 --address 0.0.0.0CAUTION: Using0.0.0.0exposes the forwarded service to your local network. While convenient for sharing with a nearby colleague or testing from a mobile device on the same network, it introduces a security risk. Only use this when you fully understand the implications and trust your local network environment.--address <SPECIFIC_IP>: You can also bind to a specific IP address on your local machine if you have multiple network interfaces.
4. Handling Multiple Forwards:
It's common to need to forward multiple services simultaneously.
Running Multiple Commands: The simplest approach is to open multiple terminal windows or tabs and run a separate kubectl port-forward command in each. Each command will establish an independent tunnel. ```bash # Terminal 1 kubectl port-forward service/my-backend-api 8000:80
Terminal 2
kubectl port-forward service/my-database 5432:5432
Terminal 3
kubectl port-forward service/my-mq 5672:5672 * **Using Different Local Ports:** Ensure that each `port-forward` command uses a unique `LOCAL_PORT` on your machine to avoid conflicts. The `REMOTE_PORT` can be the same if it targets different services.bash kubectl port-forward service/app1 8080:80 kubectl port-forward service/app2 8081:80 # Different local port for app2 ```
5. --pod-running-timeout (Newer versions of kubectl):
This flag, useful in scripting, specifies the maximum time to wait for a Pod to be running before port-forward attempts to connect. If the Pod isn't running within this timeout, the command fails.
kubectl port-forward deployment/my-app 8080:80 --pod-running-timeout=2m
6. Error Handling and Troubleshooting:
Despite its simplicity, you might encounter issues. Here's how to diagnose common problems:
- "Error: listen tcp 127.0.0.1:8080: bind: address already in use": This is the most common error. It means
LOCAL_PORT(e.g., 8080) is already being used by another application on your machine.- Solution: Choose a different
LOCAL_PORT(e.g.,8081:80) or identify and terminate the conflicting process (lsof -i :8080).
- Solution: Choose a different
- "error: service/my-service not found" or "error: pods "my-pod" not found": The specified resource name or type is incorrect, or it doesn't exist in the current/specified namespace.
- Solution: Double-check the resource name (
kubectl get servicesorkubectl get pods), ensure the namespace is correct (-n <NAMESPACE>), and verify the resource type (service/orpod/).
- Solution: Double-check the resource name (
- "error: Unable to connect to the server: dial tcp: connection refused":
kubectlcannot reach the Kubernetes API server.- Solution: Check your
kubeconfigcontext (kubectl config current-context), ensure your VPN/network connection to the cluster is active, and verify the API server is running.
- Solution: Check your
- "error: error forwarding port 8080: error listening on port 8080: Unable to listen on port 8080: listen tcp 127.0.0.1:8080: bind: permission denied": On Linux, ports below 1024 often require root privileges.
- Solution: Use a local port greater than or equal to 1024 (e.g.,
8080:80) or runkubectlwithsudo(generally not recommended for regular use).
- Solution: Use a local port greater than or equal to 1024 (e.g.,
- "error: unable to forward port 8080 to pod, target port 80 is not in use": The
REMOTE_PORTyou specified is not actually being listened on by the application inside the target Pod.- Solution: Verify that your application within the container is configured to listen on the specified port. Check container logs (
kubectl logs <POD_NAME>) to confirm the application started correctly and is listening on the expected port.
- Solution: Verify that your application within the container is configured to listen on the specified port. Check container logs (
By understanding these advanced techniques and common troubleshooting steps, you can wield kubectl port-forward with greater confidence and efficiency, making it an even more powerful tool in your Kubernetes development arsenal.
APIPark is a high-performance AI gateway that allows you to securely access the most comprehensive LLM APIs globally on the APIPark platform, including OpenAI, Anthropic, Mistral, Llama2, Google Gemini, and more.Try APIPark now! 👇👇👇
Security Implications and Best Practices: Using port-forward Responsibly
While kubectl port-forward is an incredibly useful tool, its ability to bypass standard Kubernetes networking layers means it carries significant security implications if not used responsibly. Understanding these risks and adhering to best practices is paramount to maintaining the integrity and security of your cluster.
1. port-forward is NOT for Production Exposure:
This is the most critical principle. kubectl port-forward is designed as a developer utility for temporary, local access and debugging. It must never be used to expose services for production, staging, or even shared development environments to external consumers.
- Lack of Security Features: It offers no built-in authentication, authorization, rate limiting, traffic management, logging (beyond its own output), or TLS termination. Any service accessed via
port-forwardis essentially exposed directly with no protective layer. - Ephemeral Nature: The connection is tied to the
kubectlprocess running on your local machine. If your machine crashes, loses network connectivity, or you simply close the terminal, the connection is severed. This is entirely unsuitable for reliable service provision. - Single Point of Failure: It funnels all traffic through a single
kubectlprocess on one developer's machine, creating a severe bottleneck and a single point of failure.
For exposing an api service securely and reliably to external consumers, a dedicated API gateway like APIPark is the industry standard. It offers crucial features such as authentication, authorization, rate limiting, and traffic management, none of which kubectl port-forward provides. An API gateway acts as a robust front-door, protecting your backend services, managing traffic, and enforcing security policies at scale.
2. Role-Based Access Control (RBAC): The First Line of Defense:
kubectl port-forward relies on the Kubernetes API. Therefore, the user executing the command must have appropriate RBAC permissions. Specifically, a user or service account needs:
pods/portforwardpermission: To create a port forward connection to a Pod.pods/proxypermission: To proxy requests to Pods.services(get) ordeployments(get) permissions: If you are forwarding to a Service or Deployment, you needgetaccess to resolve the underlying Pods.
Best Practice: Implement the principle of least privilege. Grant pods/portforward permissions only to users or service accounts that genuinely require it for their development or debugging tasks. Avoid granting these permissions broadly, especially in production namespaces. Regularly review and audit these permissions.
3. The 127.0.0.1 (Loopback Address) Default: Embrace It:
By default, kubectl port-forward binds the local port to 127.0.0.1. This is the safest default because it means only processes running on your specific machine can connect to that local port.
Best Practice: Unless you have a very specific, well-understood reason, always stick to the default 127.0.0.1 binding. This isolates the forwarded service to your local workstation, preventing accidental exposure to your internal network.
4. Understanding the Dangers of --address 0.0.0.0:
Using kubectl port-forward --address 0.0.0.0 binds the local port to all network interfaces. This means any device on your local network (e.g., your office LAN, your home Wi-Fi) can access the forwarded service via your machine's IP address.
CAUTION: This significantly widens the attack surface. * Unintended Exposure: Someone on your network could discover and exploit an unauthenticated service you've forwarded. * Firewall Bypass: It bypasses your operating system's firewall for that specific port, as the connection originates from kubectl.
Best Practice: Avoid using --address 0.0.0.0 unless absolutely necessary for a very short, controlled testing scenario, and always ensure you understand the potential security implications. If you must use it, immediately terminate the port-forward session once your task is complete.
5. Audit Logs and Visibility:
Kubernetes API server audit logs can record port-forward requests, providing a trail of who initiated a forward and to which resource.
Best Practice: Ensure your cluster's audit logging is enabled and configured to capture relevant events. Regularly review these logs, especially for actions taken by non-administrative users, to identify any suspicious or unauthorized port-forward activity. This provides a crucial layer of accountability and detection.
6. Alternatives for Production Service Exposure:
For any scenario where a service needs to be reliably and securely accessible, especially from outside the cluster, kubectl port-forward is the wrong tool. Instead, consider these robust alternatives:
- Kubernetes Services (
NodePort,LoadBalancer,ExternalName): Provide basic, stable network endpoints.NodePortexposes on each node's IP,LoadBalancerintegrates with cloud provider load balancers, andExternalNamemaps to an external DNS name. - Ingress Controllers: A powerful mechanism for HTTP/HTTPS routing, offering features like path-based routing, host-based routing, and TLS termination. Ideal for exposing multiple HTTP services under a single external IP.
- Service Mesh (e.g., Istio, Linkerd): Adds advanced networking capabilities like traffic management, fault injection, circuit breaking, and mutual TLS encryption between services, enhancing both security and observability.
- API Gateways (e.g., APIPark, Kong, Apigee): As previously discussed, these are purpose-built for managing and securing API traffic. They provide a rich set of features including authentication, authorization, rate limiting, caching, transformation, analytics, and developer portals. They are essential for exposing apis reliably and securely to external consumers, particularly for complex microservice architectures or AI model invocation. An API gateway like APIPark goes far beyond simple port forwarding, offering a unified API format for AI invocation, prompt encapsulation, and end-to-end API lifecycle management, making it an indispensable component for enterprises deploying production-grade AI services and traditional REST APIs.
By meticulously adhering to these security considerations and best practices, developers can harness the immense utility of kubectl port-forward without inadvertently compromising the security posture of their Kubernetes environments. It's a tool of convenience, not a solution for production-grade exposure.
Deep Dive into the Mechanics: How port-forward Works Under the Hood
To truly appreciate the elegance and security of kubectl port-forward, it's helpful to understand the intricate dance of components that orchestrate this temporary tunnel. It's not magic, but rather a clever leveraging of Kubernetes' existing communication infrastructure.
The process involves three primary actors: your local kubectl client, the Kubernetes API server, and the kubelet agent running on the node where your target Pod resides.
- Initiating the Request (
kubectlclient): When you executekubectl port-forward <resource> <local-port>:<remote-port>, yourkubectlclient doesn't directly connect to the Pod. Instead, it makes an authenticated and authorized request to the Kubernetes API server. This request specifies the target Pod (or the Pod backing the Service/Deployment), the target port within that Pod, and the local port it intends to open. - API Server as the Orchestrator: The Kubernetes API server acts as the central control plane.
- Authentication and Authorization: First, it verifies your credentials (from your
kubeconfig) and checks if your user/service account has the necessary RBAC permissions (pods/portforwardandpods/proxy) to perform this operation on the specified resource. This is a critical security gate. - Pod Discovery: If you specified a Service, Deployment, or ReplicaSet, the API server resolves this to a concrete Pod name and IP address.
- Node Identification: The API server determines which node the target Pod is currently running on.
- Establishing the Connection: The API server then initiates a connection to the
kubeletagent on that specific node. This connection is typically established over SPDY (a multiplexing protocol over HTTP/2) or direct HTTP/2, which allows for multiple streams (including exec, logs, and port-forward) over a single underlying TCP connection. This is a secure, authenticated channel.
- Authentication and Authorization: First, it verifies your credentials (from your
- Kubelet as the Node-Level Proxy: The
kubeletis an agent that runs on each node in the Kubernetes cluster. Its responsibilities include managing Pods, reporting node status, and handling communication requests from the API server.- Receiving the Request: The
kubeletreceives theport-forwardrequest from the API server, instructing it to open a port-forwarding stream to a specific port within a specific Pod managed by thatkubelet. - Pod Network Namespace: The
kubeletthen interacts with the container runtime (e.g., containerd, CRI-O, Docker) to access the network namespace of the target Pod. Each Pod has its own isolated network stack. - Local Proxy within the Node: Within the node's context,
kubeletestablishes a direct connection to the specifiedREMOTE_PORTwithin the target Pod's container. It essentially opens a local socket on the node that forwards traffic to the Pod's port.
- Receiving the Request: The
- Data Flow Through the Tunnel: Once all these connections are established, a bidirectional data stream is formed:
- When your local application sends traffic to
localhost:LOCAL_PORT, yourkubectlclient captures this traffic. kubectlencrypts and encapsulates this data and sends it over its secure SPDY/HTTP/2 connection to the API server.- The API server then forwards this encapsulated data to the
kubeleton the relevant node. - The
kubeletdecapsulates the data and injects it into the target Pod's network namespace, specifically to theREMOTE_PORTwhere your application is listening. - The application within the Pod processes the request and sends a response back.
- The response travels the reverse path: from the Pod to
kubelet, through the API server, and finally back to yourkubectlclient, which then delivers it to your local application.
- When your local application sends traffic to
Comparison with SSH Tunneling: The concept is very similar to SSH tunneling (e.g., ssh -L <local-port>:<remote-host>:<remote-port> <ssh-user>@<jump-host>). Both create a secure, encrypted tunnel to a remote service. However, kubectl port-forward leverages the Kubernetes API and its built-in secure communication channels (SPDY/HTTP/2) with kubelet for its tunneling capabilities, making it natively integrated and authenticated within the Kubernetes ecosystem, whereas SSH tunneling requires a separate SSH server running on a machine accessible from your local environment. The key difference is the underlying protocol and the context of authentication and authorization.
This deep dive reveals that kubectl port-forward is a sophisticated, multi-stage process that leverages Kubernetes' internal architecture to provide a secure and efficient way to access internal services. Its reliance on the API server and kubelet ensures that all connections are authenticated, authorized, and managed within the Kubernetes control plane.
Integrating port-forward into Your Workflow: Enhancing Productivity
While kubectl port-forward is powerful on its own, its true value is unleashed when seamlessly integrated into your daily development workflow. By automating common tasks and leveraging existing tools, you can transform port-forward from a manual chore into an intuitive and efficient part of your routine.
1. Shell Aliases for Common Forwards:
Repetitive typing of long kubectl port-forward commands can be tedious. Shell aliases (in .bashrc, .zshrc, etc.) are your best friend here. Create shortcuts for the services you frequently access.
Example:
# Alias for forwarding the Prometheus UI
alias kpfp='kubectl port-forward service/prometheus-k8s 9090:9090 -n monitoring'

# Alias for forwarding a specific backend API
alias kpfb='kubectl port-forward service/my-backend-service 8000:80 -n development'

# Generic function for forwarding to a service by name and ports
kpf_svc() {
    if [ -z "$1" ] || [ -z "$2" ] || [ -z "$3" ]; then
        echo "Usage: kpf_svc <service-name> <local-port> <remote-port> [namespace]"
        return 1
    fi
    local service_name="$1"
    local local_port="$2"
    local remote_port="$3"
    local namespace="${4:-default}" # Default to 'default' if no namespace provided

    echo "Forwarding service/$service_name to localhost:$local_port from remote port:$remote_port in namespace $namespace"
    kubectl port-forward "service/$service_name" "$local_port:$remote_port" -n "$namespace"
}
Then you can simply type kpfp or kpf_svc my-app 8080 80 development. Remember to source ~/.bashrc (or .zshrc) after adding aliases.
2. Scripting port-forward for Development Environments:
For more complex development setups, you might have multiple services that need forwarding when you start a local development session. Shell scripts can automate this process.
Example: start-dev-forward.sh
#!/bin/bash

# Ensure all forwards are killed on script exit
trap "echo 'Terminating all port-forwards...'; kill $(jobs -p)" EXIT

echo "Starting development port-forwards..."

# Backend API
echo "Forwarding backend-api (8000:80)..."
kubectl port-forward service/my-backend-api 8000:80 -n development > /dev/null 2>&1 &
BACKEND_PID=$!
echo "Backend API forward PID: $BACKEND_PID"

# Database
echo "Forwarding database (5432:5432)..."
kubectl port-forward service/my-database 5432:5432 -n development > /dev/null 2>&1 &
DB_PID=$!
echo "Database forward PID: $DB_PID"

# Message Queue
echo "Forwarding message-queue (5672:5672)..."
kubectl port-forward service/my-mq 5672:5672 -n development > /dev/null 2>&1 &
MQ_PID=$!
echo "Message Queue forward PID: $MQ_PID"

echo "All forwards started in background. Press Ctrl+C to stop all."

# Keep the script running in the foreground to keep background jobs alive
# This will wait for Ctrl+C, then the trap will execute
wait
Make the script executable (chmod +x start-dev-forward.sh) and run it. This script uses & to background each port-forward command and trap to ensure all these background processes are cleanly terminated when you Ctrl+C the script itself. This provides a single point of control for your development environment's forwards.
3. IDE Integrations:
Many Integrated Development Environments (IDEs) offer Kubernetes extensions that simplify port-forward operations.
- VS Code Kubernetes Extension: The popular "Kubernetes" extension for VS Code allows you to browse your cluster resources (Pods, Services, Deployments). You can right-click on a Pod or Service and select "Port Forward" from the context menu. The extension will manage the
port-forwardprocess for you, often showing active forwards in a dedicated panel. This visual and interactive approach can be very convenient. - Other IDEs: Look for similar plugins or extensions in your preferred IDE that integrate with
kubectl. These tools often provide a GUI for managing port forwards, making it easier to start, stop, and monitor them without leaving your development environment.
4. Monitoring and Management of Active Forwards:
When you have multiple port-forward sessions running, keeping track of them can be challenging.
jobscommand (for&backgrounded processes): If you backgrounded processes with&, thejobscommand in your shell will list them.ps aux | grep "kubectl port-forward": This command will list allkubectl port-forwardprocesses running on your machine, along with their PIDs. You can then usekill <PID>to terminate a specific forward.- Dedicated Tools (less common): For very complex local development environments, some developers might build or use scripts that track active
port-forwardconnections and provide a menu to manage them.
By strategically using shell aliases, scripting, and IDE integrations, you can significantly reduce the cognitive load and manual effort associated with managing kubectl port-forward connections, allowing you to focus more on actual development and debugging tasks.
Comparison with Other Kubernetes Service Exposure Mechanisms: When to Use What
kubectl port-forward is just one of several ways to interact with services running inside a Kubernetes cluster. While it excels at temporary, local access, it's crucial to understand how it differs from other service exposure mechanisms and when each tool is most appropriate. Choosing the right method depends on the context: who needs access, how persistent should the access be, and what level of security and traffic management is required.
Here's a comparison of kubectl port-forward with the primary Kubernetes service exposure methods:
| Feature/Method | kubectl port-forward |
NodePort Service |
LoadBalancer Service |
Ingress Resource |
ExternalName Service |
|---|---|---|---|---|---|
| Purpose | Local dev, debugging, temporary access | Expose service on all nodes' specific port | Expose service via external cloud LB | HTTP/HTTPS routing, path/host-based traffic | Map to external DNS name, not a proxy |
| Access Scope | Only from local machine (default) | From anywhere that can reach node IPs | From anywhere (public internet) | From anywhere (public internet) | Internal cluster access to external service |
| Persistence | Temporary (lasts while command runs) | Persistent (defined by Service object) | Persistent (defined by Service object) | Persistent (defined by Ingress object) | Persistent (defined by Service object) |
| Configuration | CLI command (kubectl) |
YAML Service manifest (type: NodePort) |
YAML Service manifest (type: LoadBalancer) |
YAML Ingress manifest, depends on Ingress Controller | YAML Service manifest (type: ExternalName) |
| Network Address | 127.0.0.1:<local-port> on developer's machine |
<node-ip>:<node-port> |
<load-balancer-ip>:<service-port> |
<ingress-ip>/<path> or <hostname> |
external.example.com (DNS CNAME) |
| Traffic Type | TCP/UDP (raw) | TCP/UDP (raw) | TCP/UDP (raw) | HTTP/HTTPS (L7) | DNS resolution only |
| Security Features | None (relies on local machine security & RBAC) | Basic network access | Basic network access, cloud provider security | TLS termination, basic auth, WAF (via Ingress Controller) | None (DNS only) |
| Cost | Free (CPU/RAM on local machine) | Free (uses node resources) | Cloud Provider LB charges | Varies (Ingress Controller + cloud LB/IP) | Free |
| Scalability | Single developer connection | Limited by node capacity | Highly scalable (cloud LB) | Highly scalable (Ingress Controller + cloud LB) | N/A (DNS) |
| Complexity | Low | Low | Medium | High (requires Ingress Controller) | Low |
| Typical Use Case | Debugging a database, local frontend dev against remote backend, accessing internal UIs. | Exposing a limited number of services within a private network. | Exposing publicly accessible services in cloud environments. | Managing external HTTP/HTTPS access for multiple services, host/path routing, TLS. | Mapping internal services to external CNAMEs. |
When to Use kubectl port-forward:
- Ephemeral Needs: When you need temporary access to a service for a short period.
- Debugging: The primary use case. Connect local debuggers, inspect database contents, or test API endpoints directly.
- Local Development: Connecting a local frontend or microservice to a backend or dependency running in the cluster.
- Accessing Internal UIs: Reaching monitoring dashboards (Prometheus, Grafana), admin panels, or the Kubernetes Dashboard without public exposure.
- Security by Default: Forcing access only from the developer's machine (via
127.0.0.1).
When to Use Other Mechanisms:
NodePort: For services that need to be accessible from within your private network (e.g., other machines in your office/data center) on a static port across all nodes, but without public internet exposure. Generally, not recommended for widespread use due to port conflicts and direct node exposure.LoadBalancer: For exposing services to the public internet (or a specific external network) in cloud environments. It integrates with cloud provider load balancers, providing a stable external IP and robust traffic distribution. Suitable for foundational services that need direct external access.Ingress: For managing HTTP/HTTPS traffic to multiple services from outside the cluster. It's the most flexible and powerful option for web applications, offering advanced routing (host-based, path-based), TLS termination, and often integration with Web Application Firewalls (WAFs). Ideal for public-facing web applications and APIs that need to be exposed efficiently and securely.ExternalName: When your service within Kubernetes needs to resolve to an external DNS name (e.g., an external database or an API gateway like APIPark running outside the cluster). It creates a CNAME record and doesn't proxy any traffic itself.
In summary, kubectl port-forward is a developer's best friend for quick, temporary, and secure local access. For all other scenarios, especially persistent, scalable, and secure external exposure, the other Kubernetes service types and Ingress (or a dedicated API gateway like APIPark for advanced API management) are the appropriate tools. Each serves a distinct purpose in the vast Kubernetes networking landscape.
Common Pitfalls and How to Avoid Them: Navigating port-forward Challenges
Despite its simplicity, kubectl port-forward can sometimes lead to frustrating issues if certain common pitfalls are not understood and avoided. Awareness of these traps will save you considerable debugging time.
1. Forgetting to Stop a Forward:
Pitfall: You start a port-forward in the background (using & or nohup), or you simply close the terminal without terminating the process. Later, when you try to start a new port-forward on the same LOCAL_PORT, you get an "address already in use" error. The orphaned process is still holding the port.
How to Avoid: * Use Ctrl+C: Always press Ctrl+C in the terminal where port-forward is running if you started it in the foreground. * Manage Background Jobs: If using &, explicitly bring the job to the foreground with fg and then Ctrl+C, or use kill %<job-id>. * trap in Scripts: For scripted forwards, implement a trap command to ensure all background port-forward processes are killed on script exit (as shown in the advanced scripting section). * Identify and Kill: If you suspect an orphaned process, use lsof -i :<LOCAL_PORT> (Linux/macOS) or netstat -ano | findstr :<LOCAL_PORT> (Windows) to find the process ID (PID) listening on that port, then kill <PID> (Linux/macOS) or taskkill /PID <PID> /F (Windows).
2. Port Conflicts: Local vs. Remote:
Pitfall: You specify a LOCAL_PORT that's already in use on your machine, or you confuse which port is local and which is remote.
How to Avoid: * Unique Local Ports: When running multiple port-forward sessions, ensure each uses a unique LOCAL_PORT. * Verify Remote Port: Double-check the containerPort in your Pod definition or the port in your Service definition to ensure the REMOTE_PORT you're forwarding to is actually the port your application is listening on inside the container. A common mistake is using the Service port instead of the targetPort or containerPort. For example, a Service might expose port 80, but forward to the Pod's port 8080. You should forward to 8080 (the Pod's actual listening port). * Clear Syntax: Always use LOCAL_PORT:REMOTE_PORT to maintain clarity.
3. Misunderstanding Local vs. Remote Endpoints:
Pitfall: Expecting the forwarded service to be accessible by its original Kubernetes internal DNS name (e.g., my-service.default.svc.cluster.local) from your local machine, or trying to access it from another machine on your local network when not using --address 0.0.0.0.
How to Avoid: * localhost is Key: Remember that kubectl port-forward maps the remote service to localhost:<LOCAL_PORT> on your machine (by default). Always access it via localhost (or 127.0.0.1). * --address 0.0.0.0 for Local Network Access (with caution): If you specifically need to access the forwarded service from another machine on your local network, you must use --address 0.0.0.0 and connect to your machine's actual IP address, not localhost. Be aware of the security implications.
4. RBAC Permission Issues:
Pitfall: The kubectl port-forward command fails with an "Unauthorized" or "Forbidden" error, even if you can run other kubectl commands.
How to Avoid: * Check Permissions: Ensure your current Kubernetes user or service account has pods/portforward and pods/proxy permissions (and get permissions on the target resource type) for the target namespace. If not, request your cluster administrator to grant these permissions. * Context Check: Verify you are operating in the correct Kubernetes context (kubectl config current-context) and namespace (kubectl config view --minify | grep namespace).
5. Targeting the Wrong Pod/Service:
Pitfall: The port-forward establishes successfully, but when you try to connect, you get unexpected responses, timeouts, or connect to the wrong application. This often happens in deployments with multiple Pods or services with similar names.
How to Avoid: * Verify Resource Names: Always confirm the exact name of the Pod or Service you intend to target using kubectl get pods -n <namespace> or kubectl get services -n <namespace>. Copy-pasting the full Pod name is often safest. * Inspect Labels: For Deployments and Services, use labels to ensure you're targeting the correct set of Pods (kubectl get pods -l app=my-app). * Check Logs: If you get an unexpected response, immediately check the logs of the target Pod (kubectl logs <POD_NAME>) to see if it even received the request or if it's logging errors.
6. Pod/Service Not Ready or Listening:
Pitfall: The port-forward command starts, but when you connect locally, you get a "connection refused" or timeout error. The Pod might be starting, crashing, or the application inside isn't listening on the expected REMOTE_PORT.
How to Avoid: * Check Pod Status: Before forwarding, ensure the target Pod is in a Running or Ready state (kubectl get pods <POD_NAME>). * Check Container Logs: Use kubectl logs <POD_NAME> to confirm that your application inside the container has started successfully and is listening on the REMOTE_PORT. Sometimes applications might take time to initialize or fail to bind to the port due to internal errors. * Network Policies: While port-forward bypasses many network policies, extremely restrictive egress policies within the Pod itself might prevent it from responding. This is rare but possible.
By being mindful of these common pitfalls and proactively applying the recommended avoidance strategies, you can make your experience with kubectl port-forward much smoother and more productive, minimizing downtime and frustration.
Future Trends and Alternatives: Evolving Local Development with Kubernetes
While kubectl port-forward remains a foundational tool, the landscape of Kubernetes development is continuously evolving. Newer tools and approaches are emerging to address more complex local development needs, especially as microservice architectures become more intricate. Understanding these trends and alternatives helps you choose the most appropriate tools for different scenarios.
1. Other Local Tunneling and Development Tools:
Beyond kubectl port-forward, several tools aim to simplify the local-to-cluster connection, often with additional features:
- Telepresence (by Ambassador Labs): This is a powerful tool that effectively makes a Pod in your cluster think your local machine is another Pod. It intercepts traffic intended for a specific service in the cluster and routes it to your local machine, allowing your local application to participate in the cluster's network directly. This is significantly more advanced than
port-forwardas it allows two-way communication and makes local development feel truly "in-cluster." It's excellent for developing a single microservice locally while relying on many other services in the cluster. - Skaffold (by Google): While not purely a tunneling tool, Skaffold focuses on continuous development for Kubernetes. It detects changes in your code, rebuilds, redeploys, and can even manage
port-forwarding for you. It streamlines the inner development loop by automating the build-deploy-test cycle. - Kube-bind / Kube-proxy alternatives: Some projects explore more persistent or specialized ways to connect local services to a cluster, often through VPN-like tunnels or specialized network proxies, to overcome the limitations of
port-forwardfor more complex local-cluster interactions.
2. Impact of Service Mesh on Local Development:
Service meshes like Istio, Linkerd, or Consul Connect introduce a sidecar proxy (e.g., Envoy) alongside each application container. This provides advanced traffic management, observability, and security features.
- Pros for Local Dev: A service mesh can simplify certain aspects of local development by standardizing inter-service communication. For instance, if your services rely on mTLS (mutual TLS),
port-forwardmight not directly support it without additional configuration. However, if your local application is part of the mesh (e.g., via Telepresence or similar tools), it can seamlessly participate in these mTLS communications. - Cons/Complexity: Integrating a local development environment into a service mesh can add overhead. The sidecar proxies introduce additional network hops and configuration, which might complicate direct
port-forwardconnections if not carefully managed. Often, developers will aim to bypass the mesh for localport-forwarddebugging or use tools specifically designed to integrate with the mesh.
3. Continued Relevance of port-forward:
Despite the emergence of more sophisticated tools, kubectl port-forward is unlikely to become obsolete.
- Simplicity and Zero Overhead: It remains the simplest, quickest, and most lightweight solution for one-off debugging or accessing a single service. It requires no complex configuration or additional installations beyond
kubectlitself. - Direct Control: Developers have direct control over the source and destination ports, making it predictable and easy to troubleshoot.
- Ubiquity: It's built into
kubectl, making it universally available wherever Kubernetes is managed.
For tasks like quickly checking a database, viewing an internal dashboard, or debugging a single api service, kubectl port-forward will likely remain the go-to tool for its sheer effectiveness and ease of use. More complex tools are excellent for specific, more integrated development workflows, but they often come with a steeper learning curve and more overhead.
4. Evolution of API Management and Gateways:
The rise of AI and microservices has also propelled the evolution of API gateways. Tools like APIPark exemplify this shift, moving beyond basic API routing to offer comprehensive lifecycle management for both traditional REST APIs and advanced AI/LLM models.
- Beyond Basic Exposure: As APIs become the primary interface for applications, the need for robust features like prompt encapsulation, unified API formats for AI invocation, cost tracking, and detailed analytics (as offered by APIPark) becomes critical. These are capabilities far beyond what
kubectl port-forwardor even basic Kubernetes Ingress can provide. - Developer Portals: Modern API gateways often include developer portals, simplifying API discovery, documentation, and consumption for internal and external teams. This complements the development workflow by making APIs easier to integrate with, which is a different concern than merely accessing a single service for debugging.
In conclusion, kubectl port-forward will continue to be a fundamental and irreplaceable tool for its simplicity and directness. However, developers should also be aware of and explore more advanced alternatives like Telepresence for deep local-cluster integration, and understand that for production-grade API exposure and management, specialized API gateways such as APIPark are the appropriate and necessary solutions. The Kubernetes ecosystem offers a rich array of tools, each designed to address different facets of the development and operational lifecycle.
Conclusion: kubectl port-forward – An Indispensable Developer's Companion
Throughout this comprehensive guide, we've dissected kubectl port-forward from its fundamental concepts to its most advanced applications and crucial security considerations. We've seen how this deceptively simple command acts as a critical bridge, allowing developers to peer into the otherwise isolated world of their Kubernetes clusters. It's the Swiss Army knife for quick debugging, local development against remote services, and effortless access to internal UIs, making it an indispensable component of any Kubernetes developer's daily workflow.
We began by understanding the inherent network isolation within Kubernetes, which necessitates a tool like port-forward. We then delved into its core mechanism, illustrating how it creates a secure, temporary tunnel directly from your local machine to a specific Pod or Service. The practical examples demonstrated its versatility in scenarios ranging from debugging databases and backend apis to accessing monitoring dashboards. Advanced techniques, such as backgrounding and addressing specific network interfaces, further expanded its utility, though always with a strong emphasis on the associated security risks.
A critical takeaway is the distinction between kubectl port-forward's role as a temporary developer aid and the robust, production-grade solutions for service exposure. While port-forward offers unparalleled convenience for local tasks, it fundamentally lacks the security, scalability, and management features required for exposing services to external consumers. For such enterprise-level requirements, particularly in the realm of modern microservices and AI-driven applications, dedicated API gateways like APIPark are not just recommended but essential. These platforms provide sophisticated features like unified API formats, prompt encapsulation, authentication, authorization, and comprehensive lifecycle management that port-forward is simply not designed to deliver.
Mastering kubectl port-forward empowers you to troubleshoot, develop, and iterate with unparalleled agility within your Kubernetes environment. It streamlines the inner loop of development, reducing friction and accelerating the path from code to deployment. However, true mastery also involves understanding its limitations and knowing when to reach for more specialized tools, ensuring that convenience never comes at the cost of security or reliability. Embrace kubectl port-forward as a powerful ally, but always wield it with awareness and responsibility, making it a cornerstone of your efficient and secure Kubernetes development journey.
Frequently Asked Questions (FAQs)
1. What is the primary purpose of kubectl port-forward?
The primary purpose of kubectl port-forward is to allow developers to establish a secure, temporary, and direct connection from their local machine to a specific port on a Pod, Service, or Deployment within a Kubernetes cluster. This enables debugging, local development against remote services, and access to internal web UIs without exposing these services publicly or permanently modifying cluster networking.
2. Is kubectl port-forward suitable for exposing services in production?
Absolutely not. kubectl port-forward is strictly a developer and debugging utility. It lacks essential production-grade features such as authentication, authorization, rate limiting, load balancing, high availability, and proper security hardening (like TLS termination). For exposing services in production, scalable and secure mechanisms like Kubernetes LoadBalancer services, Ingress controllers, or dedicated API gateways (like APIPark) are the appropriate choices.
3. How do I stop a kubectl port-forward session?
If you started kubectl port-forward in the foreground (meaning it's actively running in your terminal), simply press Ctrl+C to terminate the command and close the connection. If you started it in the background (using & or nohup), you'll need to find its process ID (PID) using commands like ps aux | grep "kubectl port-forward" and then kill the process using kill <PID>.
4. What is the difference between kubectl port-forward and an API Gateway like APIPark?
kubectl port-forward creates a simple, temporary, unauthenticated tunnel for local access, primarily for debugging and development. It provides no API management capabilities. An API Gateway like APIPark, on the other hand, is a robust, production-grade platform designed for managing, securing, and exposing APIs (including AI/LLM models) at scale. It offers advanced features such as authentication, authorization, rate limiting, traffic management, unified API formats, prompt encapsulation, lifecycle management, analytics, and developer portals, none of which port-forward provides. API Gateways are the industry standard for reliable and secure API exposure to consumers.
5. Why do I get an "address already in use" error when trying to use kubectl port-forward?
This error typically means that the LOCAL_PORT you specified in your kubectl port-forward command (e.g., 8080 in 8080:80) is already being used by another application or an orphaned port-forward process on your local machine. To resolve this, you can either choose a different LOCAL_PORT (e.g., 8081:80) or identify and terminate the process currently using that port (using tools like lsof -i :<PORT> on Linux/macOS or netstat -ano | findstr :<PORT> on Windows).
🚀You can securely and efficiently call the OpenAI API on APIPark in just two steps:
Step 1: Deploy the APIPark AI gateway in 5 minutes.
APIPark is developed based on Golang, offering strong product performance and low development and maintenance costs. You can deploy APIPark with a single command line.
curl -sSO https://download.apipark.com/install/quick-start.sh; bash quick-start.sh

In my experience, you can see the successful deployment interface within 5 to 10 minutes. Then, you can log in to APIPark using your account.

Step 2: Call the OpenAI API.