How to Use kubectl port-forward Effectively


In the intricate landscapes of modern application deployment, Kubernetes has emerged as the undisputed orchestrator of containerized workloads. It provides robust mechanisms for scaling, self-healing, and managing applications across clusters of machines. However, while Kubernetes excels at managing the lifecycle of applications and ensuring their availability, interacting with these applications during development, debugging, or troubleshooting can sometimes feel like navigating a labyrinth. Developers frequently encounter a common challenge: how to directly access a service or a pod running inside a Kubernetes cluster from their local machine without exposing it to the entire internet or configuring complex ingress rules prematurely. This is precisely where the kubectl port-forward command shines, serving as an indispensable tool in any Kubernetes developer's arsenal.
kubectl port-forward is not just a command; it's a lifeline for developers seeking direct, temporary, and secure access to resources living within the confines of a Kubernetes cluster. It creates a secure tunnel, bridging a port on your local machine to a port on a specific pod, service, or even a deployment within the cluster. This elegant solution bypasses the complexities of network policies, firewalls, and ingress configurations, offering an immediate conduit for testing, debugging, and interacting with your applications as if they were running locally. Whether you're trying to connect a local database client to a MySQL instance in your cluster, test a new microservice API endpoint from your browser, or debug a specific pod's behavior, kubectl port-forward empowers you to do so with remarkable ease and efficiency.
This comprehensive guide aims to demystify kubectl port-forward, moving beyond basic syntax to explore its full potential, advanced usage patterns, common pitfalls, and best practices. We will delve into its underlying mechanics, differentiate between forwarding to pods, services, and deployments, and equip you with the knowledge to leverage this powerful command effectively across various development and operational scenarios. By the end of this article, you will not only understand how to use kubectl port-forward but also appreciate its strategic importance in streamlining your Kubernetes development workflow and enhancing your ability to interact with your applications in ways that are both flexible and secure.
The Genesis of Necessity: Why kubectl port-forward is Indispensable
To truly appreciate the value of kubectl port-forward, one must first understand the networking paradigm within a Kubernetes cluster. Kubernetes provides a flat network space where pods can communicate with each other, but this internal network is typically isolated from the outside world. This isolation is a fundamental security feature, preventing unauthorized access to your applications and services. However, this same isolation can become a hurdle for developers who need to interact with these internal services during the development and debugging phases.
Consider a typical scenario: you've deployed a new microservice to your Kubernetes development cluster. This microservice exposes a RESTful API on port 8080. Locally, you might use curl or Postman to test its endpoints. But how do you reach that microservice when it's residing inside a pod, potentially with a dynamic IP address, behind a service, and encapsulated within the cluster's network?
Traditional methods of exposing services, such as NodePort or LoadBalancer service types, are often overkill for a temporary debugging session. NodePort exposes the service on a specific port across all nodes, which might require opening firewall rules and could be insecure for internal services. LoadBalancer allocates an external IP address, which is robust for production traffic but often incurs costs and requires more setup time, making it unsuitable for quick, iterative development cycles. Ingress controllers provide sophisticated HTTP routing, but they too add layers of configuration and are designed for external traffic management, not direct developer access to an individual service.
This is precisely the gap that kubectl port-forward fills. It provides a secure, temporary, and direct tunnel from your local machine to a specific resource within the cluster, bypassing the complexities of external exposure. It acts as a personal, on-demand gateway for your local machine, allowing you to establish a point-to-point connection without altering the cluster's network configuration or exposing services broadly. This capability is paramount for rapid prototyping, integrated testing, and granular debugging, allowing developers to maintain their familiar local development tools and workflows while interacting with remote services.
Deconstructing kubectl port-forward: Syntax and Core Mechanics
At its heart, kubectl port-forward is a simple yet powerful command-line utility. Its basic syntax is straightforward:
kubectl port-forward TYPE/NAME [LOCAL_PORT:]REMOTE_PORT
Let's break down each component of this command to understand its function:
kubectl: The command-line tool for interacting with a Kubernetes cluster.port-forward: The subcommand that initiates the port-forwarding process.TYPE: Specifies the kind of Kubernetes resource you want to forward to. Common types includepod,service,deployment,replicaset, or evenstatefulset.NAME: The name of the specific resource (e.g.,my-app-pod-123xyz,my-api-service,my-web-deployment).[LOCAL_PORT:]REMOTE_PORT: This is the crucial port mapping.REMOTE_PORT: The port number on the Kubernetes resource (pod, service, etc.) that you want to expose. This is the port your application within the container is listening on.LOCAL_PORT: (Optional) The port number on your local machine wherekubectlwill listen for connections. If omitted,kubectlwill attempt to use the same port number asREMOTE_PORT. If that port is already in use locally,kubectlwill automatically pick a random available ephemeral port and print it to the console. It's generally good practice to explicitly defineLOCAL_PORTto avoid ambiguity and conflicts.
When you execute this command, kubectl establishes a connection to the Kubernetes API server. The API server then instructs the Kubelet on the node where the target pod is running to open a proxy connection to that pod's specified REMOTE_PORT. kubectl on your local machine then listens on LOCAL_PORT and tunnels all incoming traffic through the API server and Kubelet proxy to the target pod. This creates a secure, bidirectional TCP tunnel. The traffic is encrypted by default if your Kubernetes cluster uses TLS for API server communication, which is standard practice.
This tunneling mechanism ensures that your local machine can communicate directly with the internal service, bypassing external network configurations. It creates a temporary, isolated channel, making it ideal for development and debugging without impacting other services or exposing your work prematurely to the public internet.
Targeting Resources: Pods, Services, and Deployments
While the basic syntax remains consistent, the TYPE of resource you choose for port-forward significantly influences how the connection behaves. Understanding these distinctions is critical for effective use.
Forwarding to a Pod: The Direct Connection
Syntax: kubectl port-forward pod/POD_NAME [LOCAL_PORT:]REMOTE_PORT
How it Works: When you port-forward to a pod, you are establishing a direct, one-to-one connection to a specific instance of your application. kubectl identifies the exact pod by its unique name (e.g., my-app-xyz123-abc45). The tunnel is then created directly to that pod.
When to Use It: This method is invaluable when you need to debug a particular pod instance. Imagine a scenario where you have multiple replicas of a service running, but one specific pod is exhibiting anomalous behavior (e.g., higher error rates, specific log messages, or resource exhaustion). Port-forwarding directly to that problematic pod allows you to isolate its behavior, inspect its logs in real-time, or even connect a debugger to it if the application supports remote debugging. It's also useful when you want to access a specific, non-load-balanced component within a pod, such as a sidecar container's API or an administrative interface.
Example: Suppose you have a pod named my-api-service-789abc456-def78 running your API on port 8080. To access it locally on port 9000:
kubectl port-forward pod/my-api-service-789abc456-def78 9000:8080
Now, you can access the API via http://localhost:9000 from your local machine, and all requests will be directed to that specific pod.
Considerations: * Ephemeral Nature: Pods are ephemeral. If the targeted pod crashes, is rescheduled, or scaled down, your port-forward connection will break. You'll need to identify a new pod and re-establish the tunnel. * No Load Balancing: Forwarding to a pod bypasses any load balancing configured by Kubernetes services. You are interacting with only one instance. This is a feature, not a bug, when specific pod debugging is required. * Pod Name Changes: In deployments, pod names often include a unique hash, meaning they change with every new deployment or update. You'll frequently need to fetch the current pod name (e.g., kubectl get pods -l app=my-api-service) before executing the port-forward command.
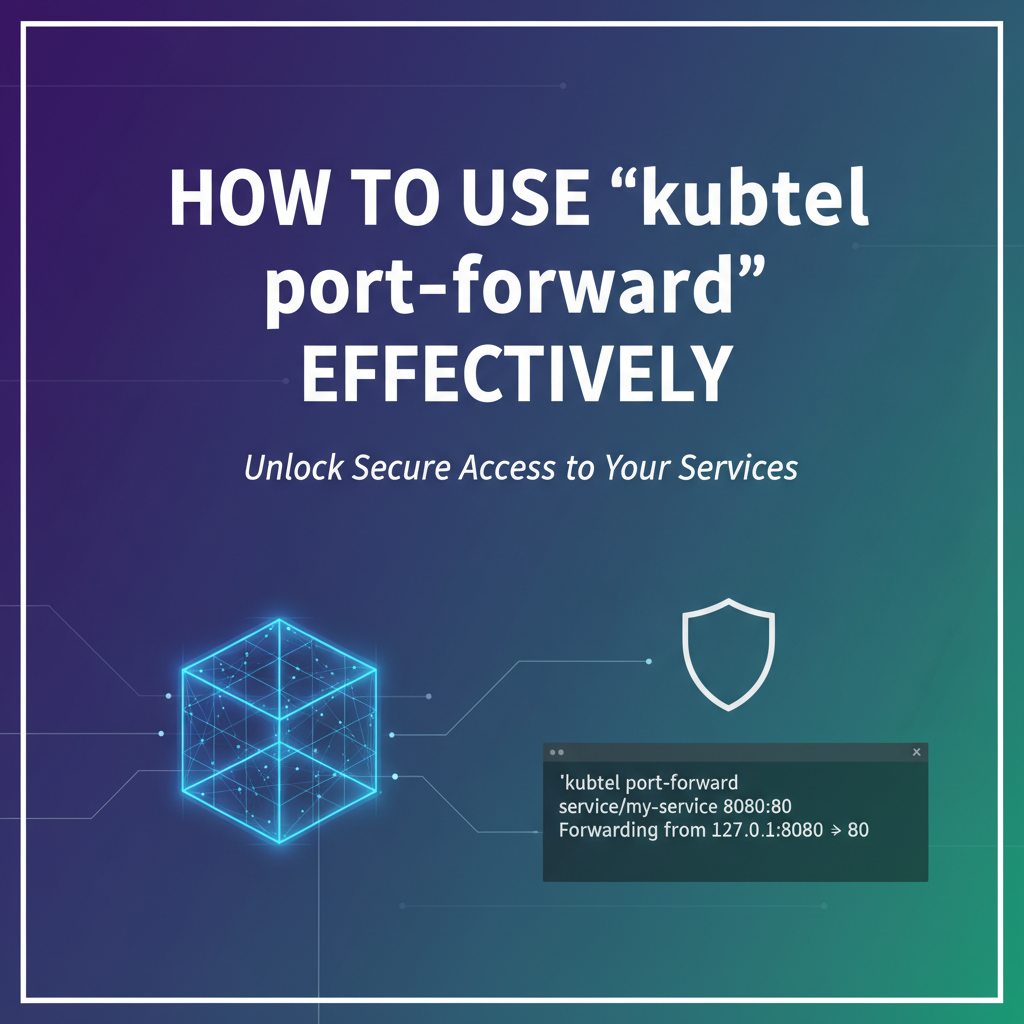
Forwarding to a Service: The Logical Connection
Syntax: kubectl port-forward service/SERVICE_NAME [LOCAL_PORT:]REMOTE_PORT
How it Works: When you port-forward to a service, kubectl queries the Kubernetes API server for the service's selector labels. It then identifies one of the healthy pods backing that service and establishes the port-forward tunnel to that selected pod. Critically, subsequent connections to your local port will continue to be routed to the same pod that was initially selected for the duration of the port-forward command. This is not true load balancing in the sense of external traffic, but rather a stable connection to one of the service's available endpoints.
When to Use It: This is arguably the most common and often preferred method for general development and testing. It allows you to interact with a logical service rather than a specific pod instance. If the chosen backend pod dies, kubectl will gracefully attempt to re-establish the tunnel to another healthy pod backing the service, providing a more resilient connection compared to direct pod forwarding. This is ideal for testing a new feature, accessing a database, or connecting to any generic API endpoint where you don't care about the specific pod handling the request, but rather the collective functionality of the service.
Example: If you have a service named my-web-app that targets pods running your web application on port 80, and you want to access it locally on port 8080:
kubectl port-forward service/my-web-app 8080:80
Now, http://localhost:8080 will connect to one of the pods associated with my-web-app service. If that pod becomes unavailable, kubectl will try to reconnect to another.
Considerations: * Service Selector: Ensure your service has correct selector labels that match the labels on your pods. Without a matching selector, the service won't have any backing pods, and port-forward will fail. * Persistence of Selected Pod: While kubectl can select a new pod if the original one fails, it doesn't perform active load balancing for each new connection within the same port-forward session. All traffic through that specific port-forward tunnel will go to the initially selected pod until the tunnel is reset or the pod becomes unavailable. * Simplicity: Offers a more stable target name than specific pod names, which are often dynamically generated.
Forwarding to a Deployment (or ReplicaSet, StatefulSet): High-Level Convenience
Syntax: kubectl port-forward deployment/DEPLOYMENT_NAME [LOCAL_PORT:]REMOTE_PORT
How it Works: When you specify a deployment (or a ReplicaSet or StatefulSet), kubectl first identifies the active ReplicaSet associated with that deployment. It then proceeds to select one healthy pod managed by that ReplicaSet, effectively behaving much like forwarding to a service, but at a higher abstraction level. kubectl handles the discovery of the underlying pods for you.
When to Use It: This method is primarily for convenience. It's useful when you know the deployment name but don't want to bother looking up the service name or a specific pod name. It provides a stable target (deployment/my-app) even if service names change or if you haven't defined a service yet. It works well for general testing where you need access to any healthy replica of your application.
Example: To forward to a deployment named my-dashboard that exposes its UI on port 3000, locally on port 8080:
kubectl port-forward deployment/my-dashboard 8080:3000
This will find a pod managed by my-dashboard deployment and create a tunnel to it.
Considerations: * Implicit Pod Selection: Like service forwarding, kubectl selects a single pod. If you need to target a specific pod for debugging, direct pod forwarding is more appropriate. * Abstraction Layer: It abstracts away the intermediate service layer. While convenient, for highly critical API access, forwarding to the service might be preferred to explicitly leverage Kubernetes' service discovery and resilience mechanisms, even if kubectl ultimately picks a pod.
Here's a comparative table summarizing the targets for kubectl port-forward:
| Feature / Target | Pod (pod/NAME) |
Service (service/NAME) |
Deployment (deployment/NAME) |
|---|---|---|---|
| Target Specificity | Highest: Connects to a unique pod instance. | Medium: Connects to one pod backing the service. | Medium: Connects to one pod managed by the deployment. |
| Primary Use Case | Specific pod debugging, inspecting individual instance behavior. | General development, testing a logical service, resilient access. | Convenience, testing any healthy replica of an application. |
| Resilience | Low: Breaks if the specific pod dies. | Medium: Tries to reconnect to another healthy pod if the original dies. | Medium: Tries to reconnect to another healthy pod if the original dies. |
| Load Balancing | None: Direct to one pod. | None (within the single tunnel): Selects one pod initially. | None (within the single tunnel): Selects one pod initially. |
| Name Stability | Low: Pod names are dynamic. | High: Service names are stable. | High: Deployment names are stable. |
| Overhead | Minimal, direct. | Minimal, service discovery adds a slight lookup step. | Minimal, deployment and ReplicaSet lookup add a slight step. |
| Ideal For | Root cause analysis, targeted debugging. | Feature development, integration testing, accessing databases. | Quick access when target is broadly defined by an application. |
Each of these targeting methods offers distinct advantages, making kubectl port-forward a versatile command suitable for a wide array of development and debugging tasks within a Kubernetes environment.
Advanced kubectl port-forward Techniques and Scenarios
Beyond the basic syntax, kubectl port-forward offers several options and can be applied in more complex scenarios to further enhance your workflow.
Specifying a Namespace (-n or --namespace)
Kubernetes resources are organized into namespaces, which provide a way to divide cluster resources. If your target pod, service, or deployment is not in the default namespace, you must specify its namespace using the -n or --namespace flag.
Example: To forward to a service named my-db in the backend namespace:
kubectl port-forward service/my-db 5432:5432 -n backend
Failing to specify the correct namespace is a very common reason for port-forward commands to fail, typically with a "not found" error. Always ensure you are targeting the correct namespace.
Listening on a Specific Local Address (--address)
By default, kubectl port-forward binds the LOCAL_PORT to localhost (127.0.0.1) on your local machine. This means only applications running on your local machine can access the forwarded port. However, there are scenarios where you might want to expose this forwarded port to other devices on your local network, for instance, a mobile device for testing or a virtual machine.
You can achieve this by specifying the --address flag:
kubectl port-forward service/my-web-app 8080:80 --address 0.0.0.0
--address 0.0.0.0: This binds the local port to all network interfaces on your machine. Any device on the same local network as your machine can now accesshttp://YOUR_MACHINE_IP:8080.
Caution: While convenient, using --address 0.0.0.0 should be done with care. It means anyone on your local network can potentially access the service you're port-forwarding. Ensure you understand the security implications, especially if the service you're exposing is sensitive or has authentication bypassed for development. For critical services, stick to 127.0.0.1 (the default) or a specific local IP address if absolutely necessary for a controlled environment.
Multiple Port Forwards and Backgrounding
It's common to need to access multiple services simultaneously. You have a few options:
- Multiple Terminal Windows: The simplest approach is to open a new terminal window for each
port-forwardcommand you need to run. Each command will block its respective terminal until terminated (e.g., withCtrl+C). - Backgrounding the Command: For convenience, you can run
kubectl port-forwardin the background.- Using
&: Appending&to the command will run it in the background in Unix-like shells.bash kubectl port-forward service/my-api 8080:80 & kubectl port-forward service/my-db 5432:5432 &You can later bring a backgrounded job to the foreground withfgor manage it withjobsandkill. - Using
nohup(No Hang Up): For more robustness, especially if you plan to close your terminal,nohupcan be used.bash nohup kubectl port-forward service/my-api 8080:80 > /dev/null 2>&1 &This runs the command in the background, redirects all output to/dev/null, and prevents it from being terminated if the terminal session closes. You'll need to manually find andkillthe process ID later (e.g.,ps aux | grep 'kubectl port-forward').
- Using
- Specific Tooling: Some IDEs and tools offer integrated port-forwarding capabilities, which can simplify management. For instance, Visual Studio Code with the Kubernetes extension can show active port-forwards and allow you to manage them.
Zero-Downtime Reconnection with --disable-follow-on-unsupported-pod (Older kubectl versions)
(Note: This flag's behavior and default have changed in newer kubectl versions. kubectl is generally more resilient now. This section details older behavior for historical context and understanding the underlying problem it addressed.)
In older kubectl versions, if the pod you were port-forwarding to (especially when targeting a service or deployment) died and was replaced by a new pod, kubectl port-forward would often terminate. This meant you'd lose your connection and have to restart the command manually.
The --disable-follow-on-unsupported-pod flag (which sounds counter-intuitive) was introduced to disable the default behavior of not trying to re-establish the connection to a new pod. In other words, when this flag was not used, kubectl would not follow a new pod. By setting this flag to false (or simply not including it, as the default behavior eventually changed), kubectl would attempt to find a new healthy pod to forward to, providing a more resilient connection.
Current Behavior (Modern kubectl): Modern versions of kubectl (v1.18+ and especially v1.20+) are significantly more robust. When forwarding to a service or deployment, kubectl automatically attempts to re-establish the connection to a new pod if the original one becomes unavailable. This feature is now largely automatic and doesn't require special flags for basic resilience. You'll observe this as a brief connection drop followed by kubectl printing a message about re-establishing the connection to a new pod.
This improved resilience makes kubectl port-forward even more practical for longer development sessions, minimizing interruptions when pods are recycled during updates or scaling events.
Specifying the Kubernetes Context
If you work with multiple Kubernetes clusters (e.g., development, staging, production), you'll often need to switch between them. kubectl uses "contexts" defined in your ~/.kube/config file to manage these connections.
You can explicitly specify the context for a port-forward command using the --context flag:
kubectl port-forward service/my-app 8080:80 --context my-dev-cluster
This ensures your port-forward command targets the correct cluster, preventing accidental connections to the wrong environment.
Troubleshooting Common kubectl port-forward Issues
Despite its utility, kubectl port-forward isn't immune to issues. Understanding common problems and their solutions is key to effective usage.
- "error: unable to listen on any of the requested ports: [8080]":
- Cause: The
LOCAL_PORT(e.g., 8080) on your local machine is already in use by another process. - Solution:
- Choose a different
LOCAL_PORT. - Identify and terminate the process currently using that port. On Linux/macOS, use
lsof -i :8080(or the respective port) to find the PID, thenkill PID. On Windows,netstat -ano | findstr :8080to find PID, thentaskkill /PID PID /F.
- Choose a different
- Cause: The
- "error: service/my-app not found" (or pod/deployment not found):
- Cause:
- The resource name (service, pod, or deployment) is incorrect.
- The resource exists but is in a different namespace, and you haven't specified the namespace.
- The resource simply doesn't exist in the cluster.
- Solution:
- Double-check the spelling of the resource name.
- Use
kubectl get services,kubectl get pods, orkubectl get deployments(optionally with-n ALL_NAMESPACES) to verify the resource's existence and exact name. - Add the
-n NAMESPACEflag if the resource is in a non-default namespace.
- Cause:
- "Unable to connect to the server: dial tcp: lookup kubernetes.docker.internal: no such host":
- Cause: Your
kubectlis configured for a Docker Desktop Kubernetes cluster that isn't running or is incorrectly configured. - Solution: Ensure your Docker Desktop Kubernetes cluster is running and properly initialized, or switch to the correct Kubernetes context (
kubectl config use-context).
- Cause: Your
- "E0927 10:30:15.123456 12345 portforward.go:xxx] error copying from local connection to remote stream: read tcp 127.0.0.1:8080->127.0.0.1:xxxxx: read: connection reset by peer":
- Cause: The remote pod or the process within it stopped listening on the
REMOTE_PORT, or the pod itself was terminated. This is a common message when a pod crashes or is restarted. - Solution:
- Check the status of the remote pod (
kubectl get pods). - Examine the pod's logs (
kubectl logs pod/POD_NAME) to understand why the application might have stopped. - If forwarding to a service or deployment,
kubectlmight eventually reconnect to a new pod. If not, restart theport-forwardcommand.
- Check the status of the remote pod (
- Cause: The remote pod or the process within it stopped listening on the
- "Forwarding from 127.0.0.1:8080 -> 8080" but nothing happens when accessing
localhost:8080:- Cause:
- The application inside the pod is not actually listening on the
REMOTE_PORTyou specified. - The application is listening on a different interface inside the pod (e.g.,
127.0.0.1instead of0.0.0.0), which might preventkubectlfrom connecting. - Network policies within the cluster are preventing communication to the pod, even through the
port-forwardproxy.
- The application inside the pod is not actually listening on the
- Solution:
- Verify the application's actual listening port within the container. Check its configuration or logs.
- Ensure the application inside the pod is configured to listen on
0.0.0.0(all interfaces) and not just127.0.0.1. - Inspect Kubernetes network policies that might be impacting the pod. This is less common for
port-forwardbut can occur in highly restricted environments.
- Cause:
By systematically addressing these common issues, you can quickly diagnose and resolve problems encountered while using kubectl port-forward, ensuring a smoother development and debugging experience.
APIPark is a high-performance AI gateway that allows you to securely access the most comprehensive LLM APIs globally on the APIPark platform, including OpenAI, Anthropic, Mistral, Llama2, Google Gemini, and more.Try APIPark now! 👇👇👇
Integrating kubectl port-forward with Your Development Workflow
The true power of kubectl port-forward lies in its seamless integration with daily development workflows, bridging the gap between your local machine and the remote Kubernetes cluster.
Local Development Loop Acceleration
For developers working on microservices, the ability to rapidly iterate and test changes is paramount. Instead of deploying every minor change to the cluster (which can be time-consuming), kubectl port-forward enables a "hybrid" development model: 1. Run your local application code (e.g., a new microservice feature). 2. Port-forward to backend services (databases, message queues, other microservices) running in Kubernetes. 3. Your locally running code can then communicate with these remote dependencies as if they were running locally.
This significantly speeds up the development loop by allowing you to test new features against a realistic, in-cluster environment without deploying your work-in-progress to the cluster. You can focus on your code locally while leveraging the Kubernetes cluster for its ecosystem of services.
Database Access for Local Tools
One of the most frequent and beneficial uses of kubectl port-forward is connecting local database clients (like DBeaver, DataGrip, pgAdmin, MySQL Workbench, or even command-line tools) to database instances running inside the cluster.
Example: Suppose you have a PostgreSQL database running in a pod managed by a StatefulSet:
kubectl port-forward service/my-postgres 5432:5432 -n database-ns
Now, you can configure your local PostgreSQL client to connect to localhost:5432 with the appropriate credentials, and it will tunnel directly to your in-cluster database. This allows for schema inspection, data manipulation, and query testing with your familiar local tools, all while the database itself remains securely within the Kubernetes network. This pattern applies equally well to MySQL, Redis, MongoDB, and any other data store.
Testing Microservices APIs with Local Clients
When developing a new API or a client that consumes an existing API service within the cluster, kubectl port-forward provides an immediate way to test without external exposure.
Example: If you're building a frontend application that consumes a backend-api service on port 80:
kubectl port-forward service/backend-api 8080:80
Your frontend application, running locally, can now make requests to http://localhost:8080/api/v1/resource, and these requests will be forwarded directly to the backend-api service inside the cluster. This is particularly useful for verifying API contracts, testing authentication flows, and debugging client-server interactions.
Furthermore, if your microservice exposes an OpenAPI specification endpoint (e.g., /swagger-ui.html or /v3/api-docs), you can browse this documentation locally by port-forwarding to your service. For instance, after running kubectl port-forward service/my-api-service 8080:80, you could navigate to http://localhost:8080/swagger-ui.html in your browser. This allows you to inspect your API definitions, interact with test endpoints via a local Swagger UI, and validate your OpenAPI contract against the live running service. This integration of local tooling with in-cluster APIs, described and consumed via OpenAPI specifications, significantly streamlines the development and testing of robust APIs.
Debugging with IDEs
Many modern IDEs (like Visual Studio Code, IntelliJ IDEA, or GoLand) offer excellent Kubernetes integration through extensions. These extensions often include built-in capabilities to perform port-forwarding directly from the IDE's interface.
For example, in VS Code with the Kubernetes extension, you can navigate to your cluster resources, right-click on a pod or service, and select "Port Forward." The extension will manage the kubectl port-forward process in the background, making it even easier to start and stop tunnels without leaving your development environment. This tight integration ensures that kubectl port-forward remains a central, yet unobtrusive, part of your daily coding routine.
The Role of kubectl port-forward in the Broader API Landscape: Contrasting with API Gateways
While kubectl port-forward is an indispensable tool for individual development and debugging, it's crucial to understand its limitations and how it fits into the broader ecosystem of API management and exposure. port-forward is a temporary, local, and personal gateway to an internal service. It's designed for one developer on one machine to access one or a few services. It is not intended for production traffic, external users, or enterprise-wide API management.
This is where dedicated API gateways and API management platforms come into play. Platforms like APIPark (an open-source AI gateway and API management platform) offer comprehensive solutions for managing, securing, and exposing APIs at scale. While kubectl port-forward allows you to access an internal API for testing, APIPark enables you to:
- Unified API Management: Manage the entire lifecycle of APIs, from design and publication to invocation and decommissioning. This includes versioning, traffic routing, load balancing, and health checks, all features not provided by
kubectl port-forward. - Security and Access Control: Implement robust authentication, authorization, rate limiting, and access approval workflows for APIs. While
port-forwardrelies on yourkubectlpermissions, APIPark provides fine-grained, tenant-specific security policies. - Monitoring and Analytics: Offer detailed logging, performance metrics, and analytics for all API calls, crucial for operational visibility and business intelligence.
port-forwardprovides no such monitoring capabilities. - Developer Portal: Provide a centralized portal for developers to discover, subscribe to, and consume APIs, often with auto-generated documentation based on OpenAPI specifications.
- AI Integration: Specifically, APIPark focuses on integrating and managing APIs for over 100+ AI models, offering unified API formats for AI invocation and prompt encapsulation into REST APIs. This is a far cry from the low-level network tunneling of
kubectl port-forward.
Imagine you're developing a new machine learning service that exposes a prediction API. During early development, you might use kubectl port-forward to test this API from your local machine, feeding it test data and verifying responses. However, once this API is stable and ready for internal or external consumers, relying on port-forward for all users is impractical and insecure. Instead, you would deploy your ML service, potentially behind an API gateway like APIPark, which would handle external exposure, security, traffic management, and provide a developer-friendly portal for consumers to interact with your prediction API. This platform ensures that your powerful AI capabilities are delivered securely and efficiently.
APIPark extends beyond traditional API gateway functionality by specifically addressing the unique challenges of managing AI models as services. It simplifies the integration of diverse AI models, standardizes their invocation, and even allows for encapsulating custom prompts into new REST APIs. While kubectl port-forward is your direct development line to the internals of a service, a platform like APIPark is your enterprise-grade solution for governing, securing, and scaling the exposure of all your valuable APIs, including those powering cutting-edge AI applications. It's the transition from individual debugging to robust, production-ready API delivery.
In essence, kubectl port-forward is a surgical tool for the developer, providing immediate, focused access. API gateways and platforms like APIPark are the architectural foundations for exposing and managing a portfolio of APIs in a scalable, secure, and observable manner. Both are essential, but they serve very different purposes in the application lifecycle.
Security Best Practices and Alternatives to kubectl port-forward
While kubectl port-forward is incredibly useful, it's a powerful tool that requires responsible usage, especially concerning security.
Security Best Practices
- Least Privilege Principle: Ensure the Kubernetes user or service account associated with your
kubectlcontext has only the necessary permissions to performport-forward. Ideally, it should only haveport-forwardcapabilities for the namespaces and resources it needs to access, not cluster-wide access. - Limit Exposure (Default is Best): By default,
kubectl port-forwardbinds to127.0.0.1(localhost). This is the safest default as it only allows access from your local machine. Avoid using--address 0.0.0.0unless you absolutely understand and accept the risks of exposing the port to your entire local network. - Temporary Use:
port-forwardis designed for temporary debugging and development. Do not use it as a permanent solution for accessing services in production environments or for end-user access. It lacks robustness, monitoring, and security features required for production workloads. - Sensitive Data: Be mindful of port-forwarding to services that handle sensitive data. While the tunnel itself is secured by Kubernetes API server authentication and TLS, your local machine becomes a potential access point.
- Clean Up: Always terminate
port-forwardcommands when you're done, especially those run in the background. Unnecessary active tunnels can pose a minor security risk and consume resources.
When kubectl port-forward is NOT the Right Solution (and Alternatives)
While convenient, kubectl port-forward is not a one-size-fits-all solution for service exposure. Here are scenarios where alternatives are more appropriate:
- Exposing Services to External Users/Internet:
- LoadBalancer Service: If your Kubernetes cluster is running on a cloud provider, a Service of type
LoadBalancerwill provision a cloud load balancer, assigning an external IP address to your service. This is the standard way to expose TCP/UDP services to the internet. - Ingress Controller: For HTTP/HTTPS services, an Ingress Controller (e.g., Nginx Ingress, Traefik, Istio Ingress Gateway) provides robust Layer 7 routing. It can handle host-based or path-based routing, SSL termination, and more advanced traffic management. This is the preferred method for exposing web applications and RESTful APIs to external clients.
- NodePort Service: Exposes a service on a static port across all cluster nodes. While simpler than
LoadBalancer, it requires manual firewall configuration and is less scalable or secure for internet-facing services than aLoadBalancerorIngress.
- LoadBalancer Service: If your Kubernetes cluster is running on a cloud provider, a Service of type
- Sharing Access with a Team:
port-forwardis a per-user, per-machine connection. Sharing access with a team often means provisioning aLoadBalancerorIngresswith appropriate access controls, or setting up a VPN to the cluster network.
- Cross-Cluster Communication:
- For services needing to communicate across different Kubernetes clusters, solutions like Service Mesh (e.g., Istio, Linkerd) with multi-cluster capabilities, or specialized cluster networking tools, are required.
- Persistent and Reliable Access:
- Any scenario requiring high availability, load balancing, health checks, or robust monitoring demands proper Kubernetes Service exposure types, often combined with an Ingress controller or API gateway (like APIPark for managed APIs).
- Secure Access for Remote Developers:
- For developers working remotely, setting up a VPN connection to the corporate network or directly to the Kubernetes cluster's network is often a more secure and robust solution than relying solely on
port-forwardfor sustained access. This provides a secure network perimeter.
- For developers working remotely, setting up a VPN connection to the corporate network or directly to the Kubernetes cluster's network is often a more secure and robust solution than relying solely on
Understanding these distinctions is crucial for building robust, secure, and scalable Kubernetes deployments. kubectl port-forward serves its purpose admirably for targeted, temporary access, but it's a development and debugging utility, not a production-grade exposure mechanism.
Performance Considerations and the Future of port-forward
When using kubectl port-forward, it's important to be aware of potential performance implications, especially for high-throughput or low-latency applications.
Latency and Throughput
The kubectl port-forward command creates a tunnel that goes through several hops: your local machine -> Kubernetes API server -> Kubelet on the node -> target pod. Each of these hops introduces some overhead and latency. For typical development and debugging tasks, this overhead is usually negligible. However, for extremely high-throughput data transfers or applications that require microsecond-level latency, port-forward might introduce a noticeable delay compared to direct network communication within the cluster or direct external exposure via a LoadBalancer.
- Network Distance: The physical distance between your local machine and the Kubernetes cluster (and specifically the node running the target pod) will directly impact latency.
- API Server Load: A heavily loaded Kubernetes API server could theoretically introduce delays, though this is rare for
port-forwardtraffic which is relatively lightweight. - CPU Usage: The
kubectlprocess on your local machine and the Kubelet on the node consume some CPU to manage the tunnel. This is typically minor.
For the vast majority of development and debugging use cases (e.g., testing an API endpoint, connecting to a database, viewing a UI), the performance impact of port-forward is perfectly acceptable and outweighed by its convenience and security benefits. For performance testing or production traffic, port-forward is never the right tool.
The Evolving Landscape of Kubernetes Networking Tools
The Kubernetes ecosystem is dynamic, with continuous innovation in networking and developer tooling. While kubectl port-forward remains a foundational tool, complementary and alternative solutions continue to emerge:
- Service Meshes (Istio, Linkerd, Consul Connect): Offer sophisticated traffic management, observability, and security features for inter-service communication within the cluster. They also provide gateway capabilities for ingress and egress, along with debugging tools that can inspect traffic flow at a much deeper level than
port-forward. - Local Development Tools (e.g., Telepresence, Skaffold, Garden): These tools aim to further streamline the local development experience with Kubernetes. They often extend
port-forwardcapabilities, allowing local processes to seamlessly integrate with remote cluster services, or even enabling "reverse port-forwarding" where cluster services can access local running applications. They seek to make the local-to-cluster interaction even more transparent and efficient. - Cloud-Native IDEs and Remote Development Environments: Solutions that fully host your development environment within the cloud, sometimes leveraging Kubernetes itself. These environments aim to eliminate the need for
port-forwardentirely by bringing your IDE and development tools closer to your application runtime.
Despite these advancements, kubectl port-forward maintains its unique position due to its simplicity, universality, and directness. It's a low-level, command-line utility that requires no additional setup beyond kubectl itself, making it an always-available, zero-configuration solution for immediate access. Its fundamental role in quickly bridging local and remote environments ensures its longevity as a core part of the Kubernetes developer experience.
Conclusion: Mastering the Developer's Lifeline
kubectl port-forward stands as a testament to the thoughtful design of Kubernetes, providing a critical utility that bridges the often-complex gap between a developer's local machine and the isolated world within a Kubernetes cluster. We've embarked on a detailed journey, dissecting its core mechanics, differentiating its targets—from specific pods to logical services and convenient deployments—and exploring advanced techniques that elevate its utility. We've seen how this seemingly simple command becomes a powerful gateway for local development, enabling seamless interaction with internal APIs, databases, and other microservices, accelerating the feedback loop and empowering developers to iterate with unprecedented speed.
The ability to port-forward allows developers to test their applications against live, in-cluster dependencies, debug intricate microservice interactions, and validate OpenAPI specifications directly against running services, all without the overhead of public exposure or complex networking configurations. It is the virtual umbilical cord connecting your local development environment to the heartbeat of your Kubernetes applications.
However, mastery of kubectl port-forward also entails a keen awareness of its purpose and limitations. It is a development and debugging tool, a temporary personal tunnel, not a permanent solution for enterprise-scale API management or public exposure. For those broader requirements, robust platforms like APIPark step in, offering comprehensive API gateway functionalities, lifecycle management, and secure exposure mechanisms tailored for both traditional REST APIs and the burgeoning landscape of AI models. Understanding when to leverage the surgical precision of kubectl port-forward versus the architectural solidity of a full API gateway is key to a mature Kubernetes strategy.
By internalizing the knowledge shared in this guide—from basic syntax to advanced options, troubleshooting common issues, and integrating it effectively into your workflow—you are now equipped to wield kubectl port-forward with confidence and expertise. It is more than just a command; it is an essential skill, a developer's lifeline that unlocks direct access to your applications in the cloud-native era, making your journey through the Kubernetes landscape smoother, more efficient, and ultimately, more productive. Embrace its power, respect its boundaries, and let kubectl port-forward become an indispensable ally in your daily development endeavors.
Frequently Asked Questions (FAQs)
1. What is the primary purpose of kubectl port-forward? The primary purpose of kubectl port-forward is to create a secure, temporary, and bidirectional tunnel from a port on your local machine to a port on a specific resource (like a pod, service, or deployment) inside a Kubernetes cluster. This allows developers and administrators to access internal services and applications running within the cluster from their local environment for development, debugging, and testing, bypassing the complexities of external network exposure.
2. Can kubectl port-forward be used to expose a service to the public internet? No, kubectl port-forward is not designed for exposing services to the public internet or for production use. It establishes a connection only from the machine where the command is run. For public internet exposure, Kubernetes offers service types like LoadBalancer (for external IP allocation) and NodePort (for exposing services on specific node ports), or Ingress controllers (for sophisticated HTTP/HTTPS routing and API gateway functionality). Solutions like APIPark are designed for robust, secure, and scalable API exposure and management.
3. What's the difference between port-forwarding to a pod, service, and deployment? * pod: Connects directly to a specific, named pod. Useful for debugging individual pod instances but connections break if the pod dies. * service: Connects to one of the healthy pods behind the named service. More resilient as kubectl will attempt to reconnect to another pod if the original fails. Ideal for general access to a logical service. * deployment: Connects to one of the healthy pods managed by the named deployment (via its ReplicaSet). Offers convenience by abstracting away specific pod or service names, similar resilience to service forwarding.
4. How can I run kubectl port-forward in the background so it doesn't block my terminal? You can run kubectl port-forward in the background by appending & to the end of the command in Unix-like shells (e.g., kubectl port-forward service/my-app 8080:80 &). For more robust backgrounding that persists if you close your terminal, you can use nohup (e.g., nohup kubectl port-forward service/my-app 8080:80 > /dev/null 2>&1 &). Remember to manually terminate these processes when no longer needed using kill with their respective process IDs.
5. Why might my kubectl port-forward command fail with an "unable to listen on any of the requested ports" error? This error typically means that the LOCAL_PORT you specified (or the default one chosen if you didn't specify one) on your local machine is already in use by another application or process. To resolve this, you can either choose a different LOCAL_PORT that is free, or identify and terminate the process currently occupying the desired port on your local machine.
🚀You can securely and efficiently call the OpenAI API on APIPark in just two steps:
Step 1: Deploy the APIPark AI gateway in 5 minutes.
APIPark is developed based on Golang, offering strong product performance and low development and maintenance costs. You can deploy APIPark with a single command line.
curl -sSO https://download.apipark.com/install/quick-start.sh; bash quick-start.sh

In my experience, you can see the successful deployment interface within 5 to 10 minutes. Then, you can log in to APIPark using your account.

Step 2: Call the OpenAI API.