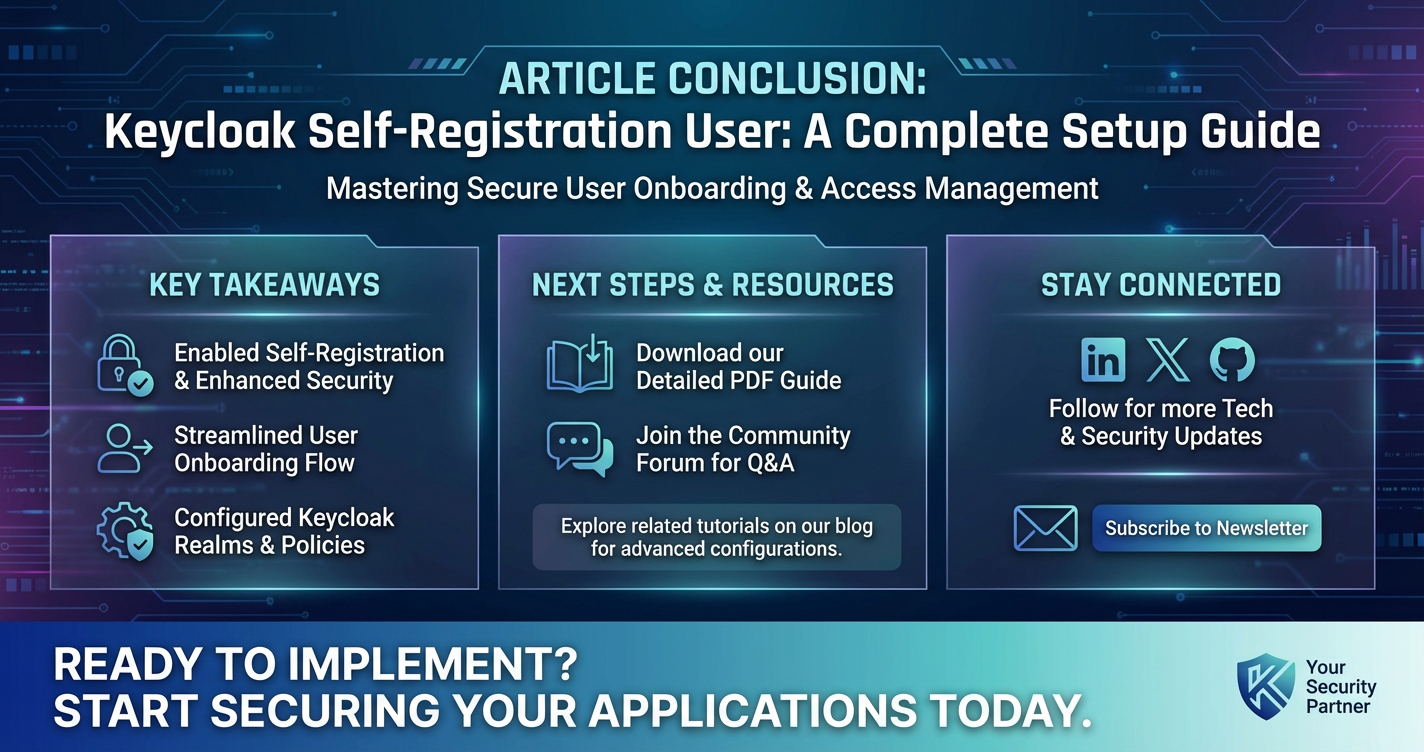
Keycloak Self-Registration User: A Complete Setup Guide


In today's interconnected digital landscape, user experience and seamless access to services are paramount. For any application or service, the initial gateway for a new user is often the registration process. A robust and user-friendly self-registration system not only enhances user satisfaction but also significantly reduces the administrative burden on IT teams. Keycloak, as an open-source Identity and Access Management (IAM) solution, provides a powerful and flexible platform to manage user identities, including the critical feature of self-registration.
This comprehensive guide is designed to walk you through every aspect of setting up and configuring Keycloak for user self-registration. From the foundational concepts of Keycloak realms and authentication flows to advanced customizations, security enhancements, and integration considerations, we will explore the intricacies required to establish a secure, efficient, and user-friendly self-registration experience. Whether you are a developer looking to integrate robust authentication into your application or an administrator seeking to streamline user onboarding, this guide will provide the detailed knowledge and practical steps needed to master Keycloak self-registration. We will delve into the why behind each configuration, discuss best practices, and offer insights to help you build a resilient IAM infrastructure.
1. Introduction: The Imperative of Self-Registration in Modern IAM
The digital era has transformed how users interact with applications and services. Gone are the days when every new user account required manual creation by an administrator. Today, users expect instant access, intuitive interfaces, and the ability to manage their own digital identities with minimal friction. This demand has elevated self-registration from a mere convenience to a fundamental requirement for any successful online platform.
What is Keycloak? A Brief Overview Keycloak is a powerful, open-source IAM solution developed by Red Hat. It provides a comprehensive suite of features for authentication, authorization, and user management, adhering to modern standards like OpenID Connect, OAuth 2.0, and SAML 2.0. At its core, Keycloak acts as a central identity broker, allowing applications to offload the complexities of user authentication and authorization, thereby enhancing security, simplifying development, and offering a single sign-on (SSO) experience across multiple applications. Its robust feature set includes user federation, social login, multi-factor authentication (MFA), and, critically, user self-registration.
Why Self-Registration is Crucial The importance of a well-implemented self-registration system cannot be overstated. It brings a multitude of benefits to both users and organizations:
- Enhanced User Experience: A streamlined self-registration process allows users to quickly and independently create accounts, fostering a positive first impression and reducing potential frustration. This immediacy is vital in retaining prospective users who might otherwise abandon a cumbersome signup flow. It empowers users, giving them control over their initial onboarding journey.
- Scalability and Reduced Administrative Overhead: As an application grows, the number of new users can rapidly increase. Manual account creation becomes an unsustainable bottleneck, consuming valuable administrative resources. Self-registration automates this process entirely, allowing organizations to scale their user base without proportionally increasing their administrative workload. This frees up IT staff to focus on more complex, strategic tasks rather than routine account management.
- Improved Data Accuracy and Ownership: When users create their own accounts, they are directly responsible for inputting their personal information. This often leads to higher data accuracy compared to an administrator manually entering details. Furthermore, it instills a sense of ownership in the user, as they are managing their own identity within the system.
- Faster Time-to-Market for New Services: For developers, offloading user management to a robust IAM solution like Keycloak means less time spent building and maintaining custom authentication logic. With self-registration readily available, new applications can integrate user onboarding quickly, accelerating deployment cycles and allowing development teams to focus on core business logic.
- Security and Compliance: While often associated with convenience, self-registration, when properly configured with features like email verification, strong password policies, and reCAPTCHA, can significantly enhance the security posture. It ensures that only legitimate users complete the registration process and that their initial credentials meet predefined security standards. Compliance requirements, such as GDPR or CCPA, often necessitate user consent mechanisms during registration, which Keycloak can facilitate.
Target Audience and Scope of This Guide This guide is intended for developers, system administrators, security professionals, and architects who are responsible for implementing and managing user identity within their applications using Keycloak. A basic understanding of Keycloak concepts and the Linux command line is beneficial, though not strictly required, as we will explain concepts in detail.
Our journey will cover: * Setting up a Keycloak instance. * Enabling and customizing the basic self-registration functionality. * Deep diving into authentication flows for email verification and custom steps. * Configuring email services for robust communication. * Implementing security best practices, including CAPTCHA. * Theming and advanced customization of the registration pages. * Troubleshooting common issues. * Strategic considerations, including how an API management platform like APIPark can complement Keycloak in a broader enterprise ecosystem.
By the end of this guide, you will possess a holistic understanding and practical expertise to deploy a secure, scalable, and user-friendly self-registration system with Keycloak, seamlessly integrated into your modern application architecture.
2. Prerequisites and Initial Keycloak Setup
Before we dive into enabling and configuring self-registration, it's essential to have a working Keycloak instance and a fundamental grasp of its core concepts. While a full Keycloak installation guide is beyond the scope of this document, we will outline the necessary steps and concepts to get you started.
2.1. Keycloak Installation (Brief Overview) For the purpose of this guide, we'll assume you have a Keycloak instance running. If not, here's a quick summary of common deployment methods:
- Docker: The simplest way to get Keycloak up and running for development or testing.
bash docker run -p 8080:8080 -e KEYCLOAK_ADMIN=admin -e KEYCLOAK_ADMIN_PASSWORD=admin -e KC_HOSTNAME_STRICT=false quay.io/keycloak/keycloak:23.0.7 start-devThis command starts Keycloak in development mode, accessible athttp://localhost:8080. The admin console will be athttp://localhost:8080/admin. - Standalone Server: Download the distribution from the official Keycloak website and run it using the
kc.shorkc.batscript. This is more suitable for production-like environments or when you need more control over the underlying Java application server. - Kubernetes/OpenShift: For production deployments, Keycloak is often deployed using its operator on Kubernetes or OpenShift, offering high availability, scalability, and automated management.
For detailed installation instructions, always refer to the official Keycloak documentation.
2.2. Basic Keycloak Concepts To effectively configure Keycloak, understanding these core concepts is crucial:
- Realms: A realm in Keycloak is a logical partition that isolates a set of users, applications, and configurations. Think of it as a tenant or a security domain. Each realm has its own administration console, users, roles, and client applications. For instance, you might have one realm for your internal employees and another for external customers. This guide will focus on configuring self-registration within a specific realm.
- Clients: A client in Keycloak represents an application or service that wants to authenticate users or obtain tokens from Keycloak. This could be a web application, a mobile app, or a RESTful API. Each client has its own configuration, including redirect URIs, access types, and potentially client secrets.
- Users: These are the individuals who authenticate with Keycloak. Users have attributes (e.g., username, email, first name, last name) and can be assigned roles and grouped together. Our focus here is on how users can create their own accounts.
- Roles: Roles represent specific permissions or functions within an application or system. Users are assigned roles, and applications then use these roles to make authorization decisions (e.g.,
adminrole,userrole). - Groups: Groups are a way to logically categorize users. Users can belong to multiple groups, and roles can be assigned to groups, simplifying user management.
2.3. Accessing the Admin Console Once Keycloak is running, open your web browser and navigate to the admin console URL (typically http://localhost:8080/admin). Log in using the administrator credentials you set during installation (e.g., admin/admin for the Docker example above).
Upon successful login, you'll be presented with the Keycloak Admin Console, which serves as your central control panel for all identity and access management configurations.
3. Understanding Keycloak Realms and Creating a New Realm
The first crucial step in setting up self-registration is to define the context within which these users will exist. In Keycloak, this context is a realm. Working within a dedicated realm for your application's users provides isolation, allowing you to configure authentication flows, user attributes, and security policies specifically for that user base without affecting other applications or administrative users.
3.1. What is a Realm? As previously mentioned, a realm is a fundamental concept in Keycloak, acting as a container for users, clients, roles, and authentication settings. Think of it as a distinct security domain. Each realm is entirely independent of others. For example: * The master realm is Keycloak's default administrative realm. You should never use the master realm for your application's users. It's strictly for managing Keycloak itself. * You might create a my-application-realm for your customer-facing application. * Another realm, internal-employee-realm, could be used for your internal staff applications.
This isolation is paramount for security, maintainability, and organizational clarity. It ensures that changes made to user authentication in one application's realm do not inadvertently impact another.
3.2. Creating a New Realm for Our Application For this guide, we will create a new realm to host our self-registered users. This practice is highly recommended for all production deployments.
Step-by-Step Realm Creation:
- Navigate to Realm Selection: In the Keycloak Admin Console, in the top-left corner, you'll see a dropdown menu typically showing
master. Click on this dropdown. - Add Realm: Click the "Add realm" button at the bottom of the dropdown list.
- Enter Realm Name: On the "Add realm" page, you will be prompted to enter a name for your new realm. For this guide, let's use
my-app-realm. - Create: Click the "Create" button.
Once created, you will be automatically switched into the context of your new my-app-realm. The top-left dropdown will now display my-app-realm. All subsequent configurations in this guide will be performed within this newly created realm.
3.3. Importance of Realm Isolation Beyond the practical benefits of organization, realm isolation serves several critical security purposes:
- Policy Enforcement: Each realm can have its own distinct set of security policies, including password policies, session timeouts, and required authentication flows. This granular control allows tailoring security levels to the specific needs and risk profiles of different user groups.
- User Separation: Users within one realm cannot authenticate or access resources in another realm unless explicitly configured through identity federation. This prevents cross-contamination of user data and credentials.
- Administrative Delegation: You can delegate administrative privileges for a specific realm to a particular team or individual, without granting them access to other realms or the overarching Keycloak configuration in the
masterrealm. This adheres to the principle of least privilege. - Theming and Customization: The branding and visual appearance of login, registration, and account management pages can be customized per realm, allowing for distinct user experiences tailored to each application's brand identity.
By consciously creating and utilizing separate realms, you lay a secure and scalable foundation for your Keycloak identity management infrastructure.
4. Enabling Self-Registration
With a dedicated realm established, the next logical step is to activate the self-registration feature. Keycloak provides a straightforward toggle in the realm settings to enable this functionality, instantly transforming your login page to include a "Register" link.
4.1. Navigating to Realm Settings Ensure you are operating within your newly created realm (e.g., my-app-realm). In the Keycloak Admin Console, on the left-hand navigation menu, click on "Realm settings". This section contains a wealth of configurations related to the realm's overall behavior, security, and user management.
4.2. Locating and Enabling the "User Registration" Option Within the "Realm settings" page, you will find several tabs: "General," "Login," "Email," "Keys," etc. Click on the "Login" tab.
This tab is specifically dedicated to configuring the login and registration experience for users within the realm. Scroll down this page, and you will find a section titled "User Registration."
- User Registration: This is the primary toggle. By default, it is usually "Off." Switch it to "On."
- Registration Requires SSL: For any production environment, this should always be "Enabled." It ensures that registration data, which often includes sensitive personal information, is encrypted during transit. For development, you might temporarily set it to "None" if you're not using HTTPS, but this is strongly discouraged for anything beyond local testing.
- Edit Username: This allows users to change their username after registration. The default is "On." Consider if this aligns with your application's user identity management strategy.
- Login with Email: If enabled, users can log in using their email address instead of their username. This is often preferred for a better user experience. Default is "Off." We recommend setting this to "On" for most applications.
- Duplicate Emails: This setting dictates whether multiple users can register with the same email address. For most applications, this should be "Off" (i.e., email addresses must be unique) to prevent identity confusion and facilitate email-based password resets.
- Recaptcha: This setting is crucial for security and will be covered in detail later. For now, leave it "Off."
After making your desired selections, remember to click the "Save" button at the bottom right of the page to apply the changes.
4.3. Understanding the Immediate Impact The moment you enable "User Registration" and save, a significant change occurs on your realm's login page.
- Access the Login Page: To see this in action, you can navigate to a URL pattern like
http://localhost:8080/realms/my-app-realm/account. This will redirect you to the login page formy-app-realm. Alternatively, if you have a client application configured, you can initiate a login flow from there. - "Register" Link Appears: You will now observe a "Register" link or button, typically below the login form fields. Clicking this link will redirect you to the self-registration form.
4.4. Initial Testing of the Self-Registration Flow It's a good practice to perform a quick test after enabling self-registration:
- Click the "Register" link.
- Fill in the default fields: Username, Email, First Name, Last Name, Password, and Password Confirmation.
- Click "Register."
If successful, you will likely be redirected to an account page or a confirmation message, depending on your Keycloak version and default flows. You can then log into the Keycloak Admin Console, navigate to "Users" under my-app-realm, and verify that the newly registered user appears in the user list.
At this point, you have a basic, functional self-registration system. However, this default setup is often insufficient for real-world applications. The next sections will guide you through customizing the registration form, enhancing security, and refining the user experience.
5. Customizing the Registration Form
The default Keycloak self-registration form provides basic fields like username, email, first name, last name, and password. While functional, most applications require more specific user information or additional consent mechanisms during registration. Keycloak offers powerful mechanisms to customize this form, primarily through the "User Profile" feature in newer versions and through custom attributes and authentication flows in all versions.
5.1. Default Fields vs. Custom Attributes Keycloak's default fields are standard identity attributes. However, you might need to collect additional information, such as: * Phone number * Company name * User's country * Acceptance of Terms and Conditions (T&C) * Consent to marketing emails
These additional pieces of information are managed as "custom attributes."
5.2. Using "User Profile" for Attribute Management (Recommended for Keycloak 17+ / latest versions)
Keycloak 17 introduced the "User Profile" feature, which significantly simplifies the management and validation of user attributes, including those on the registration form. It provides a declarative way to define attributes, their properties, and validation rules. If you are using Keycloak 17 or newer, this is the recommended approach.
5.2.1. Enabling User Profile By default, User Profile might not be fully enabled or configured. 1. Navigate to Realm settings in your realm (my-app-realm). 2. Click on the "User Profile" tab. 3. You'll see a JSON configuration. If it's empty or minimal, you'll need to define your attributes here.
5.2.2. Defining Required/Optional Attributes The User Profile JSON allows you to define groups of attributes and individual attributes within them. For each attribute, you can specify its name, display name, annotations, and most importantly, its validators and client-side configuration.
Here's an example JSON structure for User Profile:
{
  "attributes": [
    {
      "name": "username",
      "displayName": "${username}",
      "validations": {
        "length": {
          "min": 3,
          "max": 30
        },
        "pattern": {
          "pattern": "^[a-zA-Z0-9._-]+$",
          "errorMessage": "${invalidUsernameMessage}"
        }
      },
      "annotations": {
        "scope.permissions": "view,manage"
      }
    },
    {
      "name": "email",
      "displayName": "${email}",
      "validations": {
        "email": {}
      },
      "annotations": {
        "scope.permissions": "view,manage"
      }
    },
    {
      "name": "firstName",
      "displayName": "${firstName}",
      "validations": {
        "not-null": {}
      },
      "annotations": {
        "scope.permissions": "view,manage"
      }
    },
    {
      "name": "lastName",
      "displayName": "${lastName}",
      "validations": {
        "not-null": {}
      },
      "annotations": {
        "scope.permissions": "view,manage"
      }
    },
    {
      "name": "phone_number",
      "displayName": "${phoneNumber}",
      "validations": {
        "length": {
          "min": 7,
          "max": 15
        },
        "pattern": {
          "pattern": "^[0-9]+$",
          "errorMessage": "Invalid phone number format."
        }
      },
      "annotations": {
        "scope.permissions": "view,manage",
        "gui.readonly": "false",
        "gui.registration-profile": "true",
        "gui.registration-required": "true"
      }
    },
    {
      "name": "company",
      "displayName": "${company}",
      "annotations": {
        "scope.permissions": "view,manage",
        "gui.readonly": "false",
        "gui.registration-profile": "true",
        "gui.registration-required": "false"
      }
    },
    {
      "name": "terms_accepted",
      "displayName": "${termsAccepted}",
      "annotations": {
        "scope.permissions": "view,manage",
        "gui.readonly": "false",
        "gui.registration-profile": "true",
        "gui.registration-required": "true",
        "gui.component-type": "kc-checkbox",
        "gui.html-template": "terms_and_conditions.ftl",
        "gui.html-template-data": "terms_url=https://your-app.com/terms"
      }
    }
  ]
}
Let's break down the phone_number and terms_accepted attributes:
"name": The internal attribute name (e.g.,phone_number)."displayName": The label shown to the user on the registration form (e.g.,${phoneNumber}which refers to a localized message)."validations": Defines rules. Forphone_number, we addedlengthandpattern(regex) validators. Keycloak has built-in validators likenot-null,email,length,pattern,options."annotations": Crucial for controlling where and how the attribute appears."gui.registration-profile": "true": Makes the attribute appear on the registration form."gui.registration-required": "true": Makes the attribute mandatory on the registration form."gui.component-type": "kc-checkbox": Specifies the UI component forterms_accepted."gui.html-template"and"gui.html-template-data": Allows for custom HTML content, useful for complex fields like T&C. We will touch on this in theming.
5.2.3. Validation Rules for Attributes The validations block is extremely powerful. You can define multiple validators for a single attribute. * "not-null": {}: Ensures the field is not empty. * "email": {}: Validates the field as a valid email address. * "length": {"min": 5, "max": 100}: Specifies minimum and maximum length. * "pattern": {"pattern": "^[0-9]{10}$", "errorMessage": "Please enter a 10-digit phone number."}: Uses a regular expression for validation and provides a custom error message. * "options": {"options": ["option1", "option2"]}: For dropdowns with predefined values.
After updating the JSON, click "Save." Now, when you navigate to the registration page, you should see the new fields. Keycloak will automatically handle the rendering and validation based on your User Profile configuration.
5.3. Legacy Attribute Management (for Keycloak < 17 or specific scenarios) For older Keycloak versions, or if you prefer a more manual approach, custom attributes are primarily managed through the Authentication Flows. This involves adding specific "Registration Profile" or "Update Profile" authenticators to your registration flow and configuring them. This method is more complex for attribute definition and validation, as validation logic often requires custom authenticators or event listeners.
5.4. Adding Terms and Conditions (T&C) Checkbox A common requirement is to include a "Terms and Conditions" checkbox that users must explicitly agree to before registering. With User Profile, this is straightforward:
- Define
terms_acceptedAttribute: As shown in the JSON example above, add an attribute liketerms_acceptedwith"gui.component-type": "kc-checkbox"and"gui.registration-required": "true". - Displaying the T&C Link: In your custom theme (discussed later), you can create an
info.ftlor similar template that checks for this attribute and renders a link to your T&C page. For example, thegui.html-template-datacould pass the URL of your terms.html <div class="form-group"> <label for="terms_accepted"> <input type="checkbox" id="terms_accepted" name="user.attributes.terms_accepted" value="true" required> I agree to the <a href="${terms_url}" target="_blank">Terms and Conditions</a> </label> </div>This snippet would be part of your custom registration theme.
By leveraging the User Profile feature, you gain a robust and maintainable way to define, validate, and display user attributes on your registration form, ensuring that you collect all necessary information while maintaining data integrity and a smooth user experience.
6. Configuring Authentication Flows for Self-Registration
Beyond just enabling the registration form, Keycloak's power lies in its flexible authentication flows. These flows dictate the sequence of steps a user must go through during various authentication processes, including self-registration. Customizing the registration flow allows you to inject security measures, additional verification steps, and custom logic.
6.1. Understanding Keycloak Authentication Flows Authentication flows are a series of "executions" (steps) that Keycloak runs to authenticate a user. Each execution performs a specific task, such as validating credentials, checking for MFA, or, in our case, handling registration.
Keycloak provides several built-in flows: * Browser: The default flow for web application logins. * Registration: The default flow for user self-registration. * Direct Grant: For clients directly exchanging user credentials for tokens. * Reset Credentials: For password reset procedures.
Each flow is a tree-like structure, with parent flows and sub-flows. Executions within a flow can be configured as: * Required: The step must be successfully completed. If it fails, the flow stops. * Alternative: The step is attempted. If successful, the flow continues; if it fails, another "Alternative" step (if any) is tried. If all "Alternative" steps fail, the flow stops. * Disabled: The step is skipped entirely.
6.2. The "Registration" Flow: What It Does When you enable "User Registration" in the realm settings, Keycloak automatically assigns the default "Registration" flow to handle new user sign-ups. This flow typically includes executions like: * Registration User Profile: Gathers user details (username, email, etc.) from the form. * Registration Recaptcha: (If enabled) presents a reCAPTCHA challenge. * Registration Password: Prompts the user to set their password. * Verify Email: (If configured) sends a verification email.
6.3. Modifying the Default Registration Flow To customize the registration process, we'll need to work with the "Registration" flow in the Admin Console.
- Navigate to Authentication: In the left-hand menu, click on "Authentication."
- Select the "Flows" Tab: Ensure you are on the "Flows" tab.
- Locate "Registration": Find the "Registration" flow in the list of flows. Click on it to view its executions.
You'll see a list of steps, often looking something like this (depending on your Keycloak version and previous configurations):
| Execution | Requirement |
|---|---|
| Registration User Profile | Required |
| Registration Recaptcha | Disabled |
| Registration Password | Required |
| Registration Email as Username | Disabled |
| Verify Email | Disabled |
6.4. Adding Steps: Email Verification (Crucial for Security) Email verification is paramount for several reasons: * Authenticity: Confirms that the user actually owns the email address provided, preventing registration with fake or someone else's email. * Account Recovery: Ensures that the email can be used for password resets. * Communication: Guarantees that the application can communicate with the user via email.
Steps to Enable Email Verification:
- Ensure Email is Configured: Before enabling email verification, you must configure Keycloak's email settings (SMTP server) in the
Realm Settings -> Emailtab. We will detail this in the next section. Without a properly configured SMTP server, email verification will fail silently or with errors. - Enable "Verify Email" Execution: In the "Authentication -> Flows -> Registration" page, locate the "Verify Email" execution.
- Set Requirement to "Required": Click the "Actions" dropdown next to "Verify Email" and select "Config." Change the "Requirement" dropdown to "Required." Then click "Save."
Now, after a user fills out the registration form, they will be presented with a message instructing them to check their email for a verification link. Until they click this link, their account will be in a "disabled" state or marked as "email not verified," and they typically won't be able to log in.
6.5. Adding a Custom "Terms and Conditions" Step While the User Profile method allows a T&C checkbox, a more robust way to enforce acceptance, especially for legal compliance, is through a dedicated authentication flow step. This ensures the user must interact with and explicitly accept the terms.
- Create a New Flow (Optional but Recommended): For better organization, instead of adding directly to the "Registration" flow, you can create a sub-flow.
- In "Authentication -> Flows," click "Create flow."
- Name it
My T&C Flowand set type to "Generic." Click "Create."
- Add "Terms and Conditions" Execution:
- Click on your new
My T&C Flow. - Click "Add execution."
- Select "Terms and Conditions" from the dropdown list.
- Set its "Requirement" to "Required."
- Click on your new
- Integrate into Registration Flow:
- Go back to the main "Registration" flow.
- At an appropriate point (e.g., after "Registration User Profile"), click "Add execution."
- Select "Flow" from the dropdown (this allows you to embed another flow).
- Choose your
My T&C Flowfrom the "Flow" dropdown. - Set its "Requirement" to "Required."
- Click "Save."
Now, during registration, after submitting their profile information, users will be presented with the "Terms and Conditions" page, requiring them to accept before proceeding.
6.6. Integrating Custom Logic (e.g., Inviting Users to a Specific Group Upon Registration) Keycloak allows for a great deal of customization through "Event Listeners" and "Authentication SPIs." While creating a full custom SPI is advanced, a common requirement is to automatically assign roles or groups to self-registered users. This can be achieved using built-in authentication flow steps or through custom event listeners.
Using Authentication Flow for Group Assignment: Keycloak has a "Add User to Group" authenticator which can be added to your registration flow.
- Create a Group: In the left menu, go to "Groups" and create a new group, e.g.,
self-registered-users. - Add Execution: In the "Registration" flow, click "Add execution."
- Select "Add User to Group": Choose this authenticator.
- Configure: Click "Actions" -> "Config" next to the "Add User to Group" execution.
- In the "Groups" field, type the name of your group (
self-registered-users) and click "Add." - Set its "Requirement" to "Required."
- Click "Save."
- In the "Groups" field, type the name of your group (
Place this execution after Registration User Profile and before Verify Email to ensure the user is added to the group as part of the successful registration.
6.7. Detailed Explanation of Each Execution Type (Required, Alternative, Disabled)
Understanding the nuances of execution types is vital for designing robust authentication flows.
- Required: This is the most stringent requirement. If an execution marked as "Required" fails or is not completed successfully, the entire authentication flow is halted, and an error is typically displayed to the user. Use "Required" for critical steps like password validation, email verification (if mandated), or essential data collection. Example: Registration User Profile, Registration Password.
- Alternative: An "Alternative" execution offers flexibility. If this step succeeds, the flow continues. If it fails, Keycloak will attempt to find another "Alternative" execution in the sequence. If all "Alternative" executions fail, the flow stops. This is useful for providing multiple ways to achieve a goal (e.g., "Authenticate by SMS OR Authenticate by Email"). For simple registration, it's less common, but for complex login scenarios, it's very powerful. Example: Multiple MFA options.
- Disabled: An execution marked as "Disabled" is simply skipped. It remains in the flow definition but has no effect. This is useful for temporarily disabling a feature (like reCAPTCHA during development) without removing it entirely. Example: Recaptcha initially set to Disabled.
By carefully planning your authentication flow and understanding these execution types, you can build a registration process that is both secure and tailored to your application's unique needs.
7. Email Configuration for Verification
Email communication is a cornerstone of modern identity management, particularly for self-registration. It enables crucial functions like account verification, password resets, and important notifications. A properly configured SMTP server within Keycloak is non-negotiable for a functional self-registration system with email verification enabled.
7.1. Setting Up the SMTP Server in Keycloak Keycloak needs to know how to send emails. This involves configuring the SMTP (Simple Mail Transfer Protocol) server settings in your realm.
- Navigate to Realm Settings: In the Keycloak Admin Console, ensure you are in your
my-app-realm. Click on "Realm settings" in the left-hand menu. - Select the "Email" Tab: Click on the "Email" tab.
- Configure SMTP Settings: You will see a form to enter your SMTP server details. These details are typically provided by your email service provider (e.g., Gmail, Outlook 365, SendGrid, Mailgun, or your company's internal SMTP server).Here's a breakdown of the fields and common configurations:Example Configuration (using a generic external SMTP service): * From:
notifications@example.com* From Display Name:My Application* SMTP Host:smtp.myemailprovider.com* SMTP Port:587* Enable SSL:Off* Enable STARTTLS:On* Enable Authentication:On* Username:your_smtp_username* Password:your_smtp_password- From: The email address that will appear as the sender (e.g.,
noreply@your-domain.com). This should be an address you own and have configured with your SMTP provider. - From Display Name: The friendly name that appears alongside the "From" address (e.g.,
Your App Support). - Reply To: (Optional) An email address where replies should be directed.
- Reply To Display Name: (Optional) Friendly name for the "Reply To" address.
- SMTP Host: The hostname or IP address of your SMTP server (e.g.,
smtp.sendgrid.net,smtp.gmail.com). - SMTP Port: The port number for your SMTP server (commonly
587for TLS/STARTTLS, or465for SSL). - Enable SSL: Set to
Onif your SMTP server requires an SSL connection (port 465). - Enable STARTTLS: Set to
Onif your SMTP server uses STARTTLS (often port 587). You generally use either SSL or STARTTLS, not both. - Enable Authentication: Set to
Onif your SMTP server requires username and password authentication. This is almost always required for external SMTP services. - Username: The username for authenticating with your SMTP server (e.g., an API key for SendGrid, your email address for Gmail).
- Password: The password for authenticating with your SMTP server (e.g., a SendGrid API secret, an app-specific password for Gmail). Never use your main email account password directly; use app-specific passwords for services like Gmail.
- From: The email address that will appear as the sender (e.g.,
- Save Changes: After filling in all the details, click the "Save" button.
7.2. Testing Email Functionality Keycloak provides a convenient way to test your email configuration.
- Send Test Email: On the same "Email" tab, after saving your settings, you'll see a "Test Connection" or "Test Email" button.
- Enter Test Recipient: Enter an email address you have access to (e.g., your personal email) in the provided field.
- Click "Send Test Email": Keycloak will attempt to send an email.
- Verify Receipt: Check the inbox of the recipient email address. If the email arrives, your SMTP configuration is correct. If not, Keycloak will usually display an error message in the Admin Console, and you should also check the Keycloak server logs for more detailed error information. Common issues include incorrect host/port, wrong credentials, or firewall blocks.
7.3. Customizing Email Templates for Verification (FreeMarker Templates) The default email templates Keycloak sends (like the email verification link or password reset link) are functional but may not match your application's branding or tone. Keycloak uses FreeMarker Templates for email content, allowing extensive customization.
- Navigate to Realm Settings -> Email: Go back to the "Email" tab in Realm settings.
- View Templates: At the bottom, you'll see a section for "Templates." You can import or export them.
- Locate
email-verification.ftl: This is the template responsible for the email verification message. - Customize: You can override the default templates by placing your custom
.ftlfiles in a custom theme directory.Example Snippet foremail-verification.ftl:html <p>${msg("emailVerificationBody", realmName, link, linkExpiration, locale.currentLanguage.displayName)}</p> <p> <a href="${link}">${msg("emailVerificationLink", link)}</a> </p> <p>${msg("emailVerificationTearOff")}</p> <p>${msg("emailSignature")}</p>You can completely redesign this HTML, add your logo, change the wording, or embed CSS for a branded look.- Theme Structure: Create a theme directory (e.g.,
themes/my-app-theme/email/) within your Keycloak installation. - Copy Default: Copy the
email-verification.ftlfrom Keycloak's default email theme (usuallythemes/base/email/) into yourmy-app-theme/email/directory. - Edit: Open
themes/my-app-theme/email/email-verification.ftlin a text editor. You can now modify the HTML and text content. You have access to variables like${link},${user.username},${realmName}, etc.
- Theme Structure: Create a theme directory (e.g.,
- Apply Theme: In
Realm Settings -> Themes, set the "Email Theme" tomy-app-theme(or whatever you named your custom theme). - Save Changes: Click "Save."
Now, any email verification requests will use your custom template, providing a consistent and professional look for your users.
7.4. Best Practices for Email Delivery (SPF, DKIM) For reliable email delivery, especially when sending automated emails like verification links, it's crucial to implement email authentication standards for your From domain:
- SPF (Sender Policy Framework): A DNS TXT record that specifies which mail servers are authorized to send email on behalf of your domain. This helps prevent spammers from forging your domain as the sender.
- DKIM (DomainKeys Identified Mail): A digital signature added to outgoing emails, which allows the recipient server to verify that the email was sent from an authorized sender and has not been tampered with in transit.
- DMARC (Domain-based Message Authentication, Reporting & Conformance): Builds on SPF and DKIM, telling recipient servers how to handle emails that fail SPF or DKIM checks (e.g., quarantine, reject).
Consult your email service provider's documentation on how to set up SPF, DKIM, and DMARC records for your domain. Implementing these greatly improves the deliverability of your Keycloak-sent emails and reduces the chances of them being marked as spam.
APIPark is a high-performance AI gateway that allows you to securely access the most comprehensive LLM APIs globally on the APIPark platform, including OpenAI, Anthropic, Mistral, Llama2, Google Gemini, and more.Try APIPark now! 👇👇👇
8. Post-Registration Actions and User Management
After a user successfully self-registers, the process doesn't end. Keycloak offers mechanisms to perform immediate actions, such as assigning default roles or groups, and provides a robust admin console for managing these newly created users. Effective post-registration actions and user management are vital for maintaining control, security, and proper access provisioning.
8.1. Automatic Assignment of Roles/Groups After Registration It's a common requirement to automatically assign specific roles or add users to certain groups immediately after they complete self-registration. This grants them initial access permissions without manual intervention.
Methods for Automatic Assignment:
- Using the "Add User to Group" Authenticator in the Registration Flow: As discussed in Section 6.6, the
Add User to Groupauthenticator is the simplest and most direct way to assign users to one or more groups as part of the registration process.- Procedure:
- Ensure the target group(s) exist in your realm (e.g.,
self-registered-users,default-users). Go toGroupsin the left menu and create them if necessary. - Navigate to
Authentication -> Flows -> Registration. - Click "Add execution" at an appropriate point in the flow (e.g., after
Registration User ProfileandRegistration Password, but beforeVerify Emailif you want the group assignment to happen even before email verification is complete, or afterVerify Emailif group assignment depends on a verified email). - Select
Add User to Groupfrom the dropdown. - Click "Actions" -> "Config" next to the newly added execution.
- In the configuration panel, select the desired group(s) from the "Groups" dropdown and click "Add."
- Set the "Requirement" to "Required."
- Click "Save."
- Ensure the target group(s) exist in your realm (e.g.,
- Benefit: This is declarative and built into the authentication flow, making it easy to see and manage within the Admin Console.
- Limitation: It only assigns to groups. To assign roles, you typically assign roles to the group, and users inherit those roles.
- Procedure:
- Using a Custom Event Listener (Advanced): For more complex logic, such as assigning roles based on specific user attributes collected during registration, or integrating with external systems, a custom Keycloak Event Listener SPI might be necessary. This involves writing Java code that listens for
REGISTERevents (orVERIFY_EMAILif roles should only be assigned upon verification) and then programmatically assigns roles or groups. This is beyond the scope of a basic guide but offers maximum flexibility.
8.2. Reviewing Registered Users in the Admin Console Once users start self-registering, you can easily view and manage them from the Keycloak Admin Console.
- Navigate to Users: In the left-hand menu, click on "Users."
- Search and Filter: The "Users" page displays a list of all users in the current realm. You can use the search bar to find specific users by username, first name, last name, or email. You can also apply filters.
- User Details: Click on a user's
IDorUsernameto view their detailed profile. This includes:- Details Tab: Basic information (username, email, name), enabled status, email verified status.
- Credentials Tab: Manage passwords, temporary passwords, reset actions.
- Role Mappings Tab: View and manage realm-level and client-level roles assigned to the user.
- Groups Tab: View and manage groups the user belongs to.
- Attributes Tab: View and edit custom user attributes (as defined by User Profile).
- Sessions Tab: See active sessions for the user.
- Federation Tab: Information if the user is federated from an external system.
- Consents Tab: Information about client consents given by the user.
8.3. Managing User Status (Enabled/Disabled) A critical administrative function is controlling a user's ability to log in.
- Enabled Switch: On the "Details" tab of a user's profile, you'll find an "Enabled" switch. Toggling this to "Off" immediately prevents the user from logging in, even if their credentials are correct. This is useful for suspending accounts.
- Email Verified Status: If email verification is
Requiredin your registration flow, new users will often have their "Email Verified" status asOffuntil they click the verification link. Their account might be effectively disabled until verification. You can manually set this toOnif, for some reason, a user cannot receive the email but you want to grant them access.
8.4. Force Password Updates For security reasons or compliance, you might need to force a user to update their password on their next login. This is useful if: * An administrator reset their password. * A security incident occurred. * Password policy changes require re-authentication.
- Navigate to User Credentials: In the user's profile, click on the "Credentials" tab.
- Set "Password Reset": You can set a new temporary password and/or mark the "User Must Change Password" option to "On."
- Actions: Use the "Actions" dropdown on the
Detailstab for more options like "Send Reset Password Email."
8.5. Admin Initiated Actions (AIA) Keycloak allows administrators to initiate certain actions for users that they must complete before proceeding. These are configured under Authentication -> Flows -> Authentication and can include "Update Profile," "Verify Email," "Update Password," etc. You can manually assign these actions to users from their "Details" tab, under the "Required User Actions" section. This is particularly useful for requiring existing users to agree to new terms and conditions, for instance.
By actively managing users and leveraging Keycloak's post-registration features, administrators can ensure that self-registered users are properly provisioned, secure, and compliant with organizational policies, while maintaining a low administrative burden.
9. Securing the Self-Registration Process
While self-registration offers immense convenience, it also presents potential security vulnerabilities if not properly secured. Bots, malicious actors, or even accidental duplicate registrations can impact system integrity. Keycloak provides several built-in mechanisms and best practices to fortify your self-registration flow.
9.1. Captcha/reCAPTCHA Integration to Prevent Bot Registrations One of the most effective ways to combat automated bot registrations is through CAPTCHA (Completely Automated Public Turing test to tell Computers and Humans Apart) or, more commonly, Google's reCAPTCHA.
Steps for reCAPTCHA Integration:
- Register Your Domain with Google reCAPTCHA:
- Go to the Google reCAPTCHA Admin Console.
- Click the
+icon to register a new site. - Choose
reCAPTCHA v2("I'm not a robot" Checkbox or Invisible reCAPTCHA badge).v3is more programmatic and less suitable for a direct UI integration in Keycloak's default setup. Forv2, the "I'm not a robot" checkbox is the most straightforward. - Add your Keycloak domain (e.g.,
localhostfor development,your-keycloak-domain.comfor production) to the "Domains" list. - Accept the terms.
- You will receive a Site Key and a Secret Key. Keep these secure.
- Configure Keycloak with reCAPTCHA Keys:
- In the Keycloak Admin Console, ensure you are in your
my-app-realm. - Navigate to
Realm settings -> Logintab. - Scroll down to the "Recaptcha" section.
- Recaptcha Enabled: Set to
On. - Recaptcha Site Key: Paste your Google reCAPTCHA Site Key here.
- Recaptcha Secret Key: Paste your Google reCAPTCHA Secret Key here.
- Click "Save."
- In the Keycloak Admin Console, ensure you are in your
- Enable "Registration Recaptcha" in Authentication Flow:
- Navigate to
Authentication -> Flows -> Registration. - Locate the "Registration Recaptcha" execution.
- Click "Actions" -> "Config" next to it.
- Set its "Requirement" to "Required."
- Click "Save."
- Navigate to
Now, when users access the registration page, they will see the reCAPTCHA widget, significantly deterring bot registrations.
9.2. IP Rate Limiting (External Proxy/Gateway) While Keycloak doesn't have built-in IP-based rate limiting for registration attempts, this is a critical layer of defense, especially against brute-force attacks or distributed denial-of-service (DDoS) attempts on your login/registration endpoints. This is best handled upstream from Keycloak, using an API Gateway or a reverse proxy.
- Reverse Proxy/Load Balancer (Nginx, HAProxy, AWS ALB, etc.): Configure your proxy to limit the number of requests per IP address to the Keycloak registration endpoint (
/realms/{realm}/protocol/openid-connect/registrations). For example, Nginx can use thelimit_req_zoneandlimit_reqdirectives. - WAF (Web Application Firewall): A WAF (e.g., Cloudflare, AWS WAF) can provide advanced bot detection and rate limiting capabilities, often with more sophisticated algorithms than simple IP-based limits.
- APIPark: For services that integrate with Keycloak and expose APIs, a platform like APIPark can provide robust API management capabilities, including rate limiting, traffic forwarding, and security policies. While Keycloak handles identity, APIPark can act as a crucial layer of defense and control for the APIs that your Keycloak-authenticated applications consume or expose. It offers high-performance traffic management (rivalling Nginx) and detailed logging, which can indirectly protect your application's Keycloak-integrated endpoints by securing the broader API landscape.
9.3. Strong Password Policies Enforcing strong password policies is fundamental for user account security. Keycloak allows you to define these policies at the realm level.
- Navigate to Realm settings -> Security Defenses: In your realm, go to "Realm settings," then select the "Security Defenses" tab.
- Password Policy: You'll find a section for "Password Policy." Click "Add policy" to add various rules:Recommended Policies: Aim for a minimum length of 12-16 characters, and require a mix of digits, lowercase, uppercase, and special characters. Avoid
Password Historythat is too restrictive, as it can lead to users writing down passwords. 3. Save Changes: Click "Save" after defining your policies.- Min Length: Minimum number of characters.
- Digits: Require at least one digit.
- Lowercase: Require at least one lowercase letter.
- Uppercase: Require at least one uppercase letter.
- Special Chars: Require at least one special character.
- Not Username: Prevent the password from being the same as the username.
- Not Email: Prevent the password from being the same as the email.
- Password History: Prevent users from reusing recent passwords.
- Force Expire: Force users to change their password after a certain period.
- Regex: Define a custom regular expression for advanced password patterns.
These policies will be enforced during self-registration and any password change operations.
9.4. Multi-Factor Authentication (MFA) Setup for Self-Registered Users (Post-Registration) While not strictly part of the registration process itself, enabling MFA for self-registered users significantly enhances account security. You can either make MFA mandatory or allow users to configure it voluntarily after registration.
- Enable Required Actions: In
Authentication -> Required Actions, enableConfigure OTPorWebAuthn Register. - Make MFA Mandatory (Optional): In
Authentication -> Flows -> Browser(or a custom browser flow), addConfigure OTPorWebAuthn Registeras aRequiredexecution. This forces users to set up MFA upon their first login after registration. - User Self-Configuration: Alternatively, users can set up MFA themselves via the Keycloak "Account Console" once they are logged in.
9.5. Reviewing Security Events and Logs Keycloak logs various security events, including successful and failed registrations, login attempts, password resets, etc. Regularly reviewing these logs is crucial for detecting suspicious activity.
- Navigate to Events: In the left-hand menu, click on "Events."
- Filter Events: You can filter events by type (e.g.,
REGISTER,LOGIN_ERROR), user, or client. - Log Integration: For production, integrate Keycloak logs with a centralized logging system (ELK stack, Splunk, Graylog, etc.) for easier monitoring, alerting, and long-term storage. This allows you to identify trends, detect anomalies, and respond quickly to security incidents related to registration or authentication.
By implementing these security measures, you can create a self-registration system that is not only convenient but also robustly protected against common threats, safeguarding your users and your application's integrity.
10. Integrating Self-Registration with a Client Application
Once Keycloak is configured for self-registration, the next step is to integrate this functionality into your client application. Keycloak acts as an OpenID Connect (OIDC) provider, and applications communicate with it using the OIDC protocol, which is built on top of OAuth 2.0.
10.1. Overview of OAuth 2.0 / OpenID Connect * OAuth 2.0: An authorization framework that allows a user to grant a third-party application limited access to their resources on another service (e.g., grant an app access to your Google Photos). It focuses on authorization. * OpenID Connect (OIDC): An identity layer built on top of OAuth 2.0. It allows clients to verify the identity of the end-user based on the authentication performed by an authorization server (Keycloak) and to obtain basic profile information about the end-user. It focuses on authentication.
When your application directs a user to Keycloak for login or registration, it's typically using an OIDC flow, most commonly the Authorization Code Flow.
10.2. Configuring a Client in Keycloak Your application needs to be registered as a "Client" in Keycloak so Keycloak knows which applications are allowed to use its identity services.
- Navigate to Clients: In the Keycloak Admin Console, ensure you are in
my-app-realm. Click on "Clients" in the left-hand menu. - Create New Client: Click the "Create client" button.
- Client ID: Enter a unique identifier for your application (e.g.,
my-frontend-app). - Client Type: Select "OpenID Connect."
- Click Next.
- Configure Client Details:
- Name: A user-friendly name for your application (e.g.,
My Web Application). - Description: (Optional) A brief description.
- Enabled: Should be
On. - Client authentication:
Onif your application needs a client secret (e.g., confidential clients like server-side web apps).Offfor public clients like SPAs or mobile apps. - Authorization:
Offfor basic authentication scenarios,Onif you're leveraging Keycloak's fine-grained authorization policies. - Authentication flow: Leave
Standard flowenabled. - Redirect URIs: Crucial. These are the URLs in your application where Keycloak will redirect the user after successful login or registration. Keycloak enforces strict validation of these URIs for security. Add all possible redirect URIs your application might use (e.g.,
http://localhost:3000/*for local development,https://your-app.com/callback). Use*as a wildcard for path components, but be specific with the domain. - Web origins: The origins (domains) from which your application can make cross-origin requests to Keycloak. Again, specify your application's domain(s) or
*for development.
- Name: A user-friendly name for your application (e.g.,
- Click Save.
- Credentials Tab (if Client Authentication is On): If you enabled client authentication, a "Credentials" tab will appear for your client. Here you'll find the "Client Secret." This secret is used by your application to authenticate itself to Keycloak's token endpoint and should be kept absolutely confidential.
10.3. Demonstrating the Login/Registration Flow from a Client Perspective A typical OIDC client application initiates the authentication flow by redirecting the user's browser to Keycloak's authorization endpoint. Keycloak handles the login (and now, registration) process, and then redirects the user back to the application with an authorization code. The application then exchanges this code for tokens.
Conceptual Example (using a generic web app):
Imagine a simple web application (my-frontend-app) that wants to use Keycloak for authentication.
- User accesses
my-frontend-app: The app detects no active session. - App redirects to Keycloak: The app constructs an OIDC authorization request and redirects the user's browser to Keycloak.
- URL Example:
https://keycloak.example.com/realms/my-app-realm/protocol/openid-connect/auth ?client_id=my-frontend-app &redirect_uri=https://my-frontend-app.com/callback &response_type=code &scope=openid profile email &state=some_random_string_for_security
- URL Example:
- Keycloak Login/Registration Page: The user lands on Keycloak's login page.
- Option 1 (Login): If the user has an existing account, they enter credentials and log in.
- Option 2 (Register): If the user is new, they click the "Register" link, complete the self-registration form (including email verification if required), and create their account.
- Keycloak Redirects Back to App: After successful login or registration, Keycloak redirects the user's browser back to the
redirect_uri(https://my-frontend-app.com/callback) with anauthorization codeand thestateparameter. - App Exchanges Code for Tokens:
my-frontend-app's backend (for confidential clients) or frontend (for public clients, though more complex) takes theauthorization codeand sends it to Keycloak'stoken endpoint(e.g.,/realms/my-app-realm/protocol/openid-connect/token), along with itsclient_idandclient_secret(if applicable). - Keycloak Responds with Tokens: Keycloak validates the code and responds with:
id_token: A JWT containing identity information about the authenticated user.access_token: A JWT used to access protected resources (APIs) on behalf of the user.refresh_token: Used to obtain new access tokens without requiring the user to re-authenticate.
- App Establishes Session:
my-frontend-appvalidates the tokens and establishes a local session for the user, granting them access to the application's features.
Using Keycloak Adapters/Libraries: While you can implement the OIDC flow manually, it's highly recommended to use Keycloak's official client adapters or community-maintained OIDC libraries for your programming language/framework (e.g., keycloak-js for JavaScript SPAs, Spring Security for Java, node-oidc-provider for Node.js, etc.). These libraries handle the complexities of OIDC (token validation, refresh, logout, session management) securely and efficiently, significantly reducing development effort and potential security vulnerabilities.
By understanding this flow and correctly configuring your client in Keycloak, your application can seamlessly leverage Keycloak's self-registration and authentication capabilities.
11. Advanced Customization and Theming
The default Keycloak login and registration pages are functional but often don't align with an application's branding or user experience expectations. Keycloak offers powerful theming capabilities, allowing you to completely customize the look and feel of these pages, providing a consistent brand experience for your users.
11.1. Customizing the Keycloak Login/Registration Pages (HTML, CSS) Keycloak themes are composed of FreeMarker Templates (FTL for HTML), CSS stylesheets, JavaScript files, and images. Each realm can have its own theme, which can inherit from the base Keycloak theme, allowing for incremental customization.
Steps to Create a Custom Theme:
- Locate the Themes Directory: On your Keycloak server, navigate to the
themesdirectory (e.g.,KEYCLOAK_HOME/themes). - Create Your Custom Theme Directory Structure:
- Create a new directory for your theme, e.g.,
my-app-theme. - Inside
my-app-theme, create subdirectories for different theme types:login,account,admin,email. For self-registration, we focus onloginandemail. - The structure will look like:
KEYCLOAK_HOME/themes/ └── my-app-theme/ ├── login/ │ ├── theme.properties │ ├── resources/ │ │ ├── css/ │ │ │ └── custom.css │ │ ├── img/ │ │ │ └── logo.png │ │ └── js/ │ │ └── custom.js │ └── templates/ │ ├── login.ftl │ ├── register.ftl │ ├── info.ftl │ └── ... (other FTL files) └── email/ ├── theme.properties └── templates/ ├── email-verification.ftl └── ...
- Create a new directory for your theme, e.g.,
- Define
theme.properties: Inmy-app-theme/login/theme.properties, define the theme's properties.properties parent=keycloak name=My App Theme Loginparent=keycloakis crucial. It means your theme inherits from the defaultkeycloaktheme. If Keycloak can't find a template or resource in your custom theme, it will fall back to the parent theme, simplifying customization (you only override what you need).
- Override Templates (e.g.,
register.ftl):- To customize the registration page, copy
register.ftlfromKEYCLOAK_HOME/themes/keycloak/login/templates/toKEYCLOAK_HOME/themes/my-app-theme/login/templates/. - Now, edit
my-app-theme/login/templates/register.ftl. You can add your logo, change the layout, modify text, and integrate custom fields you defined with User Profile. FreeMarker syntax allows conditional logic, loops, and accessing variables passed by Keycloak (e.g.,${url.resourcesPath},${msg("register")}). - Key variables in FTL:
${url.resourcesPath}: Path to your theme'sresourcesdirectory.${msg("key")}: Retrieves localized messages frommessages.properties.${kc.locale.currentLanguage.displayName}: Current language name.${kc.form.login.username}: Pre-filled username.${kc.attribute.phone_number.input}: Renders the input field for thephone_numberattribute defined in User Profile.${kc.errors.messages?has_content}: Checks for errors.
- To customize the registration page, copy
- Add Custom CSS (
custom.css):- Create
KEYCLOAK_HOME/themes/my-app-theme/login/resources/css/custom.css. - Add your CSS rules here to override default Keycloak styles or introduce new ones.
- Link this CSS in your
register.ftl(or intemplate.ftlif you're customizing the base layout). The defaulttemplate.ftl(which most other FTLs include) already links abase.cssandmain.css. You can add yourcustom.cssafter these to ensure your styles take precedence.
- Create
- Add Custom Images (
logo.png):- Place your images in
KEYCLOAK_HOME/themes/my-app-theme/login/resources/img/. - Reference them in your FTL templates using
${url.resourcesPath}/img/logo.png.
- Place your images in
11.2. Creating Custom Themes for Realms After creating your theme files, you need to tell Keycloak to use them.
- Navigate to Realm settings -> Themes: In your Keycloak Admin Console, ensure you are in
my-app-realm. Click on "Realm settings" then the "Themes" tab. - Select Your Theme:
- Login Theme: Select
my-app-themefrom the dropdown list. This applies your custom theme to all login, registration, and password reset pages for this realm. - Account Theme: Select
my-app-themefor the Account Console. - Email Theme: Select
my-app-themefor email templates (as discussed in Section 7.3). - Admin Console Theme: Leave as
keycloak(this is for the Admin Console itself, not for end-users).
- Login Theme: Select
- Save Changes: Click "Save."
Now, when you access your realm's login or registration page, you should see your custom branding and layout.
11.3. Localization of the Registration Page Keycloak supports multiple languages. You can provide translations for your custom text and override default Keycloak messages.
- Create
messages_en.properties(and other languages):- In your theme directory, create a
messagesdirectory:KEYCLOAK_HOME/themes/my-app-theme/login/messages/. - Create
messages_en.properties(for English),messages_es.properties(for Spanish), etc. - Add your custom messages:
properties # messages_en.properties myCustomRegistrationHeader=Register for My App termsAndConditionsAgreement=I agree to the <a href="{0}" target="_blank">Terms and Conditions</a>. phoneNumber=Phone Number invalidUsernameMessage=Username can only contain letters, numbers, periods, underscores, and hyphens. - In your FTL templates, use
${msg("myCustomRegistrationHeader")}. Keycloak will automatically pick the correct language file based on the user's browser settings or explicit language selection. - You can also override existing Keycloak messages by using the same key (e.g.,
register).
- In your theme directory, create a
- Enable Internationalization: In
Realm settings -> Localization, ensure "User-managed locales" isOnand select the "Supported Locales" for your realm.
11.4. Branding Consistency Maintaining consistent branding across all user-facing components (your application, Keycloak login/registration, account console, emails) is vital for a professional and trustworthy user experience.
- Logos and Favicons: Ensure your logos and favicons are updated in your custom theme.
- Color Palette and Fonts: Use your brand's official color palette and fonts in your CSS.
- Tone of Voice: Reflect your brand's tone in all messages, error messages, and email templates.
- Accessibility: Remember to make your custom pages accessible (ARIA attributes, proper contrast, keyboard navigation).
By investing time in advanced theming and localization, you transform Keycloak from a generic authentication provider into a seamlessly integrated and branded part of your application ecosystem, enhancing user trust and satisfaction.
12. Troubleshooting Common Self-Registration Issues
Even with careful configuration, issues can arise during the self-registration process. Understanding how to diagnose and resolve these problems is crucial for maintaining a smooth user experience and a reliable IAM system. Keycloak's logging, coupled with systematic debugging, will be your primary tools.
12.1. Emails Not Sending This is perhaps the most common issue when enabling email verification.
- Symptoms: Users register, are told to verify their email, but never receive the email. No email in spam folder either.
- Diagnosis:
- Check Keycloak Admin Console - Email Tab:
- Go to
Realm settings -> Email. - Click "Send Test Email" to an external address (e.g., Gmail, Outlook). Does it arrive?
- If the test fails, Keycloak usually provides an error message in the Admin Console.
- Go to
- Keycloak Server Logs:
- Inspect Keycloak's server logs (e.g.,
KEYCLOAK_HOME/logs/keycloak.logor Docker logsdocker logs <keycloak-container-id>). Look for messages related tojakarta.mailorjavax.mailerrors, SMTP connection issues, authentication failures, or hostname resolution problems.
- Inspect Keycloak's server logs (e.g.,
- SMTP Server Status:
- Is your SMTP server actually running and accessible from the Keycloak host?
- Are there any firewall rules (on Keycloak host, network, or SMTP server) blocking outbound connections from Keycloak to the SMTP port (587 or 465)?
- Are the SMTP username and password correct? Is it an app-specific password if using services like Gmail?
- Are the
SMTP HostandSMTP Portcorrect? - Is
Enable SSLorEnable STARTTLScorrectly configured based on your SMTP provider's requirements? (Usually one or the other, not both).
- Email Provider Logs: If you're using a service like SendGrid or Mailgun, check their internal logs for any rejected emails or connection attempts from Keycloak.
- Check Keycloak Admin Console - Email Tab:
- Resolution: Correct the SMTP settings in Keycloak, adjust firewall rules, ensure SMTP server availability, and verify credentials.
12.2. Registration Form Errors Users encounter errors when submitting the registration form.
- Symptoms: "Invalid username," "Email already exists," "Password does not meet policy requirements," "Field is required," or "Recaptcha failed."
- Diagnosis:
- Admin Console - User Profile:
- Go to
Realm settings -> User Profile. Review your attribute definitions. Are therenot-nullvalidations for fields the user left empty? Arelengthorpatternvalidations too strict?
- Go to
- Admin Console - Password Policy:
- Go to
Realm settings -> Security Defenses -> Password Policy. Are the policies too strict or conflicting? Ensure users are aware of the requirements.
- Go to
- Admin Console - Authentication Flows:
- Go to
Authentication -> Flows -> Registration. - Is
Registration Recaptchaenabled and required? If so, is reCAPTCHA properly configured inRealm settings -> Loginwith valid Site and Secret Keys? Is theSite Keyvalid for the domain Keycloak is running on (e.g.,localhostfor development)?
- Go to
- Keycloak Server Logs: Look for
WARNorERRORmessages related to form submissions, validation failures, or reCAPTCHA verification issues.
- Admin Console - User Profile:
- Resolution: Adjust User Profile validations, relax password policies (if appropriate), re-check reCAPTCHA keys and domain registration, or provide clearer error messages in your custom theme to guide users.
12.3. Users Not Appearing / Not Able to Log In A user successfully completes the registration form, but their account isn't visible in the Admin Console, or they cannot log in.
- Symptoms: User registers, gets a success message, but doesn't appear in the "Users" list. Or they appear but cannot log in.
- Diagnosis:
- Admin Console - Users:
- Perform a thorough search in
Usersfor the newly registered user. - Check their
Detailstab: Is "Enabled" set toOn? Is "Email Verified" set toOn(if email verification isRequiredand they haven't clicked the link yet, their account might be implicitly disabled)?
- Perform a thorough search in
- Admin Console - Authentication Flows:
- Review the
Registrationflow carefully. Is there an execution that might be failing silently or preventing the user creation (e.g., a custom authenticator)? - Is "Verify Email"
Required? If so, the user won't be able to log in until their email is verified.
- Review the
- Keycloak Server Logs: Crucial here. Look for
ERRORmessages during the registration event, database connection issues, or issues with user storage. A user might not be appearing if the transaction failed to commit to the database. - Database Connection: Is Keycloak's database connection stable? Are there any errors related to database write operations?
- Admin Console - Users:
- Resolution: Manually enable the user or verify their email if needed. Debug the authentication flow for any failing steps. Resolve database connectivity issues.
12.4. Redirect Issues After Registration After completing registration, the user is redirected to an incorrect page, a blank page, or an error page.
- Symptoms: "Invalid Redirect URI" errors, unexpected page after registration, browser loop.
- Diagnosis:
- Admin Console - Clients:
- Go to
Clientsand select the client your application is using. Redirect URIs: This is the most common culprit. Ensure theredirect_uriconfigured in your client application exactly matches one of theRedirect URIsspecified for the client in Keycloak. Pay attention to trailing slashes, hostnames (e.g.,localhostvs127.0.0.1), and protocols (HTTP vs HTTPS). Use*for paths judiciously in development.Web Origins: Ensure this is also correctly configured.
- Go to
- Client Application Configuration: Verify that your client application is requesting the correct
redirect_uriin its OIDC authorization request. - Keycloak Server Logs: Look for "Invalid Redirect URI" errors, which will clearly state what Keycloak expected and what it received.
- Admin Console - Clients:
- Resolution: Correct the
Redirect URIsin the Keycloak client configuration and/or in your client application's OIDC request.
12.5. Logging and Debugging in Keycloak For complex issues, increasing Keycloak's logging verbosity is often necessary.
- Standalone Mode: Modify
KEYCLOAK_HOME/conf/log.properties(orlog4j2.xmlin older versions) to set the logging level for specific packages (e.g.,org.keycloak.authenticationtoDEBUG,jakarta.mailtoDEBUG). Restart Keycloak. - Docker/Kubernetes: Modify the logging configuration through environment variables or by mounting a custom
log.propertiesfile. - Keycloak's Admin Events: Under
Events -> Admin Events, you can see actions performed by administrators, which can sometimes reveal misconfigurations.
By systematically approaching troubleshooting using these methods, you can efficiently identify and resolve most self-registration related issues, ensuring a robust and reliable authentication experience for your users.
13. Best Practices for Production Deployment
Deploying Keycloak for self-registration in a production environment demands careful consideration beyond just functional setup. Scalability, resilience, security, and ongoing maintenance are critical to ensure a stable and performant identity management system.
13.1. Load Balancing Keycloak For high availability and scalability, a single Keycloak instance is insufficient for production. Keycloak should be deployed in a cluster behind a load balancer.
- Architecture: Multiple Keycloak nodes run concurrently, sharing a common database.
- Load Balancer: Use a reverse proxy like Nginx, HAProxy, AWS ALB/NLB, Azure Application Gateway, or Google Cloud Load Balancer.
- Sticky Sessions (Session Affinity): Crucial for Keycloak. Ensure your load balancer is configured for sticky sessions (based on a cookie, usually
KEYCLOAK_SESSIONorAUTH_SESSION_ID). Without sticky sessions, a user's session might hop between Keycloak nodes, leading to frequent re-authentication prompts or session loss. - Health Checks: Configure the load balancer to perform health checks on Keycloak nodes (e.g., against the
/health/liveor/health/readyendpoints in newer Keycloak versions) to automatically remove unhealthy nodes from rotation.
- Sticky Sessions (Session Affinity): Crucial for Keycloak. Ensure your load balancer is configured for sticky sessions (based on a cookie, usually
- Cloud Deployments: Cloud providers offer managed load balancers that simplify this setup. For Kubernetes, an Ingress controller handles routing and potentially session affinity.
13.2. Database Considerations Keycloak relies heavily on a relational database to store all its configuration, user data, sessions, and events.
- Production-Grade Databases: Never use the H2 database (default for dev mode) in production. Choose a robust, highly available database like PostgreSQL, MySQL, Oracle, or SQL Server. PostgreSQL is often recommended and widely used with Keycloak.
- High Availability: Configure your database for high availability (e.g., master-replica setup with failover, cloud-managed database services like AWS RDS Multi-AZ) to prevent a single point of failure.
- Connection Pooling: Keycloak uses a connection pool to manage database connections. Optimize its settings (min/max pool size, connection timeout) based on your database capacity and expected load.
- Backups: Implement regular, automated backups of your Keycloak database. Test your restoration process periodically.
13.3. Monitoring and Alerting Proactive monitoring is essential to detect issues before they impact users.
- Keycloak Metrics: Keycloak exposes various metrics (e.g., JVM metrics, database connection pool, session counts, request latency, error rates) via standard interfaces like JMX or Prometheus.
- Monitoring Tools: Integrate Keycloak metrics with monitoring systems like Prometheus/Grafana, Datadog, New Relic, or cloud-native monitoring solutions.
- Alerting: Set up alerts for critical thresholds (e.g., high error rates, database connection failures, low disk space, high CPU/memory usage on Keycloak nodes, failed login/registration attempts).
- Log Aggregation: Centralize Keycloak server logs and admin/user events into a log aggregation system (ELK stack, Splunk) for easier searching, analysis, and auditing.
13.4. Backup Strategies A comprehensive backup strategy is crucial for disaster recovery.
- Database Backups: As mentioned, regular backups of the Keycloak database are paramount. This is where all your realm configurations, users, and roles reside.
- Configuration Backups: While the database holds most configuration, also back up Keycloak's server configuration files (e.g.,
conf/keycloak.conf,conf/log.propertiesin newer versions, orstandalone.xmlin older WildFly-based versions). - Theme Backups: If you have custom themes, back up your
themesdirectory. - Automated and Tested: Automate your backups and regularly test the restoration process to ensure you can recover from a data loss event.
13.5. Regular Security Audits Keycloak is a critical security component. Regular audits are vital.
- Configuration Review: Periodically review your realm settings, authentication flows, client configurations, and user profile settings. Ensure they align with current security policies and best practices.
- Vulnerability Scanning: Conduct regular vulnerability scans of your Keycloak deployment and the underlying infrastructure.
- Penetration Testing: Engage external security experts to perform penetration tests against your Keycloak instance.
- Update Keycloak: Keep Keycloak updated to the latest stable versions. Each release often includes security fixes and performance improvements. Follow the official release notes and upgrade guides.
- Security Headers: Configure appropriate security headers on your reverse proxy or Keycloak itself (e.g.,
Content-Security-Policy,X-Frame-Options,Strict-Transport-Security) to mitigate common web vulnerabilities.
By adhering to these production best practices, you can build a highly available, scalable, secure, and maintainable Keycloak deployment that effectively handles user self-registration and overall identity management for your applications.
14. Strategic Considerations and APIPark Integration
Implementing self-registration with Keycloak is a significant step towards a modern and efficient identity management strategy. However, in a broader enterprise context, identity management often intersects with API management. Understanding these strategic connections, and how platforms like APIPark can complement Keycloak, is essential for a holistic architecture.
14.1. When is Self-Registration Appropriate? While powerful, self-registration isn't a one-size-fits-all solution. Consider its appropriateness based on your application's nature:
- Public-facing applications (e.g., e-commerce, SaaS platforms): Self-registration is almost always desirable, as it reduces friction for new customers and enables rapid user growth.
- Internal enterprise applications: Often, internal users are provisioned through centralized HR systems or identity directories (like LDAP/Active Directory) via Keycloak's user federation. Self-registration might be used for specific internal tools that need less formal onboarding or for temporary access.
- B2B Portals: Self-registration might be combined with an approval workflow, where users sign up but require administrator approval before gaining full access. This balances user convenience with business control.
14.2. Balancing User Experience and Security The tension between ease of use and robust security is perpetual. * Too much friction: Overly complex forms, excessive verification steps, or extremely strict password policies can lead to high abandonment rates during registration. * Too little security: An overly simple process can invite bots, spam, and compromise user data.
The key is to find the right balance for your specific application's risk profile: * Essential security first: Always implement email verification and strong password policies. * Layered defense: Add CAPTCHA, but don't rely solely on it. Combine with rate limiting. * Progressive profiling: Collect minimal data at registration and gather more information as the user interacts further with the application. * Clear communication: Provide clear, user-friendly error messages and instructions.
14.3. Scalability Implications As your user base grows, your Keycloak deployment must scale. * Keycloak Clustering: As discussed in production best practices, clustering Keycloak nodes behind a load balancer is crucial. * Database Scalability: Your chosen database must be able to handle increased load from user lookups, session management, and event logging. * Email Service: Ensure your email provider can handle the volume of verification emails during peak registration periods. * User Federation Scalability: If federating users from external directories, ensure those directories can also scale.
14.4. How APIPark Can Complement Keycloak in a Broader Enterprise Context
Keycloak excels at managing who a user is (authentication) and what they are allowed to do (authorization) within an application context. However, modern architectures increasingly rely on APIs to connect services and deliver data. This is where an advanced AI Gateway & API Management Platform like APIPark becomes invaluable, forming a powerful synergy with Keycloak.
Imagine a scenario where your application, secured by Keycloak's self-registered users, consumes or exposes a multitude of APIs. Keycloak ensures only authenticated users access your application. But what about the APIs themselves? APIPark fills this critical gap by providing comprehensive API governance.
Here’s how APIPark complements Keycloak:
- API Protection Beyond Identity: Keycloak authenticates the user or client application. APIPark sits in front of your backend APIs, managing access to those APIs. While Keycloak verifies the user's identity, APIPark can enforce rate limits, apply sophisticated traffic policies, and provide analytics for API consumption, ensuring the APIs are protected from abuse, even by authenticated users or applications.
- Unified API Management: Your Keycloak-secured application might interact with various internal and external APIs (e.g., payment gateways, microservices, AI models). APIPark provides a unified platform to manage all these APIs, abstracting away their complexities. This is especially relevant with APIPark's "Quick Integration of 100+ AI Models" and "Unified API Format for AI Invocation," allowing your Keycloak-authenticated applications to seamlessly access diverse AI capabilities through a standardized interface.
- API Security & Authorization: After a user self-registers and logs in via Keycloak, their
access_tokencan be used by APIPark to verify the user's identity and apply granular API-level authorization policies. APIPark's "API Resource Access Requires Approval" feature adds an additional layer of control, where even if a user is authenticated, they may still need explicit approval to subscribe to and invoke specific APIs. This complements Keycloak's role-based access control by adding another layer of API-specific subscription management. - Developer Portal and Sharing: APIPark's "API Service Sharing within Teams" and developer portal capabilities can be leveraged for internal developers or partners who are also Keycloak-authenticated users. Keycloak manages their identity, and APIPark provides a centralized catalog for them to discover, test, and subscribe to APIs, streamlining developer onboarding and collaboration.
- Performance and Monitoring for APIs: Keycloak ensures your identity layer is performing. APIPark ensures your API layer is performing. With "Performance Rivaling Nginx" and "Detailed API Call Logging," APIPark provides the necessary infrastructure for high-throughput API traffic and in-depth visibility into API usage, error rates, and performance, which is distinct from Keycloak's identity-specific event logging.
- Multi-tenancy and Scalability for API Consumers: If your Keycloak realm supports multiple client applications or even different departments, APIPark can extend this multi-tenancy to API consumption. Its "Independent API and Access Permissions for Each Tenant" feature allows different teams or applications (authenticated via Keycloak) to have independent API access policies and data, while sharing the underlying API infrastructure, optimizing resource utilization.
In summary, while Keycloak is the backbone of user identity and authentication, APIPark acts as the intelligent gateway and management layer for your APIs. It ensures that after a user has successfully self-registered and authenticated with Keycloak, their interactions with your application's underlying APIs are secure, controlled, performant, and well-managed. Together, they form a robust security and operational stack for modern digital platforms.
15. Conclusion
Establishing a well-configured self-registration system in Keycloak is a critical component of any modern application's user experience and security posture. Throughout this comprehensive guide, we have traversed the entire spectrum of this process, from the foundational setup to advanced customizations and strategic considerations.
We began by understanding the fundamental importance of self-registration, highlighting its benefits in enhancing user experience, reducing administrative overhead, and fostering scalability. We then walked through the practical steps of setting up a dedicated Keycloak realm, enabling the core self-registration functionality, and performing an initial verification.
A significant portion of our journey focused on customization – refining the registration form with the powerful User Profile feature, implementing crucial authentication flows for email verification and custom T&C steps, and configuring robust email services. We then delved into the indispensable aspect of security, integrating reCAPTCHA, enforcing strong password policies, and considering advanced measures like IP rate limiting and MFA.
Furthermore, we explored the crucial integration with client applications using OpenID Connect, ensuring that your application can seamlessly leverage Keycloak's identity services. Advanced theming and localization techniques were discussed to provide a branded and consistent user experience. We also equipped you with strategies to troubleshoot common issues and outlined critical best practices for deploying Keycloak in a production environment, emphasizing scalability, monitoring, and security audits.
Finally, we explored the broader strategic context, discussing the nuanced appropriateness of self-registration and, significantly, how a dedicated AI Gateway & API Management Platform like APIPark can powerfully complement Keycloak. While Keycloak masterfully handles user identity and authentication, APIPark provides the vital layer of governance, security, and performance management for the APIs that your Keycloak-authenticated applications consume or expose, creating a truly robust and scalable digital ecosystem.
By diligently following the steps and insights provided in this guide, you are now well-equipped to design, implement, and maintain a secure, efficient, and user-friendly self-registration system with Keycloak. This empowers your users with seamless onboarding and provides your organization with a solid foundation for identity and access management in the ever-evolving digital landscape.
16. Frequently Asked Questions (FAQs)
Here are 5 frequently asked questions related to Keycloak self-registration:
1. Q: Why isn't the "Register" link appearing on my Keycloak login page after I enabled "User Registration"? A: This is a common issue often due to incorrect realm context or caching. First, ensure you are in the correct realm (e.g., my-app-realm) in the Admin Console and that Realm settings > Login > User Registration is explicitly set to On and saved. Then, clear your browser's cache and cookies for the Keycloak domain, or try accessing the login page in an incognito/private browser window. Sometimes, if you have heavily customized your login.ftl template in a custom theme, you might have inadvertently removed or hidden the default registration link. Verify your custom login.ftl still includes url.registrationUrl for rendering the link.
2. Q: My users aren't receiving email verification links. How do I troubleshoot this? A: Email delivery issues are frequently encountered. Start by checking your Realm settings > Email configuration. Use the "Send Test Email" feature to verify your SMTP server settings (host, port, username, password, SSL/STARTTLS). If the test email fails, inspect your Keycloak server logs for detailed error messages (e.g., jakarta.mail errors, authentication failures, connection timeouts). Also, ensure there are no firewall rules blocking Keycloak from connecting to your SMTP server. Lastly, check the recipient's spam folder and consider configuring SPF, DKIM, and DMARC records for your sender domain to improve deliverability.
3. Q: How can I add custom fields (like phone number or company name) to the Keycloak self-registration form? A: For Keycloak versions 17 and later, the recommended method is using the "User Profile" feature. Navigate to Realm settings > User Profile and define your custom attributes in the JSON configuration. For each attribute, set "gui.registration-profile": "true" to make it appear on the registration form, and "gui.registration-required": "true" if it's mandatory. You can also add validations (e.g., pattern, length) for data integrity. For older Keycloak versions, this requires more manual intervention through "Registration Profile" authenticators in the authentication flow.
4. Q: Is it possible to automatically assign roles or groups to users after they self-register? A: Yes, this is a common requirement. The most straightforward way is to use the "Add User to Group" authenticator within your Keycloak "Registration" authentication flow. In the Admin Console, go to Authentication > Flows > Registration, add the "Add User to Group" execution, and then configure it to add users to your desired group(s) (which must be pre-created under the Groups section). You can then assign roles to these groups, and newly registered users will automatically inherit those roles.
5. Q: What measures can I take to prevent bot registrations and secure the self-registration process in Keycloak? A: Several layers of security are crucial. Firstly, integrate a CAPTCHA mechanism like Google reCAPTCHA by enabling it in Realm settings > Login (with your Site and Secret keys) and setting the "Registration Recaptcha" execution to Required in the "Registration" authentication flow. Secondly, enforce strong password policies via Realm settings > Security Defenses > Password Policy. Thirdly, implement email verification to ensure users own their email addresses. For an additional layer of protection, consider using an external reverse proxy or API Gateway (like Nginx or APIPark) to implement IP-based rate limiting on the registration endpoint, which can help mitigate brute-force and denial-of-service attempts.
🚀You can securely and efficiently call the OpenAI API on APIPark in just two steps:
Step 1: Deploy the APIPark AI gateway in 5 minutes.
APIPark is developed based on Golang, offering strong product performance and low development and maintenance costs. You can deploy APIPark with a single command line.
curl -sSO https://download.apipark.com/install/quick-start.sh; bash quick-start.sh

In my experience, you can see the successful deployment interface within 5 to 10 minutes. Then, you can log in to APIPark using your account.

Step 2: Call the OpenAI API.