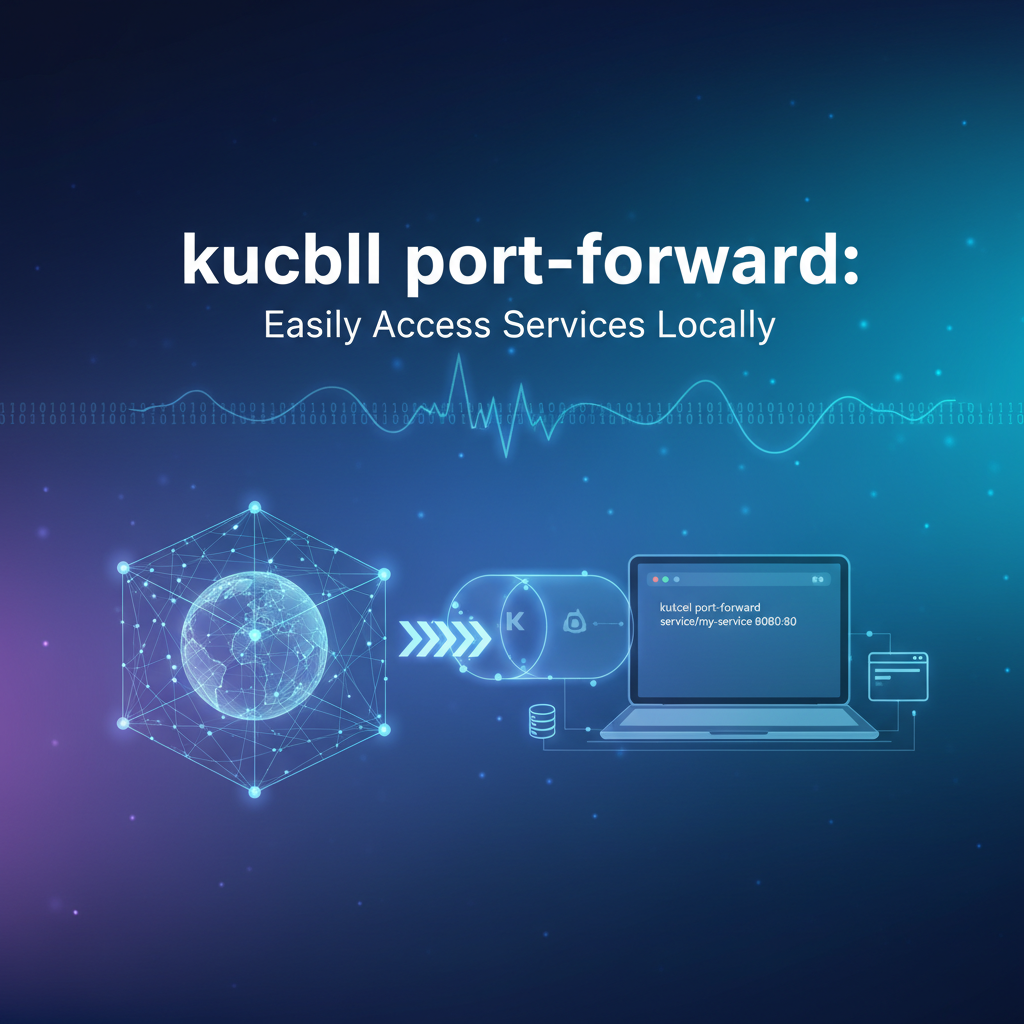
kubectl port-forward: Easily Access Services Locally


In the complex tapestry of modern cloud-native development, Kubernetes stands as the ubiquitous orchestrator, managing vast fleets of containers and services with unparalleled efficiency. However, for developers working on the front lines, this powerful abstraction sometimes introduces a challenge: how do you seamlessly connect your local development environment to a service running deep within a Kubernetes cluster? Whether you're debugging a tricky API endpoint, testing a new feature against a staging database, or simply needing to interact with a specific microservice without exposing it globally, the inherent isolation of Kubernetes can feel like a formidable barrier. This is precisely where kubectl port-forward emerges as an indispensable tool, acting as a secure, ephemeral bridge between your local machine and any pod or service within your cluster.
The journey of developing and deploying applications in a Kubernetes-centric world often involves a delicate dance between local iteration and remote validation. Developers spend countless hours crafting code on their workstations, and while unit tests and integration tests cover much ground, there's an undeniable need to see how the application behaves when interacting with its true dependencies in a cluster environment. Traditional methods of exposing services, such as NodePort, LoadBalancer, or Ingress, are designed for production-grade, public access, bringing with them a raft of security considerations and configuration overhead that are simply overkill for a quick debugging session or local feature test. kubectl port-forward cuts through this complexity, providing a direct, point-to-point tunnel that allows you to treat a remote service as if it were running on localhost. This capability is not just a convenience; it's a fundamental enabler for efficient development workflows, allowing teams to maintain agility and rapid iteration cycles even when operating within sophisticated, distributed architectures. Without it, the overhead of testing and debugging internal services would significantly impede productivity, turning what should be a straightforward task into a convoluted networking challenge. This article will delve deep into the mechanics, practical applications, advanced techniques, and critical considerations surrounding kubectl port-forward, ensuring you can harness its full power to streamline your Kubernetes development experience. We will explore its syntax, walk through real-world scenarios, discuss its security implications, and ultimately position it within the broader landscape of Kubernetes service exposure, helping you understand when and how to leverage this vital command effectively.
Understanding Kubernetes Service Exposure
Before diving into the specifics of kubectl port-forward, it's crucial to understand the foundational ways Kubernetes services are typically exposed, and why these methods, while essential for production, fall short for local development and debugging. Kubernetes, by design, provides a robust and isolated environment for running containerized applications. When you deploy an application, it typically runs within one or more Pods. To make these Pods accessible, Kubernetes uses Service objects. These Services abstract away the dynamic nature of Pods (which can be created, destroyed, and rescheduled) and provide a stable network endpoint.
There are several standard types of Kubernetes Services, each with a distinct purpose:
- ClusterIP: This is the default and most common Service type. A ClusterIP Service exposes the Service on an internal IP address within the cluster. This means the Service is only reachable from other Pods or nodes within the same cluster. It's perfect for internal communication between microservices, where one service needs to call another without external exposure. However, precisely because it's internal, a local developer workstation cannot directly access a ClusterIP Service without some form of tunnelling.
- NodePort: A NodePort Service exposes the Service on a static port on each Node's IP address. When a Service is exposed as a NodePort, Kubernetes reserves a port (typically in the 30000-32767 range) on every node in the cluster. Any traffic sent to that port on any node's IP will be routed to the Service. While this allows external access (assuming firewall rules permit), it's generally not recommended for production due to the arbitrary port numbers, potential port conflicts, and the need to manage node IPs directly. For local development, it still requires knowing a node's IP and a potentially unpredictable port, making it less convenient for ad-hoc access.
- LoadBalancer: This Service type is typically used in cloud environments (like AWS EKS, Google GKE, Azure AKS). When you create a LoadBalancer Service, Kubernetes provisions an external cloud load balancer (e.g., an AWS ELB, a Google Cloud Load Balancer) and assigns it an external IP address. This load balancer then routes traffic to your Service. LoadBalancer Services are excellent for exposing public-facing applications in a scalable and reliable manner. However, they incur costs, require cloud provider integration, and are heavy-handed for local development needs where you only want temporary access.
- ExternalName: This type of Service maps a Service to a DNS name, essentially acting as an alias. It's used for services that live outside the cluster, providing a consistent way for in-cluster services to refer to external resources by name. It does not provide any form of service exposure for local access.
Why these don't suit local development:
While these Service types are fundamental for production deployments, they often create friction for developers. * Isolation: The primary issue is the inherent network isolation of Kubernetes. Pods and Services reside within their own network plane, separate from your local machine's network. * Overhead: Setting up a NodePort or LoadBalancer for every single microservice you might want to debug locally would be cumbersome, resource-intensive, and would clutter your cluster's networking configuration. * Security: Exposing internal services via NodePort or LoadBalancer, even temporarily, broadens the attack surface and can pose security risks if not managed meticulously. For sensitive internal APIs or databases, this is often unacceptable. * Ephemeral Nature of Debugging: Local development and debugging sessions are often short-lived and highly specific. You might need to access a specific database Pod, or a particular instance of a microservice, for just a few minutes. Configuring a permanent exposure mechanism for such transient needs is inefficient.
This is where kubectl port-forward shines. It sidesteps the complexities of cluster-wide service exposure by creating a direct, secure tunnel between a port on your local machine and a port on a specific Pod or Service within the Kubernetes cluster. It's a developer's lifeline, offering on-demand, private access without altering the cluster's network configuration or incurring the overhead and security implications of public exposure mechanisms. It's a targeted tool for a targeted problem: bringing remote services within arm's reach of your localhost for testing, debugging, and interactive development. It respects the isolation of the cluster while providing the necessary flexibility for iterative software development, proving itself invaluable in scenarios where a full-fledged API gateway for production traffic would be overkill or inappropriate.
The Anatomy of kubectl port-forward
kubectl port-forward is a powerful and deceptively simple command that creates a direct, secure tunnel from your local machine to a specified resource within your Kubernetes cluster. Understanding its syntax and the underlying mechanism is key to wielding it effectively. At its core, it allows you to access a service running inside your cluster as if it were a process running on your localhost.
The basic syntax for kubectl port-forward is as follows:
kubectl port-forward <resource-type>/<resource-name> <local-port>:<remote-port> [-n <namespace>]
Let's break down each component of this command:
<resource-type>: This specifies the type of Kubernetes resource you want to forward to. Common resource types include:pod: For forwarding to a specific Pod. This is often the most direct and common use case.serviceorsvc: For forwarding to a Kubernetes Service. When you forward to a Service,kubectlwill automatically pick one of the Pods backing that Service and forward traffic to it. This is useful when you don't care which specific Pod instance you hit, and prefer the load-balancing behavior provided by the Service.deploymentordeploy: For forwarding to a Deployment.kubectlwill pick one of the Pods managed by the Deployment and forward traffic to it. Similar toserviceforwarding, this provides a level of abstraction.replicasetorrs: Similar todeployment, forwards to a Pod managed by a ReplicaSet.
<resource-name>: This is the actual name of the specific resource you want to connect to. For example, if you have a Pod namedmy-app-pod-abc12, you would usemy-app-pod-abc12. If you have a Service namedmy-service, you would usemy-service.<local-port>: This is the port number on your local machine that you want to use to access the remote service. When you send traffic to this local port,kubectlwill tunnel it to the remote service. You can choose any available port on your local machine.<remote-port>: This is the port number on the remote Pod or Service that the application is listening on. For instance, if your web application inside the Pod is listening on port 8080, then8080would be your remote port. It's crucial that the remote application is actually listening on this port.[-n <namespace>]: This optional flag specifies the Kubernetes namespace where the resource resides. If you omit this flag,kubectlwill default to the currently configured namespace in yourkubeconfig(oftendefault). It's a best practice to always specify the namespace explicitly to avoid ambiguity and accidental forwarding to the wrong resource.
Simple, Clear Examples:
Let's illustrate with some practical examples:
Example 1: Forwarding to a specific Pod
Suppose you have a Pod named my-web-app-789abcde-fghij in the development namespace, and the application inside that Pod is listening on port 8080. You want to access it from your local machine on port 3000.
kubectl port-forward pod/my-web-app-789abcde-fghij 3000:8080 -n development
Now, you can open your web browser and navigate to http://localhost:3000, and your request will be securely tunneled to port 8080 of the my-web-app Pod in the development namespace.
Example 2: Forwarding to a Service
Imagine you have a Service named my-backend-service in the production namespace, and this Service targets Pods that are listening on port 5000. You want to access this service locally on port 8000.
kubectl port-forward service/my-backend-service 8000:5000 -n production
When you hit http://localhost:8000, kubectl will pick one of the healthy Pods behind my-backend-service and forward your traffic there. This is more robust if the specific Pod you initially targeted dies, as the Service abstraction can redirect to another.
Example 3: Forwarding to a Deployment
You have a Deployment named database-deploy in the data namespace, and the database within its Pods listens on port 5432 (PostgreSQL default). You want to connect your local SQL client to it via local port 5432.
kubectl port-forward deployment/database-deploy 5432:5432 -n data
Now, your local PostgreSQL client can connect to localhost:5432 as if the database were running directly on your machine.
The Underlying Mechanism:
When you execute kubectl port-forward, several things happen under the hood:
- Kubernetes API Server Interaction: Your
kubectlclient communicates with the Kubernetes API server, requesting to establish a connection to the specified resource. - SPDY Stream: The API server then establishes a secure SPDY (or HTTP/2) stream to the kubelet agent running on the node where the target Pod is located.
- Kubelet's Role: The kubelet, responsible for managing Pods on its node, receives this request. It then opens a connection to the specified port inside the target Pod.
- Bidirectional Tunnel: A bidirectional data stream is established: your local machine's specified port is effectively mapped directly to the remote Pod's specified port through this secure tunnel. All traffic sent to
localhost:<local-port>is forwarded through the tunnel to the Pod, and all responses from the Pod are sent back through the tunnel to your local machine.
This entire process is secure, leveraging the same authentication and authorization mechanisms you use to interact with your Kubernetes cluster via kubectl. Only users with appropriate permissions to access the target Pod or Service can initiate a port-forward.
Managing the port-forward Process:
- Blocking Command: By default,
kubectl port-forwardis a blocking command. It will run in your terminal and print output until you manually stop it by pressingCtrl+C. - Backgrounding: For convenience, especially when running multiple port-forwards, you can run the command in the background by appending an
&at the end:bash kubectl port-forward service/my-backend-service 8000:5000 -n production &Note that when run in the background, you won't see its output directly. - Stopping a Background Process: If you run
port-forwardin the background, you'll need to find its process ID (PID) and kill it. You can often usejobsto list background processes orps aux | grep "kubectl port-forward"to find it, thenkill <PID>.
Error Handling:
Common issues include: * Port already in use: If <local-port> is already being used by another application on your machine, kubectl will report an error like "unable to listen on port X: listen tcp 127.0.0.1:X: bind: address already in use." You'll need to choose a different local port or free up the existing one. * Resource not found: If the <resource-type>/<resource-name> combination is incorrect or the resource doesn't exist in the specified namespace, kubectl will complain that it "couldn't find a port-forward target." * Remote port not listening: If the application inside the Pod is not listening on <remote-port>, the connection might establish, but you won't get a response when you try to access the service, or you might see connection refused errors.
By understanding these components and mechanisms, you gain the confidence to troubleshoot and effectively utilize kubectl port-forward as a cornerstone of your Kubernetes development toolkit, allowing seamless local interaction with remote services without the complexities of public exposure.
Practical Use Cases and Scenarios
kubectl port-forward is not merely a theoretical concept; it's a workhorse in the daily life of a Kubernetes developer. Its ability to create an ad-hoc, secure tunnel empowers a multitude of practical scenarios that significantly accelerate development, debugging, and testing cycles. From integrating local code with remote services to peering into the operational details of a running application, port-forward provides invaluable local access to components within your Kubernetes cluster.
Local Development & Debugging: The Cornerstone
The most prominent use case for kubectl port-forward is to bridge the gap between your local development environment and services running in a Kubernetes cluster. This is particularly crucial in microservices architectures where your local service might depend on other services or databases that reside exclusively within the cluster.
- Connecting a Local IDE Debugger to a Remote Application: Imagine you're developing a new feature for a specific microservice. Instead of deploying your potentially buggy code to the cluster for every small change, you can run your microservice locally within your IDE (e.g., IntelliJ IDEA, VS Code). However, this local instance needs to communicate with other services or a database that are already deployed in your development or staging cluster.
port-forwardallows your local service to access these remote dependencies as if they werelocalhost.- Scenario: Your local
auth-serviceneeds to validate users against auser-databasePod in the cluster. - Command:
kubectl port-forward service/user-database 5432:5432 -n dev - Result: Your local
auth-servicecan now connect tolocalhost:5432, and the traffic is securely tunneled to theuser-databasein thedevnamespace. This enables rapid iteration and debugging of your local service against real cluster data and services.
- Scenario: Your local
- Accessing a Database (e.g., PostgreSQL, MongoDB) Running in the Cluster from a Local Client: Developers frequently need to inspect or modify data in a cluster-resident database. While some databases might have external exposure, direct, secure access from a local client is often preferred.
- Scenario: You need to run a SQL query against a
production-postgresdatabase within yourdatanamespace using your local DBeaver or pgAdmin client. - Command:
kubectl port-forward deployment/production-postgres 5432:5432 -n data - Result: You can now configure your local database client to connect to
localhost:5432with the appropriate credentials, giving you direct access to the database. This is far more secure and convenient than exposing the database publicly or requiring a complex VPN setup for quick checks.
- Scenario: You need to run a SQL query against a
- Testing a New UI or Client Application Against Backend Services in Kubernetes: Front-end developers often build user interfaces that consume backend APIs. When these backend APIs are in a Kubernetes cluster,
port-forwardallows the local UI to interact with them directly.- Scenario: You're developing a new React front-end locally, and it needs to fetch data from
user-apiandproduct-apiservices in thestagingcluster. - Commands:
bash kubectl port-forward service/user-api 8081:8080 -n staging & kubectl port-forward service/product-api 8082:8080 -n staging & - Result: Your local React app can make requests to
http://localhost:8081for user data andhttp://localhost:8082for product data, securely routed to the respective services in the cluster. This enables real-time testing of the UI with real backend data and logic.
- Scenario: You're developing a new React front-end locally, and it needs to fetch data from
- Developing and Iterating on Microservices Locally While Relying on Other Services in the Cluster: In a true microservices architecture, a single service often depends on many others. Building and running all dependencies locally can be resource-intensive or even impossible.
port-forwardoffers a hybrid approach.- Scenario: Your
order-processing-service(running locally) needs to callinventory-serviceandpayment-service(running in the cluster). - Commands:
bash kubectl port-forward service/inventory-service 9001:9000 -n qa & kubectl port-forward service/payment-service 9002:9000 -n qa & - Result: Your local
order-processing-servicecan configure its environment variables or service discovery to point tolocalhost:9001andlocalhost:9002for its dependencies, creating a seamless development experience without having to run an entire local Kubernetes cluster.
- Scenario: Your
Troubleshooting & Inspection: Peering Inside the Cluster
Beyond development, kubectl port-forward is an invaluable tool for operational debugging and inspection. When something goes wrong or you need to gather specific information, port-forward provides a direct conduit.
- Accessing Internal API Endpoints That Aren't Exposed Publicly: Many microservices expose internal health checks, metrics endpoints, or administrative APIs that are never meant for external consumption.
port-forwardallows direct access for administrators or developers.- Scenario: You suspect an
admin-dashboardservice in themonitoringnamespace is having issues, and you want to access its/metricsendpoint, which is only available internally. - Command:
kubectl port-forward service/admin-dashboard 9090:8080 -n monitoring - Result: You can now
curl http://localhost:9090/metricsto directly inspect the Prometheus metrics endpoint, gaining insights into the service's performance.
- Scenario: You suspect an
- Inspecting Application Logs or Metrics Endpoints Directly: While
kubectl logsis excellent for standard output, sometimes an application exposes a dedicated logging or metrics API endpoint that provides richer, structured data or historical views.- Scenario: A custom logging service
log-aggregatorexposes a web UI on port 80 to view aggregated logs. You want to access this UI locally. - Command:
kubectl port-forward service/log-aggregator 8080:80 -n logging - Result: Open
http://localhost:8080in your browser to interact with the custom log viewer.
- Scenario: A custom logging service
- Connecting to a Service to Perform Manual Tests: Sometimes, automated tests aren't enough, and you need to manually interact with an API to understand its behavior or confirm a fix.
- Scenario: You've deployed a fix to the
user-profile-apiand want to make a fewPOSTandGETrequests using Postman orcurlto verify the fix before promoting it. - Command:
kubectl port-forward service/user-profile-api 8000:8080 -n staging - Result: Your Postman client can now send requests to
http://localhost:8000/usersorhttp://localhost:8000/profile, directly interacting with the updated API in the staging environment.
- Scenario: You've deployed a fix to the
- Circumventing Network Policies Temporarily for Debugging (with caveats): In highly secure environments, network policies can restrict communication between Pods. While these are crucial for security, they can sometimes complicate debugging.
port-forwardoperates at a lower level, effectively tunneling around these policies, which can be useful for diagnostics (though it should be used with extreme caution and awareness of security implications).- Scenario: You suspect a network policy is preventing your
reporting-servicefrom reachingdata-warehouse-service. You want to verify thatdata-warehouse-serviceis indeed accessible if the policy is bypassed for a moment. - Command:
kubectl port-forward service/data-warehouse-service 5432:5432 -n analytics - Result: You can then try connecting to
localhost:5432from your machine. If it works, it strongly suggests a network policy issue rather than the service itself being down or misconfigured. Remember to terminate theport-forwardimmediately after diagnosis.
- Scenario: You suspect a network policy is preventing your
Specific Examples with Detailed Steps:
Let's walk through a common scenario to solidify understanding: Forwarding a simple web application.
Scenario: Accessing an Nginx Web Server
- Deploy Nginx (if not already present): First, ensure you have an Nginx deployment and service in your cluster. If not, create them:
yaml # nginx-deployment.yaml apiVersion: apps/v1 kind: Deployment metadata: name: nginx-deployment labels: app: nginx spec: replicas: 1 selector: matchLabels: app: nginx template: metadata: labels: app: nginx spec: containers: - name: nginx image: nginx:latest ports: - containerPort: 80 --- # nginx-service.yaml apiVersion: v1 kind: Service metadata: name: nginx-service spec: selector: app: nginx ports: - protocol: TCP port: 80 targetPort: 80 type: ClusterIP # We want to access this internal serviceApply these:bash kubectl apply -f nginx-deployment.yaml kubectl apply -f nginx-service.yamlVerify the Pod and Service are running:bash kubectl get pods -l app=nginx kubectl get service nginx-service - Forward the Service: Now, forward the
nginx-servicefrom port 80 in the cluster to port 8080 on your local machine. Assume it's in thedefaultnamespace.bash kubectl port-forward service/nginx-service 8080:80You will see output similar to:Forwarding from 127.0.0.1:8080 -> 80 - Access Locally: Open your web browser and navigate to
http://localhost:8080. You should see the default Nginx welcome page, confirming that theport-forwardis successfully tunneling traffic from your local machine to the Nginx Pod within your Kubernetes cluster.
These examples underscore the versatility and importance of kubectl port-forward for developers working with Kubernetes. It bridges the gap between the isolated cluster environment and the familiar localhost development setup, making iterative development, debugging, and testing significantly more efficient and less cumbersome.
Advanced port-forward Techniques and Considerations
While the basic syntax of kubectl port-forward is straightforward, a deeper understanding of its nuances and capabilities, along with crucial security considerations, can unlock even greater efficiency and prevent potential pitfalls. It's a powerful tool, and like any powerful tool, it demands respect and informed usage.
Specifying Resource Types: Pods vs. Services vs. Deployments
One of the key decisions when using port-forward is choosing the target resource type. Each has its advantages:
- Pod-level Forwarding (
pod/<pod-name>):- When to use: This is the most direct method. Use it when you need to connect to a specific instance of an application. This is particularly useful for debugging a problematic Pod that might be in a bad state or for connecting to a single-instance service like a primary database Pod.
- Advantages: Absolute precision. You know exactly which Pod your traffic is going to. Essential for debugging specific Pod issues.
- Disadvantages: Fragile. If the targeted Pod is deleted, restarted, or moves to a different node, your
port-forwardconnection will break. You'll need to re-establish it, potentially to a new Pod name. - Example:
kubectl port-forward pod/my-debug-pod-xyz 8080:80
- Service-level Forwarding (
service/<service-name>orsvc/<service-name>):- When to use: This is generally preferred for accessing stateless services or services where you don't care which specific Pod instance your traffic hits. The Kubernetes Service acts as an abstraction layer.
- Advantages: Resilience and load balancing. When you forward to a Service,
kubectlconnects to one of the healthy Pods backing that Service. If that particular Pod dies,kubectlattempts to re-establish the connection to another healthy Pod automatically. This provides a more stable tunnel. - Disadvantages: Less precise. You don't control which Pod instance receives the traffic. Not suitable if you need to debug a problem on a very specific Pod.
- Example:
kubectl port-forward service/my-app-service 8080:80
- Deployment/ReplicaSet Forwarding (
deployment/<deployment-name>ordeploy/<deployment-name>):- When to use: Similar to Service-level forwarding, this is a convenience method.
kubectlwill find one of the Pods managed by the Deployment or ReplicaSet and forward to it. - Advantages: Simplicity. You might know the Deployment name more readily than a Service name or a specific Pod name.
- Disadvantages: Same as Service-level: less precision regarding the target Pod. If the underlying Pod is killed,
kubectlwill automatically pick another. - Example:
kubectl port-forward deployment/my-api-deployment 8080:80
- When to use: Similar to Service-level forwarding, this is a convenience method.
Namespaces: The Unsung Hero of Organization
Always remember to specify the namespace using the -n <namespace> flag. Kubernetes is designed for multi-tenancy and isolation through namespaces. Omitting the namespace means kubectl will default to the context's current namespace, which might not be the one you intend. Explicitly defining the namespace prevents confusion and ensures you're targeting the correct resource, especially in clusters with many services across different teams or environments.
Multiple Forwards: Managing Concurrent Connections
It's common to need to access several services simultaneously from your local machine. You can run multiple kubectl port-forward commands concurrently, each in its own terminal window or in the background.
# Terminal 1: Accessing a backend API
kubectl port-forward service/backend-api 8001:8080 -n dev

# Terminal 2: Accessing a database
kubectl port-forward service/db-service 5432:5432 -n dev

# Terminal 3: Accessing a metrics dashboard
kubectl port-forward deployment/metrics-dashboard 9000:3000 -n monitoring
For backgrounding, use the & operator:
kubectl port-forward service/backend-api 8001:8080 -n dev &
kubectl port-forward service/db-service 5432:5432 -n dev &
Remember to manage these background processes (e.g., jobs, kill %<job_number>).
Security Implications: A Critical Consideration
While port-forward is incredibly useful, it's vital to understand its security implications:
- Bypasses Network Policies:
kubectl port-forwardeffectively creates a direct tunnel between your machine and a Pod. This bypasses any Kubernetes Network Policies that might be in place to restrict traffic between Pods or from external sources. While this can be useful for debugging policy issues, it also means that if an attacker gains access to yourkubeconfig(or your machine), they could potentially bypass network segmentation within the cluster to reach otherwise protected services. - Authentication and Authorization: The
port-forwardcommand itself respects Kubernetes RBAC (Role-Based Access Control). Only users with the necessary permissions togetandforwardports to a specific Pod or Service can establish a tunnel. This is a crucial security layer, but it underscores the importance of managingkubeconfigfiles and user permissions carefully. - Not for Production Exposure:
kubectl port-forwardis explicitly not designed for production-grade service exposure. It's a development and debugging tool. For exposing services publicly or even internally within an enterprise, robust solutions are required that handle authentication, authorization, traffic management, rate limiting, logging, and security policies at scale. This is where dedicated API gateway solutions come into play.
Introducing APIPark in the Context of Production Needs:
For environments beyond individual developer debugging, where the ephemeral, local access of kubectl port-forward is insufficient, enterprises need comprehensive solutions for managing their API landscape. This is precisely the domain of an API gateway. A robust API gateway acts as the single entry point for all API requests, providing a centralized control plane for security, traffic management, and observability.
For example, while you might use kubectl port-forward to debug a specific API endpoint of a single microservice, a production application would route all external API traffic through an API gateway like APIPark. APIPark is an open-source AI Gateway & API Management Platform that goes far beyond simple port forwarding. It offers quick integration of over 100 AI models, a unified API format, prompt encapsulation into REST APIs, and end-to-end API lifecycle management. It provides essential features like robust access permissions, detailed call logging, powerful data analysis, and performance rivaling Nginx for high-throughput scenarios, supporting cluster deployment. APIPark ensures that all your APIs, both traditional REST and AI-powered, are managed securely, efficiently, and observably, something kubectl port-forward is neither designed nor equipped to do. It serves the enterprise needs for consistent API governance, contrasting sharply with the ad-hoc, individual-developer-centric nature of port-forward.
Automation: Scripting port-forward
While typically interactive, port-forward can be integrated into scripts for automating development environment setups.
- Backgrounding with
nohup: For more robust backgrounding that persists even if your shell session disconnects, combinenohupwith&:bash nohup kubectl port-forward service/my-app 8080:80 -n dev > /dev/null 2>&1 &This runs the command in the background, redirects all output to/dev/null, and prevents it from being terminated when the shell exits. - Finding and Killing Processes: If you have many background
port-forwardprocesses, you can use tools likefuser(on Linux) orlsof(on macOS/Linux) to find the process using a specific local port and then kill it.bash # Find PID using local port 8080 lsof -i :8080 # Then kill it kill <PID>Alternatively, for processes initiated in the current shell:jobsto list, thenkill %<job_number>.
Ephemeral Nature: A Temporary Solution
Always remember that kubectl port-forward creates a temporary tunnel. It will remain active only as long as the kubectl command is running. Once the command is terminated (e.g., by Ctrl+C or kill), the tunnel is closed, and local access is lost. This ephemeral nature is a feature, not a bug, as it reinforces port-forward's role as a lightweight, on-demand debugging tool, preventing lingering open connections that could pose security risks if forgotten.
By mastering these advanced techniques and being mindful of the security implications, developers can leverage kubectl port-forward to its fullest potential, making their Kubernetes development workflow exceptionally fluid and productive.
APIPark is a high-performance AI gateway that allows you to securely access the most comprehensive LLM APIs globally on the APIPark platform, including OpenAI, Anthropic, Mistral, Llama2, Google Gemini, and more.Try APIPark now! 👇👇👇
Comparison with Alternatives
While kubectl port-forward is an indispensable tool for local access to Kubernetes services, it's crucial to understand its context within the broader landscape of service exposure and network access. It solves a specific problem – temporary, secure local access for development and debugging – and is not a replacement for other mechanisms designed for different purposes. Comparing it with alternatives helps clarify its unique role.
Ingress
- What it is: Kubernetes Ingress is an API object that manages external access to services in a cluster, typically HTTP and HTTPS. Ingress provides load balancing, SSL termination, and name-based virtual hosting. An Ingress controller (e.g., Nginx Ingress Controller, Traefik, GKE Ingress) is required to fulfill the Ingress rules.
- Purpose: Exposing HTTP/HTTPS APIs and web applications to the public internet or internal corporate networks in a controlled, scalable, and production-ready manner.
port-forwardvs. Ingress:- Scope: Ingress is for cluster-wide, persistent, external HTTP/HTTPS access.
port-forwardis for local, temporary, internal access to any TCP port. - Configuration: Ingress requires
Ingressresources and an Ingress controller, which is a significant cluster component.port-forwardis a simplekubectlcommand. - Security: Ingress integrates with security measures like WAFs, DDoS protection, and fine-grained access policies at the edge.
port-forwardbypasses internal network policies but is secured by Kubernetes RBAC and relies on the user's local machine security. - Traffic Type: Ingress is HTTP/HTTPS only.
port-forwardcan tunnel any TCP traffic (databases, custom protocols, etc.).
- Scope: Ingress is for cluster-wide, persistent, external HTTP/HTTPS access.
- When to use Ingress: For deploying public-facing web applications, RESTful APIs, and microservices that need to be accessible from outside the cluster with defined hostnames, path-based routing, and SSL.
- When to use
port-forward: For quickly testing a local UI against a staging API, debugging an internal service that should never be publicly exposed, or connecting a local database client to a cluster-internal database.
NodePort/LoadBalancer
- What they are: As discussed earlier,
NodePortexposes a service on a static port across all nodes, whileLoadBalancerprovisions an external cloud load balancer. - Purpose:
NodePortprovides a basic way to expose services to external traffic (often for testing or on-premises setups where aLoadBalancerisn't available).LoadBalanceris the standard for exposing services publicly in cloud environments, providing high availability and scalability. port-forwardvs. NodePort/LoadBalancer:- Ease of Use:
port-forwardis a single command for temporary access. NodePort/LoadBalancer require modifying Service definitions and potentially managing external IPs/DNS. - Security: NodePort/LoadBalancer expose services directly to the network where nodes or load balancers reside.
port-forwardcreates a private, authenticated tunnel directly to your machine. - Persistence: NodePort/LoadBalancer are persistent ways to expose services.
port-forwardis ephemeral. - Cost: LoadBalancers can incur cloud costs.
port-forwardhas no direct cost.
- Ease of Use:
- When to use NodePort/LoadBalancer: For services that need stable, persistent external access but where Ingress's HTTP/HTTPS specific features aren't required, or for non-HTTP services that need public exposure (e.g., a custom TCP server).
kubectl proxy
- What it is:
kubectl proxycreates a local proxy server that provides access to the Kubernetes API server. It exposes the Kubernetes API at a local endpoint (e.g.,http://localhost:8001). - Purpose: To easily access the Kubernetes API itself, not your application services. This allows you to interact with Kubernetes resources (Pods, Deployments, Services, etc.) through HTTP requests from your local machine, without needing to embed
kubectlcommands. It's often used by dashboards or custom tools that need to query the Kubernetes API. port-forwardvs.kubectl proxy:- Target:
port-forwardtargets your application services (e.g., your Nginx web server, your custom API).kubectl proxytargets the Kubernetes API server. - Functionality:
port-forwardtunnels traffic to an application's specific port.kubectl proxyprovides a way to make HTTP requests to the Kubernetes API itself (e.g.,curl http://localhost:8001/api/v1/namespaces/default/pods).
- Target:
- When to use
kubectl proxy: When you need to interact programmatically with the Kubernetes API from your local machine, typically for building custom tools, scripts, or dashboards that display or modify Kubernetes resources.
VPNs/Bastion Hosts
- What they are: VPNs (Virtual Private Networks) establish a secure, encrypted connection to a remote network, making your local machine appear as if it's part of that network. Bastion hosts (or jump servers) are hardened servers placed in a secure network zone that act as a single point of entry for accessing internal systems.
- Purpose: To provide secure, enterprise-grade access to entire private networks, often used by IT operations or developers needing broad access to multiple systems within a corporate network or cloud VPC.
port-forwardvs. VPNs/Bastion Hosts:- Scope: VPNs/Bastion hosts grant network-level access to a broad range of resources.
port-forwardgrants application-level access to a single, specific port. - Complexity: VPNs and bastion hosts involve significant setup and infrastructure management.
port-forwardis a lightweight command. - Security: VPNs and bastion hosts provide robust, auditable network security for entire segments.
port-forwardrelies on Kubernetes RBAC and is for individual tunnel security. - Use Case: VPNs/Bastion hosts are for comprehensive, long-term network access.
port-forwardis for ad-hoc, temporary, and focused application access.
- Scope: VPNs/Bastion hosts grant network-level access to a broad range of resources.
- When to use VPNs/Bastion Hosts: For enterprise environments where developers or administrators need broad, authenticated, and secure access to multiple services, clusters, and other infrastructure within a private network.
Service Meshes (e.g., Istio, Linkerd)
- What they are: Service meshes are dedicated infrastructure layers that provide advanced capabilities for managing service-to-service communication, including traffic management (routing, splitting, retries), security (mTLS, authorization), and observability (metrics, tracing, logging).
- Purpose: To enhance the reliability, security, and observability of microservices communication within the cluster, often for production environments. They don't typically provide direct external access.
port-forwardvs. Service Meshes:- Concern: Service meshes focus on intra-cluster service communication and management.
port-forwardfocuses on inter-network (local-to-cluster) application access. - Layer: Service meshes operate at the application layer (Layer 7) for rich traffic control.
port-forwardoperates at the transport layer (Layer 4) for direct tunneling.
- Concern: Service meshes focus on intra-cluster service communication and management.
- When to use Service Meshes: For complex microservices deployments requiring advanced traffic management, fine-grained access control between services, and deep observability of service interactions in production. They are complementary to
port-forward, asport-forwardmight still be used to connect a local client to a service within the mesh for debugging purposes.
Local Kubernetes (Minikube, Kind, Docker Desktop K8s)
- What they are: Tools that run a lightweight Kubernetes cluster on your local machine.
- Purpose: To enable developers to run and test their applications in a full Kubernetes environment without deploying to a remote cluster.
port-forwardvs. Local K8s:- Environment: Local K8s provides a local cluster.
port-forwardconnects to a remote cluster. - Scenario: If all dependencies can run locally, a local K8s is ideal for truly isolated development. However, sometimes you need to connect to a shared staging or development cluster because of data size, specific hardware, or shared dependencies that are too large or complex to run locally.
- Environment: Local K8s provides a local cluster.
- When to use Local K8s: When you need a self-contained, isolated Kubernetes environment for local development and testing, reducing reliance on remote clusters.
- When to use
port-forward(even with Local K8s): When you still need to interact with services that only exist in a remote cluster (e.g., a production database, a third-party service integrated into a specific staging environment, or to debug a problem that only manifests in a remote cluster configuration).
Reiterating the Indispensable Role:
In summary, kubectl port-forward stands as a unique and indispensable tool. While solutions like Ingress, LoadBalancers, and API gateways (like APIPark) are designed for robust, scalable, and secure production exposure and management of services, port-forward fills a critical niche for individual developers. It offers unparalleled simplicity and directness for ad-hoc local access, debugging, and integration with remote cluster services. It avoids the overhead, security implications, and complexities of exposing services publicly, making it the go-to command for rapid, iterative development in a Kubernetes ecosystem.
Best Practices and Tips
To harness the full power of kubectl port-forward while maintaining security and efficiency, adhering to certain best practices is crucial. This command, though simple in syntax, benefits greatly from thoughtful application.
- Always Specify the Namespace: This is perhaps the most fundamental and frequently overlooked best practice. In a multi-tenant or complex Kubernetes cluster, resources (Pods, Services, Deployments) are organized into namespaces. If you omit the
-n <namespace>flag,kubectlwill default to the namespace configured in your currentkubeconfigcontext, which is oftendefault. This can lead to:- Accidental Targeting: You might unwittingly try to forward a resource in the wrong namespace, leading to "resource not found" errors.
- Ambiguity: If resources with the same name exist in different namespaces, omitting the flag can create confusion.
- Security Risks: In rare cases, you might forward a sensitive service from a production namespace if your
kubeconfighas access and is pointed there, when you intended a dev environment. - Tip: Make it a habit to type
kubectl port-forward ... -n <your-namespace-name>every single time. It adds minimal typing for maximum clarity and safety.
- Use a Consistent Port Mapping Strategy: When forwarding ports, you specify
<local-port>:<remote-port>. For common services, adopting a consistent strategy can improve clarity and reduce errors:- Matching Ports: If feasible, use the same port locally as the remote service uses (e.g.,
8080:8080,5432:5432). This makes it easy to remember. - Reserved Ranges: If the remote port is a common one (like 80 or 443), you might not be able to use it locally without elevated privileges. In such cases, choose a local port in a developer-friendly range (e.g.,
3000,8000,8080,9000). - Service-Specific Local Ports: For multiple services, assign unique, easily identifiable local ports (e.g.,
8001foruser-service,8002forproduct-service). - Tip: Document your team's port-forwarding conventions, especially for shared development environments.
- Matching Ports: If feasible, use the same port locally as the remote service uses (e.g.,
- Monitor the
port-forwardCommand Output for Connection Issues: Thekubectl port-forwardcommand, when run in the foreground, provides live feedback. Pay attention to its output:- "Forwarding from...": This confirms the tunnel is established.
- Error Messages: If the remote Pod restarts, becomes unhealthy, or the network connection drops,
kubectlwill often log an error or try to reconnect. If it fails to reconnect, your local access will cease. - "Connection refused" / "Broken pipe": These often indicate the Pod restarted or the application within the Pod stopped listening on the specified remote port.
- Tip: If you're encountering issues accessing the service locally, check the
port-forwardterminal window first for diagnostics.
- Consider Wrapping
port-forwardin Helper Scripts for Frequently Accessed Services: Typing out longkubectl port-forwardcommands repeatedly can be tedious and error-prone. For services you access frequently (e.g., a core backend API, a development database), create simple shell scripts.- Example Script (
start-dev-env.sh): ```bash #!/bin/bashNAMESPACE="my-dev-env"echo "Starting port-forward for user-api..." kubectl port-forward service/user-api 8001:8080 -n "$NAMESPACE" > user-api-pf.log 2>&1 & USER_API_PID=$! echo "User-API port-forward PID: $USER_API_PID"echo "Starting port-forward for product-db..." kubectl port-forward deployment/product-db 5432:5432 -n "$NAMESPACE" > product-db-pf.log 2>&1 & PRODUCT_DB_PID=$! echo "Product-DB port-forward PID: $PRODUCT_DB_PID"echo "Port forwards started. Access User-API at localhost:8001, Product-DB at localhost:5432" echo "To stop: kill $USER_API_PID $PRODUCT_DB_PID"`` * **Tip:** Include clear instructions in your scripts on how to stop the processes. You can also addtrap` commands to automatically clean up on script exit.
- Example Script (
- Understand When
port-forwardis Appropriate and When a More Permanent Exposure Method is Required: This is perhaps the most critical conceptual best practice.kubectl port-forwardis a developer's local utility. It's designed for:It is not suitable for: * Production exposure: Never use it to expose production services to users. * Long-term integration: Your local application should not rely on a persistentport-forwardfor its operational needs. * Team-wide sharing: While multiple people can run their ownport-forwardcommands, it's not a centralized way to share services.For production-grade, long-term, and secure exposure of your services, especially your APIs, you need robust solutions. This is where an API gateway platform like APIPark becomes essential. APIPark provides centralized API management, security features (like access permissions and approval workflows), traffic management, performance monitoring, and logging, all crucial for stable and secure operation of your APIs in a production environment. Whileport-forwardhelps you quickly test an individual API locally, APIPark ensures that thousands of production users can reliably and securely access your entire suite of APIs, whether they are traditional REST services or integrated AI models. Understanding this distinction is key to building sustainable cloud-native applications.- Temporary access: For debugging, quick tests, local development integration.
- Private access: It doesn't expose anything publicly.
- Individual use: It's for one developer's machine.
- Be Mindful of Resource Types (Pod vs. Service vs. Deployment): As discussed in the advanced techniques section, carefully choose whether to forward to a specific
pod, aservice, or adeployment.- Use
podfor targeting a specific, potentially problematic instance. - Use
servicefor more resilient forwarding to any healthy backend Pod, especially for stateless applications. - Using
deploymentis a convenience alias forserviceif a service is explicitly absent. - Tip: For most development scenarios where you just need to hit an instance of a service, forwarding to the
serviceis the most robust option as it handles Pod restarts gracefully.
- Use
- Ensure Proper RBAC Permissions: Your Kubernetes user (defined in your
kubeconfig) must have the necessary permissions togetandforwardports to the target resource. If you encounter permission errors, consult your cluster administrator or check yourRoleandRoleBindingdefinitions.- Required Verbs: Typically, you need
getandcreateonpods/portforwardorservices/portforward. - Tip: If you have
adminaccess, this usually isn't an issue. For more restricted users, ensure they have focused permissions for the resources they need toport-forward.
- Required Verbs: Typically, you need
By integrating these best practices into your workflow, you'll find kubectl port-forward to be an even more reliable, secure, and powerful ally in your Kubernetes development journey.
Introducing APIPark: Beyond Local Access
While kubectl port-forward is an unparalleled tool for individual developers seeking temporary, local access to services within a Kubernetes cluster, it's crucial to acknowledge its limitations. It serves a specific, albeit vital, purpose: bridging the gap between a developer's machine and a remote service for debugging, testing, and rapid iteration. However, in a production environment, or even in larger staging/QA environments, the requirements for service exposure and management escalate dramatically. This is where a robust API gateway and management platform becomes not just useful, but absolutely essential.
Imagine a scenario where thousands of external users, partner applications, or internal microservices need to consistently and securely interact with your backend APIs. These interactions require a sophisticated layer of management for authentication, authorization, traffic shaping, rate limiting, monitoring, logging, and security. Relying on kubectl port-forward for such scenarios would be impractical, insecure, and utterly unscalable. This is precisely the gap that APIPark fills.
APIPark is an all-in-one open-source AI Gateway & API Management Platform, built to help developers and enterprises manage, integrate, and deploy both traditional REST services and advanced AI models with unparalleled ease and efficiency. While port-forward allows you to peer into a single service, APIPark provides the comprehensive infrastructure to govern your entire API landscape.
Let's delve into APIPark's key features that distinguish it from the localized utility of kubectl port-forward and highlight its value for enterprise-grade API governance:
- Quick Integration of 100+ AI Models: In the age of artificial intelligence, APIPark stands out by offering the capability to integrate a vast array of AI models. This means you can bring in models from various providers and manage them all through a single, unified system, simplifying authentication and cost tracking across your AI services.
port-forwardhas no concept of AI model integration; it's purely a network tunneling tool. - Unified API Format for AI Invocation: A common challenge with diverse AI models is their differing API specifications. APIPark standardizes the request data format across all integrated AI models. This ensures that changes to underlying AI models or prompts do not ripple through and affect your application or microservices, drastically simplifying AI usage and reducing maintenance costs. This level of API abstraction and standardization is far beyond the scope of a simple
port-forwardtunnel. - Prompt Encapsulation into REST API: One of APIPark's most innovative features is allowing users to quickly combine AI models with custom prompts to create new, specialized REST APIs. For example, you can encapsulate a sentiment analysis prompt or a data translation task into a readily consumable REST API. This empowers developers to rapidly build and deploy intelligent features without deep AI expertise.
- End-to-End API Lifecycle Management: APIPark assists with managing the entire lifecycle of your APIs, from design and publication to invocation and decommissioning. It helps regulate API management processes, manages traffic forwarding, handles load balancing (far more robustly than a
port-forwardto a Service), and manages versioning of published APIs. This holistic approach ensures consistency and control over your entire API portfolio. - API Service Sharing within Teams: For larger organizations, discovering and reusing APIs is critical. APIPark offers a centralized developer portal that displays all API services, making it effortlessly easy for different departments and teams to find, understand, and use the required API services. This collaborative environment fosters reuse and reduces duplication of effort, contrasting with the solitary nature of
port-forwardusage. - Independent API and Access Permissions for Each Tenant: Scalability and security in multi-team or multi-departmental settings are paramount. APIPark enables the creation of multiple teams (tenants), each with independent applications, data, user configurations, and security policies. This segmentation ensures strong isolation while sharing underlying infrastructure, improving resource utilization and reducing operational costs. Such granular access control is a cornerstone of enterprise API gateway functionality.
- API Resource Access Requires Approval: To prevent unauthorized access and potential data breaches, APIPark allows for the activation of subscription approval features. Callers must subscribe to an API and await administrator approval before they can invoke it. This adds a critical layer of security and control, ensuring that only vetted consumers can access sensitive APIs.
- Performance Rivaling Nginx: An API gateway must handle high volumes of traffic efficiently. APIPark is engineered for performance, capable of achieving over 20,000 Transactions Per Second (TPS) with just an 8-core CPU and 8GB of memory. It supports cluster deployment to handle even larger-scale traffic, demonstrating its readiness for demanding production environments. This raw performance is a stark contrast to the single-connection, developer-centric
port-forward. - Detailed API Call Logging: Comprehensive logging is vital for troubleshooting, auditing, and security. APIPark provides extensive logging capabilities, recording every detail of each API call. This feature enables businesses to quickly trace and troubleshoot issues in API calls, ensuring system stability and data security.
- Powerful Data Analysis: Beyond raw logs, APIPark analyzes historical call data to display long-term trends and performance changes. This predictive capability helps businesses with preventive maintenance, identifying potential issues before they impact users.
Deployment and Commercial Support: APIPark is remarkably easy to deploy, taking just 5 minutes with a single command line, making it accessible for startups and smaller teams. While the open-source product meets many basic API resource needs, APIPark also offers a commercial version with advanced features and professional technical support tailored for leading enterprises.
APIPark's Value to Enterprises: Launched by Eolink, a leader in API lifecycle governance, APIPark provides a powerful solution that significantly enhances efficiency, security, and data optimization for developers, operations personnel, and business managers alike. It transforms API management from a fragmented, ad-hoc process into a streamlined, secure, and intelligent ecosystem.
In conclusion, while kubectl port-forward remains an invaluable personal developer tool for local access, it is a single-use tunnel. When it comes to managing the entire lifecycle of your APIs, integrating AI models, ensuring robust security, controlling access at scale, and achieving high performance in production, a comprehensive API gateway and management platform like APIPark is the necessary foundation for any modern, cloud-native enterprise. It represents the essential infrastructure for bringing your services, particularly your APIs, to the world securely and reliably.
Conclusion
The journey through the capabilities of kubectl port-forward reveals it to be a modest yet immensely powerful command, an unsung hero in the Kubernetes developer's toolkit. We've explored how this simple command cuts through the inherent network isolation of Kubernetes, providing a direct, secure, and ephemeral tunnel between your local machine and any service or pod within your cluster. It effortlessly transforms a remote service into a localhost endpoint, blurring the lines between your local development environment and the intricate ecosystem of your cloud-native applications.
We began by contrasting kubectl port-forward with the more traditional Kubernetes service exposure mechanisms like ClusterIP, NodePort, and LoadBalancer. While these are vital for production-grade, external access, they often introduce unnecessary overhead and security concerns for the fleeting needs of local development and debugging. port-forward emerges as the perfect complement, offering a targeted solution that respects cluster isolation while empowering developers.
The anatomy of kubectl port-forward revealed its straightforward syntax and the underlying mechanism of establishing a secure SPDY stream through the Kubernetes API server and kubelet. This understanding forms the bedrock for its effective use. Crucially, we then delved into a rich array of practical use cases, illustrating how port-forward accelerates workflows across local development, debugging, and troubleshooting. From connecting local IDEs to remote databases, testing new UI features against live backend APIs, to manually inspecting internal metrics endpoints, its versatility is unmatched. These scenarios underscore that port-forward is not just a convenience; it is a critical enabler for rapid iteration and problem-solving in a microservices world.
Further, we ventured into advanced techniques, distinguishing between forwarding to Pods, Services, and Deployments, emphasizing the importance of specifying namespaces, and demonstrating how to manage multiple concurrent tunnels. A significant portion of our discussion centered on the critical security implications. While port-forward is secured by Kubernetes RBAC, it bypasses network policies and is emphatically not for production exposure. This led to a natural and important distinction between a developer's local utility and the robust, enterprise-grade solutions required for managing APIs at scale, such as dedicated API gateways.
The comparison with alternatives like Ingress, NodePort/LoadBalancer, kubectl proxy, VPNs, and Service Meshes further clarified port-forward's unique niche. Each of these tools serves a distinct purpose in the Kubernetes networking ecosystem, and port-forward stands out for its directness and simplicity in facilitating temporary local access to internal cluster resources. It does not seek to replace, but rather to augment, these other solutions, providing an essential piece of the developer productivity puzzle.
Finally, we culminated our exploration with best practices, urging developers to always specify namespaces, adopt consistent port mapping strategies, monitor command output, and consider helper scripts for efficiency. Most importantly, we reiterated the fundamental understanding of port-forward's appropriate use case: a temporary, private, individual tool. For production environments, where scalability, security, and comprehensive management of numerous APIs (including cutting-edge AI models) are paramount, we introduced APIPark. APIPark, as an open-source AI Gateway & API Management Platform, provides the sophisticated layer of control, traffic management, security, and observability that transforms a collection of services into a cohesive, governed, and high-performing API ecosystem. It is the enterprise answer to challenges that port-forward is simply not designed to address.
In essence, kubectl port-forward is a testament to Kubernetes's thoughtful design, offering a direct conduit for developers to interact with their distributed applications. It empowers individual developers to maintain velocity and control, making the vastness of a Kubernetes cluster feel intimately accessible. Mastering this command is not just about knowing a syntax; it's about embracing a fundamental workflow that bridges the gap between local innovation and remote execution, ensuring that the power of Kubernetes is truly at your fingertips, while recognizing that for broader, more complex, and production-facing API management needs, platforms like APIPark stand ready to deliver robust, scalable, and secure solutions. Embrace port-forward for your daily debugging and local development, and leverage comprehensive API gateway solutions for your production success.
Table: Comparison of Kubernetes Service Exposure Methods and kubectl port-forward
This table provides a concise comparison of kubectl port-forward with common Kubernetes service exposure mechanisms and the role of an API Gateway for production use.
| Feature / Method | kubectl port-forward |
Kubernetes Service (ClusterIP) | Kubernetes Service (NodePort) | Kubernetes Service (LoadBalancer) | Kubernetes Ingress | API Gateway (e.g., APIPark) |
|---|---|---|---|---|---|---|
| Purpose | Local dev/debugging, temporary access. | Internal cluster communication. | External access via node IP/port. | External access via cloud LB. | HTTP/HTTPS routing, SSL termination. | Centralized API management, security, traffic control for APIs. |
| Exposure Scope | Your local machine only. | Internal to the cluster. | Cluster nodes' IP:NodePort. | Cloud provider's external IP. | External via Ingress Controller (HTTP/HTTPS). | External or internal via controlled endpoints. |
| Traffic Type | Any TCP port. | Any TCP/UDP. | Any TCP/UDP. | Any TCP/UDP. | HTTP/HTTPS (Layer 7). | HTTP/HTTPS (for REST/AI APIs). |
| Persistence | Ephemeral (lasts as long as command runs). | Permanent (until deleted). | Permanent (until deleted). | Permanent (until deleted). | Permanent (until deleted). | Permanent (always active). |
| Security | Authenticated tunnel, bypasses network policies. | Internal cluster security, network policies. | Node firewalls, less secure. | Cloud provider security groups, WAF. | Ingress Controller security, WAF, RBAC. | Advanced RBAC, auth, rate-limiting, WAF, audit logging. |
| Ease of Setup | Single kubectl command. |
Define Service YAML. |
Define Service YAML (type: NodePort). |
Define Service YAML (type: LoadBalancer). |
Define Ingress YAML, requires Controller. |
Platform deployment, configuration (UI/CLI/YAML). |
| Cost | Free. | Free. | Free. | Incurs cloud provider costs. | Depends on Controller, some free, some paid. | Open-source free, commercial versions paid. |
| Use Cases | Local debugging, testing, ad-hoc DB access. | Microservice communication. | Test/dev environments, on-prem exposure. | Public-facing applications in cloud. | Public web apps, RESTful APIs, host-based routing. | Enterprise API governance, AI APIs, monetization, security. |
| Handles Load Balancing | To a single Pod (or one of many via Service). | Yes (round-robin to Pods). | Yes (round-robin to Pods). | Yes (external LB to Pods). | Yes (Ingress Controller to Services). | Yes (built-in, advanced routing). |
| AI Model Integration | No. | No. | No. | No. | No. | Yes (Unified API for 100+ AI models). |
| API Lifecycle Mgmt. | No. | No. | No. | No. | No. | Yes (design, publish, invoke, decommission). |
5 FAQs about kubectl port-forward
1. What is kubectl port-forward and why is it useful? kubectl port-forward is a Kubernetes command that creates a secure, temporary tunnel from a port on your local machine to a port on a Pod or Service running within your Kubernetes cluster. It's incredibly useful for developers to access internal cluster services as if they were running on localhost. This allows for local development, debugging, and testing of applications without having to expose the services publicly, greatly simplifying workflows and enhancing security during the development phase.
2. What's the difference between forwarding to a Pod, a Service, or a Deployment? * Pod: When you port-forward to a specific Pod, you establish a direct tunnel to that exact instance. This is useful for debugging a particular problematic Pod, but if the Pod restarts or is deleted, your connection will break. * Service: Forwarding to a Service (service/<service-name>) provides more resilience. kubectl will pick one of the healthy Pods backing that Service and forward traffic to it. If that Pod fails, kubectl will try to reconnect to another healthy Pod, providing a more stable tunnel, ideal for stateless applications. * Deployment: Forwarding to a Deployment (deployment/<deployment-name>) is similar to forwarding to a Service. kubectl will pick one of the Pods managed by the Deployment, offering resilience against individual Pod failures. Generally, forwarding to a Service is often preferred if a dedicated Service object exists for the application.
3. Is kubectl port-forward secure enough for production use? No, kubectl port-forward is explicitly not designed or recommended for production use. It's a development and debugging tool that creates a direct, authenticated tunnel for individual access. While the tunnel itself is secure (using Kubernetes RBAC for authorization), it bypasses network policies and lacks crucial features required for production, such as robust authentication, authorization, traffic management, rate limiting, and centralized monitoring. For production-grade service exposure and management, a dedicated API gateway solution like APIPark is essential.
4. Can I run multiple port-forward commands at the same time? How do I manage them? Yes, you can run multiple kubectl port-forward commands concurrently. Each command should be run in a separate terminal window or in the background. If running in the background, you can append & to the command (e.g., kubectl port-forward service/my-app 8080:80 &). To manage background processes, you can use jobs to list them and kill %<job_number> to stop a specific one. For more robust backgrounding that persists after your terminal session closes, you might use nohup.
5. What should I do if my port-forward connection keeps failing or showing errors? If your port-forward connection is unstable or failing, consider these troubleshooting steps: * Check Local Port Availability: Ensure the local port (<local-port>) you're trying to use isn't already occupied by another process on your machine. (lsof -i :<local-port>) * Verify Remote Service/Pod Status: Make sure the target Pod is running and healthy, and that the application inside is actually listening on the specified remote port (<remote-port>). Check Pod logs (kubectl logs <pod-name>) for errors. * Confirm Namespace: Double-check that you've specified the correct namespace using -n <namespace>. * Review Permissions: Ensure your Kubernetes user has the necessary RBAC permissions (get, create on pods/portforward or services/portforward) to establish the tunnel. * Monitor Output: Keep an eye on the output in the port-forward terminal window; it often provides specific error messages that can guide your debugging. * Restart Command: Sometimes simply stopping (Ctrl+C) and restarting the port-forward command can resolve transient network issues.
🚀You can securely and efficiently call the OpenAI API on APIPark in just two steps:
Step 1: Deploy the APIPark AI gateway in 5 minutes.
APIPark is developed based on Golang, offering strong product performance and low development and maintenance costs. You can deploy APIPark with a single command line.
curl -sSO https://download.apipark.com/install/quick-start.sh; bash quick-start.sh

In my experience, you can see the successful deployment interface within 5 to 10 minutes. Then, you can log in to APIPark using your account.

Step 2: Call the OpenAI API.