kubectl port-forward Explained: Essential Commands & Tips


The journey through the intricate landscapes of cloud-native development often leads engineers and developers to discover a myriad of powerful tools, each designed to simplify complex operations within distributed systems. Among these, kubectl port-forward stands out as an indispensable utility for anyone working with Kubernetes. While Kubernetes provides sophisticated mechanisms for exposing services to the outside world—such as NodePort, LoadBalancer, and Ingress—there are countless scenarios, particularly during development, debugging, and testing, where these broad-stroke solutions are overkill or simply inappropriate. This is precisely where kubectl port-forward shines, offering a precise, temporary, and localized way to interact with services running inside your cluster directly from your local machine.
Imagine you're developing a new microservice that runs within a Kubernetes pod. You want to test its latest changes, debug a specific issue, or simply interact with its api endpoints without going through the public internet, configuring complex Ingress rules, or deploying a full-fledged LoadBalancer. kubectl port-forward provides that direct line, creating a secure tunnel from your local machine to a specific port on a specific pod (or service, deployment, etc.) within your cluster. It's akin to having a dedicated network cable connecting your laptop straight into the pod, bypassing all external network configurations and security layers that are typically in place for production traffic. This deep dive will unravel the mechanics, explore essential commands, offer practical tips, and discuss the best practices for leveraging this often-underestimated tool to its fullest potential, ensuring your development workflow remains fluid and efficient.
Understanding the Core Mechanism: How kubectl port-forward Works
At its heart, kubectl port-forward is a network tunneling mechanism. When you execute the command, kubectl establishes a connection to the Kubernetes API server. This connection is then used to initiate a secure, WebSocket-based tunnel to the specified pod or resource within the cluster. Crucially, the data flow does not traverse the public network between your local machine and the pod directly, nor does it typically involve the node's network interfaces in a way that exposes the pod to the entire network. Instead, the kubectl client on your local machine acts as a proxy, forwarding traffic received on a specified local port directly to a specified port within the target pod, all mediated securely through the Kubernetes API server.
This direct-to-pod tunneling offers several distinct advantages. Firstly, it provides an isolated environment for interaction. You're not contending with other services, network policies, or external traffic. Secondly, it maintains a high degree of security, as the connection is authenticated and authorized through your kubeconfig credentials, and the tunnel is only active for the duration of the kubectl port-forward command. Once the command is terminated, the tunnel closes, and the direct access ceases. Thirdly, it's incredibly versatile, allowing you to connect to virtually any api or application running within a pod, irrespective of whether that pod's service is exposed via other Kubernetes service types. This foundational understanding is critical for appreciating both the power and the limitations of port-forward, setting the stage for its effective application in a developer's toolkit.
The architecture of this tunneling is quite elegant. When you run kubectl port-forward, your kubectl client makes a request to the Kubernetes API server. The API server then identifies the target pod and instructs the kubelet agent running on the node where that pod resides to establish a stream (often an SPDY stream or WebSocket) back to the API server. Your local kubectl client then connects to this stream via the API server. This creates a full-duplex communication channel. Any data sent to your local port is multiplexed through this stream, travels to the API server, then to the kubelet, and finally to the specified port of the target container within the pod. The response follows the exact reverse path. This intricate dance ensures that even if your pod is isolated within a private network segment, kubectl port-forward can still reach it, provided your kubectl client can reach the Kubernetes API server. This mechanism highlights why port-forward is so resilient and effective for internal cluster debugging and development tasks, creating a temporary gateway for your local machine to interact with internal services.
Prerequisites for Using kubectl port-forward
Before embarking on the journey of using kubectl port-forward, a few fundamental prerequisites must be in place. These ensure that your local environment is correctly configured to communicate with your Kubernetes cluster and that you have the necessary permissions to perform the operation. Neglecting any of these steps can lead to frustrating errors and prevent you from establishing the desired tunnel.
kubectlCommand-Line Tool: The most crucial component is thekubectlcommand-line interface itself. This is the primary tool for interacting with your Kubernetes cluster. You must have it installed on your local machine and configured to connect to your target cluster. Installation instructions vary by operating system but typically involve downloading a binary or using a package manager. You can verify its installation and connection by runningkubectl versionandkubectl cluster-info.- Access to a Kubernetes Cluster: You need a running Kubernetes cluster. This could be a local cluster (like Minikube, Kind, or Docker Desktop's Kubernetes), a cluster provisioned on a cloud provider (GKE, AKS, EKS), or an on-premise cluster. The
kubectltool must be configured to point to this cluster, typically via akubeconfigfile. This file contains the connection details, user credentials, and context information. - Sufficient Permissions: To establish a
port-forwardconnection, your Kubernetes user (as defined in yourkubeconfig) must have the necessary Role-Based Access Control (RBAC) permissions. Specifically, you generally needget,list,watchpermissions on pods, and thecreatepermission onpods/portforward. Without these permissions, the Kubernetes API server will reject your request to initiate the tunnel. If you encounter permission-related errors, consult your cluster administrator or check yourClusterRoleandRoleBindingdefinitions. - Target Pod/Service/Deployment: Naturally, you need a target resource within the Kubernetes cluster that you wish to forward traffic to. This could be a specific pod, a deployment, or a service.
kubectl port-forwardis intelligent enough to find a suitable pod even when you specify a higher-level resource like a deployment or service. Ensure the target resource is running and healthy. - Available Local Port: The local port you intend to use for forwarding must not already be in use by another process on your local machine. If the local port is occupied,
kubectl port-forwardwill fail with an "unable to listen on any of the requested ports" error. You can use tools likenetstatorlsof(on Linux/macOS) orGet-NetTCPConnection(on Windows PowerShell) to check port availability.
By ensuring these prerequisites are met, you lay a solid foundation for successfully utilizing kubectl port-forward to interact with your cluster's internal services, allowing for seamless development and debugging experiences.
The Basic Syntax: Getting Started with kubectl port-forward
Mastering kubectl port-forward begins with understanding its fundamental syntax. While the command offers various options for specific scenarios, the core structure remains straightforward, allowing you to quickly establish a connection. The most common use cases involve forwarding to a specific pod, but it's also highly effective when targeting deployments or services, letting Kubernetes handle the underlying pod selection.
Forwarding to a Specific Pod
The most granular way to use port-forward is by specifying the exact pod name. This is particularly useful when you're debugging an issue on a specific instance of an application or when you have multiple pods running for a single deployment and need to target one in particular.
Command Structure:
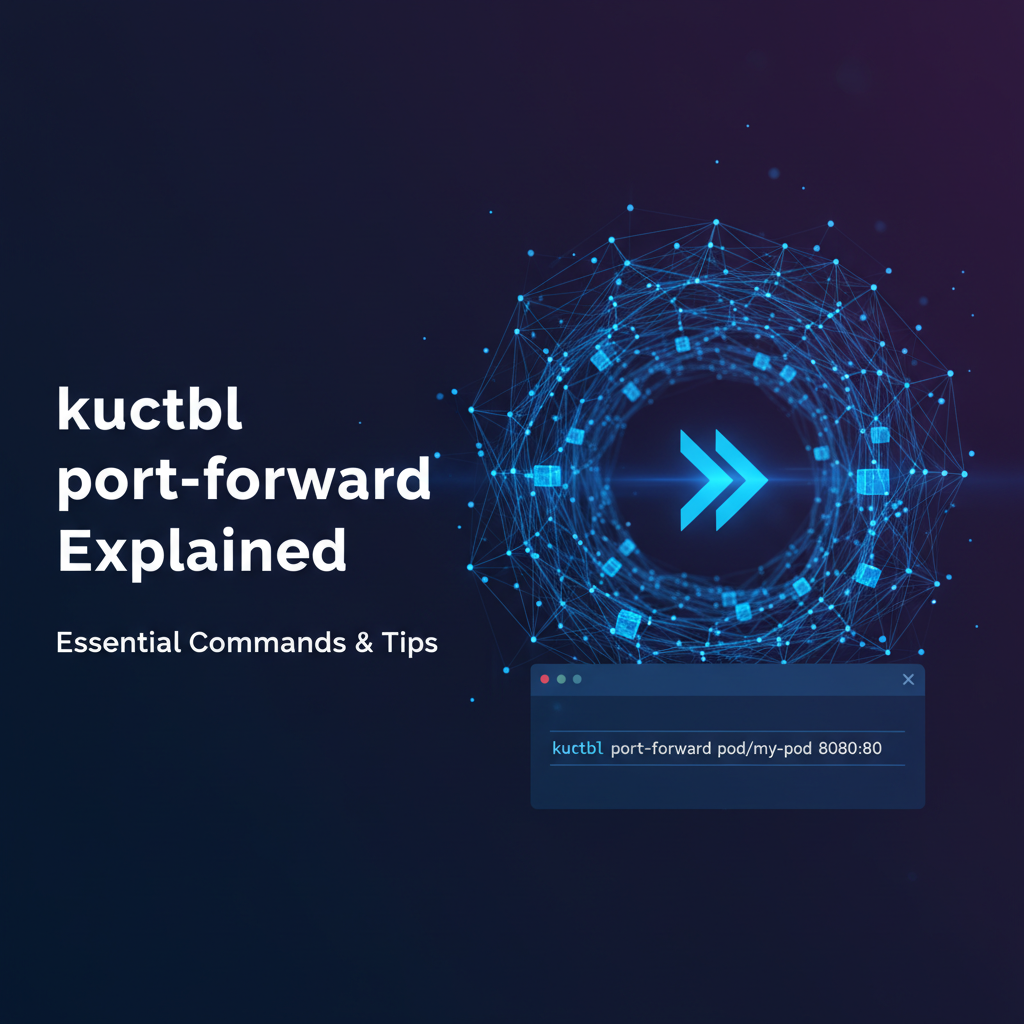
kubectl port-forward <pod-name> <local-port>:<remote-port>
Example: Suppose you have a pod named my-web-app-7c8d9f-abcde that runs a web server listening on port 80. You want to access this web server from your local machine on port 8080.
kubectl port-forward my-web-app-7c8d9f-abcde 8080:80
Once executed, kubectl will output something like:
Forwarding from 127.0.0.1:8080 -> 80
Forwarding from [::1]:8080 -> 80
This indicates that a tunnel has been established. You can now open your web browser and navigate to http://localhost:8080 (or http://127.0.0.1:8080), and your requests will be directed to port 80 of the my-web-app-7c8d9f-abcde pod. The command will run continuously in your terminal, maintaining the connection. To terminate the tunnel, simply press Ctrl+C.
Forwarding to a Deployment
Often, you don't care about the specific pod name; you just want to connect to any healthy pod managed by a particular deployment. kubectl port-forward simplifies this by allowing you to specify the deployment name directly. When you do, kubectl automatically selects one of the running pods associated with that deployment and establishes the tunnel to it.
Command Structure:
kubectl port-forward deployment/<deployment-name> <local-port>:<remote-port>
Example: If you have a deployment named my-web-app and want to forward traffic to any of its pods on local port 8080 to remote port 80:
kubectl port-forward deployment/my-web-app 8080:80
This is a highly convenient feature, as pod names often contain random hashes and change upon redeployment. Targeting the deployment ensures your command remains consistent even as pods are recreated.
Forwarding to a Service
Similar to deployments, you can also use kubectl port-forward with a service name. When you target a service, kubectl will resolve the service to its backing pods and then pick one of those pods to establish the forward. This is useful when you want to access the service's internal ClusterIP without setting up external exposure.
Command Structure:
kubectl port-forward service/<service-name> <local-port>:<remote-port>
Example: If you have a service named my-web-service that exposes pods on port 80, and you want to access it locally on 8080:
kubectl port-forward service/my-web-service 8080:80
This method provides an abstraction, as you interact with the logical service name rather than individual pods. It's especially useful for services that might have dynamically changing sets of backing pods or when you want to ensure you're hitting the service as Kubernetes sees it internally.
Omitting the Local Port (Automatic Assignment)
If you only specify the remote port, kubectl will automatically assign an available local port, typically starting from a high ephemeral port number. This can be handy when you don't have a strong preference for the local port or want to avoid conflicts.
Command Structure:
kubectl port-forward <resource-type>/<resource-name> <remote-port>
Example:
kubectl port-forward deployment/my-web-app 80
kubectl might then output something like:
Forwarding from 127.0.0.1:43257 -> 80
Forwarding from [::1]:43257 -> 80
In this case, 43257 is the automatically assigned local port. You would then access your application via http://localhost:43257.
By mastering these basic commands, you unlock the immediate power of kubectl port-forward, enabling quick and direct interaction with your Kubernetes services for development and debugging.
Advanced Usage and Scenarios for kubectl port-forward
While the basic commands provide a solid foundation, kubectl port-forward offers advanced functionalities and considerations that empower users to handle more complex scenarios effectively. Understanding these nuances can significantly enhance your debugging capabilities and streamline intricate development workflows.
Specifying Local IP Address for Listening
By default, kubectl port-forward binds to 127.0.0.1 (localhost) and [::1] (IPv6 localhost). This means only processes on your local machine can access the forwarded port. However, there might be situations where you want to expose the forwarded port to other machines on your local network (e.g., if you're developing on a VM and want to access it from your host OS, or if a colleague needs to temporarily access a service you're forwarding). You can achieve this using the --address flag.
Command Structure:
kubectl port-forward <resource-type>/<resource-name> <local-port>:<remote-port> --address <local-ip-address>
Example: To make the forwarded service accessible from any IP address on your local machine (effectively 0.0.0.0), allowing other devices on your local network to connect:
kubectl port-forward deployment/my-web-app 8080:80 --address 0.0.0.0
Caution: Using 0.0.0.0 means the port is open to your local network. Be mindful of security implications, especially in shared network environments. Only use this when explicitly required and with appropriate network firewalls in place.
Handling Multiple Port Forwards
It's common to need to access multiple services within your cluster simultaneously. You can simply open multiple terminal windows and run a kubectl port-forward command in each. Each command will establish its own independent tunnel.
Example: If you have a frontend api service on port 3000 and a backend database on port 5432:
Terminal 1:
kubectl port-forward service/frontend-api 9000:3000
Terminal 2:
kubectl port-forward service/backend-db 5432:5432
Now, your local application can connect to the frontend api at localhost:9000 and the database at localhost:5432.
Backgrounding port-forward for Uninterrupted Workflows
Running port-forward in the foreground means your terminal is tied up. For longer-running debugging sessions or when you need to continue using the terminal, you can run the command in the background.
Using & (for Unix-like systems): Append & to the command to run it in the background immediately. You'll typically see a job ID and process ID.
kubectl port-forward deployment/my-web-app 8080:80 &
To bring it back to the foreground, use fg. To list background jobs, use jobs. To kill a background job, use kill %<job-id> or kill <pid>.
Using nohup (for Unix-like systems): nohup allows a command to run even after you close the terminal. The output will be redirected to nohup.out by default.
nohup kubectl port-forward deployment/my-web-app 8080:80 > /dev/null 2>&1 &
This command forwards the port, runs in the background, and suppresses all output to avoid cluttering nohup.out. You'll need to find the process ID (PID) using ps aux | grep 'kubectl port-forward' to kill it later.
Using a dedicated port-forward manager (e.g., kubefwd): For very complex scenarios with many forwards, community tools like kubefwd can map multiple service ports to local IPs and update your /etc/hosts file, providing a more robust solution than multiple kubectl port-forward commands. While beyond the scope of this core kubectl guide, it's worth noting for advanced needs.
Forwarding to StatefulSets and DaemonSets
kubectl port-forward is not limited to just deployments and services. You can also target specific pods within StatefulSets and DaemonSets. The principle remains the same: identify the pod you want to connect to.
Example for StatefulSet: StatefulSets have predictable pod names, often my-statefulset-0, my-statefulset-1, etc.
kubectl port-forward statefulset/my-statefulset 8080:80
Or, more specifically, to a particular pod instance:
kubectl port-forward my-statefulset-0 8080:80
Example for DaemonSet: DaemonSets run one pod per node. You'll need to specify a particular pod name.
kubectl get pods -l app=my-daemonset # Find a pod name, e.g., my-daemonset-abcde
kubectl port-forward my-daemonset-abcde 8080:80
Scripting port-forward for Automation
For repetitive tasks or integration into CI/CD scripts (though sparingly, as it's a dev tool), you might want to script port-forward. Remember to handle its termination gracefully.
Example Shell Script:
#!/bin/bash

LOCAL_PORT=8080
REMOTE_PORT=80
DEPLOYMENT_NAME="my-web-app"
NAMESPACE="default"

echo "Starting port-forward for deployment/$DEPLOYMENT_NAME in namespace $NAMESPACE..."

# Find a pod name
POD_NAME=$(kubectl get pods -n $NAMESPACE -l app=$DEPLOYMENT_NAME -o jsonpath='{.items[0].metadata.name}')

if [ -z "$POD_NAME" ]; then
  echo "Error: No pod found for deployment/$DEPLOYMENT_NAME in namespace $NAMESPACE"
  exit 1
fi

echo "Forwarding to pod: $POD_NAME"

# Start port-forward in the background
kubectl port-forward $POD_NAME $LOCAL_PORT:$REMOTE_PORT -n $NAMESPACE > /dev/null 2>&1 &
PF_PID=$!

echo "Port-forward started with PID: $PF_PID"
echo "Access at http://localhost:$LOCAL_PORT"
echo "Press Enter to stop the port-forward..."

read -r # Wait for user input

echo "Stopping port-forward with PID: $PF_PID..."
kill "$PF_PID"

echo "Port-forward stopped."
This script finds a pod, starts the forward in the background, waits for user input, and then cleanly terminates the process. Such scripting can be invaluable for automating repetitive setup tasks during development, providing a consistent Open Platform for local testing.
Security Considerations with kubectl port-forward
While kubectl port-forward is an incredibly useful tool for developers and administrators, it's crucial to understand its security implications. Misuse or a lack of awareness can inadvertently create vulnerabilities, especially when dealing with sensitive data or production environments.
Bypassing Network Policies and Firewalls
The most significant security consideration is that kubectl port-forward effectively bypasses Kubernetes network policies, service meshes (like Istio or Linkerd), and traditional cluster-level firewalls. Because the connection is established via the Kubernetes API server and tunneled directly to the pod, it operates outside the normal network traffic flow that these security layers are designed to intercept and control.
- Network Policies: If you have network policies configured to restrict traffic between namespaces or even within a namespace,
port-forwardwill ignore them. This means you could potentially access a pod that is otherwise isolated by network policies. - Service Meshes: Service meshes inject sidecar proxies into pods to manage, secure, and observe traffic.
port-forwardbypasses these sidecars for the forwarded connection, meaning mTLS (mutual TLS) and other mesh-level security features will not apply to theport-forwardtraffic. - Cluster Firewalls: Any firewall rules on the Kubernetes nodes or at the edge of your cluster are also bypassed, as the traffic originates from your local machine, goes to the API server, and then directly to the pod.
This bypassing capability is a double-edged sword: it's what makes port-forward so powerful for debugging otherwise isolated services, but it also means you must exercise caution. Never assume that port-forward traffic is subject to the same security controls as normal cluster traffic.
Least Privilege and RBAC
The permissions required to use kubectl port-forward are get, list, watch on pods, and crucially, create on pods/portforward. Granting these permissions to users means they can establish direct connections to any pod they have access to within the specified namespace (or cluster-wide if cluster-level roles are granted).
- Principle of Least Privilege: Always follow the principle of least privilege. Only grant
port-forwardcapabilities to users who genuinely need them, and scope those permissions as narrowly as possible (e.g., to specific namespaces or specific pod labels). - Sensitive Pods: Be especially cautious about granting
port-forwardaccess to pods containing sensitive data (e.g., database pods, secrets management pods) or critical infrastructure components. A developer accidentally connecting to a production database viaport-forwardcould have unintended consequences.
Not for Production Exposure
kubectl port-forward is explicitly designed for local development, debugging, and administrative tasks. It is not suitable for exposing services to external users or for any form of production traffic.
- Single-User Tunnel: It creates a single-user, single-client tunnel. It's not built for high concurrency, load balancing, or robust uptime.
- Security for Production: For production-grade exposure, always use Kubernetes Service types (NodePort, LoadBalancer) or Ingress Controllers, which integrate with your cluster's networking, security policies, and observability tools. These mechanisms provide the necessary security, scalability, and manageability required for live applications.
- Auditing and Logging: While
kubectlitself might log API requests, the detailed traffic flowing through aport-forwardtunnel is typically not logged or auditable in the same way that traffic through an Ingressgatewayor a Service Mesh would be. This lack of visibility can be a security concern in regulated environments.
Potential for Unauthorized Access
If an attacker gains access to a user's kubeconfig file or credentials, they could potentially use kubectl port-forward to gain direct access to internal cluster services that might otherwise be protected by multiple layers of network security. This underscores the importance of securing kubeconfig files and using strong authentication mechanisms (like MFA) for Kubernetes API access.
In summary, kubectl port-forward is a powerful surgical instrument. Use it precisely, understand its reach, and always be aware that it operates outside many of the standard Kubernetes network security layers. Reserve it for its intended purpose: secure, temporary, and localized interaction with internal cluster services during development and troubleshooting, never for production service exposure.
Comparing kubectl port-forward with Other Exposure Methods
Kubernetes offers a rich set of primitives for exposing services, each designed for different use cases and offering varying levels of security, scalability, and complexity. While kubectl port-forward is invaluable for specific scenarios, it's essential to understand how it contrasts with other service exposure methods to choose the right tool for the job.
1. ClusterIP Service
- Purpose: Exposes the Service on an internal IP address within the cluster. It's only reachable from within the cluster. This is the default Service type.
kubectl port-forwardvs. ClusterIP:port-forwardis often used to reach a ClusterIP service from outside the cluster (i.e., your local machine) for debugging. Withoutport-forward, you couldn't directly access a ClusterIP service from your laptop.port-forwardacts as a temporary, localized bridge.- Use Cases: Internal communication between microservices, database connections within the cluster.
port-forwardfor local testing of these internal services.
2. NodePort Service
- Purpose: Exposes the Service on a static port on each Node's IP address. A ClusterIP Service is automatically created, and the NodePort Service routes to it. Any traffic sent to that port on any node will be forwarded to the service.
kubectl port-forwardvs. NodePort: NodePort makes a service available across all nodes on a specific, typically high-numbered port (30000-32767). It's more "public" thanport-forwardwithin your cluster's network.port-forwardis a direct tunnel to a single pod (or a selected pod) and doesn't involve opening ports on all nodes. NodePort is generally suitable for exposing internal services to a very specific, trusted network segment, or as a backend for an external LoadBalancer.port-forwardis for individual developer access.- Use Cases: Exposing a web server to an internal network where you can access node IPs directly, often for testing within a private network.
3. LoadBalancer Service
- Purpose: Exposes the Service externally using a cloud provider's load balancer. The cloud provider provisions an external IP address that acts as the entry point to your service. This automatically creates a NodePort and ClusterIP Service.
kubectl port-forwardvs. LoadBalancer: A LoadBalancer is a robust, production-grade solution for exposing services to the internet, providing high availability, scaling, and integration with cloud networking.port-forwardis a temporary, local, and insecure alternative for production. You would never useport-forwardto serve production traffic.- Use Cases: Exposing public-facing web applications, APIs, or any service that needs to be accessed by external clients over the internet.
4. Ingress
- Purpose: Ingress is not a Service type but an API object that manages external access to services in a cluster, typically HTTP(S). It provides HTTP routing, SSL termination, and virtual hosting, all managed by an Ingress Controller (e.g., NGINX Ingress Controller, Traefik, Istio Ingress
gateway). kubectl port-forwardvs. Ingress: Ingress is the most sophisticated and production-ready way to expose HTTP/HTTPS services. It allows for complex routing rules, path-based routing, hostname-based routing, and SSL certificate management, often sitting behind a LoadBalancer.port-forwardis a raw TCP tunnel, lacking any of these high-level HTTP features. Ingress is designed for complexapiexposure andgatewayfunctionalities for public-facing applications.port-forwardis for direct pod access.- Use Cases: Hosting multiple applications under a single external IP, advanced routing, API versioning, SSL termination for public websites and
apiendpoints.
Comparison Table
To better illustrate the differences, here's a comparative overview of these Kubernetes service exposure mechanisms:
| Feature | kubectl port-forward |
ClusterIP Service | NodePort Service | LoadBalancer Service | Ingress |
|---|---|---|---|---|---|
| Exposure Level | Local machine to single pod | Internal to cluster | Internal network to all nodes | External, cloud-managed IP | External, HTTP/HTTPS routing |
| Scope | Individual user/session | Cluster-wide internal | Cluster-wide on specific port | Cloud provider scope | Cluster-wide, HTTP/HTTPS services |
| Persistence | Temporary (while command runs) | Persistent (until deleted) | Persistent (until deleted) | Persistent (until deleted) | Persistent (until deleted) |
| Security | Local RBAC, bypassed network policies | Internal network policies applied | Basic node-level network security | Cloud provider security features | Advanced HTTP/HTTPS security, WAF integration |
| Scalability | Single-user connection | Internal load balancing | Basic load balancing across nodes | High-level cloud load balancing | High-level HTTP load balancing |
| Complexity | Low | Low | Medium | Medium-High | High (requires Ingress Controller) |
| Typical Use | Local development, debugging | Inter-service communication | Internal testing, specific access | Public-facing applications | Public APIs, web apps with complex routing |
| Traffic Type | TCP (any) | TCP (any) | TCP (any) | TCP, UDP, HTTP, HTTPS | HTTP, HTTPS (Layer 7) |
Choosing between these methods depends entirely on your needs. For local, temporary, and direct access to a specific application instance for development or debugging, kubectl port-forward is unparalleled in its simplicity and effectiveness. For robust, scalable, and secure production api exposure, you will inevitably rely on a combination of Services and Ingress, possibly complemented by an API Gateway for advanced management.
APIPark is a high-performance AI gateway that allows you to securely access the most comprehensive LLM APIs globally on the APIPark platform, including OpenAI, Anthropic, Mistral, Llama2, Google Gemini, and more.Try APIPark now! 👇👇👇
Real-world Use Cases and Examples
kubectl port-forward might seem like a niche command, but its versatility makes it a staple in the toolkit of any developer or operator working with Kubernetes. It bridges the gap between your local development environment and the remote cluster, enabling a seamless workflow for debugging, testing, and interaction.
1. Debugging a Microservice in Development
This is perhaps the most common use case. Imagine you're developing a new api endpoint for a microservice. You've deployed it to a development Kubernetes cluster, but it's not working as expected.
- Scenario: Your
order-processingservice is deployed in Kubernetes, but requests to its/ordersendpoint are failing. You want to send requests from your local machine to this specific pod to debug. - Solution:
- Get the name of your pod:
kubectl get pods -l app=order-processing - Forward the port:
kubectl port-forward <order-processing-pod-name> 8000:80(assuming your service listens on port 80). - Now, you can use
curl http://localhost:8000/ordersor your API client to send requests directly to the pod. You can observe logs from the pod (kubectl logs -f <pod-name>) and even attach a debugger if your application supports remote debugging, all while seeing the exact network traffic reach your pod. This direct access removes layers of complexity that might obscure the root cause of the bug.
- Get the name of your pod:
2. Accessing a Database Inside a Cluster from a Local Client
Many applications rely on databases, which are often deployed within the Kubernetes cluster as StatefulSets or individual pods. You might need to connect to this database from your local machine using a GUI client (like DBeaver, DataGrip, or pgAdmin) or a local script.
- Scenario: Your
postgresdatabase is running as a pod in the cluster, listening on port5432. You want to connect to it usingpgAdminrunning on your laptop. - Solution:
- Find the
postgrespod:kubectl get pods -l app=postgres - Forward the database port:
kubectl port-forward <postgres-pod-name> 5432:5432 - In
pgAdminor your preferred SQL client, configure a new connection tolocalhost:5432with the appropriate database credentials. Your local client will now establish a secure connection directly to the database pod, allowing you to run queries, inspect data, and manage the database as if it were running locally. This is invaluable for schema migrations, data inspection, and general database development.
- Find the
3. Testing a Newly Deployed api Endpoint Locally without External Exposure
Before exposing a new api endpoint to the public internet via an Ingress or LoadBalancer, you often want to perform initial testing from your local environment. port-forward allows you to do this securely and privately.
- Scenario: You've just deployed a new
payment-gatewayservice that exposes a/checkoutapiendpoint on port443. You want to test it from your local browser or Postman without making it publicly available. - Solution:
- Target the deployment:
kubectl port-forward deployment/payment-gateway 8443:443 - Now you can make
HTTPSrequests tohttps://localhost:8443/checkoutfrom your local machine. Since the connection is direct, you're not worrying about DNS propagation, external IP addresses, or Ingress configurations until you're confident theapiworks as expected. This makes for rapid iteration and testing cycles.
- Target the deployment:
4. Integrating Local Tools with Cluster Services
Modern development often involves a diverse set of tools. Sometimes, a local tool needs to interact directly with a service running inside Kubernetes.
- Scenario: You're using a local message queue client (e.g.,
kafka-console-consumeror a custom Python script) to interact with a Kafka broker running in your cluster. The Kafka broker pod listens on port9092. - Solution:
- Find your Kafka broker pod:
kubectl get pods -l app=kafka - Forward the Kafka port:
kubectl port-forward <kafka-broker-pod-name> 9092:9092 - Your local Kafka client can now connect to
localhost:9092to produce or consume messages from the cluster's Kafka instance. This allows for seamless integration of local development tools with remote cluster components.
- Find your Kafka broker pod:
5. Accessing a Web UI of an Internal Tool
Many internal Kubernetes tools or dashboards (like Grafana, Prometheus, or custom internal dashboards) are typically exposed via ClusterIP services and are not meant for external access. port-forward is perfect for gaining temporary access to their web UIs.
- Scenario: You want to view the Grafana dashboard running inside your cluster, which is exposed by a service named
grafanaon port3000. - Solution:
- Forward the service:
kubectl port-forward service/grafana 3000:3000 - Open your browser to
http://localhost:3000, and you'll see the Grafana login page. This provides a quick and secure way to access internal UIs without complex Ingress rules or opening up your cluster's network.
- Forward the service:
These examples illustrate that kubectl port-forward is more than just a command; it's a critical enabler for efficient, secure, and direct interaction with services within your Kubernetes cluster, making it an indispensable asset in a developer's daily workflow. Its ability to create a temporary gateway directly to internal components is a cornerstone of effective cloud-native debugging and development.
Troubleshooting Common kubectl port-forward Issues
Even with a clear understanding of kubectl port-forward, you might occasionally encounter issues. Knowing how to diagnose and resolve these common problems can save significant time and frustration.
1. "Unable to listen on any of the requested ports" or "Address already in use"
This is a very common error, indicating that the local port you specified (or the one kubectl tried to assign automatically) is already in use by another process on your local machine.
- Diagnosis:
- On Linux/macOS: Use
lsof -i :<port>ornetstat -tulnp | grep <port>to identify the process using the port. - On Windows: Use
netstat -ano | findstr :<port>to find the PID, thentasklist | findstr <PID>to find the process name.
- On Linux/macOS: Use
- Solution:
- Choose a different local port for the
port-forwardcommand. - Identify and terminate the process that is currently using the desired local port (if it's safe to do so).
- Choose a different local port for the
2. "error: unable to connect to the server: dial tcp..."
This error indicates that your kubectl client cannot connect to the Kubernetes API server itself. This is a fundamental issue preventing any interaction with the cluster, including port-forward.
- Diagnosis:
- Check your network connection to the cluster.
- Verify your
kubeconfigfile:kubectl config view. Ensure the cluster, user, and context are correctly configured and that the server address is reachable. - Confirm the Kubernetes API server is running and accessible (e.g., check firewall rules).
- Verify your authentication credentials are valid.
- Solution:
- Fix network connectivity.
- Update your
kubeconfigto point to the correct cluster and use valid credentials. - Consult your cluster administrator if you suspect cluster-side issues.
3. "error: Pod not found" or "error: looking up deployment/my-app: deployment.apps 'my-app' not found"
This error occurs when kubectl cannot locate the target resource (pod, deployment, service) you're trying to forward to.
- Diagnosis:
- Double-check the spelling of the resource name.
- Ensure you are in the correct namespace. If not, use the
-n <namespace-name>flag or set your current context's namespace:kubectl config set-context --current --namespace=<namespace-name>. - Verify the resource actually exists:
kubectl get pod <pod-name> -n <namespace>orkubectl get deployment <deployment-name> -n <namespace>.
- Solution:
- Correct the resource name or namespace in your
port-forwardcommand.
- Correct the resource name or namespace in your
4. "Forwarding from 127.0.0.0:XXXX -> XXXX" is shown, but nothing works (Connection Refused)
This indicates the port-forward tunnel has been established successfully by kubectl, but the connection fails when you try to access localhost:XXXX. This usually means the application inside the pod is not listening on the expected remote port, or it's not healthy.
- Diagnosis:
- Verify the remote port: Is the application in the pod actually listening on the port you specified (e.g.,
80,8080,5432)? Check the pod's container port definitions in its YAML or logs. - Check pod health: Is the target pod actually running and healthy?
kubectl get pods <pod-name>andkubectl describe pod <pod-name>. Look forCrashLoopBackOff,Pending, orErrorstates. - Check pod logs:
kubectl logs <pod-name>for any application-level errors or messages indicating the service isn't starting correctly or listening on the expected port. - Is the application bound to
0.0.0.0inside the pod? Some applications might default to binding only to127.0.0.1inside the container, which would preventport-forwardfrom reaching them. This is rare but possible.
- Verify the remote port: Is the application in the pod actually listening on the port you specified (e.g.,
- Solution:
- Correct the remote port in your
port-forwardcommand. - Fix the application issue causing the pod to be unhealthy or not listen on the correct port.
- Ensure your application within the container is configured to listen on
0.0.0.0or the specific IP assigned to the container's network interface, rather than just127.0.0.1.
- Correct the remote port in your
5. Permission Denied Errors
If you receive errors like "Error from server (Forbidden): User '...' cannot create portforward..."
- Diagnosis: Your
kubeconfiguser lacks the necessary RBAC permissions to performport-forwardoperations. - Solution:
- Contact your cluster administrator. They need to grant your user (or the service account you're using) the
createpermission onpods/portforward(and likelyget,list,watchon pods) within the relevant namespace(s) or cluster-wide.
- Contact your cluster administrator. They need to grant your user (or the service account you're using) the
By systematically going through these troubleshooting steps, you can quickly identify and resolve most issues related to kubectl port-forward, allowing you to get back to productive development and debugging.
Performance Considerations for kubectl port-forward
While kubectl port-forward is a powerful tool for development and debugging, it's crucial to understand its performance characteristics. It is inherently designed for temporary, low-to-moderate traffic scenarios and is not suitable for high-throughput, sustained production traffic.
Inherent Latency and Overhead
The kubectl port-forward mechanism introduces several layers of indirection and processing overhead:
- Local
kubectlClient: Your localkubectlprocess handles the local port listening and data forwarding. - Kubernetes API Server: All traffic is multiplexed through the Kubernetes API server. This adds latency as data travels from your client to the API server, then from the API server to the
kubeleton the target node. KubeletAgent: Thekubeleton the node acts as an intermediary, receiving the forwarded data from the API server and injecting it into the target pod's network namespace. It then performs the reverse for responses.- Network Hops: The actual physical network hops between your machine, the API server, and the node where the pod resides contribute to latency.
Each of these steps adds a small amount of processing and network latency that would not be present in a direct network connection or a load-balanced production setup. For interactive debugging or occasional api calls, this overhead is negligible. For thousands of concurrent requests or large data transfers, it becomes a significant bottleneck.
Single-Threaded Nature (Client-side)
The kubectl port-forward command, as run from your local machine, typically creates a single TCP tunnel. While the underlying WebSocket/SPDY stream might support multiplexing, the client-side operation is not designed for high concurrency in the way a production-grade LoadBalancer or Ingress gateway is. Multiple simultaneous connections to the forwarded port from different local applications might contend for resources, leading to reduced throughput and increased latency.
Not for High-Throughput or Sustained Traffic
- Load Balancing:
port-forwardconnects to a single specific pod (or one selected bykubectlfrom a deployment/service). It does not provide any load balancing across multiple replica pods. If that pod goes down or becomes unresponsive, yourport-forwardconnection will break. - Scalability: It doesn't scale. If you need to handle more traffic, you can't simply add more
port-forwardinstances and expect them to share the load efficiently. - Resilience: It lacks the resilience features of production services. There's no automatic failover, health checks, or self-healing capabilities built into a
port-forwardtunnel.
When Performance Matters, Use Production-Grade Solutions
When you transition from development and debugging to deploying services for external consumption, performance, scalability, and resilience become paramount. This is where dedicated API Gateway solutions and Kubernetes' native exposure mechanisms come into play.
For instance, an API Gateway like APIPark offers a stark contrast to kubectl port-forward in terms of performance. While port-forward serves as a personal, temporary bypass, APIPark is designed for enterprise-grade api management and traffic handling. APIPark, as an Open Platform and API Gateway, can achieve over 20,000 transactions per second (TPS) on modest hardware (8-core CPU, 8GB memory) and supports cluster deployment for large-scale traffic. It provides features like load balancing, traffic forwarding, caching, request/response transformation, and robust security, all of which are essential for high-performance api gateway deployments. It handles the entire api lifecycle, from design and publication to invocation and decommissioning, offering a unified api format for AI invocation and prompt encapsulation into REST apis, which is far beyond the scope or capability of a simple port-forward tunnel. For applications requiring a performant, secure, and manageable api layer, especially for AI and REST services, an API Gateway like APIPark is the appropriate choice, not kubectl port-forward.
In essence, view kubectl port-forward as a specialized tool for specific, development-oriented tasks where direct, temporary access is prioritized over high performance. For any production-facing or high-traffic api services, always opt for Kubernetes Services (LoadBalancer, Ingress) or dedicated API Gateway solutions, which are architected for the demands of a scalable, resilient, and performant distributed system.
Integration with Development Workflows
The true power of kubectl port-forward lies not just in its individual capability, but in how seamlessly it integrates into various development workflows, significantly enhancing developer productivity and accelerating debugging cycles within the Kubernetes ecosystem. It serves as a personal gateway, allowing developers to maintain a "local-first" mindset even when working with distributed remote services.
Local-First Development with Remote Backend
Many developers prefer to run their frontend or a specific microservice locally for faster iteration, hot-reloading, and easier debugging with familiar IDE tools. However, this local component often needs to communicate with other backend services that reside exclusively within the Kubernetes cluster (e.g., databases, authentication services, other microservices).
- Scenario: You're developing a React frontend application on your laptop. This frontend needs to consume an
apifrom a backend service deployed in Kubernetes. - Integration: You run your React app locally, and then use
kubectl port-forwardto tunnel the backendapiservice to a local port. Your frontend code can then simply makeapicalls tohttp://localhost:<local-backend-port>, effectively treating the remote service as if it were running locally. This allows for rapid frontend development without needing to deploy the entire stack to the cluster for every small change.
Automated Test Environments
While kubectl port-forward is often manual, it can also be incorporated into scripts that set up temporary testing environments. For integration tests that run on a developer's machine but require interaction with specific Kubernetes services, port-forward can establish the necessary connections before tests begin.
- Scenario: A suite of integration tests for a new microservice needs to connect to a mocked database service deployed in Kubernetes and a messaging queue.
- Integration: A setup script can spin up the required Kubernetes services, then use
kubectl port-forwardto make the database and messaging queue ports available onlocalhost. The local test runner can then connect to these local ports, execute the tests, and a teardown script can then kill theport-forwardprocesses and remove the temporary Kubernetes resources.
Remote Debugging
For languages and runtimes that support remote debugging (e.g., Java, Node.js, Python), port-forward is the standard method to connect your local debugger to a running application inside a Kubernetes pod.
- Scenario: You have a Java application running in a pod in debug mode (listening for a debugger connection on a specific port, say
5005). - Integration: You use
kubectl port-forward <java-app-pod> 5005:5005. Then, from your IDE (e.g., IntelliJ, VS Code), you configure a remote debugger connection tolocalhost:5005. Your IDE can now connect directly to the application in the pod, allowing you to set breakpoints, inspect variables, and step through code as if the application were running on your local machine. This is an incredibly powerful capability for diagnosing complex issues that are difficult to reproduce locally.
Ad-hoc Exploration and Data Access
Beyond formal development cycles, port-forward is invaluable for ad-hoc exploration.
- Scenario: A data scientist needs to quickly pull some data from a Spark cluster running in Kubernetes using a local Jupyter notebook.
- Integration:
port-forwardthe Spark UI and/or the Spark driver's port to local ports. The Jupyter notebook can then interact with the Spark cluster directly vialocalhost, allowing for interactive data analysis without needing to expose the entire Spark cluster or set up complex security.
The consistent theme across these workflows is that kubectl port-forward acts as a crucial bridge. It allows developers to leverage their familiar local tools and environments while still interacting with the distributed services of a Kubernetes cluster. This maintains productivity, reduces the cognitive load of constantly switching contexts, and ultimately makes working with cloud-native applications more accessible and efficient. It's a testament to the design of Kubernetes that such a simple command can provide such profound value as an Open Platform for interaction.
The Broader Context: API Management and Gateways
While kubectl port-forward is a powerful, direct conduit for developers, it's essential to understand its place within the larger ecosystem of api exposure and management. For production environments, exposing services requires far more sophisticated solutions that address scalability, security, lifecycle management, and observability. This is where API Gateway products and comprehensive api management platforms become indispensable, serving as the robust and intelligent gateway for all external interactions.
kubectl port-forward excels at creating a temporary, personal tunnel. It's a debug tool, a developer's lifeline to a specific pod. It lacks any features for api versioning, traffic shaping, authentication/authorization for external users, analytics, caching, rate limiting, or protocol translation. These are the domains of a dedicated API Gateway.
An API Gateway sits at the edge of your network, acting as a single entry point for all incoming api calls. It orchestrates requests, routing them to the correct backend services (which could be running in Kubernetes, VMs, or serverless functions). More importantly, it enforces policies, handles security, and provides a centralized point for api lifecycle management.
Consider APIPark, an open-source AI gateway and API Management Platform. Where kubectl port-forward gives you a raw, unmanaged TCP connection to a single pod, APIPark provides an enterprise-grade Open Platform for managing hundreds of apis, both traditional REST and AI-driven services, at scale.
Here's how APIPark addresses the challenges that kubectl port-forward is not designed for:
- Unified API Management: APIPark offers end-to-end
apilifecycle management, covering design, publication, invocation, and decommission. This contrasts sharply withport-forwardwhich is purely about temporary connectivity. - Scalability and Performance: As noted earlier, APIPark can handle over 20,000 TPS, supporting cluster deployment to manage large-scale production traffic. This is critical for public-facing
apis, unlike the single-user nature ofport-forward. - Advanced Security: APIPark provides features like API resource access approval, independent
apiand access permissions for each tenant, and centralized authentication for integrated AI models. These are robust, configurable security layers essential for protecting sensitive data and services, whichport-forwardbypasses entirely. - AI Model Integration: A unique strength of APIPark is its quick integration of 100+ AI models and a unified
apiformat for AI invocation. It allows prompt encapsulation into RESTapis, simplifying the use and maintenance of AI services—a capability entirely outside the scope ofkubectl port-forward. - Observability and Analytics: APIPark provides detailed
apicall logging and powerful data analysis features, offering insights into long-term trends and performance changes. This is crucial for proactive maintenance and operational visibility, something rawport-forwardconnections do not offer. - Team Collaboration and Sharing: APIPark enables
apiservice sharing within teams and multi-tenancy, allowing different departments to find and useapiservices efficiently, fostering collaboration within anOpen Platformecosystem.
In essence, if kubectl port-forward is a developer's local access key, then an API Gateway like APIPark is the highly secure, intelligent, and scalable front door to your entire ecosystem of services for the broader world. For anyone building a production-ready application, especially those leveraging AI, understanding the transition from temporary debugging tools to robust API Gateway solutions is a fundamental step in delivering secure, performant, and manageable services. While port-forward empowers individual developers, API Gateway solutions empower entire organizations to expose, manage, and monetize their digital assets effectively.
Conclusion
kubectl port-forward stands as a cornerstone utility for anyone navigating the complexities of Kubernetes development and operations. Its elegant simplicity belies a profound capability: to forge a direct, secure, and temporary bridge between your local machine and a specific service instance deep within your cluster. We've explored its core mechanics, understanding how it tunnels through the Kubernetes API server, bypassing conventional network layers to give you a personal gateway to internal resources. From basic command execution targeting pods, deployments, and services, to advanced scenarios involving specific IP bindings, background execution, and integration with scripting, port-forward proves its versatility time and again.
Crucially, this guide has emphasized the importance of using port-forward responsibly. While invaluable for debugging, local development, and ad-hoc troubleshooting, its security implications—particularly its ability to bypass network policies and its unsuitability for production traffic—cannot be overstated. It is a surgical tool, not a blunt instrument for general service exposure. For public-facing apis and scalable, secure service delivery, the comprehensive features offered by Kubernetes Services (NodePort, LoadBalancer) and Ingress, coupled with the advanced capabilities of a dedicated API Gateway like APIPark, are the indispensable choices. These platforms provide the Open Platform features, performance, security, and management tools required to operate a robust and production-ready api ecosystem, especially crucial for AI and REST services at scale.
By understanding both the strengths and limitations of kubectl port-forward, and by placing it correctly within the broader landscape of Kubernetes networking and api management, developers and operators can significantly enhance their efficiency. It remains an essential command for drilling down into the cluster's internal workings, offering an immediate feedback loop and an unparalleled level of interaction with remote services. Mastering kubectl port-forward isn't just about knowing a command; it's about unlocking a more fluid, effective, and direct approach to cloud-native development.
Frequently Asked Questions (FAQs)
1. What is kubectl port-forward primarily used for? kubectl port-forward is primarily used for local development, debugging, and administrative tasks. It creates a secure, temporary tunnel from your local machine to a specific port on a pod or service within your Kubernetes cluster, allowing you to access internal cluster services as if they were running on localhost. This is invaluable for testing api endpoints, connecting local IDEs for remote debugging, or accessing internal dashboards without exposing them externally.
2. Is kubectl port-forward secure for production traffic? No, kubectl port-forward is not secure or suitable for production traffic. While the initial connection to the Kubernetes API server is authenticated and authorized, the tunnel itself bypasses Kubernetes network policies, service meshes, and external firewalls. It's a single-user, temporary connection with no built-in load balancing, scalability, or robust security features required for production environments. For external exposure, API Gateway solutions like APIPark, or Kubernetes Services (LoadBalancer, Ingress), should be used.
3. What's the difference between kubectl port-forward and a Kubernetes Service like NodePort or LoadBalancer? kubectl port-forward creates a temporary, direct tunnel from your local machine to a specific pod or a selected pod behind a service, primarily for developer interaction. NodePort and LoadBalancer Services are persistent Kubernetes objects designed to expose services to the entire network (NodePort via cluster nodes, LoadBalancer via an external cloud load balancer), providing network-level exposure, load balancing (for multiple pods), and integration with cluster networking, suitable for broader access or production use.
4. Can I use kubectl port-forward to connect to a database inside my cluster from my local machine? Yes, kubectl port-forward is an excellent tool for this. You can forward the database's port (e.g., 5432 for PostgreSQL, 3306 for MySQL) from the database pod to a local port on your machine. Then, your local database client (like DBeaver, pgAdmin, or MySQL Workbench) can connect to localhost:<local-port> to interact with the database as if it were running locally, enabling easy data inspection, schema management, and query execution.
5. How can I stop a kubectl port-forward command running in the background? If you started kubectl port-forward in the foreground, you can stop it by pressing Ctrl+C. If it's running in the background (e.g., using & or nohup), you'll need to find its process ID (PID) and then terminate it. On Linux/macOS, you can typically use ps aux | grep 'kubectl port-forward' to find the PID, and then kill <PID> to stop the process. If you used nohup and redirected output, ensure you find the correct process.
🚀You can securely and efficiently call the OpenAI API on APIPark in just two steps:
Step 1: Deploy the APIPark AI gateway in 5 minutes.
APIPark is developed based on Golang, offering strong product performance and low development and maintenance costs. You can deploy APIPark with a single command line.
curl -sSO https://download.apipark.com/install/quick-start.sh; bash quick-start.sh

In my experience, you can see the successful deployment interface within 5 to 10 minutes. Then, you can log in to APIPark using your account.

Step 2: Call the OpenAI API.