kubectl port-forward Explained: Local Dev & Debugging


In the intricate landscape of modern application development, Kubernetes has emerged as the de facto standard for orchestrating containerized workloads. It provides unparalleled scalability, resilience, and declarative management, fundamentally transforming how applications are built, deployed, and run. However, this power and complexity often introduce a unique set of challenges, particularly for developers accustomed to working on a local machine. Debugging an application running inside a Kubernetes pod, or simply accessing its services from a local development environment, can feel like navigating a labyrinth without a map. This is precisely where kubectl port-forward steps in, acting as an indispensable utility that bridges the chasm between your local workstation and the heart of your Kubernetes cluster.
At its core, kubectl port-forward is a command-line tool designed to create a secure, temporary connection from a local port on your machine to a specific port on a pod within your Kubernetes cluster. It effectively bypasses the intricate network policies, ingress controllers, and service meshes that govern inter-service communication within Kubernetes, offering a direct, unadulterated channel straight to your application. This capability is not merely a convenience; it is a critical enabler for various development and debugging workflows. Imagine being able to use your favorite local IDE to set breakpoints in a service running in the cloud, or accessing a database deployed in Kubernetes with your familiar local SQL client. kubectl port-forward makes these scenarios not only possible but remarkably straightforward.
This comprehensive guide will embark on a deep dive into kubectl port-forward, peeling back its layers to reveal its underlying mechanisms, exploring its myriad use cases, and unraveling advanced techniques. We will navigate through practical examples, discuss common pitfalls and their solutions, and outline best practices to maximize your efficiency. Furthermore, we will contextualize kubectl port-forward within the broader ecosystem of API management, distinguishing its role as a developer utility from the robust, production-grade solutions like an API gateway that manage external API exposure. By the end of this journey, you will possess a profound understanding of kubectl port-forward, transforming it from a simple command into a powerful extension of your development toolkit, empowering you to debug and develop Kubernetes-native applications with unprecedented ease and confidence.
Understanding Kubernetes Networking Fundamentals
Before we delve into the specifics of kubectl port-forward, it's crucial to establish a foundational understanding of how networking operates within a Kubernetes cluster. Kubernetes provides a sophisticated and flexible networking model that allows pods, services, and other components to communicate seamlessly, both internally and, where necessary, externally. However, this model is inherently designed for the cluster's internal operations and external exposure through specific mechanisms, which often don't align with the immediate needs of a local developer.
Pods, Services, and Deployments: The Building Blocks
At the lowest level, applications in Kubernetes run inside Pods. A pod is the smallest deployable unit in Kubernetes, encapsulating one or more containers, storage resources, a unique cluster IP address, and options that govern how the containers run. Each pod gets its own IP address, which is routable within the cluster but not directly accessible from outside without additional configuration. This isolation is a fundamental security and organizational principle.
While pods provide the runtime environment, they are ephemeral. They can be created, destroyed, and rescheduled across different nodes. This dynamic nature means that relying on a pod's IP address directly is impractical. This is where Services come into play. A Kubernetes Service is an abstract way to expose an application running on a set of pods as a network service. Services define a logical set of pods and a policy by which to access them. They provide a stable IP address and DNS name, acting as a load balancer for the traffic directed to the underlying pods that match a specific selector.
There are several types of Kubernetes Services, each serving a different purpose for exposing services: * ClusterIP: The default service type. It exposes the service on an internal IP address within the cluster. This makes the service only reachable from within the cluster. * NodePort: Exposes the service on a static port on each node's IP address. This makes the service accessible from outside the cluster using <NodeIP>:<NodePort>. * LoadBalancer: Exposes the service externally using a cloud provider's load balancer. This allocates an external IP address that external clients can use to access the service. * ExternalName: Maps a service to a DNS name, not to a selector of pods.
Finally, Deployments manage the lifecycle of pods. A Deployment ensures that a specified number of replicas of a pod are running at any given time, handling updates, rollbacks, and self-healing. When you create a Deployment, it creates ReplicaSets, which in turn create pods.
The Challenge of External Access for Local Development
The standard Kubernetes networking model is robust for managing applications within the cluster and exposing them for production use cases. However, for a developer working on their local machine, this model presents a significant hurdle: 1. Pod IP Isolation: Pods have IP addresses that are internal to the cluster. Your local machine cannot directly route to these IP addresses. 2. Service Abstraction: While Services provide stable internal access, types like ClusterIP do not offer direct external access. NodePort and LoadBalancer services do provide external access, but they are often overkill or undesirable for quick, temporary local debugging. Setting up a LoadBalancer for every microservice you want to debug locally is impractical and can incur cloud costs. NodePort can expose services on high ports, but it still requires knowing a node's IP address and managing firewall rules. 3. Security and Network Policies: Kubernetes clusters typically employ Network Policies to restrict traffic flow between pods for security reasons. These policies are essential for production but can complicate attempts to establish a direct connection for local development.
Consider a scenario where you're developing a new feature for a microservice that runs within a Kubernetes pod. You need to connect your local IDE's debugger to this pod, or perhaps your local frontend application needs to talk to this backend service. Relying on an Ingress controller (which routes external HTTP/S traffic to services) or a LoadBalancer for every such interaction is cumbersome, slow, and often unnecessary. You need a simple, direct, and temporary tunnel that respects Kubernetes authentication and authorization, allowing you to treat a remote pod as if it were running on localhost. This is precisely the void that kubectl port-forward fills with elegant simplicity, providing a direct channel for debugging and local integration without the overhead of reconfiguring cluster-wide network infrastructure.
The Core Concept of kubectl port-forward: Bridging the Gap
kubectl port-forward is a deceptively simple yet profoundly powerful command that acts as a secure intermediary, creating a temporary tunnel between your local machine and a specific port within a pod in your Kubernetes cluster. It's akin to having a dedicated network cable that stretches directly from your development environment to the exact process running inside a remote container, bypassing all the intervening network layers that typically isolate Kubernetes workloads.
What It Does: Creates a Secure Tunnel
In essence, kubectl port-forward establishes a TCP tunnel. When you execute the command, it tells the Kubernetes API server to initiate a connection to the specified pod (or a pod backing a deployment or service). The API server then instructs the Kubelet agent running on the node hosting that pod to open a connection to the specified port within the pod's container. Crucially, this connection is then multiplexed and streamed back through the Kubernetes API server to your local kubectl client. The kubectl client, in turn, listens on a local port that you specify. Any traffic sent to this local port by your applications or browser is then forwarded through this secure tunnel to the pod's port, and responses are routed back to your local machine.
This process is fundamentally different from exposing a service via NodePort or LoadBalancer. Those mechanisms are designed for persistent, external access to an application for many clients, often involving DNS resolution, external IP addresses, and load balancing. kubectl port-forward, on the other hand, is a single-client, temporary connection intended for developer-centric tasks. It’s a direct conduit for one-to-one interaction, perfect for scenarios where you need direct, low-latency access to a specific workload for debugging or testing purposes.
How It Works: The Components in Play
To fully appreciate the mechanism, let's break down the interaction between the key Kubernetes components:
- Your Local
kubectlClient: This is where you initiate theport-forwardcommand. It authenticates with the Kubernetes API server using your configured kubeconfig credentials, just like any otherkubectlcommand. - Kubernetes API Server: The API server is the control plane's front door. When it receives a
port-forwardrequest, it acts as a central orchestrator. It verifies your permissions and, if authorized, initiates a connection to the Kubelet on the node where the target pod is running. This communication often uses a protocol called SPDY, which allows for multiplexing different streams over a single TCP connection, making it efficient for variouskubectloperations includingexec,logs, andport-forward. - Kubelet: This agent runs on each node in the Kubernetes cluster. Upon receiving instructions from the API server, the Kubelet is responsible for interacting with the container runtime (e.g., containerd or Docker) to establish a connection to the specified port within the target pod's network namespace. It then streams the traffic between its own host machine's port (which the API server connects to) and the pod's port. The Kubelet essentially acts as the final hop in the tunnel, pushing traffic directly into and pulling it out of the pod.
The entire communication path – from your local kubectl client, through the API server, to the Kubelet, and finally into the pod – is encrypted and authenticated. This ensures that your local development connections are secure and adhere to the cluster's access control policies, providing a safe environment for debugging sensitive applications.
Syntax: The Basic Blueprint
The fundamental syntax for kubectl port-forward is straightforward, yet versatile:
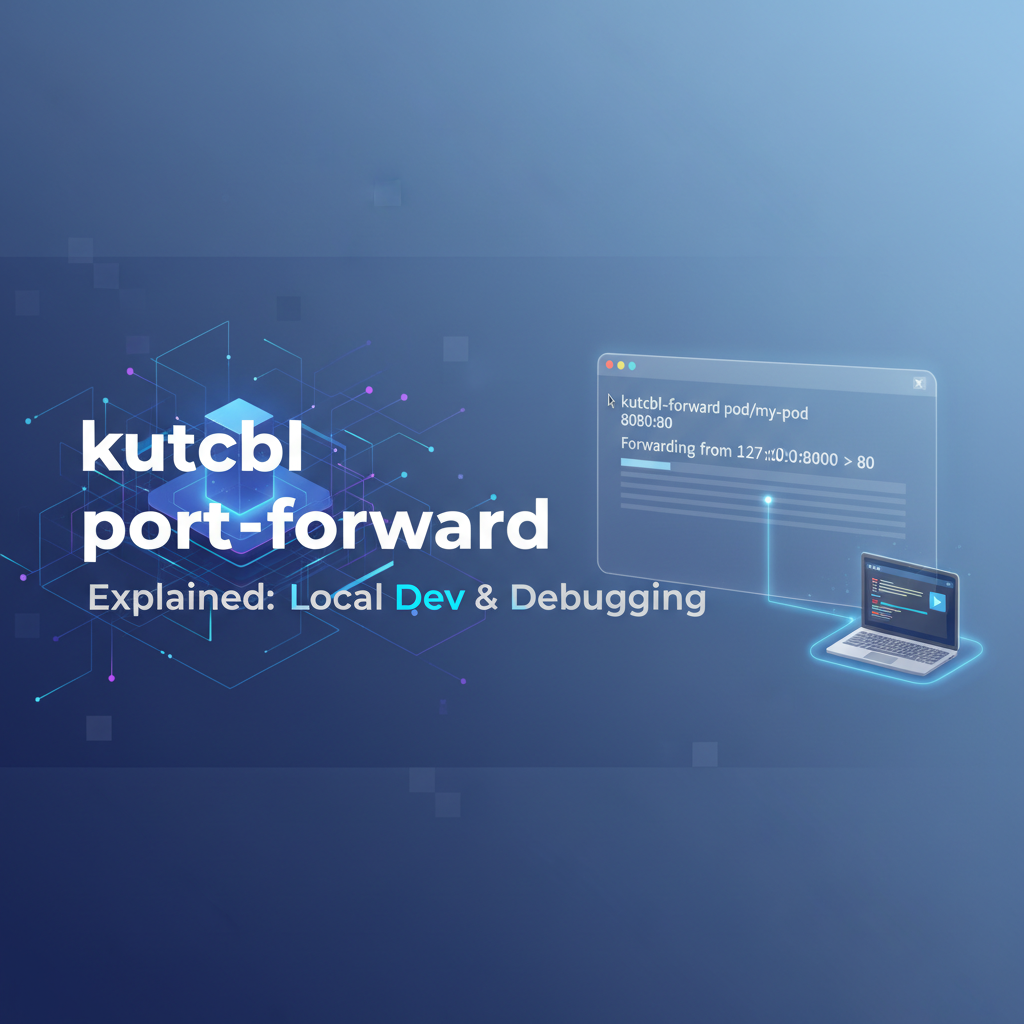
kubectl port-forward <resource_type>/<resource_name> <local_port>:<pod_port>
Let's dissect the components:
<resource_type>: This specifies the type of Kubernetes resource you want to target. Common choices includepod,deployment, andservice.<resource_name>: The specific name of the pod, deployment, or service you wish to connect to.<local_port>: The port on your local machine that you want to listen on. When you accesslocalhost:<local_port>, your traffic will be routed through the tunnel.<pod_port>: The port inside the pod (or the target port of the service) that your application is listening on. This is the port your application exposes within its container.
For instance, if you have a web application running on port 8080 inside a pod named my-web-app-pod-xyz, and you want to access it from your local machine on port 9000, the command would be:
kubectl port-forward pod/my-web-app-pod-xyz 9000:8080
This single command unlocks a world of possibilities, enabling seamless local development and debugging experiences within a Kubernetes-native environment.
Setting the Stage: Prerequisites and Initial Setup
Before you can harness the power of kubectl port-forward, there are a few fundamental prerequisites and initial setup steps you need to ensure are in place. These steps are standard for any interaction with a Kubernetes cluster but are worth reiterating to ensure a smooth experience.
1. kubectl Installed and Configured
The primary tool you'll need is the Kubernetes command-line interface, kubectl. If you haven't already, install it on your local machine. Installation instructions vary depending on your operating system (Linux, macOS, Windows) but are generally well-documented in the official Kubernetes documentation.
Once installed, kubectl needs to be configured to connect to your Kubernetes cluster. This is typically done via a kubeconfig file (usually located at ~/.kube/config). This file contains credentials and endpoint information for one or more clusters. If you're using a managed Kubernetes service (like GKE, EKS, AKS), their respective cloud CLIs will usually set up your kubeconfig automatically when you configure access. For local clusters like Minikube or Kind, their installation process usually handles this as well.
To verify kubectl is installed and configured correctly, run a simple command:
kubectl cluster-info
This should output information about your connected cluster, indicating that kubectl can communicate with the Kubernetes API server. If you encounter errors, troubleshoot your kubeconfig setup or network connectivity to the cluster.
2. Access to a Kubernetes Cluster
You'll need an active Kubernetes cluster to experiment with kubectl port-forward. This could be:
- Local Clusters:
- Minikube: A lightweight Kubernetes implementation that creates a VM on your local machine and runs a single-node cluster inside it. Ideal for local development and testing.
- Kind (Kubernetes in Docker): Runs local Kubernetes clusters using Docker containers as "nodes." Great for testing multi-node setups locally.
- Managed Cloud Clusters:
- Google Kubernetes Engine (GKE): Google Cloud's managed Kubernetes service.
- Amazon Elastic Kubernetes Service (EKS): AWS's managed Kubernetes service.
- Azure Kubernetes Service (AKS): Microsoft Azure's managed Kubernetes service.
- On-premise or Self-Managed Clusters: Any Kubernetes cluster you have administrative access to.
Ensure your kubeconfig is pointing to the cluster you intend to use. You can check the current context with kubectl config current-context.
3. Example Application Deployment
To have something concrete to forward traffic to, you'll need an application running inside a Kubernetes pod. For demonstration purposes, a simple web server is perfect. Let's deploy a basic Nginx server.
First, create a Deployment:
# nginx-deployment.yaml
apiVersion: apps/v1
kind: Deployment
metadata:
  name: nginx-deployment
  labels:
    app: nginx
spec:
  replicas: 1
  selector:
    matchLabels:
      app: nginx
  template:
    metadata:
      labels:
        app: nginx
    spec:
      containers:
      - name: nginx
        image: nginx:latest
        ports:
        - containerPort: 80
Apply this deployment:
kubectl apply -f nginx-deployment.yaml
Next, expose this deployment with a ClusterIP Service. This ensures it's accessible within the cluster, which is a prerequisite for port-forward but doesn't expose it externally.
# nginx-service.yaml
apiVersion: v1
kind: Service
metadata:
  name: nginx-service
spec:
  selector:
    app: nginx
  ports:
    - protocol: TCP
      port: 80
      targetPort: 80
  type: ClusterIP
Apply this service:
kubectl apply -f nginx-service.yaml
Now, verify that the pod and service are running:
kubectl get pods -l app=nginx
kubectl get service nginx-service
You should see a pod with a status of Running and the nginx-service with a ClusterIP type. The Nginx server inside the pod will be listening on port 80. With these prerequisites met and an example application ready, you are fully prepared to start experimenting with kubectl port-forward and experience its capabilities firsthand.
Basic Usage and Practical Examples
With our prerequisites in place and a simple Nginx application running in a Kubernetes cluster, we can now dive into the practical application of kubectl port-forward. This section will cover the most common scenarios, starting with forwarding to a specific pod and then extending to deployments and services, providing step-by-step instructions and explanations.
Forwarding to a Pod
The most direct way to use kubectl port-forward is by targeting a specific pod. This is often necessary when you need to access a particular instance of a microservice, especially during debugging when you might want to isolate a problematic pod.
Scenario: Access the Nginx web server running on port 80 inside our nginx-deployment pod from localhost:8080 on your machine.
Step 1: Identify the Pod Name First, you need to find the exact name of the pod you want to forward to. Since our nginx-deployment creates pods with a consistent label (app=nginx), we can filter for them.
kubectl get pods -l app=nginx
You'll see output similar to this:
NAME                             READY   STATUS    RESTARTS   AGE
nginx-deployment-78f997645f-abcde   1/1     Running   0          5m
Note down the full pod name, e.g., nginx-deployment-78f997645f-abcde.
Step 2: Execute kubectl port-forward Now, use the pod name and specify the local and pod ports.
kubectl port-forward pod/nginx-deployment-78f997645f-abcde 8080:80
You should see output indicating that the forwarding is active:
Forwarding from 127.0.0.1:8080 -> 80
Forwarding from [::1]:8080 -> 80
The command will block your terminal, continuously forwarding traffic.
Step 3: Access the Service Locally Open your web browser or use curl to access localhost:8080:
curl http://localhost:8080
You should see the default Nginx welcome page HTML. This confirms that your local machine is successfully connected to the Nginx server inside the Kubernetes pod.
Backgrounding the Process: Often, you don't want kubectl port-forward to monopolize your terminal. You can run it in the background by appending & to the command. However, if the kubectl client disconnects (e.g., your terminal closes), the tunnel will break. For more robust backgrounding, consider using nohup or a session manager like tmux or screen.
kubectl port-forward pod/nginx-deployment-78f997645f-abcde 8080:80 &
To stop a backgrounded process, you'll need to find its process ID (PID) using ps and then kill it:
ps aux | grep "kubectl port-forward"
kill <PID>
Forwarding to a Deployment
While forwarding to a specific pod is useful, deployments often manage multiple replicas. If you target a deployment, kubectl port-forward intelligently picks one of the healthy pods managed by that deployment and establishes a connection to it. This is convenient when you don't care about a specific pod instance, just any available one.
Scenario: Access the Nginx server by targeting the nginx-deployment.
kubectl port-forward deployment/nginx-deployment 8080:80
The output will be similar to forwarding to a pod, and you can access http://localhost:8080 just as before. kubectl automatically selects an available pod from the nginx-deployment and establishes the tunnel. If that pod is terminated or crashes, the port-forward command will typically terminate as well, requiring you to restart it.
Forwarding to a Service
Forwarding to a Service is arguably the most common and often preferred method, especially when your application relies on the stable endpoint provided by a Service rather than directly addressing pods. When you forward to a Service, kubectl resolves the Service's selector to find a healthy pod and then establishes the port-forward tunnel to that pod.
Scenario: Access the Nginx server by targeting the nginx-service.
kubectl port-forward service/nginx-service 8080:80
Again, the output will indicate successful forwarding, and http://localhost:8080 will display the Nginx welcome page. The advantage here is abstraction: you don't need to know the specific pod name, nor are you relying on kubectl picking an arbitrary pod from a deployment. You are directly targeting the Service, which represents your application's stable entry point within the cluster. This is particularly useful when developing against a service that might scale up or down, or whose pods might be replaced; the port-forward command remains stable as long as the Service exists and has healthy backing pods.
Multiple Forwards
It's very common to need to forward multiple ports, perhaps to different services or different ports on the same service.
1. Different Local Ports for Different Pod Ports (Same Pod/Service): If a single pod or service exposes multiple ports (e.g., an HTTP API on 8080 and a metrics endpoint on 9090), you can forward both:
kubectl port-forward service/my-app-service 8080:8080 9090:9090
This will forward localhost:8080 to pod:8080 and localhost:9090 to pod:9090 in a single command.
2. Different Local Ports for Different Services: You'll need separate kubectl port-forward commands, ideally run in separate terminals or backgrounded, for each service.
# In Terminal 1
kubectl port-forward service/my-frontend 3000:80 &

# In Terminal 2
kubectl port-forward service/my-backend 8081:8080 &

# In Terminal 3 (or for a database)
kubectl port-forward service/my-database 5432:5432 &
This setup allows your local frontend (localhost:3000) to talk to the backend (localhost:8081), and your local development tools to connect to the database (localhost:5432), all running within the Kubernetes cluster.
kubectl port-forward is a cornerstone for local Kubernetes development, offering flexibility and directness unmatched by other exposure methods for developer-centric tasks. Mastering these basic usages is the first step toward a more efficient and integrated development workflow.
Advanced Techniques and Scenarios
Beyond its basic application, kubectl port-forward offers several advanced options and lends itself to complex development and debugging scenarios. Understanding these advanced techniques can significantly enhance your productivity and streamline your Kubernetes development workflow.
Specifying Namespace (-n <namespace>)
Kubernetes resources are often organized into namespaces. By default, kubectl operates in the default namespace. If your target pod, deployment, or service is in a different namespace, you must specify it using the -n or --namespace flag.
Scenario: Your application, including the Nginx deployment and service, is in a namespace called dev-env.
kubectl port-forward service/nginx-service -n dev-env 8080:80
Forgetting the namespace is a common cause of "resource not found" errors, so always be mindful of where your resources reside.
Random Local Port (0:<pod_port>)
Sometimes you don't care about the specific local port, or you want to avoid conflicts. You can instruct kubectl port-forward to automatically select an available ephemeral port on your local machine by specifying 0 for the local port.
Scenario: You want to forward to nginx-service's port 80, but let kubectl choose a free local port.
kubectl port-forward service/nginx-service 0:80
The output will tell you which local port was chosen:
Forwarding from 127.0.0.1:49152 -> 80
Forwarding from [::1]:49152 -> 80
You can then access the Nginx server via http://localhost:49152 (or whatever random port was assigned). This is particularly useful in scripts or when you're rapidly switching between multiple forwards.
Binding to Specific IP Address (--address <ip_address>)
By default, kubectl port-forward binds to 127.0.0.1 (localhost), meaning only applications on your local machine can access the forwarded port. If you want other devices on your local network (e.g., another computer, a mobile device) to access the forwarded service, or if you have multiple network interfaces and want to bind to a specific one, you can use the --address flag.
Scenario: You want to expose the Nginx service on your local network interface's IP address (e.g., 192.168.1.100) so that a colleague can access it.
kubectl port-forward service/nginx-service --address 0.0.0.0 8080:80
Using 0.0.0.0 will bind to all available network interfaces on your local machine. You can also specify a particular IP address if you have multiple. After running this, your colleague on the same network could access http://<YOUR_MACHINE_IP>:8080. Be cautious when using 0.0.0.0 or specific public IPs, as it can expose your cluster service more broadly than intended on your local network.
Debugging Services with kubectl port-forward
This is one of the most powerful applications of kubectl port-forward. It allows developers to attach a local debugger to a process running inside a Kubernetes pod, effectively providing a seamless remote debugging experience.
Scenario: Debugging a Node.js application (or Java, Python, Go, etc.) running in a pod. Most modern languages and IDEs support remote debugging via a network port.
- Configure your application in Kubernetes: Ensure your application's container is started with remote debugging enabled and listening on a specific port. For a Node.js application, this might involve adding
node --inspect=0.0.0.0:9229 app.jsto yourDockerfileor entry point. - Deploy your application: Deploy your Node.js application to Kubernetes, ensuring the container exposes port
9229. - Port-forward the debugger port:
bash kubectl port-forward deployment/my-nodejs-app 9229:9229 - Attach your local debugger: In your IDE (e.g., VS Code), configure a "Remote Debug" launch configuration to connect to
localhost:9229.
Now, when you start the debugger in your IDE, it will connect through the port-forward tunnel to your application running in the pod, allowing you to set breakpoints, inspect variables, and step through code as if it were running locally. This capability drastically reduces the debug-deploy-test cycle time.
Accessing Databases or Message Queues
Many applications rely on backend data stores or messaging systems. While kubectl port-forward is excellent for connecting to your application code, it's equally effective for connecting to these crucial infrastructure components running inside your cluster.
Scenario: You have a PostgreSQL database running in a pod and want to connect to it using your local pgAdmin client or a custom script.
- Identify the database service/pod: Assuming your PostgreSQL is exposed via a service (e.g.,
postgres-service) and listening on the standard port5432. - Port-forward the database port:
bash kubectl port-forward service/postgres-service 5432:5432 - Connect your local client: Configure
pgAdminor your SQL client to connect tolocalhost:5432with the appropriate credentials.
This allows you to inspect data, run queries, or seed your database directly from your local tools, eliminating the need to set up local database instances or complex VPNs. The same principle applies to Redis (6379), Kafka (9092), RabbitMQ (5672), or any other network-accessible service within your cluster.
Testing Webhooks or Callbacks with External Services
Sometimes your Kubernetes application needs to receive callbacks or webhooks from external services (e.g., a payment API, a Git repository webhook). Normally, this requires your service to be publicly exposed via Ingress or LoadBalancer, which is impractical for local development. kubectl port-forward combined with a tunneling service like ngrok or cloudflared can solve this.
Scenario: Your microservice needs to receive a webhook from an external API provider.
- Port-forward your service locally:
bash kubectl port-forward service/my-webhook-receiver 8000:8000Now, your service is available atlocalhost:8000. - Use
ngrokto expose your local port publicly:bash ngrok http 8000ngrokwill provide a public URL (e.g.,https://abcdef12345.ngrok.io) that tunnels to yourlocalhost:8000. - Configure the external service: Provide this
ngrokURL to the external API provider as the webhook endpoint.
Now, when the external service sends a webhook, it hits the ngrok tunnel, which forwards it to localhost:8000, which then, thanks to kubectl port-forward, routes it directly to your service inside the Kubernetes pod. This is an incredibly powerful setup for testing complex integrations without deploying your service publicly.
These advanced techniques demonstrate the versatility of kubectl port-forward, making it an indispensable tool for any developer working with Kubernetes. Its ability to create direct, secure channels empowers you to integrate local tools, debug efficiently, and test complex interactions with unparalleled flexibility.
APIPark is a high-performance AI gateway that allows you to securely access the most comprehensive LLM APIs globally on the APIPark platform, including OpenAI, Anthropic, Mistral, Llama2, Google Gemini, and more.Try APIPark now! 👇👇👇
Under the Hood: How kubectl port-forward Works (Technical Deep Dive)
To truly appreciate the elegance and robustness of kubectl port-forward, it's beneficial to peel back the layers and understand the technical details of how it orchestrates a connection across diverse network boundaries. While we've touched upon the components, let's delve deeper into the protocols and processes involved.
The Orchestration: API Server and Kubelet
The kubectl port-forward command initiates a complex dance between several Kubernetes components, each playing a crucial role in establishing and maintaining the tunnel.
- The
kubectlClient's Request: When you executekubectl port-forward <target> <local_port>:<pod_port>, yourkubectlclient first resolves the<target>(pod, deployment, or service) to a specific pod name and its namespace. It then constructs a request to the Kubernetes API server. This request is an authenticated and authorized call to the API server'spods/portforwardendpoint. - Kubernetes API Server as the Central Hub: The API server receives the request. It performs crucial checks:If all checks pass, the API server acts as a proxy. It establishes a secure connection to the Kubelet agent running on the node hosting the target pod. This connection typically uses the SPDY protocol (pronounced "speedy") or, more recently, HTTP/2.
- Authentication: Verifies your
kubeconfigcredentials. - Authorization: Ensures your user/service account has the necessary RBAC permissions (e.g.,
createpermission onpods/portforward) to perform this action on the target pod. - Pod Location: Identifies the node where the target pod is currently running.
- Authentication: Verifies your
- Kubelet's Role: The On-Node Agent: The Kubelet, receiving the
port-forwardrequest from the API server, is the final component responsible for actually bridging the host network to the pod's network namespace.- It identifies the container within the target pod and the specified
pod_port. - It then opens a TCP socket on the node itself (on a high-numbered ephemeral port, not directly accessible from outside the node by default) and binds it to
localhost. - Crucially, it then uses network namespace manipulation (specifically
nsenteror similar mechanisms provided by the container runtime) to enter the network namespace of the target pod. - Inside the pod's network namespace, it establishes a connection from the pod's
localhostinterface to thepod_portof the application. - The Kubelet then streams data bidirectionally between the TCP socket on the node and the TCP socket inside the pod.
- It identifies the container within the target pod and the specified
SPDY Protocol: The Underlying Transport
The magic that allows kubectl exec, kubectl logs, and kubectl port-forward to work efficiently over a single HTTP/S connection to the API server is the SPDY protocol. SPDY was developed by Google as a multiplexing transport protocol over TCP, designed to improve web page loading performance by reducing latency and improving network resource utilization. Although SPDY is largely superseded by HTTP/2 for web browsers, Kubernetes leverages it (or HTTP/2, which is based on SPDY concepts) for these specific API server proxy functions.
When kubectl initiates a port-forward request, it upgrades the HTTP connection to SPDY. This allows kubectl to establish multiple, independent "streams" over a single underlying TCP connection to the API server. For port-forward, one stream is typically for data going into the pod, and another is for data coming out. The API server then forwards these streams to the Kubelet over its own SPDY/HTTP/2 connection. This means that despite the multi-hop journey, the port-forward tunnel behaves like a direct, low-latency connection.
Security Implications and Considerations
While kubectl port-forward offers immense convenience, it's vital to understand its security implications:
- Authentication and Authorization: The entire process is secured by Kubernetes' standard authentication and authorization mechanisms. Your
kubectlclient must be authenticated with valid credentials, and your user or service account must have the necessary RBAC permissions to performport-forwardoperations on the target resource. This prevents unauthorized users from arbitrarily creating tunnels into your cluster. - Encrypted Tunnel: The communication between your
kubectlclient and the API server, and between the API server and the Kubelet, typically occurs over HTTPS (TLS-encrypted). This ensures that the data traversing the tunnel is encrypted in transit, protecting it from eavesdropping. - Bypassing Network Policies (Crucial Caveat): This is perhaps the most important security consideration.
kubectl port-forwardestablishes a direct, secure tunnel that bypasses Kubernetes Network Policies. Network Policies are designed to restrict how pods communicate with each other within the cluster based on labels and namespaces. However, since theport-forwardtunnel is established outside the normal pod-to-pod networking flow (it goes through the API server and Kubelet), it effectively creates an exception.- Implication: If you
port-forwardto a pod that would normally be isolated by a Network Policy, your local machine will still be able to connect to it. This is generally desired for debugging, but it means that the security of yourport-forwardsession relies entirely on the security of yourkubectlclient and the RBAC permissions. - Best Practice: Only grant
port-forwardpermissions to trusted users or service accounts, and ensure local machines usingport-forwardare secure. Never useport-forwardas a long-term solution for exposing services; for that, rely on Services (NodePort, LoadBalancer) or Ingress, which adhere to Network Policies and other cluster-level security configurations.
- Implication: If you
- Local Exposure: By default,
port-forwardbinds tolocalhost. If you use--address 0.0.0.0or a specific network interface IP, you are explicitly making the forwarded port accessible on your local network. Be mindful of this when handling sensitive data or services, as it could unintentionally expose them to other devices on your local segment.
In summary, kubectl port-forward is a meticulously engineered tool that provides secure, authenticated, and encrypted access to Kubernetes pods for development and debugging. Understanding its internal workings empowers you to use it more effectively and securely, ensuring that you leverage its power without inadvertently compromising your cluster's integrity.
Best Practices and Considerations
While kubectl port-forward is an incredibly useful tool, its effectiveness and security depend heavily on how it's used. Adhering to best practices and understanding its limitations is crucial for a smooth and secure development workflow.
When to Use vs. When Not to Use
Knowing when kubectl port-forward is the right tool for the job is paramount.
Ideal Use Cases: * Quick Debugging: Attaching a local debugger (IDE) to a service running in a pod. * Local Testing: Connecting a local frontend to a backend service in the cluster, or a local test suite to a service under test. * Database/Message Queue Access: Using a local client (e.g., pgAdmin, Redis CLI) to interact with a database or message queue running inside Kubernetes. * Ad-Hoc Inspection: Briefly accessing a web UI or API endpoint of a specific pod for manual inspection or troubleshooting. * Developing Against Cluster Services: When your local development environment needs to interact with services (e.g., authentication service, file storage API) that are only available within the Kubernetes cluster. * Testing Webhooks/Callbacks: As discussed, coupling with ngrok for external service integration.
When Not to Use (or use with extreme caution): * Production Access / External Exposure: kubectl port-forward is not a production solution. It's a temporary, single-client tunnel. For exposing services to external users, always use Kubernetes Services of type NodePort or LoadBalancer, or an Ingress controller, which provide proper load balancing, DNS, external IP addresses, TLS termination, and adherence to network policies. * High-Traffic Scenarios: The tunnel goes through the Kubernetes API server and Kubelet, which are not designed to handle high volumes of application traffic. Performance will be limited compared to direct network paths. * Long-Term Integrations: If a local system permanently needs to connect to a cluster service, a more robust solution like a VPN, a dedicated external service (LoadBalancer), or an Ingress controller is warranted. * Sharing Access with Multiple Developers (Without --address): By default, it binds to localhost, making it inaccessible to other team members. While --address 0.0.0.0 can share it on your local network, it's generally better for each developer to manage their own port-forward sessions.
Resource Consumption and Session Management
While kubectl port-forward is relatively lightweight, keeping many sessions open can accumulate. Each session consumes local network ports and maintains a connection to the API server.
- Mind your Local Ports: Be aware of the local ports you're using to avoid conflicts. Using
0:<pod_port>can help automatically select free ports. - Terminate Sessions: Always terminate
port-forwardsessions when they are no longer needed. A simpleCtrl+Cin the terminal running the command will stop it. If backgrounded, you'll need tokillthe process. Lingering sessions can cause resource contention or confusion. - Scripting: For complex development environments requiring multiple
port-forwardsessions, consider scripting their startup and shutdown. Tools likeforemanor simple shell scripts can manage multiple background processes efficiently.
Security Best Practices
Security should always be a top concern, especially when creating direct channels into your cluster.
- Least Privilege: Ensure that the user or service account executing
kubectl port-forwardhas only the necessary RBAC permissions. Granting blanketpods/portforwardaccess cluster-wide is not advisable. Scope permissions to specific namespaces or even specific pods if possible. - Secure Your Local Machine: Your local machine becomes an extension of your cluster's network for the duration of the
port-forwardsession. Keep your development workstation secure, updated, and protected by firewalls. - Data Sensitivity: Be cautious when forwarding sensitive services (e.g., databases containing production data). Ensure that your local environment and any tools you connect are trustworthy.
- Audit Logs: Remember that
port-forwardoperations are logged by the Kubernetes API server, providing an audit trail.
Integration with Development Workflows
kubectl port-forward integrates seamlessly into many modern microservices development workflows.
- IDE Integration: Many IDEs (VS Code, IntelliJ) have Kubernetes extensions that can automate
port-forwardoperations, allowing you to click a button to establish a connection to a service. - Local-First Development: It allows for a "local-first" development approach where much of the coding and testing happens locally, but interactions with cluster-dependent services are handled via
port-forward. - "Inner Loop" Development: Speeds up the inner development loop (code, test, debug) by quickly connecting to remote dependencies without a full redeploy or complex setup.
Alternatives (Brief Mention)
While kubectl port-forward is excellent for its specific use cases, there are other tools and methods for different scenarios:
kubectl proxy: Exposes the Kubernetes API server itself on a local port, providing access to the cluster's API and allowing local tools to interact with Kubernetes resources. It's different fromport-forwardas it exposes the API server, not a specific pod/service.- Telepresence: A more advanced tool that allows you to swap a Kubernetes deployment with a locally running process. It effectively makes your local machine part of the Kubernetes network, allowing your local service to access other cluster services directly as if it were running inside the cluster. This is ideal for more complex, full-application local development where you need deep network integration.
k expose: Akubectlcommand to create a Service for a given resource (Deployment, Pod). This is for more permanent exposure, not temporary debugging.- Ingress / LoadBalancer: As mentioned, these are the production-grade solutions for external access.
By understanding these best practices and knowing when to choose kubectl port-forward versus its alternatives, you can significantly optimize your Kubernetes development experience, making it more efficient, secure, and enjoyable.
Common Issues and Troubleshooting
Even with the best intentions and adherence to best practices, you might occasionally encounter issues when using kubectl port-forward. This section outlines some common problems and provides actionable troubleshooting steps.
1. "Error: unable to listen on ..." or "address already in use"
Problem: This error indicates that the local port you specified (<local_port>) is already in use by another application on your machine.
Example Error:
error: unable to listen on any of the listeners: [::1]:8080 (listen tcp [::1]:8080: bind: address already in use)
Troubleshooting Steps: * Check for conflicting processes: * Linux/macOS: sudo lsof -i :<local_port> (e.g., sudo lsof -i :8080) will show you which process is using the port. * Windows: netstat -ano | findstr :<local_port> to find the PID, then tasklist | findstr <PID> to identify the process. * Terminate the conflicting process: If it's a kubectl port-forward process from a previous session, kill it. If it's another application, either stop it or choose a different local port. * Use a random local port: Specify 0:<pod_port> for kubectl to automatically find a free local port.
2. "Error: pod not found" or "service not found"
Problem: kubectl cannot find the specified resource (pod, deployment, or service).
Example Error:
error: pods "non-existent-pod" not found
Troubleshooting Steps: * Typo: Double-check the spelling of the resource name. Kubernetes resource names are case-sensitive. * Wrong Namespace: Most commonly, the resource is in a different namespace than default. Ensure you're specifying the correct namespace using -n <namespace>. * Check active namespace: kubectl config view --minify --output 'jsonpath={.contexts[0].context.namespace}' * List resources in target namespace: kubectl get pods -n <namespace>, kubectl get deployments -n <namespace>, kubectl get services -n <namespace>. * Resource Doesn't Exist: The resource might not have been deployed or might have been deleted. Verify its existence with kubectl get <resource_type>.
3. "Error: connection refused" (after port-forward appears to start)
Problem: kubectl port-forward successfully establishes the tunnel, but when you try to connect to localhost:<local_port>, the connection is refused. This usually means the problem is on the pod's side.
Troubleshooting Steps: * Incorrect pod_port: The application inside the pod might not be listening on the specified <pod_port>. * Check container port: Inspect the Deployment or Pod manifest to see which ports the container is configured to expose. * Check application logs: Use kubectl logs <pod_name> to see if the application started successfully and is listening on the expected port. * Check netstat inside the pod: For advanced debugging, you can kubectl exec -it <pod_name> -- netstat -tuln (or similar for other OS) to see what ports are open inside the container. * Pod Crash/Not Running: The target pod might have crashed, be in a Pending state, or CrashLoopBackOff. * Check pod status: kubectl get pods <pod_name> * Describe pod: kubectl describe pod <pod_name> to look for events, warnings, or detailed status messages. * Application Not Started: The application within the container might not have started yet, or might have exited prematurely. Review kubectl logs. * Firewall inside the pod (uncommon): Very rarely, a custom container image might have an internal firewall blocking traffic on the specified port.
4. kubectl port-forward hangs or times out during setup
Problem: The port-forward command doesn't successfully establish the tunnel and hangs or reports a timeout.
Troubleshooting Steps: * Network Connectivity to API Server: Ensure your local machine has stable network connectivity to the Kubernetes API server. * Try other kubectl commands (e.g., kubectl get nodes) to confirm API server reachability. * Check your kubeconfig for correct cluster endpoint and authentication details. * Network Connectivity from API Server to Kubelet: There might be an issue with network connectivity between the API server and the Kubelet on the node hosting the pod. This is more of a cluster infrastructure issue. * Check node status: kubectl get nodes. If the node is NotReady, the Kubelet might be unresponsive. * Check Kubelet logs (requires SSH access to the node or querying cloud provider logs). * Kubelet Issues: The Kubelet itself might be unhealthy or overwhelmed. * RBAC Permissions: While an explicit authorization error is usually reported, subtle RBAC issues might manifest as timeouts. Double-check your user's permissions.
5. Data not flowing through the tunnel / Application unresponsive
Problem: kubectl port-forward appears to be running, but your local application isn't receiving data from or sending data to the forwarded service.
Troubleshooting Steps: * Correct Port Mapping: Ensure you've correctly mapped <local_port>:<pod_port>. It's a common mistake to swap them or use the wrong pod port. * Application Configuration: Verify that your local application is indeed configured to connect to localhost:<local_port>. * Application Logs: Check the logs of the application inside the pod (kubectl logs <pod_name>) to see if it's receiving any requests or if there are internal errors. * Client Logs: If your local client has logging capabilities, check them for any connection errors or requests being sent to the wrong endpoint. * Firewall (Local Machine): A firewall on your local machine might be blocking outgoing connections from your application to localhost:<local_port> or blocking kubectl itself. * Cluster Network Policies: While port-forward largely bypasses Network Policies for the tunnel itself, it's possible the application inside the pod is still subject to policies that prevent it from making outbound connections or responding in certain ways if its internal logic dictates so.
By systematically working through these troubleshooting steps, you can typically identify and resolve most issues encountered with kubectl port-forward, ensuring that this invaluable tool remains a reliable part of your Kubernetes development toolkit.
The Role of API Gateways and API Management
Having explored the depths of kubectl port-forward as an essential utility for local development and debugging within Kubernetes, it's crucial to contextualize its role within the broader landscape of APIs and API gateway solutions. While kubectl port-forward brilliantly solves the immediate needs of a developer connecting to internal services, it is inherently a temporary, single-user, and non-scalable solution. It is explicitly not designed for production-grade API exposure or comprehensive API management. This distinction leads us to the critical importance of robust API gateway and API management platforms.
The Broader Context: Beyond Local Development
Once your microservices are developed and debugged locally using tools like kubectl port-forward, they need to be deployed to production. In a production environment, these services often need to be exposed externally to consumers – be it other internal teams, partner applications, or public client applications. This exposure needs to be secure, reliable, scalable, and manageable. This is where an API gateway becomes an indispensable infrastructure component.
An API gateway acts as a single entry point for all client requests, routing them to the appropriate backend services. It sits between the client and a collection of backend services, abstracting the complexity of the microservices architecture from the consumer. Imagine a busy airport terminal: the API gateway is like the central check-in desk, directing passengers to the correct gates (backend services) based on their destination, ensuring they have the right boarding pass (authentication), and managing the flow of people (rate limiting).
Key Functions of an API Gateway
The responsibilities of an API gateway are extensive and critical for a well-managed API ecosystem:
- Traffic Management: Routing requests to the correct service, load balancing across multiple instances, and handling traffic shaping.
- Security: Authentication (e.g., OAuth2, JWT validation), authorization, API key management, and protection against common API threats like injection attacks.
- Rate Limiting and Throttling: Preventing abuse, ensuring fair usage, and protecting backend services from being overwhelmed.
- Caching: Storing responses to frequently accessed APIs to reduce latency and load on backend services.
- Logging and Monitoring: Centralized logging of all API requests and responses, providing metrics for performance monitoring and alerting.
- Transformations: Modifying requests and responses (e.g., header manipulation, data format conversion) to adapt between client and service requirements.
- Versioning: Managing different versions of an API, allowing for graceful deprecation and evolution.
- Developer Portal: Providing documentation, sandboxes, and self-service registration for API consumers.
Without an API gateway, each microservice would need to implement these cross-cutting concerns independently, leading to duplication of effort, inconsistent security policies, and a much higher operational burden. An API gateway centralizes these functions, making your APIs more secure, robust, and easier to consume.
Introducing APIPark: An Open Source AI Gateway & API Management Platform
This distinction between local developer tools and production-grade API management brings us to solutions like APIPark. While kubectl port-forward is a surgical tool for individual debugging sessions, APIPark is a comprehensive platform designed for the entire lifecycle of APIs, particularly excelling as an AI gateway for managing AI and REST services at scale.
APIPark is an open-source AI gateway and API developer portal, released under the Apache 2.0 license. It's engineered to help developers and enterprises efficiently manage, integrate, and deploy both AI and traditional REST services. Think of APIPark as the command center for all your APIs, ensuring they are not just running, but running optimally, securely, and manageably for external consumption.
Let's highlight some of APIPark's key features and how they address the challenges that kubectl port-forward is not intended to solve:
- End-to-End API Lifecycle Management: Unlike
kubectl port-forwardwhich is transient, APIPark assists with the entire lifecycle of APIs – from design and publication to invocation and decommissioning. It helps regulate API management processes, manages traffic forwarding, load balancing, and versioning of published APIs. This is crucial for maintaining a healthy and evolving API ecosystem in production. - Performance Rivaling Nginx: For production workloads, performance is paramount. APIPark is designed for high throughput, capable of achieving over 20,000 TPS with an 8-core CPU and 8GB of memory, supporting cluster deployment to handle large-scale traffic. This is a stark contrast to the limited throughput of a
port-forwardtunnel. - Detailed API Call Logging & Powerful Data Analysis: Monitoring and analytics are vital for production APIs. APIPark provides comprehensive logging, recording every detail of each API call. This allows businesses to quickly trace and troubleshoot issues, ensuring system stability. Furthermore, it analyzes historical call data to display long-term trends and performance changes, helping with preventive maintenance – capabilities entirely outside the scope of
kubectl port-forward. - Unified API Format for AI Invocation & Prompt Encapsulation into REST API: Specializing as an AI gateway, APIPark standardizes the request data format across various AI models. This ensures that changes in underlying AI models or prompts do not affect dependent applications or microservices, significantly simplifying AI usage and reducing maintenance costs. Users can also quickly combine AI models with custom prompts to create new, specialized APIs (e.g., sentiment analysis, translation). These intelligent routing and abstraction capabilities are features of an advanced API gateway.
- Independent API and Access Permissions for Each Tenant & API Resource Access Requires Approval: APIPark supports multi-tenancy, enabling the creation of multiple teams (tenants) each with independent applications, data, and security policies. It also allows for subscription approval features, ensuring callers must subscribe to an API and await administrator approval before invocation. This granular access control and security is a cornerstone of robust API management.
In essence, kubectl port-forward is a developer's lifeline for direct, temporary access to a single instance, facilitating debugging and rapid local iteration. APIPark, on the other hand, is an enterprise-grade solution that provides the full suite of API gateway and API management functionalities needed to expose, secure, monitor, and scale an entire portfolio of APIs – especially in a world increasingly driven by AI and microservices. They serve different, yet equally critical, stages of the software development and deployment lifecycle, working in harmony to enable efficient development and robust production operations. Developers use tools like kubectl port-forward to build, and platforms like APIPark to manage and deliver what they build to the world.
Conclusion
The journey through kubectl port-forward reveals it to be far more than just another command-line utility; it is a fundamental enabler for effective local development and debugging within the complex ecosystem of Kubernetes. By meticulously crafting a secure, temporary tunnel from your local machine directly into a pod, kubectl port-forward bypasses the layers of network abstraction and policy that typically isolate Kubernetes workloads. This direct conduit empowers developers to seamlessly integrate their preferred local tools—whether it’s an IDE for remote debugging, a database client for data inspection, or a frontend application connecting to a backend microservice—with components running deep inside the cluster. Its versatility, from basic pod-level forwarding to intelligent service and deployment targeting, coupled with advanced features like random port assignment and address binding, makes it an indispensable asset for any developer navigating the intricacies of Kubernetes-native applications.
We've explored its inner workings, understanding how the kubectl client, Kubernetes API server, and Kubelet collaborate using protocols like SPDY to establish and maintain this vital connection securely. This technical deep dive underscores why kubectl port-forward is both powerful and secure, relying on Kubernetes' native authentication and authorization mechanisms. However, we also highlighted a critical distinction: its temporary and single-client nature means it is unequivocally not a solution for production API exposure. For that, robust API gateway and comprehensive API management platforms are essential.
This brings us to the crucial difference between a development utility and an enterprise-grade infrastructure. While kubectl port-forward facilitates the "inner loop" of coding and debugging, solutions like APIPark step in to manage the "outer loop" – the secure, scalable, and observable exposure of your services, especially in a hybrid world of traditional REST APIs and burgeoning AI services. APIPark exemplifies how an AI gateway and API management platform takes over where kubectl port-forward leaves off, providing a powerful suite of features for traffic management, security, monitoring, and lifecycle governance of APIs at scale, ensuring they are performant, reliable, and consumable by a wide array of clients.
In mastering kubectl port-forward, developers gain a crucial bridge to their cloud-native applications, accelerating development cycles and simplifying debugging challenges. This proficiency, when combined with an understanding of production API management strategies and the role of an API gateway like APIPark, ensures a holistic approach to building, deploying, and maintaining modern, scalable applications in the Kubernetes era. Ultimately, kubectl port-forward is not just a command; it's a testament to Kubernetes' flexibility, enabling developers to remain productive and empowered amidst the complexity of distributed systems.
Frequently Asked Questions (FAQ)
1. Is kubectl port-forward secure for production use?
No, kubectl port-forward is not secure or suitable for production use. It is designed as a temporary, single-client, developer-centric tool for local debugging and development workflows. While the tunnel itself is authenticated, authorized, and encrypted, it bypasses Kubernetes Network Policies and is not built for high traffic, scalability, or robust external exposure. For exposing services in production, always use Kubernetes Service types like NodePort or LoadBalancer, or an Ingress controller, which provide proper load balancing, DNS, external IP addresses, TLS termination, and adhere to cluster-wide security policies.
2. Can I forward multiple ports from the same pod or service with one command?
Yes, you can forward multiple ports from the same pod or service using a single kubectl port-forward command. You simply list the local_port:pod_port pairs sequentially. For example: kubectl port-forward service/my-app 8080:8080 9090:9090. This will establish two separate tunnels from localhost:8080 to the pod's port 8080, and from localhost:9090 to the pod's port 9090.
3. What's the difference between kubectl port-forward and kubectl expose?
kubectl port-forward creates a temporary, single-client, local tunnel to a specific port of a pod or service for development and debugging purposes. It does not create any persistent Kubernetes resources in the cluster.
kubectl expose is used to create a Service resource for an existing Deployment, ReplicaSet, ReplicationController, or Pod. This Service provides a stable internal IP address and DNS name, and can expose the underlying pods externally via NodePort or LoadBalancer types. kubectl expose creates a persistent object within your cluster, designed for long-term internal or external access, not just for a developer's local machine.
4. How can I make kubectl port-forward run in the background?
You can run kubectl port-forward in the background by appending & to the command: kubectl port-forward service/my-app 8080:8080 &. However, this will typically stop if you close your terminal. For more robust backgrounding, consider using nohup (e.g., nohup kubectl port-forward service/my-app 8080:8080 &) or a terminal multiplexer like tmux or screen, which can detach from your current session. To stop a backgrounded process, you'll need to find its process ID (PID) using ps aux | grep "kubectl port-forward" and then use kill <PID>.
5. What are common reasons for kubectl port-forward failing or a connection being refused?
Common reasons for kubectl port-forward failures or connection refusals include: * Local Port Conflict: The specified local_port is already in use on your machine. Use 0:<pod_port> to let kubectl choose a random free local port, or check for conflicting processes. * Resource Not Found: Typo in the resource name, or the resource (pod, deployment, service) does not exist in the current or specified namespace. Double-check names and use -n <namespace>. * Incorrect Pod Port: The application inside the pod is not listening on the specified pod_port. Verify the container's exposed ports and the application's configuration. * Pod Not Running/Healthy: The target pod might be in a Pending, Error, or CrashLoopBackOff state. Check kubectl get pods and kubectl logs <pod_name>. * Network/RBAC Issues: Problems with network connectivity to the Kubernetes API server, or insufficient RBAC permissions for your user to perform port-forward operations on the target resource.
🚀You can securely and efficiently call the OpenAI API on APIPark in just two steps:
Step 1: Deploy the APIPark AI gateway in 5 minutes.
APIPark is developed based on Golang, offering strong product performance and low development and maintenance costs. You can deploy APIPark with a single command line.
curl -sSO https://download.apipark.com/install/quick-start.sh; bash quick-start.sh

In my experience, you can see the successful deployment interface within 5 to 10 minutes. Then, you can log in to APIPark using your account.

Step 2: Call the OpenAI API.