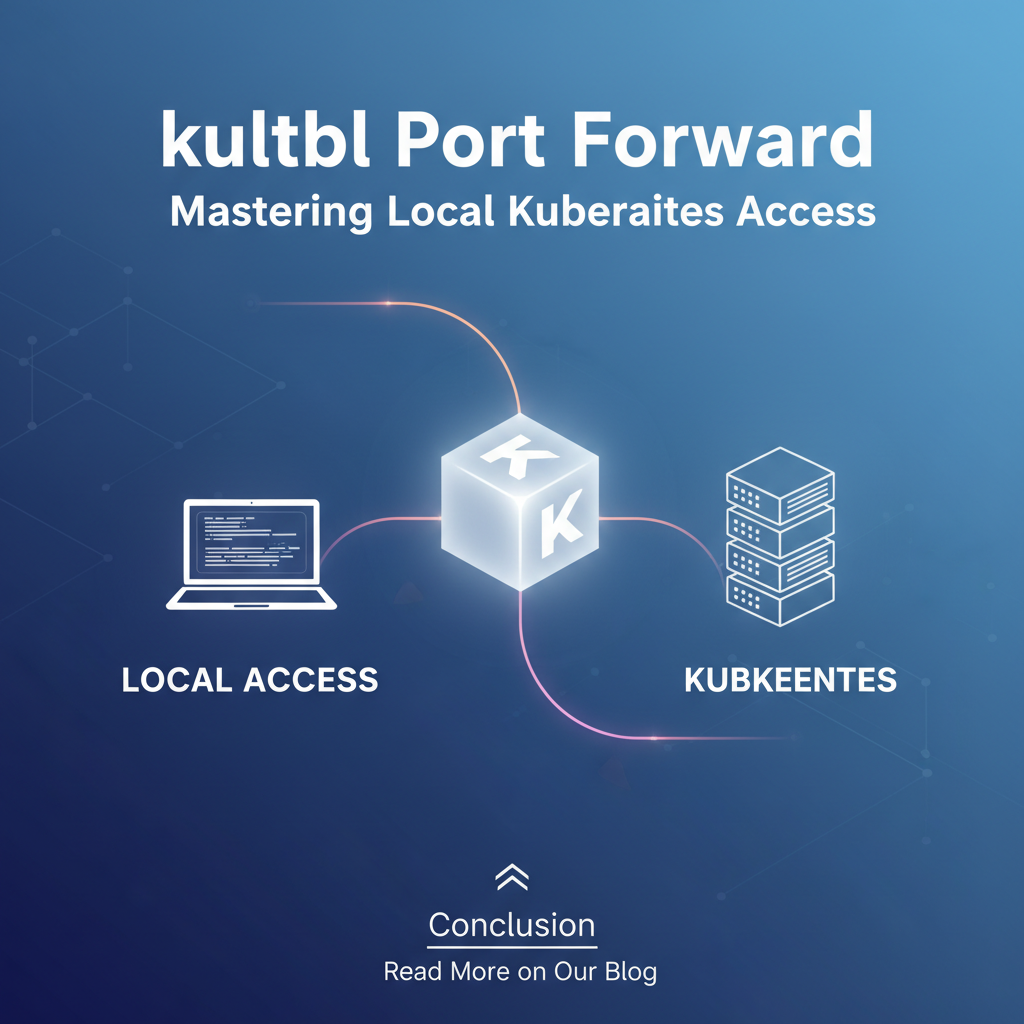
kubectl Port Forward: Master Local Kubernetes Access


In the intricate landscape of modern cloud-native development, Kubernetes stands as the undisputed orchestrator of containerized applications. It provides unparalleled scalability, resilience, and deployment flexibility, but this power often comes with a steep learning curve, particularly when it comes to local development and debugging. Developers frequently grapple with the challenge of connecting their local workstations and tools to services running within a remote Kubernetes cluster. This is where the deceptively simple yet profoundly powerful kubectl port-forward command emerges as an indispensable tool, acting as a crucial bridge that transforms a complex network topology into a manageable local connection. Mastering kubectl port-forward is not merely about memorizing a command; it's about understanding a fundamental primitive that unlocks efficient local access, debugging capabilities, and seamless integration with Kubernetes services, ultimately accelerating the development cycle and demystifying the cluster environment.
This comprehensive guide will delve deep into the mechanics, applications, security implications, and best practices surrounding kubectl port-forward. We will journey from its basic syntax to advanced usage patterns, explore its role in diverse development and troubleshooting scenarios, and contextualize its place within the broader ecosystem of Kubernetes access methods and API management solutions. By the end, you will not only be proficient in using kubectl port-forward but will also possess a holistic understanding of how it fits into a robust cloud-native workflow, empowering you to truly master local Kubernetes access.
The Core Problem: Why Local Access is Hard in Kubernetes
The very architecture that makes Kubernetes so robust also introduces inherent complexities when a developer attempts to interact with individual services running inside a cluster from a local machine. Kubernetes is designed with isolation and network segmentation as core principles, ensuring that pods and services operate within their defined boundaries, largely shielded from the external world and even from direct, arbitrary access by other components. This isolation is fantastic for security, stability, and resource management in production environments, but it presents a significant hurdle for developers trying to debug a microservice, test a new feature locally against a remote backend, or simply access a database GUI.
Consider a typical Kubernetes cluster. Applications are deployed as pods, which are the smallest deployable units, each running one or more containers. These pods are assigned ephemeral IP addresses from a private cluster network, making them unreachable directly from outside the cluster by default. To expose these pods, Kubernetes introduces the concept of Services, which provide a stable IP address and DNS name, acting as an internal load balancer to a set of pods. However, even these Services are, by default, only accessible from within the cluster. To expose a Service externally, one typically relies on Load Balancers (for network-level exposure), NodePorts (for exposing a service on a specific port across all cluster nodes), or Ingress controllers (for HTTP/HTTPS routing based on hostnames and paths). Each of these methods involves configuration, potentially DNS changes, and often a more permanent or public exposure that might not be suitable or desirable for temporary, local development tasks.
Furthermore, the ephemeral nature of pods means their IP addresses can change upon recreation or rescheduling, making direct IP-based access brittle. The dynamic scaling and self-healing capabilities of Kubernetes mean that a pod you were interacting with a moment ago might have been terminated and replaced, making persistent, direct connections problematic. This elaborate networking model, while powerful for orchestration, creates a disconnect for local development environments. Developers need a straightforward, secure, and temporary mechanism to peer into specific services without exposing them globally or reconfiguring the entire cluster's network infrastructure. Without such a mechanism, the feedback loop for development and debugging becomes agonizingly slow, requiring constant redeployments or complex VPN setups, both of which introduce friction and diminish productivity. This is precisely the gap that kubectl port-forward is designed to fill, offering a targeted, on-demand solution to bridge the local and remote Kubernetes worlds.
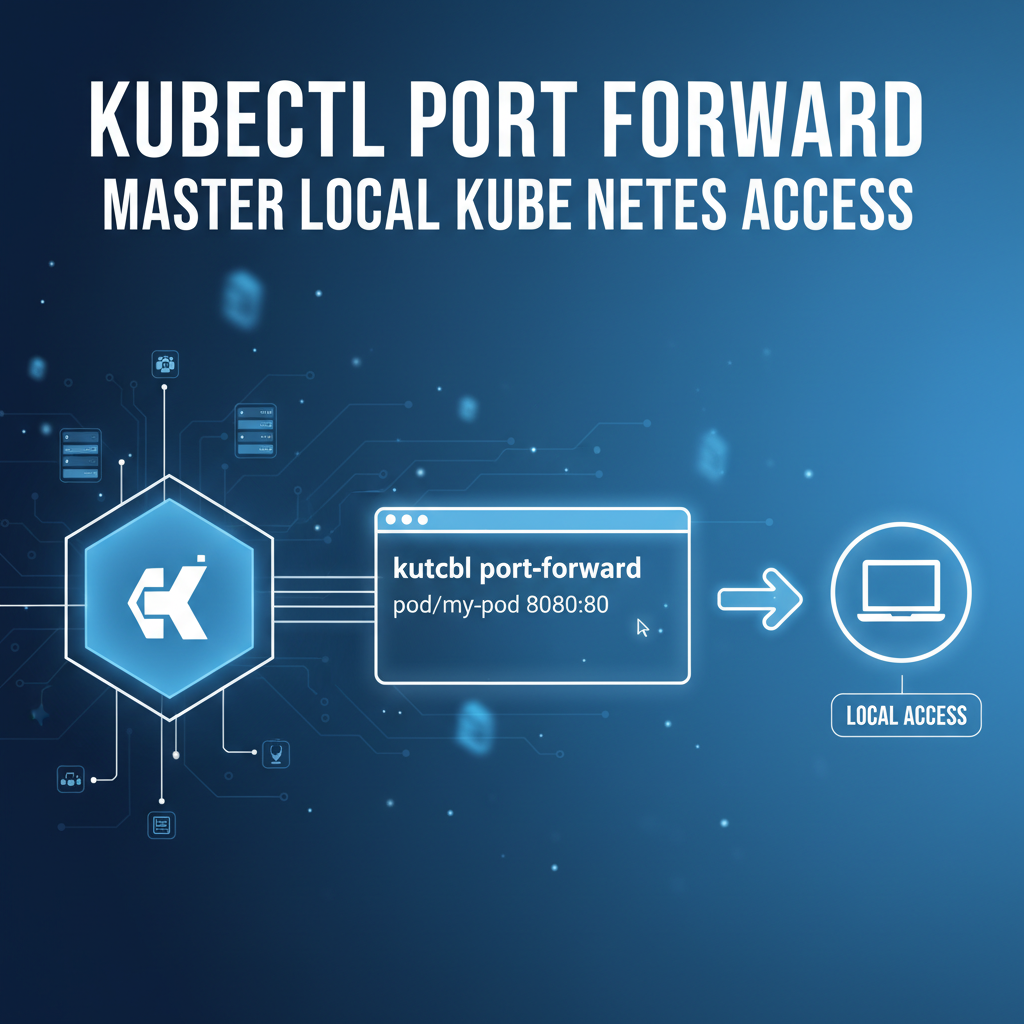
Understanding kubectl port-forward – The Basics
At its heart, kubectl port-forward is a command-line utility that creates a secure, two-way tunnel between a local port on your workstation and a specific port on a pod or service running inside a Kubernetes cluster. It effectively makes a service that is only accessible within the cluster appear as if it's running locally on your machine. This tunneling mechanism is incredibly powerful because it bypasses the complexities of Kubernetes networking and firewalls, allowing you to interact with remote services using standard local tools and api clients.
How it Works Under the Hood
When you execute kubectl port-forward, the command doesn't just open a direct connection from your machine to the pod. Instead, it leverages the Kubernetes API server as an intermediary. Here's a simplified breakdown of the process:
- Request to API Server: Your
kubectlclient sends a request to the Kubernetes API server, asking it to initiate a port-forwarding session to a specified pod or service. - API Server to Kubelet: The API server then communicates with the
kubeletagent running on the node where the target pod resides. Thekubeletis responsible for managing pods on that specific node. - Kubelet to Pod: The
kubeletreceives the request and, using its internal mechanisms (often involving network namespaces and iptables rules), establishes a connection to the specified port within the target pod. - Secure Tunnel Establishment: A secure WebSocket connection (or a similar streaming protocol) is established from your
kubectlclient, through the Kubernetes API server, to thekubelet, and finally to the application inside the pod. This connection acts as a two-way tunnel, relaying TCP traffic between your local port and the remote port.
This entire process is secured by your kubectl client's authentication credentials (e.g., kubeconfig file) and the Kubernetes Role-Based Access Control (RBAC) policies. If you have the necessary permissions to access the pod or service, the port-forward will succeed; otherwise, it will be denied. This client-server-agent architecture ensures that you don't need direct network visibility to the pod's private IP, as all communication is proxied securely through the established Kubernetes control plane.
Basic Syntax and Examples
The fundamental syntax for kubectl port-forward is straightforward:
kubectl port-forward [POD_OR_SERVICE_TYPE/NAME] [LOCAL_PORT]:[REMOTE_PORT] [FLAGS]
Let's break down the components and illustrate with examples:
[POD_OR_SERVICE_TYPE/NAME]: This specifies the Kubernetes resource you want to forward ports for. It can be apod(e.g.,pod/my-app-pod-12345) or aservice(e.g.,service/my-app-service). When using a service,kubectlautomatically selects one of the pods backing that service. Using a service is generally preferred as it provides more stability; if the initial pod is terminated,kubectlcan often re-establish the connection to a different healthy pod behind the service.[LOCAL_PORT]: The port number on your local machine that you want to bind to. When you accesslocalhost:[LOCAL_PORT], the traffic will be forwarded through the tunnel.[REMOTE_PORT]: The port number on the target pod or service that you want to expose locally. This should be the port the application inside the pod is listening on.[FLAGS]: Optional flags to customize the behavior, which we will explore in the next section.
Example 1: Forwarding to a Specific Pod
Imagine you have a pod named my-backend-789abcde-fghij running an application that listens on port 8080. You want to access this application from your local machine on port 9000.
kubectl port-forward pod/my-backend-789abcde-fghij 9000:8080
Once this command is executed, kubectl will remain active in your terminal. You can then open your web browser or use curl to access http://localhost:9000, and your requests will be securely forwarded to the my-backend pod's port 8080.
Example 2: Forwarding to a Service (Recommended)
Let's say you have a Kubernetes Service named my-backend-service that routes traffic to your backend pods, and this service exposes port 80 which then forwards to port 8080 on the pods. To forward this service to your local port 9000:
kubectl port-forward service/my-backend-service 9000:80
In this scenario, kubectl will pick one of the healthy pods associated with my-backend-service and establish the tunnel to its target port (which is 8080 by default if the service port 80 targets 8080 on the pods). If the chosen pod dies, kubectl will try to reconnect to another available pod, making this method more resilient for ongoing development.
It's crucial to remember that kubectl port-forward is an interactive command. It blocks the terminal where it's executed and continues to run until you stop it manually (typically with Ctrl+C). We'll discuss how to run it in the background in a later section. This basic understanding forms the bedrock for leveraging port-forward for more complex and advanced scenarios.
Advanced Usage Patterns and Flags
While the basic kubectl port-forward command is powerful, its true versatility shines through when exploring its advanced features and various flags. These options allow for greater control over the forwarding process, addressing common development needs and enabling more sophisticated debugging and integration workflows. Understanding these nuances is key to truly mastering local Kubernetes access.
Forwarding Multiple Ports
Often, a single application or a group of interdependent services might expose multiple ports that a developer needs to access simultaneously. For instance, a web application might have an HTTP frontend on one port and a metrics endpoint on another. kubectl port-forward supports forwarding multiple ports in a single command, which can significantly streamline your workflow.
To forward multiple ports, you simply list the LOCAL_PORT:REMOTE_PORT pairs, separated by spaces:
kubectl port-forward service/my-complex-app 8000:80 9001:9090
In this example, local port 8000 will forward to the service's port 80 (likely routing to a pod's HTTP port), and local port 9001 will forward to the service's port 9090 (perhaps a Prometheus metrics endpoint). This consolidated approach is much cleaner than running multiple port-forward commands in separate terminals.
Specifying Target IP Addresses (Multi-Container Pods)
In most single-container pods, the application listens on all available network interfaces (typically 0.0.0.0) within its container. However, in multi-container pods (where several containers share the same network namespace), you might need to target a specific container's IP address if the service itself is not granular enough or if you're troubleshooting a specific container's network binding. The --pod-running-timeout flag mentioned later is more about pod readiness. For specific container targeting, kubectl port-forward typically relies on the service's selectors to find a pod, and then connects to the specified port within that pod's network namespace. If a pod has multiple containers and they listen on different ports, specifying the correct REMOTE_PORT usually suffices, as all containers within a pod share the same network stack. The --container flag is not available for port-forward.
Running port-forward in the Background (& or nohup)
As noted earlier, kubectl port-forward runs interactively and blocks your terminal. For continuous development or when you need to free up your terminal for other commands, running it in the background is essential.
The simplest way to send a port-forward command to the background is by appending an ampersand (&) at the end of the command in Unix-like shells:
kubectl port-forward service/my-backend 8080:80 &
This will immediately return control to your terminal, and the port-forward process will continue running. You'll typically see a job ID (e.g., [1] 12345). To bring it back to the foreground, you can use fg, and to terminate it, you'd use kill %1 (where 1 is the job ID) or kill 12345 (where 12345 is the process ID).
For more robust backgrounding, especially if you want the process to survive terminal closure, nohup combined with & is a common pattern:
nohup kubectl port-forward service/my-backend 8080:80 > /dev/null 2>&1 &
This command runs port-forward in the background, redirects its output to /dev/null (to prevent nohup.out files), and detaches it from the terminal session. To manage or stop such a process, you'll need to find its process ID (ps aux | grep 'kubectl port-forward') and then use kill [PID].
Handling Port Conflicts
A common issue encountered with port-forward is a port conflict on your local machine. If LOCAL_PORT is already in use by another application, kubectl will report an error: Error: listen tcp 127.0.0.1:8080: bind: address already in use.
To resolve this, you have two primary options: 1. Choose a different local port: Simply select a LOCAL_PORT that is not currently in use. 2. Identify and terminate the conflicting process: Use operating system tools (e.g., lsof -i :8080 on Linux/macOS, or netstat -ano | findstr :8080 and then taskkill /PID [PID] on Windows) to find which process is using the port and terminate it if it's safe to do so.
The --address Flag for Binding to Specific Local Interfaces
By default, kubectl port-forward binds the LOCAL_PORT to 127.0.0.1 (localhost). This means only applications on your local machine can access the forwarded port. However, there are scenarios where you might want to share access to the forwarded service with other devices on your local network, or with virtual machines running on your host. This is where the --address flag becomes invaluable.
The --address flag allows you to specify the local IP addresses to bind to.
--address 0.0.0.0: This will bind the local port to all available network interfaces on your machine. This makes the forwarded service accessible from other devices on your local network (e.g., other computers, mobile phones), provided your local machine's firewall allows incoming connections on that port.bash kubectl port-forward service/my-web-app 8080:80 --address 0.0.0.0Important Security Note: Binding to0.0.0.0effectively exposes the Kubernetes service to your entire local network. While convenient for collaboration or testing, it also introduces a potential security risk if the service contains sensitive data or functionality and your local network isn't fully trusted. Always be mindful of what you're exposing and to whom. Ensure your local machine's firewall is configured appropriately.--address [SPECIFIC_IP]: You can also bind to a specific local IP address if your machine has multiple network interfaces. For example, if you have a VPN interface with IP192.168.1.100, you could bind to that:bash kubectl port-forward service/my-db 5432:5432 --address 192.168.1.100
The --pod-running-timeout Flag for Robust Scripting
When scripting or automating port-forward operations, especially with services that might take a moment to become truly ready, the --pod-running-timeout flag is useful. This flag specifies how long kubectl should wait for a pod to be in a Running state before attempting to establish the port-forward.
kubectl port-forward service/my-slow-starting-app 8080:80 --pod-running-timeout=1m
This command will wait up to 1 minute for a pod associated with my-slow-starting-app to enter the Running state before proceeding. This prevents port-forward from failing immediately if a pod is still initializing.
By understanding and utilizing these advanced flags and techniques, developers can tailor kubectl port-forward to fit a wide array of specific needs, making it an even more potent tool for navigating the complexities of Kubernetes environments.
Practical Scenarios and Use Cases
The true power of kubectl port-forward lies in its diverse applications across various stages of the development and operational lifecycle. From enabling seamless local debugging to facilitating ad-hoc troubleshooting, it serves as an indispensable utility for anyone working with Kubernetes. Let's explore some of the most common and impactful use cases.
Local Development & Debugging
One of the primary pain points in cloud-native development is the disconnect between local development environments and remote Kubernetes clusters. kubectl port-forward bridges this gap, creating an illusion that remote services are running locally, thus streamlining the development and debugging process.
Connecting an IDE Debugger to a Remote Service
Imagine you have a microservice deployed in Kubernetes, and you've encountered a tricky bug that's hard to reproduce in local mocks. You want to attach your IDE's debugger (e.g., VS Code, IntelliJ) to the running application inside the pod. Many programming languages (Java, Node.js, Python, Go) support remote debugging, where the application exposes a debug port. 1. Configure your application in Kubernetes to listen for debugger connections on a specific port (e.g., 5005 for Java). 2. Use kubectl port-forward to tunnel this debug port to your local machine: bash kubectl port-forward pod/my-java-app-pod-xyz 5005:5005 3. Configure your IDE to connect to localhost:5005 for remote debugging. Now, you can set breakpoints, step through code, and inspect variables in a live Kubernetes environment, accelerating bug resolution significantly.
Running a Local Frontend Against a Remote Backend
When developing a new feature for a web application, it's common to run the frontend code locally (for fast iteration with hot-reloading) while needing to connect to a stable, shared backend service running in Kubernetes. 1. Start your local frontend development server. 2. Use kubectl port-forward to expose your remote Kubernetes backend service locally: bash kubectl port-forward service/my-backend-service 8080:80 3. Configure your local frontend to make API calls to http://localhost:8080 instead of a remote URL. This setup allows you to develop and test your frontend against a realistic, up-to-date backend without deploying both components to Kubernetes for every small change. Developers often use kubectl port-forward to access internal services that expose a RESTful api they are actively building or consuming. This provides a direct, low-latency connection for testing api endpoints.
Accessing Databases (PostgreSQL, MongoDB) Running In-Cluster
It's frequently necessary for developers or database administrators to directly connect to a database instance running within Kubernetes for schema migration, data inspection, or query optimization. 1. Identify the pod or service for your database (e.g., a PostgreSQL service named my-postgres-db). 2. Forward the database port (e.g., 5432 for PostgreSQL): bash kubectl port-forward service/my-postgres-db 5432:5432 3. Use your local database client (e.g., psql, DBeaver, DataGrip) to connect to localhost:5432 with the appropriate credentials. This provides secure, direct access to your database instance without exposing it publicly via a LoadBalancer or NodePort.
Testing Webhooks or Callback URLs
If your application in Kubernetes needs to send webhooks or callbacks to an external service that's running locally on your machine (e.g., a development server for a third-party integration), kubectl port-forward won't directly help send traffic out from Kubernetes to your local machine. For that, you'd typically need a reverse tunnel or services like ngrok. However, port-forward is crucial when your local application needs to interact with an external webhook receiver running in the cluster. Or, more commonly, when you need to trigger a webhook from your local machine into the cluster.
Troubleshooting & Monitoring
Beyond development, kubectl port-forward is an invaluable tool for quick, ad-hoc troubleshooting and monitoring tasks, allowing direct inspection of internal service states.
Accessing Internal Metrics Endpoints (Prometheus, Grafana)
Many applications expose metrics endpoints (e.g., /metrics) for monitoring systems like Prometheus. If your Prometheus server isn't scraping these directly, or if you want to inspect them manually: 1. Identify the pod or service exposing the metrics. 2. Forward the metrics port: bash kubectl port-forward pod/my-app-metrics-pod 9090:9090 3. Open your browser to http://localhost:9090/metrics to view the raw metrics. This is also useful for accessing internal Grafana instances or other monitoring dashboards that are not externally exposed.
Inspecting Application Logs or Admin UIs
Some applications provide a web-based administration interface or expose a dedicated logging endpoint. If these are not exposed externally: 1. Forward the port: bash kubectl port-forward service/my-admin-ui 8000:80 2. Access http://localhost:8000 to interact with the admin interface or view aggregated logs.
Bypassing Ingress/Load Balancer Issues Temporarily
When debugging issues with external access to your services, such as misconfigured Ingress rules or LoadBalancer problems, kubectl port-forward can help isolate the problem. 1. Bypass the Ingress/Load Balancer by directly forwarding to the service: bash kubectl port-forward service/my-problematic-app 8080:80 2. If http://localhost:8080 works but the external URL doesn't, you've narrowed down the issue to the Ingress or Load Balancer configuration, confirming the application itself is responsive.
Integration with Local Tools
kubectl port-forward seamlessly integrates with virtually any local client tool, as it effectively makes the remote service behave like a local one.
Using curl, Postman, Browser Directly
Once a port is forwarded, you can use standard HTTP clients to interact with the service: * curl http://localhost:8080/api/v1/health * Postman or Insomnia can be configured to send requests to localhost:LOCAL_PORT. * Web browsers can navigate directly to http://localhost:LOCAL_PORT.
Connecting CLI Tools
For services that are not HTTP-based, CLI tools can also connect: * Databases: psql -h localhost -p 5432 -U myuser mydb for PostgreSQL. * Message Queues: redis-cli -h localhost -p 6379 for Redis. * Custom CLIs: Any custom command-line interface designed to interact with a service can connect to the forwarded local port. When these services are well-documented with OpenAPI specifications, local testing becomes even more streamlined, as developers can use tools like Postman to import the OpenAPI definition and instantly have a collection of well-defined api requests to test through their port-forward tunnel. This integration of port-forward with OpenAPI-driven development environments significantly enhances developer productivity and reduces errors.
By enabling direct and flexible access, kubectl port-forward becomes an indispensable tool for every Kubernetes developer and operator, turning potential development roadblocks into smooth, efficient workflows.
Security Considerations and Best Practices
While kubectl port-forward is an incredibly useful tool for local development and debugging, it's crucial to understand its security implications and adopt best practices to prevent unintended exposures or unauthorized access. Misusing port-forward can inadvertently create security vulnerabilities.
kubectl Authentication and Authorization (RBAC)
The primary layer of security for kubectl port-forward lies in Kubernetes' native authentication and authorization mechanisms: * Authentication: Your kubectl client must be authenticated to the Kubernetes API server. This typically involves using a kubeconfig file containing user credentials (certificates, tokens, or OIDC configurations). Without valid credentials, kubectl cannot even communicate with the API server, let alone initiate a port-forward. * Authorization (RBAC): Beyond authentication, the user or service account associated with your kubeconfig must have the necessary Role-Based Access Control (RBAC) permissions. Specifically, to perform a port-forward operation, you need create permission on the pods/portforward subresource for the target pod in its namespace. * Example RBAC rule (within a Role): yaml - apiGroups: [""] resources: ["pods/portforward"] verbs: ["create"] If you try to port-forward to a pod or service without these permissions, kubectl will return an authorization error, preventing unauthorized access. This is a fundamental security gate that ensures only authorized individuals can establish these tunnels.
Least Privilege Principle for port-forward Permissions
Adhering to the principle of least privilege is paramount. Do not grant broad pods/portforward permissions across all namespaces or to all users. Instead: * Namespace-scoped roles: Grant pods/portforward permissions only within specific namespaces where a developer needs to work. * Specific service accounts: For automated systems or CI/CD pipelines that might need port-forward (though this is rare for CI/CD), use dedicated service accounts with minimal necessary permissions. * Avoid cluster-wide permissions: Granting create on pods/portforward at the cluster level is generally discouraged for developers as it provides too much access.
Exposure Risks: Binding to 0.0.0.0
As discussed in the advanced usage section, the --address 0.0.0.0 flag allows you to bind the local port to all network interfaces, making the forwarded service accessible from other machines on your local network. While convenient, this is a significant security consideration: * Unintended Network Exposure: If your local machine is connected to an untrusted network (e.g., public Wi-Fi), or if other devices on your local network are compromised, the forwarded service (and potentially its underlying data) could be exposed to unauthorized entities. * Sensitive Services: Never use --address 0.0.0.0 for services containing highly sensitive data or critical administrative functionality unless you are absolutely certain of the security of your local network and the trustworthiness of all connected devices. * Firewall Configuration: Even with 0.0.0.0, your local machine's firewall might block incoming connections. However, relying solely on a local firewall isn't a substitute for careful consideration of network exposure. Best Practice: By default, stick to the 127.0.0.1 binding. Only use --address 0.0.0.0 when explicitly required and with a full understanding of the risks. Consider temporary firewall rules on your local machine if you do use it.
Ephemeral Nature: Not for Production Access
It's critical to understand that kubectl port-forward is designed for temporary, interactive, and developer-centric access. It is not a production-grade solution for exposing services: * No Load Balancing: It forwards traffic to a single pod. If that pod goes down, the connection breaks, and kubectl might try to reconnect to another, but it doesn't offer robust load balancing or high availability. * No Scalability: It's a single tunnel from your machine. It cannot handle large volumes of concurrent production traffic. * No Monitoring/Logging: While kubectl provides some basic output, it lacks the comprehensive monitoring, logging, and metrics collection that production API gateways or load balancers offer. * Operator Dependency: It requires an active kubectl process running on a workstation. If the workstation is shut down or the kubectl process is terminated, access is lost. Best Practice: Reserve kubectl port-forward strictly for local development, debugging, and ad-hoc troubleshooting. Never use it as a permanent or production-facing api exposure mechanism.
Alternatives for Persistent or Production Access
For exposing services reliably, securely, and at scale in production, Kubernetes offers purpose-built solutions: * Ingress Controllers: For HTTP/HTTPS traffic, Ingress provides sophisticated routing, TLS termination, virtual hosting, and integration with external load balancers. * Load Balancers: Kubernetes Service of type LoadBalancer integrates with cloud provider load balancers (AWS ELB/NLB, GCP Load Balancer, Azure Load Balancer) for network-level external exposure. * NodePorts: Exposes a service on a static port on each node's IP, making it accessible from outside the cluster. Less scalable and secure than Ingress/LoadBalancer for public services. * Virtual Private Networks (VPNs): For granting secure access to an entire private cluster network (or parts of it) to a team, a VPN solution (e.g., OpenVPN, WireGuard) provides a more holistic and controlled approach than individual port-forwards. * Service Mesh (e.g., Istio, Linkerd): Offers advanced traffic management, security (mTLS), observability, and policy enforcement within the cluster and for north-south traffic (ingress/egress). While not a direct alternative, it provides a highly controlled environment. * API Gateways: For managing api exposure, authentication, authorization, rate limiting, and traffic routing for a collection of services, a dedicated API Gateway (like Kong, Apigee, or the open-source solution we'll discuss later, APIPark) is the industry standard. These solutions provide comprehensive api lifecycle management and are built for production-grade traffic.
Audit Trails and Logging
While kubectl itself doesn't provide extensive logging for port-forward connections, the Kubernetes API server does log requests. If audit logging is enabled on your cluster, port-forward initiation requests will be recorded, providing a valuable audit trail for security investigations. Ensure your cluster has appropriate audit logging configurations in place to track who is performing port-forward operations and when.
By diligently adhering to these security considerations and best practices, developers and operators can harness the immense power of kubectl port-forward without inadvertently compromising the security posture of their Kubernetes environments. It's a tool of great utility, but one that demands respect for its capabilities and careful application.
APIPark is a high-performance AI gateway that allows you to securely access the most comprehensive LLM APIs globally on the APIPark platform, including OpenAI, Anthropic, Mistral, Llama2, Google Gemini, and more.Try APIPark now! 👇👇👇
Port-Forward vs. Other Access Methods
Kubernetes offers a rich set of networking primitives and access mechanisms, each designed for specific purposes. Understanding when to use kubectl port-forward versus other methods is crucial for efficient and secure operations. This section will compare port-forward with several common alternatives.
kubectl port-forward vs. kubectl exec
kubectl exec: Provides direct command-line access to a running container within a pod. It's like SSHing into a container.- Purpose: Primarily for running commands, inspecting filesystems, troubleshooting inside the container, or getting an interactive shell (e.g.,
bash,sh). - Interaction: Text-based, command-line interface. No direct network access from your local machine to a service port inside the container, unless you specifically use a command like
curlfrom within theexecsession. - Use Case: Debugging a container's internal state, checking logs, running migrations, installing temporary tools.
- Purpose: Primarily for running commands, inspecting filesystems, troubleshooting inside the container, or getting an interactive shell (e.g.,
kubectl port-forward: Establishes a network tunnel to a specific port of a service or pod.- Purpose: To access a network service (HTTP, database, messaging queue) running inside a pod from your local machine's network.
- Interaction: Network-based. You interact with the service as if it were running on
localhost. - Use Case: Connecting a local IDE, browser, Postman, or local database client to a remote service. When to choose
port-forwardoverexec: When you need to interact with a network service inside the cluster using your local GUI tools, browsers, or other network-aware applications.execis for shell-level interaction.
kubectl port-forward vs. kubectl proxy
kubectl proxy: Creates a local proxy server (typically onlocalhost:8001) that forwards requests to the Kubernetes API server.- Purpose: To safely access the Kubernetes API server itself from your local machine, allowing you to interact with any Kubernetes resource (pods, services, deployments, etc.) via HTTP requests, bypassing
kubectlCLI. - Interaction: HTTP requests to
localhost:8001/api/v1/...are forwarded to the API server. This gives you direct programmatic access to the Kubernetes API. - Use Case: Developing custom Kubernetes clients, integrating with tools that need to call the Kubernetes API directly, exploring the API structure with a browser.
- Purpose: To safely access the Kubernetes API server itself from your local machine, allowing you to interact with any Kubernetes resource (pods, services, deployments, etc.) via HTTP requests, bypassing
kubectl port-forward: Focuses on tunneling traffic to user-defined application services running within pods, not the Kubernetes control plane services. When to chooseport-forwardoverproxy: If you need to access your application's HTTPapi, database, or any other network service. Chooseproxyif you need direct, raw access to the Kubernetes API server endpoints. They serve fundamentally different purposes.
kubectl port-forward vs. Ingress/Load Balancers (for External Access)
- Ingress / Load Balancers: These are Kubernetes resources and controllers designed for production-grade, external exposure of services.
- Purpose: To provide stable, scalable, and secure external access to services for end-users or other external systems. They handle routing, TLS termination, load balancing, and often integrate with cloud provider infrastructure.
- Interaction: Publicly accessible endpoints (DNS names, external IP addresses).
- Use Case: Exposing web applications to the internet, public APIs, services requiring high availability and traffic management.
kubectl port-forward: Provides temporary, personal, and local access.- Purpose: Debugging, local development, ad-hoc access, internal testing. Not for persistent or public exposure.
- Interaction: Access via
localhoston your local machine. When to chooseport-forwardover Ingress/Load Balancers: When you need quick, temporary access to a single service for personal debugging or development. Never useport-forwardfor production-level exposure where stability, scalability, and security are paramount. Ingress and Load Balancers are designed for these production needs.
kubectl port-forward vs. Service Mesh (e.g., Istio, Linkerd)
- Service Mesh: A dedicated infrastructure layer that handles service-to-service communication, providing features like traffic management, security (mTLS), observability, and reliability for services within the cluster.
- Purpose: To manage, secure, and observe the vast network of microservice interactions in a large-scale, distributed application.
- Interaction: Primarily transparent to applications. Applications interact with each other, and the mesh intercepts and enhances this communication. It also provides
gatewayfunctionality for external traffic. - Use Case: Large microservices architectures requiring advanced traffic routing (canary deployments, A/B testing), strong security policies (mTLS), comprehensive metrics, and tracing.
kubectl port-forward: A direct, ad-hoc tunnel to a single service. When to chooseport-forwardover Service Mesh for local access:port-forwardis for direct, isolated local access to a single service. A Service Mesh provides a broader control plane for the entire cluster's service communication. While a Service Mesh might include an Ingress Gateway component for external access,port-forwardremains relevant for developers who want to bypass the full mesh configuration for quick local testing against a specific in-cluster service. In fact, a service mesh like Istio can actually enhanceport-forwardby ensuring secure mTLS between the service and thekubeleteven for forwarded connections, improving the security posture of the tunnel itself.
Comparison Table
To summarize the differences, here's a quick comparison:
| Feature | kubectl port-forward |
kubectl exec |
kubectl proxy |
Ingress/Load Balancer | API Gateway (e.g., APIPark) |
|---|---|---|---|---|---|
| Target | Application Service (Pod/Service) | Container in Pod | Kubernetes API Server | Application Service (HTTP/S) | Collection of APIs/Services |
| Purpose | Local dev/debug access | Shell access/in-container commands | Kubernetes API access | External/production exposure | Centralized API management |
| Interaction | Local network client | Command-line (stdin/stdout) | HTTP calls to localhost:8001 |
Public HTTP/S endpoint | Public HTTP/S endpoint |
| Scope | Single Pod/Service | Single Container | Entire Cluster's API | Specific Services (external) | Multiple APIs/Services |
| Security | RBAC, local machine security | RBAC, container isolation | RBAC, local proxy security | RBAC, network security, WAF | RBAC, AuthN/AuthZ, rate limit |
| Scalability | Low (single tunnel) | N/A (interactive session) | N/A (interactive session) | High (production-grade) | High (production-grade) |
| Use Case Example | Connecting local debugger | Inspecting pod logs, running scripts | Developing custom kubectl plugins |
Public web app, external api |
Managed AI services, microservices api aggregation |
| Complexity to Set Up | Low (single command) | Low (single command) | Low (single command) | Moderate | Moderate to High |
| Persistence | Temporary (session-bound) | Temporary (session-bound) | Temporary (session-bound) | Persistent | Persistent |
When to Choose Port-Forward
In conclusion, kubectl port-forward excels when you need: * Ephemeral, local access: For quick checks, development iterations, or isolated debugging. * Direct connection to an internal service: Bypassing external network configurations. * Integration with local tools: Using your familiar browser, IDE, Postman, or database client against a remote service. * Testing components in isolation: Running a local frontend against a remote backend.
It is a powerful, low-overhead tool for developers and operators, serving as a tactical bridge into the Kubernetes cluster. However, for any long-term, public, or high-traffic api exposure, dedicated Kubernetes services and external gateway solutions are the appropriate choices.
Troubleshooting Common Port-Forward Issues
While kubectl port-forward is generally reliable, you might encounter issues that prevent it from establishing or maintaining a connection. Understanding these common problems and their solutions is crucial for efficiently resolving roadblocks and maintaining productivity.
"Unable to listen on any of the requested ports." (Port already in use)
This is perhaps the most frequent error encountered. It means the LOCAL_PORT you specified in your port-forward command is already being used by another process on your local machine.
- Error Message Examples:
Error: listen tcp 127.0.0.1:8080: bind: address already in useF0314 10:30:45.123456 12345 portforward.go:400] error copying from local connection to remote stream: read tcp 127.0.0.1:8080->127.0.0.1:12345: use of closed network connection(This can sometimes appear after an initial bind error ifkubectltries to rebind or if the port becomes available briefly).
- Causes:
- Another instance of
kubectl port-forwardis already running on that local port. - A local application (e.g., a web server, a database, a development tool) is using that port.
- A previous
port-forwardsession was not properly terminated (e.g.,Ctrl+Zinstead ofCtrl+Cor a crash, leaving the port in aTIME_WAITstate for a brief period).
- Another instance of
- Solutions:
- Choose a different local port: The simplest solution is to pick an unused
LOCAL_PORT. For example, if8080is taken, try8081or9000.bash kubectl port-forward service/my-app 9000:8080 - Identify and kill the conflicting process:
- Linux/macOS: Use
lsof -i :LOCAL_PORTto find the process ID (PID) and thenkill -9 [PID].bash lsof -i :8080 # Output might look like: # COMMAND PID USER FD TYPE DEVICE SIZE/OFF NODE NAME # node 12345 myuser 6u IPv4 0x... 0t0 TCP localhost:http-alt (LISTEN) kill -9 12345 - Windows (PowerShell/CMD): Use
netstat -ano | findstr :LOCAL_PORTto find the PID, thentaskkill /PID [PID] /F.powershell netstat -ano | findstr :8080 # TCP 127.0.0.1:8080 0.0.0.0:0 LISTENING 12345 taskkill /PID 12345 /F
- Linux/macOS: Use
- Wait a moment: If a process just terminated, the port might be in a
TIME_WAITstate for a few seconds. Waiting and retrying can sometimes resolve this.
- Choose a different local port: The simplest solution is to pick an unused
"Error dialing backend: dial tcp..." (Pod/Service not found, or not ready)
This error indicates that kubectl couldn't establish a connection to the target pod or service within the Kubernetes cluster.
- Error Message Examples:
Error dialing backend: dial tcp 10.42.0.10:8080: connect: connection refused(This means it found the pod IP, but nothing was listening on the specified port inside the pod).error: services "my-app" not founderror: pods "my-app-pod-xyz" not found
- Causes:
- Incorrect Pod/Service name: You misspelled the name of the pod or service.
- Wrong Namespace: The pod/service is in a different namespace than the one you are currently targeting (check
kubectl config view --minify | grep namespaceor specify--namespaceflag). - Pod not running/ready: The target pod is not in a
Runningstate, or it's still initializing. - Incorrect Remote Port: The application inside the pod is not listening on the
REMOTE_PORTyou specified. - Network Policy: A Kubernetes
NetworkPolicymight be blocking traffic to the pod. - Pod CrashLoopBackOff: The pod might be repeatedly crashing.
- Solutions:
- Verify Pod/Service Existence and Name:
kubectl get pods -n <namespace>kubectl get services -n <namespace>- Correct any typos in your
port-forwardcommand.
- Check Pod Status:
kubectl get pod <pod-name> -n <namespace>: Ensure it'sRunningandReady.kubectl describe pod <pod-name> -n <namespace>: Look for events, container statuses, and readiness/liveness probe failures.kubectl logs <pod-name> -n <namespace>: Check application logs for errors.
- Verify Remote Port: Ensure the application inside the pod is actually listening on the
REMOTE_PORT. You can sometimes confirm this bykubectl execinto the pod and runningnetstat -tulnp(ifnetstatis available). - Check Network Policies: If everything else seems correct, review any
NetworkPolicyresources that might restrict ingress to the target pod. - Use
--pod-running-timeout: If the pod takes time to start, use this flag to givekubectlmore time to wait.
- Verify Pod/Service Existence and Name:
"Connection refused." (Application inside Pod not listening or misconfigured)
This error typically occurs after kubectl port-forward has successfully established the tunnel, but when you try to send traffic through it from your local machine, the application inside the pod actively rejects the connection. This implies the tunnel is working, but the destination within the pod is problematic.
- Error Message Examples:
- From
curlor browser:Connection refused - From
kubectl port-forwardoutput (less common for this specific symptom, but underlying issues in the app cause it):error copying from local connection to remote stream: read tcp 127.0.0.1:8080->127.0.0.1:12345: use of closed network connection
- From
- Causes:
- Application not running: The application inside the pod has crashed, stopped, or failed to start.
- Application listening on wrong interface: The application is explicitly configured to listen only on
localhost(127.0.0.1) inside the pod, but thekubeletconnects to the pod's primary network interface IP. Applications in containers should generally listen on0.0.0.0to accept connections from any interface. - Incorrect remote port: You are forwarding to a port that the application is not listening on.
- Application firewall/security: The application itself has internal firewall rules preventing connections.
- Solutions:
- Check Application Status & Logs: This is the first place to look.
kubectl logs <pod-name> -n <namespace>: Are there application errors? Did it start successfully?kubectl exec -it <pod-name> -n <namespace> -- ps aux: Is your application process actually running?
- Verify Application Binding:
kubectl exec -it <pod-name> -n <namespace> -- netstat -tulnp(orss -tulnp): Check if your application is listening on0.0.0.0or the correct port. If it's listening only on127.0.0.1, you might need to reconfigure your application to bind to0.0.0.0or its pod IP.
- Confirm Remote Port: Double-check your
REMOTE_PORTmatches the application's listening port.
- Check Application Status & Logs: This is the first place to look.
DNS Resolution Issues (Less common for port-forward itself)
While port-forward bypasses many Kubernetes networking layers, sometimes underlying DNS issues can manifest in subtle ways, especially if your application inside the pod relies on internal DNS lookups that are failing.
- Cause: Pods unable to resolve internal service names or external domains.
- Solution: Troubleshoot Kubernetes DNS (CoreDNS/KubeDNS). You can use
kubectl execinto the pod and tryping <service-name>ornslookup <service-name>to diagnose. This won't directly be aport-forwarderror, but a broken application may lead toconnection refusedor similar.
Network Policies Blocking Connections
If your cluster has strict NetworkPolicy resources, they might prevent the kubelet from establishing the initial connection to the pod's port, even if port-forward permissions are granted.
- Cause: A
NetworkPolicyis denying ingress traffic to the pod's port from thekubelet's source IP or for the specific protocols. - Solution: Review and adjust relevant
NetworkPolicydefinitions to allow traffic for debugging purposes. This might involve temporarily relaxing a policy or adding a specific rule for thekubelet's communication.
Firewall Issues on Local Machine
While kubectl port-forward handles the tunnel, your local machine's firewall could still block outbound connections from your kubectl client to the Kubernetes API server, or block inbound connections to your local port if you used --address 0.0.0.0.
- Cause: Local firewall (e.g.,
ufw,firewalldon Linux, macOS Firewall, Windows Defender Firewall) is blocking necessary traffic. - Solution:
- Ensure your firewall allows outbound connections for
kubectl. - If using
--address 0.0.0.0, ensure your firewall allows inbound connections on theLOCAL_PORTyou're using.
- Ensure your firewall allows outbound connections for
By systematically going through these troubleshooting steps, you can quickly pinpoint and resolve most issues encountered while using kubectl port-forward, ensuring a smooth and productive development experience.
Scripting and Automation with Port-Forward
While primarily an interactive tool, kubectl port-forward can also be integrated into scripts and automated workflows, especially for setting up development environments or running local integration tests. Automating these connections can significantly reduce manual overhead and ensure consistency.
Using nohup or disown to Run in Background
As touched upon earlier, running port-forward in the background is crucial for scripting. * & (Ampersand): The simplest way to background a command in a shell. The process will run, but it remains a child of your shell session and will terminate if your shell exits. bash kubectl port-forward service/my-app 8080:80 & echo "Port forward started in background." # ... do other tasks ... * nohup: Runs a command such that it ignores the HUP (hangup) signal, allowing it to continue running even after your terminal session closes. It typically redirects output to a file named nohup.out. bash nohup kubectl port-forward service/my-app 8080:80 > /dev/null 2>&1 & # > /dev/null 2>&1 redirects stdout and stderr to /dev/null to prevent nohup.out echo "Port forward started with nohup." * disown: If you've started a port-forward with & and then realize you want it to survive your terminal session, you can use disown to remove it from your shell's job control list. 1. Start the command: kubectl port-forward service/my-app 8080:80 & 2. Then type: disown (or disown -h to keep history, disown -a for all jobs).
When scripting, always capture the PID (Process ID) of the backgrounded port-forward process so you can explicitly kill it later when no longer needed. This prevents orphaned processes and port conflicts.
# Start port-forward and capture PID
kubectl port-forward service/my-app 8080:80 > /dev/null 2>&1 &
PF_PID=$!
echo "Port forward PID: $PF_PID"

# Do some work, e.g., run tests
sleep 10
curl http://localhost:8080/health

# Clean up
echo "Stopping port forward with PID: $PF_PID"
kill $PF_PID
Wrapper Scripts for Complex Setups
For development environments that require multiple port-forward connections or specific pre-configuration, a wrapper script can automate the entire setup process.
Consider a start-dev.sh script:
#!/bin/bash

NAMESPACE="my-dev-namespace"
FRONTEND_SVC="my-frontend-service"
BACKEND_SVC="my-backend-service"
DB_SVC="my-database-service"

# Ensure clean slate
echo "Killing existing port-forward processes..."
pkill -f "kubectl port-forward" # Be careful with this, might kill other legitimate forwards

echo "Starting port forwards for development environment in namespace $NAMESPACE..."

# Frontend (e.g., UI dev server connects to this)
kubectl port-forward service/$FRONTEND_SVC 3000:80 -n $NAMESPACE > /dev/null 2>&1 &
PF_FRONTEND_PID=$!
echo "Frontend (localhost:3000 -> $FRONTEND_SVC:80) PID: $PF_FRONTEND_PID"

# Backend API
kubectl port-forward service/$BACKEND_SVC 8080:8080 -n $NAMESPACE > /dev/null 2>&1 &
PF_BACKEND_PID=$!
echo "Backend (localhost:8080 -> $BACKEND_SVC:8080) PID: $PF_BACKEND_PID"

# Database
kubectl port-forward service/$DB_SVC 5432:5432 -n $NAMESPACE > /dev/null 2>&1 &
PF_DB_PID=$!
echo "Database (localhost:5432 -> $DB_SVC:5432) PID: $PF_DB_PID"

echo "All port forwards started. Press Ctrl+C to stop them."

# Keep the script running until Ctrl+C, then kill all background jobs
trap "echo 'Stopping all port forwards...'; kill $PF_FRONTEND_PID $PF_BACKEND_PID $PF_DB_PID; exit" INT TERM
wait # Wait for background jobs to complete (they won't unless killed)
This script: 1. Defines variables for services and namespace. 2. (Optionally) Kills previous port-forward processes. 3. Starts multiple port-forward commands in the background. 4. Captures PIDs for each. 5. Sets up a trap to catch Ctrl+C and cleanly terminate all started port-forward processes.
Integrating into CI/CD (Limited Use)
While kubectl port-forward is generally not suitable for production CI/CD pipelines (due to its ephemeral nature and single-point-of-failure characteristics), there are niche scenarios where it might be used for local integration testing within a CI agent.
For example, if a CI job runs on a dedicated agent that needs to temporarily access a specific service in a test cluster for a set of integration tests:
# Example snippet in a CI/CD configuration (e.g., Jenkinsfile, GitLab CI, GitHub Actions)
- name: Setup port-forward to test service
  run: |
    kubectl port-forward service/my-test-service 8080:80 --namespace test-env > /dev/null 2>&1 &
    echo $! > /tmp/port_forward_pid # Save PID to file
    echo "Waiting for port-forward to establish..."
    sleep 5 # Give it a moment to connect
  # Add a cleanup step to ensure the process is killed
  # This usually involves an `always` or `post` hook in CI
  finally:
    name: Kill port-forward
    run: |
      if [ -f /tmp/port_forward_pid ]; then
        kill $(cat /tmp/port_forward_pid)
      fi
Such use cases are rare and usually limited to very specific integration scenarios where a full Ingress or LoadBalancer setup for a temporary test is overkill. It's crucial to always include robust cleanup logic to prevent orphaned processes on the CI agent.
Leveraging expect or Scripting Languages for Interactive Prompts
Sometimes, the service you're forwarding to (e.g., a database) might require an interactive password prompt upon connection from your local client. While port-forward itself is non-interactive once established, the client connecting through it might be. If you're automating client connections in a script, you might need tools like expect (for shell scripts) or libraries in languages like Python (e.g., pexpect) to handle these interactive prompts.
For example, connecting psql to a forwarded PostgreSQL instance:
#!/usr/bin/expect -f

set timeout 20
spawn psql -h localhost -p 5432 -U myuser mydb
expect "Password: "
send "mypassword\r"
interact
This script would assume kubectl port-forward is already running. expect is a powerful tool for automating interactions with command-line programs that require user input.
By embracing scripting techniques, developers can transform kubectl port-forward from a manual, terminal-bound command into a seamlessly integrated component of their automated development workflows, enhancing efficiency and reducing repetitive tasks.
The Bigger Picture: API Management and Gateway Solutions
While kubectl port-forward is an indispensable tool for individual developers to gain temporary, local access to specific services within a Kubernetes cluster, it's crucial to recognize its limitations in a broader, production-oriented context. For managing and exposing a multitude of services, especially those offering a rich api to external consumers, internal teams, or even other microservices, dedicated API management and gateway solutions become not just beneficial, but absolutely essential.
Imagine a complex microservices architecture within Kubernetes. Each service might expose its own api, potentially with different authentication mechanisms, rate limits, and data formats. Manually managing direct access to each of these services from outside the cluster quickly becomes a nightmare, leading to security vulnerabilities, inconsistent api experiences, and operational overhead. This is where the concept of an API Gateway comes into play.
An API Gateway acts as a single entry point for all API calls from external clients to your backend services. It abstracts away the complexity of your microservices architecture, providing a unified and consistent api interface. Key functionalities of an API Gateway include:
- Request Routing: Directing incoming requests to the appropriate backend service based on defined rules.
- Authentication and Authorization: Centralizing security concerns by authenticating clients and enforcing authorization policies before requests reach individual services. This prevents direct exposure of backend services.
- Rate Limiting and Throttling: Protecting backend services from overload by controlling the number of requests clients can make.
- API Transformation: Modifying request and response formats (e.g., converting JSON to XML, or aggregating data from multiple services) to simplify client-side consumption.
- Load Balancing: Distributing traffic across multiple instances of a backend service.
- Caching: Improving performance by caching API responses.
- Monitoring and Analytics: Providing a centralized point for collecting metrics, logs, and tracing data for all API traffic.
- API Versioning: Managing different versions of an API to ensure backward compatibility for clients.
- OpenAPI Integration: Many modern
API Gatewaysolutions can ingest and serveOpenAPI(formerly Swagger) specifications, allowing for automated documentation, client SDK generation, and simplifiedapidiscovery.
While port-forward provides a temporary, developer-centric "gateway" for personal access, an enterprise-grade API Gateway provides a permanent, scalable, and secure "gateway" for all production traffic. It transforms a collection of disparate services into a coherent, manageable api product.
For managing and exposing a multitude of services, especially those offering a rich api, beyond what port-forward can handle for production, dedicated solutions like APIPark become essential. APIPark serves as an advanced API Gateway and API management platform, perfect for consolidating AI and REST services. This open-source solution, available under the Apache 2.0 license, provides a robust framework for managing the entire api lifecycle, from design and publication to invocation and decommissioning.
APIPark addresses critical challenges in modern api landscapes, particularly with the rise of AI-driven applications. It offers features like quick integration of over 100 AI models, providing a unified management system for authentication and cost tracking across diverse AI providers. This means developers can access various AI models through a standardized api format, simplifying usage and significantly reducing maintenance costs. Imagine testing a new prompt for an LLM; with port-forward, you might access a single service, but with APIPark, you can manage and orchestrate access to a suite of AI models, abstracting away their underlying complexities.
Furthermore, APIPark empowers users to encapsulate custom prompts with AI models into new REST apis, enabling rapid creation of specialized services like sentiment analysis or translation. This powerful capability allows teams to quickly build and expose value-added apis without deep knowledge of api gateway internals. The platform also emphasizes end-to-end api lifecycle management, ensuring that published apis are well-governed, with features such as traffic forwarding, load balancing, and versioning. These are capabilities kubectl port-forward cannot and is not designed to provide.
One of the standout features of APIPark is its ability to facilitate api service sharing within teams, offering a centralized display of all api services. This is invaluable in large organizations where different departments need to discover and consume apis efficiently. Coupled with independent api and access permissions for each tenant, APIPark ensures robust security and resource isolation, allowing multiple teams to operate independently while sharing underlying infrastructure. The platform also supports subscription approval features, requiring callers to subscribe and await administrator approval, preventing unauthorized api calls and enhancing data security.
For performance-critical environments, APIPark is engineered to rival high-performance solutions like Nginx, achieving over 20,000 TPS with modest hardware and supporting cluster deployment for large-scale traffic. Its comprehensive logging capabilities record every detail of api calls, providing crucial data for troubleshooting and system stability. Additionally, powerful data analysis tools offer insights into long-term trends and performance changes, enabling proactive maintenance.
In essence, APIPark (https://apipark.com/) complements kubectl port-forward perfectly. While port-forward remains the agile developer's personal tool for intimate, local interaction with a single service, APIPark provides the robust, scalable, and secure infrastructure required to expose, manage, and govern a fleet of apis and services in a production environment. It represents the enterprise-grade solution for api governance, offering an api gateway that brings order, security, and scalability to complex api ecosystems, whether for traditional REST apis or cutting-edge AI models. It’s the difference between a temporary footpath to a single destination and a well-engineered superhighway network.
Future Trends and Evolution of Local Access
The landscape of cloud-native development is constantly evolving, and with it, the tools and methodologies for interacting with remote Kubernetes clusters. While kubectl port-forward remains a foundational and universally relevant primitive, a new generation of tools is emerging to further streamline and enhance the local development experience, building upon or offering alternatives to traditional port-forwarding. These trends aim to make the Kubernetes development loop even faster, more integrated, and less prone to configuration headaches.
Enhanced Tooling: Telepresence, Garden, Skaffold
Several sophisticated tools are designed to provide a more integrated and developer-friendly local access experience, often abstracting away the manual port-forward steps:
- Telepresence: This tool (now part of Ambassador Labs) allows developers to proxy a specific service from their local machine into a remote Kubernetes cluster. Essentially, it replaces a service or pod in the cluster with your local process, rerouting cluster-internal traffic for that service directly to your local workstation. This enables incredibly powerful scenarios, such as debugging a local microservice while it receives traffic from other services running in Kubernetes, or running a local service that directly accesses an in-cluster database without
port-forwarding. Telepresence effectively makes your local machine "part of the cluster" for a specific service. - Garden: Garden is a full-stack orchestration tool designed for developing and testing applications across local, remote, and CI/CD environments. It can hot-reload code, build, deploy, and test services, supporting development across different environments. While not a direct
port-forwardreplacement, it often uses similar tunneling mechanisms internally to ensure local code changes are quickly reflected in remote test environments, or to facilitate local testing against remote dependencies. - Skaffold: Developed by Google, Skaffold aims to simplify the entire development workflow for Kubernetes applications. It handles building, pushing, and deploying your application, and critically, it provides a "dev loop" that watches for local code changes and automatically rebuilds, redeploys, and even
port-forwardsservices for you. Skaffold automates the tedious parts of the inner development loop, usingport-forwardunder the hood for local access to deployed services.
These tools represent a move towards higher-level abstractions that manage the complexities of Kubernetes interaction, making port-forward a foundational component they leverage rather than a command a developer needs to explicitly run repeatedly.
Deeper IDE Integrations
Integrated Development Environments (IDEs) are becoming increasingly Kubernetes-aware. Plugins and extensions for IDEs like VS Code, IntelliJ IDEA, and others are emerging that offer built-in port-forwarding capabilities, often with a graphical interface. * VS Code Kubernetes Extension: This popular extension provides a rich interface for interacting with Kubernetes clusters, including the ability to right-click on a service or pod and select "Port Forward." It simplifies the process, shows active forwards, and makes it accessible directly from your coding environment. * Cloud Code (for IntelliJ, VS Code): Google's Cloud Code offers deep integration for developing Kubernetes and Cloud Run applications. It provides features like continuous deployment, debugging, and port-forwarding directly within the IDE, streamlining the entire development experience.
These integrations reduce context switching, allowing developers to manage their Kubernetes connections without leaving their primary development interface, thus enhancing productivity.
Cloud-Native Development Environments (CDEs)
A significant trend is the rise of Cloud-Native Development Environments (CDEs) or "development-as-a-service" platforms. These platforms move the entire development environment (including IDE, compilers, dependencies, and even a miniature Kubernetes cluster or connection to a remote one) into the cloud. * Gitpod, GitHub Codespaces, Coder: These services provide browser-based IDEs running in cloud containers. When you develop in such an environment, your code is already "in the cloud," often co-located with your Kubernetes cluster. This can eliminate the need for port-forwarding entirely, as your development environment itself is within the cluster's network. Alternatively, if your CDE still connects to a separate remote cluster, these platforms can implement port-forward-like tunneling automatically and transparently.
CDEs promise to standardize development environments, simplify onboarding, and leverage the cloud's scalability for development tasks, further abstracting away traditional local access challenges.
The Continued Relevance of Port-Forward as a Fundamental Primitive
Despite the advent of more sophisticated tools and integrated environments, kubectl port-forward is unlikely to become obsolete. It remains a fundamental primitive in the Kubernetes toolkit for several reasons: * Simplicity and Universality: It's a single, straightforward command that works across any Kubernetes cluster, regardless of its setup or the tooling layers above it. It's a lowest common denominator for network access. * Debugging and Troubleshooting: For ad-hoc debugging, quick checks, or when higher-level tools fail, port-forward is the reliable fallback that gives direct, unvarnished access. * Minimal Overhead: It doesn't require complex configurations, agents, or client-side installations beyond kubectl itself. * Security Context: It operates within the existing Kubernetes RBAC framework, making it a secure choice when used correctly. * Underlying Mechanism: Many of the newer, more complex tools (like Skaffold or even some IDE extensions) often utilize kubectl port-forward under the hood to achieve their seamless local access, demonstrating its foundational importance.
In conclusion, the future of local Kubernetes access will likely involve a layered approach: sophisticated tools providing a highly integrated and automated experience for routine development, while kubectl port-forward continues to serve as the reliable, fundamental, and universally applicable command for quick, targeted, and diagnostic access. Mastering kubectl port-forward therefore remains a core skill for any Kubernetes professional, providing the bedrock understanding for navigating current and future cloud-native development challenges.
Conclusion
The journey through the capabilities and nuances of kubectl port-forward reveals it as far more than just another command-line utility; it is a critical enabler for efficient and effective Kubernetes development and operations. In a world increasingly dominated by distributed systems and microservices, where isolation and network segmentation are inherent design principles, port-forward acts as a vital bridge, transforming the challenge of remote service access into a seamless local experience.
From its foundational mechanism of creating a secure, two-way tunnel between your local machine and a specific Kubernetes service, to its advanced usage patterns involving multiple port forwards, specific binding addresses, and background execution, kubectl port-forward offers unparalleled flexibility. We've explored its indispensable role in practical scenarios ranging from connecting IDE debuggers to remote applications and running local frontends against in-cluster backends, to accessing internal databases and crucial monitoring endpoints. For every developer and operator grappling with the complexities of a Kubernetes environment, port-forward provides an immediate and direct conduit to their applications.
However, its power necessitates a deep understanding of its security implications. Adhering to the principle of least privilege, carefully managing permissions, and being acutely aware of the risks associated with exposing services to broader networks are paramount. We also distinguished port-forward from other Kubernetes access methods like kubectl exec, kubectl proxy, and production-grade solutions such as Ingress and Load Balancers, emphasizing that while port-forward is a developer's tactical friend, it is not a production api exposure mechanism.
For robust, scalable, and secure api management in production environments, solutions like APIPark step in to handle the comprehensive lifecycle of apis, providing an enterprise-grade API Gateway that port-forward is simply not designed for. APIPark facilitates unified management of diverse services, including a multitude of AI models, offering centralized authentication, rate limiting, monitoring, and traffic management, thereby transforming a collection of individual services into a cohesive and governed api product. This distinction highlights that while port-forward serves the individual, APIPark empowers the enterprise.
Looking ahead, while innovative tools and cloud-native development environments continue to abstract and automate many aspects of Kubernetes interaction, kubectl port-forward will undoubtedly retain its status as a fundamental and indispensable primitive. Its simplicity, reliability, and directness make it the go-to command for quick diagnoses, ad-hoc debugging, and the rawest form of local interaction.
Ultimately, mastering kubectl port-forward is about more than just typing a command; it's about gaining an intuitive understanding of Kubernetes networking, enhancing your debugging prowess, and accelerating your development feedback loop. It empowers you to navigate the cloud-native landscape with confidence, turning potential roadblocks into productive pathways, and truly mastering local Kubernetes access.
5 FAQs about Kubectl Port Forward
Q1: What is the primary purpose of kubectl port-forward and when should I use it?
A1: The primary purpose of kubectl port-forward is to create a secure, two-way network tunnel from a local port on your workstation to a specific port on a Pod or Service running inside a Kubernetes cluster. You should use it primarily for temporary, local development, debugging, and ad-hoc troubleshooting. This includes scenarios like connecting a local IDE debugger to a remote application, running a local frontend against a remote backend service in the cluster, accessing an in-cluster database with your local GUI client, or manually inspecting a service's metrics or admin interface without exposing it publicly. It's designed for personal, temporary access, not for persistent or production-grade service exposure.
Q2: How does kubectl port-forward work behind the scenes and what are its security implications?
A2: When you run kubectl port-forward, your kubectl client connects to the Kubernetes API server, which then instructs the kubelet agent on the node hosting the target Pod to establish a connection to the specified port within that Pod. A secure streaming connection (often WebSocket-based) is then established from your client, through the API server and kubelet, to the application in the Pod, tunneling TCP traffic. The main security implications involve: 1. RBAC: Your kubectl user must have create permissions on the pods/portforward subresource for the target Pod. 2. Local Network Exposure: Using the --address 0.0.0.0 flag exposes the forwarded service to your entire local network, which can be a security risk if your network is untrusted or if the service handles sensitive data. It's generally safer to stick to the default 127.0.0.1 binding. 3. Not for Production: It's not a secure or scalable solution for exposing production services due to lack of load balancing, high availability, and advanced security features typically found in API Gateways.
Q3: Can I forward multiple ports with a single kubectl port-forward command, and how do I run it in the background?
A3: Yes, you can forward multiple ports in a single command by listing multiple LOCAL_PORT:REMOTE_PORT pairs separated by spaces. For example: kubectl port-forward service/my-app 8000:80 9001:9090. To run kubectl port-forward in the background, you can append an ampersand (&) to the command in Unix-like shells (e.g., kubectl port-forward service/my-app 8080:80 &). For more robust backgrounding that survives terminal closure, use nohup combined with &, typically redirecting output to /dev/null (e.g., nohup kubectl port-forward service/my-app 8080:80 > /dev/null 2>&1 &). Remember to capture the process ID ($!) to kill it later.
Q4: What are the common troubleshooting steps for kubectl port-forward errors like "address already in use" or "connection refused"?
A4: * "Address already in use" (e.g., listen tcp 127.0.0.1:8080: bind: address already in use): This means your LOCAL_PORT is already occupied. * Solution: Choose a different LOCAL_PORT, or identify and kill the conflicting process using lsof -i :LOCAL_PORT (Linux/macOS) or netstat -ano | findstr :LOCAL_PORT (Windows) followed by kill or taskkill. * "Error dialing backend: dial tcp..." (e.g., dial tcp 10.42.0.10:8080: connect: connection refused): This often means kubectl found the Pod/Service but couldn't connect to the specified REMOTE_PORT inside the cluster. * Solution: Verify the Pod/Service name and namespace (kubectl get pod/svc -n <namespace>). Check the Pod's status (kubectl get pod) and logs (kubectl logs) to ensure the application is running and listening on the REMOTE_PORT. * "Connection refused" (from your local client, after forward is established): This indicates the tunnel works, but the application inside the Pod is refusing connections. * Solution: The application itself might have crashed, stopped, or is misconfigured (e.g., listening only on 127.0.0.1 instead of 0.0.0.0 within the container). Check application logs and use kubectl exec with netstat -tulnp inside the Pod to confirm the application's listening address and port.
Q5: When should I use a dedicated API Gateway like APIPark instead of kubectl port-forward?
A5: You should use a dedicated API Gateway like APIPark when you need to expose your services or apis to external consumers, other internal teams, or for production-grade traffic, requiring robust management, security, and scalability. Kubectl port-forward is for individual, temporary local access. APIPark, as an API Gateway and API management platform, provides features that port-forward does not, such as: * Centralized authentication and authorization. * Rate limiting, traffic management, and load balancing. * API transformation, versioning, and unified api format. * Comprehensive monitoring, logging, and data analysis. * Integration with OpenAPI specifications. * Support for hundreds of AI models with unified api invocation. * Team-based api sharing and tenant isolation. In short, port-forward is your personal access tool, while APIPark is your enterprise solution for managing and governing a complex api ecosystem securely and at scale.
🚀You can securely and efficiently call the OpenAI API on APIPark in just two steps:
Step 1: Deploy the APIPark AI gateway in 5 minutes.
APIPark is developed based on Golang, offering strong product performance and low development and maintenance costs. You can deploy APIPark with a single command line.
curl -sSO https://download.apipark.com/install/quick-start.sh; bash quick-start.sh

In my experience, you can see the successful deployment interface within 5 to 10 minutes. Then, you can log in to APIPark using your account.

Step 2: Call the OpenAI API.