kubectl port-forward: Seamless Local Service Access


The modern landscape of software development, particularly within the realm of cloud-native applications and microservices, is characterized by dynamic environments and intricate network topologies. At the heart of this revolution lies Kubernetes, an open-source system for automating deployment, scaling, and management of containerized applications. While Kubernetes excels at orchestrating workloads and ensuring high availability, it inherently introduces a layer of abstraction and isolation between your local development machine and the services running within its cluster. This isolation, a core tenet of containerization for security and resource management, often presents a perplexing challenge for developers: how does one seamlessly access a service or a database running inside a Kubernetes pod from a local machine for debugging, testing, or development purposes without exposing it publicly? This is precisely where the kubectl port-forward command emerges as an indispensable tool, acting as a secure, ephemeral bridge, creating a direct conduit from your local machine to a specific port on a pod or service within the Kubernetes cluster.
For developers and operations professionals alike, the ability to peer into the inner workings of a remote service as if it were running locally is not merely a convenience but a fundamental necessity. Imagine building a new feature for a local front-end application that needs to interact with a back-end microservice deployed in a development Kubernetes cluster. Or perhaps you're troubleshooting a database connectivity issue, needing to inspect the database directly from your local SQL client. In these scenarios, kubectl port-forward provides an elegant and surprisingly simple solution, bypassing the complexities of ingress controllers, public IPs, or modifying service types for temporary access. It’s a surgical instrument in the developer's toolkit, designed for precision and quick iteration, ensuring that the critical feedback loop between development and testing remains as tight as possible. This article will delve deep into the mechanics, applications, and best practices surrounding kubectl port-forward, exploring its profound impact on developer productivity and its nuanced role within the broader ecosystem of API management and network gateway solutions, ultimately painting a comprehensive picture of its utility in modern cloud-native workflows.
Chapter 1: Understanding the Kubernetes Network Landscape and the Isolation Challenge
To truly appreciate the utility of kubectl port-forward, one must first grasp the fundamental networking principles that govern a Kubernetes cluster. Kubernetes is designed to isolate workloads, giving each pod its own IP address within a flat network space, yet making these pods generally inaccessible from outside the cluster without explicit configuration. This isolation is a cornerstone of its architecture, providing security, resource partitioning, and enabling seamless scaling without IP conflicts or complex routing issues impacting other services.
Within a Kubernetes cluster, pods are ephemeral entities; they can be created, destroyed, and rescheduled across different nodes. This dynamic nature means their IP addresses are not static and can change over time. Direct access to a pod's IP from an external network is therefore impractical and often impossible due due to network policies, firewalls, and the very design of the cluster's internal routing. To address the need for stable network endpoints, Kubernetes introduces the concept of Services. A Kubernetes Service is an abstraction that defines a logical set of pods and a policy by which to access them. Services come in several types, each catering to different access patterns:
- ClusterIP: This is the default service type. It exposes the Service on an internal IP in the cluster, making it only reachable from within the cluster. This is ideal for internal microservice communication, where one service needs to call another.
- NodePort: This type exposes the Service on a static port on each node's IP address. This allows external traffic to reach the service via any node's IP and the specified NodePort. However, NodePorts are often in a high, ephemeral range (30000-32767) and require firewall rules to be opened, making them less ideal for ad-hoc developer access.
- LoadBalancer: Available only in cloud environments, this type creates an external cloud load balancer that routes traffic to the Service. It provides a stable, publicly accessible IP address but comes with associated cloud provider costs and setup overhead.
- ExternalName: This type maps a Service to a DNS name, not to pods directly. It's used for services outside the cluster.
While NodePort and LoadBalancer services do provide external access, they are typically configured for more permanent or production-oriented exposure. For a developer needing to quickly connect to a single pod or service for a few minutes or hours to debug an issue, test a new API endpoint, or inspect a database, setting up an Ingress controller, a public LoadBalancer, or even a VPN can be overkill, time-consuming, and potentially insecure if not managed properly. The inherent isolation, while beneficial for the overall system, creates a significant hurdle for local development workflows. This is precisely the gap that kubectl port-forward fills, offering a direct, secure, and temporary solution that respects the cluster's internal networking while providing the necessary bridge for local interaction. It sidesteps the complexities of public exposure mechanisms, making it an invaluable tool for developers operating within the Kubernetes ecosystem.
Chapter 2: Introduction to kubectl port-forward – The Ephemeral Tunnel
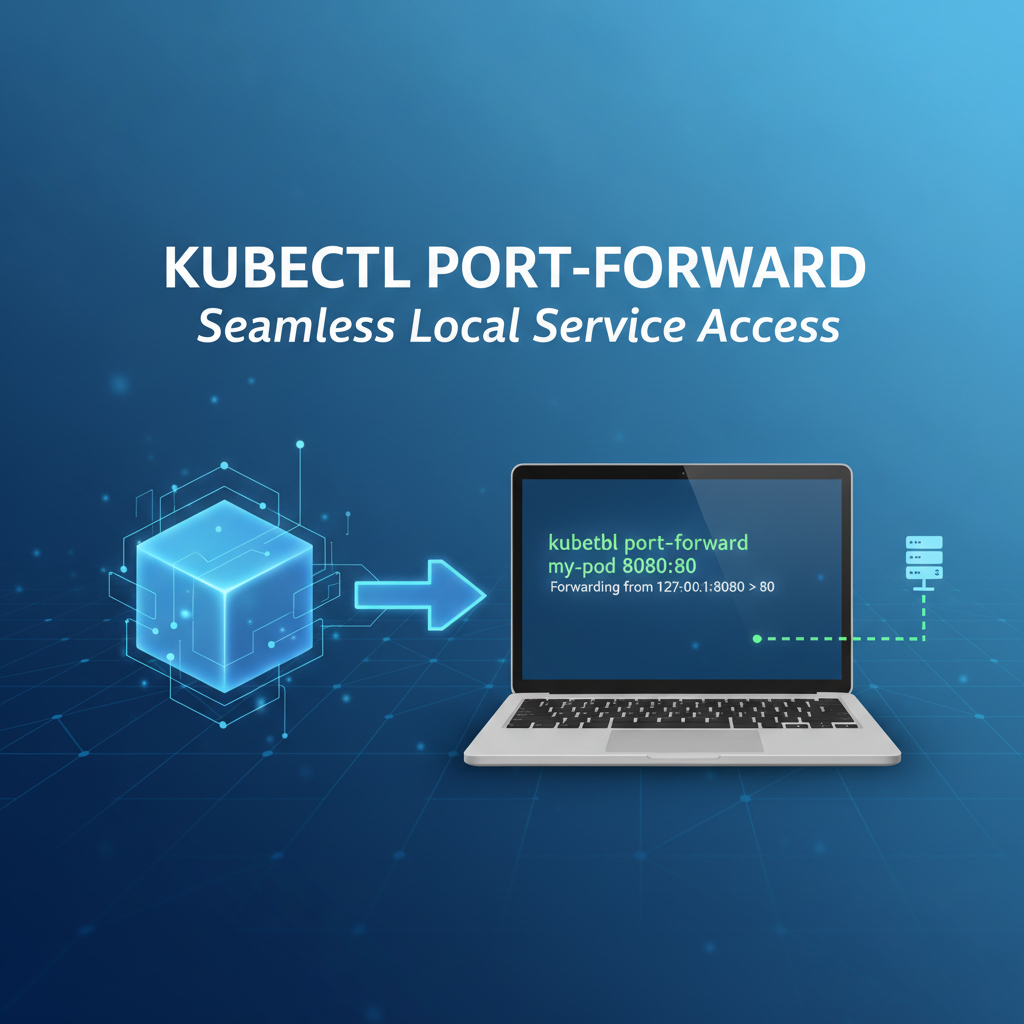
At its core, kubectl port-forward is a command-line utility designed to establish a direct, bidirectional network tunnel between a port on your local machine and a specific port on a pod or service running within a Kubernetes cluster. Think of it as creating a temporary, private VPN connection directly to a chosen service, allowing traffic intended for your local port to be securely forwarded to the corresponding port inside the cluster, and vice-versa. This mechanism effectively makes a remote service appear as if it's running locally, simplifying interaction for development and debugging purposes.
The power of kubectl port-forward lies in its simplicity and directness. It doesn't modify any Kubernetes resources, nor does it expose your service to the wider internet. Instead, it leverages the Kubernetes API server to establish a secure connection to the target pod or service. When you execute the command, kubectl first communicates with the Kubernetes API server. The API server then instructs the kubelet on the node where the target pod is running to open a proxy connection to the specified port on that pod. This connection is then relayed back through the API server to your local kubectl process, which in turn binds to the specified local port. Any traffic sent to your local port is then encapsulated and sent through this secure tunnel to the target service inside the cluster.
This tunneling mechanism offers several distinct advantages, particularly in terms of security and developer experience. Because the connection is initiated from your local machine and routed through the Kubernetes API server, it inherits the security context of your kubectl configuration. If your kubectl client is authenticated and authorized to access the cluster and the specific pod/service, the port-forward will succeed. If not, it will fail, preventing unauthorized access. This "just-in-time" and "just-enough" access model is crucial for maintaining security boundaries.
The primary use cases for kubectl port-forward are almost exclusively related to development, debugging, and ad-hoc testing. For instance:
- Local Application Development: If you're developing a local front-end application or a different microservice that needs to interact with a back-end component deployed in Kubernetes,
port-forwardallows your local application to treat the remote service as if it's running onlocalhost. - Debugging Services: When a service isn't behaving as expected,
port-forwardcan allow you to connect a local debugger, send test requests, or inspect its internal state directly. This is invaluable for pinpointing issues without deploying additional diagnostic tools within the cluster. - Database Access: Connecting a local database client (e.g., DBeaver, pgAdmin) to a database pod running in Kubernetes is a common scenario.
port-forwardprovides the necessary conduit, allowing you to run queries, manage schemas, or inspect data as if the database were on your local machine. - Accessing Internal Monitoring/Admin UIs: Many applications expose internal web interfaces for monitoring, metrics (like Prometheus exporters), or administration.
port-forwardoffers a quick way to access these UIs from your local browser without making them publicly accessible.
It's critical to emphasize that kubectl port-forward is not intended for production traffic or for exposing services to external users. It's a temporary, single-point connection. For production environments, robust solutions like Ingress controllers, LoadBalancers, or dedicated API Gateway products are the appropriate choice for managing external API access, offering features like authentication, authorization, rate limiting, and observability at scale. The ephemeral nature of port-forward underscores its role as a developer utility, a powerful yet focused tool for navigating the intricacies of Kubernetes networking during the development lifecycle.
Chapter 3: Basic Usage of kubectl port-forward – Your First Tunnel
Getting started with kubectl port-forward is remarkably straightforward, requiring only a basic understanding of your Kubernetes resources. The command's syntax is intuitive, allowing you to quickly establish a connection with minimal fuss. Mastering its basic form is the gateway to unlocking efficient local development against your Kubernetes deployments.
The fundamental syntax for kubectl port-forward is as follows:
kubectl port-forward <resource_type>/<resource_name> <local_port>:<remote_port> [options]
Let's break down each component of this command:
<resource_type>: This specifies the type of Kubernetes resource you want to forward to. The most common types arepodandservice. While technically you can target deployments or replica sets,kubectlwill simply pick one of the backing pods, makingpodorservicea more direct and reliable choice.<resource_name>: This is the specific name of the pod or service you intend to connect to. For pods, this will be the full pod name (e.g.,my-app-deployment-abcde-12345). For services, it's the service name (e.g.,my-app-service).<local_port>: This is the port on your local machine that you want to use. When you send traffic to this port onlocalhost, it will be forwarded to the remote service.<remote_port>: This is the port within the target pod or service that you want to connect to. This typically corresponds to the port where your application inside the container is listening.[options]: Various optional flags can modify the behavior of the command, which we will explore later.
Forwarding to a Pod
The most granular way to use kubectl port-forward is to target a specific pod. This is often preferred when you need to connect to a particular instance of an application, perhaps one that's exhibiting a specific bug or has unique logs.
First, you need to identify the name of the target pod. You can do this by listing pods in your desired namespace:
kubectl get pods -n <your-namespace>
Let's say you have a pod named my-api-789abcde-xyz12 running an API service on port 8080. To access this service locally on port 9000, you would run:
kubectl port-forward pod/my-api-789abcde-xyz12 9000:8080
Upon execution, kubectl will display output similar to this:
Forwarding from 127.0.0.1:9000 -> 8080
Forwarding from [::1]:9000 -> 8080
This output confirms that the tunnel has been successfully established. Now, any request sent to http://localhost:9000 (or http://127.0.0.1:9000 or http://[::1]:9000 for IPv6) on your local machine will be forwarded to port 8080 of the my-api-789abcde-xyz12 pod inside the Kubernetes cluster. The command will run in your terminal foreground until you explicitly stop it by pressing Ctrl+C.
Forwarding to a Service
While forwarding to a specific pod is useful, targeting a Kubernetes Service is often more robust, especially for applications backed by multiple pods. When you port-forward to a service, kubectl intelligently selects one of the healthy backing pods associated with that service and establishes the tunnel to it. If that pod crashes or is rescheduled, kubectl will automatically attempt to reconnect to another available pod, providing a more stable connection experience compared to directly targeting an ephemeral pod.
To forward to a service, you first need its name:
kubectl get services -n <your-namespace>
Suppose you have a service named my-api-service that routes traffic to pods listening on port 8080. To forward this service to your local port 9000:
kubectl port-forward service/my-api-service 9000:8080
The output will be similar to the pod forwarding example. The key benefit here is resilience; you don't need to worry about individual pod lifecycles. This makes it a preferred method for general development and testing when you just need any healthy instance of a service.
Specifying Namespace
If your Kubernetes resources are not in the default namespace, you must specify the namespace using the -n or --namespace flag. This is a common practice in multi-tenant or complex Kubernetes environments.
kubectl port-forward -n production-dev service/my-api-service 9000:8080
Running in the Background
For long-running sessions, or when you need to use your terminal for other tasks, you can run kubectl port-forward in the background. On Linux/macOS, this is easily done by appending & to the command:
kubectl port-forward service/my-api-service 9000:8080 &
This will immediately return control to your terminal, and the port-forwarding process will continue in the background. Note the process ID (PID) that is usually printed when you background a process, as you'll need it to terminate the tunnel.
Killing the Process
To terminate a foreground port-forward process, simply press Ctrl+C. If you ran it in the background, you'll need to find its process ID (PID) and kill it. You can list background jobs with jobs or find the process by name using ps aux | grep 'kubectl port-forward'. Once you have the PID, use kill <PID> to stop the tunnel.
By mastering these basic commands, developers gain an incredibly powerful ability to interact with their Kubernetes-deployed applications as if they were local, drastically streamlining the development and debugging process. This fundamental understanding is key to leveraging kubectl port-forward effectively in more complex scenarios.
Chapter 4: Advanced kubectl port-forward Techniques and Considerations
While the basic usage of kubectl port-forward covers a vast majority of common scenarios, the command offers additional capabilities and considerations that can further enhance its utility and address specific needs. Understanding these advanced techniques and best practices is crucial for maximizing efficiency and ensuring secure operations within your Kubernetes development workflow.
Forwarding Multiple Ports
There are situations where a single application or service might expose multiple ports, and you need to access all of them locally. kubectl port-forward supports forwarding multiple ports in a single command, which can be more convenient than running separate commands.
You can specify multiple local_port:remote_port pairs, separated by spaces:
kubectl port-forward service/my-multi-port-app 8080:8080 9000:9000
In this example, local port 8080 will tunnel to remote port 8080, and local port 9000 will tunnel to remote port 9000. This is particularly useful for applications that expose a main HTTP API on one port and a metrics endpoint or an admin interface on another.
Dynamic Local Port Assignment (0)
Sometimes, you don't care about the specific local port, or you want kubectl to pick an available port for you to avoid conflicts. You can achieve this by specifying 0 as the local_port. kubectl will then bind to a randomly available high-numbered port on your local machine and report it in the output.
kubectl port-forward service/my-app-service 0:8080
The output will then inform you which local port was chosen:
Forwarding from 127.0.0.1:51234 -> 8080
Forwarding from [::1]:51234 -> 8080
This feature is excellent for scripting or when you're rapidly switching between multiple port-forward sessions and don't want to manually track available ports.
Listening on Specific Local Interfaces (--address)
By default, kubectl port-forward binds to localhost (127.0.0.1 and ::1), meaning only applications running on your local machine can access the forwarded port. However, there are scenarios where you might want to expose the forwarded port to other machines on your local network (e.g., if you're developing on a VM and want to access it from your host machine, or if a colleague needs to quickly access your forwarded service).
You can use the --address flag to specify which local IP addresses kubectl should listen on.
kubectl port-forward service/my-app-service --address 0.0.0.0 9000:8080
Using 0.0.0.0 will make the forwarded port accessible from any network interface on your machine, including your local network IP. Exercise caution when using this option, as it broadens the accessibility of your tunnel. Ensure you understand the security implications of exposing internal cluster services beyond localhost.
Troubleshooting Common Issues
Even with its simplicity, kubectl port-forward can sometimes encounter issues. Knowing how to diagnose them quickly is key:
- Port Already In Use:
- Symptom:
error: unable to listen on any of the requested ports: [9000] - Cause: Another process on your local machine is already using
local_port. - Solution: Choose a different
local_port, or use0for dynamic assignment. You can check port usage withnetstat -tulnp | grep 9000(Linux) orlsof -i :9000(macOS).
- Symptom:
- Resource Not Found:
- Symptom:
error: services "my-nonexistent-service" not found - Cause: Typo in the resource name, wrong resource type (e.g.,
podinstead ofservice), or incorrect namespace. - Solution: Double-check the resource name and type with
kubectl get pods -n <namespace>orkubectl get services -n <namespace>. Ensure the correct namespace is specified with-n.
- Symptom:
- Connection Refused / Unable to Connect:
- Symptom:
Unable to connect to the server: EOFor the local client gets a connection refused. - Cause: The application inside the pod is not listening on
remote_port, or the pod itself is unhealthy/crashing. Less commonly, network policies might be blocking internal pod-to-pod communication (thoughport-forwardusually bypasses this by proxying through kubelet). - Solution: Verify the application's listening port within the container. Check pod logs (
kubectl logs <pod-name> -n <namespace>) and status (kubectl describe pod <pod-name> -n <namespace>) to ensure the application is running and healthy.
- Symptom:
- Permissions Issues:
- Symptom:
error: You must be logged in to the server (unauthorized) - Cause: Your
kubectlcontext does not have sufficient permissions (RBAC) to access the target pod or service. - Solution: Verify your
kubectlconfiguration (kubectl config current-context) and ensure your user/service account has the necessarygetandport-forwardpermissions for the resource in question.
- Symptom:
Security Best Practices
While kubectl port-forward is a powerful development tool, its security implications should not be overlooked:
- Strictly for Local Development and Debugging: Never use
port-forwardas a permanent solution for exposing services. It lacks the authentication, authorization, rate limiting, and observability features of proper API Gateway solutions. - Limit Access: By default,
port-forwardbinds tolocalhost, which is the safest configuration. Only use--address 0.0.0.0if absolutely necessary and ensure your local network is secured. - Principle of Least Privilege: Ensure that the Kubernetes user account you are using for
kubectlhas only the necessary permissions to perform port-forwarding on specific resources in designated development namespaces. - Short-Lived Connections: Establish
port-forwardconnections only when needed and terminate them once your task is complete. Lingering open tunnels can be a potential security risk. - Sensitive Data: Be cautious when forwarding access to services containing sensitive data (e.g., production databases). Ensure your local machine is secure, and consider if
port-forwardis the most appropriate method for such access. For production environments, direct database access is usually handled through bastion hosts or dedicated secure channels, often managed by a dedicated gateway or VPN.
By understanding these advanced aspects and adhering to security best practices, developers can wield kubectl port-forward as an even more effective and responsible tool in their Kubernetes arsenal, balancing convenience with robust operational security.
Chapter 5: kubectl port-forward in a Developer's Workflow
The integration of kubectl port-forward into a developer's daily workflow is transformative, eliminating many common friction points associated with developing applications destined for or running within Kubernetes. It fundamentally bridges the gap between the familiar local development environment and the often-abstracted world inside the cluster, fostering rapid iteration and efficient debugging.
Local Application Development Against Remote Services
One of the most frequent and impactful use cases for kubectl port-forward is enabling local applications to interact with remote services. Imagine you are building a new feature for your front-end application written in React or Angular, running on your local machine via npm start. This front-end needs to consume APIs exposed by a back-end microservice deployed in your Kubernetes development cluster. Without port-forward, you'd need to expose that back-end service publicly (e.g., via Ingress or LoadBalancer), which adds complexity, potential security risks, and latency.
With kubectl port-forward, you can simply run:
kubectl port-forward service/my-backend-service 3001:8080 -n dev-env
Now, your local front-end application, configured to make API calls to http://localhost:3001, will seamlessly communicate with the my-backend-service running in your dev-env namespace. This setup allows developers to leverage their full local IDEs, debuggers, and rapid compilation cycles, while still testing against the true Kubernetes deployment environment, ensuring compatibility and catching integration issues early. This is a critical workflow for microservices architectures, where individual components might be developed and tested in isolation but need to integrate with a broader remote ecosystem.
Debugging Microservices: Accessing Logs, Metrics Endpoints, and Custom Debug Ports
Debugging is an inherent part of software development, and microservices in Kubernetes can present unique challenges. While kubectl logs provides access to standard output, sometimes you need more interactive debugging or access to specific diagnostic endpoints.
- Accessing Metrics: Many applications expose Prometheus-compatible metrics endpoints (e.g., on port
9090).port-forwardallows you to quickly access these from your local browser orcurlwithout full observability stack configuration:bash kubectl port-forward pod/my-app-metrics-exporter-pod 9090:9090 # Then access http://localhost:9090/metrics in your browser - Custom Debug Ports: Some applications might expose a specific debug port (e.g., a Java remote debugger on
5005, or a Node.js inspector on9229).port-forwardenables a secure connection for your local IDE's debugger:bash kubectl port-forward pod/my-java-app-pod 5005:5005 # Configure your IDE to connect to localhost:5005This allows developers to set breakpoints, step through code, and inspect variables in a running containerized application, significantly streamlining the bug-fixing process compared to relying solely on logs.
Database Access: Connecting Local Tools to Remote DBs
Database interactions are another cornerstone of many applications. When a database (like PostgreSQL, MySQL, MongoDB, or Redis) is deployed within Kubernetes, accessing it directly from a local client (e.g., DBeaver, DataGrip, pgAdmin) can be tricky. kubectl port-forward provides the ideal solution.
# Example for PostgreSQL
kubectl port-forward service/my-postgres-db 5432:5432 -n data-layer
Now, your local database client can connect to localhost:5432 using the appropriate credentials, and kubectl will route the traffic directly to your PostgreSQL service in the data-layer namespace. This is incredibly powerful for:
- Schema Migration Testing: Running local schema migrations against a remote development database.
- Data Inspection: Quickly querying and modifying data for testing or troubleshooting.
- Performance Tuning: Monitoring database activity from specialized local tools.
This capability significantly reduces the overhead of needing to deploy a separate database client within the cluster or exposing the database publicly, which is almost universally discouraged for security reasons.
Testing New Features Before Full Deployment
During the development cycle, features are often built incrementally. Before a full deployment or integration into a staging environment, port-forward allows developers to test new features or specific branches of a service in isolation, or as part of a larger local integration test. You might have a new version of a microservice that isn't ready for general deployment but needs to be tested with a local client or another local service. By port-forwarding to a pod running your specific development image, you can thoroughly test its APIs and functionality without affecting other developers or the shared development environment.
In essence, kubectl port-forward empowers developers to maintain a "local-first" development mentality while working within a distributed, cloud-native architecture. It removes the networking barriers, allowing for faster debugging, more reliable integration testing, and a generally more fluid development experience when interacting with remote Kubernetes services. It’s a testament to the power of well-designed command-line utilities in modern DevOps.
Chapter 6: kubectl port-forward and the Broader API Ecosystem: A Tale of Two Access Patterns
Understanding where kubectl port-forward fits within the broader API ecosystem, particularly in relation to concepts like API Gateways and general network gateways, is crucial for comprehensive architecture design and secure operations. While kubectl port-forward is an indispensable tool, it serves a distinctly different purpose than a robust API Gateway solution. They are complementary, each addressing specific needs within the lifecycle of an application and its exposed APIs.
The Role of APIs in Modern Architectures
At the heart of modern distributed systems, especially those built on microservices in Kubernetes, is the concept of the API (Application Programming Interface). APIs define the contracts through which different software components communicate, whether they are internal microservices talking to each other, or external client applications interacting with a back-end system. Every service running in Kubernetes likely exposes an API of some form, be it a RESTful HTTP endpoint, a gRPC service, or even a message queue interface.
For developers, kubectl port-forward provides a direct, unmanaged channel to interact with these internal APIs for testing and debugging. When you port-forward to a my-backend-api service, you're interacting with its raw API endpoints directly, without any additional layers of processing or security. This direct access is exactly what you need when you're developing and troubleshooting, as it gives you an unfiltered view of the service's behavior.
kubectl port-forward vs. API Gateway: Complementary Access Patterns
The distinction between kubectl port-forward and an API Gateway can be summarized as follows: port-forward is for individual, ephemeral, local-to-cluster access, while an API Gateway is for managed, persistent, external-to-cluster access.
kubectl port-forward: * Purpose: Personal development, debugging, and ad-hoc testing. * Scope: Local machine to a specific pod or service within the cluster. * Security: Relies on kubectl RBAC and the local secure tunnel. Not for public exposure. * Features: Basic port tunneling. * Traffic: Developer's local machine traffic only. * Use Case: Debugging a microservice's API, connecting a local database client to a remote database, accessing an internal UI.
API Gateway: * Purpose: Centralized management, security, and routing for external consumers of APIs. * Scope: External clients (web, mobile, other services) to multiple back-end services within the cluster. * Security: Robust authentication (OAuth, JWT), authorization, rate limiting, WAF (Web Application Firewall), DDoS protection. * Features: API routing, load balancing, caching, request/response transformation, versioning, analytics, monitoring, policy enforcement. * Traffic: High volume, diverse external client traffic. * Use Case: Exposing a public API for a mobile app, providing a unified endpoint for multiple microservices, managing access for partners.
Here's a comparison table highlighting these differences:
| Feature | kubectl port-forward |
Dedicated API Gateway (e.g., ApiPark) |
|---|---|---|
| Primary Use Case | Local development, debugging, ad-hoc testing | Securely exposing and managing APIs for external consumers and internal cross-team consumption |
| Exposure Scope | Local machine only (or local network with --address 0.0.0.0) |
Public internet, internal networks, partner networks |
| Security Model | kubectl RBAC, local tunnel encryption |
OAuth2, JWT, API Keys, mutual TLS, rate limiting, WAF, sophisticated access policies |
| Traffic Management | None (direct tunnel) | Load balancing, routing, request/response transformation, caching, circuit breakers |
| API Lifecycle | None (temporary access) | Design, publish, versioning, deprecation, analytics, developer portal |
| Observability | Basic kubectl logging for tunnel status |
Detailed API call logging, metrics, tracing, real-time analytics, dashboards |
| Scalability | Single point connection, not scalable | Highly scalable, distributed deployment, supports high TPS |
| Complexity to Setup | Simple command-line execution | Initial setup and configuration, but offers significant long-term benefits for API governance |
| Cost | Free (included with kubectl) |
Can be free (open-source) or commercial (with advanced features and support) |
| Target Audience | Developers, DevOps engineers | API consumers, API providers, business owners, security teams |
Where an API Gateway Excels and Complements port-forward
While kubectl port-forward is perfect for individual developers, an API Gateway is essential for any serious deployment that needs to expose APIs externally or manage internal API consumption across teams. A sophisticated API Gateway acts as the single entry point for all API calls, handling a multitude of concerns that port-forward simply doesn't address:
- Unified Access Point: Consolidates access to multiple microservices behind a single endpoint, simplifying client-side development.
- Security Enforcement: Applies granular access control, authentication, and authorization policies, protecting your back-end services from unauthorized access. This is crucial for maintaining data integrity and compliance.
- Traffic Management: Efficiently routes requests, performs load balancing, and can apply rate limiting to prevent abuse or overload.
- Observability: Provides centralized logging, monitoring, and analytics for all API traffic, offering critical insights into performance, usage patterns, and potential issues.
- Developer Experience: Often includes a developer portal where consumers can discover, subscribe to, and test APIs, greatly enhancing the overall API ecosystem.
For instance, products like ApiPark offer an open-source AI gateway and API management platform. While a developer might use kubectl port-forward to debug a new API feature of a microservice, once that feature is ready to be exposed to external users or integrated into a larger system by other internal teams, it would be published and managed through a platform like ApiPark. This allows for quick integration of 100+ AI models, unified API formats, prompt encapsulation into REST APIs, and end-to-end API lifecycle management. ApiPark would handle the subscription approvals, detailed call logging, and powerful data analysis, providing the robust, scalable, and secure gateway solution that kubectl port-forward is not designed to be.
In conclusion, kubectl port-forward and API Gateways operate at different layers of concern and for different audiences. port-forward facilitates the individual developer's journey, making internal services accessible during the build and debug phases. An API Gateway, on the other hand, is the professional facade, the comprehensive management layer that ensures your APIs are securely, efficiently, and reliably consumed at scale by a broader audience. Both are vital tools, but their appropriate application depends entirely on the specific access pattern and lifecycle stage of your API.
Chapter 7: Practical Scenarios and Detailed Examples
To solidify the understanding of kubectl port-forward, let's walk through several detailed practical scenarios that developers frequently encounter. These examples will illustrate the command's versatility and the specific steps involved in leveraging it effectively.
Scenario 1: Accessing a Prometheus Instance in Kubernetes
Prometheus is a popular open-source monitoring system that often runs within Kubernetes clusters. It typically exposes its web UI and API on port 9090. For debugging alerts, creating new dashboards, or simply inspecting metrics directly, developers often need temporary access to the Prometheus server.
Steps:
- Identify the Prometheus Pod/Service: First, determine the name of the Prometheus pod or service. Prometheus is commonly deployed as a
StatefulSetorDeploymentwith a correspondingService. Let's assume there's a service namedprometheus-k8sin themonitoringnamespace.bash kubectl get services -n monitoring # Expected output might include: prometheus-k8s ClusterIP 10.xx.xx.xx <none> 9090/TCP - Establish the Port Forward: Now, forward the Prometheus service's port
9090to an available local port, say9090.bash kubectl port-forward service/prometheus-k8s 9090:9090 -n monitoringYou will see output indicating the forwarding is active:Forwarding from 127.0.0.1:9090 -> 9090 Forwarding from [::1]:9090 -> 9090 - Access Prometheus Locally: Open your web browser and navigate to
http://localhost:9090. You should now see the Prometheus web interface, allowing you to run queries, view targets, and inspect configuration as if it were running on your local machine. - Terminate: Once you're done, simply press
Ctrl+Cin the terminal wherekubectl port-forwardis running.
This scenario demonstrates how port-forward provides immediate access to internal cluster UIs without reconfiguring network policies or exposing services publicly.
Scenario 2: Connecting a Local IDE/Client to a Remote Kafka Cluster
Developing applications that interact with Apache Kafka often requires a local Kafka client (e.g., kcat, Kafka-UI, or even a custom Java/Python application) to connect to a running Kafka cluster. If your Kafka cluster is within Kubernetes, port-forward can temporarily expose a Kafka broker.
Steps:
- Identify a Kafka Broker Pod: Kafka clusters typically consist of multiple broker pods. You'll need to select one to forward to. Let's assume you have pods like
kafka-0,kafka-1, etc., in thekafkanamespace, and Kafka listens on port9092.bash kubectl get pods -l app=kafka -n kafka # Pick one, e.g., kafka-0 - Establish the Port Forward: Forward the chosen Kafka broker pod's port
9092to your local port9092.bash kubectl port-forward pod/kafka-0 9092:9092 -n kafkaIf successful,kubectlwill confirm the forwarding. - Configure Local Kafka Client: Now, configure your local Kafka client or application to connect to
localhost:9092. For example, withkcat(formerlykafkacat):bash kcat -b localhost:9092 -L # List topicsYour local client will now communicate directly with the Kafka broker inside Kubernetes. This is critical for end-to-end testing of event-driven microservices. - Terminate: Press
Ctrl+C. Remember that for a robust, multi-broker Kafka setup,port-forwardis a single-point connection and not a substitute for proper Kafka client configurations that handle multiple brokers and failover.
Scenario 3: Debugging a Web Service with a Local Browser and curl
A common development task is testing changes to a web service API before deployment. You've made some local code changes to your my-web-service that's deployed in the dev namespace, and you want to ensure it works correctly with your local browser or curl.
Steps:
- Identify the Web Service: Assume your web service is exposed via a service named
my-web-serviceon port80.bash kubectl get services -n dev # Find my-web-service - Establish the Port Forward: Forward the service's port
80to your local port8000.bash kubectl port-forward service/my-web-service 8000:80 -n dev - Test with Browser/Curl: Open your web browser and navigate to
http://localhost:8000/api/users(assuming an API endpoint). Alternatively, usecurl:bash curl http://localhost:8000/healthzYour requests will hit the service inside the Kubernetes cluster. This allows for quick, iterative testing of API endpoints, UI components, and application logic. - Terminate: Press
Ctrl+C.
Scenario 4: Interacting with a MongoDB Database Service
Many applications rely on NoSQL databases like MongoDB. Similar to PostgreSQL, accessing a MongoDB instance running in Kubernetes from a local client (e.g., MongoDB Compass, mongo shell) is greatly simplified by port-forward.
Steps:
- Identify MongoDB Service: Assume your MongoDB instance is running as a service named
mongodb-svcin thedatanamespace, listening on the default MongoDB port27017.bash kubectl get services -n data # Look for mongodb-svc - Establish the Port Forward:
bash kubectl port-forward service/mongodb-svc 27017:27017 -n data - Connect Local MongoDB Client: Launch your MongoDB client (e.g.,
mongoshell or MongoDB Compass) and connect tomongodb://localhost:27017. You'll now have full access to perform database operations, inspect collections, and manage your data.bash # From your local terminal after port-forward is active mongo --host localhost --port 27017 - Terminate: Press
Ctrl+C.
These scenarios collectively demonstrate the immense practical value of kubectl port-forward. It empowers developers to maintain a high level of productivity and interactivity with their applications running in Kubernetes, ensuring that the remote nature of cloud-native environments does not become a barrier to efficient development and debugging.
Chapter 8: Alternatives to kubectl port-forward and When to Use Them
While kubectl port-forward is a powerful and frequently used tool, it's not the only way to access services within a Kubernetes cluster, nor is it always the most appropriate solution. Understanding its alternatives and their respective use cases is essential for making informed architectural decisions and selecting the right tool for the job. The choice often hinges on the permanence of the access, the target audience, security requirements, and the scale of traffic.
1. kubectl proxy: For Accessing the Kubernetes API Server
- What it is:
kubectl proxycreates a local proxy to the Kubernetes API server. It essentially exposes the API server's endpoints on your local machine, allowing you to access Kubernetes resources via a RESTful API throughlocalhost. - How it differs from
port-forward:kubectl proxyonly provides access to the Kubernetes API server itself, not to your application pods/services.- It's used for programmatic access to Kubernetes resources (e.g., listing pods, deploying resources) via HTTP, or for dashboard access, whereas
port-forwardtunnels traffic directly to your application's ports.
- When to use it: When you need to interact with the Kubernetes API programmatically (e.g., using
curlto query Kubernetes resources directly, or for local tools that manage Kubernetes). It's primarily for cluster management tasks, not application access.
2. Kubernetes Ingress and LoadBalancer Services: For Persistent External Access
- What they are:
- LoadBalancer Service: In cloud environments, this creates an external load balancer with a public IP that distributes traffic to your service's pods.
- Ingress: An API object that manages external access to services within a cluster, typically HTTP(S). It acts as an entry point for external traffic, providing URL-based routing, SSL termination, and virtual hosting.
- How they differ from
port-forward:- Designed for permanent, public exposure of services to external clients (users, other applications).
- Provide features like load balancing across multiple pods, SSL termination, domain routing, and often integrate with cloud provider networking.
- Require infrastructure setup (cloud load balancer, Ingress controller like Nginx or Traefik).
- When to use them: For production services, public-facing APIs, web applications, or any service that needs stable, scalable, and secure external access. They are foundational for establishing the external gateway into your cluster.
3. VPN / Bastion Host: For Secure Network-Level Access
- What they are:
- VPN (Virtual Private Network): Extends a private network across a public network, enabling users to send and receive data across shared or public networks as if their computing devices were directly connected to the private network.
- Bastion Host: A special-purpose server in a network specifically designed to be the single point of entry from an external network into an internal network, acting as a secure gateway.
- How they differ from
port-forward:- Provide network-level access, meaning your local machine becomes part of the cluster's network (conceptually) or has secure access to the cluster's private network.
- More complex to set up but offer comprehensive access, not just port-level tunneling.
- Typically used for more privileged access or when multiple services need to be accessed securely from an external network.
- When to use them: For operations teams, for connecting entire development environments to a staging cluster, or for accessing multiple internal services securely from outside the cluster when direct API access is insufficient.
4. Specialized Local Development Proxies/Tooling (e.g., Telepresence, Skaffold)
- What they are: Tools like Telepresence, Skaffold, and Draft are designed to enhance local development against remote Kubernetes clusters. They often create sophisticated local proxies or synchronizers that allow specific services to run locally while still interacting with the remote cluster for dependencies, or vice-versa.
- How they differ from
port-forward:- Offer more advanced functionalities beyond simple port forwarding, such as intelligently swapping out a remote pod with a locally running version of your service, or synchronizing local code changes to a remote development pod.
- Aimed at streamlining the inner development loop for microservices in Kubernetes.
- When to use them: When your local development workflow involves frequently swapping between local and remote versions of services, hot-reloading code in remote pods, or debugging complex inter-service communication across the cluster boundary.
5. Service Mesh (e.g., Istio, Linkerd): For Internal Service-to-Service Communication Management
- What they are: A service mesh is a dedicated infrastructure layer for handling service-to-service communication. It provides capabilities like traffic management, policy enforcement, and observability for communications between services within the cluster.
- How they differ from
port-forward:- Operate internally within the cluster, managing traffic between pods/services, not external access.
- Address concerns like mutual TLS, traffic shifting for canary deployments, resilience (retries, timeouts, circuit breakers), and detailed tracing for microservice calls.
- When to use them: When you need advanced control and visibility over internal service communication within a complex microservices architecture, improving reliability, security, and observability across the entire API landscape of your application.
The Indispensable Role of an API Gateway
As discussed in Chapter 6, an API Gateway serves a critical, distinct purpose from all the above. While kubectl port-forward provides ephemeral, single-user access, and Ingress/LoadBalancer provide generic network exposure, an API Gateway (like ApiPark) specifically focuses on managing the application-level interaction for APIs. It handles concerns such as:
- API Management: Versioning, documentation, developer portal, subscription management.
- Security: Advanced authentication and authorization for API consumers, not just network-level access.
- Monetization/Analytics: Tracking API usage, billing, detailed insights into consumer behavior.
- Integration: Facilitating the quick integration of diverse services, including AI models, with unified API formats.
These features go far beyond simple network tunneling. An API Gateway is the strategic entry point for your entire API product, enabling your services to be consumed securely, efficiently, and at scale by external developers, partners, and applications. It is the cornerstone for building a robust and governable API ecosystem, especially when dealing with a multitude of internal and external API consumers, distinguishing it from the simple, local access provided by kubectl port-forward.
Chapter 9: The Future of Local-to-Cluster Connectivity and API Management
The rapid evolution of cloud-native development continues to reshape how developers interact with their applications. Kubernetes, now a de facto standard for container orchestration, sets the stage for ever more sophisticated tools and practices. Within this dynamic environment, the simple yet powerful kubectl port-forward command retains its fundamental relevance, while the broader landscape of API and gateway solutions continues to mature.
The trend towards increasingly granular microservices means more distinct APIs, more complex inter-service dependencies, and a greater need for efficient debugging and testing workflows. As development teams become more distributed, and development environments proliferate, the ability to quickly and securely bridge a local machine to a remote cluster will remain a core requirement. kubectl port-forward fulfills this need with minimal overhead, making it a timeless utility in the developer's toolkit. Its low barrier to entry and direct functionality ensures it will likely persist as the go-to solution for quick, temporary, and personal access to cluster services.
However, the challenges associated with scale, security, and governance are also escalating. While port-forward addresses individual developer needs, it does not tackle the enterprise-level complexities of managing public-facing APIs or sharing internal APIs across large organizations. This is where the future of API Gateway solutions becomes even more critical. We can anticipate API Gateways evolving to become even more intelligent, leveraging AI and machine learning to predict traffic patterns, proactively identify security threats, and automatically optimize routing.
For instance, platforms like ApiPark are already at the forefront of this evolution, not just as a traditional API Gateway but as an AI gateway that simplifies the integration and management of diverse AI models alongside traditional REST services. The unification of API formats for AI invocation, prompt encapsulation into REST APIs, and end-to-end API lifecycle management are all indicative of where the industry is heading. As AI becomes embedded in virtually every application, the need for intelligent API Gateways that can seamlessly manage both conventional and AI-driven APIs will only grow. Features like independent API and access permissions for each tenant, coupled with robust performance and detailed data analysis capabilities (as offered by ApiPark), underscore the increasing demand for comprehensive API governance solutions that can scale with organizational and technological complexity.
Furthermore, the integration of local development tooling with remote cluster environments will continue to deepen. Tools that combine the simplicity of port-forward with more intelligent context-switching, resource synchronization, and integrated debugging across hybrid environments are likely to gain more traction. The goal is always to minimize the impedance mismatch between local development and the cloud-native deployment target, giving developers the best of both worlds: the speed and familiarity of local iteration combined with the realism of a deployed Kubernetes environment.
In summary, the future will likely see a continued dichotomy: kubectl port-forward will remain the agile, precise instrument for individual developers to cut through network complexities for immediate access, while sophisticated API Gateways and API management platforms will serve as the strategic control plane for exposing, securing, and optimizing the vast network of APIs that power modern applications. Both are indispensable, and their co-evolution will shape the efficacy and security of cloud-native development for years to come.
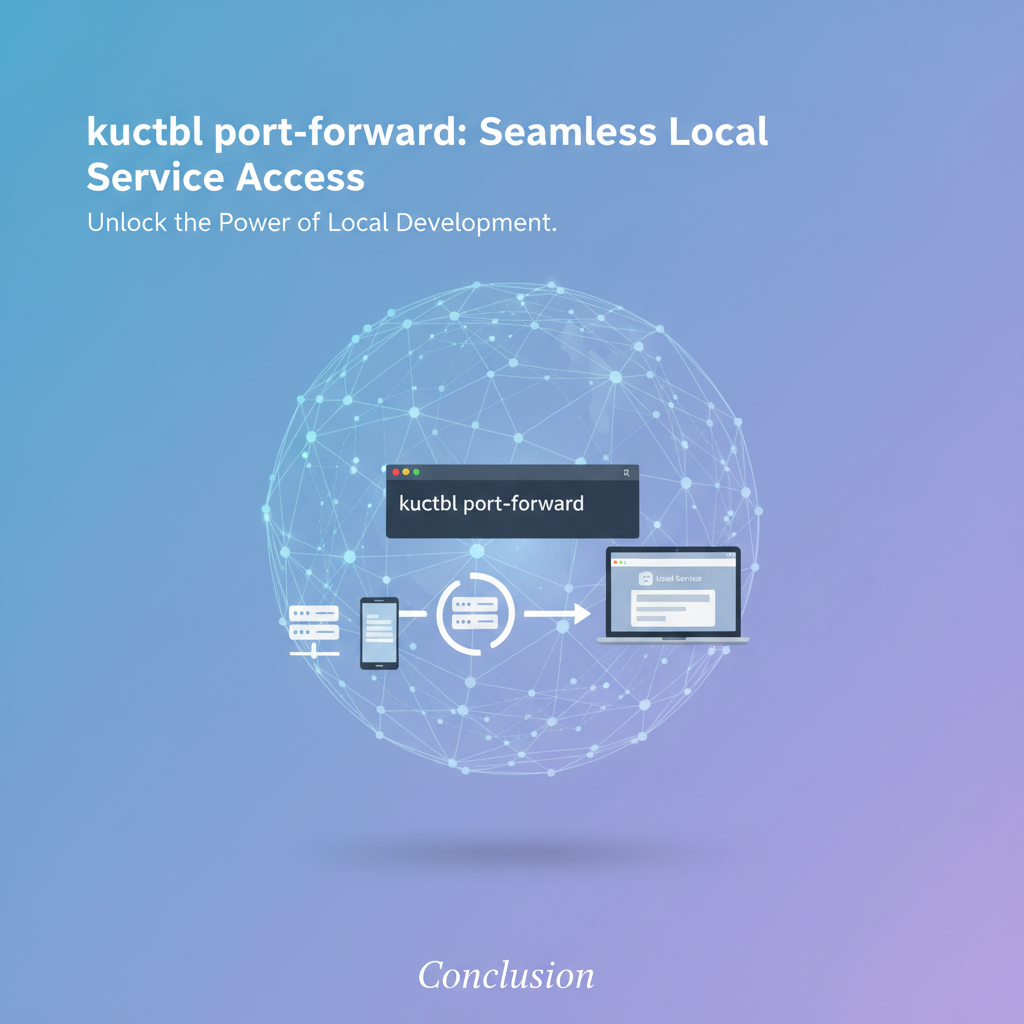
Conclusion
In the intricate tapestry of modern cloud-native development, where applications are meticulously woven from countless microservices orchestrated by Kubernetes, kubectl port-forward stands out as a deceptively simple yet profoundly powerful command-line utility. It serves as the quintessential bridge, an ephemeral tunnel that elegantly bypasses the inherent network isolation of Kubernetes clusters, linking a developer's familiar local machine directly to the remote services running within. This capability is not merely a convenience; it is a cornerstone of efficient development and debugging, enabling rapid iteration, precise troubleshooting, and seamless integration between local and remote components. From debugging a recalcitrant API endpoint to connecting a local database client to a remote data store, port-forward streamlines countless daily tasks, embodying the agility required in fast-paced development environments.
We have traversed the Kubernetes networking landscape, understood the fundamental isolation of pods and services, and then explored the mechanics of kubectl port-forward itself. We delved into its basic and advanced usages, providing detailed examples that illuminate its practical application in real-world scenarios, while also emphasizing crucial troubleshooting tips and security best practices. The command's ability to create a secure, temporary conduit without altering cluster configurations makes it an invaluable tool for individual developers and small teams.
Crucially, we've also positioned kubectl port-forward within the broader context of the API ecosystem, contrasting its role with the more robust and enterprise-grade functionalities of an API Gateway. While port-forward offers an unmanaged, personal access route for development, solutions like ApiPark provide the centralized, secure, and scalable gateway necessary for managing, monitoring, and exposing APIs to external consumers or across large internal teams. These two tools are not mutually exclusive; rather, they are complementary, each addressing distinct needs within the full lifecycle of a cloud-native application, from its initial development to its broad consumption.
As Kubernetes continues to evolve and microservices architectures become even more pervasive, the need for efficient local-to-cluster connectivity will only intensify. kubectl port-forward will undoubtedly remain a steadfast companion for developers, empowering them to interact directly with their remote services. Simultaneously, the demand for sophisticated API Gateways, particularly those capable of managing the increasing complexity of AI-driven APIs, will drive innovation in how organizations govern and leverage their digital interfaces. Ultimately, kubectl port-forward is more than just a command; it's a testament to the power of targeted tooling in unlocking developer productivity and ensuring seamless interaction within the dynamic world of Kubernetes.
Frequently Asked Questions (FAQs)
1. What is kubectl port-forward and why is it useful? kubectl port-forward is a Kubernetes command-line utility that creates a secure, temporary tunnel from a port on your local machine to a port on a specific pod or service within a Kubernetes cluster. It's incredibly useful for developers to access internal cluster services (like databases, web APIs, or admin UIs) directly from their local environment for debugging, testing, and development purposes, without exposing these services publicly.
2. Is kubectl port-forward suitable for production environments or exposing services to external users? No, kubectl port-forward is explicitly not suitable for production use or for exposing services to external users. It creates a single, ephemeral connection intended for individual developer use. For production deployments and external API exposure, robust solutions like Kubernetes Ingress, LoadBalancer services, or a dedicated API Gateway (such as ApiPark) are required. These provide essential features like load balancing, persistent public IPs, SSL termination, authentication, authorization, rate limiting, and comprehensive observability, which port-forward lacks.
3. What's the difference between kubectl port-forward and kubectl proxy? kubectl port-forward creates a tunnel to your application's ports within a pod or service, allowing you to interact with your deployed application directly. kubectl proxy, on the other hand, creates a local proxy to the Kubernetes API server, enabling you to interact with Kubernetes resources (like pods, deployments, services) programmatically via their RESTful API endpoints. They serve different purposes: port-forward for application access, proxy for Kubernetes API access.
4. How do I make kubectl port-forward run in the background, and how do I stop it? To run kubectl port-forward in the background on Linux/macOS, simply append an & to the command (e.g., kubectl port-forward service/my-app 8080:80 &). This will return control to your terminal. To stop a background process, you'll need its process ID (PID). You can find it using ps aux | grep 'kubectl port-forward' and then terminate it with kill <PID>. For a foreground process, simply press Ctrl+C.
5. What are the security considerations when using kubectl port-forward? While kubectl port-forward creates a secure tunnel, misuse can lead to vulnerabilities. Key security considerations include: * Local Machine Access: By default, it binds to localhost, which is secure. Using --address 0.0.0.0 exposes the forwarded port to your local network, increasing the risk if your network is not secure. Use this option with caution. * Permissions: Ensure your kubectl context has the minimum necessary RBAC permissions to get and port-forward to the target resources. Avoid using highly privileged accounts for routine port-forwarding. * Sensitive Services: Be cautious when forwarding access to services containing highly sensitive data (e.g., production databases). Consider if alternative, more secure access methods are available for such critical data. * Temporary Nature: port-forward connections should be temporary. Terminate them as soon as they are no longer needed to minimize potential exposure time.
🚀You can securely and efficiently call the OpenAI API on APIPark in just two steps:
Step 1: Deploy the APIPark AI gateway in 5 minutes.
APIPark is developed based on Golang, offering strong product performance and low development and maintenance costs. You can deploy APIPark with a single command line.
curl -sSO https://download.apipark.com/install/quick-start.sh; bash quick-start.sh

In my experience, you can see the successful deployment interface within 5 to 10 minutes. Then, you can log in to APIPark using your account.

Step 2: Call the OpenAI API.