kubectl port-forward: Ultimate Guide & Best Practices


Kubernetes has firmly established itself as the de facto standard for container orchestration, revolutionizing how applications are developed, deployed, and managed in modern cloud-native environments. Its powerful capabilities for scaling, self-healing, and declarative configuration have empowered teams to build resilient and highly available systems. However, the very isolation that makes Kubernetes so robust – abstracting away underlying infrastructure and segmenting network traffic – can present unique challenges, particularly when developers or operations engineers need to gain direct, temporary access to services running deep within a cluster. This is where the kubectl port-forward command emerges as an indispensable utility, a veritable lifeline for peering into the intricate network fabric of a Kubernetes deployment.
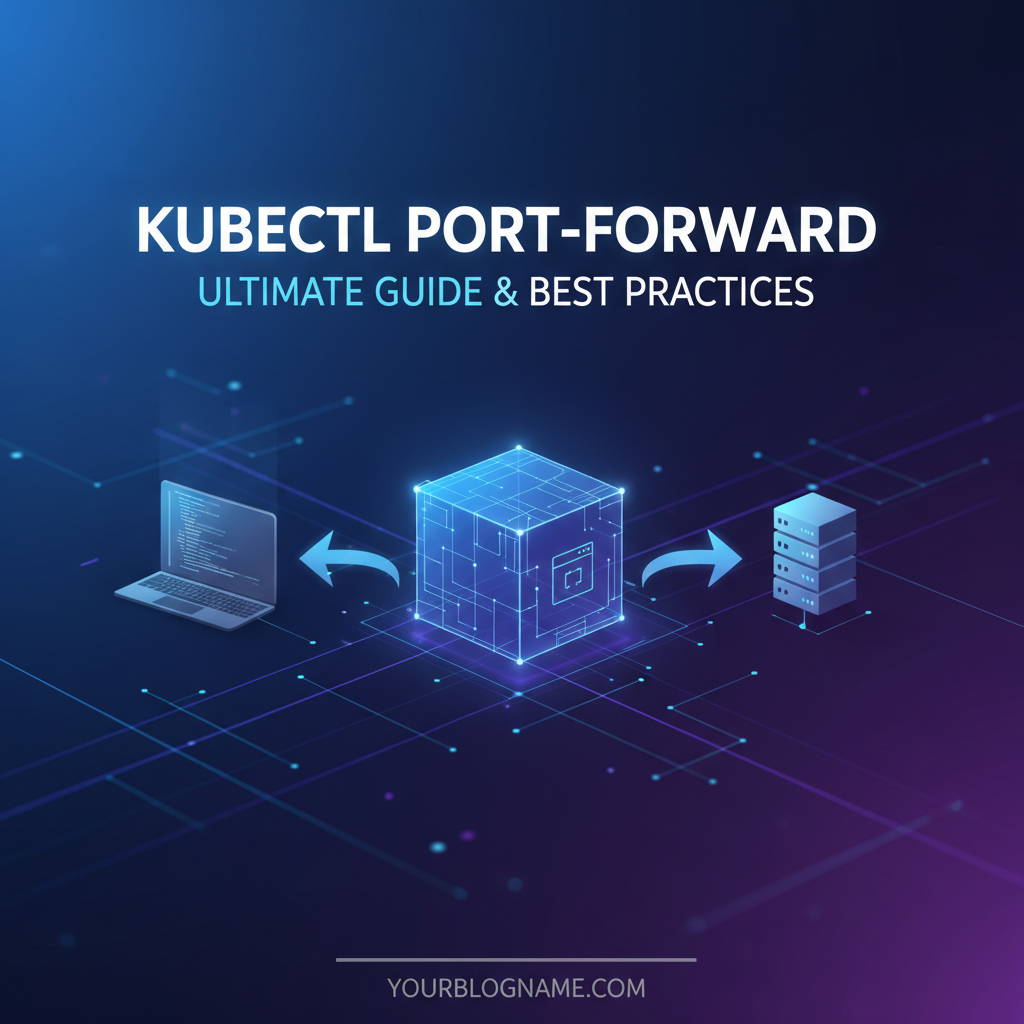
For anyone who has wrestled with debugging a stubborn microservice, testing a new feature against a remote database, or simply trying to reach an admin interface that isn't exposed externally, kubectl port-forward offers a straightforward and secure solution. It acts as a temporary, on-demand tunnel, bridging a local port on your workstation to a specific port of a pod, service, or deployment within your Kubernetes cluster. Unlike exposing services via LoadBalancers, Ingress controllers, or NodePorts, which are designed for persistent, often public access, port-forward is specifically tailored for development, debugging, and administrative tasks. It creates a direct, secure channel that bypasses the complexities of external networking, allowing you to interact with internal components as if they were running directly on your local machine.
This ultimate guide will take a comprehensive journey through the world of kubectl port-forward. We will begin by dissecting its fundamental mechanics, understanding how it establishes these crucial network bridges. From there, we'll dive into a myriad of practical applications and real-world use cases, illustrating how this powerful command can streamline your development workflow, accelerate debugging efforts, and simplify administrative chores. A detailed exploration of its syntax and various options will empower you to wield port-forward with precision and confidence, followed by a section dedicated to best practices, advanced considerations, and the critical security implications of its usage. Finally, we'll equip you with strategies for troubleshooting common issues, ensuring that you can effectively diagnose and resolve any hurdles you might encounter. By the end of this extensive exploration, you will not only understand how to use kubectl port-forward but also master its nuances, integrating it seamlessly into your daily Kubernetes toolkit and navigating the internal network of your clusters with unprecedented ease and security.
Understanding kubectl port-forward: The Invisible Bridge
At its core, kubectl port-forward serves as a network proxy, designed to create a secure, temporary connection between a local port on your machine and a port on a specific resource within your Kubernetes cluster. This functionality is absolutely vital for developers and administrators who need to interact with services that are intentionally isolated from the public internet, adhering to the principle of least privilege and enhancing overall system security. Without port-forward, accessing such internal components would typically require complex and often insecure workarounds, such as temporarily modifying firewall rules, exposing services publicly, or configuring elaborate VPNs for every debugging session.
The mechanism behind kubectl port-forward is elegantly engineered for efficiency and security. When you execute the command, your local kubectl client initiates a connection to the Kubernetes API server. This connection is typically secure, leveraging your existing kubeconfig and RBAC (Role-Based Access Control) permissions. The API server, acting as a central coordinator, then communicates with the Kubelet agent running on the node where the target pod resides. Importantly, this communication between the API server and the Kubelet often occurs over a secure, authenticated WebSocket tunnel, preventing unauthorized interception or manipulation of the data stream. Once this secure tunnel is established, kubectl forwards traffic from the specified local port through this secure channel, directly to the specified port on the target pod. This means that any application on your local machine can then connect to localhost:LOCAL_PORT, and its traffic will be seamlessly redirected to POD_IP:REMOTE_PORT within the cluster.
One of the key advantages of this architecture is its inherent security. The port-forward tunnel is ephemeral; it exists only as long as the kubectl command is running. When the command is terminated, the tunnel closes, immediately cutting off access. Furthermore, access is dictated by the user's RBAC permissions. If a user does not have permission to get or forward ports on a specific pod or service, the command will simply fail. This granular control ensures that only authorized personnel can establish these internal connections, preventing potential backdoors or unauthorized access to sensitive internal services. The traffic itself is encapsulated within the secure Kubernetes API communication, meaning it doesn't traverse public networks in an unencrypted state and doesn't require any changes to the pod's manifest or the cluster's network policies. It truly is an "invisible bridge," allowing targeted, temporary interaction without altering the fundamental security posture of your cluster.
The versatility of kubectl port-forward is another significant benefit. While it is most commonly used to forward ports to individual pods, its capabilities extend to services and even deployments. When forwarding to a service, kubectl intelligently selects one of the healthy backend pods associated with that service and establishes the tunnel to it. This abstracts away the need to know the specific pod name, which can change frequently in dynamic Kubernetes environments due to scaling, updates, or crashes. Similarly, when forwarding to a deployment, kubectl will identify a pod managed by that deployment and connect to it, simplifying access when dealing with horizontally scaled applications. This flexibility makes port-forward an incredibly powerful and adaptive tool, suitable for a wide array of scenarios from quick local testing to intricate multi-component debugging. It significantly reduces the friction involved in developing and maintaining applications within a Kubernetes ecosystem, allowing engineers to focus more on code and less on complex network configurations.
Practical Applications and Use Cases
kubectl port-forward is not just a theoretical concept; it's a workhorse in the daily life of anyone interacting with Kubernetes. Its ability to create instant, temporary network tunnels unlocks a multitude of practical applications, significantly enhancing developer productivity and simplifying operational tasks. Understanding these common use cases will highlight why this command is considered an essential part of the Kubernetes toolkit.
Debugging Services and Databases
One of the most frequent and critical uses of kubectl port-forward is for debugging services that are not exposed externally. Imagine you have a database, such as PostgreSQL or Redis, running inside your Kubernetes cluster, strictly isolated from public access for security reasons. When you need to inspect its state, run specific queries, or simply verify its connectivity from your local development environment, port-forward becomes invaluable. You can establish a connection like this:
kubectl port-forward service/my-database-service 5432:5432
This command would make the cluster's my-database-service accessible on your local machine at localhost:5432. You could then use any local database client (psql, DBeaver, TablePlus) to connect directly to the database instance running inside Kubernetes, just as if it were a local service. This completely bypasses the need for creating a temporary LoadBalancer or exposing the database via a NodePort, which would compromise security. Similarly, if you have a private admin UI for a service that you only want to access from your secure workstation, port-forward allows you to temporarily expose it to localhost without any permanent changes to your cluster's networking. This is particularly useful for internal monitoring tools, message queue dashboards (like RabbitMQ management UI), or custom application diagnostic interfaces that should never see the light of day on the public internet.
Local Development Workflow Synergy
kubectl port-forward plays a transformative role in local development workflows, especially in microservices architectures. Consider a scenario where you are developing a new microservice locally on your machine, but this service depends on other microservices or a specific api endpoint already deployed within your Kubernetes cluster. Instead of deploying all dependent services locally, which can be resource-intensive and complex to manage, you can use port-forward to connect your locally running service to its remote dependencies.
For instance, if your local auth-service needs to communicate with a user-profile-api running in Kubernetes, you could forward the user-profile-api service's port:
kubectl port-forward service/user-profile-api 8080:80
Now, your locally running auth-service can make HTTP requests to localhost:8080, and these requests will be tunneled directly to the user-profile-api pod in the cluster. This setup significantly speeds up the development feedback loop. Developers can iterate quickly on their local code, test against a realistic environment, and debug issues without the overhead of containerizing and deploying every minor change to the cluster. This strategy allows for a hybrid development model, leveraging the best of both local productivity and a remote, shared environment.
Troubleshooting Network Issues and Connectivity
When troubleshooting network connectivity within Kubernetes, kubectl port-forward can be an invaluable diagnostic tool. If you suspect a service isn't listening on the correct port, or if there's an internal firewall rule preventing communication, you can use port-forward to directly test the connectivity from your machine. By connecting directly to a pod's port, you can bypass other networking layers like kube-proxy or network policies that might be complicating the diagnosis.
For example, if you're trying to figure out why your application isn't responding, you can port-forward to the application pod's port and try to curl it from your local machine:
kubectl port-forward my-app-pod 8000:8000
curl localhost:8000/health
If the curl command works, it confirms that your application inside the pod is indeed listening on port 8000 and is responsive. If it fails, you know the problem lies within the pod itself or its configuration, rather than external network policies or service definitions. This direct line of sight helps isolate the problem space considerably.
Accessing Monitoring and Logging Interfaces
Monitoring tools like Prometheus, Grafana, or specialized logging api endpoints often have web UIs or data access interfaces that are deployed within the cluster but not necessarily exposed publicly. While these might eventually be accessed via a secure Ingress or VPN, kubectl port-forward provides an immediate and convenient way for engineers to check dashboards or query data on demand. For instance, to quickly view a Grafana dashboard:
kubectl port-forward service/grafana 3000:3000 -n monitoring
This would make the Grafana UI available at localhost:3000, allowing you to inspect metrics or alerts without needing to configure complex access methods for a temporary check. The ability to quickly and securely access these critical internal systems empowers operational teams to react swiftly to incidents and perform routine health checks. It truly enables a more agile and responsive approach to infrastructure management, transforming potential bottlenecks into seamless operations. The temporary nature of the connection aligns perfectly with the ad-hoc requirements of incident response, ensuring that access is granted only when needed and automatically revoked upon completion of the task.
Deep Dive into Syntax and Options
Mastering kubectl port-forward goes beyond knowing its basic function; it involves understanding its versatile syntax and various options that allow for precise control over the tunneling process. The command's flexibility means it can target different Kubernetes resources, listen on specific local interfaces, and even handle multiple port mappings concurrently. Let's break down the essential components and common variations.
The fundamental structure of the kubectl port-forward command is relatively simple, yet powerful:
kubectl port-forward [RESOURCE_TYPE]/[RESOURCE_NAME] [LOCAL_PORT]:[REMOTE_PORT] [options]
Here, RESOURCE_TYPE can be pod, service (or svc), deployment (or deploy), replicaset (or rs), and statefulset (or sts). RESOURCE_NAME is the specific name of that resource. LOCAL_PORT is the port on your local machine that you want to open, and REMOTE_PORT is the port on the target resource within the Kubernetes cluster to which traffic should be forwarded.
Basic Pod Forwarding
The most common use case involves forwarding a port to a specific pod. This is direct and ideal when you know exactly which pod instance you need to interact with, perhaps because you're debugging a specific instance or it's a singleton.
kubectl port-forward my-app-pod-xyz12 8080:80
This command opens port 8080 on your local machine and forwards all traffic received on it to port 80 of the my-app-pod-xyz12 pod. Your local application or browser can then access http://localhost:8080 to interact with the service running on port 80 inside that specific pod.
Service Forwarding
When you want to forward a port to a service, kubectl takes care of selecting one of the healthy backend pods associated with that service. This is particularly useful in dynamic environments where pod names frequently change or when you don't care about a specific pod instance, just any healthy one.
kubectl port-forward service/my-frontend-service 3000:80 -n default
Here, kubectl will identify a pod backing my-frontend-service in the default namespace, establish a tunnel, and forward local port 3000 to the pod's port 80. This provides a more resilient way to access your application without constantly checking pod names.
Deployment/ReplicaSet Forwarding
Similar to service forwarding, you can target a deployment or a ReplicaSet. kubectl will then pick one of the pods managed by that deployment/ReplicaSet. This is convenient when you want to access any instance of your application that is part of a larger deployment.
kubectl port-forward deployment/my-backend-deployment 9000:8080
This command makes the my-backend-deployment accessible on your local port 9000, connecting to port 8080 of one of its pods.
Namespace Considerations
Kubernetes resources are often segregated into namespaces. If your target resource is not in the default namespace, you must specify the namespace using the -n or --namespace flag.
kubectl port-forward pod/my-db-pod 5432:5432 -n dev-environment
Failing to specify the correct namespace is a common cause of "NotFound" errors.
Selecting Multiple Local Ports
You can forward multiple ports with a single command by simply listing more LOCAL_PORT:REMOTE_PORT pairs. This is incredibly useful when an application exposes several ports or when you need to access different components of a multi-container pod.
kubectl port-forward my-multi-service-pod 8080:80 9000:9001
This command sets up two separate tunnels: one from localhost:8080 to my-multi-service-pod:80 and another from localhost:9000 to my-multi-service-pod:9001.
Backgrounding the Process
By default, kubectl port-forward runs in the foreground, tying up your terminal. For continuous access during a development session, you might want to run it in the background.
- Using
&: The simplest way on Linux/macOS is to append&to the command:bash kubectl port-forward my-app-pod 8080:80 &You can later bring it back to the foreground withfgor kill it withkill %1(if it's job number 1). - Using
nohup: For a more robust background process that continues even if your terminal closes,nohupcan be used:bash nohup kubectl port-forward my-app-pod 8080:80 > /dev/null 2>&1 &This detaches the process from the terminal and redirects output, making it run silently.
Addressing Specific Local Interfaces
By default, kubectl port-forward binds to localhost (127.0.0.1). This means only applications on your local machine can access the forwarded port. If you need to make the forwarded port accessible from other machines on your local network (e.g., for a colleague to test against your dev environment), you can specify the --address option.
kubectl port-forward pod/my-app-pod 8080:80 --address 0.0.0.0
This binds the local port to all network interfaces on your machine. Caution: Using 0.0.0.0 exposes the forwarded port to your entire local network. Only do this in trusted environments and with full awareness of the security implications. For most debugging and development tasks, 127.0.0.1 (the default) is the safest choice. You can also specify a particular IP address if your machine has multiple interfaces.
Handling error: unable to listen on any of the requested ports
This error commonly occurs when the LOCAL_PORT you've specified is already in use by another application on your machine. Solutions: * Choose a different LOCAL_PORT that is not in use. * Identify and terminate the process currently using that port (e.g., using lsof -i :LOCAL_PORT on Linux/macOS or netstat -ano | findstr :LOCAL_PORT on Windows, then kill PID).
Summary of Common port-forward Commands
To crystallize these various options, here's a table summarizing common kubectl port-forward commands and their functionalities. This serves as a quick reference for different scenarios you might encounter in your daily Kubernetes interactions.
| Command Syntax | Description |
|---|---|
kubectl port-forward my-pod 8080:80 |
Forwards local port 8080 to port 80 of the specific pod my-pod. |
kubectl port-forward svc/my-service 3000:80 |
Forwards local port 3000 to port 80 of a pod backing my-service. kubectl automatically selects a healthy pod. |
kubectl port-forward deploy/my-deployment 9000:8080 -n my-namespace |
Forwards local port 9000 to port 8080 of a pod managed by my-deployment in my-namespace. |
kubectl port-forward my-pod 8080:80 9000:9001 |
Establishes two tunnels: localhost:8080 to my-pod:80 and localhost:9000 to my-pod:9001. |
kubectl port-forward my-pod 8080:80 --address 0.0.0.0 |
Forwards local port 8080 to my-pod:80, binding to all local network interfaces, making it accessible from other machines on the local network (use with caution). |
kubectl port-forward my-pod :80 |
kubectl automatically selects an available local port and forwards it to my-pod:80. The chosen local port will be printed in the output. |
nohup kubectl port-forward my-pod 8080:80 > /dev/null 2>&1 & |
Runs the port-forward command in the background, detached from the terminal, redirecting all output to /dev/null (for quiet operation). |
kubectl port-forward --kubeconfig=/path/to/config my-pod 8080:80 |
Uses a specific kubeconfig file for authentication and cluster connection, overriding the default ~/.kube/config. Useful for multiple cluster contexts. |
By thoroughly understanding these syntax variations and options, you gain significant control over how you interact with your Kubernetes cluster. This level of detail ensures that you can precisely tailor port-forward commands to meet the specific requirements of any debugging or development scenario, enhancing both efficiency and security in your daily Kubernetes operations. The ability to specify addresses, manage multiple ports, and gracefully handle background processes elevates kubectl port-forward from a simple utility to a truly powerful and indispensable tool.
APIPark is a high-performance AI gateway that allows you to securely access the most comprehensive LLM APIs globally on the APIPark platform, including OpenAI, Anthropic, Mistral, Llama2, Google Gemini, and more.Try APIPark now! 👇👇👇
Best Practices and Advanced Considerations
While kubectl port-forward is undeniably powerful and convenient, its effective use necessitates an understanding of best practices, advanced considerations, and, critically, its security implications. Treating it merely as a quick fix without acknowledging its boundaries can lead to suboptimal workflows or, worse, unintended security vulnerabilities.
Security Implications: A Critical Perspective
The temporary, direct nature of kubectl port-forward makes it inherently more secure than permanently exposing services. However, it’s crucial to understand the security context in which it operates:
- RBAC Permissions are Paramount: Access to
port-forwardfunctionality is controlled by Kubernetes RBAC. A user must havegetandcreatepermissions on pods (or services, deployments, etc.) and specificallyportforwardpermissions on thepods/portforwardresource. This means that if a malicious actor gainskubectlaccess with sufficient permissions, they could potentiallyport-forwardto any sensitive service within the cluster. Therefore, always adhere to the principle of least privilege forkubectlusers. - Bypasses Network Policies and Ingress:
port-forwardcreates a direct tunnel that bypasses Kubernetes Network Policies, Ingress controllers, and LoadBalancers. While this is precisely its utility for debugging, it means you're circumventing the very security mechanisms designed to protect your cluster's internal network. Never rely onport-forwardfor production access or external exposure. - Local Exposure: By default,
port-forwardbinds to127.0.0.1(localhost) on your machine, meaning only processes on your local machine can access the forwarded port. This is the safest default. If you use--address 0.0.0.0, the forwarded port becomes accessible from any device on your local network. This is a significant security downgrade and should only be done in highly trusted, isolated environments (e.g., a secured development VLAN) and for very brief periods, if at all. Avoid0.0.0.0in general. - Application-Level Security Still Matters: Even with a
port-forwardtunnel, the target application inside the pod should still enforce its own authentication and authorization.port-forwarddoesn't magically secure an insecure internalapiendpoint; it merely provides a network path to it. Always ensure internal services require proper credentials.
Performance Characteristics
kubectl port-forward is designed for interactive, human-driven debugging and development tasks, not for high-throughput, sustained connections or production traffic. It operates through the Kubernetes API server and Kubelet, adding a layer of proxying that introduces latency and overhead. For example, if you're transferring large files or expecting high request volumes, you'll likely experience performance bottlenecks. It is not a replacement for proper network ingress (like Ingress controllers) or external service exposure (like LoadBalancers) which are optimized for performance and scalability. Use port-forward when convenience and temporary direct access outweigh the need for raw speed.
Automation and Scripting
While primarily interactive, kubectl port-forward can be integrated into scripts for specific automated tasks. For instance:
- CI/CD Setup: A CI pipeline might
port-forwardto a newly deployed database service to run integration tests against it before tearing down the environment. - Local Development Environment Setup: A script could
port-forwardseveral dependent services as part of initializing a local development setup, allowing a developer to run a single command to bring up their entire working environment. - Temporary Data Export/Import: Scripted data migration tools might leverage
port-forwardto gain temporary access to a database for an export or import operation.
When scripting port-forward, remember to handle its lifecycle properly (start in background, ensure it's killed when no longer needed) and error conditions (e.g., local port in use). Tools like pkill kubectl (with caution), or managing PIDs in scripts, can help.
Alternatives to kubectl port-forward
Understanding when not to use kubectl port-forward is as important as knowing when to use it. For persistent, production-grade access or specific network requirements, there are more suitable Kubernetes constructs:
- Ingress Controllers: For exposing HTTP/HTTPS services externally, an Ingress controller (like Nginx Ingress, Traefik, or Istio's Ingress
gateway) is the industry standard. It provides advanced routing rules, SSL termination, virtual hosting, and load balancing. An Ingress Controller is a robustgatewaysolution for HTTP traffic, offering features thatport-forwardcannot, such as centralized traffic management and WAF capabilities. - LoadBalancers: For exposing non-HTTP/HTTPS services (e.g., raw TCP, UDP databases, or custom protocols) externally, a
LoadBalancerservice type is the way to go. Cloud providers provision a dedicated load balancer that distributes external traffic to your service's pods. This is a durable, highly available solution for public access. - NodePort/HostPort: These are simpler ways to expose services directly on a cluster node's IP and a specific port.
NodePortmakes the service accessible on a static port on each node's IP, whileHostPortbinds a pod's port directly to the host's port. While simpler, they can be less secure and flexible thanIngressorLoadBalancer, and resource contention can be an issue withHostPort. They are generally not recommended for production exposure beyond very specific use cases. - VPNs and Service Meshes: For more complex internal networking, secure multi-cluster communication, or fine-grained traffic control, a Virtual Private Network (VPN) connecting your local machine to the cluster's network, or a Service Mesh (like Istio, Linkerd) can provide comprehensive solutions. Service meshes offer advanced traffic management, observability, and security features between services within the cluster, acting as a sophisticated internal api gateway for microservices communication.
When to use port-forward vs. a proper gateway solution
The distinction is crucial: kubectl port-forward is a developer/operator tool for temporary, direct, internal access to a single instance or service. It's about personal, interactive debugging. In contrast, a robust gateway solution, whether it's an Ingress Controller for HTTP traffic or a specialized API Gateway, is designed for persistent, public, scalable, and secure exposure and management of services. A gateway solution handles concerns like authentication, rate limiting, traffic routing, protocol translation, and centralized logging at an enterprise level.
While kubectl port-forward is an indispensable tool for direct, temporary access to services within a Kubernetes cluster, especially during development and debugging, it's crucial to recognize its limitations when it comes to robust, secure, and scalable API exposure and management. For comprehensive handling of APIs, particularly when dealing with AI models or a multitude of REST services, a dedicated API Gateway and management platform becomes essential. This is where solutions like APIPark come into play. APIPark, an open-source AI gateway and API developer portal, offers an all-in-one solution for managing, integrating, and deploying AI and REST services. It provides features like quick integration of 100+ AI models, unified API formats, prompt encapsulation into REST APIs, and end-to-end API lifecycle management, far beyond what kubectl port-forward is designed for. While kubectl port-forward provides the quick tunnel for a developer, platforms like APIPark offer the enterprise-grade infrastructure to build, secure, and scale an entire API ecosystem, handling complex tasks like traffic forwarding, load balancing, and detailed logging that are critical for production environments. Understanding this delineation allows you to select the right tool for the job, optimizing for both developer efficiency and production system resilience.
Troubleshooting Common Issues
Even with a firm grasp of its syntax and best practices, users occasionally encounter challenges when using kubectl port-forward. Knowing how to diagnose and resolve these common issues can save significant time and frustration, ensuring a smoother debugging and development experience.
1. "Error: unable to listen on any of the requested ports"
This is perhaps the most frequent error encountered. It signifies that the LOCAL_PORT you specified in the port-forward command is already in use by another process on your local machine. Operating systems prevent multiple applications from binding to the same port simultaneously, leading to this conflict.
Diagnosis & Solution: * Check Local Port Usage: * Linux/macOS: Use lsof -i :LOCAL_PORT (e.g., lsof -i :8080). This command will show you which process is listening on that port and its Process ID (PID). * Windows: Use netstat -ano | findstr :LOCAL_PORT (e.g., netstat -ano | findstr :8080). This will display the PID of the process using the port. * Resolve the Conflict: * Choose a Different Local Port: The simplest solution is often to pick an alternative LOCAL_PORT that is currently free (e.g., kubectl port-forward my-pod 8081:80). * Terminate the Conflicting Process: If you need to use that specific local port, you can terminate the process that's currently using it. On Linux/macOS, use kill -9 PID (replace PID with the process ID found by lsof). On Windows, use taskkill /F /PID PID. Be cautious when killing processes, especially if you're unsure of their purpose.
2. "Error from server (NotFound): pods '...' not found"
This error indicates that kubectl cannot locate the specified Kubernetes resource (pod, service, deployment, etc.). There are several reasons this might occur.
Diagnosis & Solution: * Incorrect Resource Name: Double-check the spelling of your pod, service, or deployment name. Kubernetes resource names are case-sensitive. * Solution: Use kubectl get pods (or svc, deploy) to list actual resource names in your current namespace and copy the correct one. * Incorrect Namespace: Resources are namespaced. If the target resource is not in your current context's default namespace, you must specify it. * Solution: Add the -n NAMESPACE_NAME flag to your command (e.g., kubectl port-forward my-pod 8080:80 -n dev-environment). * Resource Not Running/Deleted: The pod or service might not be running or might have been deleted from the cluster. * Solution: Verify the resource's status using kubectl get pod my-pod -n my-namespace and kubectl describe pod my-pod -n my-namespace. Ensure it exists and is in a Running or Ready state.
3. Connection Refused (after forwarding is established)
This is a subtle issue. The kubectl port-forward command might appear to succeed, establishing the tunnel, but when you try to connect to localhost:LOCAL_PORT with your client (browser, curl, database client), you receive a "Connection Refused" error. This usually means the problem lies inside the target pod.
Diagnosis & Solution: * Target Application Not Listening: The application inside the pod might not be listening on the REMOTE_PORT you specified, or it might be listening on a different port. * Solution: Use kubectl exec -it POD_NAME -- /bin/bash (or /bin/sh) to shell into the pod. Once inside, use networking tools to check listening ports: * netstat -tulnp (Linux) or ss -tulnp (newer Linux systems) to see what ports are open and listening. * Confirm the application is running and configured to listen on the correct port. * Firewall Rules Inside Pod: Less common, but a container might have internal firewall rules blocking access to its own ports (e.g., iptables rules applied within the container). * Solution: Check the container's configuration or Dockerfile for any iptables commands or security profiles that might be interfering. * Application Crash/Unresponsive: The application inside the pod might have crashed or become unresponsive. * Solution: Check pod logs with kubectl logs POD_NAME -n NAMESPACE and status with kubectl describe pod POD_NAME -n NAMESPACE for errors or restart events.
4. Permission Denied
If your kubectl port-forward command fails with a "Permission denied" or "Forbidden" error, it's almost always an RBAC issue.
Diagnosis & Solution: * Insufficient RBAC Permissions: Your user account (or the service account used by your kubeconfig) does not have the necessary permissions to perform port-forward operations on the target resource. * Solution: You need get, list, and watch permissions on the resource type (e.g., pods) and specifically the create permission on the pods/portforward subresource for the relevant namespace. Contact your cluster administrator to grant these permissions if they are missing. * You can check your effective permissions with kubectl auth can-i port-forward pod/my-pod -n my-namespace.
5. Slow Connections or kubectl Hanging
While port-forward is not designed for high performance, unusually slow connections or kubectl commands that hang without output can indicate underlying issues.
Diagnosis & Solution: * Network Latency: High network latency between your kubectl client, the API server, and the node hosting the pod can degrade performance. * Solution: Check your internet connection speed and latency to the cluster's API server. * API Server/Kubelet Load: If the Kubernetes API server or the Kubelet on the target node is under heavy load, port-forward connections can be affected. * Solution: Monitor the health and resource utilization of your control plane and nodes. * Firewall/Proxy Interference: Intermediate firewalls or HTTP/S proxies between your local machine and the Kubernetes API server might interfere with the WebSocket connection used by port-forward. * Solution: Ensure that your network environment allows WebSocket traffic to the Kubernetes API server. Check proxy configurations if you're behind one. * Client-Side Issues: Rarely, issues with your local kubectl client binary itself or local machine resource constraints could be a factor. * Solution: Try updating kubectl to the latest version. Check your local machine's CPU and memory usage.
By systematically approaching these common troubleshooting scenarios, you can quickly identify the root cause of kubectl port-forward failures and get back to your development and debugging tasks with minimal disruption. The key is to understand the different layers involved – your local machine, the kubectl client, the API server, the Kubelet, and finally, the application within the pod – and to methodically check each component.
Conclusion
kubectl port-forward stands as a testament to the elegant design and robust utility of the Kubernetes ecosystem. It is far more than just a simple command-line tool; it is a critical enabler for developers and operators alike, bridging the inherent network isolation of a Kubernetes cluster with the immediate, hands-on needs of local development and debugging. Through its secure, ephemeral tunneling capabilities, port-forward simplifies complex tasks such as accessing internal databases, testing newly developed microservices against live cluster dependencies, and quickly diagnosing connectivity issues within the intricate network fabric of a cloud-native application.
We have traversed the comprehensive landscape of kubectl port-forward, from its foundational mechanics – the secure WebSocket connection orchestrated by the API server and Kubelet – to its diverse array of practical applications that span debugging, local development workflow enhancement, and targeted troubleshooting. A detailed exploration of its syntax, including resource targeting, namespace considerations, and advanced options like specifying local interfaces, has equipped you with the precision required to wield this tool effectively in any scenario. Crucially, we delved into the best practices and significant security implications, underscoring the importance of RBAC, judicious use of --address, and understanding its role as a temporary bypass rather than a production-grade exposure mechanism. The contrast with more robust gateway solutions like Ingress controllers and dedicated API management platforms was highlighted, illustrating when port-forward is the ideal choice versus when a more permanent, scalable solution is required, particularly for managing external API traffic.
Mastering kubectl port-forward is not merely about memorizing commands; it’s about understanding the underlying Kubernetes networking model and recognizing the right tool for the right job. It empowers you to interact directly with your cluster's internal components, providing unparalleled visibility and control during the most critical phases of development and operations. While it streamlines quick access and diagnostics, it also subtly reinforces the layered security model of Kubernetes by offering a controlled, temporary window into your applications without compromising the cluster's perimeter.
As Kubernetes continues to evolve and abstract away more of the underlying infrastructure, tools like kubectl port-forward will remain indispensable. They provide the necessary ground-level access that fosters innovation, accelerates problem-solving, and ultimately enhances the overall efficiency of working with containerized applications. By integrating the insights and best practices from this guide into your daily routine, you will not only become proficient in using kubectl port-forward but will also cultivate a deeper understanding of Kubernetes networking, positioning yourself as a more effective and confident practitioner in the dynamic world of cloud-native development. Embrace this powerful utility, and unlock a new level of productivity and control over your Kubernetes deployments.
5 FAQs
Q1: What is kubectl port-forward and why is it used? A1: kubectl port-forward is a Kubernetes command-line utility that creates a secure, temporary network tunnel between a local port on your machine and a port on a specific resource (like a pod, service, or deployment) within your Kubernetes cluster. It's primarily used for development, debugging, and administrative tasks to access services that are intentionally isolated from the public internet, bypassing complex external networking configurations. It allows you to interact with internal cluster components as if they were running locally.
Q2: Is kubectl port-forward secure for production use? A2: No, kubectl port-forward is not designed or recommended for production use or for exposing services externally. While the tunnel itself is secure (authenticated and encrypted via the Kubernetes API), it bypasses network policies, Ingress controllers, and other security mechanisms intended for robust, scalable public access. It's meant for temporary, direct access by authorized users for debugging and development. For production external exposure, use Kubernetes Services of type LoadBalancer or NodePort, or an Ingress controller, or a dedicated API Gateway like APIPark.
Q3: How do I forward a port to a Kubernetes Service instead of a specific Pod? A3: To forward a port to a Service, you specify service/SERVICE_NAME (or svc/SERVICE_NAME) in the command. kubectl will then automatically select one of the healthy backend pods associated with that service to establish the tunnel. For example: kubectl port-forward service/my-app-service 8080:80. This is beneficial because Service names are stable, unlike Pod names which can change frequently.
Q4: What does the "Error: unable to listen on any of the requested ports" mean, and how can I fix it? A4: This error indicates that the LOCAL_PORT you specified in your kubectl port-forward command is already in use by another application on your local machine. To fix it, you can either: 1. Choose a different LOCAL_PORT that is currently free (e.g., kubectl port-forward my-pod 8081:80). 2. Identify and terminate the process that is currently using that port (on Linux/macOS, lsof -i :LOCAL_PORT then kill PID; on Windows, netstat -ano | findstr :LOCAL_PORT then taskkill /F /PID PID).
Q5: Can I expose the forwarded port to other machines on my local network? A5: By default, kubectl port-forward binds the local port to 127.0.0.1 (localhost), meaning only your machine can access it. You can expose it to your local network by using the --address 0.0.0.0 flag, e.g., kubectl port-forward my-pod 8080:80 --address 0.0.0.0. However, this is a significant security risk. It makes the forwarded port accessible from any device on your local network. Only use this in highly trusted, isolated environments, for very brief periods, and with full awareness of the potential security implications. For most tasks, 127.0.0.1 is the safest choice.
🚀You can securely and efficiently call the OpenAI API on APIPark in just two steps:
Step 1: Deploy the APIPark AI gateway in 5 minutes.
APIPark is developed based on Golang, offering strong product performance and low development and maintenance costs. You can deploy APIPark with a single command line.
curl -sSO https://download.apipark.com/install/quick-start.sh; bash quick-start.sh

In my experience, you can see the successful deployment interface within 5 to 10 minutes. Then, you can log in to APIPark using your account.

Step 2: Call the OpenAI API.