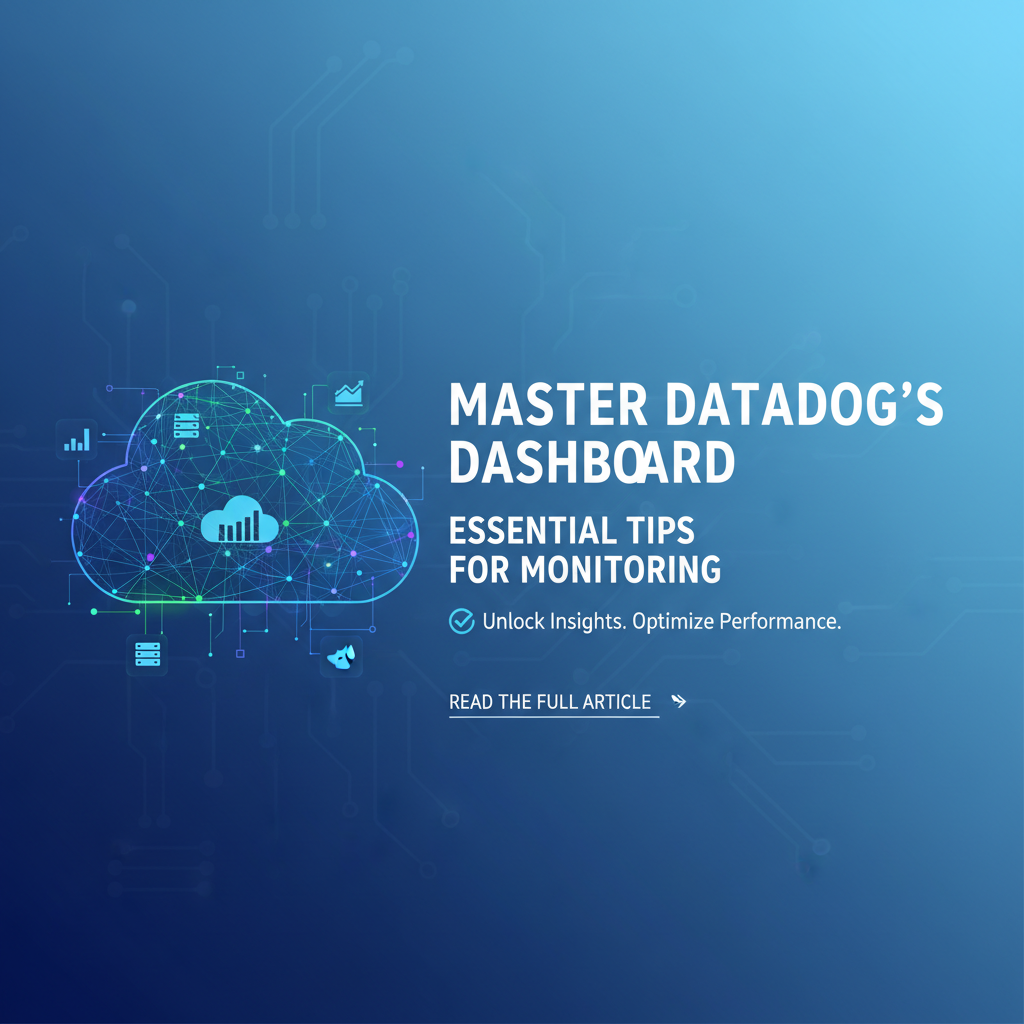
Master Datadogs Dashboard: Essential Tips for Monitoring


In the intricate tapestry of modern software and infrastructure, visibility is not merely an advantage; it is an absolute necessity. As systems grow in complexity, encompassing microservices, cloud-native architectures, serverless functions, and diverse data sources, the challenge of maintaining a holistic view of their health and performance becomes paramount. This is where robust monitoring platforms like Datadog step in, offering a powerful lens through which to observe, understand, and act upon the vast streams of operational data. Yet, the true power of Datadog isn't just in its ability to collect metrics, logs, and traces; it lies in the art and science of transforming this raw data into actionable insights through intelligently designed dashboards.
This comprehensive guide is dedicated to demystifying the process of mastering Datadog dashboards. We will journey from the foundational concepts of observability to the nuanced strategies for constructing dashboards that not only reflect the current state of your systems but also anticipate potential issues, guide troubleshooting efforts, and inform critical business decisions. Whether you are an SRE, DevOps engineer, developer, or a business analyst seeking clearer insights into your application's performance, understanding how to leverage Datadog's dashboarding capabilities effectively is a skill that will profoundly impact your operational efficiency and strategic foresight. By the end of this exploration, you will possess the knowledge and practical tips to build, refine, and maintain dashboards that truly empower your teams, ensuring that your digital infrastructure operates with optimal performance and unwavering reliability.
The Foundation: Understanding Datadog's Core Observability Concepts
Before diving into the intricacies of dashboard creation, it's crucial to grasp the fundamental pillars upon which Datadog's monitoring capabilities are built. These core concepts — metrics, logs, traces, and events — represent different facets of your system's behavior, and their synergistic integration within Datadog is what enables a truly comprehensive observability strategy. Understanding each component individually and how they interrelate is the bedrock for designing effective dashboards that tell a complete story.
Metrics: The Pulse of Your Systems
Metrics are numerical measurements collected over time, providing quantitative insights into the performance and health of your infrastructure and applications. They are the most granular and frequently collected data points, offering real-time and historical views of system behavior. Datadog categorizes metrics in several ways, each suited for different types of data:
- Gauge: Represents a single point-in-time value that can go up or down, like the temperature of a server or the current number of active users. Gauges are ideal for tracking current state.
- Counter: A cumulative metric that only ever increases. Common examples include the total number of requests served or bytes transferred. Datadog often applies functions like
rate()to counters to show their change over time, transforming a cumulative value into a per-second rate. - Histogram: Captures the distribution of values for a given event, such as request durations or query latencies. Histograms allow you to understand not just the average but also percentiles (e.g., p95, p99), which are crucial for identifying outliers and understanding user experience.
- Distribution: Similar to histograms but optimized for global aggregation across multiple hosts or instances, providing a more accurate representation of the overall distribution without local binning issues.
Datadog collects metrics through its Agent, which runs on hosts, containers, and serverless environments, as well as through direct integrations with cloud providers (AWS CloudWatch, Azure Monitor, GCP Stackdriver) and thousands of popular applications and services. The ability to collect and aggregate metrics from such a diverse range of sources into a single platform is a cornerstone of Datadog's power, enabling a unified view of your entire ecosystem. When designing dashboards, thoughtful selection of key metrics and appropriate aggregation methods is vital for conveying meaningful information without overwhelming the viewer.
Logs: The Narrative of Events
While metrics provide quantitative data, logs offer the qualitative narrative of what's happening within your systems. Every application, service, and infrastructure component generates logs detailing events, errors, warnings, and informational messages. Datadog's log management capabilities go beyond simple ingestion; they involve sophisticated processing, parsing, and analysis to transform unstructured text into structured, searchable data.
- Ingestion: Logs are collected from various sources – files, systemd journals, Docker containers, Kubernetes, cloud services – by the Datadog Agent or through dedicated forwarding services.
- Parsing: Raw log lines are parsed into individual attributes (e.g., timestamp, message, service name, status code, user ID) using Grok patterns, JSON parsing, or custom rules. This structuring is critical for effective querying and aggregation.
- Aggregation and Exploration: Once parsed, logs can be searched, filtered, and aggregated based on any of their attributes. This allows teams to quickly identify error trends, investigate specific user sessions, or understand deployment impacts. Log patterns and analytics further help in identifying common issues and unusual spikes.
Incorporating log streams and log-based metrics into dashboards provides crucial context. A metric might show a spike in errors, but a correlated log stream widget on the same dashboard can instantly reveal the specific error messages and their sources, accelerating troubleshooting.
Traces: Following the User's Journey
Application Performance Monitoring (APM) and distributed tracing are about understanding the journey of a request as it traverses multiple services in a distributed architecture. A trace represents a complete end-to-end request, broken down into individual "spans," where each span represents an operation within a service (e.g., a database query, an HTTP call to another service, a function execution).
- Instrumentation: Datadog APM agents automatically instrument popular languages and frameworks to capture traces, injecting correlation IDs to link spans together across service boundaries.
- Service Maps: Datadog automatically generates service maps from trace data, visualizing dependencies and call flows between services, which is invaluable for understanding complex architectures.
- Flame Graphs and Span Details: For each trace, detailed flame graphs show the time spent in each operation, pinpointing bottlenecks and performance issues down to the code level.
Traces are essential for diagnosing latency issues, identifying bottlenecks in service-to-service communication, and understanding the performance impact of code changes. Dashboards often include APM metrics derived from traces (e.g., average latency per service, error rates, throughput) and links to specific trace views for deeper investigation.
Events: Significant Occurrences
Events are discrete, time-stamped occurrences that provide context to your metrics, logs, and traces. They can be anything from code deployments, configuration changes, auto-scaling events, or scheduled maintenance windows.
- Integration: Datadog collects events from various sources, including its own monitors, deployment tools (e.g., Jenkins, GitHub Actions), and custom scripts.
- Correlation: Events are crucial for correlating spikes or dips in metrics with specific actions. For instance, a sudden increase in CPU utilization might be correlated with a recent code deployment event, immediately suggesting a potential root cause.
Dashboards can display events as markers on time-series graphs, offering immediate visual correlation between system behavior changes and significant operational activities. This contextual layer is vital for effective post-incident analysis and performance debugging.
Infrastructure: The Bedrock
At the heart of all these data types is your infrastructure – hosts, containers, serverless functions, and cloud resources. Datadog provides comprehensive visibility into these components, from bare metal servers to ephemeral Kubernetes pods and Fargate tasks.
- Host Map: A dynamic visualization of your entire infrastructure, allowing you to quickly identify underperforming or problematic hosts based on customizable metrics.
- Container and Kubernetes Monitoring: Deep integration to collect metrics, logs, and traces from containers, pods, nodes, and clusters, offering insights into resource utilization, performance, and health of containerized applications.
- Cloud Integrations: Native integrations with major cloud providers (AWS, Azure, GCP) pull in service-specific metrics and logs, ensuring consistent monitoring across hybrid and multi-cloud environments.
Dashboards dedicated to infrastructure provide critical oversight, helping ensure that the underlying resources supporting your applications are healthy and appropriately scaled.
Integrations: Expanding the Monitoring Horizon
One of Datadog's most significant strengths is its vast ecosystem of integrations. With hundreds of out-of-the-box integrations for databases, web servers, message queues, cloud services, and more, Datadog can collect telemetry from virtually any part of your technology stack. These integrations often come with pre-built dashboards and monitors, providing a quick start to comprehensive observability. This extensibility means that as your technology stack evolves, Datadog can continue to provide a unified monitoring experience, pulling diverse data types into a single, cohesive view.
The interplay between these core components – metrics for quantification, logs for narrative, traces for journey mapping, events for context, and infrastructure for the foundation – forms a powerful observability framework. Mastering Datadog dashboards means mastering the art of combining these elements to create a clear, actionable picture of your systems.
Deconstructing the Datadog Dashboard
Having established a solid understanding of Datadog's fundamental observability components, we can now turn our attention to the canvas upon which these insights are painted: the Datadog dashboard. A dashboard in Datadog is not just a collection of graphs; it's a meticulously crafted visual story designed to convey specific information to a particular audience. Datadog offers two primary types of dashboards, each with distinct characteristics and ideal use cases.
What is a Datadog Dashboard?
At its core, a Datadog dashboard is a customizable canvas where you arrange various widgets to visualize your collected metrics, logs, traces, and events. These widgets can range from simple time-series graphs and status gauges to complex heat maps and log stream displays. The primary goal of any dashboard is to provide a quick, intuitive understanding of your system's health, performance, and behavior, facilitating rapid decision-making and troubleshooting. Effective dashboards prevent information overload by presenting data in a structured and digestible manner, allowing users to move from high-level overviews to detailed insights with ease.
Types of Dashboards: Timeboards vs. Screenboards
Datadog provides two distinct dashboard types: Timeboards and Screenboards. Understanding their differences is key to choosing the right tool for your specific monitoring needs.
Timeboards: The Temporal View
Timeboards are designed for tracking changes over time and are characterized by a unified time selector that applies to all widgets on the dashboard. This means if you change the time window (e.g., from 1 hour to 24 hours), all graphs and time-based widgets on the Timeboard will update simultaneously.
Characteristics of Timeboards:
- Unified Time Scope: All widgets share a single global time selector. This is their defining feature.
- Relative Positioning: Widgets are arranged in a grid-like structure, and their sizes are relative to each other and the screen width. They automatically adjust and reflow when the browser window is resized, making them responsive.
- Templating Capabilities: Timeboards excel with template variables, allowing users to dynamically filter or group all widgets on the dashboard by specific tags (e.g., environment, service, host). This enables the creation of highly flexible dashboards that can be adapted to specific contexts without duplicating effort.
- Focus: Best for operational monitoring, trend analysis, anomaly detection, and comparing performance over time.
Ideal Use Cases for Timeboards:
- Service-Level Dashboards: Monitoring the core metrics (latency, errors, throughput) for a specific service, allowing teams to quickly assess its health over various timeframes.
- Incident Response Dashboards: Providing a unified view of relevant metrics during an active incident, where quickly changing timeframes to investigate the incident's timeline is critical.
- Infrastructure Health Dashboards: Overview of CPU, memory, network I/O across a fleet of servers, where comparing current state against historical trends is important.
- Capacity Planning: Observing resource utilization trends over longer periods to inform scaling decisions.
Screenboards: The Static, Informational Canvas
Screenboards offer a more free-form, pixel-perfect layout. Unlike Timeboards, each widget on a Screenboard can have its own independent time scope, or no time scope at all. Widgets are placed at absolute pixel coordinates, allowing for precise arrangement and the inclusion of static information.
Characteristics of Screenboards:
- Independent Time Scope: Each widget can display data for a different time range, or even be a static image or text.
- Absolute Positioning: Widgets are placed at specific X/Y coordinates, maintaining their exact position and size regardless of screen resolution or window resizing. This offers pixel-perfect control over the layout.
- Rich Context and Mixed Media: Screenboards can incorporate images, markdown text, log streams, and event streams alongside metrics, making them ideal for runbooks, status pages, or executive summaries.
- Less Responsive: Due to absolute positioning, Screenboards are not as responsive as Timeboards and may require scrolling on smaller screens if too much content is packed in.
- Limited Templating: While template variables exist, their application is less pervasive than in Timeboards; typically, they apply to individual widgets rather than globally.
Ideal Use Cases for Screenboards:
- NOC (Network Operations Center) Displays: Large, always-on displays showing the overall health of critical systems, with key metrics, alert statuses, and potentially embedded video feeds.
- Executive Dashboards: High-level summaries of business-critical KPIs, often incorporating text explanations and company logos.
- Runbooks and Troubleshooting Guides: Combining operational metrics with step-by-step instructions, links to documentation, and embedded log snippets for specific troubleshooting scenarios.
- Post-Mortem Analysis: Presenting a static snapshot of relevant data and explanations from an incident for review.
- Status Pages: Public-facing dashboards communicating the operational status of services.
Choosing Between Timeboards and Screenboards
The decision between a Timeboard and a Screenboard hinges on the primary purpose and audience of your dashboard:
- Need to compare trends across different timeframes or filter dynamically? -> Timeboard.
- Need a pixel-perfect layout with mixed media for a specific narrative or static display? -> Screenboard.
- Operational troubleshooting and deep dives into time-series data? -> Timeboard.
- Executive summaries, status pages, or detailed runbooks? -> Screenboard.
Many organizations effectively use both. A Timeboard might serve as a real-time operational monitor for an application, while a Screenboard provides an executive summary of its business impact or a detailed runbook for its troubleshooting.
The Dashboard Editor Interface: A Deep Dive
Datadog's dashboard editor is a powerful yet intuitive interface that allows users to create and customize dashboards with a wide array of widgets. Understanding its components is fundamental to mastering dashboard creation.
When you create or edit a dashboard, you'll typically encounter:
- Widget Library: On the left sidebar (or top bar), this provides a comprehensive list of all available widget types, categorized for easy selection (e.g., Graph, Alert, Logs, Infrastructure, etc.).
- Main Canvas: The central area where you drag, drop, and arrange your widgets.
- Widget Configuration Panel: When a widget is selected or added, a panel appears (usually on the right or as a modal window) where you define its data source, queries, display options, and formatting. This is where you write your Datadog Query Language (DQL) for metrics, configure log searches, set titles, choose colors, and define conditional formatting.
- Global Time Selector (Timeboards Only): Located at the top, this dropdown allows you to select a predefined or custom time range for all widgets on a Timeboard.
- Template Variables (Timeboards Only): Below the global time selector, these dropdowns allow users to dynamically filter dashboard content by tags, providing immense flexibility without dashboard duplication.
- Dashboard Settings: Options to rename the dashboard, set its access permissions, and manage tags.
- Save/Cancel Buttons: To finalize or discard your changes.
Familiarity with this interface and a clear understanding of Timeboard vs. Screenboard capabilities are the first steps towards building dashboards that are not just aesthetically pleasing but also profoundly effective in driving operational excellence. The next step is to delve into the principles that guide the creation of truly insightful dashboards.
Building Effective Dashboards: Best Practices and Design Principles
Creating a Datadog dashboard is more than just dragging and dropping widgets; it's an exercise in information design, storytelling, and user experience. An effective dashboard transcends a mere collection of data points; it serves as a dynamic narrative that guides users towards understanding, diagnosing, and ultimately resolving issues. Adhering to best practices and design principles is crucial to ensure your dashboards are not only visually appealing but also highly actionable and sustainable.
Start with a Clear Goal: What Problem Are You Solving?
Before you even think about which metrics to include or what widgets to use, pause and define the primary objective of your dashboard. Every dashboard should have a specific purpose. Is it for:
- Troubleshooting a specific service? Focus on its core performance indicators, error rates, and dependencies.
- Capacity planning? Emphasize resource utilization, growth trends, and forecasting.
- Business KPI tracking? Highlight conversion rates, user engagement, and revenue metrics.
- Operational overview for a NOC? Showcase critical alerts, overall system health, and key infrastructure statuses.
A dashboard without a clear goal becomes a data dump – noisy, overwhelming, and ultimately useless. By defining the problem first, you can meticulously select relevant data, eliminate distractions, and ensure every widget serves a purpose in advancing that goal. This also helps in naming your dashboards clearly (e.g., "Service X - Health Overview," "DB Cluster - Performance," "Website Traffic - Business KPIs").
Identify Your Target Audience: Who Will Use It?
The design and content of a dashboard should be tailored to its primary users. Different roles have different information needs and levels of technical detail they require.
- DevOps/SREs: Need detailed technical metrics (CPU, memory, latency, error rates, queue depths), often with drill-down capabilities into logs and traces. They require dashboards that aid in rapid diagnosis and root cause analysis.
- Developers: Might need application-specific metrics, API performance data, error rates from their code, and links to relevant logs or traces.
- Product Managers/Business Analysts: Are less interested in infrastructure specifics and more focused on business metrics (user sign-ups, transaction volumes, conversion funnels, feature usage). They need dashboards that translate technical performance into business impact.
- Executives: Require high-level, aggregated summaries of critical business KPIs and overall system health, presented in a clear, concise manner, often with trend indicators.
Understanding your audience helps you decide on the level of aggregation, the complexity of the queries, the terminology used, and the overall visual layout. Avoid creating "one-size-fits-all" dashboards, as they often end up serving no one well.
Establish Information Hierarchy: Important Data First
Think of your dashboard as a story. The most critical information should be presented first, in a prominent position, typically at the top-left of the screen (following the natural reading flow for Western languages). This allows users to quickly grasp the overall status without needing to scroll or search.
- Top Level: Start with high-level aggregate metrics that represent the overall health or key performance indicators. These should be your "canary in the coal mine" metrics.
- Mid Level: Below the critical overview, provide more detailed breakdowns or related metrics that offer context or indicate potential areas of concern. For example, if overall error rate is high, then individual service error rates.
- Bottom Level (or Secondary Dashboards): Reserve the bottom sections, or link out to separate dashboards, for highly granular data, specific log streams, or deep-dive trace views that are only needed during detailed troubleshooting.
This hierarchy ensures that users can scan the dashboard quickly for a general status and then progressively drill down into more granular details if a problem is identified.
Ensure Visual Clarity: Choosing the Right Widget for the Data Type
Datadog offers a rich palette of widgets, and selecting the appropriate one for each data point is crucial for effective communication. Misusing a widget can lead to misinterpretation or make critical information hard to discern.
Here's a breakdown of common widget types and their best use cases, often incorporating the selected keywords api and gateway where relevant:
| Widget Type | Best Use Cases | Example Query/Description |
|---|---|---|
| Timeseries Graph | Trends and Anomalies: Ideal for visualizing metrics that change over time, showing historical patterns, spikes, dips, and correlations. Excellent for monitoring API request rates, gateway latency, CPU utilization, network I/O, error percentages. Can display multiple metrics for comparison. | avg:system.cpu.user{host:my-server} by {host} (User CPU for a specific host).avg:api.request.count{service:auth-api,env:prod}.as_count() (Total API requests over time for a service).avg:api_gateway.latency_p99{region:us-east-1} (99th percentile latency of an API gateway). |
| Host Map | Infrastructure Overview: Provides a high-level view of an entire fleet of hosts or containers, colored by a specific metric (e.g., CPU, memory, custom health score). Quickly identifies outliers or problematic nodes. | Map all hosts by system.cpu.user or system.load.1. Filter by specific tags like env:prod. |
| Table Widget | Granular Data & Top N Lists: Best for displaying tabular data, top consumers (e.g., top N most expensive queries, top N services with highest error rates), or detailed lists of specific items (e.g., specific APIs with high latency, specific gateways experiencing heavy load). Useful for displaying metrics aggregated by tags. | top(avg:system.cpu.user, 5, 'host') (Top 5 hosts by CPU usage).top(avg:api.latency{env:prod}, 10, 'api_endpoint') (Top 10 API endpoints by latency).sum:api_gateway.error_5xx{env:prod} by {region} (5xx errors per region for an API gateway). |
| Heatmap | Distribution and Density: Shows the distribution of a metric across a dimension over time (e.g., request latency distribution across different services, or CPU usage across many hosts). Helps visualize patterns and identify persistent problems vs. transient spikes. | avg:http.request.duration.by_service{*} by {service} (Latency distribution across services).avg:lambda.invocations{function_name:my_api_lambda} (Invocation distribution for a specific serverless API function). |
| Log Stream Widget | Real-time Logs & Context: Displays a live stream of logs matching a specific query. Invaluable for providing immediate context during troubleshooting when combined with metric spikes. Can filter for specific error messages or user IDs. | status:error service:web-app (Live stream of error logs from the web-app service).service:auth-api @http.status_code:[500 TO *] (Live stream of 5xx errors from the authentication API). |
| Gauge / Change / Scalar | Current State & Single Values: Displays a single, current numeric value. Useful for presenting overall health scores, current throughput, error counts, or key business KPIs. Gauges can have thresholds for color-coding (e.g., green, yellow, red). | sum:api.requests.total{service:payment-gateway,env:prod}.as_count() (Total API requests for a payment gateway).avg:system.load.1{host:my-server} (Current 1-minute load average).sum:http.status_code.5xx{service:my-api} (Count of 5xx errors for a specific API). |
| Alert / Monitor Status | Quick Status Checks: Shows the current status of specific Datadog monitors (alerts). Provides a rapid overview of whether critical systems are alerting or healthy. | Displays a list of monitors, their current state (OK, WARN, ALERT), and recent history. Ideal for NOC dashboards. |
| Notes / Markdown Widget | Context and Runbooks: Provides text-based explanations, links to documentation, runbook steps, or embedded images. Crucial for adding context to complex dashboards, explaining metrics, or guiding troubleshooting. Can include links to specific API documentation or gateway configuration guides. | Markdown text: ### Troubleshooting Guide for Service X\n\n1. Check [APIDocs](link_to_docs) for API endpoint definitions.\n2. Review logs for 'fatal' errors.. |
| Service Map | Distributed Tracing & Dependencies: Visualizes the dependencies and call flow between services based on APM trace data. Helps understand architectural interactions and pinpoint where latency might be introduced, especially crucial for understanding API call chains and traffic through an API gateway. | Automatically generated by APM data, showing services, their interconnections, and health indicators. |
Consistency: Naming Conventions, Color Schemes
Consistency significantly enhances a dashboard's usability and reduces cognitive load.
- Naming Conventions: Adopt a clear and consistent naming convention for your metrics, tags, and especially your dashboards. (e.g.,
[Service Name] - [Dashboard Purpose],Auth_API - Latency & Errors). - Color Schemes: If possible, use consistent colors for similar metrics across different dashboards. For example, always use red for error rates, blue for latency, green for success. Datadog allows custom color palettes, so leverage this for consistency.
- Thresholds: Define consistent thresholds for "healthy," "warning," and "critical" states for common metrics across your organization. This helps teams quickly understand the severity of an issue without needing to consult documentation for each dashboard.
Iterative Design: Dashboards Are Living Documents
Dashboards are rarely perfect on the first attempt. They are living documents that should evolve with your systems and your teams' needs.
- Start Simple: Don't try to build the ultimate dashboard in one go. Start with the most critical metrics and gradually add more detail as needed.
- Gather Feedback: Regularly solicit feedback from your target audience. Are they finding it useful? Are there missing metrics? Is anything confusing?
- Refine and Prune: Be prepared to remove widgets or entire dashboards that are no longer useful or have become too noisy. An overly cluttered dashboard is counterproductive.
- Review Regularly: Schedule periodic reviews (e.g., quarterly) to ensure dashboards remain relevant, accurate, and optimized for performance.
By following these best practices, you can move beyond simply visualizing data to creating powerful, insightful dashboards that actively contribute to the stability, performance, and overall understanding of your complex systems.
Advanced Widget Configuration and Customization
Building effective dashboards goes beyond selecting the right widget; it involves mastering the art of data querying, transformation, and visual presentation within each widget. Datadog offers a rich set of features for advanced configuration and customization, allowing you to extract maximum insight from your monitoring data. This section delves into these advanced capabilities, providing the tools to create highly refined and dynamic dashboards.
Querying Metrics: Deep Dive into the Datadog Query Language (DSL)
The Datadog Query Language (DQL) is the backbone of metric visualization. It allows you to select, filter, aggregate, and transform your metrics with precision. Mastering DQL is essential for creating powerful and nuanced widgets.
A basic metric query in Datadog follows the format: [aggregator]:[metric_name]{[scope]} by {[group_by_tags]}.
- Aggregators: Determine how values are combined within a time slice. Common ones include:
avg: Average value (most common for gauges, CPU, memory).sum: Sum of values (useful for counters like total requests, bytes transferred).min: Minimum value.max: Maximum value.count: Number of metric submissions in a time slice (useful for event counts).
metric_name: The specific metric you want to query (e.g.,system.cpu.user,api.request.duration).{scope}: Filters the metric based on specific tags (e.g.,{host:my-server},{env:prod,service:auth-api}). This is critical for narrowing down your data to relevant subsets.- Example:
{service:my-api, status_code:5xx}to specifically target 5xx errors from a givenapi.
- Example:
by {[group_by_tags]}: Groups the aggregated data by one or more tags, allowing you to break down a metric.- Example:
by {host}to see CPU usage per host, orby {api_endpoint}to see latency perapiendpoint.
- Example:
Advanced DQL Concepts:
rollup(): Changes the aggregation method or interval over a longer time window.avg:system.cpu.user{*} by {host}.rollup(max, 3600)would show the maximum CPU usage over hourly intervals.rate(): Converts a counter metric into a per-second rate. Essential for understanding throughput (e.g., requests per second).rate(sum:api.request.count{*}).as_count()would show the requests per second for allapis.integral(): Calculates the area under the curve, useful for cumulative values like total bytes transferred over a period.- Arithmetic Operations: You can perform arithmetic directly in queries.
avg:system.cpu.user{*} / 100(to convert percentage to a fraction) or(sum:api.success.count{} / sum:api.total.count{}) * 100(success rate percentage for anapi). fill(): Handles missing data points by filling them with a specified value (e.g.,zero,null,last).as_count()andas_rate(): Functions often applied to sum aggregations to correctly interpret the underlying data as either a total count or a rate. For example,sum:http.requests{*}.as_count()to get the total number of HTTP requests.
Understanding how to combine these elements allows you to craft highly specific and informative queries that precisely target the data you need to visualize. For instance, to monitor the error rate of a specific API gateway per geographic region, you might use: sum:api_gateway.errors{region:*, env:prod} by {region}.
Applying Functions: Aggregation, Transformation, Anomaly Detection
Beyond basic aggregation, Datadog offers a plethora of functions to transform your data within a widget. These functions can be chained to achieve complex analyses.
top()/bottom(): Identifies the highest or lowest N series based on a given metric.top(avg:system.cpu.user, 5, 'host')shows the 5 hosts with the highest average CPU.anomalies(): Automatically detects deviations from normal behavior using machine learning. This is powerful for proactive alerting and identifying subtle issues that might not trigger fixed thresholds.anomalies(avg:api.request.errors{service:my-api}, 'robust_seasonal')would highlight unusual error spikes for yourapi.outliers(): Identifies data points that are statistically unusual compared to their peers within a group. Useful for finding a single host behaving badly among a cluster.timeshift(): Compares current data with data from a previous period (e.g., 1 day ago, 1 week ago). This is invaluable for trend analysis and understanding performance regressions.avg:api.latency{*},avg:api.latency{*}.timeshift('1w')to compare currentapilatency to last week.cumsum(): Calculates a cumulative sum over time, useful for tracking totals like daily user sign-ups or total error occurrences for anapiover a given period.
These functions elevate your dashboards from merely displaying data to performing sophisticated analysis, helping you identify trends, compare performance, and detect anomalies automatically.
Overlaying Data: Comparing Metrics, Baselines
Overlaying multiple data series on a single graph can provide rich context and facilitate comparisons.
- Comparing Different Metrics: Plotting
system.cpu.userandsystem.cpu.systemon the same graph to see their relationship. - Comparing with Baselines: Use
timeshift()to overlay last week's or yesterday's performance, providing a visual baseline for current behavior. - Thresholds and SLOs: Add static lines to graphs representing critical thresholds or Service Level Objectives (SLOs) for metrics like
apilatency or error rates. This immediately highlights when performance is outside acceptable bounds.
Conditional Formatting: Highlighting Critical States
Conditional formatting allows you to dynamically change the appearance of a widget based on the values of the metrics it displays. This is particularly useful for quickly drawing attention to critical information.
- Gauge Widgets: Set thresholds to change the gauge's color (e.g., green for healthy, yellow for warning, red for critical).
- Table Widgets: Color-code rows or cells based on metric values, making it easy to spot problematic entries in a list of hosts or
apiendpoints. - Scalar/Change Widgets: Change the background color or text color of a single value widget if it crosses a threshold.
Effective use of conditional formatting turns passive data displays into active warning signals, guiding the user's eye to where attention is most needed, for example, an api gateway showing high error rates.
Templated Variables: Dynamic Dashboards for Different Contexts
Templated variables are a cornerstone of building flexible and scalable dashboards, especially Timeboards. Instead of creating separate dashboards for each environment, service, or host, you can create one dynamic dashboard.
- Text Variables: Manually defined lists of values that users can select from (e.g.,
dev,staging,prodfor anenvironmentvariable). - Tag Variables: Dynamically populated with all available values for a specific tag (e.g.,
host,service,datacenter). This is incredibly powerful as it automatically updates as your infrastructure changes.
How to Use Them:
- Define Variables: In your dashboard settings, define variables (e.g.,
environmentas a text variable,serviceas a tag variable forservice:*). - Integrate into Queries: Use the variable in your widget queries. For example,
{env:$environment,service:$service}. When a user selects a value from the variable dropdown, the query updates dynamically, and all widgets using that variable reflect the new scope.
Example: Imagine a dashboard monitoring an API gateway. With templated variables, a single dashboard can be used to: * View the API gateway metrics for env:prod. * Switch to env:staging to test new deployments. * Filter by region to see performance in different geographic areas.
This significantly reduces dashboard sprawl, improves maintainability, and empowers users to explore data dynamically.
Graphing Logs and Traces: Visualizing Patterns from Unstructured Data
Datadog's ability to transform logs and traces into metrics is a powerful feature for dashboarding.
- Log-Based Metrics: You can create metrics directly from your logs. For example, count all log lines with
status:errorfor a specific service. This allows you to graph log trends alongside traditional metrics.count_nonzero(avg:logs.status.error{service:my-api})could visualize the frequency ofapierrors from log data. - Trace-Based Metrics (APM): APM automatically generates metrics like
trace.flask.request.hits(requests per second),trace.flask.request.errors(error rates), andtrace.flask.request.duration(latency percentiles). These are directly queryable in your dashboard widgets, offering deep insights into application performance. - Log Stream Widgets: As discussed, embedding live log streams provides immediate textual context, correlating metric anomalies with specific log messages.
By leveraging these advanced configuration options, you can move beyond basic monitoring to create dashboards that are deeply insightful, highly interactive, and precisely tailored to the dynamic needs of your operations and business. The next step is to apply these techniques to specific monitoring scenarios.
Specific Monitoring Scenarios and Dashboard Examples
With a solid grasp of Datadog's core concepts and advanced dashboarding features, we can now explore how to apply this knowledge to various real-world monitoring scenarios. Each scenario demands a specific approach to dashboard design, focusing on the most relevant metrics, logs, and traces to provide actionable insights. We'll also naturally weave in the chosen keywords api and gateway, demonstrating how Datadog provides end-to-end visibility for these critical components.
Infrastructure Monitoring: The Digital Foundation
Monitoring your underlying infrastructure is the first line of defense against outages and performance degradation. Infrastructure dashboards provide a high-level overview of physical or virtual resources.
Key Metrics: * CPU Utilization: system.cpu.user, system.cpu.system, system.cpu.idle * Memory Usage: system.mem.used, system.mem.total, system.mem.pct_usable * Disk I/O: system.disk.in_use, system.disk.read_bytes, system.disk.write_bytes * Network I/O: system.net.bytes_rcvd, system.net.bytes_sent * Load Average: system.load.1, system.load.5, system.load.15
Example Dashboard Layout: "Overall System Health" (Timeboard)
- Top Row (Overview):
- Gauge: Overall CPU Utilization (across entire environment,
avg:system.cpu.user{*}). - Gauge: Overall Memory Utilization (
avg:system.mem.pct_usable{*}). - Alert Widget: Status of critical infrastructure monitors (e.g., "High CPU on any host," "Low Disk Space").
- Gauge: Overall CPU Utilization (across entire environment,
- Second Row (Key Trends):
- Timeseries Graph: Average CPU Utilization per Host (
avg:system.cpu.user{*} by {host}). - Timeseries Graph: Average Memory Utilization per Host (
avg:system.mem.pct_usable{*} by {host}). - Timeseries Graph: Top 5 Hosts by Disk IOPS (
top(sum:system.disk.io_ops{*}, 5, 'host')).
- Timeseries Graph: Average CPU Utilization per Host (
- Third Row (Detailed Breakdowns):
- Table Widget: List of Hosts with Highest Load Average (
top(avg:system.load.1, 10, 'host')). - Host Map: Visualizing CPU usage across all hosts, color-coded.
- Table Widget: List of Hosts with Highest Load Average (
This dashboard helps quickly identify which hosts are under stress, detect resource bottlenecks, and ensure the fundamental stability of your environment. For systems that route API traffic, the health of the underlying gateway infrastructure is paramount.
Application Performance Monitoring (APM): Understanding User Experience
APM dashboards are critical for understanding how your applications are performing from the user's perspective. They focus on latency, error rates, and throughput.
Key Metrics (LET Method): * Latency: trace.<service_name>.request.duration.p95, trace.<service_name>.request.duration.avg * Errors: trace.<service_name>.request.errors (count), trace.<service_name>.request.hits (throughput for error rate calculation) * Throughput: trace.<service_name>.request.hits (requests per second)
Example Dashboard Layout: "Service X - Performance Overview" (Timeboard with Template Variables)
- Template Variables:
service(tag variable),env(text variable:prod,staging). - Top Row (Service Health Summary):
- Scalar Widget:
p95Latency (trace.$service.request.duration.p95{env:$env}). - Scalar Widget: Error Rate (calculated:
(sum:trace.$service.request.errors{env:$env} / sum:trace.$service.request.hits{env:$env}) * 100). - Scalar Widget: Throughput (RPS) (
rate(sum:trace.$service.request.hits{env:$env})).
- Scalar Widget:
- Second Row (Key Trends):
- Timeseries Graph: Latency P95, P99, and Average (
trace.$service.request.duration.p*). - Timeseries Graph: Error Count and Throughput (overlapping).
- Timeseries Graph: Latency P95, P99, and Average (
- Third Row (Dependencies & Bottlenecks):
- Service Map Widget: Showing dependencies for the selected
$service. - Table Widget: Top 5 Slowest Spans for
$service(e.g., database queries, external API calls). - Log Stream Widget: Filtered for
service:$service status:error.
- Service Map Widget: Showing dependencies for the selected
This type of dashboard allows developers and SREs to quickly pinpoint performance bottlenecks within a specific service, identify upstream or downstream dependencies causing issues, and diagnose API-related performance problems where the application acts as an API consumer or provider.
Cloud Infrastructure Monitoring (AWS, Azure, GCP)
Cloud providers expose thousands of metrics. Effective dashboards consolidate these into meaningful views.
Key Metrics (AWS Example): * EC2: aws.ec2.cpuutilization, aws.ec2.network_in, aws.ec2.network_out * S3: aws.s3.get_requests, aws.s3.4xx_errors, aws.s3.5xx_errors * Lambda: aws.lambda.invocations, aws.lambda.errors, aws.lambda.duration * RDS: aws.rds.cpuutilization, aws.rds.free_storage_space, aws.rds.database_connections * API Gateway: aws.apigateway.5xx_errors, aws.apigateway.count, aws.apigateway.latency
Example Dashboard Layout: "AWS Production Health" (Screenboard)
- Top Section (Overall Cloud Health):
- Alert Widget: Status of critical AWS service monitors.
- Scalar Widget: Total EC2 instances running.
- Scalar Widget: Total Lambda invocations (last 1 hour).
- Mid Section (Service-Specific Panels):
- Panel 1: EC2 Fleet Health:
- Host Map: EC2 instances by CPU utilization.
- Timeseries Graph: Total EC2 CPU utilization.
- Panel 2: Lambda Performance:
- Table Widget: Top 5 Lambda functions by error rate.
- Timeseries Graph: Total Lambda errors and invocations.
- Panel 3: API Gateway Performance:
- Timeseries Graph:
aws.apigateway.latency.p99for allAPIsthrough thegateway. - Timeseries Graph:
aws.apigateway.5xx_errorsby API endpoint. - Scalar Widget: Total
API gatewayrequests per second.
- Timeseries Graph:
- Panel 1: EC2 Fleet Health:
- Bottom Section (Cost & Security, optional):
- Markdown Widget: Links to AWS Cost Explorer, Security Hub.
This dashboard provides a comprehensive view across critical cloud services, allowing teams to quickly identify issues with specific services like an API gateway or a set of API functions.
Network Performance Monitoring (NPM): The Connective Tissue
NPM dashboards focus on traffic flow, connection health, and latency between services, often providing crucial context for distributed systems where the network can be a bottleneck, especially for API communications.
Key Metrics: * TCP Retransmissions: datadog.network.tcp.retrans_packets_per_second * Network Throughput: system.net.bytes_rcvd, system.net.bytes_sent (per interface, per connection) * Connection Count: datadog.network.tcp.connections * DNS Latency: datadog.dns.response_time
Example Dashboard Layout: "Network Latency & Throughput" (Timeboard)
- Top Row (Network Overview):
- Timeseries Graph: Overall Network In/Out (
sum:system.net.bytes_rcvd{*},sum:system.net.bytes_sent{*}). - Timeseries Graph: TCP Retransmission Rate (
avg:datadog.network.tcp.retrans_packets_per_second{*}).
- Timeseries Graph: Overall Network In/Out (
- Second Row (Inter-Service Communication):
- Network Map Widget (NPM): Visualizing traffic between critical services, highlighting high-latency or high-retransmission links. This is excellent for understanding dependencies between microservices using APIs.
- Table Widget: Top 10 High-Traffic Connections (source/destination IPs/ports).
- Third Row (DNS Health):
- Timeseries Graph: DNS Response Time per Resolver (
avg:datadog.dns.response_time{*} by {resolver_ip}).
- Timeseries Graph: DNS Response Time per Resolver (
This dashboard helps identify network-related performance issues that might affect your APIs or services behind an API gateway.
Log Management Dashboards: Unearthing Patterns
Log dashboards transform raw log data into actionable insights, helping to visualize error trends, specific event occurrences, or user activity.
Key Metrics (derived from logs): * Error Rate from Logs: sum:logs.status.error{service:my-service}.as_count() * Unique Users from Logs: count_unique(@user.id){service:my-service} * Specific Event Count: sum:logs.event_type.login_failed{service:auth-api}.as_count()
Example Dashboard Layout: "Authentication Service Log Insights" (Timeboard)
- Top Row (Error Summary):
- Timeseries Graph: Authentication Service Error Rate from Logs (
rate(sum:logs.status.error{service:auth-api}).as_count()). - Timeseries Graph: Login Attempts (Success vs. Failed) (
rate(sum:logs.event_type.login_success{service:auth-api}.as_count())vs.rate(sum:logs.event_type.login_failed{service:auth-api}.as_count())).
- Timeseries Graph: Authentication Service Error Rate from Logs (
- Mid Row (Detailed Error Analysis):
- Table Widget: Top 5 Error Messages (
top(count:logs.status.error{service:auth-api}, 5, 'error_message')). - Log Pattern Widget: Identifying recurring log patterns for the
auth-apiservice.
- Table Widget: Top 5 Error Messages (
- Bottom Row (Real-time Context):
- Log Stream Widget: Filtered for
service:auth-api status:errorshowing live error logs.
- Log Stream Widget: Filtered for
This dashboard provides a powerful view into the textual narrative of your services, helping you understand the "why" behind metric spikes, especially critical for API services where request/response details are often logged.
Business Observability Dashboards: Connecting Tech to Value
These dashboards bridge the gap between technical performance and business impact, crucial for product owners and business stakeholders.
Key Metrics: * User Sign-ups: custom.users.new_signups.count * Transaction Volume: custom.ecommerce.transactions.count * Conversion Rates: custom.ecommerce.checkout.conversion_rate * API Usage by Partners: custom.api.partner_usage.count{partner:*, api_product:*} by {partner}
Example Dashboard Layout: "Website Business KPIs" (Screenboard)
- Top Section (Overall Business Health):
- Scalar Widget: Daily Active Users.
- Scalar Widget: Conversion Rate (Today vs. Yesterday change).
- Gauge: Overall Website Health Score (derived from a complex monitor).
- Mid Section (Key Funnels & Revenue):
- Timeseries Graph: User Sign-up Trend (daily).
- Timeseries Graph: Revenue Generated (daily).
- Table Widget: Top 5 Products by Sales.
- Timeseries Graph:
APICall Volume to Partner Integrationgateway(if applicable).
- Bottom Section (Context):
- Markdown Widget: Explanations of KPIs, links to marketing dashboards.
This dashboard connects the operational health of your systems, including any API backend or API gateway, directly to the business outcomes, allowing stakeholders to see the impact of technical performance on revenue or user engagement.
Container and Kubernetes Monitoring: The Orchestrated World
Monitoring containerized environments like Kubernetes requires specific dashboards that track the health and resource utilization of nodes, pods, and deployments.
Key Metrics: * Node/Pod CPU/Memory: kubernetes.node.cpu.usage, kubernetes.pod.cpu.usage, kubernetes.node.memory.usage, kubernetes.pod.memory.usage * Deployment Status: kubernetes.deployment.replicas.ready * Container Restarts: kubernetes.container.restarts * Network Traffic (Pods): kubernetes.pod.network.bytes_received, kubernetes.pod.network.bytes_sent
Example Dashboard Layout: "Kubernetes Cluster Health" (Timeboard with Template Variables)
- Template Variables:
cluster_name,namespace. - Top Row (Cluster Overview):
- Gauge: Cluster CPU Utilization (
avg:kubernetes.node.cpu.usage{cluster_name:$cluster_name}). - Gauge: Cluster Memory Utilization (
avg:kubernetes.node.memory.usage{cluster_name:$cluster_name}). - Scalar Widget: Unready Pods (
sum:kubernetes.deployment.replicas.unready{cluster_name:$cluster_name, namespace:$namespace}).
- Gauge: Cluster CPU Utilization (
- Second Row (Node & Pod Performance):
- Host Map: Nodes by CPU usage, color-coded.
- Timeseries Graph: Top 5 Pods by CPU usage (
top(avg:kubernetes.pod.cpu.usage{cluster_name:$cluster_name, namespace:$namespace}, 5, 'pod_name')). - Timeseries Graph: Container Restarts (
sum:kubernetes.container.restarts{cluster_name:$cluster_name, namespace:$namespace}).
- Third Row (Networking & Logs):
- Table Widget: Pods with High Network I/O (
top(sum:kubernetes.pod.network.bytes_sent{cluster_name:$cluster_name, namespace:$namespace}, 5, 'pod_name')). - Log Stream Widget: Filtered for
kubernetes.cluster_name:$cluster_name kubernetes.namespace:$namespace status:error.
- Table Widget: Pods with High Network I/O (
This dashboard provides detailed insights into the health and performance of your Kubernetes clusters, critical for applications that serve APIs or act as an API gateway in a containerized environment.
Serverless Monitoring (Lambda, Fargate): The Event-Driven World
Serverless applications pose unique monitoring challenges due to their ephemeral nature. Dashboards need to focus on invocation patterns, errors, and duration.
Key Metrics: * Invocations: aws.lambda.invocations * Errors: aws.lambda.errors * Duration: aws.lambda.duration.avg, aws.lambda.duration.p95 * Throttles: aws.lambda.throttles * Cold Starts: Derived from logs or custom metrics.
Example Dashboard Layout: "Serverless Application Health" (Timeboard with Template Variables)
- Template Variables:
function_name(tag variable),env. - Top Row (Function Overview):
- Scalar Widget: Total Invocations (
sum:aws.lambda.invocations{function_name:$function_name, env:$env}). - Scalar Widget: Error Rate (
(sum:aws.lambda.errors{function_name:$function_name, env:$env} / sum:aws.lambda.invocations{function_name:$function_name, env:$env}) * 100). - Scalar Widget:
p95Duration (aws.lambda.duration.p95{function_name:$function_name, env:$env}).
- Scalar Widget: Total Invocations (
- Second Row (Performance Trends):
- Timeseries Graph: Invocations, Errors, Throttles (overlayed).
- Timeseries Graph: Duration (Avg, P95, P99).
- Third Row (Context & Logs):
- Table Widget: Top 5 Invocation Hotspots (e.g., source IP, user agent).
- Log Stream Widget: Filtered for
function_name:$function_name status:error.
This dashboard is crucial for ensuring the reliable operation of serverless APIs and backends, providing insights into their performance and error characteristics.
APIPark is a high-performance AI gateway that allows you to securely access the most comprehensive LLM APIs globally on the APIPark platform, including OpenAI, Anthropic, Mistral, Llama2, Google Gemini, and more.Try APIPark now! 👇👇👇
Proactive Monitoring: Alerts, SLOs, and Automation
Dashboards are powerful for reactive monitoring and incident investigation, but their true value is amplified when integrated with proactive monitoring strategies. This involves setting up intelligent alerts, defining Service Level Objectives (SLOs), and automating dashboard creation and management.
Integrating Dashboards with Alerts: Visualizing Alert Status
Datadog's strength lies in its ability to seamlessly integrate monitoring data with its robust alerting engine. Dashboards can play a crucial role in visualizing the status of these alerts, offering immediate context and reducing alert fatigue.
- Monitor Status Widgets: These widgets display the current state (OK, WARN, ALERT, NO DATA) of one or more Datadog monitors. Placing these prominently on a dashboard provides a quick, color-coded overview of your system's health, allowing responders to see at a glance which critical services or components are in distress.
- Alert Overlays on Graphs: When a monitor triggers on a metric that's also displayed in a time-series graph, Datadog can overlay the alert events directly onto the graph. This visual correlation immediately shows when the alert fired relative to the metric's behavior, providing invaluable context for understanding the cause and impact of the alert. For example, if an alert fires on
api.latency.p99, seeing that spike on the dashboard graph alongside the alert event helps confirm the issue. - Runbook Links: Many alert notifications (e.g., Slack, PagerDuty) can include direct links to relevant Datadog dashboards or specific traces/logs, empowering responders to jump straight to the relevant information for investigation. Conversely,
Markdownwidgets on dashboards can link to runbook documentation for specific alerts or common troubleshooting scenarios, reducing mean time to resolution (MTTR).
Setting up SLOs/SLIs: How Dashboards Support Tracking Service Level Objectives
Service Level Objectives (SLOs) and Service Level Indicators (SLIs) are critical for defining and measuring the reliability of your services. Datadog provides native SLO capabilities, and dashboards are the primary visual interface for tracking your progress against these objectives.
- SLO Widgets: Datadog offers dedicated widgets to display the current status of your SLOs, including their "error budget" burn rate and projected compliance. These widgets often use intuitive color-coding and progress bars, providing a clear indication of whether your service is meeting its reliability targets.
- Correlating Metrics to SLOs: SLOs are built upon underlying SLIs, which are typically derived from metrics or logs (e.g., the percentage of successful
APIcalls, thep99latency of a criticalAPI endpoint). Dashboards should prominently display the metrics that feed into your SLOs, allowing teams to understand the real-time performance driving their service reliability. For instance, an SLO might target 99.9% availability for a criticalAPI gateway, and the dashboard would show the success rate metric feeding into that SLO. - Drill-down from SLO: If an SLO widget shows a deteriorating error budget, your dashboard should offer easy drill-down paths to relevant APM traces, log streams, or more granular metric dashboards that can help diagnose why the SLO is being missed.
By integrating SLOs directly into your dashboards, you shift the focus from merely reacting to problems to proactively managing the reliability of your services against predefined goals, fostering a culture of shared responsibility for service health.
Automating Dashboard Creation: API-Driven Approaches and Terraform
Manually creating and managing dozens or hundreds of dashboards can become a significant operational burden, especially in dynamic environments. Datadog supports automation, enabling teams to manage dashboards as code.
- Datadog API: Datadog provides a comprehensive REST API that allows you to programmatically create, update, delete, and fetch dashboards. This is ideal for generating dashboards from templates, synchronizing configurations across multiple environments, or integrating dashboard creation into CI/CD pipelines. For example, a new microservice that includes several
APIendpoints could automatically have a monitoring dashboard provisioned for it upon deployment. - Infrastructure as Code (IaC) with Terraform: For organizations already leveraging IaC practices, the Datadog Terraform provider is an excellent solution for managing dashboards. You can define your dashboards using HashiCorp Configuration Language (HCL), allowing them to be version-controlled, reviewed, and deployed alongside your infrastructure and application code. This ensures consistency, reduces manual errors, and makes dashboard management scalable.
Benefits of Automation: * Consistency: Ensures all dashboards follow organizational standards and best practices. * Scalability: Easily create and manage hundreds of dashboards without manual effort. * Version Control: Track changes, revert to previous versions, and collaborate effectively. * Reduced Toil: Free up engineers from repetitive manual tasks.
Automating dashboard creation means that your monitoring views are always up-to-date and reflect the current state of your deployed services, from individual API endpoints to entire API gateway clusters.
Integrating "api" and "gateway" Keywords (and APIPark)
While Datadog provides powerful general monitoring capabilities, its effectiveness is particularly evident when overseeing critical components like APIs and the API gateways that manage them. These elements are the backbone of modern interconnected applications, and their reliable operation is paramount. Datadog offers deep insights into the performance and health of these systems.
Monitoring APIs with Datadog
APIs, whether internal microservice interfaces or external customer-facing endpoints, are the communication channels of distributed systems. Monitoring them effectively is crucial for application performance and user experience.
- API Gateway Metrics: If your APIs are exposed through a commercial
API gateway(e.g., AWS API Gateway, Nginx, Kong), Datadog offers integrations to collect specific metrics directly from these platforms. Key metrics include:- Latency: Average, P95, P99 latency of requests passing through the
gateway. - Error Rates: Number of 4xx and 5xx errors generated by the
gatewayor the backend services it routes to. - Throughput: Requests per second (RPS) handled by the
gateway. - Connection Limits: Metrics related to active connections and potential throttling.
- Dashboards can visualize these metrics over time, breaking them down by
apiendpoint, consumer, or region, providing a comprehensive view ofAPI gatewayperformance.
- Latency: Average, P95, P99 latency of requests passing through the
- Monitoring Individual API Endpoints: Beyond the
gateway, Datadog's APM can instrument the backend services that implement yourAPIs. This provides granular details on:- Endpoint-specific Latency: Duration of specific
APIcalls within your application code. - Database Query Performance: If an
APIcall involves a database lookup, APM traces can pinpoint slow queries. - External Service Calls: If your
APIcalls another externalAPI, the trace will show the latency and success/failure of that dependency. - Dashboards can then aggregate these APM metrics, showing the performance of specific
APIroutes, identifying the slowestAPIsor those with the highest error rates.
- Endpoint-specific Latency: Duration of specific
- Synthetic API Testing: Datadog Synthetics allows you to create automated, simulated user journeys or
APIcalls from various global locations. These synthetic tests continuously hit yourAPIendpoints and report on availability, latency, and correctness (e.g., checking response bodies).- Proactive Problem Detection: Synthetics can detect
APIoutages or performance degradation before real users are affected. - SLA Verification: Helps verify that your
APIsare meeting their Service Level Agreements (SLAs). - Dashboard widgets can display the results of synthetic
APItests, showing availability percentages, average latency from different regions, and any failing checks, giving a real-time health check of your externalAPIsurface.
- Proactive Problem Detection: Synthetics can detect
Datadog helps ensure the reliability and performance of your external and internal APIs by providing a unified view of their health, from the gateway layer down to individual application code.
Monitoring API Gateways: The Traffic Cop of Your Architecture
An API gateway acts as a single entry point for all API requests, handling tasks like routing, load balancing, authentication, rate limiting, and more. Monitoring the gateway itself is critical because its failure or poor performance can impact all downstream APIs and services.
- Common Gateway Metrics: Regardless of the specific
gatewaytechnology, core metrics to monitor include:- CPU, Memory, and Network Utilization of the
gatewayinstances/pods. - Number of active connections and open file descriptors.
- Latency (time taken by the
gatewayto process requests, not including backend processing). - Error rates (e.g.,
5xxerrors generated by thegatewayitself due to overload or misconfiguration). - Throughput (requests per second).
- CPU, Memory, and Network Utilization of the
- Specific Metrics for Popular Gateways: Datadog offers specific integrations for various
API gatewaytechnologies:- Nginx: Metrics like
nginx.connections.active,nginx.requests.total,nginx.bytes_read. - Kong: Metrics related to plugin performance, upstream latency, and consumer usage.
- AWS API Gateway: As mentioned earlier,
aws.apigateway.5xx_errors,aws.apigateway.count,aws.apigateway.latency. - These specific metrics provide deeper insights into the internal workings and health of your chosen
API gateway.
- Nginx: Metrics like
- Traffic Management Insights: Dashboards built for
API gatewayscan visualize traffic patterns, showing peaks and troughs, identifying potential DDoS attacks or unexpected traffic surges, and monitoring the effectiveness of rate-limiting policies. Breakdown byapikey, client IP, or service can reveal usage patterns and potential abuses.
The robust monitoring capabilities of Datadog ensure that your API gateways are not just forwarding traffic but doing so efficiently, securely, and reliably, acting as the critical control plane for your API ecosystem.
Introducing APIPark: Enhancing Your API and AI Gateway Landscape
For organizations managing a multitude of APIs, especially those leveraging advanced functionalities like AI integration or unified invocation formats, platforms like APIPark become indispensable. APIPark is an open-source AI gateway and API management platform designed to help developers and enterprises manage, integrate, and deploy AI and REST services with ease. It provides capabilities like quick integration of 100+ AI models, unified API formats for AI invocation, prompt encapsulation into REST APIs, and end-to-end API lifecycle management.
While APIPark provides robust API management and an AI gateway, Datadog can seamlessly integrate to monitor the performance, health, and traffic flowing through such critical gateways and individual APIs. By tracking metrics exposed by APIPark or its underlying infrastructure (e.g., CPU, memory, network I/O of the servers running APIPark, or specific API call counts and latencies that APIPark might expose), you can ensure the optimal operation of your API ecosystem within Datadog dashboards.
For instance, a Datadog dashboard could feature: * Timeseries Graph: API request volume for APIs managed by APIPark. * Table Widget: Top API endpoints experiencing latency issues within the APIPark managed services. * Gauge Widget: Overall health score of the APIPark gateway infrastructure. * Log Stream Widget: Filtered for errors from the APIPark instances, providing real-time diagnostic information.
This combined approach allows organizations to leverage the specialized capabilities of an AI gateway and API management platform like APIPark while maintaining a centralized and comprehensive observability view through Datadog. It ensures that the critical API infrastructure, including advanced AI APIs, operates efficiently and reliably, with all performance and health indicators readily available in your Datadog dashboards.
Collaborative Monitoring and Sharing
Monitoring is rarely a solitary endeavor. In modern organizations, effective monitoring requires seamless collaboration and clear communication across teams. Datadog provides robust features for sharing dashboards, fostering a shared understanding of system health, and streamlining incident response.
Sharing Dashboards within Teams
Sharing dashboards within your team or across relevant teams is fundamental to collaborative monitoring. Datadog makes this process straightforward.
- Permissions and Access Control: Dashboards can be configured with specific access permissions, allowing you to control who can view, edit, or manage them. This ensures that sensitive information is protected while relevant stakeholders have the access they need. You can assign permissions to individual users, teams, or roles.
- Direct Sharing: You can easily share a dashboard via a direct URL. This is invaluable during incident response when you need to quickly point colleagues to the relevant monitoring view.
- Dashboard Lists and Folders: Organizing dashboards into logical folders (e.g., by service, team, or environment) helps teams find relevant information quickly, preventing dashboard sprawl and improving discoverability.
- Dashboard Previews: When navigating the dashboard list, Datadog often provides small previews or descriptions, making it easier to identify the correct dashboard at a glance.
By facilitating easy sharing and controlled access, Datadog ensures that everyone from the developer responsible for a specific API to the SRE managing the API gateway can access the same critical information, fostering a unified operational picture.
Public Dashboards
For certain use cases, you might want to share a dashboard with individuals outside your Datadog account or even publicly.
- Public URL Sharing: Datadog allows you to generate a public, read-only URL for specific dashboards. These dashboards do not require any authentication to view and can be embedded in external websites, internal portals, or shared directly with clients or partners.
- Use Cases:
- Status Pages: Creating a public status page for your services, showing their current operational health and availability (e.g., for an external-facing
APIservice). - Client Reporting: Providing key clients with a real-time view of their service performance or
APIusage. - Team Transparency: Sharing high-level dashboards with the broader organization to promote transparency about system health and business KPIs.
- When creating public dashboards, always be mindful of the data you expose, ensuring no sensitive information is inadvertently shared.
- Status Pages: Creating a public status page for your services, showing their current operational health and availability (e.g., for an external-facing
Reporting and Exports
Beyond real-time viewing, there's often a need to generate reports or export dashboard data for further analysis or historical record-keeping.
- Dashboard Snapshots: You can take snapshots of dashboards at specific points in time. These static images can be attached to incident reports, post-mortems, or weekly summaries, providing a visual record of system state.
- Exporting Data: Most widgets, particularly time-series graphs and tables, allow you to export the underlying data as CSV or JSON files. This enables more in-depth analysis using external tools, data archiving, or integration with other reporting systems. For example, exporting
API gatewaylatency data for compliance reporting. - Scheduled Reporting: Datadog can be configured to send scheduled email reports containing dashboard snapshots or key metric summaries, ensuring that stakeholders receive regular updates on system performance and
APIhealth without actively logging into the platform.
Effective sharing and reporting capabilities transform dashboards from simple monitoring tools into powerful communication and analysis instruments, driving transparency and informed decision-making across the entire organization.
Continuous Improvement: Iterating on Your Dashboards
Just as your applications and infrastructure evolve, so too should your Datadog dashboards. The journey to monitoring mastery is not a one-time setup but an ongoing process of refinement, adaptation, and optimization. Embracing a mindset of continuous improvement ensures that your dashboards remain relevant, effective, and free from clutter.
Regular Review Cycles
Scheduled, periodic reviews of your dashboards are essential. These reviews should involve the dashboard's primary users and stakeholders.
- Weekly/Bi-weekly Operational Reviews: Teams should regularly review their service-specific or
APImonitoring dashboards to identify any new pain points, missing metrics, or opportunities for improvement. Are there any metrics that consistently show "no data" or are always green, perhaps indicating they are not useful or thresholds are too loose? - Post-Incident Analysis: After every incident, part of the post-mortem process should include reviewing the dashboards used during troubleshooting. Were they effective? Was information missing? Could the dashboard have predicted the incident? This direct feedback from crisis situations is invaluable.
- Architectural Changes: Whenever there's a significant change in your system architecture, a new service or
APIis deployed, or an existing component is deprecated, review relevant dashboards to ensure they still accurately reflect the new reality. NewAPI gatewaydeployments, for instance, would necessitate new or updated monitoring dashboards.
Regular reviews help keep your dashboards aligned with the dynamic nature of your infrastructure and the evolving needs of your teams.
Gathering Feedback
Actively solicit feedback from anyone who uses your dashboards. They are your primary customers, and their insights are crucial.
- Direct Conversations: Engage with your team members, SREs, developers, and even product managers who rely on the dashboards. Ask open-ended questions: "What problems are you trying to solve with this dashboard?" "Is there anything you wish this dashboard could tell you?"
- Embedding Feedback Mechanisms: Consider adding a
Markdownwidget to your dashboards with a simple link to a feedback form or a Slack channel where users can submit suggestions or report issues. - Observe Usage Patterns: While less direct, observing how dashboards are used (or not used) can provide clues. Are certain dashboards consistently ignored? Are users frequently navigating to other dashboards to get missing information?
Feedback ensures that dashboards are built for purpose and genuinely empower their users, making API or gateway monitoring more user-friendly.
Cleaning Up Outdated Dashboards
Dashboard sprawl is a common problem in growing organizations. Over time, dashboards can become outdated, redundant, or simply unused. A cluttered dashboard environment reduces discoverability and increases cognitive load.
- Archive or Delete: Regularly identify and archive or delete dashboards that are no longer relevant (e.g., for deprecated services, temporary investigations, or experiments). Before deleting, ensure no one is actively using it and consider archiving it first for a grace period.
- Consolidate: Look for opportunities to consolidate multiple similar dashboards into one more comprehensive or dynamic dashboard, especially using templated variables. For example, if you have separate dashboards for each
APIendpoint's latency, consider a single dashboard with anapi_endpointtemplate variable. - Standardize: Enforce naming conventions and consistent tagging. This makes it easier to find and manage dashboards and prevents duplication.
A clean, well-organized set of dashboards is just as important as the individual dashboards themselves. It reduces confusion, improves efficiency, and ensures that your Datadog environment remains a valuable source of truth for your entire organization, whether monitoring a single api or a complex api gateway infrastructure.
Conclusion
Mastering Datadog dashboards is an essential skill for anyone navigating the complexities of modern distributed systems. It's not merely about collecting vast amounts of data but about transforming that data into clear, actionable insights that drive operational excellence and informed decision-making. We've explored the foundational elements of Datadog's observability platform—metrics, logs, traces, and events—understanding how each contributes to a holistic view of your infrastructure and applications, including critical components like APIs and the API gateways that manage them.
We delved into the specifics of Timeboards and Screenboards, dissecting their unique strengths and ideal use cases, and detailed the best practices for designing dashboards that prioritize clarity, hierarchy, and audience relevance. From crafting sophisticated DQL queries to leveraging advanced functions, conditional formatting, and templated variables, you now possess the tools to build highly dynamic and insightful visualizations. We walked through various monitoring scenarios, demonstrating how tailored dashboards can illuminate the health of infrastructure, the performance of applications, the behavior of cloud services, and the crucial insights derived from logs and business KPIs. Furthermore, the strategic integration of proactive measures like intelligent alerts and SLOs, coupled with automation through APIs and Infrastructure as Code, elevates monitoring from reactive firefighting to strategic reliability management.
The journey doesn't end with dashboard creation; it's a continuous cycle of review, feedback, and refinement. By embracing an iterative approach, your dashboards will remain living documents that evolve alongside your systems and organizational needs, consistently providing value. The ability to effectively monitor and manage your APIs and API gateways through platforms like Datadog, complemented by the robust capabilities of an AI gateway and API management platform such as APIPark, ensures comprehensive visibility across your entire digital landscape.
Ultimately, a masterfully crafted Datadog dashboard empowers your teams to quickly identify issues, understand root causes, predict future problems, and ultimately ensure the stability, performance, and reliability of your entire technology stack. It transforms raw data into a compelling narrative, fostering collaboration and driving a culture of proactive observability. Continue to experiment, iterate, and learn, for in the world of monitoring, mastery is a continuous pursuit.
Frequently Asked Questions (FAQ)
1. What is the primary difference between a Datadog Timeboard and a Screenboard? A Datadog Timeboard features a unified time selector that applies to all widgets, making it ideal for tracking trends, comparing performance over time, and utilizing dynamic template variables. Widgets automatically reflow. A Screenboard, on the other hand, allows each widget to have an independent time scope (or no time scope), offers pixel-perfect absolute positioning, and is best suited for static displays, runbooks, or executive summaries that blend various media types.
2. How can I make my Datadog dashboards more actionable during an incident? To make dashboards actionable during an incident, focus on information hierarchy (most critical data at the top), use clear conditional formatting (e.g., red/yellow/green for thresholds), include quick links to related logs and traces, embed Markdown widgets with runbook steps, and display the status of relevant Datadog monitors. Utilizing template variables also helps rapidly narrow down scope to the affected service or host.
3. What are Datadog Template Variables, and why are they important? Datadog Template Variables allow you to create dynamic dashboards that can be filtered by specific tags (like env, service, host) without duplicating the dashboard itself. They are crucial for scalability and flexibility, enabling users to quickly switch contexts (e.g., viewing API metrics for prod vs. staging) and reduce dashboard sprawl.
4. How can Datadog help monitor API gateways and individual API performance? Datadog integrates with various API gateway technologies (e.g., AWS API Gateway, Nginx, Kong) to collect metrics on latency, error rates, and throughput. It also uses APM to trace individual API calls within your applications, providing deep insights into endpoint performance and dependencies. Synthetic API tests can proactively monitor external API availability and latency. Platforms like APIPark, an AI gateway and API management platform, can expose metrics that Datadog can ingest, offering a unified view of your API ecosystem.
5. What is the best strategy for managing a large number of dashboards in Datadog? For managing numerous dashboards, implement clear naming conventions and organize them into folders. Regularly review and prune outdated or unused dashboards to avoid clutter. Leverage automation through the Datadog API or Infrastructure as Code tools like Terraform to create, update, and manage dashboards programmatically, ensuring consistency and scalability across your monitoring landscape.
🚀You can securely and efficiently call the OpenAI API on APIPark in just two steps:
Step 1: Deploy the APIPark AI gateway in 5 minutes.
APIPark is developed based on Golang, offering strong product performance and low development and maintenance costs. You can deploy APIPark with a single command line.
curl -sSO https://download.apipark.com/install/quick-start.sh; bash quick-start.sh

In my experience, you can see the successful deployment interface within 5 to 10 minutes. Then, you can log in to APIPark using your account.

Step 2: Call the OpenAI API.