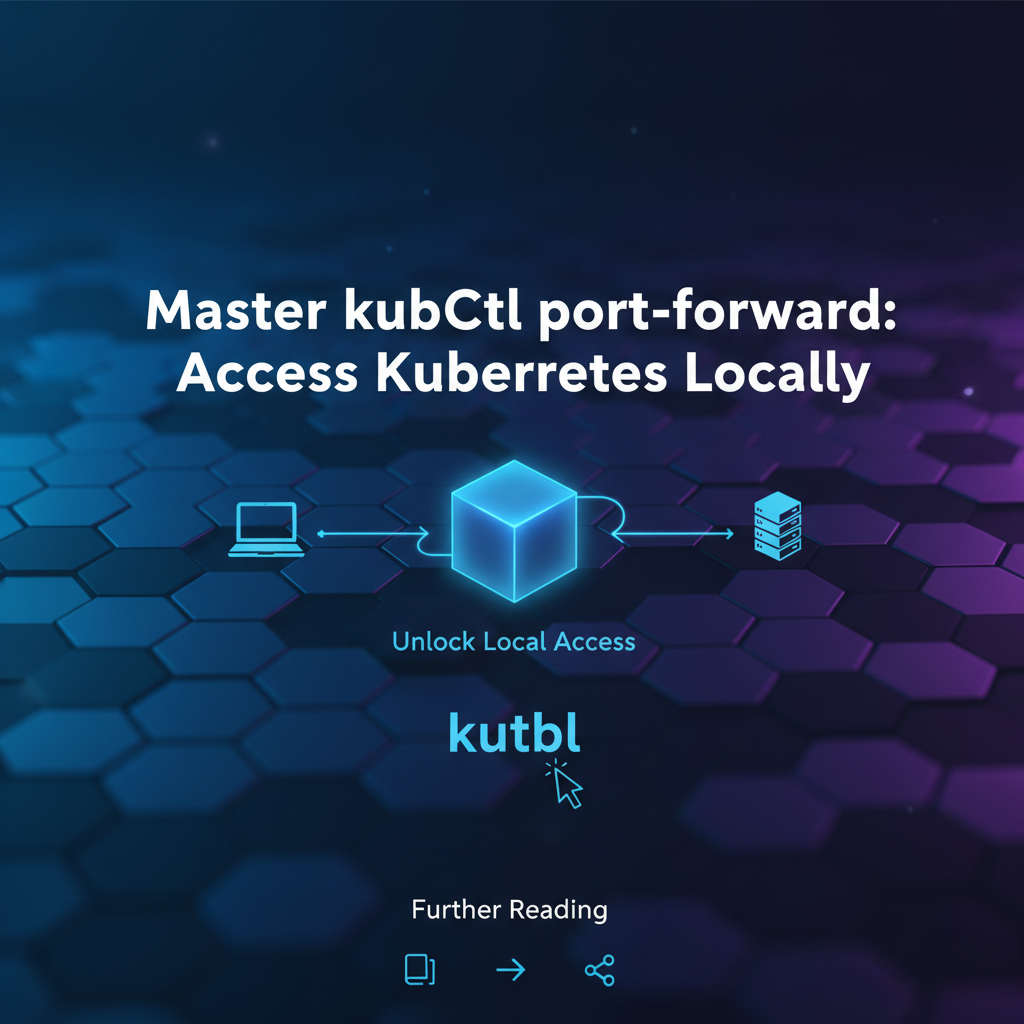
Master kubectl port-forward: Access Kubernetes Locally


Kubernetes, at its core, is an orchestrator of containers, designed to manage complex, distributed applications with high availability and scalability. However, this power and abstraction come with a unique set of challenges, particularly when developers need to interact with individual components of their applications running inside the cluster from their local development environment. Direct access to pods and services within a Kubernetes cluster is often not straightforward due to network isolation, dynamic IP addressing, and the intricate overlay networks that underpin cluster communication. This is precisely where kubectl port-forward emerges as an indispensable tool, serving as a secure, temporary bridge that allows developers to access services running inside their Kubernetes pods as if they were running on their local machine.
Imagine a scenario where you've deployed a microservice, a database, or even an internal API gateway within your Kubernetes cluster. Your local development setup, however, needs to connect to this remote service for testing, debugging, or simply to use it as a backend for a locally running frontend application. Without a direct route, this interaction would be cumbersome, requiring changes to service types, firewall rules, or complex network configurations, which are often undesirable for temporary development needs and can pose security risks if not managed meticulously. kubectl port-forward elegantly solves this conundrum by creating a direct, secure TCP tunnel from your local machine to a specific port on a pod or service within the cluster, bypassing the complexities of the Kubernetes network fabric and allowing for seamless local interaction.
This article will embark on a comprehensive journey into the world of kubectl port-forward. We will delve deep into the Kubernetes networking model to understand why such a tool is necessary, dissect the intricate mechanics of how port-forward establishes its secure tunnel, explore a myriad of practical examples ranging from basic usage to advanced debugging scenarios, and critically examine its security implications and best practices. Furthermore, we will compare port-forward with other Kubernetes access methods, highlighting its unique advantages and specific use cases. By the end of this exploration, you will not only be proficient in using kubectl port-forward but will also possess a profound understanding of its underlying principles, transforming you from a casual user into a true master of this essential Kubernetes utility, empowering your development and debugging workflows like never before.
The Labyrinth of Kubernetes Networking: Why Direct Access is a Challenge
Before we can truly appreciate the utility of kubectl port-forward, it's crucial to understand the intricate and often abstract networking model upon which Kubernetes operates. Unlike traditional virtual machines or bare-metal servers where services might bind to directly accessible public IP addresses, pods within a Kubernetes cluster reside in a highly isolated and dynamic network environment. This isolation is a fundamental design principle, enhancing security and facilitating the scalability and resilience that Kubernetes is renowned for.
At the heart of Kubernetes networking is the Container Network Interface (CNI) specification. CNI defines a standardized interface between Kubernetes and various network plugins (like Calico, Flannel, Weave Net, Cilium, etc.). Each of these plugins implements the CNI specification, providing the actual network fabric that allows pods to communicate with each other. Regardless of the specific CNI plugin, a few core principles hold true:
- Pod-to-Pod Communication without NAT: Every pod in a Kubernetes cluster gets its own unique IP address. This is a flat network space where pods can communicate with any other pod in the cluster without Network Address Translation (NAT) in between. This direct communication simplifies application design, as pods don't need to worry about the complexities of NAT when addressing each other. However, these pod IPs are internal to the cluster and generally not routable from outside the cluster network.
- Ephemeral and Dynamic IP Addresses: Pods are ephemeral by nature. They can be created, destroyed, and rescheduled across different nodes. When a pod restarts or gets rescheduled, it might receive a new IP address. Relying on these dynamic and short-lived pod IPs for external access is impractical and unreliable.
- Network Overlay Networks: Most CNI plugins implement an overlay network. This means that pod network traffic is encapsulated (e.g., using VxLAN, IP-in-IP, or BGP routing) and tunneled over the underlying physical network. From the perspective of the host operating system, the pod network traffic appears to be just another stream of data between nodes. This abstraction decouples the pod network from the host network, allowing for greater flexibility and scalability, but it also means that the pod IP addresses are not directly accessible from outside the cluster network or even from the host network without specific routing rules.
- Service Abstraction: To address the ephemeral nature of pod IPs, Kubernetes introduces the concept of Services. A Service provides a stable, abstract IP address and DNS name (ClusterIP) that load-balances requests across a set of pods. Applications within the cluster connect to the Service's IP, and Kubernetes handles the routing to the backend pods. While Services provide stable internal access, their
ClusterIPs are also internal to the cluster and not directly reachable from outside.
Consider a development scenario: you have a local application that needs to interact with an API endpoint running inside a pod in your Kubernetes cluster. If that pod's IP address is 10.42.0.5 and it exposes an api on port 8080, simply trying to curl http://10.42.0.5:8080 from your local machine would fail. Your local machine's network stack has no idea how to reach 10.42.0.5, as it's an IP within the private, isolated overlay network of your Kubernetes cluster. Even if you knew the IP address of the node hosting that pod, and that node had a public IP, accessing 10.42.0.5:8080 through the node would still be impossible due to the network isolation and routing rules designed to keep pod networks separate.
This fundamental isolation, while beneficial for security and management within the cluster, creates a barrier for local development and debugging workflows. Developers frequently need a way to peer into their applications running inside the cluster, test APIs, interact with databases, or connect debuggers, all without disrupting the cluster's network integrity or exposing services unnecessarily. This is precisely the gap that kubectl port-forward bridges, offering a temporary, secure, and developer-friendly solution to this inherent networking challenge. Without it, the development experience with Kubernetes would be significantly more cumbersome, requiring either elaborate and potentially insecure external exposure of services or complex VPN setups for every debugging session.
Demystifying kubectl port-forward: The Unsung Hero
In the face of the complex and isolated Kubernetes networking model, kubectl port-forward emerges as a remarkably elegant and indispensable tool. It provides a straightforward, secure, and temporary method to bridge the gap between your local development environment and services running within your Kubernetes cluster. Essentially, port-forward creates a direct, local tunnel from a specified port on your machine to a specified port on a pod (or service, deployment, replicaset) inside the cluster.
The core purpose of kubectl port-forward is to allow you to access an application or service running inside your cluster as if it were listening on a port on your local machine. This means you can point your web browser, your local development server, a database client, or any other application that needs to communicate with a remote service, directly at localhost:LOCAL_PORT, and the traffic will be securely routed through the Kubernetes API server to the target pod or service within the cluster.
Let's break down its basic syntax and how it achieves this:
The most common form of the command is:
kubectl port-forward <POD_NAME> [LOCAL_PORT]:[REMOTE_PORT] -n <NAMESPACE>
<POD_NAME>: This is the name of the specific pod you want to forward traffic to. Alternatively, you can specifyservice/<SERVICE_NAME>,deployment/<DEPLOYMENT_NAME>, orreplicaset/<REPLICASET_NAME>, andkubectlwill intelligently pick a healthy pod associated with that resource.[LOCAL_PORT]: This is the port on your local machine that you want to bind to. When you accesslocalhost:LOCAL_PORT, your traffic will be sent through the tunnel. If omitted,kubectlwill automatically pick an available local port.[REMOTE_PORT]: This is the port on the target pod (or service) where the application is actually listening. This port must be exposed by the application within the pod.-n <NAMESPACE>: (Optional but highly recommended) Specifies the Kubernetes namespace where the pod/service resides. If omitted,kubectluses the current context's default namespace.
How it Creates a Secure Tunnel:
When you execute kubectl port-forward, it doesn't directly establish a connection to your pod. Instead, it leverages the Kubernetes API server as a secure intermediary. Here's a simplified overview of the process:
- Client Request: Your
kubectlclient sends a request to the Kubernetes API server, requesting to establish a port-forwarding connection to a specific pod and port. This request includes authentication and authorization checks (RBAC) to ensure you have the necessary permissions. - API Server as Proxy: The API server, acting as a secure gateway, then establishes a connection to the
kubeletagent running on the node where the target pod resides. - Kubelet's Role: The
kubeleton the node receives the request from the API server and initiates a local connection to the specified port within the target pod's network namespace. - Data Tunnel: A bidirectional data stream (a secure TCP tunnel, often implemented over a WebSocket connection) is then established:
- From your local machine's
LOCAL_PORTto yourkubectlclient. - From your
kubectlclient to the Kubernetes API server. - From the Kubernetes API server to the
kubeleton the node. - From the
kubeletto theREMOTE_PORTinside the target pod.
- From your local machine's
This multi-hop, secure tunnel ensures that all traffic between your local machine and the pod is encrypted and authenticated through the Kubernetes control plane. It's akin to having a personal, on-demand VPN directly to your pod's service, without the overhead and complexity of setting up a full VPN infrastructure.
Crucially, kubectl port-forward provides a temporary bridge. It runs in your terminal, and as soon as you terminate the command (e.g., by pressing Ctrl+C), the tunnel is closed. This ephemeral nature makes it perfect for debugging, quick tests, and local development where persistent external exposure of services is neither necessary nor desirable. It provides a surgical level of access, focusing only on the specific port and pod you need, making it an invaluable tool for any Kubernetes developer or operator.
Under the Hood: A Deep Dive into the Mechanics of kubectl port-forward
To fully grasp the power and security implications of kubectl port-forward, it's beneficial to peel back the layers and understand the intricate dance between various Kubernetes components that facilitate this seemingly simple operation. This deeper understanding not only enhances your troubleshooting capabilities but also solidifies your confidence in using this essential tool.
The entire port-forward operation hinges on the collaboration of three primary entities: the kubectl client on your local machine, the kube-apiserver in your Kubernetes cluster, and the kubelet agent running on the node hosting the target pod.
- The
kubectlClient's Initiation: When you executekubectl port-forward, your localkubectlclient doesn't directly attempt to reach the pod's IP address. Instead, it initiates an authenticated and authorized request to thekube-apiserver. This initial request specifies:Crucially,kubectlrelies on your existing Kubernetes configuration (kubeconfig file) for authentication (e.g., client certificates, tokens) and authorization (RBAC rules). Thekube-apiserverwill first verify that your user or service account has the necessary permissions to perform aport-forwardoperation on the specified pod. Without appropriate RBAC roles, the connection will be denied with aForbiddenerror.- The target pod's name (or service/deployment).
- The
REMOTE_PORTwithin the pod. - The
LOCAL_PORTon your machine (if specified). - The namespace.
- The
kube-apiserveras the Secure Proxy: Upon receiving and validating theport-forwardrequest, thekube-apiserverplays a pivotal role. It does not forward traffic itself but acts as a secure, authenticated proxy. Thekube-apiserverestablishes a secure WebSocket connection to thekubeletagent running on the specific node where the target pod is scheduled. This connection is typically over HTTPS, ensuring encryption and mutual authentication between theapiserverandkubelet.Theapiserveressentially relays theport-forwardcommand to thekubelet. It's vital to understand that theapiserveritself doesn't inspect or modify the application-level data flowing through the tunnel; it merely facilitates the secure channel. This ensures privacy and integrity of your data. - The
kubeletand Container Runtime Interface (CRI): Thekubeletis the agent that runs on each worker node in your Kubernetes cluster. Its responsibilities include managing pods on its node, reporting node status, and executing commands within containers. When thekubeletreceives theport-forwardrequest from theapiserver, it performs the following actions:- Identifies the Target Pod: It locates the specific pod by its UID or name running on its node.
- Delegates to Container Runtime: The
kubeletthen delegates the actual port forwarding task to the container runtime (e.g., containerd, CRI-O, Docker if using legacy setup) that manages the containers within that pod. The container runtime, through its Container Runtime Interface (CRI), has the capability to establish network connections into a container's isolated network namespace. - Establishes Local Connection: The container runtime effectively binds to the
REMOTE_PORTwithin the pod's network namespace. This creates a local server endpoint within the pod that listens for connections coming from thekubelet. - TCP Stream Bridging: The
kubeletthen bridges the TCP stream between the WebSocket connection from theapiserverand the local connection it established to theREMOTE_PORTwithin the pod.
- The Bidirectional Data Tunnel: Once all these connections are established, a full, bidirectional TCP tunnel exists:
Local Application (on LOCAL_PORT)<-->kubectl client<-->kube-apiserver<-->kubelet<-->Container Runtime<-->Pod Application (on REMOTE_PORT)Data flowing from your local machine to the pod goes through this chain, and responses from the pod flow back through the same chain in reverse. This entire communication path is secured. Thekubectlclient andkube-apiservercommunicate over HTTPS, and theapiservertokubeletcommunication is also secured. The internalkubeletto pod communication is typically within the node's trusted network, leveraging the container runtime's capabilities.
Key Characteristics and Differences from SSH Tunneling:
- Kubernetes-Native Authentication/Authorization: Unlike
ssh -L, which relies on SSH keys and user accounts on the remote host,kubectl port-forwardleverages Kubernetes's robust RBAC system. This means that access is granular and auditable within the Kubernetes security model. - No Direct Node Access Required: You don't need direct SSH access to the Kubernetes worker nodes. All interactions are mediated through the
kube-apiserver, simplifying the operational overhead and reducing the attack surface. - TCP-Only:
kubectl port-forwardoperates at the TCP layer. It forwards raw TCP streams, making it protocol-agnostic for the application traffic itself. It doesn't interpret HTTP, WebSocket, or any other application-layer protocols. This allows it to be used for databases, message queues, custom APIs, and virtually any TCP-based service. - Ephemeral Nature: The tunnel exists only for the duration of the
kubectl port-forwardcommand. When the command is terminated, the tunnel is dismantled. This makes it ideal for temporary debugging and development without leaving persistent exposures. - No Public IP Exposure: Crucially,
port-forwarddoes not expose your pod or service to the public internet. The tunnel terminates on your local machine, keeping the cluster's internal network isolated and secure.
Understanding this underlying mechanism provides clarity on why kubectl port-forward is so effective and secure. It’s a well-engineered solution that leverages the existing Kubernetes control plane infrastructure to provide a powerful, on-demand debugging and development aid without compromising the cluster's integrity. It's a testament to Kubernetes's thoughtful design in empowering developers to interact with their distributed applications seamlessly.
Mastering Basic Usage: Practical Examples and Scenarios
Having delved into the theoretical underpinnings, let's transition to the practical application of kubectl port-forward. This section will provide clear, step-by-step examples demonstrating how to use the command in various common scenarios, along with explanations of the observed behavior and best practices for each.
For all these examples, let's assume we have a simple Nginx deployment running in our default namespace.
First, let's create a basic Nginx deployment and service:
# nginx-deployment.yaml
apiVersion: apps/v1
kind: Deployment
metadata:
  name: nginx-deployment
  labels:
    app: nginx
spec:
  replicas: 1
  selector:
    matchLabels:
      app: nginx
  template:
    metadata:
      labels:
        app: nginx
    spec:
      containers:
      - name: nginx
        image: nginx:latest
        ports:
        - containerPort: 80
# nginx-service.yaml
apiVersion: v1
kind: Service
metadata:
  name: nginx-service
spec:
  selector:
    app: nginx
  ports:
    - protocol: TCP
      port: 80
      targetPort: 80
  type: ClusterIP
Apply these to your cluster:
kubectl apply -f nginx-deployment.yaml
kubectl apply -f nginx-service.yaml
Wait a moment for the pod to be ready:
kubectl get pods -l app=nginx
You should see an output similar to:
NAME                               READY   STATUS    RESTARTS   AGE
nginx-deployment-xxxxxxxxxx-xxxxx   1/1     Running   0          60s
Now, let's explore port-forward's capabilities.
1. Forwarding to a Specific Pod
This is the most direct and granular way to use port-forward. You target a specific pod by its exact name. This is particularly useful when you have multiple replicas of a service and want to debug a particular instance, perhaps one that's exhibiting unusual behavior.
Let's get the exact name of our Nginx pod:
POD_NAME=$(kubectl get pods -l app=nginx -o jsonpath='{.items[0].metadata.name}')
echo $POD_NAME
(e.g., nginx-deployment-7bb9564c7-wz86c)
Now, forward port 8080 on your local machine to port 80 (where Nginx listens) on that specific pod:
kubectl port-forward $POD_NAME 8080:80
You will see output indicating the forwarding is active:
Forwarding from 127.0.0.1:8080 -> 80
Forwarding from [::1]:8080 -> 80
While this command is running, open a new terminal tab or window and try accessing Nginx locally:
curl http://localhost:8080
You should receive the default Nginx welcome page HTML. This demonstrates that traffic from localhost:8080 is now securely routed to port 80 inside your nginx-deployment pod.
Explanation of Local and Remote Ports: * 8080: This is the LOCAL_PORT. It's the port on your machine. You can choose any unused port here. It doesn't have to match the remote port. * 80: This is the REMOTE_PORT. It's the port inside the pod where the Nginx application is listening. This must match the port the application actually exposes. If Nginx were listening on port 8000 inside the container, you would use 8080:8000.
2. Forwarding to a Service (Recommended for most cases)
While forwarding to a specific pod is powerful for debugging, in many scenarios, you don't care about a specific pod instance; you just want to access any healthy pod backed by a particular service. Forwarding to a service abstracts away the individual pod names and provides a more resilient connection. If the original pod chosen by kubectl restarts, port-forward might attempt to reconnect to another healthy pod behind the service (though this behavior can vary slightly with kubectl versions and specific kubelet implementations, it generally aims for resilience).
kubectl port-forward service/nginx-service 8081:80
Notice we now specify service/nginx-service instead of a pod name. This command will forward port 8081 on your local machine to port 80 of the nginx-service. kubectl will automatically pick one of the pods associated with nginx-service to establish the tunnel.
Test it:
curl http://localhost:8081
You'll again get the Nginx welcome page. This method is generally preferred for accessing stable applications because it's less brittle to pod restarts or scaling events.
3. Forwarding to a Deployment or ReplicaSet
Similar to forwarding to a service, you can also target a deployment or replicaset directly. kubectl will then select a healthy pod from that deployment or replicaset to forward to.
kubectl port-forward deployment/nginx-deployment 8082:80
Test it:
curl http://localhost:8082
Again, the Nginx welcome page. This offers similar advantages to service-based forwarding in terms of abstraction.
4. Specifying Local and Remote Ports (and Letting kubectl Choose)
You don't always have to specify both local and remote ports.
- Specify only Remote Port,
kubectlchooses Local Port: If you only care about the remote port and wantkubectlto pick any available local port, you can do this:bash kubectl port-forward deployment/nginx-deployment :80kubectlwill output which local port it chose, e.g.:Forwarding from 127.0.0.1:40123 -> 80 Forwarding from [::1]:40123 -> 80You would then accesshttp://localhost:40123. This is useful if you don't care about a specific local port and just need any access.
Specify only Local Port, kubectl infers Remote Port: If your pod exposes only one port, or if you want to forward to the first exposed port, you can just specify the local port. Let's modify our Nginx deployment to explicitly name the port, which is good practice.```yaml
nginx-deployment-named-port.yaml
apiVersion: apps/v1 kind: Deployment metadata: name: nginx-deployment labels: app: nginx spec: replicas: 1 selector: matchLabels: app: nginx template: metadata: labels: app: nginx spec: containers: - name: nginx image: nginx:latest ports: - name: http containerPort: 80 `` Apply this:kubectl apply -f nginx-deployment-named-port.yaml`Now, you can forward by named port: bash kubectl port-forward deployment/nginx-deployment 8083:http Here, http refers to the named port 80 in the container specification.
5. Running in the Background (&, nohup)
kubectl port-forward runs as a foreground process, blocking your terminal. For continuous access during development or when you need to run multiple commands, you'll want to run it in the background.
Method 1: Using & (Unix/Linux/macOS)
kubectl port-forward deployment/nginx-deployment 8084:80 &
This will immediately return control to your terminal, and the port-forward process will run in the background. You'll see a process ID (PID) like [1] 12345. To bring it back to the foreground, use fg. To kill it, use kill %1 (where 1 is the job number) or kill 12345 (where 12345 is the PID).
Method 2: Using nohup (More robust for backgrounding)
nohup allows a command to run in the background even after you close the terminal session, preventing it from being killed by a hang-up signal.
nohup kubectl port-forward deployment/nginx-deployment 8085:80 > /dev/null 2>&1 &
nohup: Prevents the command from being terminated when the shell exits.> /dev/null 2>&1: Redirects both standard output and standard error to/dev/null, preventingnohup.outfiles from being created and keeping your terminal clean.&: Puts the command into the background.
To kill this process, you'll need to find its PID using ps aux | grep "kubectl port-forward" and then use kill <PID>.
6. Specifying Namespaces (-n)
While our examples used the default namespace, in real-world scenarios, applications are often deployed in dedicated namespaces (e.g., dev, staging, prod, monitoring). Always specify the namespace to avoid ambiguity and accidental connections to the wrong resources.
Let's imagine our Nginx is in a web-apps namespace:
kubectl create namespace web-apps
kubectl apply -f nginx-deployment.yaml -n web-apps
kubectl apply -f nginx-service.yaml -n web-apps
Now, to forward:
kubectl port-forward service/nginx-service 8086:80 -n web-apps
This ensures you are targeting the nginx-service specifically within the web-apps namespace.
These basic examples cover the most frequent use cases for kubectl port-forward. Mastering them provides a solid foundation for more advanced scenarios and effective troubleshooting, enabling seamless interaction with your Kubernetes-deployed applications from your local environment. The ability to quickly and securely access internal services, be it for debugging an API endpoint or testing a new feature, makes port-forward an indispensable tool in any Kubernetes developer's arsenal.
APIPark is a high-performance AI gateway that allows you to securely access the most comprehensive LLM APIs globally on the APIPark platform, including OpenAI, Anthropic, Mistral, Llama2, Google Gemini, and more.Try APIPark now! 👇👇👇
Advanced Techniques and Troubleshooting for kubectl port-forward
Beyond its fundamental usage, kubectl port-forward offers advanced capabilities that cater to complex debugging and development scenarios. Simultaneously, understanding common issues and their resolutions is paramount to maintaining a smooth workflow. This section delves into both, empowering you to leverage port-forward more effectively and troubleshoot problems swiftly.
Accessing Internal APIs and Microservices
One of the most potent applications of kubectl port-forward is for interacting with internal APIs, microservices, or backend components that are not exposed externally. Imagine a scenario where you have a complex microservices architecture in Kubernetes: a frontend, a user service, a product catalog service, and an order processing service, all communicating internally via APIs. If you're developing a new feature on your local machine that relies on the user-service's API, you can use port-forward to establish a direct connection.
Let's say your user-service deployment has a container listening on port 3000 for its internal API.
# Assuming 'user-service' is a deployment or service in the 'my-app' namespace
kubectl port-forward deployment/user-service 8000:3000 -n my-app
Now, from your local application, instead of trying to reach a cluster-internal user-service.my-app.svc.cluster.local:3000 (which isn't directly routable), you can simply configure your local app to call http://localhost:8000. All your local API requests to localhost:8000 will be tunneled to the user-service pod's internal API on port 3000. This allows for robust local development against a live cluster backend without deploying your local changes or modifying cluster ingress rules.
This capability is particularly powerful when dealing with complex API ecosystems. While kubectl port-forward helps you during development and testing to ensure your individual services and their APIs are functioning correctly, the larger management and orchestration of these APIs, especially in a distributed environment or when integrating AI models, requires a more comprehensive platform. This is where tools like ApiPark become invaluable. Once your individual APIs are tested locally via port-forward, APIPark can assist in their lifecycle management, from design and publication to security, monitoring, and even unifying invocation formats for a vast array of AI and REST services. It provides the structured environment needed for these APIs to thrive beyond their initial development phase.
Debugging Applications in a Pod
kubectl port-forward is an indispensable tool for remote debugging. Many programming languages and IDEs (like IntelliJ IDEA for Java, VS Code for Node.js/Python) support remote debugging protocols where the debugger client connects to a debugging server running within the application process.
For instance, if you have a Java application running in a pod with the JVM configured for remote debugging on port 5005, you can forward that port:
kubectl port-forward my-java-app-pod 5005:5005
Then, configure your IDE's remote debugger to connect to localhost:5005. Your IDE will establish a debugging session, allowing you to set breakpoints, inspect variables, and step through code as if the application were running locally. This eliminates the need to expose debugging ports via NodePort or LoadBalancer, which can be significant security risks.
Accessing Databases or Message Queues Securely
Accessing backend data stores like PostgreSQL, MySQL, Redis, or message queues like Kafka or RabbitMQ, directly from your local machine is often a requirement during development or for ad-hoc queries. These services are typically deployed as ClusterIP services within Kubernetes and are not meant for external access.
If you have a PostgreSQL database running in a pod, listening on port 5432:
kubectl port-forward deployment/my-postgresql 5432:5432
Now, you can use your local database client (e.g., DBeaver, pgAdmin) to connect to localhost:5432 with the appropriate credentials, effectively tunneling your connection to the database instance inside your cluster. This provides a secure and temporary way to interact with your data without exposing sensitive database ports to the internet.
Troubleshooting Common Issues
Despite its utility, kubectl port-forward can sometimes be temperamental. Here are common issues and their resolutions:
- Port Conflicts: "Error: listen tcp 127.0.0.1:: bind: address already in use"
- Cause: The
LOCAL_PORTyou specified is already in use by another application on your machine. - Resolution: Choose a different
LOCAL_PORT. You can check which process is using a port withlsof -i :<PORT>(macOS/Linux) ornetstat -ano | findstr :<PORT>(Windows). Alternatively, letkubectlpick a random local port by omittingLOCAL_PORT(e.g.,kubectl port-forward pod/my-pod :80).
- Cause: The
- Pod Does Not Exist: "Error: pod/ does not exist"
- Cause: The pod name is incorrect, or the pod is in a different namespace, or it hasn't started yet.
- Resolution:
- Verify the pod name with
kubectl get pods. - Ensure you're in the correct namespace or specify it with
-n <NAMESPACE>. - Check pod status with
kubectl get pod <POD_NAME> -n <NAMESPACE>. If it's notRunningorContainerCreating, wait or investigate pod startup issues.
- Verify the pod name with
- Connection Dropping/Timing Out
- Cause:
- The pod might have restarted or crashed.
- Network issues between your machine and the cluster.
- The
port-forwardprocess itself might have been terminated. - The application inside the pod stopped listening on the
REMOTE_PORT.
- Resolution:
- Check pod status:
kubectl get pod <POD_NAME> -n <NAMESPACE>. - Check pod logs:
kubectl logs <POD_NAME> -n <NAMESPACE>. - Restart the
kubectl port-forwardcommand. - Ensure the application inside the pod is indeed listening on the
REMOTE_PORT. You can usekubectl exec <POD_NAME> -n <NAMESPACE> -- netstat -tulnp(orss -tulnp) to verify inside the container.
- Check pod status:
- Cause:
- RBAC Issues: "Error from server (Forbidden)"
- Cause: Your user account or the service account used by
kubectldoes not have the necessary permissions to performport-forwardon the specified resource. - Resolution: Contact your cluster administrator to grant you the
port-forwardpermission (e.g., via aRoleandRoleBindingthat includesverbs: ["create"]onresourceNamesof pods andsubresource: ["portforward"]).
- Cause: Your user account or the service account used by
- Target Port Not Exposed/Listening:
kubeleterror or connection refused after forwarding- Cause: The application inside the pod is not actually listening on the
REMOTE_PORTyou specified, or a firewall inside the container is blocking it. - Resolution:
- Double-check the application's configuration within the container to ensure it's listening on the correct port (
REMOTE_PORT). - Use
kubectl execto runnetstat -tulnporss -tulnpinside the pod to see active listening ports.
- Double-check the application's configuration within the container to ensure it's listening on the correct port (
- Cause: The application inside the pod is not actually listening on the
Using the --address Flag for Specific Network Interfaces
By default, kubectl port-forward binds the LOCAL_PORT to 127.0.0.1 (localhost), meaning only applications on your local machine can access it. However, in some development environments (e.g., if you're running kubectl in a VM and want to access the forwarded port from your host machine, or from another device on your local network), you might need to bind to a different IP address or 0.0.0.0 (all interfaces).
kubectl port-forward deployment/nginx-deployment 8080:80 --address 0.0.0.0
This command will bind LOCAL_PORT 8080 to all available network interfaces on your local machine. You can then access http://<YOUR_MACHINE_IP>:8080 from other devices on your local network. Be cautious with 0.0.0.0, as it makes the forwarded port accessible from outside your immediate machine, potentially exposing it to other devices on your local network segment.
Mastering these advanced techniques and troubleshooting strategies transforms kubectl port-forward from a simple command into a powerful diagnostic and development instrument. It empowers developers to navigate the complexities of Kubernetes networking with confidence, providing direct, secure access to internal services for a myriad of development and debugging needs.
Beyond port-forward: When to Use Alternatives
While kubectl port-forward is an exceptionally versatile and indispensable tool for local development and debugging, it's essential to understand its limitations and when other Kubernetes service exposure mechanisms are more appropriate. port-forward is inherently temporary and designed for individual developer access. For persistent, external, or production-grade access, Kubernetes offers more robust and scalable solutions.
Here's a comparison of kubectl port-forward with other common service exposure methods:
| Feature/Method | kubectl port-forward |
Service Type: NodePort |
Service Type: LoadBalancer |
Ingress (with Ingress Controller) |
kubectl proxy |
|---|---|---|---|---|---|
| Purpose | Local dev/debug access to a single pod/service | Expose service on a specific port of each node's IP | Expose service with a dedicated external IP/DNS (Cloud Provider) | HTTP/HTTPS routing based on host/path, centralized | Access Kubernetes API server directly |
| Access Scope | Local machine only (or local network with --address 0.0.0.0) |
Accessible from outside the cluster via NodeIP:NodePort |
Accessible from the internet via LoadBalancerIP:ServicePort |
Accessible from the internet via IngressHost (HTTP/HTTPS) |
Local machine only, via localhost:PORT |
| Persistence | Temporary (lasts as long as command runs) | Persistent | Persistent | Persistent | Temporary (lasts as long as command runs) |
| Security | Secure, authenticated tunnel via API server, least exposure | Requires firewall rules, exposes to cluster network | Cloud provider security, exposes to internet | Ingress controller security, exposes to internet, often with TLS | Secure, authenticated tunnel via API server, least exposure |
| Complexity | Low | Low-Medium (requires node IP knowledge) | Medium (cloud provider integration) | High (requires Ingress Controller setup and rules) | Low |
| Authentication | Kubernetes RBAC | None (relies on network security) | None (relies on network security) | Can integrate with external auth providers | Kubernetes RBAC |
| Load Balancing | None (targets a single pod or service-selected pod) | Basic (clients must balance across NodeIPs) | Cloud provider LB (robust, L4/L7) | Ingress Controller (advanced L7 features) | None |
| Protocol Support | TCP (any TCP-based protocol) | TCP, UDP | TCP, UDP | HTTP/HTTPS (L7 specific) | HTTP/HTTPS (for Kubernetes API) |
| Primary Use Cases | Developer debugging, local frontend testing against backend APIs, database access | Exposing custom apps, services in smaller clusters, non-HTTP services | Exposing public-facing applications, typically web services | Complex web applications, API gateways, microservices with URL routing | Debugging kubectl calls, custom dashboards |
Now, let's elaborate on each alternative and when to consider them.
1. Service Type: NodePort
A NodePort service exposes a specific port on every node in your cluster. Kubernetes then automatically routes traffic from that NodePort to the pods backing your service.
- When to use:
NodePortis suitable for development environments or smaller clusters where you need to expose a service to an external network (e.g., your local network or a specific set of users) but don't require the advanced features or a dedicated IP address provided by aLoadBalancer. It's often used as a building block for other ingress methods. For example, if you have a local application needing to continuously access a specific API and you don't want to manageport-forwardsessions, aNodePortmight be acceptable, provided the exposure is limited and secure. - Limitations:
- Port Range:
NodePorts are restricted to a specific port range (default: 30000-32767). - Node IP Dependency: You need to know the IP address of one of your cluster nodes to access the service. If node IPs change, your access breaks.
- Limited Load Balancing: External clients need to either hit a single node (which becomes a single point of failure) or implement their own load balancing across multiple node IPs.
- Security Concerns: Exposes services on all nodes, potentially wider than desired.
- Port Range:
2. Service Type: LoadBalancer
A LoadBalancer service type is typically used in cloud environments (AWS, GCP, Azure, etc.). When you create a LoadBalancer service, your cloud provider provisions an external load balancer with a dedicated, publicly routable IP address. This load balancer then directs traffic to your service's pods within the cluster.
- When to use: This is the standard way to expose public-facing applications and APIs in a production environment. It provides a stable IP address, robust load balancing, and often integrates with other cloud provider features like DNS management and DDoS protection. If your application's
apineeds to be consistently available to external consumers, aLoadBalanceris generally the way to go. - Limitations:
- Cost: Cloud provider load balancers incur costs.
- Cloud-Specific: Requires a cloud provider that supports
LoadBalancerservices. - Limited L7 Features: Primarily a Layer 4 (TCP/UDP) load balancer; for advanced HTTP routing,
Ingressis often preferred.
3. Ingress (with Ingress Controller)
Ingress is not a service type but rather a collection of rules for external access to services within the cluster, specifically for HTTP and HTTPS traffic. An Ingress Controller (like Nginx Ingress, Traefik, GKE Ingress) is a component that watches for Ingress resources and acts upon them, usually by configuring an external reverse proxy or load balancer.
- When to use:
Ingressis the most powerful and flexible option for exposing HTTP/HTTPS applications and APIs in a production environment. It allows for host-based routing (app.example.com), path-based routing (example.com/api,example.com/frontend), TLS termination, and often integrates with authentication and authorization mechanisms. For managing a suite of APIs with different routes and domains,Ingressis superior. - Limitations:
- Complexity: Requires deploying and managing an
Ingress Controller. - HTTP/HTTPS Only: Primarily designed for Layer 7 (HTTP/HTTPS) traffic. Not suitable for raw TCP/UDP services (though some controllers offer extensions).
- No Direct IP:
Ingressitself doesn't provide an IP address; it relies on an underlyingService(oftenLoadBalancerorNodePort) to expose theIngress Controlleritself.
- Complexity: Requires deploying and managing an
4. kubectl proxy
kubectl proxy creates a local proxy server that allows you to directly access the Kubernetes API server. It exposes the Kubernetes API at localhost:<PORT>, enabling you to make authenticated requests to any resource within the cluster via its RESTful endpoint.
- When to use:
kubectl proxyis specifically for interacting with the Kubernetes API itself, not your application's API or services. It's useful for developing custom dashboards, scripts, or tools that need to query or manipulate Kubernetes resources. It's also often used by UI tools like the Kubernetes Dashboard. - Limitations:
- Not for Application Services: Cannot be used to access your own application's services or their internal
apiendpoints. - Foreground Process: Like
port-forward, it runs in the foreground.
- Not for Application Services: Cannot be used to access your own application's services or their internal
5. VPNs and Direct Network Access
In some highly secure or specialized enterprise environments, direct network access to Kubernetes worker nodes might be provided via a Virtual Private Network (VPN). Once connected to the VPN, your local machine might be on the same network segment as the cluster, allowing direct routing to Pod IPs or ClusterIPs.
- When to use: When strict network isolation and deep integration with enterprise network infrastructure are paramount. This allows complete network transparency, making all internal cluster IP addresses directly routable from your local machine, mimicking being inside the cluster network.
- Limitations:
- Complex Setup: Requires significant network engineering and VPN infrastructure.
- Operational Overhead: Managing VPN clients, access, and security policies.
- Less Granular: While providing broad access, it lacks the specific, temporary focus of
port-forwardfor individual debugging tasks.
In summary, kubectl port-forward excels for highly focused, temporary, and secure local access to individual services or pods during development and debugging. It’s ideal when you need to quickly inspect, test, or attach a debugger to an internal api or backend service without affecting the cluster's external exposure. For anything that needs persistent, external, or production-grade access, or complex HTTP routing, NodePort, LoadBalancer, and Ingress are the appropriate tools, each serving distinct purposes within the broader Kubernetes networking landscape. Choosing the right tool depends entirely on the specific requirements for access scope, persistence, security, and traffic management.
Best Practices for kubectl port-forward
While kubectl port-forward is a powerful tool, using it effectively and securely requires adherence to certain best practices. These guidelines ensure stability, prevent conflicts, and maintain a secure development posture within your Kubernetes environment.
1. Always Specify Target with Precision
When initiating a port-forward connection, be as specific as possible about your target.
- Specify Pod Names for Debugging: If you're debugging a specific pod instance (e.g., one that's crashing or exhibiting unusual behavior), use its exact pod name. This ensures you're connecting to the intended instance, especially in deployments with multiple replicas.
bash kubectl port-forward my-app-pod-xyz-123abc 8080:80 - Specify Services for General Access: For general development or when you need to access any healthy instance of a service, always use the
service/<SERVICE_NAME>syntax. This makes yourport-forwardcommand more resilient to pod restarts or scale-downs, askubectlwill attempt to re-establish the connection to another available pod behind the service.bash kubectl port-forward service/my-app-service 8080:80 - Always Specify Namespace (
-n): Omitting the namespace can lead to unintended connections or errors if resources with the same name exist in different namespaces. Explicitly stating-n <NAMESPACE>removes ambiguity and enhances clarity.
2. Manage Local Ports Prudently
- Check for Conflicts: Before starting a
port-forward, quickly check if the chosenLOCAL_PORTis already in use on your machine. Tools likelsof -i :<PORT>(Linux/macOS) ornetstat -ano | findstr :<PORT>(Windows) are invaluable for this. - Use Distinct Ports: If you're forwarding multiple services simultaneously, ensure each uses a unique
LOCAL_PORT. Overlapping ports will cause theport-forwardcommand to fail. - Let
kubectlChoose: If the specificLOCAL_PORTdoesn't matter to your workflow, allowkubectlto pick an available one by specifying:REMOTE_PORT. This reduces the likelihood of conflicts.
3. Handle Background Processes Gracefully
When running port-forward in the background, ensure you have a reliable way to manage and terminate these processes.
- Use
nohupfor Persistence: For long-running backgroundport-forwardsessions that should survive terminal closures,nohupcombined with&is a robust choice:bash nohup kubectl port-forward service/my-backend 8000:80 > /tmp/backend-pf.log 2>&1 &Remember to redirect output (> /tmp/backend-pf.log) to avoid fillingnohup.out. - Keep Track of PIDs: When running in the background, note the process ID (PID) or job number. Use
ps aux | grep "kubectl port-forward"to find the PID later for termination (kill <PID>). - Script for Convenience: For frequently used
port-forwardsetups, encapsulate the commands in simple shell scripts (start-backend-pf.sh,stop-backend-pf.sh) to automate starting and stopping.
4. Understand Security Implications
While kubectl port-forward is secure in terms of tunnel encryption and authentication via the Kubernetes API, it still grants direct access.
- RBAC Permissions: Ensure that the user or service account performing
port-forwardhas only the necessary RBAC permissions. Granting broadport-forwardaccess to all pods in all namespaces is a security risk. Limit it to specific namespaces or pods where necessary. --address 0.0.0.0Caution: Using--address 0.0.0.0makes the forwarded port accessible from any device on your local network. Only use this when explicitly required (e.g., debugging from a different machine on your local LAN) and understand the potential exposure. Avoid it in shared or untrusted network environments.- Ephemeral Access: Remember that
port-forwardis temporary. Do not rely on it for persistent production access or as a substitute for proper service exposure mechanisms likeLoadBalancerorIngress.
5. Monitor Connections
- Check
port-forwardOutput: Theport-forwardcommand outputs messages indicating that it's "Forwarding from..." and will display errors if the connection breaks. Keep an eye on the terminal where it's running (if in foreground) or check its redirected log file (if usingnohup). - Verify Application Connectivity: After establishing a forward, always verify that your local application or client can indeed connect to the forwarded port (e.g.,
curl localhost:8080, connect with your database client). - Pod Stability: If the target pod restarts or scales down, your
port-forwardconnection might break. If usingservice/as a target,kubectlmight attempt to reconnect, but it's not guaranteed. Always check the target pod's health if experiencing connection issues.
By integrating these best practices into your workflow, you can maximize the efficiency and security benefits of kubectl port-forward, making it an even more powerful ally in your Kubernetes development and debugging endeavors. It transforms a potentially complex task of interacting with internal cluster services into a straightforward and reliable experience, freeing you to focus on developing and refining your applications, including their integral APIs.
The APIPark Connection: From Local Debugging to Global API Management
We've explored how kubectl port-forward is an indispensable tool for bridging the local development environment with the Kubernetes cluster, enabling developers to interact directly with internal services, debug applications, and test API endpoints without exposing them externally. This local, direct access is crucial during the initial stages of development and iterative testing of individual microservices and their exposed APIs. You can thoroughly test your backend logic, verify API contracts, and ensure your services respond as expected, all while running your local client application against a remote Kubernetes instance of your api.
However, the lifecycle of an API extends far beyond local development and debugging. Once an API is stable and ready to be consumed by other internal teams, external partners, or even directly by end-users, it transitions from a locally tested component to a managed, integrated, and governed asset. This is where kubectl port-forward reaches its limit, and a robust API management platform becomes essential.
This is precisely the point where a platform like ApiPark seamlessly integrates with the developer's journey. While kubectl port-forward helps you ensure that your individual APIs and services are functioning correctly in their isolated Kubernetes environment, APIPark steps in to manage these APIs at scale, across their entire lifecycle.
ApiPark - Open Source AI Gateway & API Management Platform
ApiPark is an all-in-one AI gateway and API developer portal, open-sourced under the Apache 2.0 license. It's designed to help developers and enterprises manage, integrate, and deploy both AI and traditional REST services with ease.
Consider the journey: you use kubectl port-forward to meticulously test your new user-authentication API running in a pod in your dev cluster. You confirm all endpoints are responding correctly and securely. Now, how do you make this API discoverable, secure, and manageable for other teams? How do you apply traffic policies, monitor performance, and enforce access controls? How do you ensure its reliability and scalability?
APIPark provides the answers. It takes your battle-tested APIs, which you've fine-tuned with the help of tools like port-forward, and offers:
- End-to-End API Lifecycle Management: From design and publication to invocation and decommission, APIPark helps you regulate API management processes, manage traffic forwarding, load balancing, and versioning of published APIs. This goes beyond the temporary tunnel of
port-forwardto provide persistent, managed access. - API Service Sharing within Teams: Once an API is stable, APIPark allows for its centralized display, making it easy for different departments and teams to find and use the required services. This fosters collaboration and reuse, preventing duplicated efforts.
- API Resource Access Requires Approval & Independent Permissions: APIPark ensures that access to your APIs is controlled and secure. Callers must subscribe and await approval, preventing unauthorized calls. It also enables the creation of multiple teams (tenants), each with independent applications, data, user configurations, and security policies.
- Performance and Monitoring: While
port-forwardhelps you see local issues, APIPark provides comprehensive logging for every API call and powerful data analysis to track long-term trends and performance changes, ensuring system stability and data security at scale.
In essence, kubectl port-forward is your indispensable microscope for examining and refining the intricate workings of your APIs and services within Kubernetes during development. APIPark then becomes the robust framework that takes these refined components and elevates them into a globally manageable, secure, and scalable API ecosystem. It's the logical next step for any organization moving from isolated development to comprehensive API governance and consumption, especially in an era increasingly leveraging diverse AI models and sophisticated microservice architectures.
Conclusion
The journey through the intricacies of kubectl port-forward has illuminated its profound importance in the daily workflow of any Kubernetes developer. From navigating the inherent complexities of Kubernetes's isolated networking model to establishing secure, temporary tunnels to individual pods and services, port-forward proves to be an indispensable bridge. It empowers developers to seamlessly connect their local development tools – be it a browser, a local application, an IDE debugger, or a database client – directly to remote services running within the cluster, treating them as if they were hosted on localhost.
We've explored its core mechanics, understanding how the kubectl client, kube-apiserver, and kubelet collaborate to forge this secure, authenticated TCP tunnel. The practical examples demonstrated its versatility, from forwarding to specific pods and services to managing background processes and addressing common issues like port conflicts and connection drops. Furthermore, we critically examined its place within the broader Kubernetes networking ecosystem, contrasting it with persistent exposure mechanisms like NodePort, LoadBalancer, and Ingress, clearly delineating when each tool is most appropriate.
The true mastery of kubectl port-forward lies not just in knowing its commands, but in comprehending its underlying principles, its security implications, and its synergistic relationship with other development and management tools. It's the essential utility that enables efficient iteration and precise debugging, allowing developers to focus on the logic and functionality of their applications and their integral APIs without getting entangled in network configurations. And as we saw, once those APIs are polished and ready, platforms like ApiPark then step in to manage their entire lifecycle, ensuring they are discoverable, secure, and performant at scale.
In the ever-evolving landscape of cloud-native development, tools that simplify complexity while preserving security are invaluable. kubectl port-forward stands as a testament to this principle, an unsung hero that, when mastered, dramatically enhances productivity and fosters a more seamless, integrated development experience with Kubernetes. Embrace it, understand it, and let it empower you to unlock the full potential of your cloud-native applications.
Frequently Asked Questions (FAQ)
1. What is the primary difference between kubectl port-forward and kubectl proxy?
kubectl port-forward creates a direct, secure TCP tunnel from your local machine to a specific port on a pod or service within the Kubernetes cluster, allowing you to access your application's services. For example, you can use it to connect to a web server, database, or a custom API running inside a pod. kubectl proxy, on the other hand, creates a local proxy server that provides authenticated access to the Kubernetes API server itself. Its purpose is to allow you to make requests against the Kubernetes control plane (e.g., list pods, get service definitions) from your local machine, often used for custom dashboards or scripts that interact with Kubernetes resources, not your deployed applications.
2. Can I use kubectl port-forward to access a service from outside my machine (e.g., from another computer on my network)?
By default, no. kubectl port-forward binds the local port to 127.0.0.1 (localhost), meaning only processes on your local machine can connect to it. However, you can make the forwarded port accessible from other devices on your local network by using the --address 0.0.0.0 flag. For example: kubectl port-forward service/my-service 8080:80 --address 0.0.0.0. Be cautious with this, as it increases exposure and should only be used in trusted network environments. For persistent external access, consider Kubernetes Service types like NodePort or LoadBalancer, or Ingress.
3. Is kubectl port-forward secure for production access?
No, kubectl port-forward is designed for temporary development and debugging access, not for persistent production use. While the tunnel itself is secure (encrypted and authenticated via the Kubernetes API server's RBAC), it's not designed for high availability, robust load balancing, or scalable external access. Relying on a developer's local machine for production traffic is a single point of failure and does not integrate with standard production-grade monitoring, logging, and security practices. For production, use Service types like LoadBalancer or Ingress with appropriate security measures.
4. How do I make kubectl port-forward run in the background reliably?
To run kubectl port-forward in the background reliably, especially if you need it to persist even after closing your terminal, use nohup combined with the & operator: nohup kubectl port-forward service/my-service 8080:80 > /dev/null 2>&1 & This command detaches the process from your terminal, redirects its output to /dev/null (or a log file of your choice), and runs it in the background. To terminate it later, you'll need to find its process ID (PID) using ps aux | grep "kubectl port-forward" and then use kill <PID>.
5. What happens if my pod restarts while port-forward is active?
If you are forwarding to a specific pod name (kubectl port-forward <POD_NAME> ...), and that pod restarts or is deleted, your port-forward connection will break and eventually terminate with an error (e.g., "Error: lost connection to pod"). You would need to restart the port-forward command, likely with the new pod name. However, if you are forwarding to a service, deployment, or replicaset (kubectl port-forward service/my-service ...), kubectl is often more resilient. It will attempt to detect the pod restart and re-establish the connection to another healthy pod backed by that service/deployment, though this behavior can vary and is not guaranteed to be instantaneous or flawless. For stability, always monitor your port-forward connections and the health of your target pods.
🚀You can securely and efficiently call the OpenAI API on APIPark in just two steps:
Step 1: Deploy the APIPark AI gateway in 5 minutes.
APIPark is developed based on Golang, offering strong product performance and low development and maintenance costs. You can deploy APIPark with a single command line.
curl -sSO https://download.apipark.com/install/quick-start.sh; bash quick-start.sh

In my experience, you can see the successful deployment interface within 5 to 10 minutes. Then, you can log in to APIPark using your account.

Step 2: Call the OpenAI API.