Master kubectl port-forward: Local Access for Kubernetes


Kubernetes has undeniably revolutionized the way modern applications are deployed, managed, and scaled. Its robust orchestration capabilities, declarative configuration, and self-healing mechanisms have made it the de facto standard for containerized workloads. However, while Kubernetes excels at managing applications within its distributed cluster environment, interacting with these applications during development, debugging, or even simple operational checks from a local machine can sometimes feel like trying to reach across a vast ocean. This is where the deceptively simple yet profoundly powerful kubectl port-forward command steps in, acting as a crucial bridge that connects your local development environment directly to services running deep within your Kubernetes cluster.
For developers and operations teams alike, the ability to peer into the inner workings of an application or a specific microservice without exposing it to the entire network is invaluable. Imagine you're building a new feature that relies on a backend service deployed in Kubernetes, or perhaps you're troubleshooting a subtle bug that only manifests in the cluster environment. You need to connect your local debugger, your browser, or a custom script to that specific service instance. While Kubernetes offers various methods for exposing services externally, such as NodePorts, LoadBalancers, and Ingress controllers, these solutions are often designed for persistent, production-grade access and can introduce unnecessary complexity or security risks for temporary, local development needs. kubectl port-forward elegantly bypasses these complexities, creating a secure, direct, and temporary tunnel that makes an internal cluster service appear as if it's running directly on your local machine. This article will delve deep into the intricacies of kubectl port-forward, exploring its mechanics, diverse use cases, best practices, security considerations, and how it seamlessly integrates into modern Kubernetes development workflows, ultimately empowering you to master local access to your cloud-native applications.
The Kubernetes Ecosystem and the Conundrum of Local Development Access
To fully appreciate the utility of kubectl port-forward, it's essential to understand the architectural landscape of Kubernetes and the inherent challenges it presents for local development and debugging. Kubernetes operates on a distributed model, where applications are packaged into containers and scheduled onto a cluster of nodes. These nodes, typically virtual or physical machines, form the compute foundation, while the Kubernetes control plane manages the orchestration, scheduling, and networking of these containers. Services within a Kubernetes cluster are designed to be isolated and communicate with each other primarily through an internal cluster network, often using DNS names resolved by the cluster's DNS service.
When you deploy an application to Kubernetes, it typically consists of one or more Pods, which are the smallest deployable units, each encapsulating one or more containers. These Pods are ephemeral; they can be created, destroyed, and rescheduled dynamically across different nodes. To provide a stable endpoint for other services within the cluster, Kubernetes introduces the concept of a Service. A Service is an abstract way to expose an application running on a set of Pods as a network service. It provides a stable IP address and DNS name, acting as an internal load balancer that distributes traffic to healthy Pods.
This internal-first design, while excellent for security and scalability within the cluster, creates a natural barrier when developers or operations personnel on their local machines need to interact directly with an individual Pod or a specific Service. Consider a scenario where a developer is working on a new frontend application locally and needs to connect it to a backend microservice running inside Kubernetes. Or perhaps a SRE is debugging a persistent issue with a database Pod and needs to run specific commands against it from their workstation. Directly accessing these internal cluster resources from an external machine is not straightforward. The Pods have internal cluster IPs, which are not routable from outside the cluster, and even if they were, their ephemeral nature means these IPs can change.
Traditional methods for external access like NodePort expose a service on a static port across all nodes, LoadBalancer provisions an external load balancer (if supported by the cloud provider), and Ingress provides HTTP/HTTPS routing to services based on hostnames or paths. While these are vital for production exposure, they often come with overhead: provisioning external resources, managing DNS, configuring security groups, and potentially exposing services more broadly than desired for temporary development or debugging. For instance, creating an Ingress resource and waiting for it to propagate, just to test a single API endpoint for a few minutes, is inefficient. Furthermore, these methods typically expose services at the Service level, not necessarily allowing direct, fine-grained access to a specific Pod instance, which might be crucial for debugging. This is precisely the gap that kubectl port-forward fills, offering a lightweight, secure, and on-demand solution for local access without the complexities of full-blown external exposure mechanisms.
Understanding kubectl port-forward: The Secure Tunnel Explained
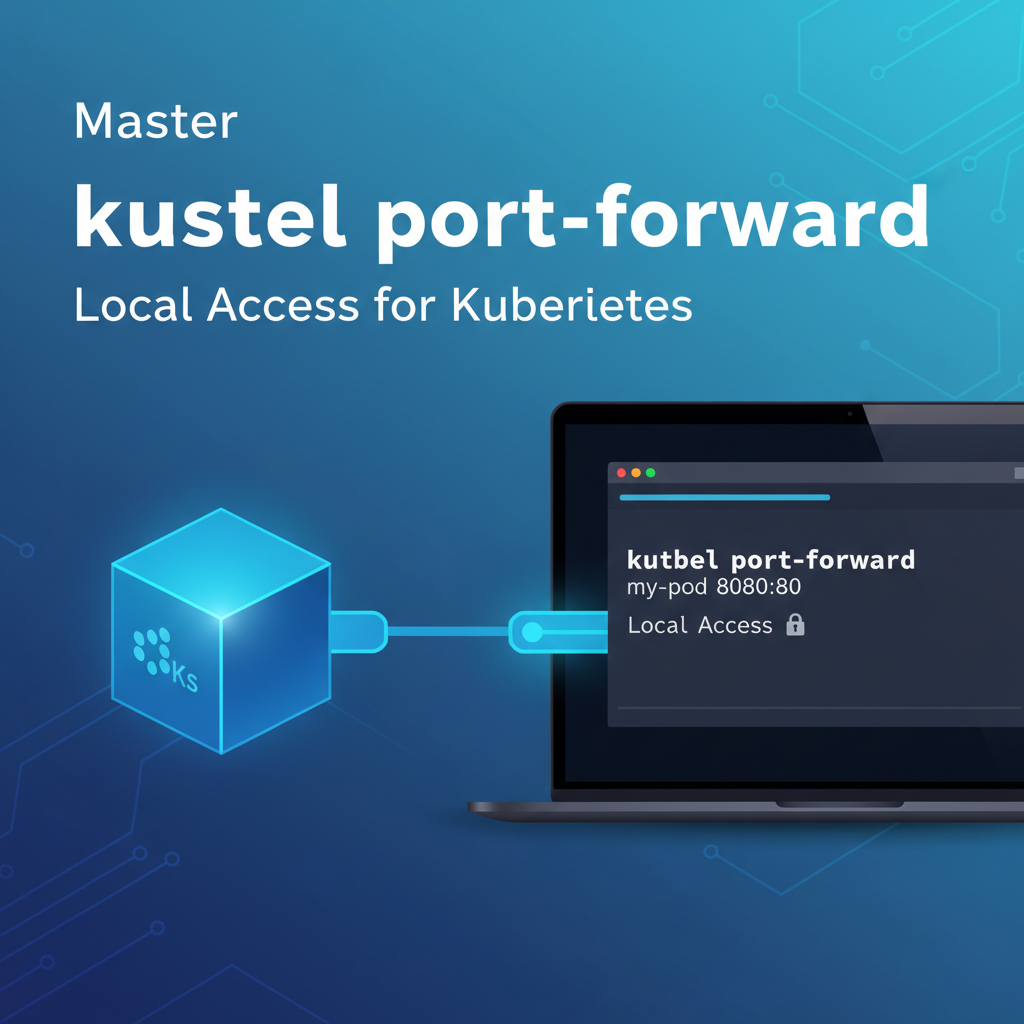
At its core, kubectl port-forward is a command-line utility that establishes a direct, secure network tunnel between a local port on your machine and a port on a Pod, Deployment, or Service within your Kubernetes cluster. It effectively makes a remote service or Pod accessible as if it were running on localhost. This mechanism is analogous to SSH port forwarding but specifically tailored for the Kubernetes environment, leveraging the Kubernetes API server as the conduit.
When you execute kubectl port-forward, several steps occur behind the scenes to create this seamless connection:
- Authentication and Authorization: Your
kubectlclient first authenticates with the Kubernetes API server using your configured credentials (e.g.,kubeconfig). The API server then performs an authorization check to ensure that your user account has the necessary permissions (specifically,pods/portforwardverb on the target resource) to establish a port-forward to the specified Pod, Deployment, or Service. This security layer is crucial, as it prevents unauthorized users from gaining direct access to internal cluster resources. - API Server as a Proxy: Once authorized,
kubectlsends a request to the Kubernetes API server to initiate the port-forwarding session. The API server then acts as an intelligent proxy. It doesn't directly handle the data forwarding itself but rather establishes a stream to the kubelet agent running on the node where the target Pod resides. - Kubelet's Role: The kubelet, the agent that runs on each node and manages Pods, receives the request from the API server. It then opens a connection to the specified container port within the target Pod. The kubelet's responsibility is to bridge the API server's connection to the actual Pod's network stack.
- Data Flow: With the tunnel established, any traffic sent to the specified local port on your machine is securely forwarded through the
kubectlclient, up to the Kubernetes API server, then down to the kubelet on the target node, and finally into the specified port of the container within the Pod. Responses follow the reverse path. This entire process happens over a secure, encrypted connection (typically HTTPS to the API server).
This multi-hop architecture ensures that kubectl port-forward is both secure and robust. It doesn't require direct network routes from your local machine to the Pods or nodes; all communication is mediated by the Kubernetes API server, which acts as a trusted intermediary. This makes it particularly useful in environments where direct node access is restricted or where network topology is complex. The temporary nature of the tunnel is also a key feature: as soon as you terminate the kubectl port-forward process, the connection is severed, ensuring that no lingering access points remain open. This on-demand, secure, and isolated access method significantly enhances developer agility and troubleshooting capabilities within the dynamic Kubernetes environment.
Basic Usage of kubectl port-forward: Your First Steps to Local Access
The kubectl port-forward command is remarkably straightforward for its primary use case: forwarding a local port to a specific Pod. This section will guide you through the fundamental syntax, essential options, and practical examples to get you started.
The most common syntax for kubectl port-forward is:
kubectl port-forward <POD_NAME> <LOCAL_PORT>:<REMOTE_PORT> -n <NAMESPACE>
Let's break down these components:
<POD_NAME>: This is the exact name of the Pod you wish to connect to. Pod names are unique within a namespace. You can find Pod names usingkubectl get pods.<LOCAL_PORT>: This is the port on your local machine that you want to use to access the service. Any available port on your local machine will work.<REMOTE_PORT>: This is the port inside the container within the Pod that the service is listening on. If you don't specify this,kubectlwill default to the same value as<LOCAL_PORT>, but it's good practice to be explicit.-n <NAMESPACE>: This flag specifies the Kubernetes namespace where the Pod resides. If you omit this,kubectlwill use your currently configured namespace (oftendefault). It's always a good idea to be explicit with namespaces to avoid errors.
Example 1: Forwarding to a Single Pod
Let's imagine you have a web application Pod named my-web-app-5cd5c6f67d-abcdef in the default namespace, and it's serving HTTP traffic on port 8080 inside its container. You want to access it from your local browser on port 8000.
First, ensure your Pod is running:
kubectl get pods
# Example output:
# NAME                          READY   STATUS    RESTARTS   AGE
# my-web-app-5cd5c6f67d-abcdef   1/1     Running   0          5m
Now, establish the port-forward:
kubectl port-forward my-web-app-5cd5c6f67d-abcdef 8000:8080
Once this command is executed, it will block your terminal and output messages indicating that the forwarding is active:
Forwarding from 127.0.0.1:8000 -> 8080
Forwarding from [::1]:8000 -> 8080
You can now open your web browser and navigate to http://localhost:8000. Your browser's request will be routed through the tunnel to port 8080 of the my-web-app Pod. To terminate the port-forward, simply press Ctrl+C in the terminal where the command is running.
Example 2: Omitting the Remote Port (Implicit Mapping)
If your local port and the remote port are the same, you can often omit the remote port specification. For instance, if the my-web-app Pod is listening on port 8080 and you want to access it on local port 8080:
kubectl port-forward my-web-app-5cd5c6f67d-abcdef 8080
# This is equivalent to: kubectl port-forward my-web-app-5cd5c6f67d-abcdef 8080:8080
While convenient, explicitly stating both ports (LOCAL_PORT:REMOTE_PORT) is generally recommended for clarity and to avoid confusion, especially when debugging.
Example 3: Specifying the Namespace
If your Pod is in a different namespace, for example, development, you must specify it using the -n flag:
kubectl port-forward my-web-app-5cd5c6f67d-abcdef 8000:8080 -n development
Failure to specify the correct namespace will result in an error message like "Error from server (NotFound): pods "my-web-app-5cd5c6f67d-abcdef" not found".
Example 4: Forwarding to a Random Local Port
Sometimes you don't care about the specific local port, and you just want an available one. You can specify 0 for the local port, and kubectl will automatically pick a random, available port on your local machine and print it to the console:
kubectl port-forward my-web-app-5cd5c6f67d-abcdef :8080
# Output might be:
# Forwarding from 127.0.0.1:51318 -> 8080
# Forwarding from [::1]:51318 -> 8080
In this case, you would then access the service at http://localhost:51318. This is particularly useful in scripting or when you want to avoid port conflicts manually.
Mastering these basic usages forms the bedrock of effectively leveraging kubectl port-forward for your daily Kubernetes interactions, making remote cluster resources feel like local ones.
Advanced Usage and Scenarios: Beyond Basic Pod Forwarding
While forwarding to a specific Pod is the most common application of kubectl port-forward, the command offers more flexibility, allowing you to target Deployments, ReplicaSets, and even Services. Understanding these advanced scenarios and options can significantly enhance your debugging and development workflows.
Forwarding to a Deployment or ReplicaSet
Instead of providing a specific Pod name, you can instruct kubectl port-forward to target a Deployment or ReplicaSet. When you do this, kubectl will automatically select one healthy Pod managed by that resource to establish the tunnel. This is particularly useful because Pod names are ephemeral and change upon recreation. By targeting a higher-level resource, you don't need to constantly update your command with new Pod names.
The syntax is similar, just replace <POD_NAME> with <DEPLOYMENT_NAME> or <REPLICASET_NAME>:
kubectl port-forward deployment/<DEPLOYMENT_NAME> <LOCAL_PORT>:<REMOTE_PORT> -n <NAMESPACE>
# Or
kubectl port-forward rs/<REPLICASET_NAME> <LOCAL_PORT>:<REMOTE_PORT> -n <NAMESPACE>
Example: If you have a Deployment named my-backend-deployment that manages your backend Pods, and the backend service listens on port 3000 internally, you can forward to it like this:
kubectl port-forward deployment/my-backend-deployment 9000:3000 -n default
kubectl will pick one of the Pods managed by my-backend-deployment (e.g., my-backend-deployment-xyz12-abcde) and forward traffic to its port 3000 via your local port 9000. This provides a stable target for your port-forward command, even if individual Pods are restarted or replaced.
Forwarding to a Service
Perhaps the most convenient and resilient way to use kubectl port-forward is by targeting a Service. When you forward to a Service, kubectl resolves the Service to one of its backing Pods (similar to how a Service load balances traffic) and establishes the tunnel to that Pod. The key advantage here is that Services provide a stable, abstract network endpoint. You don't need to worry about individual Pods or their ephemeral nature at all. kubectl handles the underlying selection of a healthy Pod for you.
The syntax for forwarding to a Service:
kubectl port-forward service/<SERVICE_NAME> <LOCAL_PORT>:<REMOTE_PORT> -n <NAMESPACE>
Example: Suppose you have a Service named my-api-service in the production namespace, which exposes your application's API on port 80. You want to test it from your local machine on port 8080.
kubectl port-forward service/my-api-service 8080:80 -n production
This command will now forward traffic from localhost:8080 to port 80 of one of the Pods backing my-api-service. If that specific Pod goes down or is rescheduled, kubectl port-forward might attempt to reconnect to another healthy Pod, depending on the version and specific scenario, offering better resilience. This method is often preferred for development as it aligns with how applications typically interact within the cluster—via Service names, not individual Pod names.
Forwarding Multiple Ports Simultaneously
You can forward multiple ports in a single kubectl port-forward command. This is useful when an application exposes several different services (e.g., HTTP on one port, metrics on another, debugging interface on a third).
kubectl port-forward <RESOURCE_TYPE>/<RESOURCE_NAME> <LOCAL_PORT_1>:<REMOTE_PORT_1> <LOCAL_PORT_2>:<REMOTE_PORT_2> ...
Example: Forwarding local port 8000 to remote port 80 and local port 9000 to remote port 9090 of a Pod:
kubectl port-forward my-multi-service-pod 8000:80 9000:9090
Addressing Specific Local Interfaces (--address)
By default, kubectl port-forward binds to 127.0.0.1 (localhost). This means only applications running on your local machine can access the forwarded port. However, there are scenarios where you might want to expose the forwarded port to other machines on your local network (e.g., a colleague needs to access it, or you're running a virtual machine that needs to connect). You can achieve this using the --address flag.
kubectl port-forward --address <IP_ADDRESS_TO_BIND> <RESOURCE>/<RESOURCE_NAME> <LOCAL_PORT>:<REMOTE_PORT>
Example: To bind to all network interfaces on your local machine, allowing other devices on your network to access the forwarded port:
kubectl port-forward --address 0.0.0.0 service/my-api-service 8080:80
CAUTION: Using --address 0.0.0.0 exposes the forwarded port to your entire network. Be mindful of security implications, especially in untrusted networks. Only use this when absolutely necessary and ensure the service itself is secured.
Running kubectl port-forward in the Background
The kubectl port-forward command blocks the terminal it's run in. For continuous development or scripting, you might want to run it in the background.
- Using
&(Bash/Zsh): Append&to the command to run it in the background immediately. You can then usejobsto list background processes andfg %1(where1is the job number) to bring it back to the foreground.bash kubectl port-forward service/my-api-service 8080:80 & - Using
nohup:nohupallows a command to continue running even after you log out or close the terminal. The output is usually redirected tonohup.out.bash nohup kubectl port-forward service/my-api-service 8080:80 > /dev/null 2>&1 &This command redirects all output to/dev/nullto preventnohup.outfrom growing large and puts the process in the background.
Using screen or tmux: For more robust backgrounding and session management, screen or tmux are excellent tools. You can start a new session, run kubectl port-forward within it, and then detach the session, allowing it to run independently. You can later reattach to check its status or terminate it.```bash
In tmux:
tmux new -s my-port-forward-session kubectl port-forward service/my-api-service 8080:80
Press Ctrl+B, then D to detach
To reattach: tmux attach -t my-port-forward-session
```
Troubleshooting Common Issues
- "Error from server (NotFound): pods..." or "services...": Double-check the spelling of the Pod/Service/Deployment name and ensure you're in the correct namespace (using
-nflag). - "Unable to listen on any of the requested ports..." (Local Port Conflict): The specified local port (
LOCAL_PORT) is already in use on your machine. Choose a different port or kill the process currently using it. - "Error forwarding ports: error upgrading connection: container not found (""): This can happen if the Pod or container you're trying to reach doesn't exist or isn't healthy. Check Pod status with
kubectl get podsand logs withkubectl logs <POD_NAME>. - "Error forwarding ports: error upgrading connection: Port 8080 is not exposed" (Remote Port Mismatch): The port you specified as
REMOTE_PORTis not being listened on by the application inside the container. Verify the application's configuration or inspect the container image. - Connection Refused (After forwarding is active): Even if
kubectl port-forwardstarts successfully, the application inside the Pod might not be running or might be misconfigured. Usekubectl logsandkubectl execto troubleshoot the application within the Pod. - Permissions Issues (RBAC): If you encounter
forbiddenerrors, your Kubernetes user might not have the necessary RBAC permissions (pods/portforwardverb) to perform the operation. Contact your cluster administrator.
By understanding these advanced options and troubleshooting tips, you can leverage kubectl port-forward with greater confidence and efficiency, making it an indispensable tool in your Kubernetes development arsenal.
Security Considerations and Best Practices
While kubectl port-forward is an incredibly useful tool, it's crucial to approach its usage with a clear understanding of its security implications. Because it creates a direct tunnel into your cluster's internal network, improper or excessive use can inadvertently open up security vulnerabilities.
RBAC and Authorization
The first line of defense for kubectl port-forward is Kubernetes Role-Based Access Control (RBAC). A user must have the pods/portforward permission to initiate a port-forwarding session. This permission is typically granted as part of broader roles like edit or admin, but it can be granularly controlled.
Best Practice: * Least Privilege: Grant users only the necessary permissions. If a developer only needs to port-forward to Pods in their development namespace, ensure their RBAC roles are scoped to that namespace and only include the pods/portforward verb on Pods or Services they actually need to access. Avoid granting cluster-wide port-forwarding permissions unless absolutely necessary for administrators. * Audit Logs: Kubernetes audit logs can track who initiated a kubectl port-forward session, when, and to which resource. Regularly reviewing these logs can help detect suspicious activity.
Exposing Services to the Local Network (--address 0.0.0.0)
As discussed in the advanced usage section, the --address 0.0.0.0 flag can expose your forwarded port to all network interfaces on your local machine, making it accessible to other devices on your LAN.
Security Implications: * Unintended Exposure: If your local machine is on an insecure network (e.g., public Wi-Fi), or if other devices on your corporate network are compromised, they could potentially access the service running inside your Kubernetes cluster through your port-forward tunnel. * Lack of Authentication/Authorization: The service itself might not have robust authentication or authorization mechanisms, assuming it's only accessed internally within the cluster. Exposing it externally via --address 0.0.0.0 bypasses any cluster-level network policies or ingress controllers that would normally provide security.
Best Practice: * Avoid --address 0.0.0.0 in Production/Untrusted Environments: Reserve this flag for highly controlled, isolated environments where you explicitly need external access to your local machine. For most debugging and development, stick to the default 127.0.0.1. * Use Strong Application-Level Security: If you must use --address 0.0.0.0, ensure the application running in the Pod has its own strong authentication, authorization, and encryption (HTTPS) mechanisms.
Risks of Persistent Port-Forwards
Leaving kubectl port-forward commands running indefinitely, especially in background processes, can pose security risks:
- Lingering Access: An active port-forward keeps a tunnel open to your cluster. If your local machine is compromised, attackers could potentially use this tunnel to gain access to internal cluster resources.
- Resource Consumption: While generally low, a large number of persistent port-forwards can consume resources on both your local machine and the Kubernetes API server.
Best Practice: * Temporary by Design: Treat kubectl port-forward as a temporary utility. Terminate the process as soon as you are done with your debugging or development task (Ctrl+C or kill the background process). * Automated Cleanup: If using port-forwarding in scripts, ensure there are mechanisms to automatically terminate the processes when no longer needed.
Alternatives for Long-Term Access
For long-term or production-grade access to services, kubectl port-forward is not the appropriate solution. Kubernetes offers dedicated resources for this:
- Ingress: For HTTP/HTTPS traffic, Ingress controllers provide robust routing, load balancing, SSL termination, and often WAF capabilities. They are designed for external exposure.
- Service Type LoadBalancer: For TCP/UDP services, a LoadBalancer Service type provisions an external load balancer, providing a stable external IP address.
- Service Type NodePort: Exposes a service on a static port on each node's IP, primarily for development or specific on-premise scenarios.
- Service Mesh (e.g., Istio, Linkerd): Service meshes offer advanced traffic management, security (mTLS), and observability features, including specific commands like
istioctl dashboard grafanaoristioctl port-forwardwhich can provide controlled local access to internal services, often with stronger authentication and policy enforcement.
When to Choose port-forward: * Ad-hoc debugging: Quickly connect a local debugger to a specific Pod. * Local development: Test a local frontend against a backend in the cluster. * Accessing internal tools: Temporarily access a database, message queue, or a monitoring dashboard that's not otherwise exposed externally. * Isolated testing: Test an application feature in an environment that closely mirrors production without affecting other developers or exposing it broadly.
By adhering to these security considerations and best practices, you can harness the full power of kubectl port-forward while maintaining the integrity and security of your Kubernetes environment. It's a powerful developer tool, but like all powerful tools, it demands responsible use.
APIPark is a high-performance AI gateway that allows you to securely access the most comprehensive LLM APIs globally on the APIPark platform, including OpenAI, Anthropic, Mistral, Llama2, Google Gemini, and more.Try APIPark now! 👇👇👇
Real-World Use Cases and Practical Examples
kubectl port-forward isn't just a theoretical command; it's a workhorse in the daily life of anyone interacting with Kubernetes. Its versatility makes it invaluable across a spectrum of real-world scenarios, from development to operations.
1. Debugging a Microservice Locally
One of the most common and powerful use cases is debugging a specific microservice instance. Imagine you have a complex application composed of many microservices, and you suspect a bug in a particular service. You want to attach your local debugger (e.g., VS Code's debugger for Node.js/Python, IntelliJ's debugger for Java) to a running instance of that service inside the cluster.
Scenario: A catalog-service Pod is misbehaving. It's running in the default namespace, and its debug port is 9229. You want to connect your local debugger to it.
# First, find the Pod name:
kubectl get pods -l app=catalog-service
# Example output: catalog-service-7b8c9d-jklmn

# Then, port-forward the debug port:
kubectl port-forward catalog-service-7b8c9d-jklmn 9229:9229
Now, configure your local debugger to connect to localhost:9229. Your local debugger will transparently connect to the remote Pod, allowing you to set breakpoints, inspect variables, and step through code as if the service were running on your machine. This significantly accelerates the debugging cycle for containerized applications.
2. Accessing a Database Inside the Cluster
Many applications rely on databases like PostgreSQL, MySQL, or MongoDB running within the Kubernetes cluster. For development or occasional administrative tasks, you might need to connect a local database client (e.g., DBeaver, TablePlus, psql) to these databases without exposing them publicly.
Scenario: You have a PostgreSQL database running as a StatefulSet in the data namespace, exposed by a Service named postgres-db, which listens on its standard port 5432.
kubectl port-forward service/postgres-db 5432:5432 -n data
With this command running, you can now connect your local PostgreSQL client to localhost:5432 using the internal cluster credentials. This provides a secure, temporary conduit for database interaction without the need for external IP addresses or complex firewall rules.
3. Connecting to a Message Queue or Cache
Similar to databases, message queues (like RabbitMQ, Kafka) or in-memory caches (like Redis) are often deployed within Kubernetes. Developers might need to publish/consume messages or inspect cache contents from their local development environment.
Scenario: A Redis instance is running in the cache namespace, exposed by a Service redis-master on port 6379. You want to use your local redis-cli.
kubectl port-forward service/redis-master 6379:6379 -n cache
Now, from another terminal, you can run redis-cli -h localhost -p 6379 to interact directly with the Redis instance inside your cluster.
4. Testing a New UI Against a Backend in Kubernetes
This is a classic development workflow. You're developing a new frontend locally (e.g., a React, Angular, or Vue application) and need it to communicate with a backend microservice already deployed in Kubernetes.
Scenario: Your local frontend expects the backend API to be available at http://localhost:8080. Your backend microservice is exposed by a Service named backend-api-service in the dev namespace, listening on port 3000.
kubectl port-forward service/backend-api-service 8080:3000 -n dev
With this, your local frontend application, when making API calls to http://localhost:8080/api/..., will seamlessly communicate with the backend service running in your Kubernetes cluster, providing a realistic integration testing environment.
5. Accessing Internal Dashboards or Metrics UIs
Many internal tools, monitoring dashboards (like Grafana, Prometheus UIs), or application-specific administration panels run within Kubernetes and are not meant for public exposure. kubectl port-forward offers an easy way to access these tools securely for operational tasks.
Scenario: You want to view the Prometheus UI, which is deployed in the monitoring namespace and exposed by a Service prometheus-server on port 9090.
kubectl port-forward service/prometheus-server 9090:9090 -n monitoring
Open your browser to http://localhost:9090, and you'll have access to your Prometheus dashboard. This avoids the need to set up Ingress or other external exposure mechanisms just for a quick check.
6. Executing Custom Scripts Against an Internal Service
Developers or SREs might write custom scripts (Python, Go, shell scripts) to interact with an internal service for data migration, health checks, or specific administrative actions.
Scenario: A custom migration script needs to interact with a specific internal data-processor API on port 4000 in the jobs namespace.
kubectl port-forward service/data-processor 4000:4000 -n jobs &
# (Run in background)

# Now your script can connect to localhost:4000
python my_migration_script.py --api-endpoint http://localhost:4000/
This temporary, programmatic access allows for flexible interaction with internal services, much like local development.
These examples illustrate the breadth of scenarios where kubectl port-forward becomes an indispensable tool. It significantly simplifies the developer experience, bridging the gap between local development environments and the remote Kubernetes cluster, enabling faster iteration, more effective debugging, and seamless operational checks.
Comparing kubectl port-forward with Other Access Methods
Kubernetes offers a variety of ways to expose services, each with its own purpose, advantages, and disadvantages. Understanding these differences is key to choosing the right tool for the job. While kubectl port-forward excels at temporary, local access, it's not a substitute for robust external exposure solutions.
Let's compare kubectl port-forward with NodePort, LoadBalancer, and Ingress:
| Feature | kubectl port-forward |
Service Type: NodePort |
Service Type: LoadBalancer |
Ingress |
|---|---|---|---|---|
| Purpose | Temporary, local-only access for development/debugging | Expose service on a static port across all nodes' IPs | Expose service with an external, cloud-managed IP/hostname | HTTP/HTTPS routing, hostname/path-based, external exposure |
| Access Scope | Local machine only (or local network with --address) |
Any client that can reach node IPs & NodePort | Any client that can reach LoadBalancer IP/hostname | Any client that can reach Ingress Controller IP/hostname |
| Longevity | Temporary (session-based), manual termination | Permanent (as long as service exists) | Permanent (as long as service exists) | Permanent (as long as Ingress resource exists) |
| Resource Type | kubectl command, no cluster resource created |
Kubernetes Service object | Kubernetes Service object (cloud provider integration) | Kubernetes Ingress object (requires Ingress Controller) |
| Traffic Type | TCP/UDP | TCP/UDP | TCP/UDP | HTTP/HTTPS (L7 routing) |
| Ease of Setup | Very easy, single command | Easy, change service type | Easy, change service type (if cloud provider supported) | Moderate to complex (requires controller, rules, TLS config) |
| Security | Secure tunnel (API server proxied, RBAC controlled) | Exposes on all node IPs; relies on network security groups | Relies on cloud provider security features, network policies | Robust (TLS termination, WAF, authentication via controller) |
| Cost | None | None | Cloud provider charges for LoadBalancer | Potential cost for Ingress Controller resources/LoadBalancer |
| Ideal Use Case | Local debugging, local development, ad-hoc admin access | Demonstrations, internal cluster access, on-prem bare-metal | Production services needing direct external TCP/UDP access | Production HTTP/HTTPS services, host/path routing, SSL/TLS |
| Target Flexibility | Pod, Deployment, ReplicaSet, Service | Pods behind the Service | Pods behind the Service | Pods behind the Service (via Ingress rules) |
| Network Proximity Needed | None (only API server access) | Direct network access to nodes | Direct network access to LoadBalancer IP | Direct network access to Ingress Controller IP |
When to Choose kubectl port-forward
Based on the comparison, kubectl port-forward is the superior choice for:
- Rapid Local Development and Debugging: When you need to quickly establish a connection from your local machine to a specific Pod or Service within the cluster for testing, debugging, or immediate development iteration. It's about bridging the local developer environment to the remote application.
- Ad-Hoc Administrative Tasks: For one-off access to internal dashboards, databases, or message queues that are not meant for persistent external exposure.
- Minimal Overhead: When you want to avoid provisioning any additional cluster resources (like LoadBalancers or Ingresses) or modifying existing service configurations.
- Security for Internal Access: When you need a secure, authenticated tunnel that leverages Kubernetes RBAC, without exposing the service widely to your network or the internet. The connection is ephemeral and tied to your
kubectlsession. - Troubleshooting Specific Pods: When you need to interact directly with a particular Pod instance, perhaps to inspect its state or execute commands against it, bypassing the Service abstraction.
In essence, kubectl port-forward is a developer and operator's best friend for getting a quick, secure, and direct view into the cluster's internal workings. It's a surgical tool for precise, temporary access, complementing the broader, more permanent exposure mechanisms that Kubernetes provides for production-grade service delivery.
Integration with Development Workflows
kubectl port-forward is more than just a standalone command; it's a vital component that significantly enhances modern cloud-native development workflows. By providing a seamless bridge between local and cluster environments, it streamlines several critical phases of the software development lifecycle.
Enhancing Developer Productivity
- Iterative Development: Developers can run their frontend or client applications locally, benefiting from hot-reloading and fast feedback loops, while connecting to the latest version of backend services deployed in Kubernetes. This hybrid approach combines the speed of local development with the realism of a cluster environment, avoiding the need to deploy and rebuild the entire application on every code change. This speeds up the "inner loop" of development.
- Realistic Testing Environment: Instead of mocking or maintaining complex local dependencies, developers can test their code against actual services running in a Kubernetes cluster (e.g., a development or staging environment). This ensures that integration issues are caught early, in an environment closer to production, rather than surfacing later in the CI/CD pipeline.
- Local IDE Integration: Many Integrated Development Environments (IDEs) and development tools can be configured to leverage port-forwarding. For example, a debugger can connect to
localhost:debug-portwhich is then forwarded to a Pod. Some tools even offer integrated port-forwarding capabilities or extensions that abstract thekubectlcommand, making it even more user-friendly. This tight integration means developers rarely have to leave their familiar development environment to interact with cluster resources. - Shared Development Environments: In teams where multiple developers are working on different services within a shared development cluster,
kubectl port-forwardallows each developer to selectively access their specific service or a dependent service without interfering with others or requiring complex, separate deployments. - Offline-like Experience: While not truly offline,
kubectl port-forwardenables developers to work with services in the cluster as if they were running locally. This reduces the cognitive load associated with remote debugging and interaction, making the cluster feel more like an extension of their local machine.
kubectl port-forward and CI/CD Pipelines
It's important to note that kubectl port-forward is generally not used directly within automated CI/CD pipelines for deploying or testing applications. CI/CD pipelines typically interact with Kubernetes using: * Declarative Configurations: Applying YAML manifests for Deployments, Services, Ingresses, etc. * Service Accounts: Using specific service accounts for programmatic access to the Kubernetes API. * Internal Networking: Inter-service communication within the pipeline often happens directly via Kubernetes internal DNS and service discovery. * Integration Tests: These tests usually run within the cluster itself or connect to externally exposed services (via Ingress or LoadBalancer) in a staging environment.
However, kubectl port-forward indirectly supports CI/CD by making the development and debugging of services before they enter the pipeline more efficient. A well-debugged and locally tested service using port-forwarding is more likely to pass CI/CD checks, ultimately leading to smoother deployments.
Furthermore, kubectl port-forward can be invaluable during the CD (Continuous Delivery) phase for post-deployment verification and troubleshooting. After a new version of an application is deployed, an SRE or developer might use port-forward to quickly check an internal metric endpoint, access a health dashboard, or confirm specific application behavior without waiting for external routes to propagate or exposing potentially sensitive internal services. This on-demand access aids in rapid validation and rollback decisions.
In summary, kubectl port-forward acts as a crucial enabler for developer productivity in the cloud-native era. It empowers engineers to interact intimately with their Kubernetes applications, bridging the physical distance and network isolation of a cluster to foster a more fluid and efficient development experience, ultimately contributing to faster delivery of high-quality software.
Bridging Local Development and Enterprise API Management: The Broader Context of APIs and Gateways
Up to this point, our deep dive has illuminated kubectl port-forward as an essential tool for developers and operators to gain temporary, local access to internal services within a Kubernetes cluster. It effectively creates a direct, secure channel, making a remote service accessible as if it were running on localhost. Conceptually, kubectl port-forward provides a personal, temporary gateway to an internal API (or any network service) deployed on the Kubernetes Open Platform. It's about bridging your local machine to an isolated environment, enabling rapid iteration and debugging by making an internal API locally accessible for a specific user.
However, the world of modern applications extends far beyond individual developer access. While kubectl port-forward is perfectly suited for a single developer's needs, it's not designed for exposing services to the wider internet, managing access for multiple external consumers, or ensuring robust, scalable, and secure interactions in a production environment. This is where the broader concept of enterprise API Gateways becomes indispensable.
Beyond Local: The Need for Enterprise API Gateways
In a microservices architecture, especially one running on a dynamic platform like Kubernetes, services expose APIs that need to be consumed by other services, client applications (web, mobile), and even external partners. Directly exposing every microservice API to the internet would lead to a chaotic and insecure architecture. This is precisely the problem that dedicated API Gateways solve.
An API Gateway acts as a single entry point for all client requests, routing them to the appropriate backend service. It performs a multitude of critical functions that kubectl port-forward is not intended for:
- Traffic Management: Load balancing, routing, throttling, caching, and rate limiting to ensure performance and prevent abuse.
- Security: Authentication, authorization (JWT validation, API keys), SSL/TLS termination, and integration with identity providers.
- Policy Enforcement: Applying access control, compliance, and auditing policies.
- API Transformation: Modifying requests and responses to unify API formats or adapt to different client needs.
- Monitoring and Analytics: Centralized logging, metrics collection, and insights into API usage and performance.
- API Lifecycle Management: Versioning, documentation, and deprecation strategies.
These robust gateway functionalities are critical components for any Open Platform that needs to expose its services securely and scalably to a diverse ecosystem of consumers—be they internal teams, external developers, or end-users. While kubectl port-forward is about opening a temporary back door for a privileged few, an API Gateway is about building a secure, managed, and highly performant front door for a multitude of authorized users.
Introducing APIPark: A Comprehensive Open Source AI Gateway & API Management Platform
For organizations that are serious about managing and exposing their services, particularly those integrating Artificial Intelligence (AI) and Large Language Models (LLMs), beyond local development, a dedicated API Gateway and management platform becomes indispensable. This is where APIPark steps in as an excellent solution.
APIPark is an all-in-one AI gateway and API developer portal that is open-sourced under the Apache 2.0 license. It's specifically designed to help developers and enterprises manage, integrate, and deploy AI and REST services with ease, serving as a powerful gateway for all your APIs on an Open Platform. While kubectl port-forward gives you a peek into one service, APIPark gives you control over your entire API landscape.
Let's explore how APIPark addresses these enterprise-grade API management challenges, acting as a true gateway for your services:
- Quick Integration of 100+ AI Models: APIPark offers the capability to integrate a variety of AI models with a unified management system for authentication and cost tracking. This centralizes access to numerous APIs, making it easier to manage and consume diverse AI services, acting as a single gateway to the world of AI.
- Unified API Format for AI Invocation: It standardizes the request data format across all AI models. This means changes in underlying AI models or prompts do not affect the application or microservices, thereby simplifying AI usage and significantly reducing maintenance costs for integrating various AI APIs. This consistent interface is a hallmark of a well-managed gateway.
- Prompt Encapsulation into REST API: Users can quickly combine AI models with custom prompts to create new APIs, such as sentiment analysis, translation, or data analysis APIs. This feature transforms complex AI interactions into easily consumable RESTful APIs via the gateway.
- End-to-End API Lifecycle Management: APIPark assists with managing the entire lifecycle of APIs, including design, publication, invocation, and decommission. It helps regulate API management processes, manage traffic forwarding, load balancing, and versioning of published APIs. This robust lifecycle management is a core function of an enterprise API Gateway, ensuring orderly governance of all services on the Open Platform.
- API Service Sharing within Teams: The platform allows for the centralized display of all API services, making it easy for different departments and teams to find and use the required API services. This fosters collaboration and reuse across the organization, promoting an efficient Open Platform for internal developers.
- Independent API and Access Permissions for Each Tenant: APIPark enables the creation of multiple teams (tenants), each with independent applications, data, user configurations, and security policies, while sharing underlying applications and infrastructure. This multi-tenancy capability is crucial for large organizations, ensuring isolated and secure API access through the gateway while optimizing resource utilization.
- API Resource Access Requires Approval: APIPark allows for the activation of subscription approval features, ensuring that callers must subscribe to an API and await administrator approval before they can invoke it. This prevents unauthorized API calls and potential data breaches, adding a critical security layer to the gateway.
- Performance Rivaling Nginx: With just an 8-core CPU and 8GB of memory, APIPark can achieve over 20,000 TPS, supporting cluster deployment to handle large-scale traffic. High performance is paramount for any API Gateway handling production traffic.
- Detailed API Call Logging: APIPark provides comprehensive logging capabilities, recording every detail of each API call. This feature allows businesses to quickly trace and troubleshoot issues in API calls, ensuring system stability and data security—essential for a reliable gateway.
- Powerful Data Analysis: APIPark analyzes historical call data to display long-term trends and performance changes, helping businesses with preventive maintenance before issues occur. These analytics provide invaluable insights into API usage and the health of services flowing through the gateway.
APIPark's open-source nature further reinforces the concept of an Open Platform, providing transparency and flexibility for organizations to build upon. While the open-source product meets the basic API resource needs of startups, APIPark also offers a commercial version with advanced features and professional technical support for leading enterprises, demonstrating its scalability from individual projects to large-scale corporate deployments.
The Complementary Nature
In conclusion, kubectl port-forward and solutions like APIPark serve different but fundamentally complementary roles in the broader ecosystem of accessing and managing services. kubectl port-forward is a developer's tactical tool, providing a temporary, personal gateway for local interaction with an internal API within Kubernetes. It's about empowering individual developers to quickly connect to a single point for development and debugging.
APIPark, on the other hand, is a strategic enterprise-grade solution. It functions as a robust, centralized API Gateway that manages the entire lifecycle of APIs (especially AI-driven ones), ensuring secure, scalable, and observable exposure of services for multiple consumers on an Open Platform. It's about providing a well-governed, performant front door for all your API offerings. Both are crucial for leveraging the full potential of a cloud-native, API-driven Open Platform, ensuring that applications are both efficiently developed and securely delivered.
Future Trends and Alternatives in Kubernetes Local Access
The landscape of cloud-native development is constantly evolving, and while kubectl port-forward remains a steadfast tool, new approaches and enhancements are emerging to simplify local access and integration with Kubernetes. These trends aim to further bridge the gap between local development and the remote cluster, offering more sophisticated or automated solutions.
Evolution of Development Tools
Many modern development tools and IDEs are increasingly integrating Kubernetes-native capabilities. * IDE Extensions: Tools like the Kubernetes extensions for VS Code or IntelliJ offer built-in functionalities that can detect services in your cluster and often automate kubectl port-forward on your behalf, sometimes even overlaying local code changes onto a remote Pod for live debugging (e.g., using tools like Skaffold, Telepresence, or Tilt). This kind of integration abstracts away the command-line intricacies, making the process smoother and more intuitive. * Cloud-Native Development Environments: Platforms like Google Cloud Code, Azure Dev Spaces, or even custom internal development environments aim to provide a fully integrated experience where developers can write, run, and debug code directly within a remote Kubernetes cluster or a closely mirrored local environment. These tools often use advanced proxying and synchronization mechanisms that might leverage port-forward under the hood or offer more advanced ways to achieve the same outcome.
Service Meshes and Enhanced Local Access
Service meshes (e.g., Istio, Linkerd) provide a programmable network layer for microservices, offering advanced traffic management, security, and observability. Beyond their core functions, some service meshes offer enhanced local access capabilities: * istioctl port-forward: Istio, for example, has its own istioctl port-forward command. While it might leverage the underlying Kubernetes port-forward mechanism, it can also integrate with Istio's sidecar proxy, potentially offering more robust connection management or routing based on Istio's traffic rules. This can be beneficial in scenarios where standard kubectl port-forward might struggle with service mesh-specific configurations. * Traffic Mirroring/Shadowing: Service meshes enable advanced traffic routing features like mirroring (sending a copy of live traffic to a development instance) or shadowing. This allows developers to test their local services against a realistic stream of requests without impacting production, a capability far beyond what a simple port-forward can offer. * Virtual Services and Gateways: Service meshes extend the concept of a gateway with more granular control over inbound and outbound traffic, allowing for very specific routing and policy enforcement, which can be configured to direct traffic to development instances or local proxies.
Cloud-Native Development Ecosystems
The broader cloud-native ecosystem is fostering tools that aim to create isolated development environments within the cluster itself. * Remote Development Containers: Tools like Gitpod or GitHub Codespaces provide full-fledged development environments running in the cloud, often backed by Kubernetes. Developers connect to these environments remotely via their web browser or IDE, and the development containers have direct, low-latency access to other services within the same cluster. This eliminates the need for port-forward for basic local access, as the "local" environment is already co-located with the cluster. * Development-Time Proxies and Agents: Projects like Telepresence (from Ambassador Labs) and Tilt aim to replace or augment kubectl port-forward by inserting a proxy or agent into your cluster that can intercept traffic for a specific service and redirect it to a local process. This allows developers to effectively "swap out" a running service in the cluster with a locally running version, enabling live debugging and testing of microservices within the full context of the cluster's network and dependencies, often with more automation and less manual port management.
While these emerging tools and platforms offer more integrated and sometimes more powerful ways to interact with Kubernetes services, kubectl port-forward will likely remain a fundamental, low-level utility. Its simplicity, ubiquity, and directness make it an irreplaceable command for quick checks, ad-hoc debugging, and scenarios where the overhead of more complex solutions is unwarranted. As the Kubernetes ecosystem continues to mature, kubectl port-forward will persist as a foundational skill, even as higher-level tools build upon its capabilities or offer alternative, more automated pathways to achieve similar development and debugging goals.
Conclusion
kubectl port-forward stands as an indispensable utility in the modern Kubernetes landscape, a humble yet profoundly powerful command that bridges the chasm between your local development environment and the intricate, distributed world of your Kubernetes cluster. We've journeyed through its core mechanics, understanding how it meticulously crafts a secure, temporary tunnel, leveraging the Kubernetes API server as its trusted intermediary to make remote services feel as if they are running natively on your localhost. This capability is not merely a convenience; it's a critical enabler for efficient iterative development, precise debugging, and streamlined operational checks within a cloud-native paradigm.
From its basic application of forwarding a single local port to a specific Pod, we've explored its more advanced nuances, demonstrating how it can target Deployments, ReplicaSets, and even abstract Services, providing a stable and resilient access point regardless of the ephemeral nature of individual Pods. The ability to forward multiple ports, bind to specific network interfaces, and gracefully manage background processes further cements its versatility, making it a Swiss Army knife for developers and SREs alike. We delved into the crucial security implications, emphasizing the importance of RBAC controls and responsible usage of options like --address 0.0.0.0 to prevent unintended exposure, contrasting its temporary, local scope with the more robust, enterprise-grade external exposure mechanisms like Ingress and LoadBalancers.
The real-world examples articulated the command's pervasive utility: debugging elusive microservice bugs with a local debugger, connecting a local database client to a cluster-internal PostgreSQL instance, interacting with message queues, or testing a newly developed UI against a live backend service in Kubernetes. Each scenario underscored kubectl port-forward's role in accelerating feedback loops and fostering a more productive, realistic development experience. Its complementary relationship with comprehensive API management platforms like APIPark was also highlighted; while kubectl port-forward provides an individual's tactical entry point to an internal API on an Open Platform, APIPark serves as the strategic gateway for robust, scalable, and secure external API exposure and lifecycle management. Both are vital, serving different but equally critical roles in harnessing the power of an API-driven, cloud-native ecosystem.
As the Kubernetes ecosystem continues its dynamic evolution, with sophisticated IDE integrations, service mesh enhancements, and innovative remote development environments emerging, kubectl port-forward will undoubtedly retain its fundamental significance. Its simplicity, reliability, and directness ensure its enduring status as a go-to command for anyone navigating the complexities of Kubernetes. By mastering kubectl port-forward, you not only gain unparalleled local access to your cluster but also empower yourself with a foundational skill that is indispensable for effective development, debugging, and operation of applications in the cloud-native era.
Frequently Asked Questions (FAQs)
1. What is kubectl port-forward and why is it useful?
kubectl port-forward is a command-line utility that creates a secure, temporary network tunnel from a local port on your machine to a specific port on a Pod, Deployment, ReplicaSet, or Service within your Kubernetes cluster. It's incredibly useful for development and debugging because it allows you to access internal cluster services (like a backend API, database, or a monitoring dashboard) as if they were running on localhost, without exposing them to the internet or configuring complex network access rules. This enables local development tools, browsers, or debuggers to interact directly with applications inside the cluster.
2. Is kubectl port-forward secure?
Yes, kubectl port-forward is generally secure for its intended use case (temporary, local access). The connection is established through the Kubernetes API server, which requires your kubectl client to be authenticated and authorized (via RBAC permissions like pods/portforward). All traffic is multiplexed over the secure connection to the API server, so you don't need direct network routes to the Pods or nodes. However, security considerations arise if you use the --address 0.0.0.0 flag, which exposes the forwarded port to your entire local network, potentially allowing other devices to access the service. It's best practice to use this flag only in trusted, controlled environments and ensure the application itself has strong security.
3. Can I use kubectl port-forward to expose services to the internet?
No, kubectl port-forward is designed for temporary, local access from your machine and is not suitable for exposing services to the broader internet or for production use. It requires a kubectl process to be actively running on your local machine, blocking the terminal. For exposing services externally in a scalable, secure, and permanent manner, Kubernetes provides dedicated Service types like LoadBalancer or NodePort, and Ingress resources, which are built for production traffic management, SSL/TLS termination, and robust routing.
4. What is the difference between kubectl port-forward to a Pod, a Deployment, and a Service?
- To a Pod:
kubectl port-forward <POD_NAME> <LOCAL_PORT>:<REMOTE_PORT>connects directly to a specific Pod. This is precise but less resilient, as Pods are ephemeral and their names change if they are recreated. - To a Deployment/ReplicaSet:
kubectl port-forward deployment/<DEPLOYMENT_NAME> <LOCAL_PORT>:<REMOTE_PORT>instructskubectlto pick one healthy Pod managed by that Deployment/ReplicaSet and forward traffic to it. This provides a more stable target than a direct Pod name. - To a Service:
kubectl port-forward service/<SERVICE_NAME> <LOCAL_PORT>:<REMOTE_PORT>is often the most convenient.kubectlresolves the Service name to one of its backing Pods, similar to how a Service load balances traffic. This is the most resilient method as it abstracts away the underlying Pods entirely, andkubectlmight even attempt to reconnect to a different healthy Pod if the initial target Pod becomes unavailable.
5. How can kubectl port-forward assist in my development workflow, especially with API management?
kubectl port-forward significantly enhances development workflows by enabling developers to run their client applications (e.g., frontend, mobile apps, scripts) locally while interacting with backend services or APIs running inside the Kubernetes cluster. This facilitates faster iteration, realistic integration testing, and efficient debugging using local IDEs. In the broader context of API management, while kubectl port-forward provides a personal, temporary "gateway" to an internal API for local development, it complements enterprise-grade API management platforms like APIPark. APIPark, an Open Source AI Gateway & API Management Platform, handles the robust, scalable, and secure exposure and lifecycle management of APIs for external consumption, providing a sophisticated "front door" for your services in a way that kubectl port-forward is not designed to do. Both tools serve distinct but complementary roles in making cloud-native applications accessible and manageable.
🚀You can securely and efficiently call the OpenAI API on APIPark in just two steps:
Step 1: Deploy the APIPark AI gateway in 5 minutes.
APIPark is developed based on Golang, offering strong product performance and low development and maintenance costs. You can deploy APIPark with a single command line.
curl -sSO https://download.apipark.com/install/quick-start.sh; bash quick-start.sh

In my experience, you can see the successful deployment interface within 5 to 10 minutes. Then, you can log in to APIPark using your account.

Step 2: Call the OpenAI API.