Mastering Dockerfile Build: Best Practices


In the rapidly evolving landscape of modern software development, Docker has emerged as an indispensable tool, revolutionizing how applications are built, shipped, and run. At the heart of Docker's power lies the Dockerfile – a simple text file that contains all the commands a user could call on the command line to assemble an image. It serves as the blueprint, the single source of truth for constructing your application's immutable infrastructure. Yet, the simplicity of its syntax often belies the complexity of building truly optimized, secure, and maintainable container images. Many developers, either new to containerization or under tight deadlines, often overlook critical best practices, leading to bloated images, security vulnerabilities, slower deployments, and increased operational costs.
This comprehensive guide delves deep into the art and science of Dockerfile construction, dissecting foundational concepts, practical techniques, and advanced strategies that empower you to master the build process. From the fundamental principles of layer caching and context management to sophisticated multi-stage builds, security hardening, and performance optimizations, we will explore the nuances that differentiate a mediocre Dockerfile from an exemplary one. Our journey will illuminate how thoughtful Dockerfile design not only streamlines development workflows but also fortifies the resilience and efficiency of your deployed applications, whether they are simple microservices, complex backend systems, or critical components of an extensive api ecosystem. Embracing these best practices is not merely about writing correct Dockerfiles; it's about engineering robust, scalable, and secure software delivery pipelines that thrive in today's containerized world.
The Foundations: Understanding Docker Builds and Their Mechanics
Before diving into specific best practices, it is crucial to establish a solid understanding of how Docker builds images, as this underpins many of the optimization strategies we will discuss. A Dockerfile is essentially a script composed of instructions that Docker executes in sequence to create a Docker image. Each instruction in a Dockerfile creates a new layer on top of the previous one, and these layers are immutable once created. This layered architecture is fundamental to Docker's efficiency and versioning capabilities.
1. The Anatomy of a Dockerfile Instruction
Every line in a Dockerfile, starting with a keyword (like FROM, RUN, COPY, CMD, EXPOSE, etc.), represents an instruction. Each instruction triggers an action, such as fetching a base image, executing a command inside the container, copying files, or setting environment variables. For instance, a RUN instruction executes a command and commits the results to a new image layer. Understanding that each significant change creates a new layer is the first step towards optimizing image size and build speed. If you have five RUN commands, you will likely have five distinct layers created for those operations, each potentially adding to the final image size.
2. The docker build Command: Context and Process
The docker build command is the entry point for creating an image from a Dockerfile. When you execute docker build -t myapp:1.0 ., Docker initiates a complex process:
- Build Context: The
.at the end of the command specifies the build context. This is the set of files and directories at the specified path that the Docker daemon can access during the build. Docker sends this entire context to the Docker daemon. A common pitfall is including unnecessary files (like.gitdirectories,node_modules, or temporary build artifacts) in the build context, which can significantly slow down the build process, especially over networks, and lead to larger images if these files are inadvertently copied. - Daemon Communication: The Docker client sends the entire build context to the Docker daemon. This is why a large context can slow things down, as the daemon needs to receive all these files even if only a few are actually used by
COPYorADDinstructions. - Instruction Execution: The daemon then processes the Dockerfile instruction by instruction. For each instruction, it attempts to reuse an existing layer from its build cache.
- Layer Caching: This is perhaps the most critical concept for fast and efficient Docker builds. Docker caches the results of each instruction. If an instruction (and its preceding instructions) remains unchanged, Docker can use the cached layer instead of re-executing the command. This dramatically speeds up subsequent builds. However, any change to an instruction or a file copied by an instruction will invalidate the cache for that instruction and all subsequent instructions.
3. The Power and Peril of Layer Caching
Layer caching is a double-edged sword. When used effectively, it slashes build times. When misunderstood, it can lead to frustratingly slow builds.
- How Caching Works: Docker compares each instruction to the instructions of previously built images. If an identical instruction is found, and all preceding instructions are also cached, Docker reuses the cached layer. For
COPYandADDinstructions, Docker also checks the checksums of the files being copied. If a file's content or metadata (like modification time) changes, the cache for thatCOPY/ADDinstruction is invalidated. - Cache Invalidation: The moment an instruction invalidates the cache, all subsequent instructions will also be re-executed, even if they haven't changed themselves. This makes the order of instructions paramount. Instructions that are less likely to change (like
FROM, installing system dependencies) should generally come earlier in the Dockerfile, allowing Docker to leverage cached layers for these stable parts of the build. Instructions that frequently change (like copying application code) should come later.
Understanding these foundational mechanics is the bedrock upon which all Dockerfile best practices are built. By consciously managing the build context, strategically ordering instructions, and leveraging multi-stage builds, developers can significantly enhance the efficiency, security, and maintainability of their containerized applications.
Core Best Practices for Efficiency, Security, and Size Optimization
Crafting an optimal Dockerfile involves a deliberate strategy to minimize image size, accelerate build times, and bolster security. These core practices form the backbone of a robust containerization approach.
1. Choose the Right Base Image: The Foundation Matters
The FROM instruction is the very first step in almost every Dockerfile, and the choice of your base image profoundly impacts the final image size, security profile, and overall compatibility.
- Minimality is Key: Aim for the smallest possible base image that satisfies your application's runtime dependencies. Smaller images download faster, consume less disk space, and have a reduced attack surface due to fewer installed packages.
- Alpine Linux: Known for its extremely small footprint (around 5-8 MB) due to using musl libc and BusyBox. It's an excellent choice for applications that have minimal system dependencies, like Go binaries or simple Node.js services, where every megabyte counts. However, be aware of musl libc compatibility issues with certain compiled languages or complex libraries.
- Slim/Debian-based images: Many official language images (e.g.,
python:3.9-slim-buster,node:16-slim) offer a compromise. They are based on Debian or Ubuntu but are stripped down, containing only essential packages. They provide a more traditional glibc environment while still being significantly smaller than full-fledged distributions. - Distroless Images: These images from Google (e.g.,
gcr.io/distroless/static,gcr.io/distroless/nodejs) contain only your application and its direct runtime dependencies. They are incredibly small and secure, as they lack package managers, shells, or any other tools typically found in a standard Linux distribution, drastically reducing the attack surface. They are ideal for compiled languages (Go, Rust) or interpreted languages where the runtime environment is well-defined.
- Specific Version Tagging: Always pin your base images to specific versions (e.g.,
python:3.9.10-slim-busterinstead ofpython:3.9-slimor justpython). This ensures reproducible builds, preventing unexpected breakages if a new version of the base image introduces breaking changes or vulnerabilities. Relying onlatestis a common anti-pattern that can lead to inconsistent builds over time.
2. Leverage Multi-Stage Builds: The Art of Separation
Multi-stage builds are arguably the most impactful best practice for reducing final image size and managing build dependencies. Introduced in Docker 17.05, they allow you to use multiple FROM statements in a single Dockerfile. Each FROM instruction can use a different base image, and critically, each FROM starts a new build stage.
- The Problem Multi-Stage Builds Solve: Traditional Dockerfiles often required installing extensive build tools (compilers, SDKs, test frameworks, npm/pip/maven dependencies) that were necessary to compile or package an application but were completely superfluous at runtime. This resulted in bloated images containing megabytes or even gigabytes of unnecessary tools and temporary files.
- How They Work: In a multi-stage build, you perform all your build-time tasks (compilation, dependency installation, testing) in an initial "builder" stage. Then, in a subsequent "runtime" stage, you start fresh with a minimal base image and only
COPY --from=the necessary artifacts (e.g., the compiled binary, production dependencies, configuration files) from the previous build stage.
Example:```dockerfile
Stage 1: Build the application
FROM golang:1.20-alpine AS builder WORKDIR /app COPY go.mod go.sum ./ RUN go mod download COPY . . RUN CGO_ENABLED=0 GOOS=linux go build -o myapp .
Stage 2: Create the final lean image
FROM alpine:latest WORKDIR /root/ COPY --from=builder /app/myapp . EXPOSE 8080 CMD ["./myapp"] ```In this Go example, the golang:1.20-alpine image (which is quite large due to the Go SDK) is only used during the build phase. The final image is based on a tiny alpine:latest and only contains the compiled myapp binary, resulting in a dramatically smaller and more secure image. * Benefits: * Significantly Smaller Images: Removes all build dependencies from the final image. * Reduced Attack Surface: Fewer packages mean fewer potential vulnerabilities. * Improved Cache Utilization: Changes to source code only invalidate the application build stage, not the base dependency installation stage. * Cleaner Dockerfiles: Separates build logic from runtime configuration. * Enhanced Security Posture: By reducing the attack surface, your application deployed through an api gateway or as part of an Open Platform is inherently more secure.
3. Minimize Layers and Combine Instructions: Less is More
Each RUN, COPY, ADD instruction creates a new layer. While layers are efficient in terms of storage (shared between images), an excessive number of layers can increase image metadata and potentially lead to longer image pulls. More importantly, each layer adds to the potential for cache invalidation.
- Combine Related
RUNCommands: Instead of multipleRUNinstructions for installing packages, use a singleRUNcommand with&&to chain operations.- Bad:
dockerfile RUN apt-get update RUN apt-get install -y --no-install-recommends some-package RUN rm -rf /var/lib/apt/lists/* - Good:
dockerfile RUN apt-get update && \ apt-get install -y --no-install-recommends some-package && \ rm -rf /var/lib/apt/lists/*The "good" example creates a single layer, ensuring thatapt-get updateand the subsequent install and cleanup happen within the same atomic operation. This also ensures that therm -rfcommand is part of the same layer that added the files, thus removing them from that layer's filesystem diff and preventing them from unnecessarily increasing the layer's size.
- Bad:
- Order Instructions Strategically for Cache Optimization: Place instructions that are least likely to change earlier in the Dockerfile.By following this order, if only your application code changes, Docker can reuse cached layers for the base image, system dependencies, and language dependencies, only rebuilding from the point where the application code is copied.
FROM(base image)RUNcommands for installing core system dependenciesCOPYfiles that rarely change (e.g.,package.json,requirements.txt)RUNcommands for installing language-specific dependencies (npm install,pip install)COPYapplication source code (which changes frequently)EXPOSE,CMD,ENTRYPOINT
4. Clean Up After Yourself: No Unnecessary Clutter
Any file or package installed during the build process that is not required at runtime should be removed. This is especially critical for single-stage builds, but even in multi-stage builds, the "builder" stage should be kept clean to ensure only essential artifacts are passed to the final stage.
- Package Manager Caches: Clear package manager caches immediately after installation.
- For
apt:rm -rf /var/lib/apt/lists/* - For
yum:yum clean all && rm -rf /var/cache/yum - For
apk:rm -rf /var/cache/apk/*
- For
- Build-time Dependencies: Uninstall packages only needed for building (e.g., development headers, compilers) if they are not necessary for the final runtime image. Multi-stage builds largely automate this, but it's a manual concern for single-stage builds.
- Temporary Files: Remove any temporary files or directories created during the build.
5. Optimize COPY and ADD Instructions: Precision Matters
COPY and ADD are used to transfer files from the build context into the image. While similar, COPY is generally preferred for its explicit and predictable behavior.
- Be Specific with
COPY: AvoidCOPY . .unless absolutely necessary and only after employing a robust.dockerignore. Instead, copy only the files and directories your application explicitly needs.- Bad:
COPY . /app(Copies everything from the build context) - Good:
COPY requirements.txt /app/ - Good:
COPY src/ /app/src/
- Bad:
- Use
.dockerignore: This file works similarly to.gitignoreand tells the Docker client which files and directories to exclude from the build context before it's sent to the Docker daemon. This is crucial for:- Reducing Build Context Size: Speeds up the initial context transfer, especially over slow networks.
- Preventing Unnecessary Files in Image: Avoids accidental inclusion of sensitive files,
.gitfolders,node_modules(if installed separately), or local development artifacts. - Example
.dockerignore:.git .gitignore *.log node_modules/ tmp/ *.md Dockerfile .dockerignore
ADDvs.COPY:COPYonly copies local files or directories. It's transparent and explicit.ADDhas additional features: it can extract compressed archives from the build context and can fetch files from remote URLs. However, these features can be less predictable and potentially introduce security risks (e.g., downloading from an untrusted URL). Generally,COPYis safer and preferred for most use cases. If you need to download and extract, useRUN wget ... && tar -xf ...for greater control and explicit cleanup.
6. Run as Non-Root User: A Fundamental Security Practice
Running containers as the root user is a significant security risk. If a vulnerability allows an attacker to break out of the container, they would have root privileges on the host system.
- Create a Dedicated User:
dockerfile # Create a non-root user and group RUN addgroup --system appgroup && adduser --system --ingroup appgroup appuser # Change ownership of the application directory WORKDIR /app COPY --from=builder /app/myapp . RUN chown -R appuser:appgroup /app # Switch to the non-root user USER appuser EXPOSE 8080 CMD ["./myapp"] - Benefits:
- Principle of Least Privilege: Limits the damage an attacker can do if they compromise the container.
- Prevents Root Escalation: Reduces the chances of a container breaking out and gaining root access on the host.
- Consider User Namespaces: For even greater isolation, Docker supports user namespaces, which map the container's root user to an unprivileged user on the host. This adds another layer of security, making it harder for a compromised container to affect the host.
7. Version Pinning for Dependencies: Reproducibility and Stability
Just as with base images, pinning versions for all application dependencies is critical for reproducible builds and preventing unexpected issues.
- System Packages: When using
apt-get install, specify versions (e.g.,apt-get install -y nginx=1.20.1-1~buster). This is more robust than relying on the latest available in the repository. - Language Dependencies: Use lock files (
package-lock.json,yarn.lock,requirements.txtwith pinned versions,go.sum,Gemfile.lock) and install dependencies using commands that respect these lock files (e.g.,npm ci,pip install -r requirements.txt). This ensures that your application always uses the exact same versions of its dependencies, regardless of when the image is built. - Benefits:
- Reproducible Builds: Every build yields the exact same image content.
- Prevents "It worked on my machine" Syndrome: Ensures consistency across development, testing, and production environments.
- Easier Debugging: If a bug appears, you know the dependency versions haven't silently changed.
- Security Patch Management: Allows you to explicitly decide when to update dependencies for security patches, rather than having them implicitly updated.
8. Use Build Arguments (ARG) for Flexibility
The ARG instruction defines a variable that users can pass to the builder with the docker build --build-arg <varname>=<value> command. This allows for flexible customization of the build process without modifying the Dockerfile itself.
- Use Cases:
- Proxy Servers:
ARG HTTP_PROXY - Version Numbers:
ARG APP_VERSION - Base Image Variants:
ARG BASE_IMAGE_TAG=latest(though specific tags are recommended forFROM).
- Proxy Servers:
- Placement:
ARGinstructions can appear beforeFROM. If anARGis defined beforeFROM, it's available for theFROMinstruction (e.g.,FROM myimage:${IMAGE_TAG}). Otherwise, they are available from where they are defined. - Sensitive Information: Be cautious with
ARGfor sensitive information. Build arguments are visible in the image history, so they are not suitable for secrets. For secrets, use Docker BuildKit'ssecretmounts or external secrets management tools.
9. Add Labels for Metadata and Organization
LABEL instructions add metadata to an image. While they don't affect the runtime behavior of the container, they are invaluable for documentation, automation, and image management.
- Key-Value Pairs: Labels are typically key-value pairs.
dockerfile LABEL maintainer="Your Name <your.email@example.com>" \ version="1.0.0" \ description="My amazing API service" \ org.label-schema.vcs-url="https://github.com/myorg/myapp" \ org.label-schema.build-date=$BUILD_DATE - Standard Labels: Follow common conventions like
org.label-schemaor OCI image specification labels for interoperability with tools that consume this metadata. - Benefits:
- Documentation: Provides quick information about the image's purpose, version, author, etc.
- Automation: Tools can use labels to filter, manage, or automate actions based on image metadata. For example, a CI/CD pipeline might look for a specific label to determine if an image should be deployed to a
gatewayor anOpen Platform. - Searchability: Makes it easier to find specific images in a registry.
10. Implement Health Checks (HEALTHCHECK)
A HEALTHCHECK instruction tells Docker how to test if a containerized application is still running and healthy. This is vital for orchestrators like Kubernetes to know when to restart an unhealthy container or when it's safe to route traffic to it.
- Syntax:
dockerfile HEALTHCHECK --interval=30s --timeout=10s --retries=3 CMD curl --fail http://localhost:8080/health || exit 1 - Parameters:
--interval: How often to run the check.--timeout: How long to wait for a check to complete.--start-period: Grace period for containers to start up.--retries: How many consecutive failures before the container is consideredunhealthy.
- Types of Checks:
CMD: Execute a command inside the container. If the command exits with status0, the container is healthy; otherwise, unhealthy.NONE: Disables health checks inherited from the base image.
- Benefits:
- Reliable Deployments: Ensures that traffic is only routed to truly ready and functional containers.
- Automated Recovery: Orchestrators can automatically restart unhealthy containers, improving application resilience.
- Improved Observability: Provides a clear signal about the application's state.
11. Security Scanning of Images: Proactive Vulnerability Management
Even with the best Dockerfile practices, vulnerabilities can lurk in base images or third-party dependencies. Proactive security scanning is an essential step in your CI/CD pipeline.
- Tools:
- Docker Scout: Docker's own tool for vulnerability and supply chain insights.
- Clair: Open-source static analysis for container vulnerabilities.
- Trivy: A comprehensive and popular open-source scanner for vulnerabilities in OS packages, application dependencies, IaC, and more.
- Snyk: Commercial tool for security scanning across various layers.
- Integration: Integrate these scanners into your automated build process. Fail the build if critical vulnerabilities are detected.
- Remediation: Regularly update base images and dependencies to patch known vulnerabilities. Pay attention to security advisories.
12. Managing Secrets: Never Hardcode Sensitive Information
Hardcoding API keys, database credentials, or other sensitive information directly into a Dockerfile or an image layer is a severe security breach waiting to happen. Once in an image layer, it's very difficult to remove completely.
- Avoid
ARGfor Secrets: As mentioned,ARGvalues are visible in image history. - Docker BuildKit Secret Mounts: If you need secrets during the build process (e.g., to authenticate with a private package repository), use BuildKit's
--secretflag withRUN --mount=type=secret.... This makes the secret available only during the build command's execution and not in the final image layer. - Runtime Secrets Management: For secrets needed by the running container, rely on:
- Environment Variables: While visible to
docker inspect, they are common for non-sensitive configurations. - Docker Secrets: For Docker Swarm or standalone containers.
- Kubernetes Secrets: The standard for Kubernetes deployments.
- External Secret Management Systems: Vault, AWS Secrets Manager, Azure Key Vault, Google Secret Manager for robust, centralized secret handling.
- Environment Variables: While visible to
- Principle: Secrets should be injected into the container at runtime, not baked into the image.
13. Optimizing for Performance: Understanding docker buildx and BuildKit
Modern Docker builds increasingly leverage BuildKit, a next-generation builder toolkit. Buildx is a CLI plugin that extends the docker build command with BuildKit capabilities, offering significant performance advantages and advanced features.
- Parallel Builds: BuildKit can process independent build stages concurrently, drastically reducing overall build times for complex Dockerfiles.
- Advanced Caching:
- Improved Layer Caching: More granular cache invalidation.
- Cache Exports: BuildKit allows you to export and import build caches to/from registries or local disk, which is invaluable for CI/CD pipelines. This means subsequent builds, even on different machines, can benefit from previous build caches.
- Distributed Builds: BuildKit supports building for multiple platforms (e.g.,
linux/amd64,linux/arm64) with a single command, producing multi-platform images. - Secret Mounts: As discussed, for secure handling of build-time secrets.
- Syntax Extensions: BuildKit introduces new Dockerfile syntax features like
RUN --mountfor cache mounts, secret mounts, and SSH agent forwarding. - Leveraging Buildx:
bash # Create a new builder instance docker buildx create --use --name mybuilder # Build with BuildKit (e.g., for multi-platform) docker buildx build --platform linux/amd64,linux/arm64 -t myimage:latest . --pushIntegratingdocker buildxinto your CI/CD pipelines can unlock substantial speedups and capabilities, especially for projects targeting diverse architectures or requiring optimized cache management.
14. Immutable Images and Reproducible Builds: The Gold Standard
The ultimate goal of Dockerfile best practices is to produce immutable images and achieve fully reproducible builds.
- Immutable Images: Once an image is built and tagged, it should not be modified. Any changes require building a new image with a new tag. This ensures that what runs in development is identical to what runs in staging and production.
- Reproducible Builds: Given the same Dockerfile, build context, and build arguments, a build process should always produce the exact same image (byte-for-byte, ignoring metadata like creation time). This is achieved by:
- Pinning all versions: Base images, system packages, language dependencies.
- Controlled Inputs: Minimizing external network calls during the build (e.g., pre-downloading dependencies or using private registries).
- Deterministic Operations: Ensuring commands like
RUNproduce consistent outputs. - BuildKit's Role: BuildKit significantly aids in reproducibility by providing better cache control and more deterministic build processes.
APIPark is a high-performance AI gateway that allows you to securely access the most comprehensive LLM APIs globally on the APIPark platform, including OpenAI, Anthropic, Mistral, Llama2, Google Gemini, and more.Try APIPark now! 👇👇👇
Advanced Considerations and Ecosystem Integration
Beyond the fundamental practices, the efficacy of your Dockerfiles is often magnified when considered within the broader context of your development and deployment ecosystem.
1. Integrating with CI/CD Pipelines: Automation is Key
A Dockerfile's true power is unleashed when its build process is fully automated within a Continuous Integration/Continuous Deployment (CI/CD) pipeline. This ensures that every code change triggers an automated image build, test, and potentially, deployment.
- Automated Builds: Trigger
docker build(ordocker buildx build) on every push to your version control system. - Automated Testing: Run unit, integration, and even end-to-end tests against the newly built image. This could involve running the container and executing tests within or against it.
- Image Tagging Strategy: Implement a consistent tagging scheme (e.g.,
myapp:latest,myapp:v1.2.3,myapp:git-commit-sha). Semantic versioning is highly recommended for production releases. - Registry Push: Automatically push successfully built and tested images to a container registry (Docker Hub, AWS ECR, GCR, Azure Container Registry, GitLab Container Registry).
- Deployment: Integrate image deployment with orchestration tools like Kubernetes, Docker Swarm, or cloud-native services. A well-constructed Dockerfile directly translates to faster, more reliable deployments in these environments.
2. Docker Compose for Local Development: Streamlining the Workflow
While Dockerfiles define how a single image is built, Docker Compose (a tool for defining and running multi-container Docker applications) provides a seamless way to manage multi-service applications during local development.
- Orchestrating Services: Use
docker-compose.ymlto define how your application's services (e.g., a webapi, a database, a cache, a queue) interact, including networking, volumes, and environment variables. - Build Integration: Docker Compose can directly reference your Dockerfiles, allowing you to build images as part of starting your local development environment (
docker-compose up --build). - Environment Parity: Docker Compose helps maintain environment parity between your local machine and production, reducing the "it works on my machine" problem. This is particularly valuable when developing an
apiservice that depends on several other containerized components.
3. Container Orchestration Platforms: Kubernetes and Beyond
The quality of your Dockerfile directly impacts the performance, scalability, and resilience of your applications when deployed on container orchestration platforms like Kubernetes.
- Smaller Images, Faster Deployments: Smaller images pull faster to nodes, leading to quicker pod startup times and more efficient scaling operations.
- Resource Efficiency: Lean, optimized images consume fewer resources (CPU, memory, disk) on your cluster, leading to better utilization and reduced infrastructure costs.
- Security: Secure Dockerfiles (non-root users, minimal attack surface) are a prerequisite for robust security policies within Kubernetes (e.g., Pod Security Standards).
- Health Checks:
HEALTHCHECKinstructions in Dockerfiles are directly utilized by Kubernetes liveness and readiness probes, enabling intelligent traffic routing and automated self-healing. - Configuration Management: Dockerfiles define the immutable image. Configuration (like database connection strings, environment-specific
apiendpoints) should be managed externally via Kubernetes ConfigMaps and Secrets, not baked into the image.
4. Natural Integration with API Management and Open Platforms
The entire discussion around Dockerfile best practices culminates in the deployment of robust and efficient applications, many of which are api services. A well-built container image is the fundamental unit of deployment for microservices, which often communicate via APIs.
Consider an application that serves as an api gateway – a critical component in any modern microservices architecture, especially one involving AI models or complex integrations. Such a gateway needs to be built with utmost efficiency and security. A Dockerfile for an api gateway application would benefit immensely from all the practices discussed:
- Minimal Base Image: To reduce its footprint and attack surface.
- Multi-Stage Build: To compile the gateway application (e.g., written in Go, Java, or Node.js) and then package only the necessary binary/runtime into a tiny final image.
- Non-Root User: To enhance security, as an
apigatewayis an exposed entry point. - Version Pinning: For all dependencies, ensuring predictable behavior and easier patching of vulnerabilities in core components.
- Health Checks: To allow orchestrators to confirm the
gatewayis operational and ready to route traffic, which is crucial for maintaining anOpen Platform's availability.
In the context of managing and deploying AI and REST services, platforms like APIPark exemplify how containerization and API management converge. APIPark is an open-source AI gateway and API management platform designed to help developers and enterprises manage, integrate, and deploy AI and REST services with ease. A Dockerfile built with best practices would be instrumental in deploying APIPark itself, or the services that sit behind it. For example, if you're building a custom AI model serving api that will be integrated into APIPark, crafting its Dockerfile using these best practices ensures your model is deployed efficiently, securely, and with minimal overhead, allowing APIPark to then provide unified API formats, prompt encapsulation, and end-to-end API lifecycle management atop a solid container foundation. This synergy demonstrates how mastering Dockerfile builds is a prerequisite for building reliable, performant components within an Open Platform ecosystem, particularly for innovative solutions like AI gateways.
5. Documentation and Comments: Maintaining Clarity
While a Dockerfile is inherently a script, clear documentation and comments are essential for maintainability, especially in complex projects or team environments.
- Explain Intent: Use comments (
#) to explain non-obvious steps, design choices, or specific reasons for certain instructions. - Structure: Group related instructions with comments for better readability.
- README: A good
README.mdin the repository should complement the Dockerfile, explaining how to build, run, and interact with the image, including any necessarybuild-args or environment variables.
Table: Dockerfile Best Practices Summary
To encapsulate the vast array of best practices discussed, here's a table summarizing key areas and their corresponding strategies. This table provides a quick reference for developers aiming to optimize their Dockerfile builds, whether they are building a simple api endpoint or a complex component of an Open Platform like an api gateway.
| Category | Best Practice | Rationale | Example (Conceptual) |
|---|---|---|---|
| Image Size | Multi-Stage Builds | Isolate build dependencies from runtime, drastically reducing final image size. | FROM build-env AS builder then FROM runtime-env, COPY --from=builder |
| Minimal Base Images | Reduce attack surface, download times, and disk footprint. | FROM alpine, FROM <language>:slim, FROM distroless |
|
| Clean Up Artifacts | Remove build caches, temporary files, and unnecessary packages from layers. | rm -rf /var/lib/apt/lists/* |
|
| Build Speed | Order Instructions Strategically | Place stable instructions early to maximize layer caching. | FROM, RUN apt-get update, COPY requirements.txt, RUN pip install, COPY app/ |
Optimize COPY with .dockerignore |
Reduce build context size, speed up context transfer, prevent unnecessary file inclusion. | COPY requirements.txt ., using .dockerignore for node_modules |
|
| Leverage BuildKit/Buildx Cache | Utilize advanced caching features, cache exports, and parallel builds. | docker buildx build --cache-to type=registry... |
|
| Security | Run as Non-Root User | Adhere to the principle of least privilege, limit potential damage in case of container compromise. | RUN adduser --system appuser, USER appuser |
| Pin All Versions | Ensure reproducible builds and prevent unexpected dependency updates (base images, packages, language deps). | FROM python:3.9.10-slim-buster, pip install some-lib==1.2.3 |
|
| Scan Images for Vulnerabilities | Proactively identify and remediate known vulnerabilities in base images and dependencies. | Integrate Trivy, Clair, or Docker Scout in CI. | |
| Manage Secrets Securely | Never embed sensitive information in image layers; inject at runtime or use BuildKit secrets for build-time needs. | Use Kubernetes Secrets, Docker BuildKit --secret. |
|
| Maintainability | Use ARG for Flexibility |
Allow customization of build parameters without modifying the Dockerfile. | ARG APP_VERSION, docker build --build-arg APP_VERSION=1.0.0 |
Add LABELs for Metadata |
Provide image documentation for identification, searchability, and automation. | LABEL maintainer="John Doe" version="v1.0" |
|
Implement HEALTHCHECK |
Define how to check if the application inside the container is healthy for orchestration. | HEALTHCHECK CMD curl -f http://localhost/health |
|
| Documentation/Comments | Explain complex steps or design decisions for future maintainers. | # Install dependencies for service X |
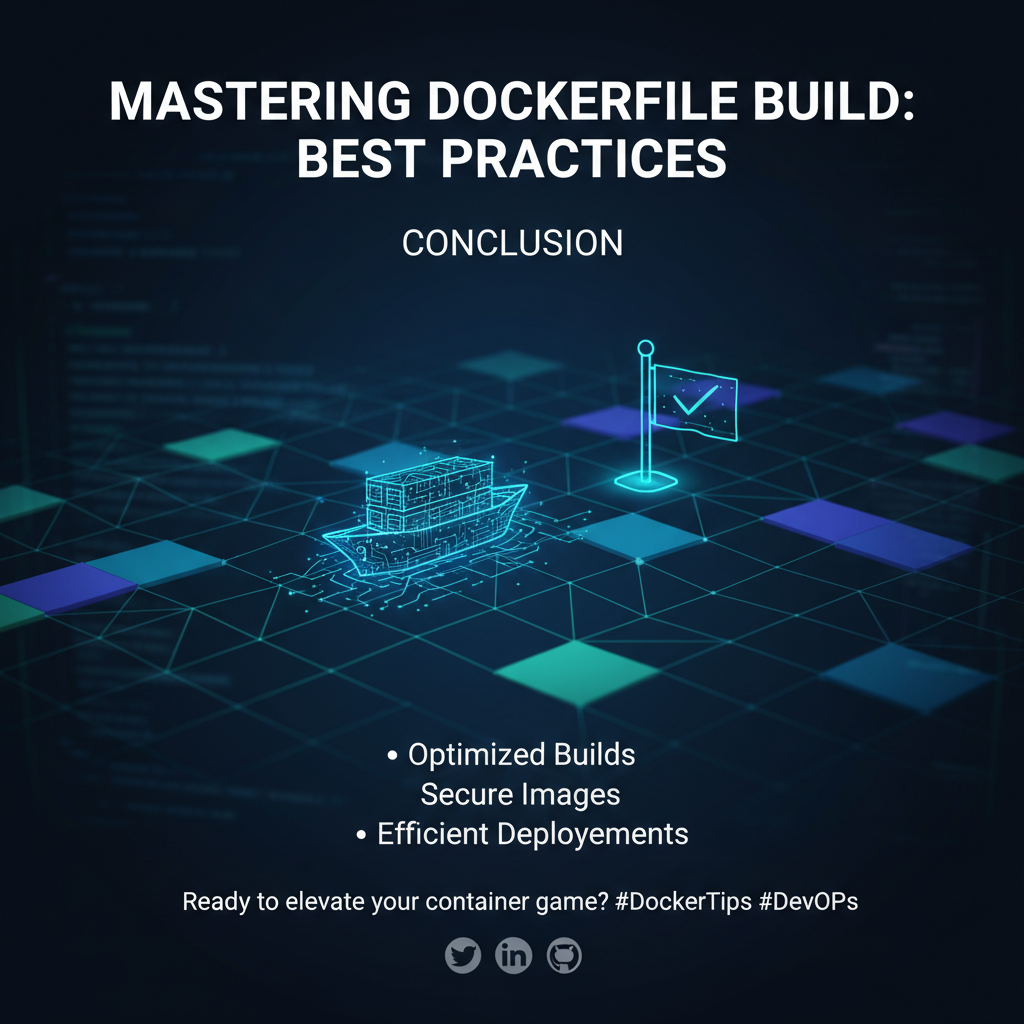
Conclusion
Mastering Dockerfile builds is not a trivial pursuit but a continuous journey of learning and refinement. The Dockerfile, as the immutable blueprint for your containerized applications, directly influences their efficiency, security, and scalability. By diligently applying the best practices outlined in this guide – from judicious base image selection and the transformative power of multi-stage builds to meticulous security hardening and strategic instruction ordering – you empower yourself to craft images that are not only compact and fast to build but also robust and secure for production environments.
The impact of these practices extends far beyond individual images. Optimized Dockerfiles lay the groundwork for a more efficient CI/CD pipeline, accelerate deployments across diverse environments, and enhance the overall resilience of applications running on orchestration platforms like Kubernetes. Furthermore, in an increasingly interconnected world, where applications frequently interact via APIs and form part of larger Open Platform ecosystems, the underlying quality of each containerized service is paramount. Whether you are developing a simple microservice, a complex api endpoint, or a sophisticated gateway for AI models, the principles of a well-architected Dockerfile remain universally applicable and profoundly beneficial.
Embrace these best practices not as rigid rules but as guiding principles. Continuously evaluate your Dockerfiles, stay abreast of new Docker features like BuildKit, and integrate security scanning and automated testing into your workflow. By doing so, you will not only streamline your development process but also build a foundation for resilient, high-performing applications that meet the rigorous demands of modern cloud-native architectures. The investment in mastering your Dockerfile builds today will yield significant returns in the reliability, security, and operational efficiency of your software for years to come.
Frequently Asked Questions (FAQ)
1. Why is choosing a minimal base image so important for Dockerfiles? Choosing a minimal base image (like Alpine, slim variants, or distroless images) is crucial for several reasons: it significantly reduces the final image size, which leads to faster download and deployment times. More importantly, smaller images contain fewer packages and dependencies, drastically reducing the attack surface for potential security vulnerabilities. This aligns with the principle of least privilege, ensuring your container only contains what's absolutely necessary for runtime.
2. What are multi-stage builds, and why are they considered a best practice? Multi-stage builds allow you to use multiple FROM statements in a single Dockerfile, creating distinct build "stages." The primary advantage is separating build-time dependencies (like compilers, SDKs, or extensive development tools) from the final runtime environment. You can compile your application in one stage and then copy only the compiled artifacts (e.g., binaries, production-ready code) to a much smaller, minimal base image in a subsequent stage. This dramatically reduces the final image size and its attack surface, making it one of the most effective optimization techniques.
3. How does .dockerignore help in optimizing Dockerfile builds? The .dockerignore file functions similarly to .gitignore. It specifies which files and directories should be excluded from the "build context" that Docker sends to the Docker daemon. By ignoring unnecessary files (e.g., .git folders, node_modules if installed within the container, temporary files, or local development configuration), you achieve two main benefits: first, it speeds up the build process by reducing the amount of data transferred to the daemon, especially over networks. Second, it prevents accidental inclusion of sensitive or irrelevant files into your final image, contributing to smaller and more secure images.
4. Why is running a container as a non-root user a critical security best practice? Running a container as the root user is a significant security risk because if an attacker manages to compromise the application inside the container, they would gain root privileges within that container. In certain scenarios, this could potentially be escalated to root access on the host system. By creating and switching to a dedicated non-root user (USER appuser) within the Dockerfile, you enforce the principle of least privilege. This significantly limits the potential damage an attacker can inflict, as their compromised process would operate with reduced permissions.
5. What is the role of HEALTHCHECK in a Dockerfile, and why is it important for deployment? The HEALTHCHECK instruction defines how Docker (and subsequently, container orchestrators like Kubernetes) can determine if the application inside a container is healthy and responsive. It specifies a command to execute periodically, along with parameters like interval, timeout, and retries. This is vital for deployment because it allows orchestrators to: * Route Traffic Safely: Only send traffic to containers that are confirmed to be healthy and ready. * Automate Recovery: Automatically restart containers that become unhealthy, improving application resilience and uptime. * Provide Observability: Offer clear signals about the state of your application, aiding in monitoring and troubleshooting.
🚀You can securely and efficiently call the OpenAI API on APIPark in just two steps:
Step 1: Deploy the APIPark AI gateway in 5 minutes.
APIPark is developed based on Golang, offering strong product performance and low development and maintenance costs. You can deploy APIPark with a single command line.
curl -sSO https://download.apipark.com/install/quick-start.sh; bash quick-start.sh

In my experience, you can see the successful deployment interface within 5 to 10 minutes. Then, you can log in to APIPark using your account.

Step 2: Call the OpenAI API.