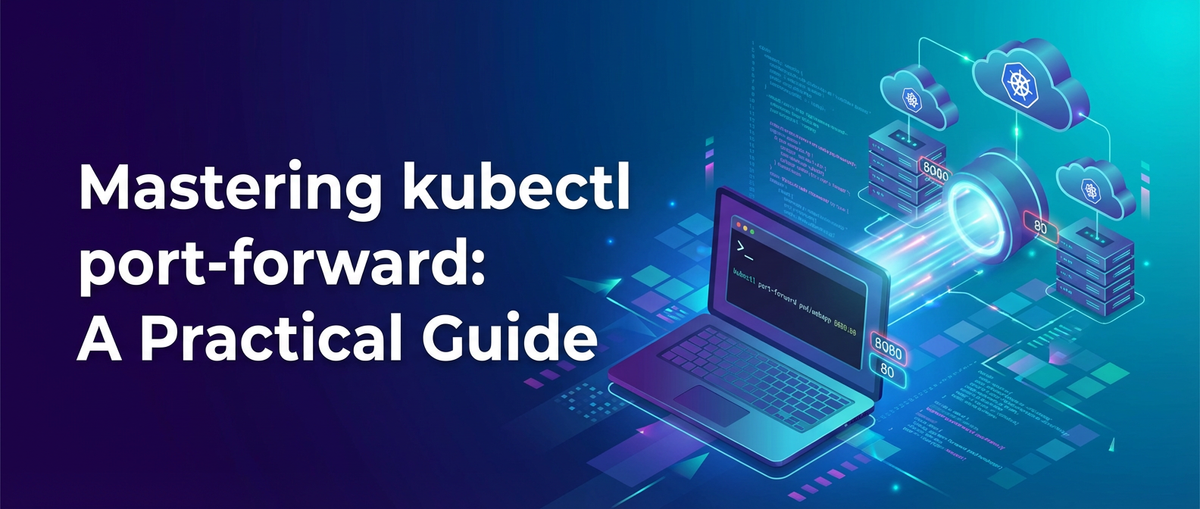
Mastering kubectl port-forward: A Practical Guide


Kubernetes has undeniably revolutionized the way we deploy, scale, and manage applications in modern cloud environments. Its robust orchestration capabilities provide unparalleled flexibility, but this power often comes with a steep learning curve, especially when it comes to understanding its intricate networking model. Developers and operations engineers frequently find themselves needing to interact with services running inside a Kubernetes cluster directly, whether for local development, debugging, or simply inspecting the state of a particular application. This is where kubectl port-forward emerges as an indispensable tool, a simple yet profoundly powerful command-line utility that creates a secure, temporary tunnel, bridging the chasm between your local machine and a specific resource within your cluster.
Imagine a scenario where your microservices are neatly encapsulated within pods, each with its own ephemeral IP address, residing in a network fabric that is entirely distinct from your local development environment. While Kubernetes offers various mechanisms like Services and Ingress to expose applications to the outside world, these are often designed for production-grade, sustained external access. For quick, ad-hoc, or development-centric needs, setting up an Ingress controller or a LoadBalancer service might be overkill, time-consuming, or even impractical. You might simply need to connect your local IDE to a database running inside a pod, test a new API endpoint before it's publicly exposed, or debug a specific instance of a faulty service without affecting live traffic. kubectl port-forward is precisely engineered for these use cases, offering a direct, secure, and temporary conduit that sidesteps the complexities of service exposure for immediate interaction.
This comprehensive guide aims to demystify kubectl port-forward, transforming you from a casual user to a master of this essential Kubernetes command. We will embark on a detailed exploration, starting from the fundamental networking concepts that necessitate such a tool, progressing through its basic syntax and common use cases, and finally delving into advanced techniques, security considerations, and best practices. By the end of this journey, you will possess a deep understanding of how port-forward operates, when to leverage its power, and how to integrate it seamlessly into your daily development and debugging workflows, ensuring smoother sailing in the complex seas of Kubernetes.
Chapter 1: Understanding the Kubernetes Networking Landscape
Before we dive into the mechanics of kubectl port-forward, it's crucial to grasp the fundamental networking principles that govern Kubernetes clusters. The design of Kubernetes networking prioritizes isolation, scalability, and flexibility, which, while beneficial for production environments, can sometimes make direct interaction with internal services challenging for a developer on their local machine. Understanding this landscape will illuminate why port-forward is not just a convenience, but often a necessity.
1.1 The Isolation of Kubernetes Pods
At the heart of Kubernetes lies the Pod, the smallest deployable unit that encapsulates one or more containers. Each Pod is assigned its own unique IP address within the cluster's network. This IP address is typically part of a private network range (e.g., 10.x.x.x, 172.x.x.x, or 192.168.x.x), making it inaccessible directly from outside the cluster. This design choice offers several advantages:
- Isolation: Pods are isolated from each other by default, enhancing security and preventing unintended interference.
- Port Freedom: Applications within Pods can bind to any port without worrying about conflicts with other applications on the same node, as each Pod has its own network namespace.
- Simplified Application Design: Applications within a Pod can communicate with
localhost, much like traditional applications running on a single host.
However, this isolation also presents a challenge. If you want to connect to a database or an API service running inside a specific Pod from your local laptop, you cannot simply use its Pod IP address because it's not routable from your external network. Furthermore, Pods are inherently ephemeral; they can be created, destroyed, or rescheduled onto different nodes at any time. Their IP addresses are not stable, making it impossible to rely on them for consistent connectivity.
The Container Network Interface (CNI) plays a pivotal role here. CNI plugins (like Calico, Flannel, Cilium, Weave Net) are responsible for allocating IP addresses to Pods and ensuring network connectivity between them across different nodes. While CNI enables inter-pod communication, it does not inherently provide a mechanism for external access to these isolated Pod IPs.
1.2 Services: The Abstraction Layer
To address the ephemerality of Pods and provide a stable network endpoint for applications, Kubernetes introduces the concept of a Service. A Service is a logical abstraction that defines a policy for accessing a set of Pods. When you create a Service, Kubernetes assigns it a stable ClusterIP, which is also an internal, private IP address, but unlike Pod IPs, it remains constant for the lifetime of the Service.
Services provide several crucial functions:
- Stable Network Endpoint: Services offer a stable DNS name and IP address, allowing other Pods within the cluster to reliably discover and communicate with a group of Pods, even if the underlying Pods are constantly changing.
- Load Balancing: A Service acts as a simple load balancer, distributing incoming connections across the healthy Pods it targets.
- Decoupling: Services decouple the application logic from the underlying infrastructure, allowing Pods to be scaled up or down without affecting how other applications access them.
Kubernetes offers different types of Services to cater to various access requirements:
- ClusterIP: This is the default Service type. It exposes the Service on an internal IP address within the cluster. This Service is only reachable from within the cluster.
- NodePort: This type exposes the Service on a static port on each Node's IP. This means any traffic sent to
NodeIP:NodePortwill be routed to the Service. While it provides external access, the port range is restricted (typically 30000-32767), and it ties the service to specific node IPs, which can be problematic in dynamic cloud environments. - LoadBalancer: Available in cloud environments (e.g., AWS, GCP, Azure), this type creates an external load balancer provided by the cloud provider, which automatically routes traffic to the Service. This provides a publicly accessible IP address but incurs cloud resource costs and can take time to provision.
- ExternalName: This type maps the Service to an arbitrary external hostname, effectively acting as a CNAME alias. It's used for services outside the cluster.
While Services provide a foundational way to expose applications, for development and debugging purposes, even a LoadBalancer or NodePort might not be ideal. They either incur costs, take time to provision, or expose the service more broadly than necessary for a quick local test. Moreover, for non-HTTP services (like databases, message queues, or custom TCP protocols), Ingress (discussed next) isn't an option.
1.3 Ingress: External Access for HTTP/HTTPS
For exposing HTTP and HTTPS services externally, Kubernetes introduces Ingress. An Ingress is an API object that manages external access to services in a cluster, typically HTTP. Ingress can provide load balancing, SSL termination, and name-based virtual hosting. It acts as a routing layer, directing incoming external HTTP/HTTPS traffic to the correct backend Service based on rules defined in the Ingress resource.
An Ingress controller (e.g., Nginx Ingress Controller, Traefik, GKE Ingress) is required to fulfill the Ingress rules. This controller watches the Ingress resources and configures itself to route traffic accordingly.
Ingress is an excellent solution for exposing web applications, APIs, and other HTTP-based services to the public internet in a production-ready manner. It allows you to define complex routing rules, host multiple services under a single IP, and handle SSL certificates centrally.
However, Ingress has its limitations:
- HTTP/HTTPS only: It's designed specifically for HTTP and HTTPS traffic and cannot be used for arbitrary TCP/UDP services (like databases or custom protocols).
- Complexity: Setting up and managing an Ingress controller, along with its associated rules, can add significant complexity to a development environment, especially if you only need temporary access.
- Not for direct debugging: While it exposes your service, it adds another layer of abstraction. If you need to debug a specific Pod's behavior directly without the Ingress proxying,
port-forwardis more suitable.
For managing a fleet of APIs in a more robust and feature-rich manner, especially with AI integration, a dedicated API gateway like APIPark offers functionalities far beyond what Ingress can provide. APIPark can handle unified API formats for AI invocation, end-to-end API lifecycle management, robust authentication, and detailed logging, acting as a powerful central nervous system for your API ecosystem. While Ingress handles basic HTTP routing, an API gateway like APIPark provides crucial business and operational features for modern API-driven architectures.
1.4 The Need for port-forward
Having surveyed the Kubernetes networking landscape, the specific niche for kubectl port-forward becomes clear. It addresses the gaps left by traditional exposure mechanisms for specific use cases:
- Temporary Direct Access: You need to interact with a service or a specific Pod without making it permanently accessible to the outside world or incurring the overhead of a cloud load balancer.
- Debugging: When troubleshooting an application, you might want to bypass the load balancing of a Service or the routing of an Ingress and connect directly to a single Pod instance to inspect its state, logs, or respond to requests.
- Local Development: Integrating a local development environment with an in-cluster database, message queue, or a specific API service that is not yet ready for public exposure.
- Non-HTTP Services: Accessing services that communicate over raw TCP or UDP protocols, for which Ingress is not an option.
- Internal Tools: Connecting to internal cluster tools like Prometheus, Grafana, or a Kubernetes Dashboard that are intentionally not exposed externally.
In essence, kubectl port-forward offers a secure, on-demand, and temporary tunnel that allows you to treat a Pod or Service within your Kubernetes cluster as if it were running on localhost. It provides a surgical tool for precise, direct interaction, making it an indispensable part of any Kubernetes developer's toolkit. It empowers you to bridge the gap between your development machine and the isolated world of Kubernetes, fostering agility and efficiency in your workflows.
Chapter 2: kubectl port-forward - The Fundamentals
With a clear understanding of why kubectl port-forward is essential, let's now delve into its core mechanics, syntax, and basic usage patterns. This chapter will lay the groundwork for effectively leveraging this powerful command in your Kubernetes endeavors.
2.1 What port-forward Does
At its core, kubectl port-forward establishes a secure, bidirectional tunnel between a specified local port on your machine and a port on a resource (Pod, Service, Deployment, StatefulSet, or ReplicaSet) within your Kubernetes cluster. This tunnel operates over the existing authenticated and authorized kubectl connection to your Kubernetes API server.
Here's a breakdown of the process:
- Client-Side Initiation: When you execute
kubectl port-forward, yourkubectlclient connects to the Kubernetes API server. - Resource Identification:
kubectlidentifies the target resource (e.g., a specific Pod, or a Pod selected by a Service/Deployment). - API Server Proxy: The API server then proxies the request to the
kubeletagent running on the node where the target Pod resides. - Kubelet Tunnel: The
kubeletcreates a secure tunnel into the target Pod's network namespace and begins forwarding traffic between the specified Pod port and thekubectlclient. - Local Connection: On your local machine,
kubectlbinds to the specified local port, listening for incoming connections. Any traffic sent to this local port is then forwarded through the established tunnel to the target Pod's port, and vice-versa for the response.
Crucially, port-forward is a client-side operation. It doesn't modify any Kubernetes cluster configuration, nor does it expose your service to the broader internet. The tunnel exists only for as long as the kubectl port-forward command is running on your local machine. Once the command is terminated, the tunnel closes, and the connection is severed. This temporary nature is a key feature, making it safe for ad-hoc debugging and development without creating persistent security vulnerabilities.
Visually, you can imagine it like this:
+-------------------+           +----------------------------------+          +------------------------+
| Your Local Machine |           |      Kubernetes API Server       |          |      Kubernetes Node   |
| (localhost:LOCAL_PORT) | <-----> | (Proxies connection to Kubelet) | <-----> | (Kubelet opens tunnel) | <-----> | Target Pod/Service |
|                   | Tunnel established |                                  |          | (Listening on REMOTE_PORT) |
+-------------------+           +----------------------------------+          +------------------------+
2.2 Basic Syntax and Usage
The basic syntax for kubectl port-forward is straightforward, yet versatile:
kubectl port-forward TYPE/NAME [LOCAL_PORT:]REMOTE_PORT [...LOCAL_PORT_N:REMOTE_PORT_N] [options]
Let's break down the components:
TYPE/NAME: This specifies the Kubernetes resource you want to target.pod/POD_NAME: Targets a specific Pod by its exact name. This is the most direct method.service/SERVICE_NAME: Targets a Service.kubectlwill automatically select one of the healthy Pods backed by this Service to establish the tunnel.deployment/DEPLOYMENT_NAME: Targets a Deployment. Similar to Service,kubectlwill pick a Pod managed by the Deployment.statefulset/STATEFULSET_NAME: Targets a StatefulSet, picking one of its pods.replicaset/REPLICASET_NAME: Targets a ReplicaSet, picking one of its pods.- You can also simply provide the
POD_NAMEwithoutpod/if it's unambiguous.
[LOCAL_PORT:]REMOTE_PORT: This is the core port mapping.REMOTE_PORT: The port number that the application inside the target Pod is listening on. This is crucial; if your application listens on port 8080,REMOTE_PORTmust be8080.LOCAL_PORT: The port on your local machine that you want to use to access the forwarded service.- If
LOCAL_PORTis omitted (e.g.,8080),kubectlwill attempt to use the same port number asREMOTE_PORTon your local machine. If that port is already in use, it will automatically choose a random available port and print it to the console. - If
LOCAL_PORTis specified (e.g.,9000:8080),kubectlwill bind toLOCAL_PORTon your machine and forward traffic toREMOTE_PORTin the Pod.
- If
Here are some common basic examples:
1. Forwarding to a specific Pod:
Suppose you have a Pod named my-web-app-pod-abcdefg. Your application inside this Pod is listening on port 80.
# Use the same local and remote port (80)
kubectl port-forward my-web-app-pod-abcdefg 80

# Now, access your app at http://localhost:80

# Use a different local port (8080) for remote port 80
kubectl port-forward my-web-app-pod-abcdefg 8080:80

# Now, access your app at http://localhost:8080
2. Forwarding to a Service:
If you have a Service named my-web-app-service that targets your web application Pods, and the Service exposes port 80 (which then routes to port 80 on the Pods).
kubectl port-forward service/my-web-app-service 8080:80

# This will pick one healthy Pod associated with 'my-web-app-service'
# and forward local port 8080 to the Pod's port 80.
# Access your app at http://localhost:8080
3. Forwarding to a Deployment:
Similarly, if you want to forward to any Pod managed by a Deployment named my-web-app-deployment.
kubectl port-forward deployment/my-web-app-deployment 8080:80

# This will pick one healthy Pod from 'my-web-app-deployment'.
# Access your app at http://localhost:8080
2.3 Targeting Specific Pods from a Deployment/Service
When you use service/SERVICE_NAME or deployment/DEPLOYMENT_NAME, kubectl port-forward intelligently selects one of the available, ready Pods associated with that resource. This is usually desirable for general testing, as it doesn't require you to know the specific, ephemeral Pod name.
However, there are scenarios, particularly during debugging, where you might need to target a very specific Pod instance. Perhaps you have a deployment with multiple replicas, and one particular replica is exhibiting an issue that you want to investigate in isolation.
To achieve this, you first need to identify the exact name of the target Pod. You can do this using kubectl get pods:
kubectl get pods -l app=my-web-app # Use your specific labels
This command will list all Pods with the label app=my-web-app. From the output, pick the exact Pod name you wish to target (e.g., my-web-app-7c7d45c58b-q2d7x). Then, use the Pod-specific port-forward command:
kubectl port-forward my-web-app-7c7d45c58b-q2d7x 8080:80

# Now you are guaranteed to be connected to that specific Pod instance.
This level of precision is invaluable for isolating and diagnosing issues in a distributed environment where multiple identical Pods might be running.
2.4 Port Mapping Flexibility
The flexibility in mapping local and remote ports is a significant advantage of port-forward:
- Same Port:
kubectl port-forward my-pod 8080:8080- This is common when you want to access the service on its default port locally.
- If
8080is free on your machine, it's convenient.
- Different Ports:
kubectl port-forward my-pod 9000:8080- Useful when
LOCAL_PORT(e.g., 8080) is already in use by another application on your local machine. - Allows you to run multiple
port-forwardsessions or other applications without port conflicts. - It also allows you to test an API service that runs on a standard port (like 80 or 443) on your local machine, but you don't have the necessary root privileges to bind to those privileged ports. By forwarding to a higher port (like 9000), you avoid permission issues.
- Useful when
- Automatic Local Port:
kubectl port-forward my-pod :8080orkubectl port-forward my-pod 8080(implicitly)- If you don't specify a
LOCAL_PORT,kubectlwill try to use theREMOTE_PORT. If that's unavailable, it will automatically find an open, random local port and print it to your console (e.g.,Forwarding from 127.0.0.1:50123 -> 8080). - This is convenient for quick checks when you don't care about a specific local port number.
- If you don't specify a
Understanding these port mapping options empowers you to adapt port-forward to various local development and testing environments, accommodating existing port usage on your machine.
2.5 Keeping the Tunnel Open and Backgrounding
By default, kubectl port-forward runs in the foreground and blocks your terminal session. It will keep the tunnel open as long as the command is running and the connection to the Kubernetes API server is active. To terminate the tunnel, you simply press Ctrl+C.
For many short-lived debugging tasks, this foreground behavior is perfectly acceptable. However, for longer development sessions or when you need to perform other terminal tasks concurrently, backgrounding the port-forward process is essential.
1. Backgrounding on Linux/macOS using &:
The simplest way to run port-forward in the background is to append & to the command:
kubectl port-forward deployment/my-web-app-deployment 8080:80 &
This will immediately return control to your terminal, and the port-forward process will run in the background. You will typically see output like [1] 12345, where 12345 is the process ID (PID). To bring it back to the foreground, use fg. To kill it, use kill 12345 (replace 12345 with the actual PID) or kill %1 (if it's the first background job).
2. Using nohup for Robust Backgrounding:
The & operator is tied to your terminal session. If you close the terminal, the background process (and thus the port-forward tunnel) will be terminated. To make the port-forward tunnel survive terminal closures, you can use nohup:
nohup kubectl port-forward deployment/my-web-app-deployment 8080:80 > /dev/null 2>&1 &
nohup: Ensures the command continues to run even if the user logs out or closes the terminal.> /dev/null 2>&1: Redirects both standard output and standard error to/dev/null, preventingnohup.outfiles from being created and keeping your terminal clean.&: Puts thenohupcommand itself into the background.
To find and terminate nohup-backed processes, you'll need to use ps aux | grep 'kubectl port-forward' to find its PID, then kill <PID>.
3. Using screen or tmux:
For more complex scenarios where you manage multiple long-running processes or need to detach/re-attach to sessions, terminal multiplexers like screen or tmux are superior.
- Start a
tmuxsession:tmux new -s my-forward-session - Inside the
tmuxsession, runkubectl port-forward ... - Detach from the session:
Ctrl+B D(for tmux) orCtrl+A D(for screen) - You can then close your terminal. To re-attach later:
tmux attach -s my-forward-session
This method provides excellent control and resilience for persistent port-forward tunnels required during extended development or testing phases.
4. Sharing the Forwarded Port with --address 0.0.0.0:
By default, kubectl port-forward binds the local port to 127.0.0.1 (localhost). This means only applications on your local machine can access the forwarded port. If you want to allow other machines on your local network (e.g., a colleague's machine, or a virtual machine running on your host) to access the forwarded port, you can use the --address flag:
kubectl port-forward --address 0.0.0.0 deployment/my-web-app-deployment 8080:80
0.0.0.0instructskubectlto bind the local port to all available network interfaces on your machine.- Important Security Note: Using
--address 0.0.0.0can expose the forwarded service to anyone on your local network who can reach your machine's IP address and the specified port. Use this with caution and only in trusted environments. We'll delve deeper into security considerations in a later chapter.
Mastering these fundamental aspects of kubectl port-forward will provide you with the confidence and capability to establish and manage direct, temporary connections to your Kubernetes resources effectively.
Chapter 3: Advanced port-forward Techniques and Scenarios
Beyond the basics, kubectl port-forward offers a rich set of capabilities that make it invaluable for complex debugging, local development with microservices, and accessing internal cluster components. This chapter explores these advanced techniques and real-world scenarios.
3.1 Multiple Port Forwards
There are two primary ways to handle multiple port forwards:
1. Multiple Port Mappings in a Single Command:
If you need to forward multiple ports from the same target resource (e.g., a single Pod running multiple services on different ports), you can specify multiple LOCAL_PORT:REMOTE_PORT pairs in one command:
kubectl port-forward my-multi-service-pod 8080:80 9000:9000 7000:7000
In this example, local port 8080 maps to remote port 80, local port 9000 maps to remote port 9000, and local port 7000 maps to remote port 7000, all through the same tunnel to my-multi-service-pod. This is efficient as it establishes only one underlying connection to the kubelet.
2. Running Multiple port-forward Commands Concurrently:
If you need to forward ports from different target resources (e.g., one Pod for your API service and another Pod for your database), you'll need to run separate kubectl port-forward commands. Each command will establish its own independent tunnel.
# Forwarding to an API service Pod
kubectl port-forward deployment/my-api-service 8080:80 &

# Forwarding to a database Pod
kubectl port-forward deployment/my-database-service 5432:5432 &
Remember to use the & operator (or nohup/tmux) to background each command if you need your terminal back. This allows you to simultaneously access various components of your application stack from your local machine.
3.2 Forwarding to StatefulSets and DaemonSets
While we primarily discussed Pods, Services, and Deployments, port-forward works equally well with StatefulSets and DaemonSets. The key difference is how you refer to them.
DaemonSets: DaemonSets ensure that a copy of a Pod runs on every (or selected) node in the cluster. To forward to a Pod managed by a DaemonSet, you typically target a specific Pod name if you know which node it's running on, or you can target the DaemonSet resource, and kubectl will pick one of its pods:```bash
Forward to a Prometheus Node Exporter Pod running on a specific node
First, find the Pod name: kubectl get pods -l app.kubernetes.io/name=prometheus-node-exporter
kubectl port-forward prometheus-node-exporter-abcde 9100:9100 ```Or, more generally: bash kubectl port-forward daemonset/prometheus-node-exporter 9100:9100
StatefulSets: Pods in a StatefulSet have stable, unique names (e.g., my-db-0, my-db-1). If you want to target a specific replica of a database or a Kafka broker in a StatefulSet, you use its full Pod name:```bash
Forward to the first replica of a PostgreSQL StatefulSet
kubectl port-forward my-postgres-0 5432:5432 ```You can also target the StatefulSet resource directly, and kubectl will pick one of its pods:bash kubectl port-forward statefulset/my-postgres 5432:5432
3.3 port-forward with Namespaces
Kubernetes namespaces provide a mechanism for isolating groups of resources within a single cluster. When using kubectl port-forward, it's crucial to specify the correct namespace if your target resource is not in the default namespace. You use the -n or --namespace flag for this.
# Forwarding to a Pod in the 'dev' namespace
kubectl port-forward -n dev my-api-pod 8080:8080

# Forwarding to a Service in the 'monitoring' namespace
kubectl port-forward --namespace monitoring service/prometheus-server 9090:9090
Failing to specify the namespace will result in kubectl searching only in the default namespace, likely leading to an "Error from server (NotFound)" message.
3.4 Debugging Microservices and Inter-Service Communication
One of the most compelling use cases for kubectl port-forward is debugging microservices architectures. In a typical microservices setup, your application might consist of several independent API services, each communicating with others and potentially with backend databases or message queues.
Consider a scenario where you're developing a new feature for your ProductAPI service. This ProductAPI needs to communicate with an InventoryService and a PostgreSQL database, all running within your Kubernetes cluster.
Scenario 1: Debugging ProductAPI Locally, Connecting to In-Cluster Dependencies
You want to run your ProductAPI code locally in your IDE, but you want it to interact with the actual InventoryService and PostgreSQL database running in the cluster (rather than local mocks or test doubles).
- Forward the InventoryService:
bash kubectl port-forward service/inventory-service 8081:80 &Now, your localProductAPIcan access theInventoryServiceathttp://localhost:8081. You'll need to configure your localProductAPI's environment variables or configuration files to point tolocalhost:8081for the InventoryService's API endpoint. - Forward the PostgreSQL Database:
bash kubectl port-forward service/postgres-db 5432:5432 &Your localProductAPIcan now connect to the cluster's PostgreSQL database vialocalhost:5432.
With these tunnels established, your locally running ProductAPI can seamlessly interact with its in-cluster dependencies, providing a realistic testing environment without deploying your ProductAPI to the cluster itself. This greatly accelerates the development feedback loop.
Scenario 2: Inspecting an In-Cluster Database/Service Directly
You suspect an issue with the InventoryService itself or the PostgreSQL database. You want to connect directly to them with a local client (e.g., psql command-line tool, Postman for the API service) to query data or make direct requests.
- Forward the InventoryService (for Postman):
bash kubectl port-forward service/inventory-service 8081:80You can then open Postman orcurland send requests tohttp://localhost:8081/inventoryto directly test the API exposed by the service. - Forward the PostgreSQL Database (for
psql):bash kubectl port-forward service/postgres-db 5432:5432Now, from your local terminal, you can connect usingpsql:bash psql -h localhost -p 5432 -U myuser -d mydbThis allows you to inspect the database state directly, run queries, or diagnose connection issues.
This direct access is particularly valuable because it bypasses any potential issues with Ingress, Service load balancing, or network policies that might be complicating external access, giving you a raw, unmediated view of the service.
For scenarios where you need to manage, secure, and expose your API services to a wider audience, or integrate with various AI models, a dedicated solution like APIPark becomes essential. APIPark acts as an AI gateway and API management platform, offering capabilities like unified API format for AI invocation, end-to-end API lifecycle management, and robust security features, which are beyond the scope of a simple port-forward tunnel. While kubectl port-forward provides invaluable immediate access for development and debugging, a comprehensive platform like APIPark handles the enterprise-grade challenges of API exposure, governance, and AI integration.
3.5 Accessing Internal Kubernetes Components
Many critical Kubernetes components and monitoring tools are deployed within the cluster and are not meant to be publicly exposed. kubectl port-forward is the standard way to temporarily access these for administrative or diagnostic purposes.
- Private Docker Registry: If you have a private Docker registry running inside your cluster that is not exposed, you might need to push/pull images from a local build environment for testing.
bash kubectl port-forward service/my-registry 5000:5000 -n my-registry-namespaceThen, you can configure your local Docker daemon to uselocalhost:5000as an insecure registry ordocker push localhost:5000/my-image.
Prometheus/Grafana: For cluster monitoring, these tools are often deployed internally. ```bash # Forward Prometheus server kubectl port-forward service/prometheus-server 9090:9090 -n monitoring
Access Prometheus UI at http://localhost:9090
Forward Grafana
kubectl port-forward service/grafana 3000:3000 -n monitoring
Access Grafana UI at http://localhost:3000
``` These examples illustrate how you can quickly gain access to complex internal UIs for troubleshooting or operational tasks without deploying additional external services.
Kubernetes Dashboard: If you have the Kubernetes Dashboard deployed, you can access it: ```bash # First, find the Pod name for the dashboard kubectl get pods -n kubernetes-dashboard
Then, port-forward to it (e.g., dashboard-pod-abcde is the pod name)
kubectl port-forward -n kubernetes-dashboard dashboard-pod-abcde 8443:8443 `` You would then accesshttps://localhost:8443` in your browser.
3.6 Beyond Localhost: Binding to Specific IP Addresses
As briefly mentioned earlier, by default, kubectl port-forward binds the LOCAL_PORT to 127.0.0.1. This means only processes running on the same machine where kubectl port-forward is executed can access the forwarded service.
The --address flag provides control over which local network interfaces kubectl should bind to:
kubectl port-forward --address <IP_ADDRESS> TYPE/NAME [LOCAL_PORT:]REMOTE_PORT
--address 0.0.0.0: Binds to all available network interfaces on your local machine. This allows other machines on your local network (e.g., a colleague's laptop, a VM on the same host) to access the forwarded service by using your machine's IP address and theLOCAL_PORT.bash # Example: Share a web service with a colleague on your LAN kubectl port-forward --address 0.0.0.0 deployment/my-web-app 8080:80If your machine's IP on the local network is192.168.1.100, your colleague can then access the service athttp://192.168.1.100:8080.--address <SPECIFIC_IP>: Binds to a specific IP address on your local machine. This is less common but can be useful in machines with multiple network interfaces or specific routing requirements.
Security Implications of --address 0.0.0.0: While convenient for collaborative local debugging, binding to 0.0.0.0 should be used with extreme caution. It essentially makes the forwarded service accessible from any machine on your network that can reach your local IP address. Never use this in untrusted network environments or for exposing sensitive services, as it bypasses all Kubernetes network policies and cluster-level security.
3.7 Handling Connection Issues and Troubleshooting
Like any network operation, port-forward can encounter issues. Understanding common error messages and troubleshooting steps is key.
1. "Unable to listen on any of the requested ports: [ports]"
- Cause: The
LOCAL_PORTyou specified (or theREMOTE_PORTifLOCAL_PORTwas omitted) is already in use by another process on your local machine. - Solution:
- Choose a different
LOCAL_PORT. - Find and terminate the process currently using that port (e.g.,
netstat -tulnp | grep <port>on Linux,lsof -i :<port>on macOS,netstat -ano | findstr :<port>on Windows, thentaskkill /PID <PID> /F). - Let
kubectlchoose a random port by omittingLOCAL_PORT(kubectl port-forward pod/my-pod :8080).
- Choose a different
2. "Error from server: error dialing backend: dial tcp:: connect: connection refused"
- Cause: This indicates that
kubectlsuccessfully connected to thekubeletand tried to establish a connection to the Pod, but the application inside the Pod was not listening onREMOTE_PORT, or the Pod itself was not ready/healthy. - Solution:
- Verify
REMOTE_PORT: Double-check theREMOTE_PORTis correct and matches the port your application within the Pod is actually listening on. (e.g., look at your DockerfileEXPOSEinstruction or application configuration). - Check Pod Status: Use
kubectl get pods -n <namespace>andkubectl describe pod <pod-name> -n <namespace>to ensure the Pod is running, healthy, and not in a CrashLoopBackOff state. - Check Pod Logs: Use
kubectl logs <pod-name> -n <namespace>to see if the application started successfully and is listening on the expected port. - Check Service Definition: If forwarding to a Service, ensure the
targetPortin the Service definition correctly maps to the Pod's listening port.
- Verify
3. "Port is not available" or "bind: permission denied"
- Cause: You might be trying to bind to a privileged port (ports less than 1024) on your local machine without sufficient permissions (e.g., not running as root or an administrator).
- Solution:
- Choose a non-privileged
LOCAL_PORT(e.g., anything above 1024, like 8080, 9000). - (Less recommended for security reasons) Run
kubectl port-forwardwithsudoif absolutely necessary, but generally, it's better to use a higher port.
- Choose a non-privileged
By systematically checking these points, you can quickly diagnose and resolve most port-forward connection issues.
3.8 Integrating APIPark
While kubectl port-forward is an excellent tool for developers and administrators requiring direct, temporary access to services within Kubernetes, it's crucial to understand its context within a broader enterprise API strategy. For production-grade environments, managing a multitude of APIs, particularly in a microservices or hybrid AI landscape, requires far more robust solutions than a simple client-side tunnel.
This is where an API gateway and management platform like APIPark comes into play. APIPark is an open-source AI gateway and API developer portal designed to help developers and enterprises manage, integrate, and deploy AI and REST services with ease.
Consider the following contrasting scenarios to highlight where APIPark shines versus kubectl port-forward:
- Scope:
kubectl port-forwardprovides a single-user, single-connection tunnel for local access. APIPark, on the other hand, is a centralized gateway that sits in front of potentially hundreds or thousands of API services, managing high-volume, concurrent traffic from numerous external clients. - Functionality:
port-forwardmerely creates a network tunnel. APIPark offers a comprehensive suite of features:- Unified API Format for AI Invocation: Standardizes request data formats across diverse AI models, simplifying AI consumption.
- Prompt Encapsulation into REST API: Enables quick creation of new APIs from AI models and custom prompts.
- End-to-End API Lifecycle Management: Handles design, publication, invocation, and decommission of APIs.
- Traffic Management: Provides capabilities like load balancing, rate limiting, and traffic forwarding which are essential for resilient API exposure.
- Security: Offers robust authentication, authorization, and subscription approval mechanisms to protect your APIs.
- Observability: Provides detailed API call logging, monitoring, and powerful data analytics for performance insights and troubleshooting.
- Audience:
port-forwardis primarily for internal developers and operators. APIPark serves as the public face of your organization's APIs, providing a developer portal for external consumers and enabling API service sharing within internal teams with independent access permissions. - Scalability & Performance:
port-forwardis not designed for performance or scale; it's a diagnostic tool. APIPark is built for high performance (rivaling Nginx with over 20,000 TPS) and supports cluster deployment for large-scale traffic handling.
In essence, while kubectl port-forward empowers individual developers to interact directly with services during development and debugging, APIPark provides the enterprise-grade infrastructure necessary to robustly govern, secure, and scale your entire API ecosystem, especially in an era of increasing AI integration. It transforms individual APIs into managed, discoverable, and secure products. Therefore, port-forward and APIPark are complementary tools in a modern Kubernetes-driven development pipeline: port-forward for the granular, direct access; APIPark for the overarching API gateway and management platform.
APIPark is a high-performance AI gateway that allows you to securely access the most comprehensive LLM APIs globally on the APIPark platform, including OpenAI, Anthropic, Mistral, Llama2, Google Gemini, and more.Try APIPark now! 👇👇👇
Chapter 4: Best Practices, Security, and Limitations
While kubectl port-forward is an incredibly useful tool, like any powerful utility, it comes with its own set of best practices, security considerations, and inherent limitations. Understanding these aspects is critical for using port-forward effectively and responsibly in any environment, from local development to production debugging.
4.1 When to Use port-forward (and When Not To)
It's important to delineate the appropriate scenarios for kubectl port-forward to ensure you're using the right tool for the job.
Use kubectl port-forward for:
- Local Development Integration: Connecting your local development environment (IDE, local application) to services (databases, message queues, APIs) running inside your Kubernetes cluster. This allows you to develop locally while leveraging in-cluster dependencies without deploying your work-in-progress code to the cluster.
- Debugging and Troubleshooting: Gaining direct access to a specific Pod or service instance to inspect its behavior, make direct requests, or connect a local debugger. This bypasses load balancers and network policies, offering an unmediated view for focused diagnosis.
- Ad-hoc Access to Internal Tools: Temporarily accessing internal cluster UIs like the Kubernetes Dashboard, Prometheus, Grafana, Jaeger, or private registries that are not, and should not be, publicly exposed.
- Testing New Features/API Endpoints: Quickly testing a new API endpoint or service functionality that is deployed in the cluster but not yet exposed via Ingress or a LoadBalancer service. This accelerates the feedback loop during feature development.
- Non-HTTP/HTTPS Services: Accessing services that communicate over raw TCP/UDP protocols (e.g., custom game servers, some IoT protocols, specialized database clients) for which Ingress is unsuitable.
Avoid kubectl port-forward for:
- Production Exposure: Never use
port-forwardas a means to expose production services to external users or applications. It's a single-user, temporary tunnel and lacks the resilience, scalability, and security features required for production traffic. - High-Traffic Scenarios:
port-forwardis not designed to handle high volumes of concurrent connections or significant bandwidth. Its performance is limited by your local machine's capabilities and thekubectlclient connection. - Long-Term External Access: For persistent external access, especially for public-facing APIs or web applications, use Kubernetes Services (LoadBalancer, NodePort), Ingress controllers, or dedicated API gateways like APIPark.
- Permanent Solutions: It's an ephemeral tool. Any solution that relies on
port-forwardrunning indefinitely is brittle and prone to failure (e.g., if your local machine reboots or thekubectlprocess crashes). - Bypassing Security Controls without Reason: While it can bypass some network policies, doing so without a specific debugging objective can be risky. Always understand the security implications.
4.2 Security Considerations
kubectl port-forward creates a direct conduit into your cluster, making security a paramount concern.
- RBAC Authorization:
port-forwarditself respects Kubernetes Role-Based Access Control (RBAC). A user must have the necessary permissions togetandcreatepods/portforwardon the target Pod/Service. This means that if a user doesn't have access to a particular Pod in a namespace, they won't be able toport-forwardto it. This is your primary line of defense.- Best Practice: Implement granular RBAC policies. Limit
pods/portforwardpermissions to only those users and namespaces where direct access is absolutely necessary (e.g., developers in their dev namespaces, ops teams in specific debugging contexts).
- Best Practice: Implement granular RBAC policies. Limit
- No In-Transit Encryption by Default: The
port-forwardtunnel itself is established over the secure HTTPS connection to the Kubernetes API server. However, once traffic leaves your local machine and enters the tunnel, its encryption depends entirely on the application-layer protocol. If the service inside the Pod is an unencrypted HTTP API or a plain TCP database connection, the traffic within the cluster (fromkubeletto Pod) and potentially from your machine to the API server might not be encrypted at the application level.- Best Practice: Always use encrypted protocols (e.g., HTTPS, TLS for databases like
psqlwithsslmode=require) when accessing sensitive services, even over aport-forwardtunnel.
- Best Practice: Always use encrypted protocols (e.g., HTTPS, TLS for databases like
--address 0.0.0.0Risk: As discussed, binding to0.0.0.0makes the forwarded port accessible from any machine on your local network. This bypasses all Kubernetes-level network segmentation and could expose internal services to unauthorized parties if your local machine's network is compromised or untrusted.- Best Practice: Avoid
--address 0.0.0.0unless strictly necessary in a controlled, trusted environment. If used, ensure your local machine has a robust firewall configured to restrict access to the forwarded port from specific IPs or networks.
- Best Practice: Avoid
- Privileged Ports: Binding to ports below 1024 (e.g., 80, 443) on your local machine often requires elevated privileges (root/administrator). Running
kubectlas root forport-forwardis generally discouraged as it grants unnecessary permissions to thekubectlclient.- Best Practice: Use non-privileged local ports (e.g., 8080, 9000) and map them to the remote privileged ports if needed (e.g.,
8080:80).
- Best Practice: Use non-privileged local ports (e.g., 8080, 9000) and map them to the remote privileged ports if needed (e.g.,
4.3 Performance Implications
kubectl port-forward is not designed for performance or high-throughput scenarios. It's a debugging and development tool, not a production gateway.
- Single-Threaded Tunnel: The connection is effectively a single-stream tunnel, with limited capacity for concurrent connections or high bandwidth.
- Overhead: There's inherent overhead involved in tunneling traffic through the
kubectlclient, the API server, and thekubelet. This can introduce noticeable latency, especially for chattier protocols or distant clusters. - Client-Side Bottleneck: Your local machine's network speed, CPU, and available memory can become bottlenecks if you attempt to push too much traffic through
port-forward. - Not a Load Balancer: When forwarding to a Service or Deployment,
kubectlpicks one Pod. It does not perform load balancing across multiple Pods. If that Pod restarts or becomes unhealthy, yourport-forwardconnection will break.
For these reasons, never consider port-forward a viable solution for serving production traffic or for scenarios requiring high availability and scalability.
4.4 Alternatives and When to Use Them
Understanding port-forward's limitations helps clarify when other Kubernetes exposure mechanisms are more appropriate.
- Ingress:
- When to use: For exposing HTTP/HTTPS services externally with advanced routing rules (host-based, path-based), SSL termination, and possibly authentication. Ideal for production web applications and APIs.
- Why not
port-forward: Ingress offers robust, scalable, and manageable external exposure, whichport-forwardcannot provide.
- LoadBalancer Service:
- When to use: For exposing TCP/UDP services directly via a cloud provider's external load balancer. This provides a stable, public IP address and handles load distribution across Pods. Suitable for production databases, custom TCP servers.
- Why not
port-forward: A LoadBalancer Service is a production-grade solution for external access, offering high availability and proper load distribution, unlikeport-forward.
- NodePort Service:
- When to use: In scenarios where you need to expose a service on a specific port across all cluster nodes, often used in conjunction with an external (non-cloud) load balancer. Less common for direct external exposure in cloud environments.
- Why not
port-forward: Provides cluster-wide external access on a stable node port, suitable for more persistent exposure thanport-forward.
- VPN/Bastion Host:
- When to use: For secure, broader network access to the entire cluster network from a remote location. A VPN provides network-level connectivity, while a bastion host acts as a jump server.
- Why not
port-forward: These solutions offer full network access and are suitable for administrators or remote teams needing to interact with multiple internal services over a secure channel, beyond just a single port tunnel.
- Service Mesh (e.g., Istio, Linkerd):
- When to use: For advanced traffic management, security, and observability features for
apiservices within the cluster. Service meshes can handle sophisticated routing, circuit breaking, mutual TLS, and detailed metrics collection, often complementing or even replacing the need for a separategatewayfor internalapicalls. - Why not
port-forward: Service meshes operate at a much higher level of abstraction, managing and securing inter-service communication at scale, which is fundamentally different fromport-forward's direct tunneling purpose.
- When to use: For advanced traffic management, security, and observability features for
- Dedicated API Gateway (e.g., APIPark):
- When to use: For comprehensive management of APIs, especially in complex enterprise environments, microservices architectures, or when integrating with AI models. An API gateway like APIPark provides centralized control over API exposure, security, versioning, traffic management, analytics, and developer portals.
- Why not
port-forward: An API gateway is designed to be the single entry point for all external API traffic, offering enterprise-level features for security, scalability, and lifecycle management thatport-forwardcannot even begin to address. It's the robust, long-term solution for exposing and governing your API economy.
In conclusion, kubectl port-forward is a surgical instrument for specific, temporary tasks. For persistent, scalable, and secure external exposure of your applications, especially your API services, you must leverage Kubernetes' built-in Service types, Ingress, or a dedicated API gateway platform. APIPark's powerful API governance solution can enhance efficiency, security, and data optimization for developers, operations personnel, and business managers alike, serving as a critical infrastructure component for modern API-driven enterprises.
Chapter 5: Practical Use Cases and Step-by-Step Examples
To solidify your understanding of kubectl port-forward, let's walk through several practical, step-by-step examples that cover common development and debugging scenarios. These examples will illustrate how to apply the techniques discussed in previous chapters.
5.1 Debugging a Web Application
This is arguably the most common use case for port-forward. You have a simple web application (e.g., an Nginx server or a Node.js API) running in a Pod, and you want to quickly test it from your local browser.
Scenario: Deploy a basic Nginx web server in a Kubernetes cluster and access it locally.
Steps:
- Verify Pod and Service:
bash kubectl get pods -l app=nginx kubectl get service nginx-serviceEnsure the Pod isRunningand the Service has aClusterIP. - Port Forward to the Service: Since the Service routes to Pods on port 80, and we want to access it on local port 8080:
bash kubectl port-forward service/nginx-service 8080:80You will see output indicating the forwarding is active:Forwarding from 127.0.0.1:8080 -> 80. - Access from Browser: Open your web browser and navigate to
http://localhost:8080. You should see the default Nginx welcome page. - Clean Up: Press
Ctrl+Cin the terminal runningport-forwardto stop the tunnel. Then delete the Kubernetes resources:bash kubectl delete -f nginx-deployment.yaml kubectl delete -f nginx-service.yaml
Deploy Nginx: Create a deployment and service for Nginx.```yaml
nginx-deployment.yaml
apiVersion: apps/v1 kind: Deployment metadata: name: nginx-deployment labels: app: nginx spec: replicas: 1 selector: matchLabels: app: nginx template: metadata: labels: app: nginx spec: containers: - name: nginx image: nginx:latest ports: - containerPort: 80
nginx-service.yaml
apiVersion: v1 kind: Service metadata: name: nginx-service spec: selector: app: nginx ports: - protocol: TCP port: 80 targetPort: 80 type: ClusterIP Apply these manifests:bash kubectl apply -f nginx-deployment.yaml kubectl apply -f nginx-service.yaml ```
Here's a comparison of different port-forward targets for this Nginx scenario:
| Target Resource | kubectl Command Example |
Notes |
|---|---|---|
| Pod | kubectl port-forward nginx-deployment-xxxx-yyyy 8080:80 |
Requires knowing the exact Pod name. Useful for debugging a specific instance. |
| Service | kubectl port-forward service/nginx-service 8080:80 |
kubectl automatically selects a healthy Pod behind the service. Preferred for general access if multiple replicas exist and any one will do. |
| Deployment | kubectl port-forward deployment/nginx-deployment 8080:80 |
kubectl automatically selects a healthy Pod managed by the deployment. Similar to Service target but directly tied to the deployment's Pod template. |
| Deployment (random local port) | kubectl port-forward deployment/nginx-deployment :80 |
kubectl will pick a random available local port and print it. Convenient if you don't care about the specific local port. |
5.2 Accessing a Database (e.g., PostgreSQL, Redis)
port-forward is exceptionally useful for connecting local database clients or tools to a database instance running inside your cluster.
Scenario: Connect to a PostgreSQL database Pod using your local psql client.
Steps:
- Verify Pod and Service: Wait for the Pod to be
Running.bash kubectl get pods -l app=postgres kubectl get service postgres-service - Port Forward to the PostgreSQL Service:
bash kubectl port-forward service/postgres-service 5432:5432This will forward local port5432to the PostgreSQL Pod's port5432. - Connect with
psql(or another client): Open a new terminal window (leave theport-forwardcommand running) and connect usingpsql:bash psql -h localhost -p 5432 -U myuser -d mydatabaseEntermypasswordwhen prompted. You should now be connected to the PostgreSQL database running in your cluster! You can run SQL queries likeCREATE TABLE test (id SERIAL PRIMARY KEY, name VARCHAR(50));or\dt. - Clean Up: Exit
psql(\q), then pressCtrl+Cin theport-forwardterminal.bash kubectl delete -f postgres-deployment.yaml kubectl delete -f postgres-service.yaml
Deploy PostgreSQL: Create a simple PostgreSQL deployment and service. (Note: For a real production setup, use StatefulSets and persistent storage, but for this example, a simple deployment is sufficient).```yaml
postgres-deployment.yaml
apiVersion: apps/v1 kind: Deployment metadata: name: postgres-deployment spec: replicas: 1 selector: matchLabels: app: postgres template: metadata: labels: app: postgres spec: containers: - name: postgres image: postgres:13 env: - name: POSTGRES_DB value: mydatabase - name: POSTGRES_USER value: myuser - name: POSTGRES_PASSWORD value: mypassword ports: - containerPort: 5432
postgres-service.yaml
apiVersion: v1 kind: Service metadata: name: postgres-service spec: selector: app: postgres ports: - protocol: TCP port: 5432 targetPort: 5432 type: ClusterIP Apply these manifests:bash kubectl apply -f postgres-deployment.yaml kubectl apply -f postgres-service.yaml ```
This technique is incredibly useful for database migrations, data inspection, or even running local ORM tests against a live cluster database.
5.3 Testing a New API Endpoint Locally
Developing a new API feature often involves iteratively testing endpoints. port-forward allows you to do this quickly without setting up a full Ingress or a LoadBalancer service.
Scenario: Test a hypothetical my-new-api service deployed in the cluster using curl or Postman from your local machine.
Steps:
- Verify Deployment and Service:
bash kubectl get pods -l app=my-api kubectl get service my-api-service - Port Forward to the API Service: Let's say you want to use local port
9000to avoid conflicts.bash kubectl port-forward service/my-api-service 9000:8000 - Clean Up:
Ctrl+Ctheport-forwardcommand, then delete the resources.
Test with curl or Postman: Open a new terminal. ```bash # Example GET request to a /status endpoint curl http://localhost:9000/status
Example POST request to a /data endpoint
curl -X POST -H "Content-Type: application/json" -d '{"key": "value"}' http://localhost:9000/data ``` You should receive responses from your API service running in the cluster. This allows for rapid iteration and testing of your API logic.
Deploy my-new-api: Assume you have a deployment and service for your new API that listens on port 8000.```yaml
my-api-deployment.yaml (example for a Python Flask API)
apiVersion: apps/v1 kind: Deployment metadata: name: my-api-deployment labels: app: my-api spec: replicas: 1 selector: matchLabels: app: my-api template: metadata: labels: app: my-api spec: containers: - name: my-api image: some-repo/my-api:latest # Replace with your API image ports: - containerPort: 8000
my-api-service.yaml
apiVersion: v1 kind: Service metadata: name: my-api-service spec: selector: app: my-api ports: - protocol: TCP port: 8000 targetPort: 8000 type: ClusterIP Apply these manifests (after replacing `some-repo/my-api:latest` with your actual **API** image).bash kubectl apply -f my-api-deployment.yaml kubectl apply -f my-api-service.yaml ```
5.4 Sharing Access with a Colleague (Carefully)
Sometimes, you might be working with a team member who also needs to access a specific service in the cluster from their machine, but neither of you wants to set up external exposure for a temporary task. port-forward with --address 0.0.0.0 can facilitate this, with crucial security warnings.
Scenario: You need to share access to the Nginx web server (from section 5.1) with a colleague on the same local network.
Steps:
- Deploy Nginx: (As in 5.1) Ensure Nginx deployment and service are running.
- Identify Your Local IP: Find your machine's IP address on your local network. On Linux/macOS, use
ifconfigorip a. On Windows, useipconfig. Let's assume your IP is192.168.1.100. - Port Forward with
--address 0.0.0.0(from your machine):bash kubectl port-forward --address 0.0.0.0 service/nginx-service 8080:80The output will show:Forwarding from 0.0.0.0:8080 -> 80. This means your machine is now listening on port 8080 on all its network interfaces. - Colleague Accesses (from their machine): Your colleague, connected to the same local network, can open their browser and navigate to:
http://192.168.1.100:8080(Replace192.168.1.100with your actual local IP address). They should now see the Nginx welcome page. - Critical Security Warning: Again, this exposes the forwarded service to any machine on your local network that can reach your IP and port. If you are in an untrusted network (e.g., public Wi-Fi), this is extremely risky. Only use this method in secure, trusted local network environments and for non-sensitive data. Terminate the
port-forwardtunnel as soon as it's no longer needed.
These practical examples underscore the versatility and utility of kubectl port-forward across various development, debugging, and administrative tasks. By mastering these scenarios, you gain a powerful capability to directly interact with your Kubernetes-deployed applications, significantly enhancing your productivity and troubleshooting prowess. Remember, for managing production APIs at scale, integrating AI models, and ensuring robust security and governance, solutions like APIPark provide the necessary enterprise-grade infrastructure, complementing the direct interaction offered by kubectl port-forward.
Conclusion
kubectl port-forward stands as a testament to Kubernetes' philosophy of providing powerful, granular control to developers and operators. Throughout this extensive guide, we have journeyed from the intricate networking landscape of Kubernetes, understanding the isolation of Pods and the abstractions of Services and Ingress, to the fundamental mechanics of port-forward. We've delved into its basic syntax, explored advanced techniques for targeting specific resources, debugging complex microservice architectures, and accessing crucial internal cluster components. Crucially, we have also thoroughly examined the best practices, security implications, and inherent limitations of this indispensable tool, ensuring you wield its power responsibly.
The ability to create a temporary, secure tunnel directly from your local machine to any Pod, Service, or Deployment within your cluster is a game-changer for local development and debugging. It empowers you to bypass the complexities of external service exposure, rapidly iterate on code, test API endpoints, and diagnose issues with unparalleled directness. Whether you're connecting a local IDE to an in-cluster database, testing a nascent API service, or simply peeking at the UI of a monitoring tool, port-forward eliminates friction and accelerates your workflow.
However, as we've emphasized, kubectl port-forward is a surgical instrument, not a blunt force tool for production exposure. For the robust, scalable, and secure management of your API ecosystem, especially in modern architectures integrating artificial intelligence, solutions like a dedicated API gateway and management platform are indispensable. APIPark exemplifies such a platform, providing comprehensive features for API lifecycle management, AI model integration, advanced traffic control, security, and observability at an enterprise scale. It effectively acts as a critical gateway for your API economy, offering capabilities that are fundamentally different from the temporary, developer-centric tunnels provided by port-forward.
By understanding both the immediate, powerful utility of kubectl port-forward and the strategic, long-term value of a comprehensive API gateway like APIPark, you are equipped with a holistic understanding of how to manage and interact with your applications in the Kubernetes ecosystem. Mastering kubectl port-forward means not just knowing the commands, but understanding its place in your toolkit, knowing when to deploy its power, and when to opt for more robust, production-ready alternatives. It is a cornerstone of efficient Kubernetes development, enabling you to navigate the complexities of distributed systems with confidence and precision.
Frequently Asked Questions (FAQs)
1. What is the primary purpose of kubectl port-forward? The primary purpose of kubectl port-forward is to establish a secure, temporary, and bidirectional tunnel from a local port on your machine to a specified port on a resource (like a Pod, Service, or Deployment) within your Kubernetes cluster. This allows developers to access internal cluster services directly from their local environment for development, debugging, or ad-hoc testing, bypassing the need for external exposure mechanisms like Ingress or LoadBalancer Services.
2. Is kubectl port-forward suitable for exposing production services to external users? No, kubectl port-forward is explicitly not suitable for exposing production services to external users or applications. It is a single-user, client-side tunnel that lacks the scalability, resilience, load balancing, security features, and monitoring capabilities required for production traffic. For production exposure, you should use Kubernetes Services (LoadBalancer, NodePort), Ingress controllers, or a dedicated API gateway like APIPark for comprehensive API management.
3. What is the difference between kubectl port-forward service/my-service 8080:80 and kubectl port-forward my-pod-name 8080:80? When you use service/my-service, kubectl port-forward will automatically select one of the healthy Pods that are backend to my-service and establish the tunnel to that Pod. This is convenient when you have multiple replicas and don't care about a specific one. When you use my-pod-name, you are explicitly targeting a specific Pod by its exact name. This is crucial for debugging scenarios where you need to isolate and interact with a particular instance of a Pod.
4. Can I share a port-forward connection with a colleague? Yes, you can, but with significant caution. By default, port-forward binds to 127.0.0.1 (localhost), making it accessible only from your machine. If you use the --address 0.0.0.0 flag, kubectl will bind the local port to all available network interfaces on your machine, allowing other machines on your local network to access the forwarded service using your machine's IP address. This should only be done in trusted, secure network environments due to the potential security risks of exposing internal services.
5. How does kubectl port-forward relate to an API gateway like APIPark? kubectl port-forward is a developer tool for temporary, direct access to specific services for debugging and local development. It's a low-level network utility. An API gateway like APIPark, on the other hand, is a comprehensive, enterprise-grade platform designed for managing, securing, and exposing all your APIs (including AI services) to a wider audience, often in production. APIPark provides features like API lifecycle management, unified API formats for AI invocation, robust security, traffic management, and detailed analytics. These tools are complementary: port-forward facilitates individual developer productivity, while an API gateway manages the overarching API economy for an organization.
🚀You can securely and efficiently call the OpenAI API on APIPark in just two steps:
Step 1: Deploy the APIPark AI gateway in 5 minutes.
APIPark is developed based on Golang, offering strong product performance and low development and maintenance costs. You can deploy APIPark with a single command line.
curl -sSO https://download.apipark.com/install/quick-start.sh; bash quick-start.sh

In my experience, you can see the successful deployment interface within 5 to 10 minutes. Then, you can log in to APIPark using your account.

Step 2: Call the OpenAI API.