Mastering kubectl port forward: Connect Services Locally


In the vast and intricate landscape of cloud-native development, Kubernetes has emerged as the de facto standard for orchestrating containerized applications. It offers unparalleled power and flexibility, allowing developers to deploy, scale, and manage their services with remarkable efficiency. However, this power often comes with a steep learning curve, particularly when it comes to networking and local development. One of the most common challenges developers face is how to seamlessly connect their local development environment to services running inside a Kubernetes cluster, without exposing these services publicly or incurring unnecessary costs. This is precisely where kubectl port-forward steps in, acting as an indispensable tool that bridges the gap, creating a secure, temporary tunnel between your local machine and your cluster's internal services.
This command is a cornerstone for any developer working with Kubernetes. It transforms the often-abstracted network boundaries of a cluster into an accessible local endpoint, making it possible to debug applications, test new features, and interact with backend data stores or API services as if they were running directly on your workstation. Without kubectl port-forward, tasks like stepping through code with a local debugger connected to a remote Pod, or having a locally running frontend application communicate with a backend API service deployed within Kubernetes, would be significantly more complex, if not impossible, without resorting to exposing internal services through more permanent and potentially less secure means like NodePort or LoadBalancer Services.
The goal of this comprehensive guide is to delve deep into the mechanics, practical applications, and best practices of kubectl port-forward. We will explore its syntax, various use cases, and how it fits into a broader development and API management strategy. By the end of this article, you will not only understand how to effectively use this command but also appreciate its nuances, enabling you to master local connectivity to your Kubernetes workloads, streamline your development workflow, and troubleshoot issues with unprecedented ease. We will discuss how this local connectivity paves the way for interactions with sophisticated backend APIs, and how, in a production setting, these local tests evolve into services managed by an API gateway for robust, scalable operations.
1. The Core Concept of kubectl port-forward: Your Local-Cluster Bridge
At its heart, kubectl port-forward is a simple yet profoundly powerful mechanism designed to establish a direct, secure, and bidirectional network tunnel. This tunnel connects a specified port on your local machine to a port on a Pod, Service, or Deployment residing within a Kubernetes cluster. Think of it as creating a private, temporary access route, allowing your local applications or tools to "see" and interact with internal cluster resources as if they were local processes.
1.1. What Exactly Is It?
In essence, kubectl port-forward acts as a proxy. When you execute the command, your kubectl client connects to the Kubernetes API server. The API server then instructs the kubelet agent on the node where the target Pod is running to open a secure SPDY stream (a multiplexed protocol built over TLS) to the specified container port within that Pod. Your kubectl client then forwards traffic from your local machine to this SPDY stream, which in turn delivers it to the Pod's port, and vice-versa for return traffic. This entire process occurs securely over the existing Kubernetes API server connection, often leveraging HTTPS, making it a safe way to access internal services without exposing them to the wider internet.
1.2. Why Is It Needed? The Challenges of Cluster Networking
Kubernetes is built on a robust but isolated networking model. By default, Pods and Services are designed to communicate internally within the cluster. Accessing them from outside the cluster typically requires explicit exposure mechanisms, which come with their own complexities and implications:
- Debugging from Local Tools: Imagine you have a backend API service running in a Pod, and you need to attach a local debugger (e.g., VS Code debugger, IntelliJ IDEA debugger) to step through its code. Without
port-forward, this would involve complex configurations, potentially deploying the debugger into the cluster, or modifying the service to expose sensitive debugging ports publicly.port-forwardsimplifies this by making the remote debugging port locally accessible. - Developing Applications that Consume Cluster Services: Consider a scenario where you are building a new frontend application on your local machine, and it needs to call a backend API that is already deployed in Kubernetes. Or perhaps you're developing a new microservice locally that needs to connect to a shared database or a message queue (like Kafka or RabbitMQ) running in the cluster. Deploying your local development environment into the cluster for every change is cumbersome and slow.
port-forwardallows your local application to connect to these cluster services as if they werelocalhostservices. This is especially useful when your local development needs to interact with an upstream API gateway that's already deployed in the cluster, or directly with a specific microservice. - Accessing Internal Dashboards and Tools: Many Kubernetes deployments include internal monitoring tools (like Prometheus or Grafana), distributed tracing systems, or custom administration API dashboards that are not meant for public exposure.
port-forwardprovides a quick, ad-hoc way for administrators and developers to access these tools directly from their workstation without configuring more permanent, cluster-wide ingress rules or VPNs. - Avoiding Public Exposure and Costs: Solutions like
NodePortexpose services on every node's IP, andLoadBalancerprovisions a cloud load balancer, both of which can lead to unnecessary public exposure and associated cloud costs if the access is only required for temporary, local development.port-forwardis a lightweight, on-demand solution that avoids these drawbacks.
1.3. How It Differs from Other Kubernetes Networking Concepts
It's crucial to understand that kubectl port-forward serves a very specific, temporary, and local-centric purpose, distinguishing it from Kubernetes' more permanent and production-oriented networking solutions:
- Kubernetes Services (ClusterIP): Primarily for internal cluster communication, providing a stable virtual IP for a set of Pods. Not directly accessible from outside the cluster.
port-forwardallows you to access a ClusterIP service locally. - Kubernetes Services (NodePort): Exposes a Service on a static port on each node's IP address. This makes the service accessible from outside the cluster via any node's IP and the specified NodePort. While it provides external access, it's less secure for internal services and might use ephemeral ports.
- Kubernetes Services (LoadBalancer): Leverages cloud provider load balancers to expose a Service externally with a dedicated IP address. This is suitable for production APIs and applications requiring high availability and public accessibility but incurs cloud costs and is not designed for direct developer debugging.
- Kubernetes Ingress: Manages external access to services within a cluster, typically HTTP/HTTPS traffic. Ingress provides URL-based routing, SSL termination, and host-based virtual hosting, often acting as the cluster's API gateway for public traffic. It's a high-level abstraction for exposing APIs and web applications.
In contrast, port-forward is: * Temporary: The tunnel only exists as long as the kubectl port-forward command is running. * Ad-hoc: It's invoked manually for specific, immediate needs. * Local-only: It exclusively connects your local machine to the cluster, not the internet. * Secure: Traffic is encapsulated within the kubectl client's connection to the API server, leveraging existing authentication and authorization.
By understanding these distinctions, developers can judiciously select the right tool for the job, using port-forward for its intended purpose: efficient, secure, and temporary local access to Kubernetes services and APIs.
2. Prerequisites and Setup for kubectl port-forward
Before you can embark on your journey to master kubectl port-forward, a few fundamental components need to be in place. These prerequisites ensure that your local environment is correctly configured to communicate with your Kubernetes cluster and that you have a basic understanding of the cluster's topology.
2.1. A Running Kubernetes Cluster
The most obvious requirement is access to a functional Kubernetes cluster. This could be:
- Local Clusters:
- Minikube: A popular choice for local development, running a single-node Kubernetes cluster inside a VM on your laptop. Ideal for testing and development.
- Kind (Kubernetes in Docker): Runs Kubernetes clusters using Docker containers as "nodes," making it lightweight and fast for local development and CI/CD environments.
- Docker Desktop (with Kubernetes enabled): If you're using Docker Desktop, you can often enable a built-in Kubernetes cluster with a single click in its settings.
- Cloud-Managed Clusters:
- Google Kubernetes Engine (GKE): Google Cloud's managed Kubernetes service.
- Amazon Elastic Kubernetes Service (EKS): Amazon Web Services' managed Kubernetes service.
- Azure Kubernetes Service (AKS): Microsoft Azure's managed Kubernetes service.
- Any other cloud provider's managed Kubernetes offering.
- Self-Managed Clusters:
- Clusters deployed on private infrastructure using tools like
kubeadmor Rancher.
- Clusters deployed on private infrastructure using tools like
For the purpose of this guide, any accessible cluster will suffice. If you don't have one readily available, Minikube or Kind are excellent starting points for local experimentation.
2.2. kubectl Installed and Configured
kubectl is the command-line tool for running commands against Kubernetes clusters. It's your primary interface for interacting with your cluster, including managing deployments, services, and, of course, initiating port forwards.
- Installation: Ensure
kubectlis installed on your local machine. Instructions vary by operating system:- macOS:
brew install kubernetes-cli - Linux:
sudo apt-get update && sudo apt-get install -y kubectl(for Debian/Ubuntu) orsudo yum install -y kubectl(for CentOS/RHEL). Alternatively, download the binary directly. - Windows: Use
choco install kubernetes-cli(with Chocolatey) or download and configure manually.
- macOS:
- Configuration (
kubeconfig): After installation,kubectlneeds to know how to connect to your cluster. This is managed through akubeconfigfile (typically located at~/.kube/config). This file contains cluster connection details, user credentials, and context information.- If you're using Minikube or Docker Desktop,
kubectlis usually configured automatically. - For cloud clusters, you'll typically use a cloud provider's CLI tool (e.g.,
gcloud,aws cli,az cli) to generate or merge akubeconfigentry that authenticateskubectlto your specific cluster. - Verify your configuration by running
kubectl config current-contextto see which clusterkubectlis currently pointing to, andkubectl get nodesto ensure you can list the cluster's nodes.
- If you're using Minikube or Docker Desktop,
2.3. Basic Understanding of Kubernetes Concepts
While kubectl port-forward is a specific command, its effectiveness hinges on a foundational understanding of key Kubernetes resources:
- Pods: The smallest deployable units in Kubernetes, encapsulating one or more containers, storage resources, a unique network IP, and options for how the container(s) should run.
port-forwardcan directly target a Pod. - Services: An abstract way to expose an application running on a set of Pods as a network service. Services provide a stable IP address and DNS name for a dynamic set of Pods, enabling stable communication even as Pods are created, killed, or replaced.
port-forwardcan target a Service, andkubectlwill automatically resolve it to one of the backing Pods. - Deployments: A higher-level resource that declares the desired state for your application, typically managing the lifecycle of stateless Pods. Deployments handle creating and updating Pods, ensuring a specified number of replicas are running. You can target a Deployment with
port-forward, andkubectlwill pick one of its managed Pods. - Ports: Understand that containers within Pods expose specific ports (e.g., 80 for HTTP, 443 for HTTPS, 8080 for an application API). You'll need to know these internal container ports to forward traffic correctly.
2.4. Example Setup: Deploy a Simple Web Application
To make our examples tangible, let's set up a simple Nginx web server within our Kubernetes cluster. This Nginx instance will serve as our target service for port-forward operations.
First, create a deployment.yaml file:
# deployment.yaml
apiVersion: apps/v1
kind: Deployment
metadata:
  name: nginx-deployment
  labels:
    app: nginx
spec:
  replicas: 1
  selector:
    matchLabels:
      app: nginx
  template:
    metadata:
      labels:
        app: nginx
    spec:
      containers:
      - name: nginx
        image: nginx:latest
        ports:
        - containerPort: 80 # Nginx listens on port 80 by default
        env:
        - name: MY_POD_NAME
          valueFrom:
            fieldRef:
              fieldPath: metadata.name
---
apiVersion: v1
kind: Service
metadata:
  name: nginx-service
spec:
  selector:
    app: nginx
  ports:
    - protocol: TCP
      port: 80
      targetPort: 80 # The service targets port 80 on the Pods
  type: ClusterIP # Internal service, not externally exposed
Apply this configuration to your cluster:
kubectl apply -f deployment.yaml
Verify that the Pod and Service are running:
kubectl get pods -l app=nginx
kubectl get svc nginx-service
You should see output similar to this:
NAME                             READY   STATUS    RESTARTS   AGE
nginx-deployment-xxxxxxxx-yyyyy   1/1     Running   0          Xs

NAME            TYPE        CLUSTER-IP       EXTERNAL-IP   PORT(S)   AGE
nginx-service   ClusterIP   10.xx.xx.xx      <none>        80/TCP    Xs
With these prerequisites met and our sample application deployed, we are now ready to dive into the practical application of kubectl port-forward. This Nginx instance will represent a typical backend api or web service that you might need to access locally for development or debugging.
3. Basic Usage: Forwarding to a Pod
The most direct way to use kubectl port-forward is to target a specific Pod. This method is particularly useful when you need to interact with a unique instance of an application or debug a specific Pod that might be exhibiting anomalous behavior.
3.1. Syntax
The basic syntax for forwarding to a Pod is straightforward:
kubectl port-forward <pod-name> <local-port>:<remote-port>
Let's break down each component: * <pod-name>: This is the exact name of the Pod you want to connect to. Pod names are unique within a namespace and often include a random hash (e.g., nginx-deployment-78f5664d68-abcd1). * <local-port>: This is the port on your local machine that kubectl will listen on. You can choose any available port on your workstation. * <remote-port>: This is the port that the application inside the target Pod is listening on. This is the container port.
3.2. Step-by-Step Example: Accessing Our Nginx Pod
Using the nginx-deployment we set up earlier, let's forward port 8080 on our local machine to port 80 inside the Nginx Pod.
Step 1: Get the Pod Name First, you need the exact name of your Nginx Pod.
kubectl get pods -l app=nginx
You'll get output similar to:
NAME                             READY   STATUS    RESTARTS   AGE
nginx-deployment-78f5664d68-abcd1   1/1     Running   0          5m
Let's assume our Pod name is nginx-deployment-78f5664d68-abcd1.
Step 2: Execute kubectl port-forward Now, run the port-forward command, replacing the Pod name with yours:
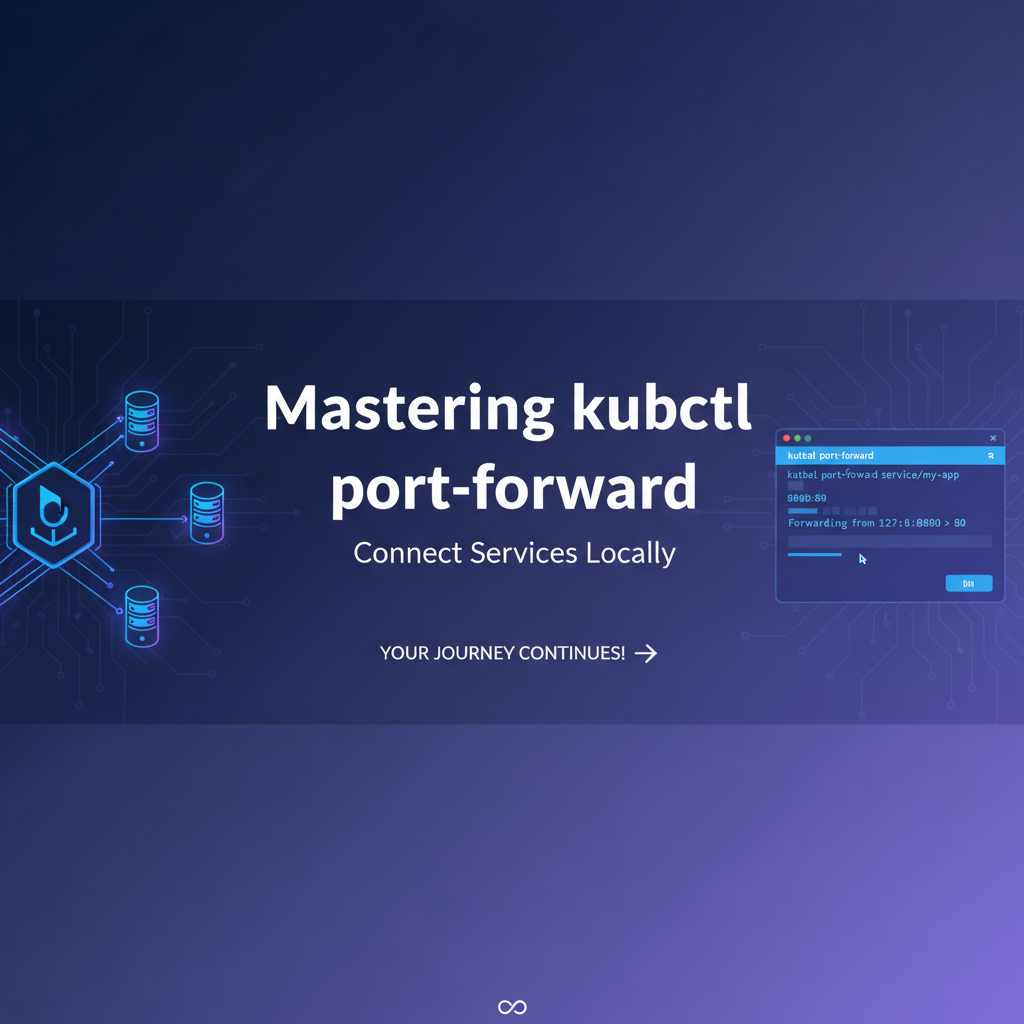
kubectl port-forward nginx-deployment-78f5664d68-abcd1 8080:80
Upon execution, kubectl will output something like:
Forwarding from 127.0.0.1:8080 -> 80
Forwarding from [::1]:8080 -> 80
This message indicates that the tunnel has been successfully established. The command will remain running in your terminal, actively maintaining the connection.
Step 3: Test Access from localhost Open a new terminal window or your web browser. You can now access the Nginx web server using localhost and the local port you specified:
curl http://localhost:8080
You should receive the default Nginx welcome page HTML, indicating a successful connection:
<!DOCTYPE html>
<html>
<head>
<title>Welcome to nginx!</title>
...
In your original terminal where kubectl port-forward is running, you might see output indicating traffic passing through the tunnel (though Nginx might not log every request to standard output unless configured).
To stop the port forward, simply press Ctrl+C in the terminal where the command is running. The tunnel will be closed, and your local port 8080 will no longer be connected to the Pod.
3.3. Detailed Explanation of Ports
local-port(e.g.,8080): This is the port on your machine. You have full control over this. Choose a port that isn't already in use by another application on your system. It doesn't have to be the same as the remote port; in fact, it often isn't, especially if the remote port is a common one like 80 or 443, which might require root privileges to bind to locally.remote-port(e.g.,80): This is the port that the containerized application inside the Pod is listening on. You must know this port for the forwarding to work correctly. If your Nginx container listens on 80, but you specify 8080 as the remote port, the connection will fail because Nginx isn't listening on 8080.
3.4. Common Pitfalls and Solutions
- Port Already in Use: If your chosen
local-portis already in use by another process on your machine,kubectlwill report an error like "listen tcp 127.0.0.1:8080: bind: address already in use."- Solution: Choose a different
local-port(e.g.,8081:80). You can find which process is using a port withnetstat -tulnp(Linux) orlsof -i :8080(macOS).
- Solution: Choose a different
- Incorrect Pod Name: If the Pod name is misspelled or doesn't exist in the current namespace,
kubectlwill return "Error from server (NotFound): pods "..." not found."- Solution: Double-check the Pod name using
kubectl get pods. Ensure you're in the correct namespace (kubectl config view --minify | grep namespace:or specify with-n <namespace>).
- Solution: Double-check the Pod name using
- Incorrect Remote Port: If the application inside the Pod is not listening on the specified
remote-port, theport-forwardcommand might start successfully, but attempts to connect tolocalhost:local-portwill result in "connection refused" or a timeout.- Solution: Verify the application's listening port. You can inspect the Pod's configuration (
kubectl describe pod <pod-name>) for container port definitions or check the application logs.
- Solution: Verify the application's listening port. You can inspect the Pod's configuration (
- Pod Not Running/Healthy: If the target Pod is in a "Pending," "CrashLoopBackOff," or "Error" state,
port-forwardmight fail or connect to a non-responsive Pod.- Solution: Check the Pod's status (
kubectl get pods), logs (kubectl logs <pod-name>), and events (kubectl describe pod <pod-name>) to diagnose the Pod's health.
- Solution: Check the Pod's status (
Mastering this basic usage of forwarding to a Pod lays the groundwork for more advanced scenarios and is an essential skill for any Kubernetes developer needing direct, temporary access to their api or application instances.
4. Advanced Usage: Forwarding to a Service
While forwarding directly to a Pod is effective for specific debugging scenarios, it has a significant drawback: Pods are ephemeral. They can be restarted, rescheduled, or replaced by a Deployment controller, leading to a new Pod with a new name. When this happens, your kubectl port-forward connection to the old Pod will break, and you'll have to find the new Pod's name and re-establish the tunnel.
This is where forwarding to a Kubernetes Service becomes invaluable. Services provide a stable abstraction over a dynamic set of Pods. When you forward to a Service, kubectl handles the underlying Pod selection, automatically re-establishing the connection if the target Pod changes.
4.1. Why Forward to a Service Instead of a Pod?
- Stability: Services offer a stable virtual IP and DNS name, abstracting away the underlying Pod churn. When you forward to a Service,
kubectlresolves the Service to one of its healthy backend Pods. If that Pod dies and a new one replaces it,kubectlmight (depending onkubectlversion and specific circumstances) be resilient or at least easier to restart, always connecting to a healthy instance. More importantly, it means you don't need to constantly update the Pod name in yourport-forwardcommand. - Load Balancing: While
kubectl port-forwarditself doesn't perform load balancing in the traditional sense (it picks a single Pod endpoint), it benefits from the Service's selector mechanism. If your Service targets multiple Pods,kubectlwill simply pick one of the available Pods to establish the tunnel to. This ensures you're always connecting to a living replica. - Abstraction: You don't need to know the specific Pod name. You only need the Service name, which is typically more stable and easier to remember (e.g.,
my-backend-api-service). This is particularly useful when dealing with a microservice architecture where many services might be exposing differentapis.
4.2. Syntax
The syntax for forwarding to a Service is very similar to forwarding to a Pod, with a key difference in how you identify the target:
kubectl port-forward service/<service-name> <local-port>:<remote-port>
Or, more simply:
kubectl port-forward svc/<service-name> <local-port>:<remote-port>
service/<service-name>orsvc/<service-name>: This explicitly tellskubectlyou're targeting a Service, not a Pod. You provide the name of the Kubernetes Service.<local-port>: The port on your local machine.<remote-port>: ThetargetPortthat the Service exposes on the Pods it manages. This is typically the same as thecontainerPorton the Pod.
4.3. Step-by-Step Example: Accessing Our Nginx Service
Let's use the nginx-service we defined earlier, which targets our nginx-deployment Pods on port 80.
Step 1: Get the Service Name We already know our Service is named nginx-service. You can verify this:
kubectl get svc nginx-service
Output:
NAME            TYPE        CLUSTER-IP       EXTERNAL-IP   PORT(S)   AGE
nginx-service   ClusterIP   10.xx.xx.xx      <none>        80/TCP    Xs
Step 2: Execute kubectl port-forward to the Service Now, let's forward local port 8080 to the nginx-service on its target port 80:
kubectl port-forward service/nginx-service 8080:80
Again, kubectl will output:
Forwarding from 127.0.0.1:8080 -> 80
Forwarding from [::1]:8080 -> 80
The behavior will be identical from your perspective – the tunnel is established.
Step 3: Test Access As before, you can test this connection:
curl http://localhost:8080
You should again receive the Nginx welcome page.
4.4. How It Works Internally
When you target a Service with kubectl port-forward, the kubectl client performs a lookup to identify the Pods backing that Service (based on the Service's selector). It then picks one of the available Pods and establishes the SPDY tunnel to it, just as it would if you had specified the Pod name directly.
The benefit here is that kubectl manages the mapping. If the Pod it initially connected to goes down, and the Deployment controller spins up a new Pod, kubectl might try to re-establish the connection to a new healthy Pod. However, it's generally safer to assume that if the underlying Pod is killed, the port-forward session will terminate. The main advantage remains the abstraction and the fact that you don't need to manually update the ever-changing Pod names. This stable api endpoint for your local machine simplifies script automation and general development processes.
4.5. Handling Multiple Services on the Same Port or Different Ports
You might have multiple Services in your cluster, perhaps different microservices, each exposing its own API on a standard port like 80 or 8080.
For example, if you have nginx-service (port 80) and my-backend-api-service (port 8080):
- To access Nginx locally on
8080:bash kubectl port-forward service/nginx-service 8080:80 - To access your backend API locally on
9000:bash kubectl port-forward service/my-backend-api-service 9000:8080(assumingmy-backend-api-servicelistens on port 8080 internally).
You can run these commands in separate terminal windows to have multiple port-forward sessions active concurrently, connecting to different services or even different ports on the same service. This flexibility makes kubectl port-forward an indispensable tool for local development of complex microservice architectures, where you might need to interact with several APIs simultaneously.
5. Even More Advanced Usage: Forwarding to a Deployment/ReplicaSet
Beyond Pods and Services, kubectl port-forward also allows you to target a Deployment or a ReplicaSet directly. This offers another layer of abstraction, useful when you're primarily concerned with interacting with any healthy instance of an application managed by a Deployment, without needing to know specific Pod or Service names.
5.1. Syntax
The syntax for forwarding to a Deployment is similar:
kubectl port-forward deployment/<deployment-name> <local-port>:<remote-port>
Or for a ReplicaSet:
kubectl port-forward replicaset/<replicaset-name> <local-port>:<remote-port>
deployment/<deployment-name>orreplicaset/<replicaset-name>: This specifies the target resource as a Deployment or ReplicaSet.<local-port>: The port on your local machine.<remote-port>: The port that the application inside the Pods managed by the Deployment/ReplicaSet is listening on.
5.2. Explanation and Use Case
When you target a Deployment (or ReplicaSet), kubectl will intelligently pick one of the healthy Pods managed by that Deployment and establish the port-forward tunnel to it. It essentially performs a lookup, finds an active Pod belonging to the Deployment, and then uses that Pod's name for the underlying port-forward operation.
Why use this? * Convenience: If you're rapidly iterating on a Deployment and don't want to bother checking the Service name (which might be generic) or the constantly changing Pod name, targeting the Deployment directly is the quickest way to get a connection. It provides a simple, direct api to your running application instances. * Rapid Debugging: When you've just deployed a new version of an application (e.g., a new backend API service) and want to quickly verify it locally without setting up a Service, using the Deployment name can save a step. * Similar to Service, but without a Service object: In some ad-hoc development or testing scenarios, you might have a Deployment running without an associated Service (e.g., if it's an internal-only component not intended to be accessed by other cluster services via a stable IP). In such cases, forwarding to the Deployment is the only logical abstraction besides targeting a raw Pod.
Example: Using our nginx-deployment from before:
kubectl port-forward deployment/nginx-deployment 8080:80
This command will behave identically to forwarding to the Pod or Service in this specific example, as there's only one Pod managed by the Deployment. If there were multiple replicas, kubectl would pick one of them.
The output will be the familiar:
Forwarding from 127.0.0.1:8080 -> 80
Forwarding from [::1]:8080 -> 80
And you can test it with curl http://localhost:8080.
While targeting a Service is generally preferred for its stability, forwarding to a Deployment offers a convenient shortcut, especially when you are focused on the application instance itself and less on the stable network abstraction provided by a Service. This shows the versatility of kubectl port-forward in adapting to various development and debugging scenarios within your Kubernetes gateway to your internal applications.
6. Practical Scenarios and Use Cases
kubectl port-forward is not just a theoretical tool; it's a workhorse in the daily life of a Kubernetes developer. Its ability to create temporary, secure tunnels unlocks numerous practical scenarios, making local development and debugging significantly more efficient.
6.1. Debugging Applications with Local Debuggers
This is arguably one of the most common and powerful use cases. Imagine you have a Java, Python, Node.js, or Go application running in a Kubernetes Pod, and it's throwing an unexpected error. You want to attach your favorite local IDE debugger to it to step through the code, inspect variables, and understand the runtime flow.
- Scenario: A backend
apimicroservice in a Pod is failing to process a specific request. - Solution: Configure your application in the Pod to listen for a debugger connection on a specific port (e.g., Java's
agentlib:jdwp=transport=dt_socket,server=y,suspend=n,address=5005). Then, usekubectl port-forwardto expose that debugger port locally:bash kubectl port-forward <my-api-pod> 5005:5005Now, from your local IDE, you can configure a remote debugger connection tolocalhost:5005, and your debugger will connect directly to the application running in the Kubernetes Pod. This allows for deep introspection without redeploying or altering the cluster network significantly. This direct connection to the application's API allows for fine-grained debugging.
6.2. Local Development Against Cluster Services
Developing new features often requires your local application to interact with other services that are already deployed and functioning in the Kubernetes cluster. port-forward makes this seamless.
- Scenario A: Frontend Development: You're building a new web frontend locally (e.g., React, Angular, Vue) that needs to consume a backend API deployed in Kubernetes.
- Solution: Instead of deploying your frontend to the cluster or setting up a complex local mock
api, you canport-forwardyour backend API Service:bash kubectl port-forward service/my-backend-api-service 8000:8080Now, your local frontend can make API calls tohttp://localhost:8000, whichkubectltransparently routes to your backend service in the cluster. This allows for rapid iteration on the frontend while relying on a stable backend API.
- Solution: Instead of deploying your frontend to the cluster or setting up a complex local mock
- Scenario B: Microservice Development: You're developing a new microservice locally that needs to connect to an existing database (e.g., PostgreSQL, MongoDB) or a message queue (e.g., Kafka) running in the Kubernetes cluster.
- Solution:
port-forwardthe database or message queue Service:bash kubectl port-forward service/my-postgres-service 5432:5432 kubectl port-forward service/my-kafka-broker 9092:9092Your local microservice can now connect tolocalhost:5432for PostgreSQL orlocalhost:9092for Kafka, accessing the cluster instances directly. This avoids the need to run heavy database or message queue services locally, which consumes resources and can be cumbersome to manage. When these services are eventually deployed, they will likely be managed by an API gateway for external consumption, butport-forwardallows you to test their internal connections locally.
- Solution:
6.3. Accessing Internal Tools/Dashboards
Many Kubernetes deployments include various operational tools that are internal to the cluster for security and performance reasons.
- Scenario: You need to check the Grafana dashboard for metrics, a Prometheus server UI, or a custom application admin panel that is only exposed as a
ClusterIPService. - Solution:
port-forwardthe respective Service:bash kubectl port-forward service/grafana 3000:3000 kubectl port-forward service/prometheus 9090:9090You can then openhttp://localhost:3000orhttp://localhost:9090in your browser to access these dashboards, bypassing the need for an Ingress, NodePort, or VPN. This offers quick and secure access to your cluster's operational APIs and UIs.
6.4. Database Access
Direct database access for schema migrations, data inspection, or query debugging is a common development task.
- Scenario: You need to connect a local SQL client (e.g., DBeaver, pgAdmin) to a PostgreSQL Pod running in Kubernetes.
- Solution:
port-forwardthe PostgreSQL Service:bash kubectl port-forward service/my-db-service 5432:5432Your local SQL client can then connect tolocalhost:5432using the appropriate credentials, directly interacting with the database instance in the cluster. This is far more secure than exposing the database publicly.
6.5. Ephemeral Access for CI/CD or Scripting (with Caution)
While primarily a manual debugging tool, port-forward can sometimes be incorporated into automated scripts, though typically for non-production, ephemeral testing.
- Scenario: An integration test in a CI pipeline needs to make a few quick assertions against a freshly deployed
apiin a temporary test cluster, but setting up a full Ingress might be overkill or too slow. - Solution: A script could
port-forwardthe target Service in the background, run its tests againstlocalhost, and then kill theport-forwardprocess.bash kubectl port-forward service/my-test-api 8080:8080 & # Wait for port-forward to establish (e.g., using `nc -z localhost 8080` or sleep) curl http://localhost:8080/healthz # Run integration tests kill %1 # Kill the background processThis approach is less common in robust CI/CD and should be used cautiously, ensuring proper cleanup and error handling, asport-forwardis inherently meant for interactive use. For production APIs, a proper API gateway or Ingress controller is always the better solution.
These diverse use cases highlight kubectl port-forward as an essential utility for anyone operating within the Kubernetes ecosystem. It transforms the challenges of cluster networking into opportunities for more efficient and secure local development and troubleshooting of apis and applications.
APIPark is a high-performance AI gateway that allows you to securely access the most comprehensive LLM APIs globally on the APIPark platform, including OpenAI, Anthropic, Mistral, Llama2, Google Gemini, and more.Try APIPark now! 👇👇👇
7. Handling Multiple Port Forwards and Backgrounding
In a complex development environment, especially one involving multiple microservices, you might frequently find yourself needing to forward several ports simultaneously. Furthermore, keeping a kubectl port-forward command running in the foreground of your terminal can be disruptive to your workflow. This section covers techniques for managing multiple forwarding sessions and running them in the background.
7.1. Running Multiple port-forward Commands Simultaneously
There's no inherent limitation on the number of port-forward commands you can run concurrently, other than the availability of local ports and system resources. Each command will establish its own independent tunnel.
- Method: Simply open a new terminal window or tab for each
port-forwardcommand you need to run. - Example:
- Terminal 1: Accessing an Nginx web server:
bash kubectl port-forward service/nginx-service 8080:80 - Terminal 2: Accessing a backend
apiservice:bash kubectl port-forward service/my-backend-api-service 9000:8080 - Terminal 3: Accessing a database:
bash kubectl port-forward service/my-database 5432:5432With this setup, your local applications can interact withhttp://localhost:8080,http://localhost:9000/api, andlocalhost:5432for the database, all at the same time, without conflicts. This is a common pattern for local microservice development where your localapimight depend on other APIs in the cluster.
- Terminal 1: Accessing an Nginx web server:
7.2. Backgrounding kubectl port-forward
Running port-forward in the background allows you to free up your terminal while keeping the tunnel active. There are several ways to achieve this, depending on your operating system and preference.
7.2.1. Using & (Unix/Linux/macOS)
The simplest way to background a command on Unix-like systems is to append an ampersand (&) at the end of the command.
kubectl port-forward service/nginx-service 8080:80 &
This will start the port-forward process in the background, and your terminal prompt will return immediately. You'll typically see a job number (e.g., [1] 12345) indicating the background process.
Caveat: If the kubectl command prints output (like "Forwarding from..."), it might still print to your terminal even if backgrounded. You can redirect standard output and error to /dev/null or a log file to completely silence it:
kubectl port-forward service/nginx-service 8080:80 > /dev/null 2>&1 &
7.2.2. Using nohup (Unix/Linux/macOS)
nohup (no hang up) is useful if you want the port-forward process to continue running even if you close the terminal window.
nohup kubectl port-forward service/nginx-service 8080:80 > /dev/null 2>&1 &
This will create a nohup.out file (unless redirected) and ensure the process persists. It's excellent for long-running background port-forward sessions.
7.2.3. Using screen or tmux (Unix/Linux/macOS)
Terminal multiplexers like screen or tmux are professional tools for managing multiple terminal sessions. You can start a new screen or tmux session, run kubectl port-forward in it, and then detach from the session. The port-forward command will continue running in the detached session.
tmuxexample:- Start a new tmux session:
tmux new -s my-port-forward-session - Inside the new session, run your command:
kubectl port-forward service/my-api 8080:8080 - Detach from the session: Press
Ctrl+B, thenD. - To re-attach later:
tmux attach -t my-port-forward-session
- Start a new tmux session:
7.2.4. Scripting port-forward with Readiness Checks
For more robust backgrounding, especially in scripts, you might want to wait until the port forward is actually ready before proceeding.
#!/bin/bash

# Start port-forward in background
kubectl port-forward service/my-backend-api 8080:8080 > /dev/null 2>&1 &
PF_PID=$! # Store the process ID

# Wait for the port to be open on localhost
echo "Waiting for port-forward to establish on 8080..."
until nc -z localhost 8080; do
  sleep 0.1
done
echo "Port 8080 is open. Port-forward established."

# Your local application logic here...
curl http://localhost:8080/healthz

# When done, kill the port-forward process
echo "Killing port-forward process (PID: $PF_PID)..."
kill $PF_PID
This script ensures that subsequent commands only run once the port-forward tunnel is functional, providing a more reliable automation experience for your local API testing.
7.3. Managing Backgrounded Processes
When you background port-forward commands, you'll eventually need to stop them.
- Using
jobsandkill(for&backgrounding):- List background jobs in your current terminal session:
jobs[1]+ Running kubectl port-forward ... & - Kill a specific job:
kill %1(where1is the job number).
- List background jobs in your current terminal session:
- Using
psandkill(fornohupor general processes):- Find the process ID (PID) of your
kubectl port-forwardcommand:bash ps aux | grep "kubectl port-forward" | grep -v grepThis will show a line like:youruser 12345 ... kubectl port-forward ...where12345is the PID. - Kill the process:
kill 12345(replace12345with the actual PID).
- Find the process ID (PID) of your
- For
tmux/screen: Re-attach to the session, then pressCtrl+Cto stop the command, and then typeexitto close the session.
By mastering these techniques, you can efficiently manage your port-forward sessions, keeping your development environment clean and productive, whether you're interacting with a single backend api or a multitude of cluster services.
8. Security Considerations and Best Practices
While kubectl port-forward is incredibly useful, it's crucial to understand its security implications and adopt best practices to prevent unintended vulnerabilities. It creates a direct, temporary bridge, and like any bridge, it must be used responsibly. This is especially important when you consider that these local api calls might eventually interact with a production API gateway that has stringent security measures.
8.1. Security Implications
- Bypassing Network Policies: A
port-forwardtunnel can potentially bypass internal Kubernetes Network Policies. If a Network Policy is designed to restrict Pod-to-Pod communication,port-forwardeffectively acts as an external entry point, allowing your local machine to connect directly to the target Pod's port, regardless of internal policies. This means that if you canport-forwardto a Pod, you effectively gain direct network access to it, even if other Pods are blocked. - Exposure to Your Local Machine: The
local-portyou open is typically bound to127.0.0.1(localhost) by default, meaning only applications on your local machine can access it. However, you can bind to0.0.0.0to make it accessible from other machines on your local network (e.g.,kubectl port-forward pod-name 0.0.0.0:8080:80). This greatly expands the attack surface from your single machine to anyone on your network who can reach your IP, which is rarely advisable for internal services. - Privilege Escalation: If an attacker gains control of your workstation and your
kubeconfigfile is configured with high privileges, they could useport-forwardto access sensitive services within your cluster (e.g., databases, internal APIs, control plane components), even if those services are not publicly exposed. - Data Exfiltration: If you forward a port to a malicious Pod (or a compromised legitimate Pod), it could potentially use that tunnel to exfiltrate data from your local machine, though this is less common. The primary risk is usually the other way around: exposing cluster data to your local machine.
8.2. Best Practices for Secure Usage
- Principle of Least Privilege for
kubectl:- Ensure that the Kubernetes user associated with your
kubeconfighas only the necessary permissions. Specifically, limitport-forwardpermissions (createonpods/portforward). Don't use a highly privilegedkubeconfig(e.g., cluster-admin) for daily development tasks if a more restricted role would suffice. - Implement Role-Based Access Control (RBAC) to precisely define who can
port-forwardto which resources and in which namespaces.
- Ensure that the Kubernetes user associated with your
- Bind to
localhostExplicitly:- Always prefer
127.0.0.1orlocalhostfor your local binding address.kubectl port-forwarddoes this by default. Avoid0.0.0.0unless you have a very specific, secure reason and understand the network implications. If you need to make the forwarded port available to other machines, consider a more robust and secure VPN solution or a proper Ingress/LoadBalancer setup.
- Always prefer
- Use It Temporarily and Close Sessions:
port-forwardis designed for temporary, ad-hoc access. Do not leaveport-forwardsessions running indefinitely, especially if they provide access to sensitive internal APIs or data.- Always terminate your
port-forwardprocesses (Ctrl+C,kill, or script cleanup) once you no longer need them.
- Forward Only Necessary Ports:
- Avoid forwarding entire ranges of ports or ports you don't immediately need. Be precise with your
local-port:remote-portspecification.
- Avoid forwarding entire ranges of ports or ports you don't immediately need. Be precise with your
- Be Aware of the Target:
- Always confirm which Pod, Service, or Deployment you are forwarding to. Ensure it's the intended target and that it's not a potentially compromised or untrusted workload.
- Consider Alternatives for Production:
kubectl port-forwardis NOT for production traffic. For exposing production APIs and services, use KubernetesIngress,LoadBalancerServices, or dedicated API Gateway solutions. These solutions provide robust security features, traffic management, scalability, and observability thatport-forwardlacks.
- Educate Your Team:
- Ensure all developers and operators using
kubectl port-forwardunderstand its capabilities and limitations, particularly regarding security. Foster a culture of responsible usage.
- Ensure all developers and operators using
By adhering to these security considerations and best practices, you can leverage the immense power of kubectl port-forward for efficient local development and debugging without inadvertently creating security holes in your Kubernetes environment or compromising your sensitive APIs and data.
9. Troubleshooting Common port-forward Issues
Even with a clear understanding of kubectl port-forward, you might encounter issues. This section provides a guide to diagnosing and resolving the most common problems.
9.1. "Error: listen tcp 127.0.0.1:8080: bind: address already in use"
- Problem: This is the most frequent error. It means the
local-portyou specified (e.g., 8080) is already being used by another application on your local machine. - Solution:
- Choose a different local port: The easiest fix is to simply pick another available port, for example:
kubectl port-forward ... 8081:80. - Find and kill the conflicting process:
- Linux/macOS: Use
lsof -i :<port>(e.g.,lsof -i :8080) to find the process ID (PID) and thenkill <PID>. - Windows: Use
netstat -ano | findstr :<port>to find the PID, thentaskkill /PID <PID> /F.
- Linux/macOS: Use
- Ensure previous
port-forwardsessions are closed: If you're running multiple terminals, you might have anotherport-forwardinstance still active.
- Choose a different local port: The easiest fix is to simply pick another available port, for example:
9.2. "Error from server (NotFound): pods "" not found" or "Error from server (NotFound): services "" not found"
- Problem:
kubectlcannot find the specified Pod or Service. - Solution:
- Verify the name: Double-check the exact spelling of the Pod or Service name. Kubernetes resource names are case-sensitive.
- Check the namespace: Resources are namespaced. If your Pod/Service is not in the default namespace, you must specify its namespace using the
-nflag (e.g.,kubectl port-forward -n my-namespace service/my-api 8080:80). Confirm your current context's namespace withkubectl config view --minify | grep namespace:. - Verify resource existence: Use
kubectl get pods -n <namespace>orkubectl get svc -n <namespace>to list all resources and find the correct name.
9.3. Connection Refused or Timed Out After Forwarding is Established
- Problem: The
kubectl port-forwardcommand starts successfully, indicating the tunnel is established, but when you try to accesslocalhost:local-port, you get a "connection refused" or "timeout" error from your local client (e.g.,curl). This usually means the tunnel works, but the application inside the Pod isn't responding correctly. - Solution:
- Is the application listening on the correct
remote-port? This is a very common cause. Theremote-portin yourport-forwardcommand (<local-port>:<remote-port>) must precisely match the port the application within the container is listening on. Check your application's configuration, Dockerfile, orkubectl describe pod <pod-name>to confirm the container's listening port. - Is the Pod healthy and running?
kubectl get pods <pod-name>: Is itRunningandREADY(e.g.,1/1)?kubectl logs <pod-name>: Check application logs for errors or startup failures.kubectl describe pod <pod-name>: Look for recent events that might indicate issues (e.g., image pull errors, OOMKilled, CrashLoopBackOff).
- Is the application inside the container actually running? Even if the Pod is "Running," the application itself might have crashed internally or failed to start up.
- Internal Network Policies: In rare cases, extremely restrictive Network Policies might prevent internal loopback connections within the Pod itself, but this is highly unusual for standard application behavior. More likely, it's the application itself.
- Firewall inside the container: Some base images might have a firewall that blocks connections, but this is uncommon.
- Is the application listening on the correct
9.4. "Error from server (Forbidden): User "" cannot portforward pods "..." in namespace "..." "
- Problem: You lack the necessary RBAC permissions to perform a
port-forwardoperation. - Solution:
- Check your permissions: You need
createpermission on thepods/portforwardresource (ordeployments/portforward,services/portforwardif targeting those directly) in the target namespace. - Contact your cluster administrator: Request the appropriate RBAC roles and permissions for your user. Avoid asking for overly broad permissions like
cluster-adminif more specific ones suffice. - Switch context: Ensure you're using the correct
kubeconfigcontext that has the necessary permissions.kubectl config use-context <context-name>.
- Check your permissions: You need
9.5. Local Firewall Issues
- Problem: Your local machine's firewall (e.g., Windows Defender Firewall,
ufwon Linux, macOS Firewall) is blocking incoming connections to thelocal-port, even if it's bound tolocalhost. - Solution:
- Temporarily disable the firewall (for testing): This can help diagnose if the firewall is the culprit. Re-enable it immediately after testing.
- Add an exception: Configure your local firewall to allow connections to the specific
local-portyou are using forport-forward. This is usually a safer approach than disabling the firewall entirely.
By systematically going through these troubleshooting steps, you can quickly pinpoint and resolve most issues you encounter when using kubectl port-forward, ensuring smooth local access to your Kubernetes services and their APIs.
10. Integrating port-forward with Development Workflows
kubectl port-forward is more than just a standalone command; it's a versatile tool that can be seamlessly integrated into various development workflows, enhancing productivity and streamlining the developer experience. Its ability to create a secure gateway to your internal cluster applications is key to modern cloud-native development.
10.1. IDE Integration
Many modern Integrated Development Environments (IDEs) offer sophisticated Kubernetes integrations that abstract away the command-line intricacies of kubectl port-forward. This allows developers to manage port forwarding directly from their IDE's UI.
- VS Code (with Kubernetes extension): The Kubernetes extension for VS Code (developed by Microsoft) is incredibly powerful. It allows you to browse your cluster resources, view logs, exec into containers, and crucially,
port-forwardservices and Pods with a simple right-click. You can initiate and manage forwarding sessions directly from the "Kubernetes" explorer pane. This provides a visualapito your cluster resources. - JetBrains IDEs (IntelliJ IDEA, GoLand, PyCharm, etc. with Kubernetes plugin): JetBrains IDEs, via their Kubernetes plugin, offer similar capabilities. You can navigate your cluster, view Pods, Services, and Deployments, and start
port-forwardsessions with contextual menus. These IDEs also integrate well with remote debuggers, making theport-forwardstep a natural precursor to attaching a debugger to a remote Pod. - Other IDEs/Tools: Many other development environments or specialized Kubernetes desktop clients (like Lens, K9s) offer built-in
port-forwardfunctionalities, recognizing its importance for developer productivity.
Integrating port-forward into your IDE means less context switching between terminals and a more fluid debugging and development experience, especially when dealing with multiple cluster resources and their associated apis.
10.2. Scripting port-forward for Automated Setups
For teams or individual developers who frequently set up specific local environments that rely on multiple forwarded ports, scripting port-forward operations can save significant time and reduce manual errors.
Example: Multi-service Local Dev Environment Script: You could create a shell script that, upon execution, starts all necessary port-forward tunnels for your local development setup:```bash
!/bin/bash
echo "Starting local Kubernetes development environment..."
Kill any existing port-forwards to prevent conflicts
killall kubectl port-forward 2>/dev/null
Frontend API gateway (if applicable)
echo "Forwarding frontend API gateway..." kubectl port-forward service/my-frontend-gateway 8000:80 & FRONTEND_PID=$!
Backend Microservice 1 (e.g., User Service API)
echo "Forwarding User Service API..." kubectl port-forward service/user-service 8081:8080 & USER_SVC_PID=$!
Backend Microservice 2 (e.g., Product Catalog API)
echo "Forwarding Product Catalog API..." kubectl port-forward service/product-service 8082:8080 & PRODUCT_SVC_PID=$!
Database access
echo "Forwarding Database..." kubectl port-forward service/my-database 5432:5432 & DB_PID=$!echo "All services forwarded. PIDs: $FRONTEND_PID, $USER_SVC_PID, $PRODUCT_SVC_PID, $DB_PID" echo "Access your frontend via http://localhost:8000" echo "Access User Service via http://localhost:8081" echo "Access Product Service via http://localhost:8082" echo "Access Database via localhost:5432"
Optional: Trap CTRL+C to kill all forwards when script exits
trap "echo 'Terminating all port-forwards...'; kill $FRONTEND_PID $USER_SVC_PID $PRODUCT_SVC_PID $DB_PID; wait" EXITecho "Press Ctrl+C to stop all port-forwards and exit." wait `` This script encapsulates allport-forward` commands, handles backgrounding, and provides a clean way to start and stop the entire local environment. Such a script acts as a powerful local API gateway for your development machine.
10.3. Configuration Management and Sharing
For teams, documenting and standardizing port-forward configurations can improve consistency and reduce setup time for new members.
- Version Control: Store
port-forwardscripts or configuration files in your project's version control system (Git). This ensures everyone on the team uses the same localapiaccess patterns. - README Documentation: Include clear instructions in your project's README on how to set up the local development environment, including any necessary
port-forwardcommands. kubectlAliases: Encourage the use ofkubectlaliases for frequently usedport-forwardcommands to simplify their execution (e.g.,alias kpf-user='kubectl port-forward service/user-service 8081:8080').
By integrating kubectl port-forward intelligently into your development workflows, you can transform it from a mere command into a powerful enabler of efficient, collaborative, and consistent cloud-native development. It's a critical tool in bridging the gap between your local workstation and the intricate world of Kubernetes cluster services, allowing you to interact with your APIs and applications as if they were just another local process.
11. The Role of kubectl port-forward in a Broader API Management Context: Introducing APIPark
While kubectl port-forward is an indispensable tool for individual developers and teams needing temporary, direct local access to Kubernetes services, it's crucial to understand its place within a broader API management strategy. port-forward excels at bridging the local environment to internal cluster services for debugging and development. However, when it comes to managing APIs for production, scalability, security, and enterprise-wide consumption, a dedicated API gateway solution becomes not just beneficial, but essential. This is where platforms like APIPark come into play.
11.1. Bridging Local Development to Enterprise API Management
Imagine you're using kubectl port-forward to test a new microservice locally. This microservice exposes a RESTful API that will eventually be consumed by other services, client applications, or even external partners. During local development, you might be calling http://localhost:8080 (thanks to port-forward) to hit your service's API endpoints directly.
This local testing is vital for rapid iteration and debugging. It allows you to: * Verify the functionality of your API endpoints. * Test different request/response cycles. * Ensure data models are correct. * Debug logic flaws using your local IDE.
However, once your microservice is ready for deployment, it transitions from a locally tested component to a production-grade API that requires: * Unified Access: How do other services or clients find and consume this API reliably? * Security: How is it authenticated, authorized, and protected from abuse? * Traffic Management: How is rate limiting, load balancing, and routing handled across multiple instances or versions? * Observability: How are calls monitored, logged, and analyzed for performance and errors?
These are challenges that kubectl port-forward is not designed to solve. It provides the direct access necessary for development, but for the robust, scalable, and secure exposure of APIs in production, an API gateway is the answer.
11.2. APIPark: Your Open Source AI Gateway & API Management Platform
This is precisely the domain of APIPark. While kubectl port-forward empowers individual developers to connect and debug services locally, large-scale API management, especially for diverse services including cutting-edge AI models, requires a dedicated API gateway solution. APIPark bridges this gap, providing a comprehensive, open-source platform for managing, integrating, and deploying both AI and REST services.
For developers who use kubectl port-forward to meticulously test their backend services and APIs locally, APIPark represents the next logical step in their API's lifecycle. It transforms a locally validated API into a centrally managed, secure, and scalable asset accessible across an enterprise or to external consumers.
Let's look at how APIPark's features complement the development process facilitated by kubectl port-forward:
- Unified API Format for AI Invocation & Quick Integration of 100+ AI Models: You might be developing a microservice locally (accessed via
port-forward) that consumes various AI models. APIPark takes this to the next level by standardizing the request format across 100+ AI models, ensuring that changes in AI models or prompts don't break your applications. This means theapicalls your locally forwarded service makes can be future-proofed by eventually routing through APIPark. - Prompt Encapsulation into REST API: Imagine your locally developed service (
port-forwarded) needs to perform sentiment analysis. With APIPark, you can combine an AI model with custom prompts to quickly create new REST APIs, such assentiment-analysis-api. Your local service can then consume this standardized, enterprise-grade API rather than directly interacting with the raw AI model, simplifying your local development and improving consistency. - End-to-End API Lifecycle Management: Once your service's API is locally stable, APIPark assists with managing its entire lifecycle – from design and publication to invocation and decommissioning. It offers crucial features like traffic forwarding, load balancing, and versioning, all aspects that
kubectl port-forwardcannot provide for production environments. - API Service Sharing within Teams & Independent API and Access Permissions for Each Tenant: After developing and testing an API locally, APIPark enables centralized display and secure sharing of all API services across departments and teams. This fosters collaboration and reuse. Furthermore, it supports multi-tenancy, allowing different teams to have independent APIs and access configurations while sharing the underlying infrastructure, offering a robust API gateway for enterprise scaling.
- API Resource Access Requires Approval: While
port-forwardrelies on yourkubectlpermissions for access, APIPark provides granular subscription approval features, ensuring that only authorized callers can invoke an API after administrator approval, preventing unauthorized access and data breaches in a production context. - Performance Rivaling Nginx & Detailed API Call Logging & Powerful Data Analysis:
port-forwarddoesn't provide performance metrics or logging beyond what your localkubectlclient might show. APIPark, on the other hand, boasts high performance (20,000+ TPS) and provides comprehensive logging and data analysis. This allows businesses to monitor API performance, trace issues, and identify long-term trends – vital for production APIs that were once just locally forwarded services.
In essence, kubectl port-forward is the essential developer's scalpel for precise, temporary local surgery on Kubernetes services and their apis. APIPark is the robust, high-performance API gateway and management platform that takes these healthy, locally tested services and safely and efficiently integrates them into the broader enterprise and AI ecosystem. They serve different but complementary roles in the journey of an API from conception to widespread, managed consumption.
12. Comparison with Other Kubernetes Networking Solutions
To fully appreciate kubectl port-forward, it's helpful to compare it with other methods of exposing and connecting to services within a Kubernetes cluster. Each solution has its specific use cases, advantages, and disadvantages. The following table provides a clear overview, emphasizing where kubectl port-forward fits in the larger networking landscape, particularly when contrasted with more permanent API gateway solutions.
| Feature / Solution | kubectl port-forward |
Kubernetes Service (ClusterIP) | Kubernetes Service (NodePort) | Kubernetes Service (LoadBalancer) | Kubernetes Ingress Controller | External API Gateway (e.g., APIPark) |
|---|---|---|---|---|---|---|
| Purpose | Local dev/debug | Internal communication | Expose on Node IP:Port | Expose via external LB | HTTP/S Routing to Services | Centralized API management, security, traffic control for external/internal consumption |
| Accessibility | Local machine only | Within cluster only | Cluster Nodes, external | External (Cloud LB) | External (via Ingress host/path) | External (Internet/Intranet) |
| Longevity | Temporary, ad-hoc | Persistent | Persistent | Persistent | Persistent | Persistent |
| Protocol Support | TCP, UDP | TCP, UDP | TCP, UDP | TCP, UDP | HTTP/S (L7) | HTTP/S, often gRPC, WebSocket, custom protocols |
| Security Model | Direct tunnel via K8s API server, local user permissions | K8s Network Policies | K8s Network Policies, Node FW | K8s Network Policies, LB FW | K8s Network Policies, Ingress Rules, WAF (optional) | Advanced authentication (OAuth, JWT), authorization, rate limiting, DDoS protection, WAF, API key management |
| Load Balancing | None (to a single Pod) | Round-robin, session affinity | Round-robin, session affinity | Cloud-managed LB | Ingress controller manages (e.g., Nginx, Envoy) | Advanced intelligent routing, canary releases, A/B testing, circuit breaking |
| Complexity | Low | Low | Medium | Medium-High | Medium-High | High (but offers significant value and features) |
| Cost Implications | None (local resources) | None | None (uses node resources) | Cloud LB costs | Controller resource costs (Pod, LB if needed) | Infrastructure costs, potential licensing/subscription, operational overhead |
| Use Case Example | Debugging a Pod from VS Code, local frontend calling backend api |
Internal microservice communication | Testing from VM on same network, exposing limited services | Public web service exposure (e.g., web app, REST api) |
Routing multiple domains/paths to services, SSL termination | Managing production APIs, AI services, microservices, exposing to partners, detailed analytics |
| Key Differentiator | Direct, secure, personal access to internal resources | Stable internal IP for dynamic Pods | Exposing services on cluster nodes | Public, highly available access via cloud LB | HTTP/S routing and SSL for public web services | Comprehensive API gateway for lifecycle, security, traffic, and AI management |
This comparison highlights that kubectl port-forward fills a unique and essential niche for local development and debugging. It’s a tool for direct, personal access, operating outside the public exposure mechanisms. When an API or service needs to be universally accessible, scalable, secure, and managed with enterprise-grade features, then solutions like Kubernetes Ingress and, more comprehensively, a dedicated API Gateway like APIPark become indispensable. They represent the transition of an application from a developer's workbench to a robust, managed production service that forms part of a larger digital ecosystem.
Conclusion: Empowering Your Kubernetes Development with kubectl port-forward
Mastering kubectl port-forward is not merely about learning a command; it's about unlocking a fundamental capability that profoundly impacts the efficiency, security, and developer experience within the Kubernetes ecosystem. Throughout this comprehensive guide, we've dissected the command's core mechanics, explored its diverse applications, and understood its critical role as a temporary, secure bridge between your local development environment and the intricate world of your Kubernetes cluster.
We began by establishing port-forward as an indispensable tool for direct local access, contrasting it with the more permanent, production-oriented Kubernetes networking solutions like Services and Ingress. We walked through basic, advanced, and even more advanced usages, demonstrating how to forward to Pods, Services, and Deployments, offering varying levels of abstraction and convenience for your local API interactions.
The practical scenarios illuminated the true power of port-forward: from attaching local debuggers to remote applications and seamlessly connecting local frontends to cluster-hosted backend APIs, to accessing internal dashboards and debugging databases. These use cases underscore its versatility as a daily companion for any Kubernetes developer. Furthermore, we covered essential techniques for managing multiple forwarding sessions and backgrounding commands, ensuring that port-forward enhances, rather than disrupts, your development workflow.
Crucially, we delved into the security implications of port-forward, emphasizing the need for responsible usage, adherence to the principle of least privilege, and understanding its limitations. This led us to troubleshoot common issues, equipping you with the knowledge to diagnose and resolve problems efficiently, keeping your development process smooth and uninterrupted. We also explored how port-forward can be integrated into modern IDEs and automated scripts, transforming it into a seamless part of your development toolkit.
Finally, we positioned kubectl port-forward within the broader context of API management, introducing APIPark as a robust, open-source AI gateway and API management platform. This discussion highlighted that while port-forward is your precision tool for local development, solutions like APIPark are essential for managing APIs in production—offering features like unified API formats, lifecycle management, advanced security, and performance monitoring that are vital for enterprise-grade operations. They are two sides of the same coin: port-forward for the individual developer's immediate needs, and an API gateway for the collective, scalable, and secure deployment of those developed apis.
In conclusion, mastering kubectl port-forward empowers you to navigate the complexities of Kubernetes networking with confidence. It streamlines your development, accelerates debugging, and fosters a more productive cloud-native experience. By understanding when and how to wield this powerful command, you not only connect services locally but also gain a deeper appreciation for the architectural considerations that govern the entire lifecycle of your applications and APIs within Kubernetes. Embrace kubectl port-forward as a core component of your Kubernetes toolkit, and watch your development workflow transform.
5 FAQs
- What is
kubectl port-forwardprimarily used for?kubectl port-forwardis primarily used by developers and administrators to establish a secure, temporary, and bidirectional tunnel between a port on their local machine and a specific port on a Pod, Service, or Deployment running within a Kubernetes cluster. Its main purpose is to enable local development, debugging, and ad-hoc access to internal cluster services without exposing them publicly. This allows local tools to interact with remote applications as if they were running onlocalhost. - What are the security implications of using
kubectl port-forward? Whilekubectl port-forwardis secure in terms of traffic encryption (using SPDY over the Kubernetes API server connection), it can have security implications if not used carefully. It can bypass internal Kubernetes Network Policies, providing direct access to a Pod. If an attacker gains access to your workstation andkubeconfigcredentials, they could useport-forwardto access sensitive internal services. It's crucial to follow the principle of least privilege for yourkubectluser, only forward necessary ports, bind tolocalhost(default), and terminate sessions when not in use. - Can I use
kubectl port-forwardfor production traffic or permanent exposure? No,kubectl port-forwardis emphatically not designed for production traffic or permanent service exposure. It's a temporary, ad-hoc tool meant for individual developers or debugging sessions. For production APIs and applications, you should use Kubernetes Service types likeLoadBalancerorNodePort, or anIngresscontroller, which provide features like high availability, scalability, robust security, and traffic management. For advanced API governance, an API Gateway like APIPark is the appropriate solution. - How do I stop a
kubectl port-forwardsession? If you startedkubectl port-forwardin the foreground of your terminal, you can stop it by pressingCtrl+C. If you ran it in the background (e.g., using&ornohup), you'll need to find its process ID (PID) and kill it. On Linux/macOS, you can useps aux | grep "kubectl port-forward"to find the PID, thenkill <PID>. For jobs started with&in the current shell, you can usejobsto list them andkill %<job_number>to terminate them. - What's the difference between forwarding to a Pod and forwarding to a Service?
- Forwarding to a Pod (
kubectl port-forward <pod-name> ...): This establishes a tunnel directly to a specific Pod instance. It's useful for debugging a unique Pod or when you need to bypass Service abstractions. The drawback is that Pod names are ephemeral; if the Pod restarts or is replaced, yourport-forwardsession will break, and you'll need to update the command with the new Pod name. - Forwarding to a Service (
kubectl port-forward service/<service-name> ...): This establishes a tunnel to a Pod that backs the specified Service.kubectlresolves the Service to one of its healthy backend Pods. This method is more stable because you specify the static Service name, not a dynamic Pod name. If the underlying Pod changes,kubectlmight (depending on its version and specific conditions) automatically re-establish the connection to a new healthy Pod, or at least you won't need to manually find a new Pod name. It leverages the Service's abstraction for greater convenience.
- Forwarding to a Pod (
🚀You can securely and efficiently call the OpenAI API on APIPark in just two steps:
Step 1: Deploy the APIPark AI gateway in 5 minutes.
APIPark is developed based on Golang, offering strong product performance and low development and maintenance costs. You can deploy APIPark with a single command line.
curl -sSO https://download.apipark.com/install/quick-start.sh; bash quick-start.sh

In my experience, you can see the successful deployment interface within 5 to 10 minutes. Then, you can log in to APIPark using your account.

Step 2: Call the OpenAI API.