Mastering `kubectl port-forward` for Local Development
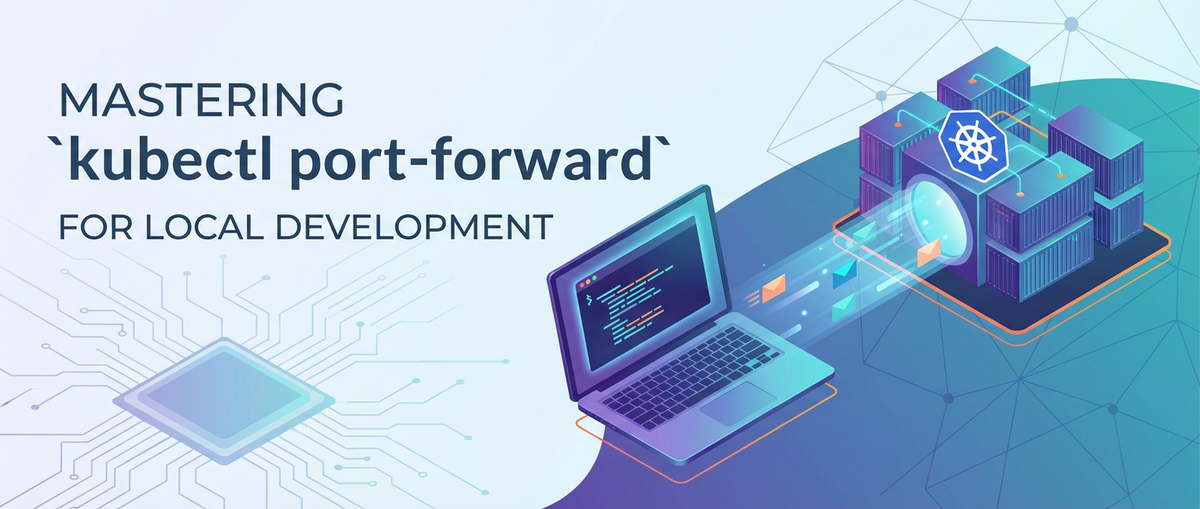


Kubernetes has irrevocably transformed the landscape of application deployment and management, offering unparalleled scalability, resilience, and operational efficiency for modern cloud-native architectures. As organizations increasingly embrace container orchestration, developers find themselves navigating a new paradigm where applications are no longer monolithic entities running on a single server, but rather distributed systems composed of numerous interconnected microservices residing within a Kubernetes cluster. This shift, while empowering, introduces unique challenges, particularly when it comes to the crucial phase of local development and debugging. How does a developer efficiently interact with a service or a database running remotely in a Kubernetes cluster without deploying their entire development environment into the cluster itself? This is precisely where the kubectl port-forward command emerges as an indispensable tool, serving as a critical bridge between a developer's local workstation and the intricate world within a Kubernetes cluster.
For many developers accustomed to directly accessing services via IP addresses or hostnames in more traditional environments, the isolation of Kubernetes pods can initially seem daunting. Services within a cluster are often designed to be accessed internally, through a sophisticated internal networking layer that abstracts away the underlying pod IPs. While this internal abstraction is a cornerstone of Kubernetes' power, ensuring that applications remain resilient to pod failures and scaling events, it simultaneously creates a barrier for local development workflows. Imagine needing to connect your local IDE's debugger to a specific microservice running in a development cluster, or perhaps querying a database instance that lives solely within the cluster's network. Without a mechanism to punch through this isolation layer, developers would be forced into cumbersome deployment cycles for every minor code change, or resort to less efficient remote debugging techniques that lack the immediate feedback loop of local interaction.
kubectl port-forward directly addresses this dilemma by establishing a secure, temporary tunnel. It allows you to forward network traffic from a specific local port on your machine to a designated port on a Pod or Service within your Kubernetes cluster. This means your local applications can interact with remote services as if they were running directly on your local network, bypassing the complexities of cluster networking, ingress controllers, and load balancers for the purpose of development. It’s not merely a convenience; it’s a fundamental enabler for agile development in a Kubernetes-centric world. Throughout this comprehensive guide, we will delve deep into the mechanics of kubectl port-forward, exploring its various applications, advanced features, security implications, and how it fits into a broader local development strategy, ensuring that you can master this potent command and integrate it seamlessly into your daily workflow. We will also touch upon how this ephemeral local tunneling contrasts with robust, production-grade api gateway solutions, giving a holistic view of managing api interactions from development to deployment.
Understanding Kubernetes Networking Fundamentals
Before we dissect the intricacies of kubectl port-forward, it's crucial to grasp the foundational concepts of Kubernetes networking that make this command so vital. Kubernetes' network model is designed for flexibility and flat networking, enabling pods to communicate with each other regardless of the node they reside on, and allowing external clients to access services within the cluster. However, this flexibility comes with a layer of abstraction that shields internal components from direct external exposure by default.
At the heart of Kubernetes networking are Pods and Services. A Pod is the smallest deployable unit in Kubernetes, encapsulating one or more containers, storage resources, a unique network IP, and options that govern how the containers run. Each Pod gets its own IP address, and containers within a Pod share this network namespace, meaning they can communicate with each other via localhost. However, Pod IPs are ephemeral; they are assigned dynamically and can change when a Pod is rescheduled or replaced. This ephemeral nature means you cannot reliably connect to a Pod directly by its IP address for long-term communication.
This is where Services come into play. A Service is an abstraction layer that defines a logical set of Pods and a policy by which to access them. Services address the problem of Pod ephemerality by providing a stable IP address and DNS name. When you define a Service, it acts as a persistent entry point to a group of Pods that match a specified selector. Kubernetes supports several types of Services, each catering to different access patterns:
- ClusterIP: The default Service type. It exposes the Service on an internal IP address within the cluster. This type makes the Service only reachable from within the cluster. It's perfect for internal microservice communication.
- NodePort: Exposes the Service on a static port on each Node's IP. This makes the Service accessible from outside the cluster by requesting
<NodeIP>:<NodePort>. While it offers external access, it's often not suitable for production due to port conflicts and a single entry point per node. - LoadBalancer: Exposes the Service externally using a cloud provider's load balancer. This type is generally only available on cloud providers that support external load balancers. It provides a dedicated, external IP address and often integrates with DNS.
- ExternalName: Maps a Service to an arbitrary external name, like
my.database.example.com. This type doesn't proxy traffic but returns a CNAME record.
The inherent design philosophy behind Kubernetes networking prioritizes isolation. Pods are isolated from the host network by default, and Services are isolated from external networks unless explicitly exposed via NodePort, LoadBalancer, or an Ingress controller. This isolation is a critical security feature, preventing unauthorized access to internal components. However, for a developer working locally, this isolation creates a significant hurdle. Your local machine is an "external" entity to the Kubernetes cluster. While you might be able to reach NodePorts if your cluster nodes are directly accessible, this isn't always practical or secure, especially for development clusters that might reside in a private network or for specific internal apis not meant for broad exposure.
Furthermore, relying on NodePorts or LoadBalancers for local development often presents several drawbacks. NodePorts might conflict with other services or require specific firewall rules, and they expose services on all cluster nodes, which is an unnecessary level of exposure for individual debugging. LoadBalancers incur cost and configuration overhead and are typically provisioned for production-grade traffic, not ephemeral development access. The goal during local development is often to establish a direct, secure, and temporary connection to a single service or pod instance without altering the cluster's external exposure policies or incurring unnecessary overhead. This is precisely the problem kubectl port-forward is designed to solve, offering a controlled, on-demand tunnel that respects the cluster's internal networking while making specific internal components locally accessible.
The Core Concept of kubectl port-forward
At its heart, kubectl port-forward is a utility that enables a developer to establish a secure, ephemeral tunnel between their local machine and a specific resource within a Kubernetes cluster. Think of it as creating a temporary, personal bridge that allows your local applications to "see" and interact with a remote Pod or Service as if it were running on localhost or a local IP address. It's an essential tool for debugging, testing, and accessing internal cluster resources without altering cluster networking configurations or exposing services broadly.
What it does: When you execute kubectl port-forward, it initiates a proxy process on your local machine. This process listens on a specified local port. Any traffic directed to this local port is then securely forwarded through the Kubernetes api server to the designated target (either a Pod or a Service) within the cluster. Conversely, any responses from the target service are sent back through the same tunnel to your local application. This creates a transparent connection, making it appear as though the remote service is residing on your local network.
How it works: The magic happens through the Kubernetes api server. The api server acts as the central control plane component, handling all communications within the cluster. When kubectl port-forward is invoked, it makes a request to the api server to establish a streaming connection (usually WebSocket-based). The api server then proxies the traffic between the kubectl client on your local machine and the Kubelet agent on the node where the target Pod resides. The Kubelet, in turn, handles the actual port forwarding to the specified container within the Pod. If you're forwarding to a Service, the api server directs the request to one of the Pods backed by that Service, and the Service's internal load balancing mechanism takes over from there.
This entire process is secure because all communication goes through the authenticated and authorized api server. Your kubectl context, including your user credentials and permissions, dictates whether you are allowed to perform the port-forward operation. This ensures that only authorized users can create these tunnels, respecting the cluster's Role-Based Access Control (RBAC) policies.
Analogy: Consider kubectl port-forward as setting up a temporary, highly specialized personal VPN, but instead of connecting your entire machine to a remote network, it only connects a specific local port to a specific remote service. It's like having a dedicated secret passage directly from your desk to a specific room inside a large, secure building (your Kubernetes cluster), allowing you to interact with something in that room directly, without needing to open up the main entrance or build a new road. This passage is created on demand and dismantled once you're done, leaving no persistent exposure.
Basic Syntax and its Components: The fundamental command structure for kubectl port-forward is straightforward:
kubectl port-forward [RESOURCE_TYPE]/[RESOURCE_NAME] [LOCAL_PORT]:[REMOTE_PORT]
Let's break down these components:
[RESOURCE_TYPE]: This specifies whether you want to forward to apodor aservice. You can also use abbreviations likepofor pod andsvcfor service.[RESOURCE_NAME]: This is the exact name of the Pod or Service you wish to connect to. It's case-sensitive and must match an existing resource in your current (or specified) namespace.[LOCAL_PORT]: This is the port number on your local machine that you want to use. Your local application will connect to this port.[REMOTE_PORT]: This is the port number on the target Pod or Service within the cluster that you want to forward traffic to. This is typically the port an application inside the Pod is listening on, or the Service's port.
Understanding this core mechanism is crucial for leveraging kubectl port-forward effectively. It's not a generic network tunnel for all cluster traffic, but a focused, point-to-point connection for specific service interaction during development and debugging. Its temporary nature, combined with its reliance on the api server for authentication and authorization, makes it a powerful yet secure tool in a developer's Kubernetes toolkit.
Basic Usage: Forwarding to a Pod
The most granular way to use kubectl port-forward is to establish a connection directly to a specific Pod. This approach is particularly useful when you need to interact with a single instance of an application, perhaps for debugging a particular replica or accessing a component that doesn't have a formal Service defined, such as a temporary testing utility or a one-off database instance.
Scenario: Accessing a single application instance (Pod) Imagine you have a Kubernetes deployment running multiple replicas of a web application. During development, you might encounter an issue that only manifests in a specific Pod. Or perhaps you've deployed a temporary Pod with a specialized debugging tool, and you need to access its web interface locally. Forwarding directly to a Pod allows you to bypass the Service abstraction and target that exact instance.
Finding Pod names: Before you can forward to a Pod, you need its precise name. Pod names are usually generated with a unique suffix, making them distinct. You can list all Pods in your current namespace using:
kubectl get pods
This command will output a list of Pods, their statuses, and their names. For example:
NAME                                READY   STATUS    RESTARTS   AGE
my-webapp-deployment-78f77d76b8-abcde   1/1     Running   0          5d
my-webapp-deployment-78f77d76b8-fghij   1/1     Running   0          5d
database-pod-xyz123                     1/1     Running   0          2d
From this list, you can pick the name of the Pod you want to connect to, for instance, my-webapp-deployment-78f77d76b8-abcde.
Command structure: kubectl port-forward <pod-name> <local-port>:<pod-port> Once you have the Pod name and know the port your application is listening on inside that Pod, you can construct the command.
Practical example: Accessing a simple web server or database
Let's say you have a simple Nginx web server running in a Pod named nginx-pod-12345 and it's listening on port 80 (the default for HTTP). You want to access this Nginx server from your local browser on port 8080.
The command would be:
kubectl port-forward nginx-pod-12345 8080:80
When you execute this, your terminal will display output similar to this:
Forwarding from 127.0.0.1:8080 -> 80
Forwarding from [::1]:8080 -> 80
This indicates that kubectl has successfully established the tunnel. Now, if you open your web browser and navigate to http://localhost:8080, your request will be forwarded through the tunnel to port 80 of the nginx-pod-12345 inside the Kubernetes cluster. The Nginx server will serve its default page, and the response will travel back through the tunnel to your browser.
Similarly, if you have a PostgreSQL database running in a Pod named database-pod-xyz123 and it's listening on port 5432, and you want to connect to it using a local PostgreSQL client (like psql or DBeaver) on local port 5432:
kubectl port-forward database-pod-xyz123 5432:5432
Now your local psql client can connect to localhost:5432, and it will be transparently communicating with the database inside the cluster.
Explaining what happens when the command runs: Upon execution, kubectl port-forward holds your terminal session open. It continuously listens on the specified local port (8080 in the Nginx example, 5432 in the PostgreSQL example). Any incoming connections to that local port are then wrapped in an authenticated and authorized connection to the Kubernetes api server. The api server routes this connection to the Kubelet on the node hosting nginx-pod-12345 (or database-pod-xyz123). The Kubelet then injects this traffic directly into the network namespace of the target Pod, specifically directing it to port 80 (or 5432) within that Pod. This process ensures that your local application feels like it's talking directly to the remote service, without needing to know the complex internal routing of Kubernetes.
Dealing with multiple containers in a pod: A Pod can contain multiple containers. By default, kubectl port-forward will attempt to forward to the first container defined in the Pod's manifest. If your application or service is running in a specific container within a multi-container Pod, and it's not the first one, you might need to specify the target container explicitly. This is done using the --container or -c flag:
kubectl port-forward my-multi-container-pod 8080:80 --container my-web-app-container
Here, my-web-app-container would be the name of the container within my-multi-container-pod that is listening on port 80. This allows for precise targeting, even in more complex Pod configurations.
Forwarding to a Pod offers maximum control, allowing you to interact with individual instances, which is invaluable for isolated debugging and testing. However, when you need to access a service that's managed by Kubernetes' load balancing across multiple replicas, forwarding to a Service becomes the more appropriate and robust approach.
Advanced Usage: Forwarding to a Service
While forwarding directly to a Pod gives you granular control over a single instance, it often bypasses Kubernetes' inherent resilience and load-balancing capabilities. In many development scenarios, especially when working with microservices that have multiple replicas, you don't necessarily want to connect to a specific Pod. Instead, you want to connect to the logical entity that represents your application – the Service. This is where forwarding to a Service becomes incredibly powerful and aligns better with the cloud-native paradigm.
Why forward to a Service instead of a Pod?
- Load Balancing: When you forward to a Service,
kubectl port-forwardleverages the Service's internal load balancing. This means your local requests will be distributed among the available healthy Pods that back that Service. If one Pod goes down or is replaced, your forwarded connection will automatically be routed to another healthy Pod, providing a more stable and resilient development experience. This is crucial when your local application needs to interact with a highly availableapior backend service. - Resilience: Pods are ephemeral. They can be evicted, crash, or be scaled down. If you're forwarding to a specific Pod, and that Pod ceases to exist, your
port-forwardsession will break. Forwarding to a Service mitigates this; as long as the Service has at least one healthy backing Pod, your tunnel remains active. - Abstraction: Services provide a stable IP address and DNS name. They abstract away the constantly changing Pod IPs. Forwarding to a Service means you don't need to worry about which specific Pod is currently running your application; you just target the abstract Service entity. This makes your local development scripts and configurations more robust and less prone to breaking due to Pod lifecycle events.
- Consistency: In a microservices architecture, services typically expose
apis. When you're developing a newapiconsumer locally, you want to ensure it interacts with the service in the same way other internal services do. Forwarding to the Service ensures your local calls respect the same load balancing and service discovery mechanisms as internal cluster communications.
Command structure: kubectl port-forward service/<service-name> <local-port>:<service-port> The syntax for forwarding to a Service is very similar to forwarding to a Pod, with one crucial distinction: you specify service/<service-name> instead of just the Pod name.
First, identify the Service name using:
kubectl get services
This will show you a list of Services, their types, ClusterIPs, and ports. For example:
NAME         TYPE        CLUSTER-IP       EXTERNAL-IP   PORT(S)          AGE
kubernetes   ClusterIP   10.96.0.1        <none>        443/TCP          5d
my-webapp    ClusterIP   10.100.200.150   <none>        80/TCP           5d
my-database  ClusterIP   10.100.200.151   <none>        5432/TCP         2d
From this list, let's pick my-webapp. It exposes port 80/TCP.
Now, if you want to access the my-webapp Service from your local machine on port 8080, the command would be:
kubectl port-forward service/my-webapp 8080:80
And for my-database on local port 5432:
kubectl port-forward service/my-database 5432:5432
Practical example: Accessing a Service that fronts multiple replica Pods
Consider my-webapp, which is backed by three replica Pods. When you run kubectl port-forward service/my-webapp 8080:80 and then make requests to http://localhost:8080, kubectl will communicate with the my-webapp Service. The Service, in turn, will use its internal load-balancing mechanism (e.g., round-robin) to direct each incoming request to one of the three healthy Pods. If one Pod becomes unhealthy, the Service will automatically exclude it from the load-balancing pool, and your local requests will continue to be served by the remaining healthy Pods, maintaining connection stability.
Implications: Traffic goes through the Service's internal load balancing This is the most significant advantage of forwarding to a Service. It means your local client is interacting with the service just like any other internal service within the cluster. You benefit from Kubernetes' built-in service discovery and load distribution, which is a more realistic representation of how your api consumers will interact with your service in production. This approach is ideal when you're developing and testing local applications that consume apis from a remote Kubernetes cluster.
Distinction between Service port and target port: When defining a Kubernetes Service, there are typically two important port definitions:
port(Service port): This is the port that the Service itself listens on inside the cluster. Other services within the cluster communicate with this port. In our example, formy-webapp, this is80.targetPort: This is the port on the backing Pods that the Service forwards traffic to. This is the port where your application container inside the Pod is actually listening. Often,portandtargetPortare the same, but they can be different.
When you use kubectl port-forward service/<service-name> <local-port>:<service-port>, the <service-port> refers to the port defined in the Service manifest. kubectl routes traffic to the Service's internal IP and port, and the Service then handles mapping that to the appropriate targetPort on a chosen Pod. It's crucial to specify the service-port correctly in your kubectl port-forward command, as this is the entry point to the Service's internal load balancer.
In essence, forwarding to a Service is generally the preferred method for interacting with applications during development, as it provides a more robust, resilient, and representative connection to your application's api within the Kubernetes ecosystem.
Practical Scenarios and Use Cases
kubectl port-forward is more than just a command; it's a foundational utility that unlocks a multitude of practical scenarios for developers working with Kubernetes. Its ability to create temporary, secure tunnels dramatically streamlines various aspects of the development lifecycle, from initial coding and debugging to testing and accessing internal tooling.
Developing and Debugging Microservices:
- Connecting a local IDE debugger to a remote application: This is perhaps one of the most common and powerful use cases. Imagine you're developing a microservice locally, but you want to test it against other services or data that only exist in your remote development cluster. You can run your microservice locally in debug mode, and then use
kubectl port-forwardto expose an upstream dependency (like a message queue, another microservice'sapi, or a database) from the cluster to your local machine.- Example: Your local service needs to call an
auth-servicerunning in Kubernetes on port8080.bash kubectl port-forward service/auth-service 8080:8080Now your local service can callhttp://localhost:8080and reach the remoteauth-service. Conversely, if you want to attach your local IDE's debugger to a specific instance of your microservice running in the cluster, and that microservice exposes a debugger port (e.g., Java's JDWP on 5005), you can forward that port:bash kubectl port-forward my-microservice-pod-xyz123 5005:5005Then, configure your IDE to connect tolocalhost:5005for remote debugging. This provides an interactive debugging experience as if the application were running locally.
- Example: Your local service needs to call an
- Accessing a database (e.g., PostgreSQL, MongoDB) running in the cluster from a local client: Developers frequently need to interact directly with databases during feature development or bug investigation. Rather than configuring complex
Ingressrules or exposing sensitive database ports globally,kubectl port-forwardoffers a secure, temporary solution.- Example: Accessing a PostgreSQL instance running in a Pod named
pg-cluster-0on its default port5432:bash kubectl port-forward pg-cluster-0 5432:5432You can now use your localpsqlclient, DBeaver, or DataGrip to connect tolocalhost:5432with the appropriate credentials. This is significantly safer than exposing the database directly to the internet.
- Example: Accessing a PostgreSQL instance running in a Pod named
- Testing local changes against remote
apis or services: When developing a new feature, you might want to test how your local code interacts with theapis of other services already deployed in the cluster. Instead of constantly deploying your work-in-progress code to the cluster, you can useport-forwardto bring the cluster's dependencies to you.- Example: Your local frontend application needs to consume a
/productsapifrom aproduct-servicein the cluster.bash kubectl port-forward service/product-service 8000:80Your local frontend can now makeapicalls tohttp://localhost:8000/products, directly reaching the remoteproduct-service.
- Example: Your local frontend application needs to consume a
- Using local tools (e.g., Postman, cURL) to interact with internal
apis: Many internalapis within a Kubernetes cluster are not exposed externally for security or architectural reasons.kubectl port-forwardprovides an easy way for localapitesting tools like Postman, Insomnia, or simplecURLcommands to reach these internal endpoints.- Example: Testing an internal
metrics-apithat is only available via aClusterIPservicemetrics-aggregatoron port9090.bash kubectl port-forward service/metrics-aggregator 9090:9090Now you can runcurl http://localhost:9090/statusto hit the internalapi.
- Example: Testing an internal
Accessing Internal Management Interfaces:
Kubernetes environments often include various monitoring, logging, and management tools that are deployed as internal services. kubectl port-forward is the perfect way to access their web UIs without exposing them to the wider network.
- Kubernetes dashboards: If you're running a Kubernetes Dashboard within your cluster, you can access it:
bash kubectl port-forward service/kubernetes-dashboard 8001:80Then navigate tohttp://localhost:8001in your browser. - Prometheus UIs, Grafana instances: Similarly, for internal monitoring dashboards:
bash kubectl port-forward service/prometheus-kube-prometheus-prometheus 9090:9090 kubectl port-forward service/grafana 3000:80 # Assuming Grafana is on port 80 externally from the serviceAccess Prometheus athttp://localhost:9090and Grafana athttp://localhost:3000. - Admin consoles for message queues (Kafka, RabbitMQ) or caches (Redis): Many message brokers and caching solutions come with web-based administration interfaces.
- Example: Accessing a RabbitMQ management interface on port
15672(if available via a Service):bash kubectl port-forward service/rabbitmq-management 15672:15672Openhttp://localhost:15672to manage your RabbitMQ cluster.
- Example: Accessing a RabbitMQ management interface on port
Temporary Gateway Access:
While kubectl port-forward is primarily a development and debugging tool, it can function as a very temporary and localized gateway for a specific service. This allows local tools to interact with a single api endpoint within the cluster without the overhead of configuring a full-fledged Ingress or API Gateway for development purposes. It provides a direct channel for your machine to act as a pseudo-gateway for a specific api or application.
However, it is crucial to draw a clear distinction here. While kubectl port-forward provides a temporary access gateway for your local machine to a single service, it is fundamentally different from a production-grade API Gateway. A real API Gateway acts as the single entry point for all api calls, providing a comprehensive suite of features like authentication, authorization, rate limiting, traffic management, api versioning, analytics, and more. It is designed for high-throughput, security, and the comprehensive management of all your apis at scale.
For instance, consider a product like APIPark. APIPark is an open-source AI gateway and API management platform that provides end-to-end lifecycle management for apis. It allows for quick integration of 100+ AI models, unified API formats for AI invocation, prompt encapsulation into REST APIs, and robust API service sharing within teams. It offers features like independent API and access permissions for each tenant, subscription approval, performance rivaling Nginx (20,000+ TPS with 8-core CPU), detailed API call logging, and powerful data analysis. APIPark is built for production environments to handle complex api landscapes, offering enterprise-grade features and scaling capabilities that kubectl port-forward, by its very design, simply cannot. While kubectl port-forward helps a single developer debug a single api locally, APIPark manages the entire api ecosystem for an organization, from internal microservices to external partners and AI models. It's the difference between a temporary private tunnel for one person and a robust, secure, and managed highway system for countless users and services.
In summary, kubectl port-forward is an incredibly versatile and powerful tool that empowers developers to interact intimately with their Kubernetes applications during the development and debugging phases. Its simplicity and effectiveness make it an indispensable part of any developer's Kubernetes toolkit.
Advanced kubectl port-forward Features and Options
Beyond its basic usage, kubectl port-forward offers several advanced features and options that can enhance its utility, integrate it better into development workflows, and address specific networking requirements. Mastering these can significantly improve your productivity and make port-forward an even more seamless part of your daily routine.
Backgrounding the Process:
By default, kubectl port-forward runs in the foreground, taking over your terminal. This is often inconvenient as you typically need to run other commands or applications in parallel. There are several ways to background the process:
- Using
&on Linux/macOS: The simplest method on Unix-like systems is to append an ampersand (&) to the command. This runs the command in the background immediately, returning control of your terminal.bash kubectl port-forward service/my-webapp 8080:80 &You will see a job ID and process ID, e.g.,[1] 12345. You can then continue using your terminal. To bring it back to the foreground, usefg %1(where1is the job ID). To kill it, usekill %1orkill 12345. - Using
nohup(No Hang Up) on Linux/macOS:nohupallows a command to continue running in the background even if you close your terminal session. This is particularly useful for longer-runningport-forwardsessions that you don't want to terminate prematurely.bash nohup kubectl port-forward service/my-webapp 8080:80 > /dev/null 2>&1 &Here,> /dev/null 2>&1redirects standard output and standard error to/dev/null, preventingnohupfrom creating anohup.outfile. The final&puts thenohupcommand itself in the background. - Using
screenortmux: For more robust session management, tools likescreenortmuxallow you to create persistent terminal sessions. You can start a new session, runkubectl port-forwardin it, and then detach from the session. Theport-forwardcommand will continue running. You can reattach to the session later to manage it. This is excellent for managing multipleport-forwardsessions or for maintaining connections across SSH disconnects.
Specifying an Address:
By default, kubectl port-forward binds to 127.0.0.1 (localhost) on your local machine. This means only applications running on your machine can access the forwarded port. However, you might have scenarios where you need to access the forwarded port from another machine on your local network, or from a virtual machine running on your host.
--address 0.0.0.0for listening on all interfaces: If you want the forwarded port to be accessible from other devices on your local network, you can bind it to0.0.0.0, which tellskubectlto listen on all available network interfaces.bash kubectl port-forward service/my-webapp 8080:80 --address 0.0.0.0Caution: Using--address 0.0.0.0exposes the forwarded port to your entire local network. Only use this if you understand and accept the security implications. This should never be done on public networks or in untrusted environments.--address <ip>to bind to a specific local IP address: You can also bind to a specific non-localhost IP address if your machine has multiple network interfaces or aliases.bash kubectl port-forward service/my-webapp 8080:80 --address 192.168.1.100This would only make the port accessible via192.168.1.100:8080on your local network, assuming that IP is configured on your machine.
Random Local Port:
Sometimes you don't care about the specific local port number, or you want to avoid potential port conflicts, especially in scripts or automated workflows. kubectl port-forward can automatically assign an available local port for you.
- Omitting
<local-port>: Simply omit the local port specification, andkubectlwill pick a random available port.bash kubectl port-forward service/my-webapp :80The output will tell you which local port was chosen:Forwarding from 127.0.0.1:54321 -> 80 Forwarding from [::1]:54321 -> 80In this case,54321was chosen. This is very useful for scripting where you might programmatically read the assigned port from the output.
Multiple Forwards:
You can run multiple kubectl port-forward commands concurrently to connect to different services or pods simultaneously. Each command will open a separate tunnel.
# In terminal 1
kubectl port-forward service/my-webapp 8080:80

# In terminal 2
kubectl port-forward service/my-database 5432:5432

# In terminal 3 (using random port for another service)
kubectl port-forward service/my-message-queue :5672
Each of these will run independently, allowing your local environment to interact with various components of your Kubernetes application simultaneously. Ensure you use unique local ports for each forward to avoid conflicts.
Dealing with Namespaces:
Kubernetes resources are organized into namespaces. By default, kubectl operates within your currently configured namespace (which you can check with kubectl config view --minify | grep namespace:). If the Pod or Service you want to forward to is in a different namespace, you must specify it using the --namespace or -n flag:
kubectl port-forward --namespace dev service/my-webapp 8080:80
# Or using the short form:
kubectl port-forward -n dev service/my-webapp 8080:80
Alternatively, you can change your current context's namespace temporarily or permanently:
kubectl config set-context --current --namespace=dev
# Now all kubectl commands will target the 'dev' namespace
kubectl port-forward service/my-webapp 8080:80
Killing port-forward Sessions:
Since kubectl port-forward often runs in the foreground or background, knowing how to terminate these sessions is important.
Ctrl+C: If the command is running in the foreground, simply pressingCtrl+Cwill terminate it gracefully.- Finding and Killing Background Processes: If you backgrounded the process (e.g., using
&ornohup), you'll need to find its process ID (PID) and kill it.- On Linux/macOS:
bash ps aux | grep 'kubectl port-forward'This will list all processes containing "kubectl port-forward". Look for the PID associated with the session you want to kill.# Example output youruser 12345 0.0 0.1 123456 7890 ? S 10:00 0:00 kubectl port-forward service/my-webapp 8080:80Then, use thekillcommand with the PID:bash kill 12345If a simplekilldoesn't work (the process might be stubborn), you can usekill -9 12345for a forceful termination, though this should generally be a last resort. - Using
lsof(List Open Files): If you know the local port,lsofcan help identify the process holding it open.bash lsof -i :8080This will show you the process listening on port8080, including its PID.
- On Linux/macOS:
By incorporating these advanced options and management techniques, kubectl port-forward becomes an even more adaptable and powerful tool, capable of supporting complex development workflows and addressing a wider range of local access needs within a Kubernetes environment.
APIPark is a high-performance AI gateway that allows you to securely access the most comprehensive LLM APIs globally on the APIPark platform, including OpenAI, Anthropic, Mistral, Llama2, Google Gemini, and more.Try APIPark now! 👇👇👇
Troubleshooting Common kubectl port-forward Issues
Even with its relative simplicity, kubectl port-forward can sometimes throw a curveball. Encountering issues during setup or usage is common, but most problems can be resolved with a systematic troubleshooting approach. Understanding the typical failure modes and how to diagnose them will save you significant time and frustration.
Port Already in Use:
This is arguably the most frequent issue encountered. You try to forward a port, and kubectl complains that the local port is already occupied.
- Symptom:
error: unable to listen on any of the listeners: [::1]:8080: listen tcp [::1]:8080: bind: address already in useorerror: unable to listen on any of the listeners: 127.0.0.1:8080: listen tcp 127.0.0.1:8080: bind: address already in use - Diagnosis: Another process on your local machine is already using the specified
LOCAL_PORT. This could be anotherport-forwardsession, a local development server, or any other application. - Solution:
- Identify conflicting processes:
- On Linux/macOS: Use
lsof -i :<local-port>ornetstat -tulnp | grep :<local-port>. For example,lsof -i :8080will show you which process is listening on port8080and its PID. - On Windows (PowerShell):
Get-NetTCPConnection -LocalPort <local-port> | Select-Object OwningProcess, State, CreationTime. Then usetasklist | Select-String -Pattern <PID>orStop-Process -Id <PID>to identify or terminate.
- On Linux/macOS: Use
- Terminate the conflicting process: If it's an old
port-forwardsession, kill its PID. If it's another application, decide whether to terminate it or use an alternative local port. - Choose a different local port: The simplest solution is often to just pick an unused local port. For instance, if
8080is in use, try8081or9000. If you don't care about the specific local port, letkubectlchoose a random one:kubectl port-forward service/my-webapp :80.
- Identify conflicting processes:
Pod Not Found/Service Not Found:
If kubectl can't locate the resource you're trying to forward to, it will fail.
- Symptom:
error: pods "my-nonexistent-pod" not foundorerror: services "my-nonexistent-service" not found - Diagnosis: The specified Pod or Service name is incorrect, or it doesn't exist in the current (or specified) namespace.
- Solution:
- Check spelling: Kubernetes resource names are case-sensitive and must be exact.
- Verify existence and namespace:
- For Pods:
kubectl get pods -n <your-namespace> - For Services:
kubectl get services -n <your-namespace>Ensure the resource is listed and that you are either in the correct namespace or explicitly using the-nflag in yourport-forwardcommand.
- For Pods:
- Pod status: If you're forwarding to a Pod, ensure it's in a
RunningorContainerCreatingstate. If it'sPending,Error, orCrashLoopBackOff, theport-forwardmight connect but the application inside won't be accessible.
Connection Refused/Timeout:
You successfully establish the port-forward tunnel (the command runs without error), but when you try to access localhost:<local-port>, you get a "Connection refused" or "Timeout" error from your local client.
- Symptom: Browser shows "Connection refused" or "This site can't be reached".
curlreturns "connection refused" or hangs. - Diagnosis: The tunnel itself is established to the Pod/Service, but the application inside the Pod is not listening on the expected
REMOTE_PORT, or it's not healthy, or there's a network policy preventing access. - Solution:
- Is the Pod running and healthy?
kubectl get pods <pod-name> -n <namespace>: Check itsSTATUS.kubectl describe pod <pod-name> -n <namespace>: Look atEventsfor issues,Containersstatus, andReadiness/Liveness Probes.kubectl logs <pod-name> -n <namespace>: Check application logs for errors or indications that it's not starting correctly or listening on the correct port.
- Is the target port correct? Double-check the
REMOTE_PORTyou provided in theport-forwardcommand. It must be the port that the application inside the Pod is actually listening on. You can inspect the Pod's manifest (kubectl describe pod <pod-name>) underContainers->Portsorkubectl get pod <pod-name> -o yamlto confirm. - Firewall issues:
- Local machine firewall: Ensure your local firewall isn't blocking outgoing connections to the Kubernetes
apiserver or incoming connections to yourLOCAL_PORT. - Cluster network policies: Check if Kubernetes Network Policies are in place that might be preventing traffic from reaching the target Pod on the specified port, even internally. This is less common for
port-forwardas it uses theapiserver as a proxy, but could be a factor in highly locked-down clusters.
- Local machine firewall: Ensure your local firewall isn't blocking outgoing connections to the Kubernetes
- Application inside Pod not listening: Even if the container is running, the application itself might have failed to start or is misconfigured to listen on a different port or interface (e.g.,
localhostinstead of0.0.0.0within the container, though this is rare in K8s).
- Is the Pod running and healthy?
Authentication Issues:
kubectl port-forward relies on your kubectl configuration to authenticate and authorize with the Kubernetes api server.
- Symptom:
Error from server (Forbidden): pods "my-pod" is forbidden: User "..." cannot portforward pods "my-pod" in namespace "..." - Diagnosis: Your
kubectlcontext does not have the necessary RBAC permissions to performport-forwardon the specified resource in that namespace. - Solution:
- Check current context:
kubectl config current-context - Check user and permissions: Your cluster administrator will need to grant you the
port-forwardpermission (e.g.,pods/portforwardverb) for the relevant resources/namespaces via RBAC roles. - Kubeconfig validity: Ensure your
kubeconfigfile is valid and your credentials haven't expired.
- Check current context:
Performance Bottlenecks:
While not an error, you might experience slow performance or high latency when using port-forward.
- Diagnosis:
kubectl port-forwardis designed for development and debugging, not for high-throughput or low-latency production traffic. All traffic is proxied through the Kubernetesapiserver, which adds overhead. Network latency between your local machine and the cluster (especially if it's geographically distant) can also contribute significantly. - Solution:
- Understand limitations: Don't expect production-level performance. It's a tool for specific tasks.
- Optimize network: If possible, work from a network location closer to your cluster.
- For persistent or high-performance access: Use proper
Ingresscontrollers, VPNs, or dedicatedAPI Gatewaysolutions (like APIPark) for production-gradeapiaccess, which are designed for efficiency, security, and scalability.
By systematically going through these common issues and their solutions, you can efficiently troubleshoot most kubectl port-forward problems and keep your local development workflow running smoothly.
Security Considerations and Best Practices
While kubectl port-forward is an incredibly useful tool for developers, it's crucial to use it with an understanding of its security implications. Like any powerful tool that bridges network boundaries, it can introduce vulnerabilities if misused. Adhering to best practices ensures you leverage its benefits without inadvertently compromising your development environment or the cluster.
Ephemeral Nature: Understand it's a temporary tunnel, not a permanent solution.
The fundamental design of kubectl port-forward is to create temporary, on-demand tunnels. This ephemeral nature is a key security feature. The tunnel exists only for the duration of the kubectl port-forward command's execution. Once the command is terminated (e.g., via Ctrl+C or kill), the tunnel is immediately closed.
- Best Practice: Always remember that
port-forwardis for isolated, controlled access during development and debugging. It is not a mechanism for permanently exposing services, nor should it be relied upon for critical, long-running integrations. For persistent access, production traffic, or exposingapis to other systems, dedicated Kubernetes mechanisms (Services of type LoadBalancer, Ingress controllers) or externalAPI Gatewaysolutions are appropriate.
Least Privilege: Only forward necessary ports.
Always be mindful of which ports you are forwarding and from which Pod or Service. Forwarding unnecessary ports or sensitive internal ports creates potential exposure.
- Best Practice:
- Specify exact ports: Always explicitly define both the
LOCAL_PORTandREMOTE_PORT. Avoid leaving theREMOTE_PORTunspecified if the Pod has multiple exposed ports, askubectlmight pick a default that isn't what you intend. - Limit access: If you only need to connect to a database from your local machine, only forward the database port. Do not forward other ports on the same Pod that might expose internal management
apis or other sensitive interfaces. - Target specific services/pods: Wherever possible, be precise. If you need to debug a specific Pod, forward to that Pod. If you need to interact with a Service, forward to that Service, leveraging its abstraction.
- Specify exact ports: Always explicitly define both the
Exposure: Avoid forwarding to 0.0.0.0 in environments where local machine is exposed.
The --address 0.0.0.0 option allows kubectl port-forward to bind to all network interfaces on your local machine, making the forwarded port accessible from other machines on your local network. While useful in specific, controlled scenarios (e.g., accessing from a local VM), this significantly increases your attack surface.
- Best Practice:
- Use
0.0.0.0sparingly and judiciously: Only use--address 0.0.0.0if you absolutely need to access the forwarded port from another device on your trusted and secure local network. - Never use on public networks: Absolutely avoid using
--address 0.0.0.0if your local machine is connected to a public Wi-Fi network or an untrusted network segment. This would effectively expose your remote Kubernetes service to anyone on that network. - Firewall your local machine: If you do use
--address 0.0.0.0, ensure your local machine's firewall is configured to restrict access to the forwarded port to only trusted IP addresses or internal networks.
- Use
Alternatives for Production/Persistent Access:
It's critical to understand that kubectl port-forward is a development and debugging utility. It is not a solution for exposing services in production, connecting external systems to your cluster, or building robust api consumption patterns. These scenarios require purpose-built solutions.
- Ingress controllers: For exposing HTTP/HTTPS services to the internet, Ingress controllers (e.g., Nginx Ingress, Traefik, Istio Ingress
gateway) provide robust routing, TLS termination, load balancing, and virtual host management. They are designed for externalapiconsumption at scale. - VPNs to the cluster network: For secure, persistent access to internal cluster resources from external trusted networks (e.g., corporate offices), establishing a VPN connection to your cluster's network allows your entire machine to participate in the cluster network, subject to network policies.
- Dedicated
API Gatewaysolutions: This is whereAPI Gateways shine. For managing a multitude ofapis, securing them, applying policies, transforming requests, and providing comprehensive analytics, a dedicatedAPI Gatewayis indispensable.Consider APIPark. APIPark is an open-source AIgatewayandAPImanagement platform that stands in stark contrast to the temporary nature ofkubectl port-forward. Whileport-forwardgives you a direct, unmanaged tunnel to a singleapifor personal debugging, APIPark offers a holistic solution for managingapis across their entire lifecycle in production. It centralizesapitraffic, provides unified authentication and authorization, enables rate limiting, caching,APIversioning, and real-time monitoring and analytics. For AI services, it even unifiesAIinvocation formats and allows encapsulating prompts intoREST APIs. Features like tenant isolation, approval workflows, and high performance (20,000+ TPS) demonstrate its suitability for enterprise-gradeapimanagement. If your goal is to securely expose and manageapis for other applications, partners, or the public, or to integrate complexAImodels, anAPI gatewaylike APIPark is the engineered solution, whereaskubectl port-forwardis merely a temporary access mechanism for individual developers. The distinction is crucial: one enables personal debugging, the other powers a scalableapieconomy.
Monitoring and Auditing:
While port-forward traffic itself is local on your machine, the act of establishing the tunnel goes through the Kubernetes api server.
- Best Practice: Understand that your
kubectlcommands, includingport-forwardrequests, are typically logged and audited by the Kubernetesapiserver. This provides a trail of who accessed what and when. Ensure your cluster has appropriate audit logging enabled to track such access for security and compliance purposes. This reinforces the idea that even ephemeral access is subject to cluster governance.
By integrating these security considerations and best practices into your development workflow, you can effectively leverage the power of kubectl port-forward while maintaining a robust and secure Kubernetes environment.
Comparing kubectl port-forward with Other Local Development Approaches
kubectl port-forward is a powerful tool, but it's not the only way to interact with a Kubernetes cluster from your local machine, nor is it always the best fit for every scenario. Understanding its place relative to other local development approaches helps you choose the right tool for the job.
kubectl exec: For Shell Access, Not Network Access
kubectl exec allows you to execute commands directly inside a container within a Pod. This is akin to SSHing into a traditional server, but for a container.
- How it works:
kubectl execestablishes a direct connection to a running container and lets you run commands (likebash,sh,ls,cat) within its environment. - Use Cases:
- Debugging: Inspecting file systems, checking environment variables, reading logs directly from inside the container.
- Troubleshooting: Running network utilities like
ping,curl,netstatfrom within the Pod to diagnose connectivity issues between microservices. - One-off tasks: Executing a database migration script or a cleanup command within a specific Pod.
- Comparison to
port-forward:- Purpose:
kubectl execis for interacting directly with the container's OS and processes, providing command-line access.kubectl port-forwardis for establishing a network tunnel to an application listening inside the container, allowing your local applications to communicate with it. - Traffic:
execdoesn't forward network traffic in the same way; it's about remote command execution.port-forwardexplicitly proxies TCP connections. - Complementary: These commands are often used together. You might
execinto a Pod to determine which port a process is listening on, and then useport-forwardto access that port locally.
- Purpose:
NodePort/LoadBalancer Services: Permanent, Exposed Services
As discussed earlier, NodePort and LoadBalancer Services expose cluster applications more permanently and broadly.
- How they work:
- NodePort: Opens a specific port on every node in the cluster. Traffic hitting
<NodeIP>:<NodePort>is forwarded to the Service. - LoadBalancer: Requests a cloud provider's external load balancer, which then directs traffic to the Service via its ClusterIP. Provides a stable external IP.
- NodePort: Opens a specific port on every node in the cluster. Traffic hitting
- Use Cases:
- NodePort: Useful for exposing services to a trusted internal network where node IPs are known, or when developing within the cluster on exposed nodes. Not ideal for public exposure due to limited ports and multiple entry points.
- LoadBalancer: Standard for exposing public-facing applications or
apis that require external access and robust traffic management, especially on cloud platforms.
- Comparison to
port-forward:- Scope: NodePort/LoadBalancer expose services to a wider audience (internal network or internet).
port-forwardcreates a private tunnel for a single local machine. - Persistence: NodePort/LoadBalancer are persistent configurations that remain active.
port-forwardis temporary and lasts only as long as the command runs. - Security:
port-forwardis generally more secure for development debugging because it doesn't broadly expose services. NodePort/LoadBalancer require careful security group/firewall configurations. - Overhead/Cost: NodePort has minimal overhead but can lead to port conflicts. LoadBalancer incurs cloud provider costs.
port-forwardhas negligible cost/overhead.
- Scope: NodePort/LoadBalancer expose services to a wider audience (internal network or internet).
Local Kubernetes (Minikube, Kind, Docker Desktop K8s): Running a Full Cluster Locally
These tools allow you to run a complete, albeit lightweight, Kubernetes cluster directly on your development machine.
- How they work: They typically use virtualization (Minikube) or Docker containers (Kind, Docker Desktop Kubernetes) to simulate a full Kubernetes environment.
- Use Cases:
- Complete isolation: Develop and test your entire application (including all microservices, databases, message queues) in a fully self-contained Kubernetes environment without touching a remote cluster.
- Offline development: Work without an internet connection.
- Rapid iteration: Quick deployments and tests without network latency to a remote cluster.
- Learning Kubernetes: Experiment with cluster features and deployments in a safe, local sandbox.
- Comparison to
port-forward:- Resource Usage: Local Kubernetes clusters are resource-intensive (CPU, RAM, disk).
port-forwardis lightweight. - Scope: Local K8s provides a full cluster for all components.
port-forwardconnects your local environment to specific remote services. - Flexibility: Local K8s allows full control over cluster configuration.
port-forwardoperates within the constraints of a remote cluster. - When to choose: If you need to test entire end-to-end flows, or if your application has many interdependent microservices and you want a fully isolated environment, local K8s is suitable. If you just need to connect your local app to one or two remote dependencies, or debug a single remote Pod,
port-forwardis more efficient.
- Resource Usage: Local Kubernetes clusters are resource-intensive (CPU, RAM, disk).
Telepresence/Bridge to Kubernetes: Advanced Live-Coding Tools
These are more sophisticated tools designed for "live coding" against a remote Kubernetes cluster, making it feel like parts of the remote cluster are local.
- How they work: They often use
port-forwardunder the hood, but add features like:- Traffic interception: Rerouting specific traffic from the remote cluster to your local machine (e.g., all traffic intended for
my-servicein the cluster is now sent to your local instance ofmy-service). - Environment variable synchronization: Injecting remote environment variables into your local process.
- Shared dependencies: Allowing your local application to directly use services and databases running in the remote cluster, while also allowing remote services to call your locally running code.
- Traffic interception: Rerouting specific traffic from the remote cluster to your local machine (e.g., all traffic intended for
- Use Cases:
- Developing a single microservice locally: You can run your specific microservice on your machine, but have it interact with all its dependencies in the remote cluster, and even receive calls from other remote services.
- Faster feedback loops: Test local changes instantly in a near-production environment without building and deploying containers.
- Comparison to
port-forward:- Complexity/Power: Telepresence/Bridge are significantly more complex and powerful, offering a deeper integration between local and remote.
port-forwardis simpler, focusing solely on port mapping. - Automation: These tools automate much of the setup that would require multiple
port-forwardcommands and manual environment configuration. - When to choose: For advanced live-coding scenarios where you're actively developing and debugging a single service that needs to integrate deeply with a remote cluster (both as a consumer and producer of
apis), Telepresence/Bridge are excellent. For simpler, one-off access or accessing remote UIs,port-forwardis sufficient.
- Complexity/Power: Telepresence/Bridge are significantly more complex and powerful, offering a deeper integration between local and remote.
In summary, kubectl port-forward excels at providing a quick, secure, and ephemeral point-to-point network tunnel. It's an excellent choice for targeted debugging, accessing internal services, or connecting local tools to remote dependencies. For broader cluster interaction, complete isolation, or advanced live-coding, other tools may be more appropriate. The choice ultimately depends on the specific task, the complexity of your application, and your preferred workflow.
Building a Robust Local Development Workflow with kubectl port-forward
Integrating kubectl port-forward effectively into your local development workflow goes beyond just knowing the command's syntax. It involves scripting, integrating with development tools, and understanding its interaction with other Kubernetes concepts to create a seamless and efficient experience. A well-designed workflow can dramatically reduce context switching and accelerate your development cycle.
Scripting port-forward commands: Automating common tasks.
Manually typing out kubectl port-forward commands for multiple services can be tedious and error-prone. Scripting these commands is a significant step towards a more robust workflow.
- Makefiles or Task Runners: For more complex projects, integrate
port-forwardcommands into Makefiles or task runners (e.g.,npm scripts,Just). ```makefile .PHONY: dev-start dev-stopKUBE_NS ?= default # Default namespace, can be overriddendev-start: @echo "Starting local dev environment..." nohup kubectl port-forward -n $(KUBE_NS) service/my-webapp 8080:80 > /tmp/kpf-webapp.log 2>&1 & nohup kubectl port-forward -n $(KUBE_NS) service/my-database 5432:5432 > /tmp/kpf-db.log 2>&1 & @echo "Webapp accessible on http://localhost:8080" @echo "Database accessible on localhost:5432"dev-stop: @echo "Stopping port-forward processes..." pkill -f "kubectl port-forward .my-webapp" || true pkill -f "kubectl port-forward .my-database" || true rm -f /tmp/kpf-webapp.log /tmp/kpf-db.log @echo "Stopped."`` This allows developers to simply runmake dev-start` to set up their local environment.
Bash/Zsh scripts: You can create simple shell scripts to start and stop multiple port-forward sessions. ```bash #!/bin/bash
Define services and their ports
declare -A SERVICES SERVICES["my-webapp"]="8080:80" SERVICES["my-database"]="5432:5432" SERVICES["another-service"]="9000:8000"
Function to start port-forward in background
start_forward() { local service_name=$1 local ports=$2 local namespace=${3:-default} # Default to 'default' namespaceecho "Starting port-forward for service/$service_name on ports $ports in namespace $namespace..." nohup kubectl port-forward -n "$namespace" service/"$service_name" "$ports" > /tmp/kpf-"$service_name".log 2>&1 & PID=$! echo " PID: $PID" echo "$PID" > /tmp/kpf-"$service_name".pid echo " Logs: /tmp/kpf-"$service_name".log" }
Function to stop port-forward
stop_forward() { local service_name=$1 if [ -f "/techblog/en/tmp/kpf-$service_name".pid ]; then PID=$(cat /tmp/kpf-"$service_name".pid) echo "Stopping port-forward for service/$service_name (PID: $PID)..." kill "$PID" rm "/techblog/en/tmp/kpf-$service_name".pid rm "/techblog/en/tmp/kpf-$service_name".log else echo "No running port-forward found for service/$service_name." fi }
Main logic
case "$1" in start) for svc in "${!SERVICES[@]}"; do start_forward "$svc" "${SERVICES[$svc]}" "$2" # $2 can be namespace done echo "All specified services forwarded." ;; stop) for svc in "${!SERVICES[@]}"; do stop_forward "$svc" done echo "All specified services stopped." ;; status) echo "Checking status of port-forwards..." for svc in "${!SERVICES[@]}"; do if [ -f "/techblog/en/tmp/kpf-$svc".pid ]; then PID=$(cat /tmp/kpf-"$svc".pid) if ps -p "$PID" > /dev/null; then echo " Service $svc is running (PID: $PID)." else echo " Service $svc PID file found, but process not running. Cleaning up." rm "/techblog/en/tmp/kpf-$svc".pid fi else echo " Service $svc is not running." fi done ;; *) echo "Usage: $0 {start|stop|status} [namespace]" exit 1 ;; esac `` This script providesstart,stop, andstatus` commands for a predefined set of services, running them in the background and managing their PIDs. You can extend this to dynamically fetch service names or ports.
Integrating with IDEs:
Many modern Integrated Development Environments (IDEs) offer Kubernetes integrations that leverage port-forward for seamless local debugging and access.
- VS Code (Kubernetes extension): The Kubernetes extension for VS Code allows you to browse your cluster, view logs, and directly
port-forwardservices or pods with a few clicks from the explorer pane. This eliminates the need to jump to the terminal. - IntelliJ IDEA (Kubernetes plugin): Similar to VS Code, IntelliJ's Kubernetes plugin provides rich interaction with your cluster, including
port-forwardcapabilities, often integrated with run configurations for debugging. - Built-in features: Some IDEs even allow you to define
port-forwardas part of a "run configuration" for your local application, ensuring that the necessary tunnels are established automatically before your application starts.
Service Mesh Interaction:
When your cluster uses a service mesh (e.g., Istio, Linkerd), understanding how kubectl port-forward interacts with it is important.
- Direct bypass for tunneled traffic: Generally,
kubectl port-forwardestablishes a direct tunnel to the target Pod's network namespace. This means that the traffic flowing through yourport-forwardtunnel bypasses the service mesh's sidecar proxy that would normally intercept and manage ingress/egress traffic for that Pod. - Implications:
- No mesh policies applied: Service mesh policies (like mTLS, traffic routing rules, circuit breakers, rate limits) will not be applied to the traffic coming through your
port-forwardtunnel. - Debugging isolation: This bypass can be beneficial for debugging, as it allows you to isolate issues related to your application from issues introduced by the service mesh.
- Caveat: While the tunneled traffic bypasses the sidecar, the Pod itself is still part of the mesh. Any internal communication from that Pod to other services within the cluster will still go through its sidecar proxy.
- No mesh policies applied: Service mesh policies (like mTLS, traffic routing rules, circuit breakers, rate limits) will not be applied to the traffic coming through your
- Best Practice: Be aware of this behavior. If you need to test
apis under service mesh policies, you generally need to access them through an Ingressgatewaythat is part of the mesh, or use tools specifically designed to interact with the mesh's proxy (likeistioctl dashboardorlinkerd tap).port-forwardis best for direct application interaction where mesh features are not the primary focus of your local test.
By thoughtfully scripting, leveraging IDE integrations, and understanding how port-forward interacts with the broader Kubernetes ecosystem, you can construct a powerful and efficient local development workflow. This allows you to rapidly iterate on your code, debug issues effectively, and ensure your local application seamlessly integrates with the remote services of your Kubernetes cluster.
Table: Comparison of Kubernetes Local Access Methods
To encapsulate the different approaches discussed for local access to Kubernetes services, the following table provides a succinct comparison, highlighting the strengths and weaknesses of each method. This helps in choosing the most appropriate tool for a given development or debugging scenario.
| Feature / Method | kubectl port-forward |
NodePort Service | LoadBalancer Service | Local Kubernetes (Minikube/Kind) | Telepresence/Bridge to Kubernetes |
|---|---|---|---|---|---|
| Purpose | Ephemeral, secure local tunnel to a specific Service/Pod for debugging/dev. | Expose a Service on a static port of all cluster nodes. | Expose a Service externally via cloud load balancer. | Full, isolated cluster for local dev/testing. | Live-code a single local service against a remote cluster. |
| Target Scope | Single Pod or Service. | Single Service. | Single Service. | Entire application/cluster. | Single local service + its remote dependencies. |
| Exposure Level | Localhost (default), private tunnel. Optional --address 0.0.0.0 for local network. |
All cluster nodes, specific port. | Dedicated external IP/DNS, public access (if configured). | Local machine only, isolated from network (usually). | Local machine for single service, remote cluster for others. |
| Persistence | Temporary (lasts while command runs). | Persistent (as long as Service exists). | Persistent (as long as Service exists). | Persistent (while local cluster is running). | Temporary (for the duration of the dev session). |
| Ease of Setup | Very easy (single command). | Easy (Service manifest change). | Moderate (Service manifest + cloud provider integration). | Moderate (install & configure local K8s tool). | Moderate to Complex (tool installation, specific setup). |
| Resource Usage | Very low (client-side proxy). | Low (Kubernetes overhead). | Low (Kubernetes overhead, cloud load balancer cost). | High (requires significant CPU/RAM on local machine). | Moderate (local service + client-side proxy). |
| Security | High (authenticated, authorized, limited scope). | Moderate (requires firewall rules, careful port selection). | Moderate (requires robust cloud security group config, TLS). | High (isolated local environment). | Moderate (depends on specific tool's security model, often uses K8s auth). |
| Ideal Use Case | Debugging a specific api, accessing internal UIs, connecting local IDE. |
Internal access to stable services, dev/staging environments. | Production-grade public apis, external-facing web apps. |
Full application E2E testing, offline dev, K8s learning. | Rapid iteration & debugging of a single microservice with remote dependencies. |
| Keywords Relevance | Directly enables local api consumption. |
Exposes an api service. |
Exposes an api service as a public gateway. |
Testing apis within a full environment. |
Intercepting api traffic for live coding. |
| Example Command | kubectl port-forward service/my-app 8080:80 |
N/A (defined in YAML) | N/A (defined in YAML) | minikube start |
telepresence connect |
This table provides a quick reference to help developers navigate the various options for local interaction with Kubernetes, emphasizing that kubectl port-forward fills a unique and crucial niche for focused, secure, and temporary access.
Conclusion
In the evolving landscape of cloud-native development, where applications are meticulously crafted as distributed microservices residing within Kubernetes clusters, the ability to effectively debug, test, and interact with these remote components from a local development environment is paramount. kubectl port-forward emerges as an elegant and indispensable solution to this challenge, carving out a unique and crucial niche in the developer's toolkit.
We've embarked on a comprehensive journey, dissecting the fundamental role of kubectl port-forward in bridging the inherent network isolation of Kubernetes. From understanding the core concepts of Pods and Services to executing basic forwards to individual Pods and more robustly to Services, we've explored the practical applications that make this command a daily necessity for developers. Whether it's connecting a local IDE debugger to a remote microservice, querying a cluster-internal database, or using local tools to probe internal apis and management interfaces, port-forward provides an immediate, secure, and ephemeral conduit.
Beyond its basic functionality, we delved into advanced options that enhance its usability, such as backgrounding processes, specifying local addresses, and handling multiple concurrent sessions – all designed to integrate seamlessly into a productive workflow. We also armed ourselves with strategies for troubleshooting common pitfalls, ensuring that unexpected errors don't derail your development momentum.
Crucially, we've addressed the vital aspect of security. While kubectl port-forward offers immense convenience, it's a powerful command that demands responsible usage. Emphasizing its temporary, least-privilege nature, we underscored the importance of avoiding broad exposure and highlighted the stark contrast between this developer utility and robust, production-grade solutions like API Gateways. Tools like APIPark are designed for the secure, scalable, and managed exposure of apis to a wider audience, providing a comprehensive platform for the entire api lifecycle, a role kubectl port-forward is neither designed nor equipped to fulfill. This distinction is paramount for maintaining a secure and efficient ecosystem from development to deployment.
Finally, by comparing kubectl port-forward with other local development approaches—from kubectl exec for command-line interaction to full local Kubernetes clusters and advanced live-coding tools like Telepresence—we clarified its unique position. It's a precise, lightweight instrument for targeted connectivity, complementing other tools in a holistic development strategy.
In essence, kubectl port-forward is more than just a command; it's a cornerstone of the modern Kubernetes developer experience. Its simplicity, effectiveness, and ability to foster rapid iteration make it an invaluable asset for navigating the complexities of distributed systems. Mastering this tool means empowering yourself to work more efficiently, debug more effectively, and ultimately, build better cloud-native applications. While it serves as your personal key to the cluster's internal workings during development, remember to leverage dedicated and robust API Gateway solutions for managing your apis at scale in production, ensuring both development agility and enterprise-grade operational excellence.
5 Frequently Asked Questions (FAQs)
Q1: What is the primary difference between kubectl port-forward and exposing a Service with type: LoadBalancer? A1: The primary difference lies in their purpose, scope, and persistence. kubectl port-forward creates a temporary, private, and secure tunnel from your local machine to a specific Pod or Service inside the cluster, primarily for local development and debugging. It's transient and only accessible from your local machine (or specific local IP if --address is used carefully). In contrast, a Service with type: LoadBalancer is a persistent configuration that requests a cloud provider's external load balancer, providing a stable, public-facing IP address to expose your Service to the internet. It's designed for production traffic and external api consumers, offering high availability and scalability, but with potential costs and security implications of broad exposure.
Q2: Can I use kubectl port-forward to allow another machine on my network to access a service in my Kubernetes cluster? A2: Yes, you can, but with caution. By default, kubectl port-forward binds to 127.0.0.1 (localhost) on your machine. To allow other machines on your local network to access the forwarded port, you need to specify --address 0.0.0.0 in your command, like kubectl port-forward service/my-app 8080:80 --address 0.0.0.0. This binds the local port to all available network interfaces, making it accessible from your local network. However, this increases the security risk, as anyone on that network can now potentially access the forwarded service. Always ensure you are on a trusted and secure network when using this option, and consider local firewall rules.
Q3: My kubectl port-forward command successfully runs, but I can't connect from my browser/client. What should I check? A3: If the port-forward command runs without error (e.g., "Forwarding from..."), but your local client can't connect, the issue is likely with the target inside the cluster or your local client. 1. Verify Pod/Service health: Ensure the target Pod is Running and healthy (kubectl get pods <pod-name>), and check its logs (kubectl logs <pod-name>) for application errors. 2. Correct REMOTE_PORT: Double-check that the REMOTE_PORT you specified in the port-forward command is the actual port your application inside the Pod is listening on. This is a very common mistake. 3. Network Policies/Firewalls: Although port-forward bypasses many network policies, a very restrictive cluster-level network policy or even a firewall on your local machine could be blocking the connection. 4. Application listening: Confirm the application within the container is configured to listen on 0.0.0.0 (all interfaces) and not just 127.0.0.1 (localhost) within its own container, which can sometimes cause issues, though less common in modern container images.
Q4: How does kubectl port-forward handle multiple replicas of a service? A4: When you forward to a Kubernetes Service (e.g., kubectl port-forward service/my-app 8080:80), kubectl leverages the Service's internal load balancing mechanism. This means that your local requests sent through the tunnel will be distributed among the healthy Pod replicas that back that Service. If one Pod fails, the Service will automatically route traffic to other healthy Pods, making your local connection more resilient. If you forward to a specific Pod (e.g., kubectl port-forward my-app-pod-xyz 8080:80), you are bypassing the Service load balancing and connecting directly to that single instance.
Q5: Is kubectl port-forward suitable for exposing apis for production use or for external integrations? A5: No, kubectl port-forward is explicitly not suitable for production use or external integrations. It is a development and debugging tool designed for temporary, individual access from a developer's machine. For production-grade api exposure, you should use robust solutions like Kubernetes Ingress controllers (for HTTP/HTTPS services), Services of type LoadBalancer, or dedicated API Gateway platforms such as APIPark. API Gateways offer crucial features like centralized authentication, rate limiting, traffic management, API versioning, and analytics, which are essential for secure, scalable, and manageable apis in a production environment, fulfilling a completely different set of requirements than a simple debugging tunnel.
🚀You can securely and efficiently call the OpenAI API on APIPark in just two steps:
Step 1: Deploy the APIPark AI gateway in 5 minutes.
APIPark is developed based on Golang, offering strong product performance and low development and maintenance costs. You can deploy APIPark with a single command line.
curl -sSO https://download.apipark.com/install/quick-start.sh; bash quick-start.sh

In my experience, you can see the successful deployment interface within 5 to 10 minutes. Then, you can log in to APIPark using your account.

Step 2: Call the OpenAI API.