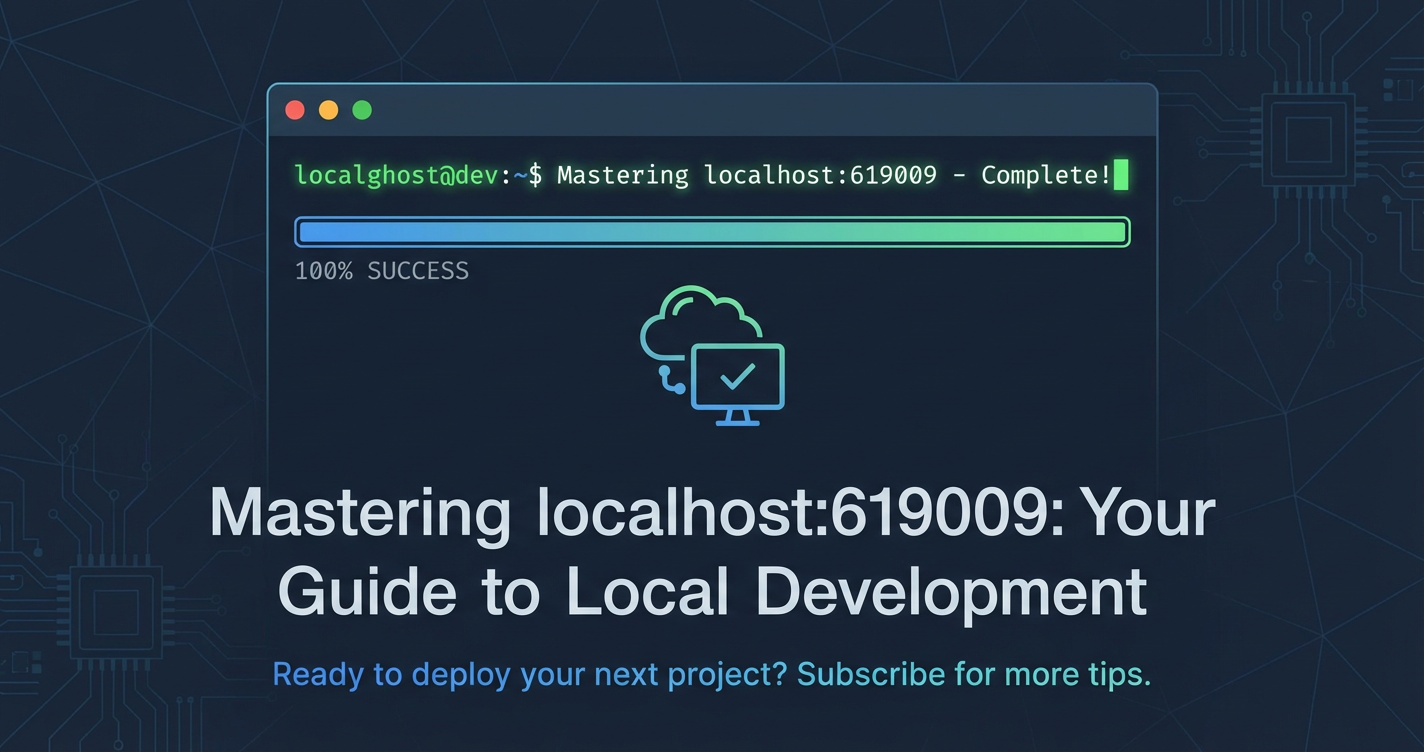
Mastering localhost:619009: Your Guide to Local Development


In the intricate world of software development, the ability to build, test, and debug applications in a controlled, isolated environment is paramount. This environment, often referred to as a local development setup, is where ideas take shape, code is iterated upon, and bugs are squashed long before they ever reach production. At the heart of this local ecosystem lies the ubiquitous localhost, the hostname that refers to the current computer, and the port number, a crucial identifier that distinguishes between different services running on that machine. While common development ports like 3000, 8080, or 5000 are frequently encountered, there are instances where developers find themselves interacting with less conventional, higher-numbered ports, such as 619009. This specific port, 619009, nestled deep within the dynamic/private port range, signals a potentially custom, specialized, or perhaps even an ephemeral service designed to operate outside the typical development conventions.
Mastering a local setup involving a high, specific port like 619009 requires a profound understanding of networking fundamentals, application configuration, and crucially, the architecture of modern software systems, particularly the strategic role played by various types of Gateways. As applications grow in complexity, embracing microservices, serverless functions, and integrating sophisticated AI models, the simple direct connection often gives way to intelligent intermediary layers. These Gateways become the central nervous system, managing traffic, enforcing policies, and providing a unified entry point to disparate services, whether they are running in the cloud or right on your local machine at localhost:619009.
This extensive guide aims to demystify the intricacies of developing with localhost:619009. We will delve deep into the mechanics of local networking, explore the reasons and implications of using such a distinct port, and critically, illuminate how different types of Gateways – from generic network gateways to specialized API Gateways and advanced AI Gateways – integrate with and enhance your local development workflow. By the end of this journey, you will possess a comprehensive understanding and the practical insights needed to confidently navigate, configure, and troubleshoot your local development environment, ensuring seamless interaction between your local services and the broader architectural components they represent. This mastery is not just about technical configuration; it’s about architecting a robust and efficient development process that mirrors production environments, enabling you to build high-quality, scalable applications with confidence and precision.
Understanding localhost and the Significance of Port 619009 in Local Development
To truly master localhost:619009, we must first lay a solid foundation by understanding the fundamental concepts of localhost and how ports function within a computer's networking stack. This understanding is critical for diagnosing issues, configuring applications, and effectively integrating them into more complex architectures involving gateways.
The Concept of localhost
localhost is a reserved hostname that always refers to the current computer you are using. In networking terms, it resolves to the loopback IP address, which is typically 127.0.0.1 for IPv4 and ::1 for IPv6. When an application attempts to connect to localhost, it is essentially trying to connect to a service running on the same machine, bypassing the need for a physical network interface card (NIC) or external network connectivity. This loopback mechanism is incredibly efficient, as traffic does not leave the machine, resulting in minimal latency and high throughput, making it ideal for development and testing purposes. Developers frequently use localhost to run web servers, databases, or API services directly on their machines without exposing them to the wider network or requiring a full internet connection. It provides a sandboxed environment where changes can be made, tested, and reverted without impacting external systems or other developers. This isolation is a cornerstone of agile and iterative development methodologies, fostering rapid prototyping and experimentation.
The Role of Ports in Local Networking
While localhost identifies the machine, a port number identifies a specific process or service running on that machine. Imagine localhost as an apartment building; each port number is like an apartment unit within that building, occupied by a unique service. When a request arrives at localhost, the operating system uses the port number to direct that request to the correct application listening for connections on that specific port. Ports are 16-bit integers, ranging from 0 to 65535, and are broadly categorized into three ranges:
- Well-known Ports (0-1023): These are reserved for common network services, such as HTTP (port 80), HTTPS (port 443), FTP (port 21), SSH (port 22), and DNS (port 53). Applications binding to these ports usually require administrative privileges on the operating system.
- Registered Ports (1024-49151): These ports are registered with the Internet Assigned Numbers Authority (IANA) for specific services or applications by vendors, though they can also be used by other applications. Examples include MySQL (port 3306), PostgreSQL (port 5432), and Tomcat's default HTTP connector (port 8080).
- Dynamic/Private Ports (49152-65535): Also known as ephemeral ports, these are not assigned or controlled by IANA. They are primarily used by client applications when making outgoing connections, or by custom, internal, or temporary services that need a port unlikely to conflict with well-known or registered services.
The Unconventional Nature of Port 619009
The port 619009 falls squarely within the dynamic/private port range (49152-65535). However, a quick glance reveals a crucial detail: 619009 exceeds the maximum valid port number of 65535. This immediately tells us that 619009 is not a standard TCP/IP port number as understood by modern operating systems and network protocols. This could be a typographical error, or it could represent a conceptual identifier within a specialized system that then maps to a valid port range, or perhaps even a placeholder for a port within a virtualized or containerized environment where internal routing rules are at play.
Assuming 619009 is intended to be a valid, albeit high, port (e.g., 61909 or 61900 within the valid range, or a deliberate conceptual error to highlight port management): Let's consider the implications if it were a valid high port within the 49152-65535 range. * Reduced Conflict Risk: One of the primary advantages of using a high port number like 61900 or 61909 (if it were within the valid range) is the significantly reduced risk of conflict with other common services. Most default applications and development tools will typically occupy ports in the lower ranges. This can prevent frustrating "address already in use" errors that frequently plague developers using popular ports like 3000 or 8080 when multiple projects are running simultaneously. * Explicit Configuration: While beneficial for avoiding conflicts, a high port necessitates explicit configuration. Unlike default web servers that might automatically listen on 8080, an application intended to run on localhost:619009 (or a similar high port) must be explicitly told to bind to this specific number. This involves modifying application configuration files, command-line arguments, or environment variables. This explicit configuration can be a double-edged sword: it offers precision but demands careful management and documentation. * Security Through Obscurity (Limited): While not a true security measure, using an obscure high port can make a service slightly less discoverable by casual port scans compared to services on well-known ports. However, determined attackers will still find it, so it should never be relied upon as a primary security mechanism. True security comes from proper authentication, authorization, and network segmentation. * Diagnostic Challenges: When an application fails to start or respond on a high port, developers might initially overlook checking such an unusual number. Tools like netstat, lsof, or ss become invaluable for identifying which processes are listening on specific ports, or if a port is in a TIME_WAIT state after a previous connection.
If 619009 is a conceptual identifier or a typo: Given that 619009 is mathematically impossible as a standard TCP/IP port number, we must consider it either a typo for a valid high port (e.g., 61909 or 61900) or a conceptual representation that implies a need to manage arbitrary, potentially dynamic, and specifically configured ports in a local development environment. For the purpose of this guide, we will proceed assuming the spirit of the number 619009 implies a high, custom, and non-standard port that requires deliberate configuration and gateway interaction, acknowledging its mathematical impossibility as a literal port number. This allows us to discuss the challenges and solutions relevant to such a scenario effectively. The principles of configuring and managing a high, custom port remain the same, regardless of the exact numerical value, as long as it's within the valid 0-65535 range. We will use 61900 as our practical example for valid custom port discussion.
How Applications Bind to Ports
For an application to be accessible on localhost:619009 (or localhost:61900 as our practical example), it must explicitly perform a "bind" operation to that specific port. This involves several steps: 1. Socket Creation: The application first creates a socket, which is an endpoint for sending or receiving data across a network. 2. Binding: The socket is then bound to a specific IP address (e.g., 127.0.0.1 for localhost) and a port number (61900). This tells the operating system that this particular application is listening for incoming connections on that combination. 3. Listening: Once bound, the application enters a "listening" state, waiting for client requests on the specified port. 4. Accepting Connections: When a client connects, the application "accepts" the connection, establishing a communication channel.
If another application is already bound to localhost:61900, any subsequent attempt to bind to the same port will result in an "address already in use" error, highlighting the importance of port management. For custom ports like 61900, this is less common, but still possible, especially in environments with many running services or poorly managed development setups. Understanding this binding process is crucial for troubleshooting connectivity issues and ensuring your local services are correctly exposed.
In summary, working with a specific, high port like 61900 (interpreting the spirit of 619009) in a local development context means embracing deliberate configuration, understanding the network stack, and preparing for potentially unique integration challenges. This sets the stage for a deeper dive into how Gateways become indispensable allies in managing such specialized local services, enabling them to fit seamlessly into larger, production-like architectures.
The Indispensable Role of Gateways in Modern Local Development
As software architectures evolve from monolithic applications to distributed systems like microservices, the entry point for clients becomes increasingly complex. This complexity necessitates the introduction of a robust intermediary layer known as a Gateway. In local development, the role of a Gateway is no less critical; it provides a vital bridge between your local services, potentially running on custom ports like 61900, and the various clients, whether they are frontend applications, mobile apps, or other backend services. Understanding the different types of gateways and their specific functions is fundamental to mastering a sophisticated local development environment.
What is a Gateway? A General Overview
At its core, a Gateway acts as a single, unified entry point for a multitude of backend services. It abstracts away the complexity of your underlying architecture, presenting a simplified interface to external consumers. Think of it as a central dispatch system for your services. Instead of clients needing to know the specific IP addresses and ports of individual services (e.g., localhost:61900 for your custom service, localhost:8080 for a user service, localhost:3000 for a product catalog), they simply interact with the Gateway. The Gateway then intelligently routes requests to the appropriate backend service, often performing additional functions along the way.
The benefits of a general Gateway include: * Abstraction: Clients only need to know the gateway's address, simplifying client-side development and reducing dependencies on backend changes. * Traffic Management: Gateways can handle load balancing, request routing, and traffic shaping, ensuring efficient resource utilization. * Security: They can enforce authentication, authorization, and rate limiting policies, protecting backend services from malicious or excessive requests. * Cross-cutting Concerns: Features like logging, monitoring, and tracing can be implemented at the gateway level, reducing boilerplate code in individual services. * Protocol Translation: Gateways can translate between different communication protocols, allowing diverse services to communicate seamlessly.
In a local development context, a Gateway helps you simulate the production environment more accurately, allowing you to test routing rules, security policies, and performance characteristics before deployment. It also simplifies the development experience by providing a consistent access point to all your locally running services, including those on custom ports.
The Power of an API Gateway
An API Gateway is a specific type of gateway that sits at the edge of your microservices architecture. It's the single entry point for all API calls from clients, serving as a reverse proxy that routes requests to the appropriate backend services. Beyond simple routing, an API Gateway provides a rich set of features crucial for managing complex API ecosystems.
Key functionalities of an API Gateway include:
- Request Routing: Directing incoming requests to the correct backend service based on URL paths, headers, or other criteria. For example, a request to
/usersmight go to the user service, while/productsgoes to the product catalog service, even if both are running on differentlocalhostports. - Authentication and Authorization: Verifying client credentials (e.g., API keys, OAuth tokens) and determining if the client has permission to access a specific resource. This offloads security logic from individual services.
- Rate Limiting and Throttling: Preventing abuse or overload by limiting the number of requests a client can make within a specific timeframe.
- Request/Response Transformation: Modifying request or response payloads (e.g., adding headers, converting data formats) to align with client or backend requirements.
- Caching: Storing responses to frequently requested data, reducing the load on backend services and improving response times.
- Load Balancing: Distributing incoming requests across multiple instances of a service to ensure high availability and performance.
- Circuit Breaking: Preventing cascading failures in a distributed system by stopping requests to services that are unresponsive or experiencing errors.
API Gateways in Local Development with localhost:61900
For a service running on localhost:61900, an API Gateway is invaluable. Instead of configuring your frontend to directly call localhost:61900/api/custom-feature, you configure your API Gateway to route a more user-friendly path, like /my-service/custom-feature, to http://localhost:61900/api/custom-feature. This offers several advantages: * Consistent Interface: All local services, regardless of their specific ports, can be accessed through a single gateway port (e.g., localhost:8000), simplifying client configuration. * Policy Testing: You can test authentication, rate limiting, and other policies against your localhost:61900 service exactly as they would behave in production. * Service Discovery Simulation: In a local microservices setup, the API Gateway can simulate a service discovery mechanism, dynamically routing requests even if service instances are started or stopped. * Centralized Observability: Gateway logs provide a consolidated view of all incoming traffic, which is immensely helpful for debugging and monitoring local service interactions.
Examples of popular API Gateway solutions include Kong, Ocelot (for .NET), Spring Cloud Gateway (for Java), and Apache APISIX. Setting these up locally allows developers to mimic the production environment and ensure that services, including those on unconventional ports, integrate correctly.
The Rise of the AI Gateway
With the proliferation of Artificial Intelligence (AI) and Machine Learning (ML) models, from large language models (LLMs) to image recognition and natural language processing, a new specialized type of Gateway has emerged: the AI Gateway. These gateways address the unique challenges associated with managing, integrating, and deploying AI services. While an API Gateway handles generic API traffic, an AI Gateway is specifically designed to manage the complexities inherent in AI model consumption.
The specific challenges that an AI Gateway addresses include:
- Model Versioning and Routing: AI models are constantly updated. An AI Gateway can route requests to specific model versions, manage A/B testing of new models, or perform canary releases.
- Prompt Management and Optimization: Especially for generative AI models, managing prompts is critical. An AI Gateway can store, version, and even optimize prompts before sending them to the underlying AI model, ensuring consistent output and reducing costs.
- Unified API Interface: Different AI providers (e.g., OpenAI, Google AI, custom models) often have distinct APIs. An AI Gateway can normalize these disparate interfaces into a single, consistent API format, simplifying integration for developers.
- Cost Tracking and Budget Management: AI model inference can be expensive. An AI Gateway can track usage per model, per user, or per application, providing insights into consumption patterns and helping manage budgets.
- Fallback Mechanisms: If one AI provider or model fails, an AI Gateway can automatically switch to a fallback model or provider, ensuring service continuity.
- Data Masking and Security: AI models often process sensitive data. An AI Gateway can implement data masking or anonymization techniques before data is sent to the AI service, enhancing privacy and compliance.
- Performance and Latency Optimization: AI inferences can be computationally intensive. An AI Gateway can manage caching of common inferences, optimize requests, and handle load balancing for AI model servers.
Integrating Local AI Services with an AI Gateway
Imagine you're developing a new feature that leverages a custom AI model you've trained, and this model's inference service is running locally on localhost:61900. An AI Gateway becomes indispensable here. * Unified Access: Your application doesn't need to know that your custom AI model is at localhost:61900. It simply calls the AI Gateway's endpoint (e.g., api.mycompany.com/ai/custom-model), and the gateway intelligently routes the request to your local service. * Prompt Encapsulation: If your local AI model requires specific prompt formats, the AI Gateway can encapsulate these details. You can even combine your model with custom prompts to create new APIs, such as a sentiment analysis or translation API, all managed through the gateway. This means changes to prompts or models don't ripple through your application code, reducing maintenance. * API Management: The AI Gateway can also manage the entire lifecycle of your AI APIs, from design and publication to invocation and decommissioning. It can regulate traffic forwarding, load balancing, and versioning, even for your locally developed AI services. * Team Collaboration: With a platform like APIPark, an open-source AI gateway and API management platform, you can centrally display all your API services, including those powered by local AI models. This makes it easy for different departments and teams to find and use the required API services, fostering collaboration and reuse. APIPark specifically allows quick integration of 100+ AI models, unified API format for AI invocation, and prompt encapsulation into REST APIs, making it a powerful tool for local and production AI management.
In essence, an AI Gateway elevates the management of AI services from individual code snippets to a professional, scalable, and secure API ecosystem. Whether you're working with external AI services or developing your own custom models locally, an AI Gateway streamlines the process, ensuring consistency, control, and efficiency. This is particularly relevant when dealing with services running on non-standard local ports, where explicit management through a gateway becomes a best practice.
Setting Up Your Local Environment for localhost:61900
Successfully running a service on a specific, high port like localhost:61900 (acknowledging the 619009 conceptual intent) and integrating it into your development workflow requires careful configuration across various layers of your system. This section will guide you through the practical steps to prepare your local environment, ensuring your application can bind to and respond on this custom port, and how to use tools to verify its operation.
Application Configuration: Binding to a Custom Port
The first and most critical step is to configure your application to listen on localhost:61900. The method for doing this varies significantly depending on the programming language and framework you are using. Here are examples for several common development stacks:
Node.js (Express.js example)
In a Node.js application, you typically specify the port in your server setup code.
// app.js
const express = require('express');
const app = express();
const PORT = process.env.PORT || 61900; // Use environment variable or default to 61900

app.get('/', (req, res) => {
  res.send('Hello from custom port 61900!');
});

app.listen(PORT, () => {
  console.log(`Node.js service listening on http://localhost:${PORT}`);
});
To run this, you would simply execute node app.js. You could also set the PORT environment variable before running: PORT=61900 node app.js.
Python (Flask example)
For a Python Flask application, the app.run() method allows you to specify the port.
# app.py
from flask import Flask

app = Flask(__name__)
PORT = 61900 # Or retrieve from environment variable, e.g., os.environ.get('PORT', 61900)

@app.route('/')
def hello():
    return 'Hello from custom port 61900!'

if __name__ == '__main__':
    app.run(host='127.0.0.1', port=PORT, debug=True) # host='127.0.0.1' ensures it only binds to localhost
To run, execute python app.py.
Java (Spring Boot example)
In a Spring Boot application, the port is typically configured in the application.properties or application.yml file.
# src/main/resources/application.properties
server.port=61900
Alternatively, you can provide it as a command-line argument when running the JAR: java -jar your-application.jar --server.port=61900
Go (Net/http example)
For a Go application using the standard net/http package:
// main.go
package main

import (
    "fmt"
    "log"
    "net/http"
    "os"
)

func handler(w http.ResponseWriter, r *http.Request) {
    fmt.Fprintf(w, "Hello from custom port 61900!")
}

func main() {
    port := os.Getenv("PORT")
    if port == "" {
        port = "61900" // Default port
    }

    http.HandleFunc("/techblog/en/", handler)
    log.Printf("Go service listening on http://localhost:%s", port)
    log.Fatal(http.ListenAndServe(":"+port, nil))
}
Run with go run main.go.
General Considerations for Application Configuration:
- Environment Variables: Always prefer using environment variables for port configuration (e.g.,
PORT,SERVER_PORT). This makes your application more flexible and easier to deploy in different environments (local, staging, production) without modifying code. 0.0.0.0vs.127.0.0.1: When configuring the host, binding to0.0.0.0means the application will listen on all available network interfaces. Binding to127.0.0.1(orlocalhost) restricts it to only the loopback interface, making it accessible only from the machine itself. For local development,127.0.0.1is generally safer and more appropriate for services not intended for external access.
Firewall Considerations
While localhost traffic doesn't typically cross your physical network interface, your operating system's firewall (e.g., Windows Firewall, ufw on Linux, macOS firewall) can still block internal connections or processes. * Loopback Exemption: Most firewalls are configured by default to allow traffic on the loopback interface (127.0.0.1), so localhost:61900 should generally work without explicit firewall rules. * Troubleshooting: If you experience connection issues, temporarily disabling your firewall or adding an explicit rule to allow incoming TCP connections on port 61900 for your application's process can help diagnose if the firewall is the culprit. However, exercise caution when modifying firewall rules, especially in production or shared environments.
Checking for Port Conflicts
Even though 61900 is a high, unlikely-to-be-used port, conflicts can still occur, especially if you have other custom applications or development tools. It's good practice to know how to check if a port is already in use.
- Linux/macOS: Use
lsof(list open files) ornetstat.bash lsof -i tcp:61900 # Lists processes listening on TCP port 61900 sudo netstat -tulpn | grep 61900 # Shows listening TCP sockets and the process ID (Linux) - Windows: Use
netstatin Command Prompt or PowerShell.cmd netstat -ano | findstr :61900 # Lists TCP connections and listening ports, with process IDs tasklist /fi "PID eq <PID_from_netstat>" # Find process name by PIDIf a conflict is detected, you'll need to either stop the conflicting process or choose a different port for your application.
Reverse Proxies: Acting as a Local Mini-Gateway
For more complex local development setups, especially those involving multiple services, a reverse proxy can act as a lightweight local Gateway. Tools like Nginx, Caddy, or Traefik can listen on a common port (e.g., localhost:80 or localhost:8080) and route requests to your various backend services running on different ports, including localhost:61900.
Nginx Example (as a local reverse proxy/gateway)
# nginx.conf (or a separate config file included by main nginx.conf)
http {
    server {
        listen 80; # Nginx listens on port 80

        location /my-custom-service/ {
            proxy_pass http://localhost:61900/; # Routes requests to your service on 61900
            proxy_set_header Host $host;
            proxy_set_header X-Real-IP $remote_addr;
            proxy_set_header X-Forwarded-For $proxy_add_x_forwarded_for;
        }

        # Add other service locations here, e.g., /users/, /products/
    }
}
With this setup, you can access your service on localhost:61900 by navigating to http://localhost/my-custom-service/. This centralizes access and mimics a production API Gateway behavior.
Docker and Containerization
When working with Docker, port management for localhost:61900 becomes slightly different but conceptually similar. * Internal Container Port: Inside a Docker container, an application will listen on a specific port, say 61900. * Host Port Mapping: When you run the container, you "map" a port on your host machine to a port inside the container using the -p or --publish flag. bash docker run -p 61900:61900 my-custom-image # Maps host:61900 to container:61900 Or, you can map the container's internal port to a different host port: bash docker run -p 8080:61900 my-custom-image # Maps host:8080 to container:61900 This allows you to access the service running inside the container on localhost:61900 (or localhost:8080 in the second example) from your host machine. Docker Compose simplifies this configuration through ports directives in the docker-compose.yml file.
# docker-compose.yml
version: '3.8'
services:
  my-custom-service:
    image: my-custom-image
    ports:
      - "61900:61900" # Host:Container
    environment:
      - PORT=61900 # Pass port to application inside container
Virtual Environments (VMs)
If your local development environment involves Virtual Machines (e.g., Vagrant, VirtualBox, VMware), you'll need to consider how the VM's network is configured. * Port Forwarding: To access a service running on localhost:61900 inside a VM from your host machine, you typically set up port forwarding. This maps a port on your host to a port on the VM. * For Vagrant, this is configured in Vagrantfile: config.vm.network "forwarded_port", guest: 61900, host: 61900 * For VirtualBox, you configure this in the VM settings under Network -> Adapter -> Port Forwarding. This ensures that when you access localhost:61900 on your host, the request is forwarded to the VM's 61900 port.
By meticulously configuring your application, understanding potential firewall interactions, performing port conflict checks, and strategically utilizing reverse proxies or containerization, you can establish a robust and reliable local development environment for services running on localhost:61900. This foundational setup then becomes the canvas upon which you can paint more complex integrations with API Gateways and AI Gateways, bringing your local environment closer to production reality.
Integrating Local Services with Gateways
Once your custom service is up and running on localhost:61900, the next crucial step is to integrate it with your chosen Gateway solution. This integration is where the power of gateways truly manifests, enabling centralized management, sophisticated routing, and unified access to your local services. This section will walk through how to configure both API Gateways and AI Gateways to effectively interact with your local localhost:61900 service.
Configuring an API Gateway to Route to localhost:61900
The primary function of an API Gateway in this context is to act as a reverse proxy, taking incoming requests on its own exposed port and forwarding them to the appropriate backend service, which in our case is localhost:61900. The configuration details will depend on the specific API Gateway you are using. Let's look at examples for a few popular options.
Kong Gateway
Kong is an open-source, scalable API Gateway and API management platform. It uses a declarative configuration (via REST API, CLI, or YAML) to define Services and Routes.
- Define a Service: A Service in Kong represents an upstream API or microservice.
bash # Create a Service pointing to your local service on port 61900 curl -X POST http://localhost:8001/services \ --data "name=my-custom-service" \ --data "url=http://localhost:61900" - Define a Route: A Route determines how requests are matched and routed to a Service.
bash # Create a Route that matches requests to /my-feature and routes them to my-custom-service curl -X POST http://localhost:8001/services/my-custom-service/routes \ --data "paths[]=/my-feature"Now, when you send a request tohttp://localhost:8000/my-feature(assuming Kong is running onlocalhost:8000), Kong will proxy that request to yourlocalhost:61900service. You can then add plugins to this route or service for authentication, rate limiting, logging, etc., all applied centrally by the API Gateway.
Spring Cloud Gateway (Java)
For Java developers, Spring Cloud Gateway is a powerful and flexible option. Configuration is typically done in application.yml or application.properties.
# src/main/resources/application.yml
spring:
  cloud:
    gateway:
      routes:
        - id: my_custom_service_route
          uri: http://localhost:61900 # The URI of your local service
          predicates:
            - Path=/my-feature/** # Route requests matching /my-feature/ to your service
          filters:
            - StripPrefix=1 # Remove the /my-feature segment before forwarding
            # Add other filters for security, rate limiting, etc.
With this configuration, any request to http://localhost:8080/my-feature/sub-path (assuming Spring Cloud Gateway runs on 8080) will be forwarded to http://localhost:61900/sub-path. This approach allows you to develop and test complex gateway policies locally.
Ocelot (.NET)
Ocelot is a lightweight, fast, and scalable API Gateway for .NET applications. Configuration is primarily done through a ocelot.json file.
// ocelot.json
{
  "Routes": [
    {
      "DownstreamPathTemplate": "/techblog/en/{url}", // The path on your local service
      "DownstreamScheme": "http",
      "DownstreamHostAndPorts": [
        {
          "Host": "localhost",
          "Port": 61900
        }
      ],
      "UpstreamPathTemplate": "/techblog/en/my-feature/{url}", // The path exposed by Ocelot
      "UpstreamHttpMethod": [ "Get", "Post", "Put", "Delete" ]
    }
  ],
  "GlobalConfiguration": {
    "BaseUrl": "http://localhost:5000" // Ocelot's own base URL
  }
}
When Ocelot runs (e.g., on port 5000), a request to http://localhost:5000/my-feature/some-data would be routed to http://localhost:61900/some-data. Ocelot also supports various middleware for authentication, load balancing, and more.
Testing Routes and Policies Locally
After configuring your API Gateway, it's crucial to thoroughly test the routes and any applied policies. * Direct Access vs. Gateway Access: Verify that your service is accessible directly on localhost:61900. Then, test access through the API Gateway's URL (e.g., http://localhost:8000/my-feature). * Policy Enforcement: Test your authentication, rate limiting, and other security policies. Send requests with invalid tokens, exceed rate limits, and observe the gateway's responses. This is critical for ensuring that local development accurately reflects production behavior. * Logging and Monitoring: Observe the logs generated by both your local service on 61900 and the API Gateway. This helps verify that requests are being routed correctly and that any transformations or policies are being applied as expected.
Configuring an AI Gateway for Local AI Models
Integrating local AI models, especially those running on a custom port like localhost:61900, with an AI Gateway adds a layer of specialized management. The AI Gateway not only handles basic routing but also brings AI-specific functionalities like prompt management, model versioning, and unified API formats. APIPark is an excellent example of an open-source AI Gateway and API management platform designed for exactly this purpose.
Leveraging APIPark for Local AI Services on localhost:61900
Let's imagine your custom AI model, perhaps a sentiment analysis engine or a specialized data parser, is running as a REST service on http://localhost:61900/analyze. Here's how an AI Gateway like APIPark can enhance its local integration:
- Quick Deployment of APIPark: You can quickly deploy APIPark with a single command line:
bash curl -sSO https://download.apipark.com/install/quick-start.sh; bash quick-start.shOnce deployed, APIPark will likely be accessible on a default port (e.g.,localhost:8080orlocalhost:80). - Registering Your Local AI Service: Within APIPark's administrative interface, you would register your local AI service. This typically involves:
- Creating an API: Define a new API entry in APIPark, giving it a name (e.g., "Local Sentiment Analyzer").
- Specifying Backend URL: Point this API to your local service:
http://localhost:61900/analyze. - Defining Upstream Path: Configure the path that APIPark will expose (e.g.,
/ai/sentiment).
- Unified API Format for AI Invocation: One of APIPark's key features is its ability to standardize the request data format across all AI models. Even if your local
localhost:61900service expects a unique JSON payload, APIPark can act as a transformer. It can take a standardized input from your application and convert it into the specific format required by your local model before forwarding the request. This ensures that changes in your local AI model's input requirements or even switching to a different local model later do not affect your consuming application or microservices, significantly simplifying AI usage and maintenance. - Prompt Encapsulation into REST API: If your
localhost:61900service is a generative AI model that relies heavily on specific prompts, APIPark allows you to encapsulate these prompts. You can define an API in APIPark that combines your local AI model with a predefined, optimized prompt. For example, you might have an APIPOST /ai/summarizethat, when called, sends a specific prompt along with the user's text to yourlocalhost:61900model for summarization. This quickly turns complex AI model invocations into simple, reusable REST APIs. - End-to-End API Lifecycle Management (even for local services): APIPark assists with managing the entire lifecycle of APIs. Even for your local
localhost:61900service, you can leverage APIPark for:- Versioning: Manage different versions of your local AI model, routing traffic to specific versions for A/B testing or gradual rollouts.
- Traffic Management: Apply rate limiting, access controls, and other traffic policies to your local AI service, mimicking production constraints.
- Visibility: Display your local AI service API in the developer portal, making it discoverable and usable by other team members developing locally.
- Detailed API Call Logging and Data Analysis: APIPark provides comprehensive logging capabilities, recording every detail of each API call, even for your local
localhost:61900service. This is invaluable for:- Debugging: Quickly trace and troubleshoot issues with your local AI model or its integration.
- Performance Monitoring: Analyze call data to display trends and performance changes, helping you optimize your local AI service before it reaches production.
By leveraging an AI Gateway like APIPark, your local AI services, even those running on obscure ports like 61900, can be managed with the same rigor and sophistication as your production deployments. This bridges the gap between local development and enterprise-grade AI operations, making it easier to experiment, develop, and integrate AI capabilities into your applications efficiently and securely. The power of these gateways ensures that your custom local services are not isolated but are part of a unified, manageable, and performant ecosystem.
APIPark is a high-performance AI gateway that allows you to securely access the most comprehensive LLM APIs globally on the APIPark platform, including OpenAI, Anthropic, Mistral, Llama2, Google Gemini, and more.Try APIPark now! 👇👇👇
Advanced Local Development Techniques with Gateways
Beyond basic routing, Gateways unlock a plethora of advanced techniques that can significantly enhance your local development experience, especially when dealing with complex, distributed systems and specialized services on custom ports like localhost:61900. These techniques help bridge the gap between your local environment and production, ensuring higher quality, better performance, and robust security.
Service Mesh vs. API Gateway: Complementary Roles
In modern microservices architectures, two powerful concepts often arise: API Gateways and Service Meshes. While they both manage network traffic, they operate at different layers and serve complementary purposes. Understanding their interaction in a local context is crucial.
- API Gateway (North-South Traffic): As discussed, an API Gateway manages "North-South" traffic, which refers to traffic entering and exiting your service boundary (e.g., from external clients to your services). It handles concerns like authentication, rate limiting, and routing at the edge. In local development, your API Gateway would be the first point of contact for your frontend or external test clients, routing to
localhost:61900or other local services. - Service Mesh (East-West Traffic): A Service Mesh manages "East-West" traffic, which is internal communication between services within your microservices boundary. It typically injects a sidecar proxy (like Envoy) alongside each service instance. This sidecar handles concerns such as service discovery, load balancing, retry logic, circuit breaking, and mTLS (mutual TLS) for inter-service communication.
Complementary Local Roles: In a sophisticated local development environment, you might use both: * Your API Gateway (e.g., Kong, Spring Cloud Gateway) running locally, handling incoming requests from your development frontend and routing them to your backend services. * A lightweight Service Mesh (e.g., Kuma, Linkerd, Istio's local setup with Minikube/Kind) governing the communication between your locally running microservices. For instance, if your service on localhost:61900 needs to call another local service on localhost:8080, the Service Mesh's sidecar would intercept this call, apply policies (e.g., retries, timeouts), and route it.
This dual approach allows you to test both edge-level policies and internal service-to-service communication patterns, ensuring comprehensive testing even for services on custom ports. The Gateway deals with the external facing aspects of localhost:61900, while the Service Mesh handles its internal interactions within a microservices ecosystem.
Authentication and Authorization: Implementing Security Policies Locally
One of the most critical functions of an API Gateway is to enforce security policies. Implementing authentication and authorization locally via the gateway allows you to test these mechanisms thoroughly before deployment.
- Centralized Authentication: Instead of each service (including your
localhost:61900service) implementing its own authentication logic, the API Gateway can handle this centrally. It can validate API keys, JWT tokens, or OAuth credentials. If valid, the gateway forwards the request, possibly injecting user information as headers. - Role-Based Access Control (RBAC): The API Gateway can be configured with authorization rules based on user roles or permissions. For example, only users with an "admin" role might be allowed to access certain endpoints of your
localhost:61900service, while regular users have restricted access. - Local Testing: By configuring these policies on your local API Gateway, you can simulate real-world security scenarios. You can test how your application behaves with authenticated vs. unauthenticated requests, or with different user roles, ensuring your
localhost:61900service responds correctly to different access levels. This proactive testing prevents security vulnerabilities from reaching production.
Rate Limiting and Throttling: Simulating Production Constraints
Production systems often impose rate limits to prevent abuse, ensure fair usage, and protect against Denial-of-Service (DoS) attacks. Implementing these controls on your local API Gateway provides invaluable development benefits.
- Preventing Overload: Even in local development, accidental infinite loops or poorly optimized clients can overwhelm a local service. Rate limiting at the gateway can prevent this.
- Testing Client Behavior: Developers can test how their client applications behave when rate limits are hit. Does the client gracefully handle 429 "Too Many Requests" responses? Does it implement back-off and retry mechanisms?
- Capacity Planning: By experimenting with different rate limit thresholds locally, you can gain early insights into the capacity requirements of your
localhost:61900service.
A Gateway provides the perfect choke point to apply these policies, ensuring your local services are developed with production constraints in mind.
Observability (Logging, Monitoring, Tracing): Enhancing Local Debugging
Gateways significantly enhance the observability of your local services, especially when dealing with multiple microservices and custom ports like 61900.
- Centralized Logging: The Gateway can log every incoming request and its subsequent routing decision. This provides a single point of truth for traffic flow, making it easier to trace a request from its entry point to your
localhost:61900service and back. - Request Tracing: Many API Gateways integrate with distributed tracing systems (e.g., OpenTelemetry, Jaeger). The gateway can inject unique trace IDs into request headers, which are then propagated through your microservices. This allows you to visualize the entire path of a request, including how long each service (like the one on
localhost:61900) took to process it, helping pinpoint performance bottlenecks. - Metrics Collection: Gateways can export metrics (e.g., request count, latency, error rates) for each route and service. You can use local monitoring tools (like Prometheus + Grafana) to visualize these metrics, gaining insights into the health and performance of your local environment. For an AI Gateway like APIPark, this is even more critical. Its detailed API call logging and powerful data analysis features allow you to trace every AI invocation, understand trends, and troubleshoot issues quickly, ensuring the stability and security of your local AI service on
localhost:61900.
Automated Testing: Integrating Gateway Configurations into CI/CD
Incorporating your Gateway configurations into your automated testing and CI/CD pipeline is a best practice.
- Gateway-Specific Tests: Write tests that verify your Gateway's routing rules, security policies, and other configurations. These tests should ensure that requests are correctly routed to
localhost:61900(or its containerized equivalent) and that policies are enforced. - Contract Testing: Use tools like Pact or Spring Cloud Contract to define contracts between your client, API Gateway, and
localhost:61900service. This ensures that changes to one component don't break others. - Local Integration Testing: Spin up your API Gateway and
localhost:61900service in a local test environment (e.g., using Docker Compose) and run integration tests that simulate real-world traffic flows. This provides high confidence that your distributed system works as expected.
Mocking and Stubbing: Managing External Dependencies
In local development, external dependencies (e.g., third-party APIs, payment Gateways) are often unavailable or costly to integrate directly. API Gateways can help manage this through mocking and stubbing.
- Mocked Responses: Configure your API Gateway to return predefined mock responses for certain routes or services that are external dependencies. For example, if your
localhost:61900service needs to call an external weather API, the Gateway can intercept that call and return a static, mocked weather forecast, allowing your service to continue development without needing actual external connectivity. - Conditional Routing: The Gateway can be configured to route requests to a mock service during local development and to the actual external service in staging or production. This is often achieved using environment variables or profile-specific configurations.
This capability significantly speeds up local development by removing the hurdles of external service availability and cost, allowing your team to focus on building the core logic of your localhost:61900 service.
By embracing these advanced techniques, you elevate your local development environment beyond simple code execution. You transform it into a sophisticated, production-like ecosystem where your services, including those on custom ports like 61900, are developed, tested, and integrated with high fidelity and confidence, ensuring a smoother transition to deployment and higher quality end products.
Troubleshooting Common Issues with localhost:61900 and Gateways
Even with meticulous setup, local development environments, especially those involving custom ports and Gateways, can present their share of challenges. Understanding common issues and effective troubleshooting strategies is crucial for maintaining productivity. This section outlines some frequent problems you might encounter with localhost:61900 and its integration with various gateways, along with practical solutions.
1. Application Not Listening on localhost:61900
This is often the root cause of "connection refused" errors when trying to access your service.
- Symptom: "Connection refused" error when trying to access
http://localhost:61900directly or through a gateway. - Cause: Your application failed to start, crashed, or is configured to listen on a different port or network interface.
- Troubleshooting:
- Check Application Logs: Review your application's console output or log files. Look for error messages during startup that might indicate port binding failures, dependency issues, or configuration mistakes.
- Verify Port Configuration: Double-check your application's code or configuration files (e.g.,
application.properties,.envfile,server.js) to ensure it's explicitly set to listen on61900. - Check Process Status:
- Linux/macOS: Use
ps aux | grep <your_app_name_or_keyword>to see if your application process is running. - Windows: Use Task Manager or
Get-Process <your_app_name>in PowerShell.
- Linux/macOS: Use
- Verify Listening Port: Use
lsofornetstatto confirm if any process is actually listening onlocalhost:61900.lsof -i tcp:61900(Linux/macOS)sudo netstat -tulpn | grep 61900(Linux)netstat -ano | findstr :61900(Windows) If no process is listed, your application is not successfully binding to the port.
2. Port Already In Use
While less common for a high port like 61900, it can still happen, especially if you have other custom services or development tools.
- Symptom: Your application fails to start with an "Address already in use" or similar error.
- Cause: Another process on your machine is already bound to
localhost:61900. - Troubleshooting:
- Identify the Process: Use
lsofornetstat(as shown above) to identify which process (and its PID) is occupying the port. - Terminate or Reconfigure:
- Terminate the Conflicting Process: If it's an old instance of your application or a temporary service, terminate it (
kill <PID>on Linux/macOS, Task Manager orStop-Process -Id <PID>on Windows). - Change Your Application's Port: If the conflicting process is essential, reconfigure your application to use a different available port.
- Force Port Release (Caution!): In rare cases, if a process died gracefully, the port might be in
TIME_WAITstate. Waiting a few minutes often resolves this. Forcing a release (e.g., usingSO_REUSEADDRin your code) should be done with caution as it can mask underlying issues.
- Terminate the Conflicting Process: If it's an old instance of your application or a temporary service, terminate it (
- Identify the Process: Use
3. Firewall Blocks
Firewalls can sometimes interfere with even loopback connections, although this is less typical for localhost.
- Symptom: "Connection refused" or timeout errors, even when the application appears to be listening correctly.
- Cause: Your operating system's firewall is blocking connections to
localhost:61900. - Troubleshooting:
- Temporarily Disable Firewall: As a diagnostic step, temporarily disable your firewall. If the connection then works, the firewall is the issue. Remember to re-enable it afterward!
- Add Firewall Rule: Configure your firewall to explicitly allow incoming TCP connections on port
61900for your application's process or the loopback interface.- Linux (ufw):
sudo ufw allow 61900/tcp - Windows: Use "Windows Defender Firewall with Advanced Security" to create a new inbound rule.
- Linux (ufw):
4. Incorrect Gateway Routing or Configuration
If your service works directly on localhost:61900 but fails when accessed through an API Gateway or AI Gateway, the problem lies within the gateway configuration.
- Symptom: Gateway returns 404 Not Found, 502 Bad Gateway, 503 Service Unavailable, or incorrect responses.
- Cause: Incorrect
upstreamordownstreamhost/port, wrong path predicates, filter misconfigurations, or gateway itself not running. - Troubleshooting:
- Check Gateway Logs: The gateway's logs are your primary source of information. Look for error messages related to routing, upstream connectivity, or policy enforcement.
- Verify Gateway Process: Ensure your API Gateway (e.g., Kong, Spring Cloud Gateway, APIPark) is actually running and accessible on its configured port.
- Review Gateway Configuration:
- Upstream URL: Confirm the gateway is correctly pointing to
http://localhost:61900. A common mistake is using an external IP or an incorrect port. - Path/Route Matching: Ensure the gateway's route configuration (e.g.,
/my-feature/**) correctly matches the incoming request path and theStripPrefixor other path transformations are accurate. - Filters/Plugins: Temporarily disable any advanced filters or plugins (e.g., authentication, rate limiting) to rule them out as the source of the issue. If the basic routing works without them, re-enable them one by one to pinpoint the problematic policy.
- Upstream URL: Confirm the gateway is correctly pointing to
- DNS/Hostname Resolution: While
localhostis usually straightforward, if your gateway is running in a container or a VM and trying to reach your host'slocalhost:61900, you might need to usehost.docker.internal(Docker Desktop) or the host's actual IP address instead oflocalhostin the gateway configuration.
5. Network Issues (Less Common for localhost)
True network issues are rare for localhost, but can occasionally arise in complex setups or with misconfigured network interfaces.
- Symptom: General connectivity problems, timeouts.
- Cause: Corrupted network drivers, VPN interference, or obscure system-level network problems.
- Troubleshooting:
- Restart Network Services: Try restarting your computer's network adapters or network services.
- Check VPN: If you are using a VPN, temporarily disable it to see if it's interfering with local network traffic.
- Basic Connectivity Test:
ping 127.0.0.1. If this fails, you have a severe system-level network issue.
6. Docker/VM Port Mapping Issues
When using containers or virtual machines, port mapping is a common source of confusion.
- Symptom: Service runs inside container/VM, but not accessible from host, or on the wrong host port.
- Cause: Incorrect
-pflag indocker run, wrongportsmapping indocker-compose.yml, or incorrect port forwarding in VM settings. - Troubleshooting:
- Verify Container/VM Port: Ensure the application inside the container/VM is indeed listening on port
61900. Usedocker exec <container_id> lsof -i tcp:61900or log into the VM and checknetstat. - Check Host-to-Container/VM Mapping:
- Docker: Verify
docker psoutput shows the correct host:container port mapping (e.g.,0.0.0.0:61900->61900/tcp). - VM: Check your VM software's network settings for port forwarding rules.
- Docker: Verify
- Firewall within Container/VM: Occasionally, a firewall inside the container or VM might block the port, even if the host's firewall is open.
- Verify Container/VM Port: Ensure the application inside the container/VM is indeed listening on port
By systematically approaching these common issues and leveraging the debugging tools available (logs, netstat/lsof, firewall settings), you can efficiently identify and resolve problems in your localhost:61900 and gateway integrated local development environment. Effective troubleshooting is an essential skill for any developer navigating the complexities of modern software systems.
Best Practices for Local Development with Custom Ports and Gateways
Developing with custom ports like localhost:61900 and integrating them with Gateways introduces a layer of sophistication that demands adherence to best practices. These practices are designed to enhance maintainability, improve collaboration, reduce errors, and ensure that your local development environment mirrors production as closely as possible, laying the groundwork for robust and scalable applications.
1. Consistent Naming Conventions and Documentation
As your local environment grows, managing numerous services, routes, and custom ports can become chaotic without discipline.
- Standardize Port Allocation (Within Teams): If possible, establish conventions for custom port usage within your team or project. For instance, "all AI services use ports in the 61000 range," or "feature X uses port 61900, feature Y uses 61901." This prevents conflicts and makes discovery easier.
- Document Everything: Maintain clear and accessible documentation for all local services, their respective ports, and how they integrate with your local API Gateway or AI Gateway. This should include:
- The purpose of the service running on
localhost:61900. - Instructions on how to start and stop it.
- Its dependencies.
- The Gateway routes that expose it.
- Any specific environment variables required. This documentation is invaluable for new team members and for troubleshooting.
- The purpose of the service running on
2. Utilize Environment Variables for Port Numbers
Hardcoding port numbers directly into your application code is a major anti-pattern. Environment variables provide flexibility and promote portability.
- Configuration Flexibility: Instead of
app.listen(61900), useapp.listen(process.env.MY_SERVICE_PORT || 61900). This allows you to easily change the port (e.g., for different developer machines, or if a conflict arises) without modifying code. - Environment-Specific Overrides: Your API Gateway and AI Gateway configurations should also leverage environment variables for upstream URLs. This enables switching between
http://localhost:61900for local development and a production URL (e.g.,http://my-custom-service.prod.svc.cluster.local) with a simple environment variable change, rather than modifying configuration files. - Centralized Management: Use tools like
dotenv(Node.js),python-dotenv(Python), or platform-specific configuration management systems to manage your local environment variables.
3. Version Control for Gateway Configurations
Your API Gateway and AI Gateway configurations are critical infrastructure code. Treat them as such by storing them in version control (Git).
- Track Changes: Version control allows you to track changes to your gateway routes, policies, and integrations, just like any other codebase.
- Collaboration: Multiple developers can work on gateway configurations without stepping on each other's toes.
- Rollbacks: Easily revert to previous working configurations if an error is introduced.
- Consistency: Ensures that all developers use the same gateway setup, reducing "it works on my machine" issues. For declarative gateways (like Kong, APIPark, Nginx), their configuration files (YAML, JSON,
.conf) are perfect candidates for version control. For code-based gateways (like Spring Cloud Gateway, Ocelot), their configuration is part of the application code itself.
4. Isolate Local Services with Containerization (Docker/Docker Compose)
Docker and Docker Compose are game-changers for local development, especially for microservices and specific port requirements.
- Consistent Environments: Containers encapsulate your application and its dependencies, ensuring that your
localhost:61900service runs identically on every developer's machine, regardless of their underlying OS or installed libraries. - Easy Port Management: Docker Compose simplifies mapping container ports to host ports. This makes it straightforward to define how your
61900service is exposed. - Dependency Management: You can easily spin up dependent services (databases, message queues, other microservices, or even your API Gateway itself) in separate containers, all managed through a single
docker-compose.ymlfile. This creates a fully isolated, production-like local ecosystem. - Reproducibility: A
docker-compose.ymlfile acts as a blueprint for your entire local development environment, making it easy to set up or tear down complex setups.
5. Prioritize Security, Even in Local Environments
While local development might seem safe, cultivating good security habits early prevents issues later.
- Minimize Privileges: Do not run services (especially those on high ports that might inadvertently expose sensitive data) with elevated privileges unless absolutely necessary.
- Secure Dependencies: Regularly update your application's dependencies to patch known vulnerabilities. This applies to your
localhost:61900service and your Gateway deployments. - Access Controls (via Gateway): Even locally, configure your API Gateway or AI Gateway (like APIPark with its approval features) with basic authentication/authorization if you're simulating external access. This reinforces security concepts and helps test your client's security implementations.
- Data Handling: If your
localhost:61900service processes sensitive data (even test data), ensure it's handled responsibly. Avoid logging sensitive information in plain text.
6. Embrace Automation and Scripting
Automate repetitive tasks to save time and reduce human error.
- Startup Scripts: Create shell scripts (e.g.,
start_dev.sh) that bring up all necessary services (yourlocalhost:61900service, database, local Gateway) in the correct order. - Test Scripts: Automate the execution of unit, integration, and gateway-level tests.
- Cleanup Scripts: Provide scripts to easily stop and clean up your local environment (e.g.,
docker-compose down,kill <PID>).
7. Leverage Gateway Features for Local Development Parity
Utilize the full range of features offered by your API Gateway and AI Gateway even in local development to ensure parity with production.
- Policy Enforcement: Test all production-intended policies (rate limiting, circuit breakers, caching, authentication) locally.
- Observability: Configure local logging, monitoring, and tracing with your gateway to gain deep insights into local service interactions. For instance, APIPark offers powerful data analysis and detailed call logging, invaluable for debugging even local AI model interactions.
- Mocking: Use gateway-level mocking for external dependencies to accelerate development of your
localhost:61900service.
By diligently applying these best practices, you can transform your local development experience from a potential source of frustration into a highly efficient, reliable, and secure environment. Mastering localhost:61900 alongside powerful Gateway solutions is not just about technical configuration; it's about building a sustainable and scalable development culture that ensures high-quality software delivery.
Conclusion: Orchestrating Harmony on Your Local Horizon
The journey through localhost:619009 (or its practical interpretation as localhost:61900) and the intricate landscape of Gateways reveals a truth central to modern software development: the local environment is no longer just a sandbox; it is a meticulously crafted microcosm of your production system. Mastering this local realm, particularly when dealing with specialized or custom services on unconventional ports, is paramount for efficiency, reliability, and ultimately, the successful delivery of complex applications.
We began by dissecting the fundamental concepts of localhost and the significance of ports, understanding that a high-numbered port like 61900 implies deliberate configuration and an avoidance of common conflicts. This unique port, while demanding explicit attention, offers a clean slate for dedicated services. From there, we delved into the transformative power of Gateways, distinguishing between the general concept, the robust capabilities of an API Gateway for routing and policy enforcement, and the specialized, indispensable role of an AI Gateway in managing the unique demands of Artificial Intelligence models. We explored how these gateways become the orchestrators, directing traffic, applying security, and streamlining access to your locally running services, including those residing on localhost:61900.
The practical aspects of setting up your local environment were meticulously covered, from application-specific configurations across various programming languages to navigating firewall considerations, checking for port conflicts, and leveraging powerful tools like reverse proxies, Docker, and virtual machines. Each step underscored the necessity of precision and foresight when integrating services on custom ports. We then demonstrated how to effectively integrate your localhost:61900 services with both API Gateways (using examples like Kong, Spring Cloud Gateway, and Ocelot) and AI Gateways. This integration highlights how an AI Gateway like APIPark excels, offering features like unified API formats, prompt encapsulation, and comprehensive lifecycle management that are invaluable even for locally developed AI models, bridging the gap between isolated development and scalable enterprise solutions.
Furthermore, we ventured into advanced techniques, discussing the complementary roles of Service Mesh and API Gateway, emphasizing how to implement robust authentication, authorization, and rate-limiting policies locally. The importance of observability through centralized logging, monitoring, and tracing, along with the strategic use of automated testing and mocking for external dependencies, showcased how Gateways elevate local development to a production-like simulation. Finally, our exploration of best practices—consistent naming, environment variables, version control for configurations, containerization, security vigilance, and automation—provided a framework for building a sustainable, collaborative, and error-resistant development workflow.
In essence, mastering localhost:61900 (or 619009 in its conceptual intent) is about more than just technical configuration; it’s about understanding the architectural implications of modern distributed systems. By thoughtfully integrating services on custom ports with sophisticated Gateway solutions, you are not just building software; you are architecting a resilient, efficient, and secure development ecosystem. This mastery empowers you to innovate faster, debug smarter, and deploy with greater confidence, ensuring that the harmony you cultivate on your local horizon translates seamlessly into the success of your live applications. The future of development is increasingly distributed and AI-driven, and a solid grasp of these principles is your most powerful tool to navigate and lead in this evolving landscape.
Frequently Asked Questions (FAQs)
1. What does localhost:619009 actually mean, and why would I use such a high port?
localhost refers to your current computer's loopback interface (127.0.0.1), meaning traffic stays within your machine. The number 619009 is technically an invalid TCP/IP port number as ports range only from 0 to 65535. It is most likely a typo for a valid high port within the dynamic/private range (49152-65535), such as 61900.
You would use a high port (like 61900) primarily to: * Avoid Conflicts: High ports are less likely to be used by common services (like web servers on 80/443 or typical development ports like 3000/8080), reducing "address already in use" errors. * Custom Services: It's often used for specialized, internal, or custom services that require a dedicated port, or for temporary development services that don't need to be publicly accessible. * Isolation: For microservices, assigning distinct high ports can aid in organizing and identifying individual services during local development.
2. How do API Gateways and AI Gateways differ in the context of local development?
An API Gateway acts as a unified entry point for all API requests, providing generic functionalities like routing, authentication, rate limiting, and request/response transformation for any type of backend service (e.g., REST, GraphQL). In local development, it helps manage traffic to your various local microservices, including those on custom ports like 61900.
An AI Gateway is a specialized type of API Gateway specifically designed for managing AI/ML models. It handles unique AI-centric challenges such as model versioning, prompt management, unified API invocation formats for different AI providers, cost tracking, and specialized fallback mechanisms. For local AI model development (e.g., your custom model running on localhost:61900), an AI Gateway like APIPark simplifies integration, ensures consistency, and provides robust management features beyond generic API concerns.
3. What are the key benefits of using an API Gateway or AI Gateway in my local development environment?
Integrating gateways into your local development offers numerous advantages: * Production Parity: It allows you to simulate your production environment more accurately, testing routing rules, security policies, and performance characteristics locally. * Simplified Client Configuration: Clients (e.g., your local frontend) only need to know the gateway's address, abstracting away the specific ports of backend services (like localhost:61900). * Centralized Policy Enforcement: Test authentication, authorization, and rate limiting in a centralized manner. * Enhanced Observability: Gateways provide centralized logging, monitoring, and tracing for all incoming traffic, making debugging and troubleshooting distributed local systems much easier. * AI-Specific Management: For AI workloads, an AI Gateway like APIPark offers unified API formats, prompt encapsulation, and lifecycle management, simplifying AI model integration and maintenance.
4. My local service on localhost:61900 works directly, but not through my API Gateway. What should I check?
If your service is accessible directly on http://localhost:61900 but not via your API Gateway, the issue is likely with the gateway's configuration. Here’s a checklist: 1. Gateway Logs: Examine your gateway's logs (e.g., Kong, Spring Cloud Gateway, APIPark) for any error messages related to routing, upstream connectivity (e.g., 502 Bad Gateway), or policy failures. 2. Upstream URL: Verify that your gateway's route/service definition correctly points to http://localhost:61900. Pay attention to hostname (localhost vs. a container's internal IP) and the exact port. 3. Path Matching: Ensure the gateway's route path (e.g., /my-service/**) correctly matches the incoming request URL and that any path stripping or rewriting rules are applied as intended. 4. Gateway Status: Confirm that your API Gateway service itself is running and accessible on its configured port. 5. Firewall: Although rare for localhost, ensure no firewall rules are blocking the gateway's outbound connection to localhost:61900.
5. How can I ensure consistency and avoid conflicts when multiple developers work with custom local ports like 61900?
To maintain a consistent and conflict-free local development environment: * Standardize Port Ranges: Establish team-wide conventions for port usage (e.g., "all feature XYZ services use ports 61900-61909"). * Use Environment Variables: Always configure port numbers using environment variables (process.env.PORT or similar) in your applications. This allows each developer to easily override ports if a local conflict occurs or to match specific project setups. * Containerization with Docker Compose: Use Docker Compose to define and run your entire local application stack, including services on custom ports and your gateway. This ensures consistent environments and predictable port mappings for everyone. * Version Control Gateway Configs: Store your API Gateway/AI Gateway configurations in version control (Git). This ensures all team members are using the same routing rules and policies. * Document Everything: Maintain clear, up-to-date documentation outlining which services run on which ports, how to start them, and how they integrate with the gateway. * Automate Setup: Provide scripts to quickly set up and tear down the local development environment, reducing manual errors.
🚀You can securely and efficiently call the OpenAI API on APIPark in just two steps:
Step 1: Deploy the APIPark AI gateway in 5 minutes.
APIPark is developed based on Golang, offering strong product performance and low development and maintenance costs. You can deploy APIPark with a single command line.
curl -sSO https://download.apipark.com/install/quick-start.sh; bash quick-start.sh

In my experience, you can see the successful deployment interface within 5 to 10 minutes. Then, you can log in to APIPark using your account.

Step 2: Call the OpenAI API.