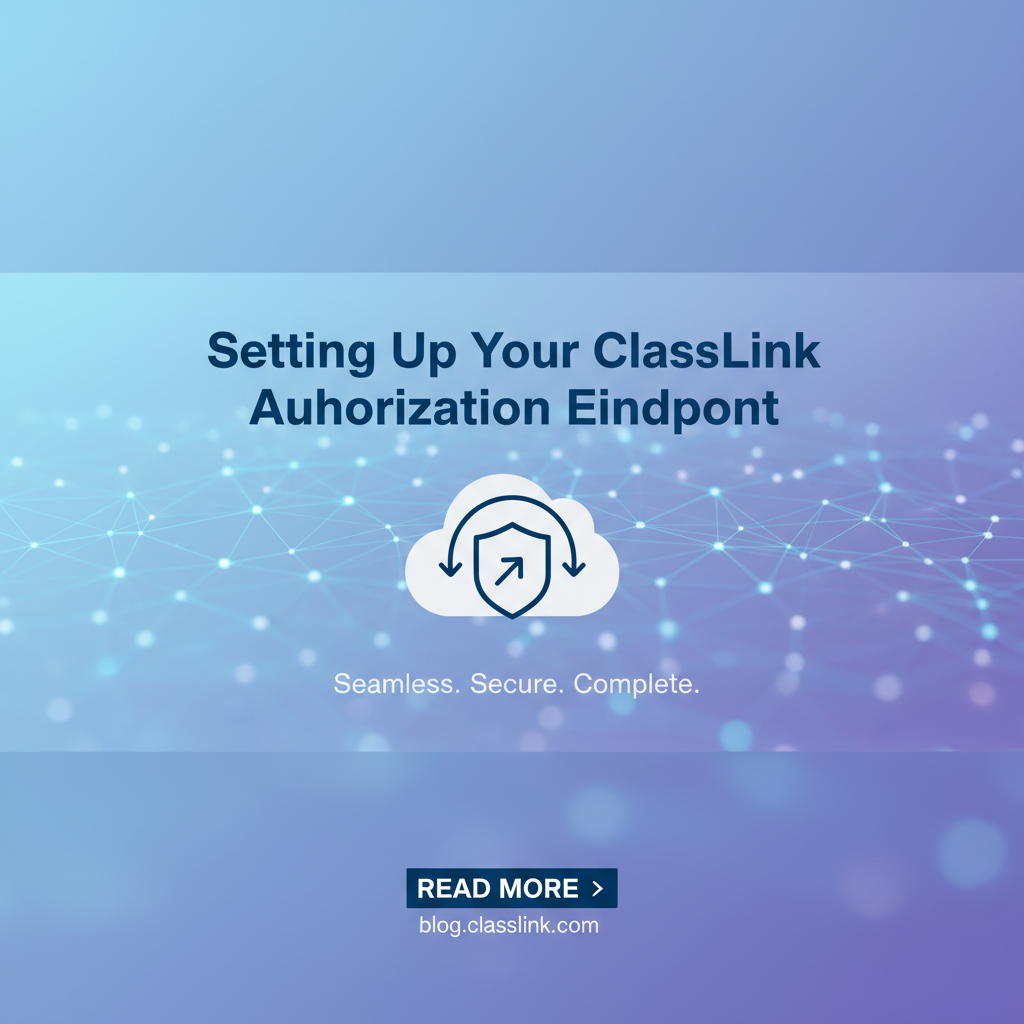
Setting Up Your Classlink Authrization Endpoint


In the rapidly evolving landscape of educational technology, seamless and secure integration of applications is not merely a convenience but a fundamental necessity. ClassLink stands as a cornerstone in this ecosystem, providing a universal rostering, single sign-on (SSO), and analytics platform that simplifies access to digital learning resources for millions of students and educators worldwide. For any third-party application or service seeking to connect with ClassLink to leverage its rich data or provide SSO capabilities, understanding and correctly configuring the ClassLink authorization endpoint is paramount. This endpoint serves as the gateway through which users grant your application permission to access their ClassLink data, orchestrating a critical dance of trust and data exchange that underpins the functionality of modern EdTech.
This extensive guide aims to demystify the process of setting up your ClassLink authorization endpoint, offering a deep dive into the underlying protocols, practical configuration steps, and essential security considerations. We will navigate the intricacies of OAuth 2.0 and OpenID Connect, explore the specific parameters required by ClassLink, and discuss best practices for building robust, secure, and user-friendly integrations. Whether you are a seasoned developer building a new EdTech solution or an IT administrator looking to integrate an existing service, this article will equip you with the knowledge to establish a reliable and secure connection with the ClassLink platform, ultimately fostering a more integrated and efficient digital learning environment. The proper setup of this authorization mechanism is not just a technical task; it's an investment in the security and usability that defines successful educational technology.
The Indispensable Role of Authorization Endpoints in Modern Digital Ecosystems
At the heart of almost every secure digital interaction today lies an authorization mechanism. From logging into your favorite social media app with your Google account to connecting third-party services to your cloud storage, the concept of granting explicit permission for one application to access resources managed by another is ubiquitous. In the realm of educational technology, where sensitive student data and intellectual property are constantly in motion, these authorization processes take on an even greater significance. The ClassLink authorization endpoint is precisely this critical piece of infrastructure, acting as the primary interface where users—students, teachers, and administrators—consent to allow your application to interact with their ClassLink-managed data and services.
This endpoint is not merely a URL; it represents a meticulously designed system that facilitates delegated authorization. Instead of requiring users to share their ClassLink credentials directly with your application (a highly insecure practice that should always be avoided), it provides a standardized, secure way for users to approve your application's access requests. This fundamental shift towards delegated authorization, primarily governed by protocols like OAuth 2.0 and OpenID Connect, has revolutionized how applications interact, making digital ecosystems more secure, interoperable, and scalable. Without a correctly configured authorization endpoint, your application would be unable to securely identify users, retrieve rostering information, or offer a seamless single sign-on experience—all capabilities that are foundational to effective EdTech solutions. Understanding its purpose and mechanics is the first, most crucial step in building a successful ClassLink integration.
Understanding ClassLink and Its Ecosystem
Before delving into the technicalities of authorization, it is essential to grasp the breadth and importance of ClassLink within the educational landscape. ClassLink is far more than just a login portal; it is a comprehensive platform designed to streamline and secure access to digital learning resources for K-12 schools and districts globally. Its core offerings address critical challenges faced by educators, students, and IT departments alike, creating a more cohesive and efficient digital learning experience.
What ClassLink Does for Education Technology
ClassLink's primary value proposition revolves around three pillars: Single Sign-On (SSO), universal rostering, and data analytics.
- Single Sign-On (SSO): Imagine a student trying to access ten different learning applications in a single day, each requiring a separate username and password. The cognitive load and time wasted on managing these credentials can be immense. ClassLink's SSO functionality solves this by providing a single point of entry. Once a user logs into their ClassLink launchpad, they gain access to all their subscribed applications without needing to re-authenticate. This significantly reduces login fatigue, improves instructional time, and simplifies password management for IT staff. For your application, integrating with ClassLink's SSO means a smoother, more immediate user experience, as users can launch your service directly from their personalized ClassLink portal.
- Universal Rostering (Roster Server): Rostering—the process of creating and managing lists of students, teachers, courses, and classes—is notoriously complex and time-consuming for schools. ClassLink's Roster Server addresses this by acting as a centralized hub for student information system (SIS) data. It standardizes data formats (often using the OneRoster standard) and securely delivers up-to-date roster information to integrated applications. This ensures that your application always has accurate class lists, student demographics, and teacher assignments, automating what was once a highly manual and error-prone process. For EdTech providers, connecting to the Roster Server through proper authorization allows for effortless onboarding, automatic class creation, and precise content delivery based on real-time school data.
- Analytics: ClassLink provides valuable insights into application usage, helping districts understand which tools are being utilized, by whom, and for how long. These analytics empower educators and administrators to make data-driven decisions about technology investments and instructional strategies. While less directly tied to the authorization endpoint setup, the ability to collect and provide this data relies on the underlying integrations facilitated by robust authorization.
The Importance of Secure Data Exchange in Education
The data handled within the ClassLink ecosystem—student names, grades, attendance records, demographic information, and more—is inherently sensitive. Protecting this data from unauthorized access, breaches, and misuse is not just a regulatory requirement (such as COPPA, FERPA in the US, or GDPR in Europe) but a moral imperative. Any integration with ClassLink must prioritize security at every stage.
The authorization endpoint is the first line of defense in this security posture. By ensuring that only authenticated users can grant permission to trusted applications, and that these permissions are specific and revocable, ClassLink safeguards student privacy and school data integrity. Misconfigurations or vulnerabilities in the authorization process can have severe consequences, leading to data exposure, compliance violations, and a loss of trust. Therefore, meticulously setting up and testing your ClassLink authorization endpoint is not merely a technical checkbox; it is a critical responsibility that underpins the trust and efficacy of your educational solution. It guarantees that the exchange of information, be it for SSO, rostering, or other services, occurs within a secure, controlled, and auditable framework, fostering a safe digital learning environment for all stakeholders.
Fundamentals of Authorization and Authentication: The Bedrock of Secure Access
Before diving into the specifics of ClassLink's authorization endpoint, it is crucial to establish a solid understanding of the foundational concepts of authentication and authorization. While often used interchangeably in casual conversation, these two processes serve distinct but complementary roles in securing digital interactions. Their proper implementation is the bedrock upon which all secure api integrations, including those with ClassLink, are built.
Authentication vs. Authorization: A Clear Distinction
- Authentication: This is the process of verifying who a user claims to be. It answers the question, "Are you who you say you are?" Common authentication methods include entering a username and password, using multi-factor authentication (MFA), or employing biometric scans. When you log into ClassLink with your credentials, you are authenticating yourself to the ClassLink system.
- Authorization: Once a user's identity has been verified (authenticated), authorization determines what that user (or an application acting on their behalf) is permitted to do. It answers the question, "What are you allowed to do, or what resources can you access?" For example, after authenticating to ClassLink, a teacher might be authorized to view student grades, while a student is only authorized to view their own grades and assignments.
In the context of third-party applications integrating with ClassLink, the ClassLink authorization endpoint handles both authentication of the user to ClassLink (if they aren't already logged in) and the subsequent authorization of your application to access specific ClassLink resources on behalf of that authenticated user.
OAuth 2.0 and OpenID Connect (OIDC): The Dominant Protocols
The secure delegation of authorization, particularly across different services, is primarily managed by two industry-standard protocols: OAuth 2.0 and OpenID Connect (OIDC). ClassLink leverages these protocols for its authorization services, making them essential knowledge for any developer integrating with the platform.
OAuth 2.0: The Authorization Framework
OAuth 2.0 is an authorization framework that enables a third-party application to obtain limited access to an HTTP service (like ClassLink's apis) on behalf of a resource owner (the user). It doesn't deal with authentication directly but focuses on delegated authorization.
Key Roles in OAuth 2.0:
- Resource Owner: This is the user (e.g., a student, teacher, or administrator) who owns the data or resources stored in ClassLink. They grant permission to the client application.
- Client Application: This is your third-party application that wants to access the resource owner's data in ClassLink.
- Authorization Server: This is ClassLink's authorization system. It authenticates the resource owner, obtains their consent, and issues access tokens to the client application. The ClassLink authorization endpoint is a key part of this server.
- Resource Server: This is where the protected resources (e.g., student rosters, user profiles) are hosted. In the ClassLink context, this refers to ClassLink's various
apiendpoints that hold the actual data. The client application uses the access token issued by the Authorization Server to request data from the Resource Server.
The Authorization Code Flow (Most Relevant for ClassLink): This is the most common and secure OAuth 2.0 grant type for web applications.
- Authorization Request: The client application redirects the user's browser to the ClassLink Authorization Endpoint. This request includes parameters like
client_id,redirect_uri,scope, andresponse_type=code. - User Authentication and Consent: ClassLink authenticates the user (if not already logged in) and presents them with a consent screen, asking if they authorize the client application to access the requested resources.
- Authorization Code Grant: If the user approves, ClassLink redirects the user's browser back to the client application's
redirect_uri, appending an authorizationcodeand the originalstateparameter. - Token Exchange: The client application's backend server then makes a direct, secure POST request to ClassLink's Token Endpoint. This request includes the authorization
code,client_id,client_secret, andredirect_uri. - Access Token (and optionally Refresh Token) Grant: ClassLink verifies the request and, if valid, issues an
access_tokenand potentially arefresh_tokento the client application. - Resource Access: The client application uses the
access_tokento make authenticated requests to ClassLink'sapis (the Resource Server) to retrieve data.
OpenID Connect (OIDC): An Identity Layer on OAuth 2.0
While OAuth 2.0 is about authorization, OpenID Connect is an identity layer built on top of OAuth 2.0. It allows client applications to verify the identity of the end-user based on the authentication performed by an Authorization Server (like ClassLink) and to obtain basic profile information about the end-user.
Key additions from OIDC:
- ID Token: A JSON Web Token (JWT) issued by the Authorization Server that contains claims about the authenticated user (e.g., user ID, name, email). It proves who the user is.
openidscope: The presence of this scope in the authorization request indicates that the client is requesting an ID Token and engaging in an OIDC flow.- Userinfo Endpoint: An optional endpoint provided by the Authorization Server where the client can retrieve more detailed profile information about the user using the
access_token.
ClassLink utilizes OIDC, meaning your authorization requests will typically include the openid scope, and you'll receive an id_token along with your access_token. This id_token is crucial for verifying the user's identity within your application.
Tokens: The Keys to Access
Tokens are the digital credentials that represent authentication and authorization.
- Access Token: A credential used by an application to access an API on behalf of a user. It has a limited lifespan and represents specific permissions (scopes). It is typically an opaque string or a JWT.
- Refresh Token: A long-lived credential used to obtain new access tokens after they expire, without requiring the user to re-authenticate. They must be stored securely.
- ID Token (JWT): A JSON Web Token (JWT) that carries verifiable claims about the identity of an authenticated user. It's digitally signed to ensure its integrity and authenticity.
Understanding these protocols and token types is fundamental. They dictate the choreography of your interaction with ClassLink and form the basis of all secure api calls to its services. Correctly handling these tokens and flows is paramount for maintaining the security and functionality of your integration. An api gateway, for instance, often plays a crucial role in validating these tokens before forwarding requests to backend services, providing a centralized enforcement point for security policies.
Deconstructing the Authorization Endpoint: The Gateway to User Consent
The ClassLink authorization endpoint is the initial point of interaction in the OAuth 2.0 and OpenID Connect flow, serving as the user-facing interface where an application requests permission to access a user's ClassLink data. It's the URL to which your application redirects a user's browser, initiating the process of authentication and consent. Understanding its components and the parameters it expects is critical for crafting a successful integration.
Definition: What It Is and Its Primary Function
In simple terms, the authorization endpoint is a specific URL provided by ClassLink that your application will direct the user to. Its primary function is twofold:
- User Authentication: If the user is not already logged into ClassLink, this endpoint will prompt them to authenticate using their ClassLink credentials.
- Consent Granting: Once authenticated, ClassLink displays a consent screen to the user, detailing the permissions (scopes) your application is requesting. The user then explicitly grants or denies these permissions.
Upon user interaction, the authorization endpoint then securely redirects the user's browser back to a pre-registered redirect_uri in your application, carrying either an authorization code (if consent was granted) or an error message (if denied or an issue occurred).
Key Parameters for the Authorization Endpoint Request
When your application constructs the URL to the ClassLink authorization endpoint, it must include several standard OAuth 2.0/OIDC query parameters. These parameters inform ClassLink about your application's identity, what permissions it needs, and where to send the user back after interaction.
Here are the essential parameters you'll typically include:
response_type:- Purpose: Specifies the type of authorization flow your application is using and what kind of credential ClassLink should return.
- Value for Authorization Code Flow:
code. This indicates that your application expects an authorization code, which it will then exchange for anaccess_tokenandid_tokenin a back-channel request. This is the most secure and recommended flow for server-side web applications. - Example:
response_type=code
client_id:- Purpose: Your application's unique identifier, assigned by ClassLink when you register your application. This tells ClassLink which application is initiating the request.
- Example:
client_id=your_app_client_id_here
redirect_uri:- Purpose: The URL in your application where ClassLink should redirect the user's browser after they have completed the authentication and consent process. This URL must be pre-registered with ClassLink and strictly match one of the registered URIs to prevent redirection attacks.
- Example:
redirect_uri=https://your-app.com/auth/callback
scope:- Purpose: A space-separated list of permissions your application is requesting from the user. These scopes define the specific data or functionalities your application wishes to access (e.g., user profile, roster data).
- Common ClassLink Scopes:
openid: Required for OpenID Connect, indicates you want an ID Token.profile: Requests basic profile information about the user.email: Requests the user's email address.oneroster.demographics: Access to basic demographic data.oneroster.orgs: Access to organization (school/district) data.oneroster.users: Access to user data (students, teachers).oneroster.courses: Access to course data.oneroster.classes: Access to class data.oneroster.enrollments: Access to enrollment data.
- Example:
scope=openid profile email oneroster.users oneroster.classes
state:- Purpose: An opaque, unguessable string value generated by your application and included in the authorization request. ClassLink returns this exact value back to your
redirect_uri. - Security Function: Crucial for preventing Cross-Site Request Forgery (CSRF) attacks. Your application must verify that the
stateparameter returned by ClassLink matches thestateit sent. If they don't match, the request should be rejected. - Example:
state=aRandomStringGeneratedByYourApp12345
- Purpose: An opaque, unguessable string value generated by your application and included in the authorization request. ClassLink returns this exact value back to your
nonce:- Purpose (for OIDC): An opaque value used by the client to mitigate replay attacks. ClassLink returns this value in the
id_token. - Security Function: Your application must verify that the
nonceclaim in the receivedid_tokenmatches thenoncevalue sent in the original authorization request. This ensures theid_tokenis fresh and not a replay of a previous token. - Example:
nonce=anotherRandomStringForIDToken
- Purpose (for OIDC): An opaque value used by the client to mitigate replay attacks. ClassLink returns this value in the
code_challengeandcode_challenge_method(for PKCE - Proof Key for Code Exchange):- Purpose: These parameters are part of the PKCE extension to OAuth 2.0, primarily designed to protect public clients (like mobile or single-page applications) from authorization code interception attacks. While server-side web apps have a
client_secretto protect their token exchange, public clients do not. PKCE adds an extra layer of security by requiring the client to prove ownership of the authorization code. code_challenge: A SHA256 hash of a randomly generatedcode_verifier.code_challenge_method: Indicates how thecode_challengewas generated (e.g.,S256).- Recommendation: Even for confidential clients (server-side web apps with a
client_secret), implementing PKCE is a recommended best practice as it adds an additional layer of security against various attacks. - Example:
code_challenge=generated_hash_here&code_challenge_method=S256
- Purpose: These parameters are part of the PKCE extension to OAuth 2.0, primarily designed to protect public clients (like mobile or single-page applications) from authorization code interception attacks. While server-side web apps have a
User Interaction Flow: A High-Level Overview
- Initiation: A user clicks a "Login with ClassLink" button in your application.
- Redirection: Your application constructs the authorization URL with all necessary parameters and redirects the user's browser to this URL on ClassLink's domain.
- ClassLink Experience: The user is taken to ClassLink.
- If not logged in, they see the ClassLink login page.
- After successful login (or if already logged in), they see a consent screen showing what permissions your app requests.
- Consent/Denial: The user either approves or denies the request.
- Callback:
- If approved, ClassLink redirects the user's browser back to your application's
redirect_uri, appending an authorizationcodeand thestateparameter. - If denied or an error occurs, ClassLink redirects back with error parameters.
- If approved, ClassLink redirects the user's browser back to your application's
Security Considerations for the Authorization Endpoint
redirect_uriWhitelisting: ClassLink strictly enforcesredirect_urimatching. Any deviation, even a trailing slash, will cause the request to fail. This prevents malicious actors from redirecting users to fake sites and capturing authorization codes.stateParameter Validation: Always validate thestateparameter. If the returnedstatedoesn't match the one you sent, immediately reject the request. This is your primary defense against CSRF attacks.- HTTPS Only: All communication with ClassLink, including the authorization endpoint, must use HTTPS to ensure data encryption and prevent eavesdropping.
- Requesting Minimal Scopes: Adhere to the principle of least privilege. Only request the
scopes absolutely necessary for your application's functionality. This enhances user trust and reduces the attack surface.
Properly understanding and implementing these parameters and security considerations is the foundation for a secure and functional integration with ClassLink. The authorization endpoint is the gateway, and a secure gateway is indispensable in protecting sensitive educational data.
Prerequisites for Setting Up Your ClassLink Authorization Endpoint
Embarking on the journey of integrating with ClassLink requires a few essential preliminary steps. These prerequisites lay the groundwork for a smooth and secure authorization process, ensuring that your application is properly identified and authorized to interact with the ClassLink ecosystem. Skipping any of these steps could lead to frustrating errors and security vulnerabilities.
ClassLink Developer Account and Application Access
The very first step is to gain access to the ClassLink developer portal or work through the ClassLink Roster Server to register your application. Depending on your relationship with ClassLink (e.g., EdTech vendor, district internal application), the exact entry point might vary slightly, but the core process of registering your application remains consistent.
- How to Obtain and Configure:
- EdTech Vendors: Typically, you'll work with ClassLink's partnership team to gain access to their developer resources and partner portal. This usually involves signing an agreement and being onboarded as a ClassLink partner. Once onboarded, you'll receive access to a dedicated developer console or a section within the Roster Server where you can manage your applications.
- District Internal Applications: If you are developing an application for a specific school district that uses ClassLink, you will likely work with the district's ClassLink administrator. They will be able to create an application entry for you directly within their Roster Server instance, granting you the necessary
client_idandclient_secret.
Regardless of the path, the goal is to access a control panel where you can register and configure the specifics of your application. This registration process is vital because it establishes your application's identity within the ClassLink system.
Application Registration: The Identity of Your Service
Once you have access to the appropriate ClassLink portal, the next crucial step is to register your application. This process involves providing ClassLink with key details about your service, which it will then use to manage trust and facilitate secure communication.
client_idGeneration:- Upon registering your application (e.g., providing a name and description), ClassLink will automatically generate a unique
client_idfor your application. Thisclient_idis a public identifier that your application will send with every authorization request. It tells ClassLink which application is requesting access. - Action: Note down this
client_idand store it securely within your application's configuration.
- Upon registering your application (e.g., providing a name and description), ClassLink will automatically generate a unique
client_secretGeneration:- For confidential clients (server-side web applications that can securely store a secret), ClassLink will also generate a
client_secret. Thisclient_secretis a highly sensitive credential, akin to a password for your application. It is used during the back-channel communication with ClassLink's Token Endpoint to exchange the authorizationcodefor anaccess_token. - Action: Treat the
client_secretwith the utmost care. Never expose it in client-side code (JavaScript, mobile apps). Store it securely on your server, preferably using environment variables or a secrets management system, and avoid hardcoding it directly into your codebase. If compromised, regenerate it immediately.
- For confidential clients (server-side web applications that can securely store a secret), ClassLink will also generate a
- Configuring
redirect_uri(Crucial):- This is perhaps the most critical configuration step. The
redirect_uri(sometimes called Callback URL or Reply URL) is the specific endpoint in your application where ClassLink will send the user back after they have completed the authentication and consent process. - Details:
- You must provide the full, exact URL, including the protocol (HTTPS), domain, and path (e.g.,
https://your-app.com/auth/callback). - ClassLink enforces strict matching. Even a minor discrepancy, such as an extra trailing slash or a different subdomain, will cause the authorization flow to fail.
- You can typically register multiple
redirect_uris (e.g., for development, staging, and production environments). However, when initiating an authorization request, theredirect_urisent in the request must exactly match one of the pre-registered ones.
- You must provide the full, exact URL, including the protocol (HTTPS), domain, and path (e.g.,
- Action: Carefully define and register all
redirect_uris that your application will use. Ensure they are secure (HTTPS) and reachable by ClassLink.
- This is perhaps the most critical configuration step. The
- Setting
scopes:- During application registration, you will usually define the default
scopesyour application intends to request. Thesescopesrepresent the specific permissions your application needs (e.g.,openid,profile,email,oneroster.users,oneroster.classes). - Details:
- While you define default scopes during registration, you can also specify
scopesdynamically in each authorization request. However, ClassLink will generally only grantscopesthat are pre-approved for your application or within its general capabilities. - Adhere to the principle of least privilege: only request the
scopesthat are absolutely necessary for your application's core functionality. This enhances user trust and minimizes the impact of a potential security breach.
- While you define default scopes during registration, you can also specify
- Action: Review ClassLink's documentation for available scopes and select only those pertinent to your application's needs.
- During application registration, you will usually define the default
Understanding Your Application's Needs: A Strategic Outlook
Before even touching code, it's vital to have a clear understanding of what your application aims to achieve with ClassLink integration. This strategic overview will guide your technical decisions.
- What Data Do You Need?
- Do you need basic user identification (name, email) for SSO?
- Do you need full rostering data (students, teachers, classes, enrollments)?
- Are you integrating with specific ClassLink features or other
apis? - The answers to these questions will directly dictate the
scopesyou need to request and the specific ClassLinkapiendpoints you will interact with.
- What Permissions Are Required?
- Beyond data, what actions does your application need to perform? For instance, some
apis might allow write operations, but typically, ClassLink integrations for third-party apps are read-only for roster data. Be explicit about your requirements to ensure you request appropriate permissions.
- Beyond data, what actions does your application need to perform? For instance, some
- How Will Tokens Be Stored and Used?
- Access Tokens: These are short-lived. How will your application securely transmit them to your backend to make
apicalls? How will you handle their expiration? - Refresh Tokens: These are long-lived and highly sensitive. How will you store them securely on your server (e.g., in an encrypted database) to obtain new
access_tokenswithout re-authenticating the user? Never store refresh tokens on the client side. - ID Tokens: How will you validate these JWTs to ensure user authenticity and retrieve user claims?
- Access Tokens: These are short-lived. How will your application securely transmit them to your backend to make
By addressing these strategic questions upfront, you can ensure that your ClassLink authorization endpoint setup is not just technically correct but also aligned with your application's functional and security requirements. This proactive approach minimizes rework and enhances the overall robustness of your integration. An effective api gateway can also greatly assist in managing these tokens, enforcing policies, and ensuring secure communication with ClassLink apis.
APIPark is a high-performance AI gateway that allows you to securely access the most comprehensive LLM APIs globally on the APIPark platform, including OpenAI, Anthropic, Mistral, Llama2, Google Gemini, and more.Try APIPark now! 👇👇👇
Step-by-Step Guide: Configuring Your ClassLink Authorization Endpoint
Setting up the ClassLink authorization endpoint involves a sequence of carefully executed steps, from initial application registration to the final invocation of ClassLink apis. This section provides a detailed, granular walkthrough of each stage, offering both conceptual understanding and practical implementation guidance.
Step 1: Registering Your Application in ClassLink Roster Server/Developer Portal
This initial step is foundational, establishing your application's identity and permissions within the ClassLink ecosystem. The exact interface may vary slightly based on whether you're an EdTech vendor using a developer portal or a district administrator configuring an app within the Roster Server. However, the core information you provide remains consistent.
- Detailed Walkthrough of the ClassLink UI:
- Access the Portal: Log into your ClassLink Roster Server (for districts) or the ClassLink Developer Portal (for vendors).
- Navigate to Applications: Look for a section typically labeled "Applications," "My Apps," or "OAuth Clients."
- Create New Application: Click an option like "Add New Application" or "Register New Client."
- Input Application Details:
- Application Name: A user-friendly name for your application (e.g., "My Learning Analytics Platform"). This name will appear on the user consent screen.
- Description: A brief explanation of what your application does.
- Logo/Icon (Optional): Upload an image that represents your application.
- Support Contact Information: Email or URL for user support.
- Crucially, Defining the
Redirect URI(s): This is arguably the most important field.- Enter the full, exact URL(s) where ClassLink should redirect the user after authorization.
- Example:
https://your-app.com/auth/callbackorhttps://dev.your-app.com/oauth/return. - Critical Note: Ensure
HTTPSis used for all productionredirect_uris. You can typically add multipleredirect_uris for different environments (development, staging, production). Eachredirect_urimust be unique and precisely match what you send in the authorization request.
- Selecting Necessary
Scopes:- ClassLink will present a list of available
scopes. Carefully select only those your application requires. - Essential OIDC Scopes: Always include
openid,profile, and oftenemail. - OneRoster Scopes (examples):
oneroster.users,oneroster.classes,oneroster.courses,oneroster.enrollments,oneroster.demographics,oneroster.orgs. Choose based on the data your app needs. - Principle of Least Privilege: Do not request
scopesyou don't use. Users are more likely to grant consent for fewer, clearly defined permissions.
- ClassLink will present a list of available
- Generating
Client IDandClient Secret:- After saving your application details, ClassLink will typically display your unique
Client IDand generate aClient Secret. - Immediate Action: Copy both the
Client IDand, especially, theClient Secret. Store theClient Secretsecurely on your backend server. It's often shown only once, so save it immediately. If you lose it, you'll likely need to regenerate it, which can invalidate existing connections.
- After saving your application details, ClassLink will typically display your unique
Step 2: Constructing the Authorization URL
With your client_id, redirect_uri, and desired scopes in hand, the next step is to programmatically construct the URL that will initiate the authorization flow. This URL is where you redirect the user's browser.
- Base URL for ClassLink: The ClassLink authorization endpoint base URL typically looks like:
https://launchpad.classlink.com/oauth2/v2/auth(This URL can vary slightly based on specific ClassLink configurations or versions, always consult official ClassLink developer documentation for the most current endpoint). - Appending Query Parameters: You will append the parameters discussed in the "Deconstructing the Authorization Endpoint" section to this base URL as query strings.``` // Example in a conceptual sense, actual code will vary by language/framework const classlinkAuthEndpoint = "https://launchpad.classlink.com/oauth2/v2/auth"; const clientId = "YOUR_CLIENT_ID_FROM_CLASSLINK"; const redirectUri = "https://your-app.com/auth/callback"; const scopes = "openid profile email oneroster.users oneroster.classes"; // Space-separated const state = generateRandomString(32); // Crucial for CSRF protection const nonce = generateRandomString(32); // Crucial for OIDC replay protection// For PKCE (Proof Key for Code Exchange) - Highly Recommended const codeVerifier = generateRandomString(128); // e.g., using crypto.randomBytes const codeChallenge = generateCodeChallenge(codeVerifier); // SHA256 hash, then base64url-encode const codeChallengeMethod = "S256";// Store state, nonce, and codeVerifier securely (e.g., in session) for later verification session.set("oauth_state", state); session.set("oauth_nonce", nonce); session.set("pkce_code_verifier", codeVerifier);const authorizationUrl = new URL(classlinkAuthEndpoint); authorizationUrl.searchParams.append("response_type", "code"); authorizationUrl.searchParams.append("client_id", clientId); authorizationUrl.searchParams.append("redirect_uri", redirectUri); authorizationUrl.searchParams.append("scope", scopes); authorizationUrl.searchParams.append("state", state); authorizationUrl.searchParams.append("nonce", nonce); authorizationUrl.searchParams.append("code_challenge", codeChallenge); authorizationUrl.searchParams.append("code_challenge_method", codeChallengeMethod);// Redirect the user's browser to authorizationUrl.toString() ```Example URL Construction (what the user's browser sees):
https://launchpad.classlink.com/oauth2/v2/auth?response_type=code&client_id=your_client_id&redirect_uri=https%3A%2F%2Fyour-app.com%2Fauth%2Fcallback&scope=openid%20profile%20email%20oneroster.users&state=aRandomString123&nonce=anotherRandomString&code_challenge=xyz...&code_challenge_method=S256Note: URL encoding (%2F,%3A,%20) is essential for parameter values containing special characters. Libraries and frameworks usually handle this automatically when building URLs.
Step 3: Implementing the Redirect URI Handler
Once the user completes the ClassLink authentication and consent process, ClassLink will redirect their browser back to your configured redirect_uri. Your application must have an endpoint ready to handle this incoming request.
- Backend Implementation: Receiving the
codeandstate- Your
redirect_uriendpoint (e.g.,/auth/callback) will receive a GET request with query parameters:codeandstate. - Crucial Validation:
- Validate
state: Compare thestateparameter received in the URL with thestatevalue you stored in the user's session (or a secure cache) during Step 2. If they do not match, immediately abort the process and show an error. This prevents CSRF attacks. - Handle Errors: Check for error parameters (e.g.,
error,error_description) in the URL, which ClassLink sends if the user denied consent or an issue occurred. Display an appropriate message to the user.
- Validate
- If the
stateis valid and no errors occurred, your backend needs to make a direct, server-to-server POST request to ClassLink's Token Endpoint. This request is sensitive and must never be performed from the client-side browser. - ClassLink Token Endpoint: Typically
https://launchpad.classlink.com/oauth2/v2/token(again, verify with ClassLink documentation). - Parameters for the POST Request (usually
application/x-www-form-urlencodedbody):grant_type: Alwaysauthorization_codefor this flow.client_id: Your application'sclient_id.client_secret: Your application'sclient_secret(kept secret!).code: The authorizationcodereceived from ClassLink in theredirect_uricallback.redirect_uri: The exact sameredirect_urithat was used in the initial authorization request.code_verifier: (If using PKCE) The original, unhashedcode_verifierthat you generated and stored in Step 2.
- Handling the Response:
- ClassLink's Token Endpoint will respond with a JSON object containing the tokens.
- Extract:
access_token: The token your application will use to makeapicalls.refresh_token: (Optional, but highly recommended) A long-lived token to obtain newaccess_tokens without user re-authentication.id_token: (Ifopenidscope was requested) A JWT containing user identity claims.expires_in: The lifespan of theaccess_tokenin seconds.token_type: UsuallyBearer.
- Your
Exchanging the Authorization Code for Tokens:``` // Conceptual backend code for token exchange import axios from 'axios'; // or equivalent HTTP clientasync function handleClasslinkCallback(req, res) { const { code, state } = req.query;
// 1. Validate 'state' parameter (CRITICAL)
if (state !== session.get("oauth_state")) {
    return res.status(400).send("State mismatch, potential CSRF attack.");
}
session.delete("oauth_state"); // Clear state after use

// 2. Prepare token exchange request
const tokenEndpoint = "https://launchpad.classlink.com/oauth2/v2/token";
const codeVerifier = session.get("pkce_code_verifier"); // Retrieve stored verifier
session.delete("pkce_code_verifier"); // Clear verifier after use

try {
    const tokenResponse = await axios.post(tokenEndpoint, new URLSearchParams({
        grant_type: "authorization_code",
        client_id: clientId,
        client_secret: clientSecret, // Must be kept secret!
        code: code,
        redirect_uri: redirectUri,
        code_verifier: codeVerifier // Include if PKCE is used
    }).toString(), {
        headers: {
            'Content-Type': 'application/x-www-form-urlencoded'
        }
    });

    const { access_token, refresh_token, id_token, expires_in } = tokenResponse.data;

    // 3. Validate ID Token (if 'openid' scope was requested)
    if (id_token) {
        // Verify JWT signature, issuer, audience, expiration, and nonce
        // Use a JWT library (e.g., 'jsonwebtoken' in Node.js)
        const decodedIdToken = verifyIdToken(id_token, jwksUri, nonce); // jwksUri from ClassLink discovery endpoint
        if (!decodedIdToken) {
            return res.status(400).send("ID Token validation failed.");
        }
        session.delete("oauth_nonce"); // Clear nonce after use
        // Extract user identity from decodedIdToken (e.g., sub, name, email)
    }

    // 4. Store tokens securely
    // For example, associate access_token and refresh_token with the user's session in your database
    // NEVER expose refresh_token to the client.
    // Access_token can be sent to client if needed for client-side API calls to *your* backend.

    // 5. Redirect user to your application's dashboard
    res.redirect("/techblog/en/dashboard");

} catch (error) {
    console.error("Error exchanging code for tokens:", error.response ? error.response.data : error.message);
    res.status(500).send("Authentication failed.");
}
} ```
Step 4: Using the Access Token to Call ClassLink APIs
Once your application has successfully obtained an access_token, it can use this token to make authenticated requests to ClassLink's Resource Server (i.e., its apis) to retrieve user data, roster information, or other authorized resources.
- Attaching the
access_tokenin theAuthorizationHeader:`` // Conceptual code for making an API call async function getUserProfile(accessToken) { const userinfoEndpoint = "https://launchpad.classlink.com/oauth2/v2/userinfo"; // Or a OneRoster API endpoint try { const response = await axios.get(userinfoEndpoint, { headers: { 'Authorization':Bearer ${accessToken}` } }); return response.data; // User profile or roster data } catch (error) { console.error("Error fetching user profile:", error.response ? error.response.data : error.message); throw new Error("Failed to fetch user data."); } }// Example usage after successful token exchange // const userData = await getUserProfile(access_token); // console.log("Fetched ClassLink User Data:", userData); ```- All requests to protected ClassLink
apis must include theaccess_tokenin theAuthorizationheader, prefixed withBearer. This is the standard for OAuth 2.0 bearer tokens.
- All requests to protected ClassLink
- Example API Calls:
- User Info Endpoint:
GET https://launchpad.classlink.com/oauth2/v2/userinfo(retrieves basic user profile data from theaccess_tokenifprofilescope was granted). - OneRoster Endpoints:
GET https://oneroster.classlink.com/v1p1/ims/users/{userId}(Fetch a specific user)GET https://oneroster.classlink.com/v1p1/ims/classes(Fetch all classes)GET https://oneroster.classlink.com/v1p1/ims/orgs(Fetch organizational units)- Note: The base URL for OneRoster
apis typically differs from the OAuth endpoints. Always consult ClassLink's OneRosterapidocumentation for the correct base URLs and endpoint specifics.
- User Info Endpoint:
This comprehensive step-by-step guide provides a robust framework for integrating your application with ClassLink. By meticulously following these steps, paying close attention to security best practices and parameter validation, you can establish a secure and reliable connection, enabling your application to leverage the rich data and SSO capabilities offered by the ClassLink platform. Remember that libraries and SDKs can often abstract away some of the lower-level HTTP request details, but understanding the underlying flow remains paramount.
Advanced Considerations and Best Practices for Robust Integrations
Beyond the fundamental steps of setting up your ClassLink authorization endpoint, several advanced considerations and best practices are crucial for building a truly robust, secure, and maintainable integration. These elements enhance security, improve user experience, and ensure long-term stability in a dynamic educational technology environment.
PKCE (Proof Key for Code Exchange): An Essential Security Layer
While the Authorization Code Flow is generally secure for confidential clients that can protect their client_secret, PKCE (pronounced "pixie") adds a vital layer of protection, especially against authorization code interception attacks. It's now considered a best practice for all OAuth 2.0 clients, including server-side web applications.
- Why it's Essential: Imagine an attacker somehow intercepts the authorization code as it's being redirected back to your application's
redirect_uri. Without PKCE, if the attacker also knows yourclient_id(which is public), they could potentially exchange that code for anaccess_tokenfrom the Token Endpoint. PKCE prevents this. code_verifierandcode_challengeGeneration:code_verifier: Your client generates a cryptographically random string (e.g., 43-128 characters, composed of URL-safe characters). This is kept secret by your client.code_challenge: Your client then transforms thecode_verifierby applying a SHA256 hash and then base64url-encoding the result.
- How it Strengthens Security:
- The
code_challengeis sent with the initial authorization request to ClassLink. - When your client exchanges the authorization
codefor tokens at the Token Endpoint, it also sends the originalcode_verifier. - ClassLink's Authorization Server re-calculates the
code_challengefrom the receivedcode_verifierand compares it to thecode_challengeit initially received. If they don't match, the token exchange is rejected. - This means an attacker who intercepts the authorization code cannot exchange it for tokens unless they also have the secret
code_verifierthat was generated by your legitimate client.
- The
- Implementation: Always generate a
code_verifierand its correspondingcode_challengefor each authorization flow. Store thecode_verifiersecurely in the user's session or a temporary, user-specific storage, clearing it immediately after it's used in the token exchange.
Scope Management: The Principle of Least Privilege
Requesting the correct set of scopes is critical for both security and user experience.
- Requesting Only Necessary Scopes: Never request
scopesthat your application doesn't genuinely need.- Security Benefit: If your
access_tokenis ever compromised, the attacker's access will be limited to only thescopesyou requested, reducing the potential damage. - User Trust: Users are more likely to grant consent when they see a clear, concise list of permissions rather than an extensive, vaguely defined set.
- Security Benefit: If your
- Understanding ClassLink's Specific Scopes: Familiarize yourself with the full range of ClassLink
scopesdocumented in their developer resources. These typically includeopenid,profile,emailfor OIDC, and variousonerosterscopes for specific data sets (e.g.,oneroster.users.readonly,oneroster.classes.readonly). Always preferreadonlyscopes if your application only needs to read data.
Token Management: Secure Handling and Lifecycle
Effective token management is paramount for maintaining continuous access and security.
- Secure Storage of Tokens (Especially Refresh Tokens):
- Refresh Tokens: These are long-lived and extremely powerful. They must be stored with the highest level of security on your backend server. Encrypt them at rest in your database. Limit their lifetime if possible. Implement mechanisms for immediate revocation if suspected of compromise. Never send refresh tokens to the client-side browser.
- Access Tokens: These are typically short-lived. They can be stored in memory on your backend server or, if necessary for direct client-side calls to your own API (not ClassLink's), in secure, short-lived, HTTP-only cookies on the client.
- Token Revocation: If a user logs out, their ClassLink session expires, or if you suspect a token has been compromised, you should implement logic to revoke the
access_token(andrefresh_token) with ClassLink's revocation endpoint if available. - Expiration and Refresh Mechanisms:
Access_tokenshave a limitedexpires_intime. Your application must anticipate this.- When an
access_tokenexpires, use therefresh_tokento request a newaccess_tokenfrom ClassLink's Token Endpoint (usinggrant_type=refresh_token). This happens transparently in the background without user intervention. - Design your
apiclient to automatically handle token refreshing before making anapicall, or upon receiving an "unauthorized" error due to an expired token.
Error Handling and User Experience
A robust integration accounts for various failure scenarios and provides clear feedback to users.
- Graceful Handling of Authorization Failures:
- If a user denies consent, or if ClassLink returns an error (e.g.,
invalid_scope,access_denied), yourredirect_urihandler must detect theseerrorparameters. - Instead of displaying a generic error, provide specific, user-friendly messages that explain what happened (e.g., "You denied access, so we can't connect your account").
- Offer clear next steps (e.g., "Try again," "Contact support").
- If a user denies consent, or if ClassLink returns an error (e.g.,
- Clear Feedback to Users: During the authorization flow, keep users informed about what's happening. A loading spinner, or a message like "Redirecting to ClassLink for authentication," can improve the user experience.
Multi-tenancy and Multiple redirect_uris
For EdTech vendors serving multiple districts, or internal applications with various environments, managing redirect_uris is important.
- Multiple
redirect_uris: ClassLink typically allows you to register multipleredirect_uris for a singleclient_id(e.g.,https://dev.your-app.com/callback,https://staging.your-app.com/callback,https://your-app.com/callback). - Dynamic
redirect_uriSelection: In your authorization request, you must explicitly specify one of your pre-registeredredirect_uris that ClassLink should use. Ensure your application configures the correctredirect_uribased on its current environment.
Logging and Monitoring
Comprehensive logging and monitoring are invaluable for debugging, auditing, and security.
- Detailed Authorization Flow Logging: Log every step of the OAuth/OIDC flow on your backend:
- The authorization URL constructed and sent to ClassLink.
- The
stateandnoncevalues generated. - The
codeandstatereceived at theredirect_uri. - The token exchange request and response (sanitize sensitive data like
client_secret). - Any errors encountered.
- Security Auditing: Logs can help trace unauthorized access attempts, diagnose issues, and comply with auditing requirements for sensitive educational data.
- Alerting: Set up alerts for critical failures or unusual patterns in the authorization flow.
By adopting these advanced considerations and best practices, your ClassLink integration will not only function correctly but also stand up to the rigorous demands of security, reliability, and user experience expected in the educational technology sector. This proactive approach to integration development minimizes vulnerabilities and ensures a smoother, more trustworthy experience for all stakeholders.
The Role of an API Gateway in Authorization Workflows
In modern distributed systems, particularly those dealing with external apis and microservices, an api gateway has become an indispensable component. It acts as a single entry point for all client requests, routing them to the appropriate backend services. More importantly, it centralizes cross-cutting concerns, providing a robust layer of control and security. When dealing with complex authorization flows like those for ClassLink, an api gateway can significantly enhance the security, manageability, and performance of your integration.
What is an API Gateway? Definition and Core Functions
An api gateway is a single-entry point for multiple services. It sits in front of your backend apis, acting as a reverse proxy that accepts requests, routes them to the correct service, and returns the service's response. Its core functions typically include:
- Request Routing: Directing incoming requests to the appropriate backend microservice based on predefined rules.
- Load Balancing: Distributing traffic across multiple instances of a service to ensure high availability and performance.
- Authentication and Authorization: Centralizing security checks, such as validating
apikeys, OAuth tokens, or JWTs, before forwarding requests. - Rate Limiting: Protecting backend services from being overwhelmed by too many requests.
- Caching: Storing responses from backend services to reduce latency and load.
- Request/Response Transformation: Modifying
apirequests or responses (e.g., converting data formats). - Logging and Monitoring: Providing a central point for collecting
apiusage metrics and logs.
Enhancing Security with an API Gateway
For ClassLink authorization and subsequent api calls, a gateway offers substantial security benefits:
- Centralized Authentication and Authorization: Instead of each backend service implementing its own token validation logic (e.g., verifying ClassLink
access_tokens orid_tokens), theapi gatewaycan handle this centrally. It validates the token's signature, expiration, issuer, and audience before any request even reaches your application's business logic. This ensures consistent security policies across allapis. APIKey Management: Beyond OAuth, agatewaycan enforceapikey security for your ownapis, adding another layer of authentication for internal or partner access.- Rate Limiting and Throttling: Prevent denial-of-service (DoS) attacks or abuse of your
apis by limiting the number of requests clients can make within a given timeframe. - IP Whitelisting/Blacklisting: Control access based on source IP addresses.
- TLS/SSL Termination: The
gatewaycan handle SSL certificates and encrypted traffic, offloading this computational burden from your backend services. - Protection Against Injection Attacks: Some
gateways offer Web Application Firewall (WAF) capabilities to detect and mitigate common web vulnerabilities.
Simplifying Development and Improving Performance
- Decoupling Clients from Backend Services: Clients interact only with the
gateway, shielding them from changes in your backend architecture. - Request/Response Transformation: A
gatewaycan standardizeapiresponses or transform requests, reducing the burden on individual services. - Improved Performance and Scalability: Caching, load balancing, and efficient routing contribute to faster response times and better handling of high traffic volumes.
- Centralized Policy Enforcement: Apply consistent security, traffic, and transformation policies across your entire
apilandscape from a single point of configuration.
Specific to ClassLink: How a Gateway Integrates
In the context of ClassLink integration, a gateway can sit in front of your application's backend services (which consume ClassLink data).
- Post-Authorization: After your application successfully exchanges the authorization code for ClassLink
access_tokens andid_tokens, these tokens are often stored securely on your backend. When your internal services need to call ClassLinkapis or when external clients call yourapis that rely on ClassLink data, thegatewaycan play a role. - Internal API Protection: If your application exposes its own
apis (e.g., to a mobile app or a frontend client) that, in turn, interact with ClassLink data, anapi gatewayensures that only authorized requests (e.g., requests with valid internal JWTs orapikeys) reach your services. - Token Validation and Enforcement: The
gatewaycan be configured to validate tokens (both from ClassLink and your internal tokens) received from clients. For example, it can check if the ClassLinkaccess_tokenstored for a user is still valid, or if an internalapikey has the necessary permissions to trigger a ClassLink data fetch. This centralizes the enforcement of access policies before requests are forwarded to your services.
For organizations looking to streamline the management of these external and internal apis, especially when dealing with complex authorization flows or integrating with AI services, an advanced api gateway like APIPark becomes invaluable. APIPark, an open-source AI gateway and api management platform, not only provides robust end-to-end api lifecycle management but also offers features like unified API formats and prompt encapsulation, which can significantly simplify the integration of services that rely on external authorization endpoints like ClassLink. With APIPark, developers can manage traffic forwarding, load balancing, and versioning of published apis, ensuring that the services consuming ClassLink data are performant and secure. Its independent api and access permissions for each tenant, along with the ability to require approval for api resource access, adds another layer of security and control, making it an excellent choice for enterprises managing diverse api ecosystems. The performance of APIPark, rivaling Nginx with high TPS even on modest hardware, means it can handle the significant traffic associated with widespread educational usage, while its detailed api call logging and powerful data analysis features help businesses quickly trace issues and identify long-term trends in api performance and usage.
In essence, an api gateway provides a critical layer of abstraction, security, and control for your api landscape. By centralizing common concerns, it allows your developers to focus on core business logic, confident that the underlying infrastructure is handling security, scalability, and routing efficiently. For ClassLink integrations, this means a more secure, reliable, and manageable path to delivering educational technology.
Security Best Practices for ClassLink Integration
Integrating with ClassLink means handling sensitive educational data, making security an absolute top priority. Beyond merely getting the authorization flow to work, adherence to a stringent set of security best practices is non-negotiable. These practices help protect student privacy, maintain data integrity, and safeguard your application from potential vulnerabilities.
- Always Use HTTPS:
- Rationale: All communication with ClassLink, including the authorization endpoint, token endpoint, and resource
apis, must occur over HTTPS. This encrypts data in transit, protecting against eavesdropping, man-in-the-middle attacks, and tampering. - Action: Ensure your
redirect_uriishttps://...and all your backendapicalls to ClassLink are alsohttps://.... Never use HTTP for any part of the OAuth/OIDC flow in production.
- Rationale: All communication with ClassLink, including the authorization endpoint, token endpoint, and resource
- Securely Store
client_secret(for Confidential Clients):- Rationale: The
client_secretis your application's password. If compromised, an attacker can impersonate your application and gain unauthorized access to user data. - Action:
- Never hardcode
client_secretin your codebase. Use environment variables, a dedicated secrets management service (e.g., AWS Secrets Manager, HashiCorp Vault), or configuration files that are excluded from version control. - Ensure your production servers have strict access controls to prevent unauthorized access to
client_secretstorage. - Rotate
client_secrets periodically, especially if you suspect a breach.
- Never hardcode
- Rationale: The
- Implement PKCE (Proof Key for Code Exchange) for All Clients:
- Rationale: While initially designed for public clients (mobile/SPA), PKCE significantly enhances the security of the Authorization Code Flow by binding the authorization code to a secret (
code_verifier) known only to the client that initiated the request. This prevents authorization code interception attacks. - Action: Always generate a unique
code_verifierand itscode_challengefor each authorization request. Store thecode_verifiersecurely in the user's session and verify it during the token exchange.
- Rationale: While initially designed for public clients (mobile/SPA), PKCE significantly enhances the security of the Authorization Code Flow by binding the authorization code to a secret (
- Validate
stateParameter on Redirect:- Rationale: The
stateparameter is your primary defense against Cross-Site Request Forgery (CSRF) attacks. An attacker could otherwise craft a malicious authorization request and trick a user into granting access, then potentially link it to the attacker's account. - Action: Generate a cryptographically strong, unique
stateparameter for each authorization request, store it in the user's session, and rigorously compare the returnedstateparameter with the stored one. If they don't match, reject the request.
- Rationale: The
- Validate ID Tokens (for OpenID Connect):
- Rationale: The
id_tokenis a JWT that attests to the user's identity. If not properly validated, a malicious actor could forge anid_tokento impersonate a user. - Action: After receiving the
id_token(ifopenidscope was requested), your backend must:- Verify the JWT signature using ClassLink's public keys (JSON Web Key Set - JWKS endpoint).
- Verify the
iss(issuer) claim matches ClassLink's issuer URL. - Verify the
aud(audience) claim matches yourclient_id. - Verify the
exp(expiration) claim to ensure the token is still valid. - Verify the
iat(issued at) claim. - Verify the
nonceclaim (if sent in the original request) matches the one you generated, preventing replay attacks. - Check for
nbf(not before) claim.
- Rationale: The
- Sanitize All Inputs:
- Rationale: Any data received from external sources, including query parameters from redirects or
apiresponses, should be treated as untrusted. - Action: Always sanitize and validate all inputs to prevent common web vulnerabilities like SQL injection, cross-site scripting (XSS), and directory traversal.
- Rationale: Any data received from external sources, including query parameters from redirects or
- Regularly Review
Scopesand Permissions:- Rationale: The principle of least privilege dictates that your application should only have the minimum permissions necessary to perform its function. Over-privileged applications pose a greater risk if compromised.
- Action: Periodically review the
scopesyour application requests during authorization. If your application's functionality changes, update the requestedscopesaccordingly.
- Least Privilege Principle for
APIAccess:- Rationale: Extend the principle of least privilege to your
apicalls. If you only need to read data, ensure you are using read-onlyapiendpoints or specifying read-onlyscopes. - Action: When calling ClassLink
apis, ensure your application's logic only requests and processes the data it needs.
- Rationale: Extend the principle of least privilege to your
- Implement Robust Logging and Monitoring:
- Rationale: Detailed logs are invaluable for detecting anomalies, investigating security incidents, and troubleshooting authorization issues.
- Action: Log all critical steps of the authorization flow (requests sent, responses received, token exchanges, errors). Ensure logs are stored securely, rotated, and monitored for suspicious activity.
- Educate Users on Consent:
- Rationale: Empower users to make informed decisions about granting access.
- Action: When directing users to ClassLink for authorization, clearly explain what permissions your application is requesting and why.
By consistently applying these security best practices, you build a resilient ClassLink integration that not only functions flawlessly but also upholds the highest standards of data protection, critical in the sensitive environment of educational technology. These practices are not mere suggestions; they are fundamental requirements for responsible development and deployment.
Troubleshooting Common Authorization Endpoint Issues
Despite careful planning and meticulous implementation, issues can arise during the setup or operation of your ClassLink authorization endpoint. Troubleshooting effectively requires a systematic approach and an understanding of common pitfalls. Here's a guide to diagnosing and resolving frequent problems.
Mismatched redirect_uri
This is by far the most common authorization failure.
- Symptom: ClassLink returns an
error=invalid_redirect_urior similar, or simply refuses to redirect the user back to your application, sometimes showing an error on the ClassLink side. - Cause: The
redirect_urispecified in your authorization request (redirect_uriquery parameter) does not exactly match one of theredirect_uris registered for your application in the ClassLink Roster Server/Developer Portal. - Diagnosis:
- Check Request: Inspect the authorization URL your application constructs and sends to ClassLink. Ensure the
redirect_uriparameter is correctly URL-encoded and matches what you expect. - Check ClassLink Portal: Log into your ClassLink application registration and carefully compare the
redirect_uris listed there against what your application is sending. - Common Mistakes:
- Trailing slashes:
https://your-app.com/callbackvs.https://your-app.com/callback/ - Protocol mismatch:
http://vs.https://(always use HTTPS in production!) - Subdomain variations:
www.your-app.comvs.your-app.com - Port numbers:
localhost:3000vs.localhost - Case sensitivity in path segments.
- Trailing slashes:
- Check Request: Inspect the authorization URL your application constructs and sends to ClassLink. Ensure the
- Solution: Ensure the
redirect_urisent in your request is an exact, byte-for-byte match with one of the registeredredirect_uris in ClassLink.
Incorrect scopes
Requesting invalid or unauthorized scopes can lead to errors.
- Symptom: ClassLink returns an
error=invalid_scopeorerror=access_deniedat theredirect_uri, or theaccess_tokenyou receive doesn't grant access to the expectedapis. - Cause: Your application requested a
scopethat is either not recognized by ClassLink, is not enabled for your application, or the user explicitly denied. - Diagnosis:
- Check Request: Verify the
scopeparameter in your authorization URL. - Check ClassLink Documentation: Confirm the requested
scopesare valid and spelled correctly according to ClassLink'sapidocumentation. - Check ClassLink Portal: Verify that the
scopesyou are requesting are enabled or available for your registered application within the ClassLink Roster Server/Developer Portal. Somescopesmight require explicit approval from ClassLink.
- Check Request: Verify the
- Solution: Adjust your
scoperequest to include only valid and necessaryscopesthat your application is authorized to use.
Expired or Invalid client_secret
For confidential clients, a problem with the client_secret will cause token exchange to fail.
- Symptom: The POST request to ClassLink's Token Endpoint fails with a
401 Unauthorizedorinvalid_clienterror. - Cause: The
client_secretsent in the token exchange request is incorrect, has expired, or has been revoked. - Diagnosis:
- Check Configuration: Verify the
client_secretvalue configured in your application's backend code matches the one provided by ClassLink. - Check for Regeneration: Has the
client_secretbeen regenerated in the ClassLink portal, and your application hasn't been updated? - Environmental Issues: Ensure the
client_secretis being correctly loaded from environment variables or secrets management.
- Check Configuration: Verify the
- Solution: Update your application's
client_secretto the correct, current value. If in doubt, regenerate it in the ClassLink portal and immediately update your application's configuration.
Network Issues Blocking Requests
Communication failures can occur at various points.
- Symptom: The user's browser hangs when redirecting to ClassLink, or your backend's POST request to the Token Endpoint times out or receives a network error.
- Cause: Firewall rules, DNS issues, proxy configurations, or general network connectivity problems are preventing your application or the user's browser from reaching ClassLink's servers.
- Diagnosis:
- Ping/Traceroute: From your server, try pinging or tracerouting ClassLink's domains (
launchpad.classlink.com,oneroster.classlink.com). - Firewall: Check outbound firewall rules on your server to ensure it can make HTTPS requests to ClassLink's IP ranges.
- Browser Console: For user-facing issues, check the browser's developer console for network errors during redirects.
- Ping/Traceroute: From your server, try pinging or tracerouting ClassLink's domains (
- Solution: Address network connectivity issues. Consult your network administrator if necessary.
Incorrect code_verifier/code_challenge for PKCE
If PKCE is implemented incorrectly, the token exchange will fail.
- Symptom: The POST request to the Token Endpoint fails with an
invalid_grantorcode_verifier_mismatcherror. - Cause: The
code_verifiersent in the token exchange request does not correctly correspond to thecode_challengesent in the initial authorization request. This usually means thecode_verifierwas not stored correctly, or a different one was used. - Diagnosis:
- Storage: Verify that your application is correctly storing the generated
code_verifierin the user's session and retrieving the exact same value for the token exchange. - Generation Logic: Double-check your
code_verifierandcode_challengegeneration logic (random string length, SHA256 hashing, base64url encoding).
- Storage: Verify that your application is correctly storing the generated
- Solution: Ensure the
code_verifierandcode_challengeare generated and managed correctly as per PKCE specifications.
Invalid authorization code
The authorization code is single-use and short-lived.
- Symptom: The POST request to the Token Endpoint fails with an
invalid_granterror, specifically indicatingauthorization code has been usedorexpired. - Cause:
- Attempting to use the same authorization
codemore than once. - The
codeexpired before your application could exchange it (they typically have a very short lifespan, e.g., 60-300 seconds). - The
codewas for a differentclient_idorredirect_uri.
- Attempting to use the same authorization
- Diagnosis:
- Logging: Check your logs to ensure the token exchange request is only made once per authorization code.
- Timing: Monitor the time elapsed between receiving the
codeat theredirect_uriand making the token exchange request.
- Solution: Ensure the token exchange happens promptly after receiving the authorization code. Debug any logic that might be attempting to reuse an authorization code.
ID Token Validation Failures
Issues with validating the received id_token.
- Symptom: Your application rejects the
id_tokenafter receiving it, even if theaccess_tokenexchange was successful. - Cause: Incorrect verification of JWT signature,
iss,aud,exp, ornonceclaims. - Diagnosis:
- JWKS URI: Ensure you are fetching ClassLink's public keys from the correct JWKS URI (often discoverable via ClassLink's OpenID Connect Discovery document).
- Claim Values: Log the raw
id_tokenand inspect its claims (e.g., usingjwt.io) to verifyiss,aud,exp,nonceagainst your expectations. - Library Usage: Ensure your JWT validation library is used correctly with the right options (e.g., specifying audience, issuer, nonce).
- Solution: Correct your
id_tokenvalidation logic, ensuring all required claims are checked and the signature is verified against ClassLink's public keys.
By systematically working through these common issues, utilizing logging, and carefully reviewing configuration details, you can efficiently diagnose and resolve problems with your ClassLink authorization endpoint, leading to a stable and reliable integration.
Conclusion: Empowering Seamless and Secure Educational Integrations
The journey through setting up your ClassLink authorization endpoint reveals a nuanced yet critical aspect of modern educational technology. From understanding the fundamental distinctions between authentication and authorization to meticulously configuring scopes, redirect_uris, and implementing advanced security measures like PKCE, each step plays an indispensable role in forging a reliable and secure link with the ClassLink ecosystem. This guide has emphasized that a correct setup is not just a technical formality; it's a profound commitment to protecting sensitive student data, ensuring educational continuity, and delivering a seamless user experience for millions of learners and educators worldwide.
The meticulous configuration of the authorization endpoint, the secure handling of tokens, and the vigilant adherence to security best practices collectively empower applications to leverage ClassLink's extensive rostering and SSO capabilities without compromising privacy or integrity. The advent of api gateway solutions, such as APIPark, further streamlines this process, offering centralized management, enhanced security, and optimized performance for all api interactions, both internal and external. These gateways abstract away much of the complexity, allowing developers to focus on innovation while ensuring the underlying infrastructure remains robust and secure, ready to handle the demands of a dynamic EdTech landscape.
As educational technology continues to evolve, the principles of secure, delegated authorization will only become more central. Future trends may see even more granular consent controls, enhanced biometric authentication methods, and increasingly intelligent api management platforms that anticipate and mitigate threats in real-time. By mastering the current state-of-the-art in ClassLink integration, developers and administrators are not just solving today's challenges; they are building the foundation for the next generation of secure, interconnected digital learning environments. The effort invested in a proper authorization endpoint setup is an investment in the future of education itself, ensuring that technology serves as an enabler, not a barrier, to learning.
Frequently Asked Questions (FAQ)
1. What is the ClassLink Authorization Endpoint and why is it important?
The ClassLink Authorization Endpoint is a specific URL provided by ClassLink where your application directs users to initiate the login and consent process. It's crucial because it enables your application to securely obtain permission from users (students, teachers, administrators) to access their ClassLink data (like rosters or profile information) on their behalf, without ever needing their ClassLink credentials. This delegated authorization is foundational for Single Sign-On (SSO) and data synchronization in modern educational applications, ensuring both security and user convenience.
2. What are client_id and client_secret, and how should I handle them securely?
The client_id is a unique public identifier for your application, assigned by ClassLink when you register your service. It tells ClassLink which application is requesting access. The client_secret is a highly sensitive, confidential password for your application, also provided by ClassLink, and is used to authenticate your application when exchanging an authorization code for an access_token. Security Handling: * client_id: Can be exposed in client-side code (browser, mobile app) as it's public. * client_secret: Must be kept strictly confidential. Never embed it in client-side code. Store it securely on your backend server using environment variables, a secrets management service (e.g., HashiCorp Vault, AWS Secrets Manager), or secure configuration files, and ensure it's not committed to version control. If compromised, regenerate it immediately.
3. Why is redirect_uri so important, and what happens if it's incorrect?
The redirect_uri (or Callback URL) is the exact URL in your application where ClassLink will redirect the user's browser after they have authenticated and granted (or denied) consent. It's critically important because ClassLink enforces strict matching: the redirect_uri sent in your authorization request must exactly match one of the URLs you pre-registered with ClassLink. If there's any discrepancy (e.g., a missing or extra trailing slash, protocol mismatch, wrong subdomain), ClassLink will reject the request, typically returning an invalid_redirect_uri error, and the user will not be redirected back to your application, effectively breaking the login flow. This strict enforcement is a vital security measure to prevent redirection attacks.
4. What are scopes, and which ones should I request for my application?
Scopes are permissions that your application requests from the user, defining the specific data or functionalities it wishes to access within ClassLink. For example, openid is for identity verification, profile for basic user profile data, and oneroster.users or oneroster.classes for access to roster information. You should adhere to the principle of least privilege: only request the scopes that are absolutely necessary for your application's core functionality. Requesting fewer, relevant scopes enhances user trust (as they see exactly what they're consenting to) and minimizes the potential impact if your access_token is ever compromised. Always consult ClassLink's official documentation for a comprehensive list of available scopes and their precise meanings.
5. What role does an API gateway like APIPark play in managing ClassLink integrations?
An API gateway acts as a central entry point for all API traffic, sitting in front of your backend services. For ClassLink integrations, it plays several key roles: 1. Centralized Security: It can validate ClassLink-issued access_tokens and id_tokens, enforce API keys, apply rate limiting, and protect against various API threats before requests reach your backend services. This ensures consistent security policies across all your apis. 2. Simplified Management: It streamlines traffic routing, load balancing, and versioning of your apis that consume ClassLink data. 3. Enhanced Performance: Features like caching and efficient routing improve response times and handle high traffic volumes effectively, which is vital in education. 4. Policy Enforcement: An API gateway allows you to apply fine-grained access policies, such as requiring subscription approvals for specific api resources, ensuring that only authorized callers can access sensitive ClassLink data through your application. Products like APIPark specifically cater to these needs, offering robust API lifecycle management and security features for integrating with services like ClassLink and beyond.
🚀You can securely and efficiently call the OpenAI API on APIPark in just two steps:
Step 1: Deploy the APIPark AI gateway in 5 minutes.
APIPark is developed based on Golang, offering strong product performance and low development and maintenance costs. You can deploy APIPark with a single command line.
curl -sSO https://download.apipark.com/install/quick-start.sh; bash quick-start.sh

In my experience, you can see the successful deployment interface within 5 to 10 minutes. Then, you can log in to APIPark using your account.

Step 2: Call the OpenAI API.