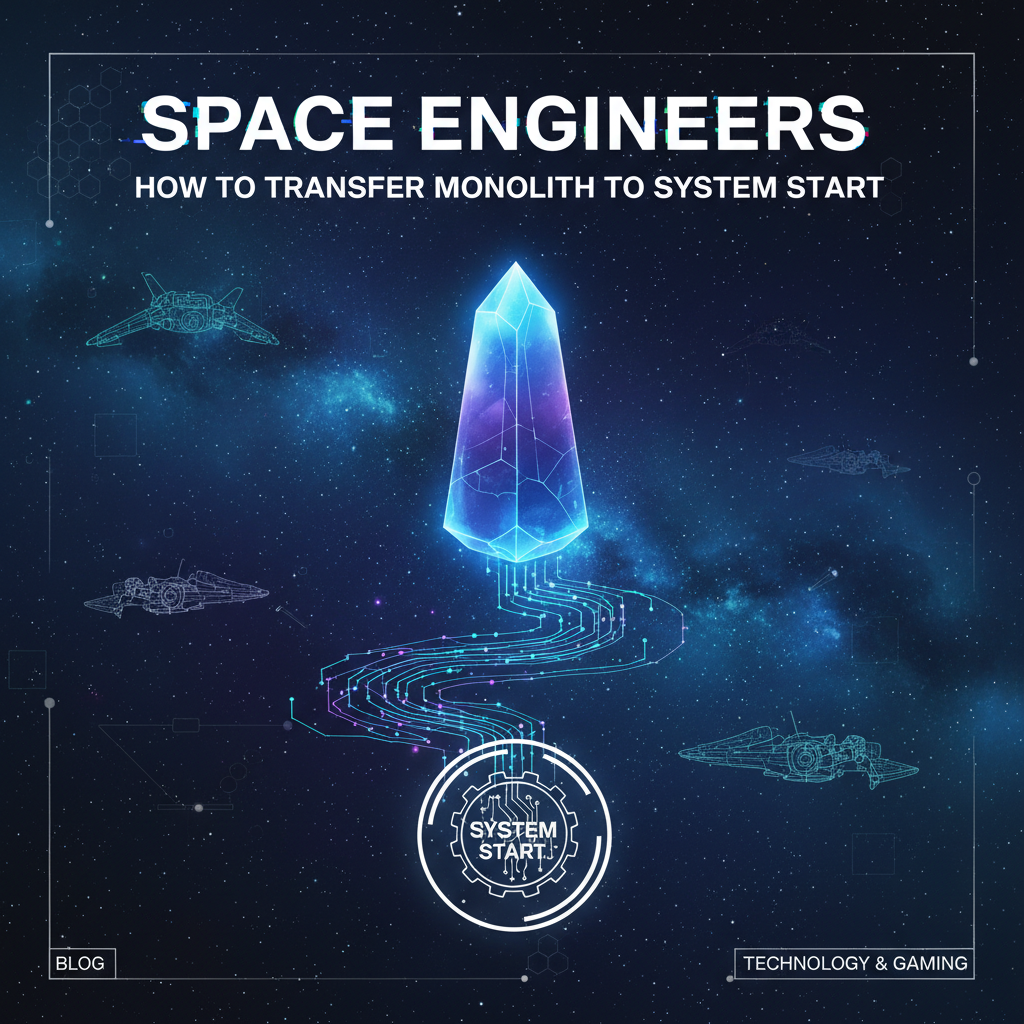
Space Engineers: How to Transfer Monolith to System Start


The cosmos of Space Engineers is a boundless canvas for creation, engineering, and monumental endeavors. Among the myriad challenges and triumphs players can experience, the task of moving a Monolith stands as a testament to ambition, ingenuity, and sheer dedication. These colossal structures, iconic landmarks within the game's universe, are not merely static decorations; they are symbols of ancient power, often sparking a desire in players to claim them, relocate them, and integrate them into their grandest visions. The journey from initial discovery to successfully transferring a Monolith to a new "System Start" – a central base, an orbital hub, or a planetary fortress – is one fraught with engineering puzzles, logistical nightmares, and exhilarating breakthroughs. This comprehensive guide will meticulously detail every phase of this epic undertaking, transforming an seemingly impossible feat into a meticulously planned and executed masterpiece of spatial engineering, helping you conquer one of Space Engineers' most formidable challenges.
The Enigmatic Monolith: Understanding Your Colossal Quarry
Before embarking on the monumental task of moving a Monolith, a deep understanding of what it is, its inherent characteristics, and its profound significance within the Space Engineers universe is absolutely paramount. These structures are not mere static objects; they are massive, indestructible, and unyielding testaments to an ancient presence, often sparking a sense of wonder and awe among players who stumble upon them. Typically found floating in deep space, far from the gravitational pull of planets or moons, or occasionally embedded within large asteroid fields, Monoliths are visually striking, often appearing as geometric wonders composed of an unknown, dark, and resilient material. Their sheer scale is humbling, easily dwarfing even the largest player-built capital ships.
In terms of in-game mechanics, Monoliths possess several critical attributes that directly impact the strategy for their transfer. Firstly, they are entirely static; they cannot be propelled by conventional thrusters, nor can they be directly attached to other grids in a way that allows them to be moved by the Monolith itself. Their massive mass, while not explicitly calculable by the player in an exact numerical value, is implicitly understood to be astronomically high, making any attempt to move them require an equivalent, if not superior, amount of force. Secondly, they are indestructible. This means you cannot mine them, disassemble them, or modify their structure in any way. This characteristic simplifies one aspect – you don't have to worry about damaging it – but complicates another, as you cannot make them lighter or more aerodynamic. Thirdly, and perhaps most importantly, they typically contain a significant amount of valuable components or rare ores embedded within their structure, usually accessible via grinding. This makes them not just aesthetic trophies but highly desirable strategic assets, further fueling the motivation for their relocation.
The challenge of transferring a Monolith stems directly from these characteristics. Imagine attempting to move a mountain without altering the mountain itself, using only the tools and principles of physics available within the game. The sheer mass necessitates an extraordinary amount of propulsion and structural integrity for any vessel attempting to move it. Its static nature means your "mover" must encapsulate or firmly grapple the Monolith, effectively becoming part of a much larger, combined grid. The location of Monoliths, often in the isolation of deep space, also presents logistical hurdles, demanding extensive planning for resource procurement, power generation, and navigational precision over vast interstellar distances. Understanding these foundational aspects is the first, crucial step in devising a successful strategy for bringing the Monolith to your chosen "System Start" – transforming a distant, enigmatic relic into the crowning jewel of your engineering empire.
The Preparatory Phase: Laying the Groundwork for a Galactic Feat
Moving a Monolith is not a spontaneous decision; it is the culmination of meticulous planning and extensive groundwork, demanding resources and infrastructure on a scale rarely seen in typical Space Engineers gameplay. This preparatory phase is arguably the most critical, laying the foundations for success and mitigating potential catastrophic failures during the actual transfer. Rushing this stage is a recipe for disaster, whereas careful preparation will pave the way for a triumphant relocation.
Massive Resource Gathering: Fueling the Ambition
The scale of construction required for a Monolith mover is staggering, demanding an unprecedented amount of raw materials. Your primary focus will be on iron, nickel, silicon, cobalt, and platinum for various components, alongside vast quantities of uranium for reactors and ice for hydrogen thrusters.
- Iron (Steel Plates, Interior Plates, Construction Components): This will be your most consumed resource, forming the backbone of your structure, armor, and many internal components. Establish multiple large-scale mining operations targeting iron-rich asteroids or planetary deposits. Consider setting up automated drills and conveyor systems to efficiently extract and transport ore.
- Nickel (Grid Components, Motors): Essential for many mechanical parts, including motors for pistons, rotors, and various sub-components. Nickel is typically found alongside iron or in specific asteroid types.
- Silicon (Computer Components, Solar Cells): Crucial for all electronic components, from basic wires to advanced programmable blocks and sensors. Silicon is abundant but often requires dedicated mining passes.
- Cobalt (Large Steel Tubes, Power Cells): Used in heavier construction and power storage. Cobalt is scarcer than iron but vital for structural integrity and energy systems.
- Platinum (Ion Thrusters, Gravity Generators, Advanced Components): This is perhaps the most critical and rarest resource for deep-space operations. Platinum is indispensable for high-efficiency ion thrusters, artificial mass blocks, and gravity generators – components that will form the core of your Monolith mover's propulsion and stabilization. Dedicated expeditions to platinum-rich asteroid fields, often far from your main base, are non-negotiable.
- Uranium (Reactor Fuel): Powering such a massive grid requires immense energy. Uranium will be consumed at an alarming rate by your numerous large reactors. Secure a steady, robust supply.
- Ice (Hydrogen Fuel): For atmospheric or emergency hydrogen thrusters, and certainly for the sheer power output if you choose a hydrogen-heavy design, vast quantities of ice are needed. Establish ice mining operations on moons or planets and transport it back for H2/O2 generator processing.
To manage this scale of resource acquisition, consider building dedicated, modular mining ships equipped with multiple drills, large cargo containers, and even automated return routes. For refining, multiple large refineries with efficiency modules are a must, ideally linked to a network of large assemblers running at peak production with speed modules. This manufacturing pipeline needs to be able to sustain continuous production of thousands, if not tens of thousands, of components.
Robust Infrastructure Development: The Backbone of Your Operation
Your primary base, or a forward operating base near the Monolith, must be transformed into a logistical and industrial powerhouse.
- Massive Storage Facilities: Build cargo containers – not just large ones, but dozens or even hundreds of them, all interconnected by a large conveyor system. Inventory management will become a mini-game in itself.
- Extensive Power Grid: Your base needs to support maximum production capacity. Multiple large reactors, complemented by extensive solar panel arrays (if on a planet/moon) and banks of batteries, will be necessary. Ensure redundant power sources to prevent outages that halt production.
- Automated Production Lines: Link your refineries directly to your assemblers, and your assemblers to storage. Utilize sorters and programmable blocks to automate the creation of specific components. For example, a dedicated line for steel plates, another for construction components, and a priority line for platinum-based parts.
- Docking and Repair Bays: Large hangars or external docking clamps capable of accommodating your mining fleets and eventually your Monolith mover itself during construction and pre-flight checks. Incorporate automated welders and grinders for efficient repair and modification.
Blueprinting and Planning: Visualizing the Unseen
Attempting to build a Monolith mover without a detailed plan is akin to building a skyscraper without blueprints.
- Projectors: Utilize projector blocks extensively. Design your mover in creative mode first, save it as a blueprint, and then project it in survival. This allows you to visualize the entire structure, identify potential weaknesses, and estimate material costs accurately before committing resources.
- Modular Construction: Break down the mover into manageable sections. Design modular components – thruster pods, reactor arrays, cargo sections – that can be replicated and integrated. This speeds up construction and simplifies troubleshooting.
- Calculations (Mental or Actual): Consider the physics. Estimate the weight of your mover plus the Monolith. Factor in the total thrust required to achieve even minimal acceleration. Space Engineers' physics engine is surprisingly robust, and underestimating these values can lead to a grid that simply won't move, or worse, tears itself apart.
Team Coordination (Multiplayer): Collective Genius
If you're undertaking this task on a multiplayer server, effective team coordination is paramount.
- Role Assignment: Designate roles: chief engineer (overall design and structural integrity), logistics manager (resource gathering and production), pilot (for test flights and the actual transfer), security (if on a PvP server).
- Communication: Consistent communication through in-game chat, voice chat, or external platforms is crucial. Regular updates on resource status, construction progress, and any encountered issues.
- Shared Blueprints: Ensure everyone has access to the latest blueprint iterations and understands the construction plan.
- Safety Protocols: For large-scale construction and movement, establish clear safety protocols to prevent accidental damage, collisions, or friendly fire.
By meticulously executing this preparatory phase, you transform a seemingly impossible dream into an achievable engineering challenge, ensuring you have the materials, infrastructure, and plans necessary to construct a vessel capable of taming the Monolith and bringing it home.
Designing and Constructing the Monolith Mover: The Engineering Marvel
The Monolith mover is not just a ship; it is a specialized, gargantuan construct engineered for a singular purpose: to grip, lift, and propel an unyielding, incredibly massive object across vast distances. This demands a design philosophy centered around immense power, unparalleled structural integrity, and precise control. There's no one-size-fits-all solution, but rather a spectrum of engineering approaches, each with its own advantages and challenges.
The Core Concept: How to Grab a Mountain
The fundamental challenge is physically attaching to and moving the Monolith, which cannot be directly interacted with by standard tools or connectors. The solution lies in building a framework or enclosure around it.
- Encapsulation Frame: The most common approach involves constructing a colossal frame that completely surrounds and engulfs the Monolith. This frame will be an independent grid that, once completed around the Monolith, will use merge blocks or strategically placed landing gear/magnetic plates to form a single, unified grid with your propulsion system.
- "Gripper" Arms: For Monoliths found in open space, a less enclosing but still robust option might involve massive, reinforced arms that extend from your main propulsion block and clamp onto specific, non-colliding sections of the Monolith. This requires careful alignment and extremely powerful attachment mechanisms.
- "Carrying Platform": If the Monolith is somehow situated in a way that allows for it, a massive platform could be built underneath it, slowly lifting it. This is less common due to the Monolith's typical deep-space location.
Crucially, once the Monolith is within your frame, you must secure it. This is often achieved by strategically placing blocks (e.g., heavy armor blocks) to perfectly hug the Monolith's contours, ensuring no significant gaps exist that could lead to independent movement or collision damage during acceleration. Pistons and rotors can be used with extreme caution to "snugly" fit these blocks, but always be mindful of Space Engineers' "Clang" physics engine, which can be unpredictable with complex moving parts under stress. Merge blocks, when used to fuse sections of your mover around the Monolith, create a truly unified grid, but this requires extreme precision in placement and construction.
Structural Integrity: The Unbreakable Embrace
The forces exerted on a structure moving an object of the Monolith's mass are immense. Your mover must withstand these stresses without tearing itself apart.
- Heavy Armor: Every external and structural component of your mover should be constructed from heavy armor blocks. While more expensive and heavier, their superior damage resistance and structural integrity are non-negotiable.
- Internal Bracing and Reinforcement: The internal framework supporting your thrusters, reactors, and the Monolith itself must be robust. Use diagonal bracing, cross-beams, and multiple layers of armor. Think of it like a bridge – every force needs to be distributed and absorbed effectively.
- Redundant Connections: Avoid single points of failure. If a crucial section of your ship is connected by only a few blocks, those blocks become critical stress points. Distribute connections across a wider area and use multiple pathways.
- Stress Testing (Creative Mode): Before committing to survival construction, stress-test your blueprint in creative mode. Spawn it, attach an equivalent mass, and try to accelerate it violently. Observe where stress fractures appear or where the grid begins to destabilize. This is invaluable feedback for refinement.
Power Generation for Movement: The Heartbeat of the Behemoth
Moving something so heavy demands colossal power. Your power generation system needs to be robust, redundant, and capable of sustaining peak thruster output for extended periods.
- Large Reactors: These are your primary power source. You will need dozens, if not hundreds, of large grid large reactors. Their output is unmatched. Distribute them throughout your mover to avoid a single point of failure and to manage power distribution effectively. Ensure a vast supply of uranium is loaded.
- Hydrogen Thrusters: For raw, unadulterated thrust, hydrogen thrusters are king, especially in gravity-free space. They consume vast amounts of hydrogen but provide incredible acceleration. You will need an extensive network of H2/O2 generators (powered by your reactors) and multiple large hydrogen tanks to feed them. The logistical challenge of keeping these tanks topped up is immense.
- Ion Thrusters (for fine control and long-distance, slow travel): While less powerful than hydrogen thrusters per block, ion thrusters are energy-efficient and rely only on electrical power, not fuel. They are excellent for fine maneuvering, stabilization, and very long, slow interstellar cruises where fuel efficiency is a concern. You'll likely use a combination: hydrogen for initial acceleration and major burns, ions for sustained, precise movement.
- Batteries (Backup and Burst Power): While reactors provide continuous power, batteries can offer burst power for peak thruster demands or serve as emergency backup. Integrate large banks of batteries, constantly recharging, ready to supplement reactors.
Thrust-to-Weight Ratio: The Immutable Law
This is the most critical calculation. Your total forward thrust must exceed the combined mass of your mover and the Monolith by a significant margin to achieve any meaningful acceleration.
- Estimate Mass: In creative mode, construct your blueprint around a Monolith. Use the "Info" tab (K key, Ship Info) to get a rough estimate of the combined mass. While the Monolith's mass isn't displayed, the increase in total mass when it's integrated into your grid will give you a sense of scale.
- Calculate Required Thrust: Remember that acceleration is force divided by mass (F=ma). Even a tiny acceleration (e.g., 0.1 m/s²) over a long period can eventually build up speed. However, for practical movement, aim for something closer to 0.5-1 m/s² acceleration at minimum. Each large hydrogen thruster provides 3.6 MN (MegaNewtons) of thrust, and a large ion thruster provides 0.432 MN. Calculate the total thrust your design provides in each direction.
- Symmetry and Balance: Ensure your thrusters are symmetrically placed around the Monolith's center of mass (or the combined grid's center of mass) to prevent unwanted rotation or torque. Asymmetrical thrust leads to drift and difficulty in control, wasting fuel and power.
- Testing and Refinement: Again, creative mode is your friend. Build a prototype, test its acceleration, braking, and turning. Refine your thruster placement and count until you achieve satisfactory performance.
Control Systems: Command and Conquer
Operating such a massive grid requires sophisticated control and monitoring.
- Multiple Cockpits/Remote Control Blocks: Provide redundant control points. A main cockpit for the pilot, and perhaps auxiliary cockpits for engineers to monitor systems or manage sub-grids. Remote control blocks allow for external control, useful for delicate maneuvers or in emergencies.
- Gyroscopes: You will need an astronomical number of gyroscopes to control the rotation and stability of such a massive object. Place them symmetrically and in large banks.
- Maneuvering Thrusters: While forward/backward thrust is vital, you also need ample thrusters for lateral (strafe) and vertical movement, as well as rotational control. Ensure full 6-directional thruster coverage to maintain precise control.
- Sensors and Cameras: Integrate cameras for external viewing, especially for docking and avoiding collisions. Sensors can warn you of approaching objects.
- Programmable Blocks (Optional but Recommended): For advanced players, programmable blocks can automate many tasks: power management, thruster overrides, emergency procedures, or even rudimentary autopilot systems for long-distance travel. Scripts can monitor hydrogen levels, reactor output, and alert you to critical conditions.
Attachment Mechanisms: The Unseen Clamps
The method by which the mover rigidly attaches to the Monolith is critical for transferring force.
- Merge Blocks: If you can build your frame in sections and then merge them around the Monolith, this creates a single, rigid grid, transferring all propulsion forces directly. This is the most robust method but requires extreme precision. You'll need multiple merge blocks connecting sections of your mover, ensuring the Monolith is perfectly enclosed.
- Landing Gear/Magnetic Plates: If using a less rigid frame or carrying platform, heavy-duty landing gear or magnetic plates (from mods or specific DLCs) can be used to clamp down onto surrounding parts of the Monolith. However, rely on these with caution; their grip can sometimes be insufficient for truly massive grids or high accelerations. The risk of the Monolith breaking free is too high. Therefore, a solid, encompassing frame is almost always preferred.
Building the Monolith mover is an engineering challenge on an epic scale. It demands forethought, meticulous design, and an understanding of Space Engineers' physics. But with a robust frame, overwhelming power, and precise control, your creation will transform from a mere collection of blocks into a magnificent machine capable of bending the very laws of spatial engineering to your will.
The Gravity Drive Method: Advanced Propulsion for the Truly Ambitious
For players seeking the pinnacle of engineering efficiency and power in Space Engineers, the Gravity Drive offers a compelling, albeit more complex, alternative or supplement to conventional thruster-based propulsion. While a pure thruster array can certainly move a Monolith, a well-designed Gravity Drive can achieve immense accelerations with significantly less energy consumption and without the constant fuel requirements of hydrogen thrusters, making it a highly attractive option for such a colossal endeavor.
Principles of Gravity Drives: Harnessing Artificial Gravity
A Gravity Drive exploits a peculiar interaction within Space Engineers' physics engine: artificial mass blocks, when placed within the field of a gravity generator, are drawn towards that generator. By rapidly activating and deactivating multiple gravity generators and artificial mass blocks in specific sequences, it's possible to create a powerful, directional "push" or "pull" that propels the entire grid.
- Artificial Mass Blocks: These are key components. Unlike other blocks, they possess an artificial mass that is affected by gravity generators, regardless of the grid's actual mass. Crucially, they do not add to the real physical mass of your grid in terms of inertia for thrusters, but they do interact with gravity fields.
- Gravity Generators: These blocks create spherical or box-shaped gravity fields. When artificial mass blocks are within this field, they experience a force pulling them towards the center of the gravity generator.
- Piston/Rotor Mechanism (Common Design): Many Gravity Drives use pistons or rotors to rapidly move artificial mass blocks into and out of the field of stationary gravity generators, or to move gravity generators around stationary artificial mass blocks. The rapid engagement and disengagement of the gravitational force create the thrust.
- Timer Blocks/Programmable Blocks: Precise timing is essential. Timer blocks are used to activate and deactivate gravity generators and pistons/rotors in sequence. For more complex and efficient drives, programmable blocks with custom scripts are often employed to manage the timing and optimization of the gravitational pulses.
Design Considerations for a Monolith Mover Gravity Drive
Integrating a Gravity Drive into a Monolith mover requires careful thought due to the sheer scale of the combined grid.
- Mass Block Placement: The artificial mass blocks should be spread throughout your mover, ideally near its center of mass, to ensure the gravitational forces are applied evenly and do not induce unwanted rotations or structural stresses. You will need a significant number of artificial mass blocks to effectively move the Monolith's real mass.
- Gravity Generator Array: Instead of one or two, you'll need an array of many gravity generators. These should be strategically placed to create a powerful, concentrated field that can interact with all your artificial mass blocks. Often, they are arranged in a "gravity tunnel" or "gravity well" configuration.
- Piston/Rotor Stability: If using a piston or rotor-based Gravity Drive, extreme care must be taken to ensure these sub-grids are incredibly stable and reinforced. Large numbers of moving parts on a massive grid can lead to "Clang" incidents – sudden, violent physics interactions that can destroy your ship. Use multiple pistons/rotors for redundancy and stability, and ensure they are well-braced.
- Power Requirements (Electrical): While Gravity Drives don't consume hydrogen, they require a substantial amount of electrical power for the gravity generators and any associated pistons/rotors. Your reactor array must be capable of sustaining this. Compared to thousands of hydrogen thrusters, however, the power draw can be significantly less for equivalent thrust.
- Safety and Redundancy: Gravity Drives, especially homemade ones, can be temperamental. Design with redundancy. If one section fails, others should still be able to operate. Include emergency thrusters as a backup.
Building a Safe and Powerful Gravity Drive
The key to a successful Gravity Drive is not just raw power but also stability and predictability.
- Modular Design: Build the Gravity Drive in modular sections that can be tested independently before integrating them into the main mover. This simplifies troubleshooting.
- Reinforcement: All components of the Gravity Drive, especially the sections holding the artificial mass blocks and gravity generators, must be heavily reinforced with heavy armor.
- Isolated Sub-grids: If using pistons or rotors, try to isolate the Gravity Drive components onto their own sub-grids to minimize the risk of "Clang" affecting the entire Monolith mover. Connect these sub-grids securely but also allow for some structural give if possible.
- Step-by-Step Activation: Do not activate the entire Gravity Drive at full power immediately. Start with a few generators, then gradually increase the power and cycle speed, observing the grid's behavior carefully.
- Understanding the "Push" vs. "Pull": Gravity generators pull objects towards them. Therefore, to push your ship forward, your Gravity Drive needs to be positioned behind your ship, pulling mass blocks that are effectively "pushing" your ship from the front. Or, more commonly, the design involves generating a gravity field in front of the ship and rapidly disabling it, causing the inertia to propel the ship forward. The specifics vary widely between designs.
Integration with the Monolith Mover: The Ultimate Powerhouse
Once you have a robust Monolith mover frame, integrating a Gravity Drive transforms it into an unstoppable force.
- Central Placement: The Gravity Drive components should be placed centrally within your Monolith mover, ideally around the Monolith itself, to ensure balanced thrust distribution.
- Conveyor System: Ensure the Gravity Drive's power requirements are met by connecting it to your main reactor array via robust large conveyor tubes.
- Control Panel Integration: All Gravity Drive components (generators, pistons, timers) should be accessible from your main control panel. Group them for easy activation and deactivation.
- Testing with Monolith: The ultimate test is when the Gravity Drive is integrated with the complete Monolith mover and the Monolith itself. The combined mass will drastically alter performance. Be prepared to tweak and optimize.
The Gravity Drive is a testament to the ingenuity of Space Engineers players. While it introduces a layer of complexity, its potential for silent, powerful, and fuel-efficient propulsion makes it an unparalleled choice for moving the game's heaviest objects. Mastering this advanced technique will not only enable you to transfer your Monolith with unprecedented speed but also elevate your engineering prowess to a truly legendary status within the game.
Transferring the Monolith: The Grand Voyage
With the Monolith mover meticulously designed and constructed, the moment of truth arrives: the actual transfer. This phase requires extreme caution, constant vigilance, and unwavering focus. The journey will likely be slow, deliberate, and potentially fraught with unforeseen challenges.
Pre-Flight Checks: Every Detail Matters
Before you even think about engaging thrusters, a comprehensive pre-flight checklist is absolutely vital. This isn't just good practice; it's the difference between a successful transfer and a spectacular, costly failure.
- Structural Integrity: Conduct a thorough visual inspection of your entire Monolith mover. Look for any damaged blocks, unattached sections, or potential weak points that might have been overlooked during construction or sustained minor damage from local environmental hazards (small meteoroids, tool accidents). Use the repair function (grinder in weld mode) to fix anything immediately. Ensure all merge blocks are properly merged, and any custom attachment mechanisms are securely locked.
- Power Systems: Verify all reactors are operational and loaded with sufficient uranium. Check that all batteries are fully charged and properly connected to the power grid. Confirm that the H2/O2 generators are running and hydrogen tanks are topped off if you're using hydrogen thrusters. Monitor the "Current Output" and "Max Output" in your info tab to ensure your power generation can meet your maximum thruster demand.
- Fuel Levels: If relying on hydrogen thrusters, meticulously check all hydrogen tanks. Calculate your estimated fuel consumption for the planned journey and ensure you have a significant surplus. Remember, long journeys will consume an enormous amount of hydrogen. Consider having auxiliary tanks or even a small, dedicated hydrogen resupply vessel on standby.
- Thruster Functionality: Individually test groups of thrusters in each direction. Ensure they all fire correctly and that there are no blocked thruster nozzles (e.g., a random block accidentally placed in the exhaust path). Check the "Thrust" section in your info tab for total thrust in each direction.
- Control Systems: Verify all gyroscopes are powered and responsive. Test the main cockpit controls, remote control blocks, and any programmable block scripts you've implemented for propulsion or stabilization. Perform a quick maneuverability check (a small, gentle rotation or translation) if possible, before engaging for the main transfer.
- Clearance and Environment: Double-check that there are no immediate obstacles in your path – stray asteroids, debris, or parts of your construction base that might impede initial movement. If in an asteroid field, carefully map out your initial exit path.
Activating and Monitoring: The First Tremors of Movement
The initial moments of movement are the most critical. This is where you'll discover if your calculations and engineering stand up to the reality of Space Engineers' physics.
- Gentle Engagement: Do not go full throttle immediately. Start by gently engaging your forward thrusters at a very low power setting, or if using a Gravity Drive, activate it at its lowest possible setting. Observe the grid's response. Is it moving smoothly? Is it drifting? Is there any unexpected rotation or vibration?
- Continuous Monitoring: Keep the "Ship Info" (K key) screen open and monitor key parameters:
- Speed and Acceleration: Confirm you are gaining speed, even if slowly.
- Power Consumption/Output: Ensure your reactors can keep up with demand. Watch for power dips or overloads.
- Hydrogen Levels: If using H2 thrusters, monitor the consumption rate.
- Structural Integrity (Visual and Debug): Pay close attention to any visual cues of stress – vibrating blocks, grinding sounds (though these can be misleading). For advanced troubleshooting, experienced players might use debugging tools or external mods that show block integrity.
- Slow and Steady: Unless absolutely necessary, maintain a slow, controlled acceleration. Rapid changes in velocity place immense stress on the grid and increase the risk of "Clang" events or structural failure. Incremental increases in speed are safer.
- Thruster Damage: Be acutely aware of thruster damage. If your thrusters are placed too close to other blocks, their exhaust flames can damage or destroy adjacent components. Verify that all thrusters have clear, unobstructed exhaust paths. This is especially important for hydrogen thrusters, which have a larger damage radius.
Navigating Space: A Marathon, Not a Sprint
The journey through space will be long and will demand patience and navigational precision.
- Trajectory Planning: Plot your course to your "System Start" well in advance. Consider the shortest route, but also factor in any known asteroid fields, potential gravitational wells (planets/moons), or areas of high player traffic (on multiplayer servers).
- Autopilot (if available): If you've implemented a programmable block autopilot script, activate it and monitor its performance. Even with autopilot, be prepared to take manual control at a moment's notice.
- Manual Course Corrections: For purely manual control, align your Monolith mover with your target using remote control or the main cockpit view. Make small, precise thrust adjustments to stay on course. This is where good gyroscope count and balanced thruster placement truly shine.
- Collision Avoidance: Constantly scan your surroundings for asteroids, debris, or other player-built structures. Even a minor collision with an object at high speed can be catastrophic for such a massive, rigid grid. Use cameras and sensors if equipped.
Dealing with Obstacles and Emergencies: Expect the Unexpected
No journey of this magnitude is entirely without incident. Prepare for the worst.
- Asteroids: The most common obstacle. If a direct collision is imminent and unavoidable with maneuvering, attempt to orient your strongest armor towards the impact point. Sometimes, it's better to slow down to minimize damage.
- Player Interference (PvP Servers): If on a PvP server, your Monolith mover is a prime target. Develop defensive strategies:
- Escort Ships: Small, agile fighters or heavily armed frigates can provide protection.
- Decoy Systems: Use decoy blocks to draw incoming fire away from critical components.
- Point Defense: Incorporate Gatling turrets or missile turrets (if available) for automated defense against smaller threats.
- Evasive Maneuvers (Limited): Due to the mover's size, high-speed evasive maneuvers are likely impossible. Focus on tanking damage or disengaging.
- Power Loss: If reactors fail or fuel runs out, immediately switch to battery power (if available) and assess the situation. If power is completely lost, your grid will drift. You'll need to send a rescue team with repairs or fuel.
- Structural Failure: If you hear grinding sounds or see parts of your ship break off, immediately cut all thrusters. Diagnose the failure point. It might require extensive repairs in deep space.
- Grid Drift/Loss of Control: If your gyroscopes are destroyed or power fails, you may lose control and begin to drift. Use emergency thrusters, remote control blocks, or attempt repairs.
By meticulously planning, executing with patience, and being prepared for any eventuality, you will slowly but surely guide your Monolith mover, with its precious cargo, through the vast emptiness of space towards its final destination, marking an unparalleled achievement in your Space Engineers career.
APIPark is a high-performance AI gateway that allows you to securely access the most comprehensive LLM APIs globally on the APIPark platform, including OpenAI, Anthropic, Mistral, Llama2, Google Gemini, and more.Try APIPark now! 👇👇👇
Reaching the "System Start": The Triumphant Arrival
The long, arduous journey through space culminates in the arrival at your designated "System Start." This final phase is as critical as the departure, requiring precision, careful maneuvering, and thoughtful integration to transform the Monolith from a mobile trophy into a foundational element of your new base. The sense of accomplishment upon successful integration is truly immense, marking the successful completion of an epic engineering saga.
Defining "System Start": More Than Just a Destination
The term "System Start" in this context is flexible, representing your ultimate goal for the Monolith. It could be:
- A Primary Planetary Base: Integrating the Monolith into a sprawling base on an Earth-like planet, an alien planet, or even a moon. This often involves lowering it through an atmosphere, which adds significant complexity.
- An Orbital Hub Station: Anchoring the Monolith to a massive space station in orbit around a celestial body. This provides a central, secure location for interstellar operations.
- A Deep Space Fortress: Positioning the Monolith as the centerpiece of a formidable fortress far from any planets, potentially in a strategic asteroid field.
- A Central Research Facility: Dedicating the Monolith to scientific study, utilizing its unique properties for power generation (if relevant to your lore) or as a data storage hub.
Whatever your chosen "System Start," its characteristics – gravity, atmosphere, proximity to other structures, and security needs – will dictate your final approach and integration strategy.
Docking and Integration: The Delicate Dance
Maneuvering your colossal Monolith mover into its final resting place is a delicate operation that demands extreme precision and patience. This is not a task for the impatient.
- Approach Vector: Plan your approach meticulously. If you are arriving at a planetary base, your trajectory will be influenced by gravity and potentially atmospheric drag. For orbital stations or deep-space fortresses, aim for a slow, stable approach that minimizes the need for drastic last-minute corrections.
- Deceleration and Braking: Begin decelerating your Monolith mover well in advance of your target. Your braking thrusters (or reverse gravity drive pulses) must be just as powerful as your forward thrust to bring such a massive object to a controlled halt. Aim for a snail's pace as you near the final docking area.
- Fine Positioning: Switch to external cameras (if available) or use third-person view for precise alignment. Utilize small, controlled bursts from your maneuvering thrusters (lateral, vertical, rotational) to align the Monolith mover exactly where it needs to be. This stage can take a considerable amount of time, with micro-adjustments being made over minutes or even hours.
- Securing the Monolith Mover: Once positioned, the first step is to secure your entire Monolith mover grid to your "System Start." Use multiple heavy-duty landing gear, magnetic plates, or merge blocks to create a robust, immovable connection. Ensure these connections are distributed to spread the load. If integrating into a planetary base, consider foundation anchors.
- Detaching the Monolith: This is the critical moment. If your mover encapsulated the Monolith using merge blocks, you will need to grind down or delete the merge blocks connecting the frame around the Monolith. If you used custom clamps or structural interlocking, these will need to be carefully removed. The goal is to separate the Monolith from the mover, allowing the mover to then be deconstructed or repurposed.
- Final Monolith Placement: Once separated, the Monolith will revert to its static, unmovable state. Ensure it is precisely where you want it. If it’s not, you may need to use a smaller, temporary pusher grid or carefully rebuild sections of your mover to nudge it into the perfect spot before finally releasing it.
- Deconstruction/Repurposing of the Mover: With the Monolith secured, your giant mover is now redundant. You can begin the process of grinding it down for its valuable components, or if it was designed with modularity in mind, repurpose sections (e.g., reactor arrays, thruster pods) for other large-scale projects. This provides a significant return on your initial investment.
Post-Transfer Operations: Activating the New Landmark
The Monolith's arrival is only the beginning of its new life within your empire. Several crucial post-transfer operations ensure its proper integration and protection.
- Re-establishing Power (if applicable): If you intend to connect the Monolith to your base's power grid (perhaps for aesthetic lighting, or if you plan to access its internal components), run conveyor lines and power cables. Ensure the base's power grid can handle any additional load.
- Integrating into the Base: Incorporate the Monolith into your base's design. Build structures around it, connect it with walkways, or make it the centerpiece of a grand plaza. This transforms it from a raw object into a functional or aesthetic part of your base.
- Protection and Security: The Monolith is a valuable asset, especially on a multiplayer server. Consider building defensive turrets, shields (if using mods), or even reinforced bunkers around it. On a PvP server, its presence will likely draw attention.
- Accessibility and Functionality: If the Monolith contains valuable components, ensure you have easy, secure access for grinding. You might set up automated grinding systems to periodically extract resources.
- Celebration: After such an epic undertaking, take a moment to appreciate your achievement. The Monolith's journey is a testament to your engineering prowess and perseverance, a story to be told and retold in the annals of your Space Engineers adventures.
The triumphant arrival of the Monolith at your "System Start" is more than just moving a large object; it is a declaration of mastery over the game's mechanics, a monument to your ambition, and a tangible representation of your dedication to pushing the boundaries of what's possible in Space Engineers.
Optimization and Best Practices: Refining Your Engineering Prowess
Successfully moving a Monolith is not just about raw power; it's about smart engineering, efficiency, and anticipating challenges. Incorporating optimization strategies and adhering to best practices can significantly reduce frustration, save time, and prevent costly errors, particularly for such a massive undertaking.
Sim Speed: The Silent Assassin of Large Grids
Space Engineers' physics engine, while robust, can be heavily taxed by exceptionally large and complex grids. "Sim Speed," or simulation speed, refers to how quickly the game's physics calculations are processed. A lower Sim Speed (anything below 1.0, where 1.0 is real-time) indicates that the game is struggling, leading to choppy gameplay, delayed controls, and potential physics glitches (the dreaded "Clang").
- Minimize Block Count: Every block adds to the simulation load. While heavy armor is necessary, avoid excessive decorative blocks or unnecessary internal structures that don't contribute to structural integrity or functionality.
- Reduce Sub-grids: Pistons and rotors create sub-grids, which are computationally expensive, especially when numerous or under stress. Limit their use, especially on the primary Monolith mover, to essential components like a Gravity Drive. If using them, ensure they are stable and well-braced.
- Optimize Conveyor Systems: While a vast conveyor network is crucial for resource management, ensure it's efficient. Avoid overly complex or redundant routing.
- Consider Server Performance (Multiplayer): On a dedicated server, a massive Monolith mover can significantly impact the server's overall performance, affecting all players. Coordinate with server administrators or your team to minimize its impact during construction and transit.
- Performance-Friendly Designs: Prioritize simplicity and efficiency in your design. A monolithic block of heavy armor is more performance-friendly than a complex, highly articulated structure of equivalent strength.
Modding Considerations: Enhancing or Hindering?
The vibrant modding community for Space Engineers offers a plethora of tools that can both simplify and complicate the Monolith transfer.
- Helper Mods:
- "Build & Repair" Mods: Automated welders and grinders can significantly speed up construction and repair of large grids.
- "Ship Grinder/Welder" Mods: Allow for more efficient material processing of your mover after the transfer.
- "Large Advanced Thrusters" / "High-Power Reactors": These mods can provide much higher thrust-to-weight ratios or power output, drastically reducing the number of blocks needed for propulsion/power, thereby improving Sim Speed.
- "Gravity Generator Boost" / "Artificial Mass Boost": Mods that enhance the effectiveness of Gravity Drives can make this method even more viable.
- Information/Utility Mods:
- "HUD Components" / "Detailed Info Screens": Provide more comprehensive data on power, thrust, mass, and other critical statistics, aiding in real-time monitoring.
- "Block Damage Display": Helps identify damaged blocks quickly for repair.
- Caution with Over-Modding: While helpful, be cautious. Too many mods, especially those that add complex scripts or physics interactions, can themselves introduce instability, lower Sim Speed, or cause conflicts. Test all mods thoroughly in a creative game before integrating them into your survival save.
- Server Compatibility: On multiplayer servers, all players must have the same mods. Ensure your chosen mods are stable and approved by server admins.
Saving and Backups: Your Digital Lifeline
For a project of this scale, losing progress due to a crash, physics glitch, or an unforeseen disaster is devastating. Regular saving and creating backups are non-negotiable.
- Frequent Manual Saves: Don't rely solely on auto-saves. Manually save your game frequently, especially after significant progress in construction or before a critical maneuver.
- Named Saves: Use descriptive names for your saves (e.g., "MonolithMover_BuildStage1," "MonolithTransfer_PreDeparture," "MonolithDocking_Attempt1"). This allows you to roll back to a specific point if something goes wrong.
- Off-Site Backups: For critical saves, copy your save game folder (usually located in
C:\Users\[Your Username]\AppData\Roaming\SpaceEngineers\Saves) to an external drive or cloud storage. This protects against hard drive failure or corrupted game files. - Dedicated Server Backups: If playing on a dedicated server, ensure the server administrator has a robust backup schedule.
Collaboration Tools: The Power of Teamwork
Even in single-player, organizing your thoughts and plans is crucial. In multiplayer, effective collaboration tools are essential.
- In-Game Communication: Use in-game chat for quick updates.
- Voice Chat: For real-time coordination, especially during complex maneuvers, voice chat (Discord, Teamspeak) is invaluable.
- External Planning Documents: Use shared documents (Google Docs, Trello, Notion) for detailed planning, resource lists, blueprint iterations, and role assignments. This keeps everyone on the same page and provides a persistent record.
- Shared Blueprints: Ensure all team members have access to the latest blueprints for construction.
- APIPark (A broader perspective on system management): While not directly used within Space Engineers gameplay for Monolith transfer, the underlying principles of managing complex systems, data flows, and coordinated efforts are strikingly similar to the challenges faced in real-world large-scale projects. For instance, in enterprise environments or even for highly sophisticated game development and server management beyond the individual player, effective API and gateway management becomes paramount. A platform like APIPark, an open-source AI gateway and API management platform, excels at orchestrating the integration of diverse AI models, standardizing API invocation formats, and providing end-to-end API lifecycle management. Such systems, in a different context, allow for seamless integration of services, efficient resource allocation, and robust monitoring—qualities that, in an abstract sense, reflect the meticulous planning and system integration required for a successful Monolith transfer, albeit on a grander, real-world data management scale. While not a game mechanic, understanding how real-world complex systems utilize MCP (Model Context Protocol, for example, in AI integration) or general API structures provides a fascinating meta-perspective on problem-solving, much like how a game developer might design the intricate interactions that govern a Space Engineers server.
By embracing these optimization strategies and best practices, you elevate your Monolith transfer from a mere struggle against physics into a masterclass of engineering, making the impossible not just possible, but smoothly and efficiently achievable.
Advanced Concepts and Future Implications: Beyond the Transfer
The successful transfer of a Monolith marks an extraordinary achievement, but it also opens doors to contemplating the broader implications of such colossal engineering feats and the underlying principles of complex system management, both within and beyond the game.
Pushing the Boundaries of Scale in Space Engineers
Moving a Monolith is a testament to what's possible within Space Engineers' physics engine, but it also highlights the inherent challenges of extreme scale.
- Sim Speed Limitations: As grids grow, so do the computational demands. This often forces players to make compromises between realistic design and game performance. Future game updates or even community-developed performance mods continue to seek ways to mitigate these limitations, allowing for even grander constructions.
- Logistical Challenges: The sheer volume of resources required for a Monolith mover pushes the limits of in-game logistics. This often leads to players developing highly automated mining fleets, vast interconnected refinery and assembler arrays, and complex inventory management systems. It's a game within a game, focused on industrial efficiency.
- "Clang" Mitigation: The infamous "Clang" (the unintentional physics deity of Space Engineers) becomes a much greater threat with large, complex, and high-stress grids. Learning to design "Clang-proof" structures and understanding the game's physics quirks is an advanced skill honed by such ambitious projects. This involves meticulous attention to sub-grid connections, avoiding unnecessary points of stress, and often resorting to simpler, more rigid designs.
The Real-World Parallel: Orchestrating Complex Systems
While Space Engineers provides a simulated environment for engineering, the challenges of managing immense complexity, coordinating vast resources, and ensuring seamless operation resonate deeply with real-world technological endeavors. Imagine, for a moment, the infrastructure required to manage a massive multiplayer game like Space Engineers itself, or to deploy cutting-edge AI services across a global network. These real-world systems face analogous challenges, albeit with different components and consequences.
- APIs and Gateways: The Backbone of Digital Interoperability: In the real world, just as you design robust connections and control systems for your Monolith mover, digital systems rely on APIs (Application Programming Interfaces) and gateways for communication and management. APIs define how different software components interact, allowing diverse applications to "talk" to each other seamlessly. Gateways, on the other hand, act as traffic cops and security checkpoints for these interactions, managing requests, enforcing policies, and ensuring efficient data flow between services.
- The Role of APIPark: Consider a product like APIPark, an open-source AI gateway and API management platform. It's designed for enterprises and developers who need to manage, integrate, and deploy AI and REST services with ease. Its capabilities include:
- Quick Integration of 100+ AI Models: Similar to how a Space Engineers player integrates various thruster types or power sources, APIPark unifies the management of diverse AI models.
- Unified API Format: Just as you standardize your construction components, APIPark standardizes data formats for AI invocation, ensuring compatibility across different models.
- Prompt Encapsulation: Like blueprinting a complex sub-system, APIPark allows users to quickly combine AI models with custom prompts to create new, specialized APIs (e.g., a "sentiment analysis API").
- End-to-End API Lifecycle Management: This mirrors the entire process of designing, building, deploying, and eventually decommissioning your Monolith mover. APIPark helps manage the entire lifecycle of APIs, from design to publication, invocation, and retirement, ensuring processes are regulated and traffic is managed.
- Performance and Monitoring: APIPark offers performance rivaling Nginx and provides detailed API call logging and powerful data analysis tools. This is akin to the meticulous monitoring of power output, thruster performance, and structural integrity during your Monolith transfer – ensuring everything runs smoothly and identifying issues proactively.
- Model Context Protocol (MCP) in AI Management: In the advanced realm of AI integration, a MCP (which can stand for various "Model Context Protocols" or "Management Control Protocols" depending on the specific AI framework) might define how different AI models maintain context, share information, or coordinate actions. For example, if you were developing an AI system that managed various aspects of a Space Engineers server – perhaps optimizing asteroid spawns, balancing player economies, or coordinating NPC factions – such a protocol would be crucial for the AI's internal communication and decision-making processes. It's about ensuring consistency and intelligent interaction across complex, distributed components, much like ensuring every part of your Monolith mover works in concert.
The journey of transferring a Monolith is more than just a game challenge; it's a profound lesson in systems engineering, resource management, and problem-solving at scale. It's a reminder that whether in the digital cosmos of Space Engineers or the intricate networks of the real world, the principles of meticulous planning, robust construction, and intelligent orchestration are universal keys to success. The satisfaction of seeing your Monolith gracefully docked at its "System Start" is not just a gaming achievement, but a practical demonstration of your ability to tackle truly formidable engineering puzzles.
Conclusion: A Monument to Ingenuity
The journey to transfer a Monolith in Space Engineers is not for the faint of heart. It is an odyssey that demands patience, an unyielding spirit, and a profound understanding of the game's intricate mechanics. From the initial glimmer of ambition upon discovering a Monolith, through the exhaustive phases of resource acquisition and infrastructure development, to the meticulous design and construction of an colossal mover, and finally, the nail-biting, deliberate voyage across the stars, every step is a test of your engineering prowess.
The successful integration of the Monolith into your "System Start" – be it a towering planetary fortress, a bustling orbital hub, or a secluded deep-space haven – is more than just a completion of a task. It is the crowning achievement of a true Space Engineer, a visible testament to your ability to tame the void, command the forces of physics, and transform an impossible dream into an awe-inspiring reality. This monumental feat not only provides a powerful, enduring symbol within your game world but also imparts invaluable lessons in large-scale project management, logistical optimization, and the art of problem-solving under extreme constraints.
Beyond the immediate thrill of gameplay, the undertaking echoes the complexities of real-world system management, where concepts like robust API management and secure gateway solutions, as exemplified by platforms like APIPark, are crucial for orchestrating intricate digital environments. Just as you meticulously align thrusters and power reactors for your Monolith mover, professionals leverage such tools to ensure seamless data flow and efficient service integration in their own grand endeavors. So, power up your reactors, calibrate your gyroscopes, and prepare for an adventure unlike any other. The Monolith awaits its new home, and you, the master engineer, are the only one capable of bringing it there. The cosmos itself bears witness to your ingenuity.
Comparative Table: Propulsion Methods for Large Grids
| Feature | Hydrogen Thrusters | Ion Thrusters | Gravity Drive (Advanced) |
|---|---|---|---|
| Thrust Output | Extremely high, best for raw acceleration. | Moderate, good for sustained, precise movement. | Potentially immense, highly scalable. |
| Power Source | Hydrogen fuel (from Ice via H2/O2 generators). | Electrical power (from reactors/solar/batteries). | Electrical power (for gravity generators/mass blocks/pistons). |
| Fuel/Energy Cost | High hydrogen consumption, constant resupply needed. | Low electrical consumption. | Moderate-high electrical consumption for generators, no physical fuel. |
| Environmental Impact | Requires atmosphere for full efficiency (some designs), but strong in vacuum. Can damage adjacent blocks. | Works best in vacuum, less effective in atmosphere. | No environmental interaction, purely internal physics manipulation. |
| Complexity | Relatively simple to build and operate. | Simple to build and operate. | Very high, requires precise timing, sub-grids, and careful design. |
| Sim Speed Impact | Moderate-high due to numerous thrusters. | Moderate due to numerous thrusters. | Can be high due to pistons/rotors, but power-efficient thrust can reduce total block count. |
| Safety Risks | High thruster damage radius, fuel storage explosion risk. | Low. | High risk of "Clang" (physics glitches) if poorly designed. |
| Best Use Case | Rapid acceleration, atmospheric flight (with atmospheric thrusters), short bursts of high power. | Long-distance, fuel-efficient travel, fine maneuvering, primary deep space propulsion. | Achieving extreme speeds for massive grids, fuel independence (once powered), overcoming immense mass challenges. |
FAQ
Q1: How much time should I allocate for a Monolith transfer project? A1: A Monolith transfer is a massive undertaking. From initial resource gathering to final docking, it can easily take anywhere from 50 to 200+ hours of dedicated gameplay, depending on your experience, the scale of your operation, whether you're playing solo or with a team, and if you're using mods. Rushing it will only lead to costly mistakes. Patience and meticulous planning are your greatest assets.
Q2: Is it possible to move a Monolith in an atmosphere, or is it strictly a space-only operation? A2: While Monoliths are usually found in deep space, it is technically possible to bring one into an atmosphere, but this adds extreme complexity. You would need an absolutely colossal amount of atmospheric thrusters to counteract gravity and atmospheric drag, in addition to your space-faring propulsion. The sheer weight would likely mean needing a mover that is primarily atmospheric thrusters, or a combination of them and hydrogen thrusters for extra lift. Such an endeavor would vastly increase resource costs, power demands, and the risk of structural failure due to atmospheric forces. Most players opt for orbital or deep-space integration.
Q3: What are the biggest risks I should prepare for during the transfer? A3: The primary risks are structural failure due to the immense stress on your mover, power loss (leading to loss of propulsion and control), and collisions with asteroids or other grids. On PvP servers, player intervention is a significant threat. To mitigate these, build with heavy armor and redundancy, ensure robust power generation and fuel supply, constantly monitor your surroundings, and implement defensive measures if necessary. Also, "Clang" (physics glitches) is always a risk with very large, complex grids.
Q4: Can I use a single-grid ship to push/pull the Monolith, or do I need to integrate it? A4: While some small, lighter objects can be pushed or pulled by a separate grid (like an industrial tugboat), for a Monolith, direct integration is almost always necessary. The Monolith's mass is too great for a simple push/pull to be effective or stable over long distances without constant, precise maneuvering and immense thruster output. By enclosing or firmly attaching the Monolith to your mover, you create a single, unified grid, allowing the mover's propulsion to act directly and efficiently on the combined mass, ensuring stability and control.
Q5: After moving the Monolith, what can I actually do with it? Is it just a trophy? A5: Primarily, the Monolith serves as an immense trophy and a symbol of your engineering prowess. It's a focal point for your base, a testament to your accomplishments. However, beyond aesthetics: * Resource Source: Many Monoliths contain valuable internal components or rare ores that can be ground out, providing a continuous (though finite) source of high-tier materials. * Lore/Roleplaying: It can become the central hub of your faction, a research facility, or a powerful relic in your server's lore. * Strategic Landmark: On multiplayer servers, it can become a highly visible and defensible landmark, drawing attention and potentially acting as a strategic objective. While it doesn't have direct interactive functions like a refinery, its sheer presence and resource potential make it far more than just a static decoration.
🚀You can securely and efficiently call the OpenAI API on APIPark in just two steps:
Step 1: Deploy the APIPark AI gateway in 5 minutes.
APIPark is developed based on Golang, offering strong product performance and low development and maintenance costs. You can deploy APIPark with a single command line.
curl -sSO https://download.apipark.com/install/quick-start.sh; bash quick-start.sh

In my experience, you can see the successful deployment interface within 5 to 10 minutes. Then, you can log in to APIPark using your account.

Step 2: Call the OpenAI API.