Space Engineers: How to Transfer Monolith to System Start Guide
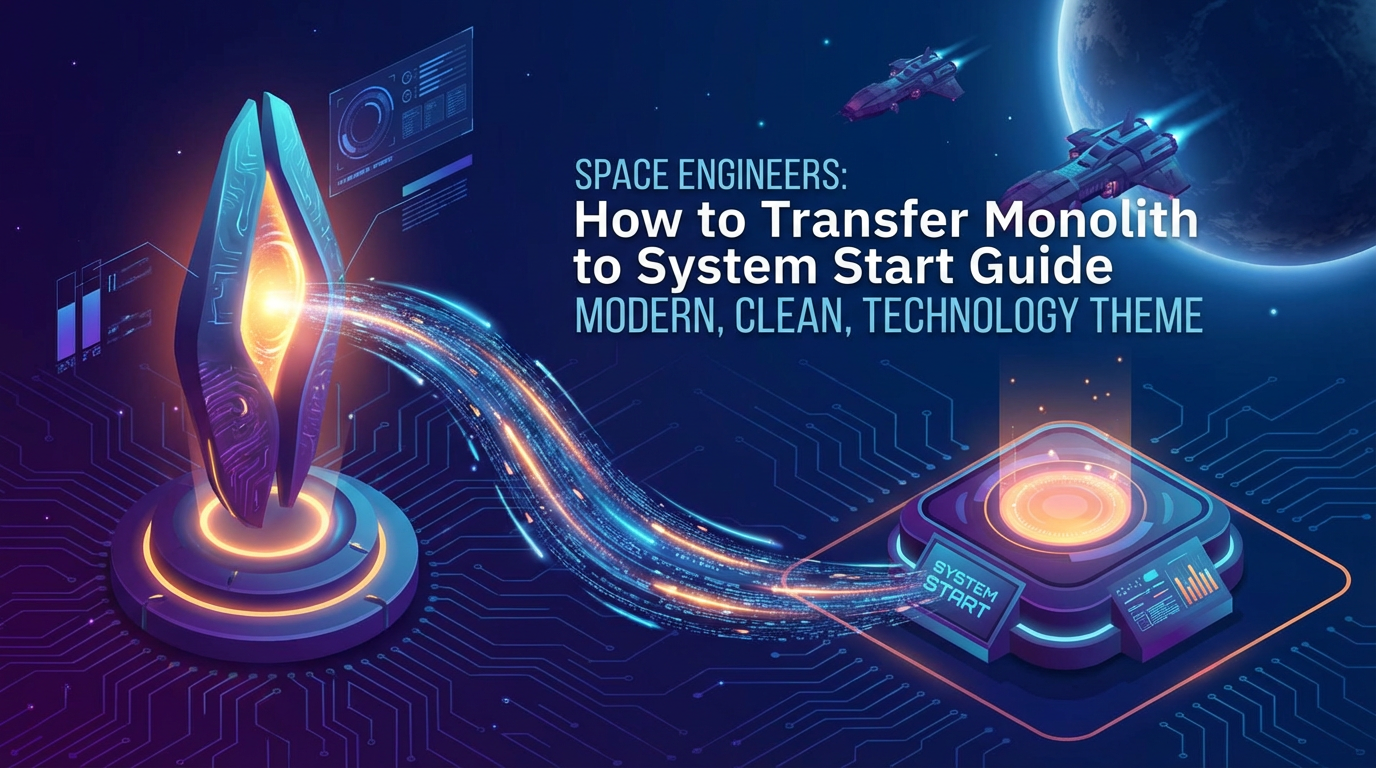


Space Engineers, a sandbox game of construction and survival in space and on planets, consistently challenges players with its intricate physics, vast array of blocks, and the sheer scale of engineering possibilities. Among the myriad projects players undertake, few inspire as much awe and require as much meticulous planning as the relocation of an "immovable" object. This guide delves deep into one such monumental task: the transfer of a Monolith to your system start, transforming it from a static landmark into a cornerstone of your burgeoning empire. This isn't merely about moving blocks; it's about mastering game mechanics, understanding structural integrity, and orchestrating a symphony of engineering prowess to achieve what initially seems impossible.
The Monolith, for many Space Engineers players, is more than just a large, enigmatic structure; it's a beacon, a mystery, and a unique challenge. Unlike typical asteroids or static structures that can be mined or ground down, the Monolith often presents itself as an unyielding fixture of the game world, seemingly defiant to the laws of conventional manipulation. Its presence can be a constant reminder of the alien wonders that pepper the game's universe, or, more practically, an inconvenient obstacle if it spawns too close to a desirable build site. However, for the ambitious engineer, the Monolith represents an unparalleled opportunity: to integrate a piece of the world's inherent mystery directly into their operational base, making it a central feature, a formidable defense, or merely an impressive trophy of their engineering capabilities. This guide aims to demystify the process, providing a granular, step-by-step approach to not just moving, but integrating this colossal relic into your base, right from your system's initial startup. We will cover everything from the initial reconnaissance and resource acquisition to the intricate design of a colossal transport system and the delicate execution of its transfer, ensuring every detail is addressed for both survival and creative mode players.
The task of "transferring" a Monolith is, in itself, a testament to the player's understanding of Space Engineers' core mechanics. Since the Monolith itself cannot be directly mined, dismantled, or attached to in a conventional sense as a separate entity to be pushed or pulled, the true art lies in building a movable structure around and incorporating the Monolith. This means essentially turning the Monolith into a fixed component of a much larger, player-constructed grid. It becomes the heart of a new, colossal vehicle or stationary base, requiring an immense investment in resources, time, and intellectual ingenuity. The process is less about physical displacement and more about clever grid manipulation, structural reinforcement, and brute-force propulsion. Whether you envision it as the unyielding core of an orbital fortress, a majestic center for a planetary base, or simply a monument moved for aesthetic reasons, the journey to transfer the Monolith is a defining project that pushes the boundaries of your engineering skills. Precision, meticulous planning, and a deep understanding of weight distribution, thrust mechanics, and power generation are not just recommended but absolutely critical for success.
Understanding the Monolith: Its Nature and Implications
Before embarking on such a monumental undertaking, it is crucial to fully grasp what the Monolith is within the context of Space Engineers. Often appearing as large, dark, geometrically perfect structures, Monoliths typically serve as distinctive landmarks, adding an element of alien mystery to the otherwise procedurally generated landscapes of planets or asteroid fields. They are not minable, nor can they be damaged or destroyed by conventional means, making them essentially indestructible, static entities. This immutability is the core challenge. You cannot simply attach a tow cable or push it with a few thrusters. Instead, you must accept its permanence and build a mobile platform around it, making it an integrated part of your transport grid.
Physical Characteristics and Grid Interaction: The Monolith usually exists as part of the "static grid" of the planet or asteroid field it spawns on. This means it is fixed, unmoving, and has infinite mass from a gameplay perspective when not attached to a player-built grid. The key to moving it is to merge it with a player-constructed grid. When a player constructs a block adjacent to or directly overlapping a static Monolith (or any static object that allows block placement, like certain terrain voxels), the game's grid system intelligently merges the static object into the player's grid. This effectively gives the Monolith the properties of the player's grid – it gains a defined mass (derived from its volume), becomes subject to physics, and can then be moved. This transformation is pivotal. Once merged, the Monolith's inherent properties (like its dark texture, specific shape, and indestructibility) are retained, but its physical behavior is dictated by the grid it has joined. It becomes, in essence, a giant, indestructible, and exceptionally heavy block within your new structure. The sheer volume and density implied by its size mean that even after merging, it contributes an enormous amount of mass, which directly translates to the immense thrust or torque required to move it.
Distinction Between Creative and Survival Mode: The approach to transferring a Monolith varies significantly depending on your game mode.
- Creative Mode: In Creative Mode, resources are infinite, and grinding/welding is instant. This drastically simplifies the construction phase. You can instantly spawn any block, fabricate massive structures without gathering a single ore, and test designs with unparalleled freedom. The primary challenge in Creative Mode shifts from resource management to design and physics mastery. You can experiment with different transport vessel designs, structural reinforcements, and propulsion systems without the burden of material acquisition. This makes Creative an ideal sandbox for prototyping your Monolith transfer solution before attempting it in a more demanding environment. Debugging physics glitches, optimizing thruster placement, and refining control systems become the main focus, allowing for rapid iteration and refinement of your ultimate design. The ability to copy and paste large sections of your design, or even the entire Monolith-transport assembly, further accelerates the process, enabling grander scales of engineering.
- Survival Mode: Survival Mode elevates the Monolith transfer to an epic endgame challenge. Every single block, every component, every unit of power must be meticulously gathered, refined, and assembled. This requires an established industrial infrastructure: automated miners, efficient refineries, high-throughput assemblers, and a robust power grid. The resource cost for a Monolith-carrying vessel or ground system will be astronomical, demanding vast quantities of steel plates, motors, construction components, computer components, and especially thruster components if you opt for an airborne solution. The risk of failure is also significantly higher; a catastrophic structural collapse due to insufficient reinforcement, an accidental collision, or running out of fuel mid-flight can mean the loss of hundreds of hours of work and immense resource investment. Therefore, meticulous planning, resource forecasting, and contingency plans are absolutely paramount in Survival Mode. Every welding torch, every grinder, and every single block placement becomes a calculated decision, heavily weighted against the risk of loss and the sheer effort involved in recovery. The journey to gather resources alone can be an epic saga, involving establishing outposts, exploring distant asteroid fields, and fending off hostile NPC encounters.
Regardless of the mode, the fundamental principle remains: the Monolith must be encapsulated and integrated into a new, player-controlled grid. Its sheer mass will then dictate the engineering requirements, pushing your understanding of Space Engineers' physics engine and your capacity for large-scale construction to their absolute limits. The successful transfer of a Monolith is not just a triumph of engineering; it's a statement of mastery over the game's most daunting challenges, a true testament to the spirit of a Space Engineer.
Phase 1: Pre-Transfer Planning and Preparation
The success of a Monolith transfer hinges less on brute force and more on meticulous planning and comprehensive preparation. This initial phase lays the groundwork for the entire operation, minimizing unforeseen complications and optimizing resource expenditure, especially crucial in Survival Mode. Skipping or rushing through these steps almost guarantees frustration, if not outright failure.
Strategic Location Assessment: Why, Where, and How
The first question an engineer must ask is: Why transfer the Monolith? Is it for aesthetic integration into a new base design, to utilize its unique properties as a defensive core, or simply to clear a prime building site? Understanding your objective will inform the scale and nature of your transport solution. If it's merely a short-distance relocation to an adjacent flat area, a simpler ground-based system might suffice. If it's an interplanetary transfer, a massive, self-sufficient spaceborne carrier is required.
Next, Where is the Monolith currently, and where will it go? * Current Location Analysis: * Terrain: Is the Monolith embedded in a mountain, sitting on a flat plain, or partially submerged? The surrounding terrain dictates the initial approach. Removing significant voxels around the Monolith (if it's embedded) will be the first step, requiring extensive drilling operations. In survival, this means a large mining vehicle or even establishing a temporary mining outpost. The amount of rock or soil that needs to be cleared can be staggering, influencing your time estimates and fuel consumption. * Gravity: Is it on a planet with high gravity, low gravity, or in space? Planetary gravity significantly impacts thrust requirements for airborne solutions and adds complexity to ground vehicle stability. High-gravity environments demand exponentially more thrusters for lifting and maintaining altitude, drastically increasing component and fuel costs. * Obstructions: Are there mountains, other asteroids, or existing structures between the Monolith and its destination? Any obstacles will either need to be cleared, or your transport path will need to be navigated around them. Clearing obstructions, especially large ones, can be a monumental task in itself, potentially involving multiple large mining vessels or even controlled demolition with explosives (if you're feeling adventurous and confident in your game saving habits).
- Target Location Selection:
- Proximity to Resources: For a system start, placing the Monolith near essential ore deposits (iron, nickel, silicon, cobalt, uranium, platinum) ensures your future base has convenient access to raw materials for expansion and repairs. Consider not just the surface deposits, but also potential underground veins that could be accessed via drilling operations from your new base.
- Flatness and Stability: A level, stable surface is ideal for landing a massive Monolith-carrying vessel or for constructing a stationary base around it. Preparing the target site might involve extensive terraforming – leveling terrain with grids, filling depressions, or even creating a large, reinforced concrete pad using multiple layers of heavy armor blocks. This structural foundation must be able to withstand the immense weight of the Monolith.
- Future Expansion: Consider your long-term plans. Will your base grow into a sprawling industrial complex, a massive ship manufacturing hub, or a defensive fortress? Position the Monolith in a way that allows for logical expansion without becoming an obstruction later. Think about clear flight paths for ships, accessible ground vehicle routes, and optimal placement for solar arrays or defensive turrets.
- Aesthetic Integration: If the Monolith is intended to be a centerpiece, ensure its placement allows for impressive visual integration. Maybe it sits in the middle of a grand plaza, or its apex breaks through the roof of your main command center. Visual planning can be done with temporary placeholders in creative mode.
Resource Gathering (Survival Mode Focus): The Industrial Backbone
In Survival Mode, resource acquisition is the bedrock of any major engineering feat. The Monolith transfer will demand an unprecedented amount of materials.
- Basic Ores:
- Iron (Fe): The most common and versatile, vital for Steel Plates (structural integrity), Interior Plates, Construction Components, and Motors. You'll need tens of thousands of these, if not hundreds of thousands, depending on the scale of your transport.
- Nickel (Ni): Crucial for Grid Motors (used in motors and thruster components), Computer, Display, and Power Cell components.
- Silicon (Si): Essential for Computer, Detector, and Solar Cell components.
- Cobalt (Co): Key for Thrust Components and Heavy Armor Blocks. High-thrust solutions will consume vast quantities of cobalt.
- Rare Earths and Specialized Ores:
- Uranium (U): The lifeblood of Nuclear Reactors, providing immense power for large grids. A Monolith transport vessel will likely require multiple reactors or a very large uranium reserve for extended operation.
- Platinum (Pt): Critical for Ion Thrusters and Gravity Generators. If you plan to move the Monolith in space or use ion propulsion on a planet, platinum is indispensable and often difficult to find.
- Gold (Au): Used in Gravity Generators, Medical Components, and Superconductors (essential for powerful Thruster Components).
- Magnesium (Mg): For explosive components and ammunition, if your design incorporates defensive elements or if you need to clear terrain with explosives.
- Component Manufacturing: Your assemblers will be running non-stop. Prioritize automating the production of:
- Steel Plates: The most basic and numerous component for structural blocks.
- Construction Components: For almost all blocks.
- Motors: For hinges, rotors, pistons, and wheels.
- Computer Components: For cockpits, control panels, programmable blocks, sensors, timers.
- Thruster Components: The most expensive and vital for any airborne solution. You will likely need thousands of these for a truly colossal carrier.
- Power Cells: For batteries.
- Girder Components: For light, strong support structures.
- Large Grid Conveys and Tubes: For power and resource flow.
- Heavy Armor Blocks: For reinforcement and durability.
Establishing an Industrial Base: To gather and process these resources efficiently, you'll need: * Automated Mining Operations: Large drill ships or static drills connected to refineries. Consider establishing a deep-core mining operation for a continuous supply. * High-Throughput Refineries: Multiple fully upgraded refineries are essential to process raw ore into ingots quickly. Efficiency modules are a must. * Multiple Assemblers: Stacked with speed and efficiency modules to churn out components at an accelerated rate. You might need 10+ assemblers working concurrently to keep up with demand. * Massive Storage: Ample cargo containers (both small and large) to store raw ore, ingots, and finished components. A well-organized inventory system using sorters and conveyors is critical. * Robust Power Generation: A reliable and abundant power source (multiple nuclear reactors, extensive solar arrays with batteries, or hydrogen engine farms) to fuel your industrial complex and the transport vessel itself.
Tooling and Infrastructure: Equipping Your Engineers
- Grinders and Welders: You'll need many of these. Consider building large, ship-mounted grinders and welders for rapid construction and deconstruction. These can significantly speed up the initial excavation around the Monolith and the final assembly of your transport. Automated welding ships or drones can also be immensely helpful.
- Assemblers and Refineries: As mentioned, these are your manufacturing backbone. Ensure they are fully upgraded and connected to a robust conveyor system.
- Storage Systems: A well-designed inventory and conveyor network to move components from assemblers to the construction site and to the transport vessel.
- Temporary Power Grids: When working at the Monolith's location, you might need temporary power (batteries, small reactors, or even a basic solar setup) to power grinders, welders, and possibly temporary lights for night operations.
- Utility Vehicles: Small utility ships for reconnaissance, shuttling components, and personnel transport. A small grid rover for ground scouting can also be useful.
- Blueprint Projectors: Invaluable for precisely planning and building large structures. Projecting your transport vessel's design allows for exact placement and welding, minimizing errors.
- Backup Saves: Frequently save your game, especially before critical steps. Space Engineers is known for unexpected physics interactions, and a well-timed save can save hours of recovery work.
Blueprint Considerations: Designing for Efficiency
Whether in Creative or Survival, blueprints are your best friend. * Modular Design: Break down your transport vessel into manageable modules (e.g., propulsion module, control module, Monolith clamping module). Design these in Creative Mode, save them as blueprints, and then project and weld them in your survival game. * Testing Prototypes: Use Creative Mode to build and test miniature versions of your clamping mechanisms, structural supports, and propulsion systems. This allows you to identify design flaws and optimize performance without significant resource loss. * Pre-Fabrication: In Survival, pre-fabricate large quantities of common components (thrusters, gyros, reactors, armor blocks) and have them ready in storage containers near the construction site. This reduces travel time and speeds up the final assembly. * Monolith-Specific Blueprints: Consider designing a framework that perfectly encases the Monolith. This framework can be blueprinted, ensuring a snug and secure fit when welded to the Monolith's grid. The tighter the fit, the less potential for grid instability.
This phase, while seemingly mundane, is the most critical. It's where the abstract idea of moving a Monolith transforms into a concrete engineering project, with detailed plans, resource estimates, and logistical considerations. A well-prepared engineer is a successful engineer.
Phase 2: Designing the Monolith Transfer System
With planning complete and resources accumulating, the next monumental step is designing the actual system that will incorporate and move the Monolith. This is where your engineering ingenuity truly shines. The core concept, as previously established, is not to move the Monolith itself, but to build a massive, player-controlled grid around it, making the Monolith an integral, unyielding component of that new grid. Its sheer mass, once integrated, will be the primary design constraint, dictating the scale and power of your chosen transport method.
Core Concept: Encapsulation and Movement
The Monolith, when part of the static world grid, has infinite mass and is fixed. When you build player-controlled blocks (any standard block like light armor, heavy armor, etc.) directly adjacent to or partially overlapping a static Monolith, the game’s engine registers these blocks as connected to the Monolith. This action effectively merges the Monolith from the static world grid into your dynamic, player-controlled grid. Once merged, the Monolith acquires a finite, albeit enormous, mass, and becomes subject to physics. It's like taking a colossal, immovable boulder and welding it seamlessly into the very structure of a giant truck. The boulder is now part of the truck, and if the truck moves, the boulder moves with it. This merging process is the fundamental trick. The rest is about designing a vehicle strong enough and powerful enough to move that "truck" with its monumental cargo.
Choosing a Transfer Method: Tailoring to Your Environment
The choice of transfer method heavily depends on the Monolith's location (planet surface, deep space, high/low gravity), your resource availability, and your personal preference for engineering challenges.
Method A: Air/Spaceborne Carrier (Large Grid Ship)
This is perhaps the most iconic and challenging method: lifting the Monolith into the air or space. It demands immense power and structural integrity but offers unparalleled flexibility in traversing diverse terrains and vast distances.
- Design Philosophy:
- Stability: A wide, distributed base for thrusters and gyroscopes is essential to prevent uncontrollable spinning or tipping under the Monolith's immense, often uneven, weight. Think of a broad, flat platform rather than a tall, narrow tower.
- Thrust-to-Weight Ratio: This is paramount. You need significantly more upward thrust than the total mass of your ship plus the merged Monolith, especially in planetary gravity. Aim for at least 1.5-2.0 times the total gravitational force for comfortable lift-off and maneuverability.
- Structural Integrity: The forces involved in lifting and accelerating such a mass are immense. The connection points between your carrier and the Monolith, and indeed the entire structure of the carrier, must be heavily reinforced.
- Key Components:
- Heavy Armor: Used extensively for the core structure, especially around the Monolith's integration points. Its higher HP and mass contribute to durability.
- Thrusters:
- Hydrogen Thrusters: Absolutely indispensable for planetary lift-off and high-thrust maneuvers due to their raw power. They require a substantial supply of hydrogen (from H2/O2 Generators or ice mining). Distribute them evenly and extensively on all six axes for omni-directional control.
- Ion Thrusters: Ideal for space operations due to their efficiency and lack of fuel requirements (beyond electricity). Less powerful than hydrogen in atmosphere, but crucial for fine control and sustained movement in vacuum.
- Atmospheric Thrusters: Excellent for efficient horizontal and vertical movement within a planetary atmosphere, but useless in space. Combine with hydrogen or ion for versatility.
- Redundancy: Build redundant thruster arrays. Losing a few thrusters shouldn't cripple your entire operation.
- Gyroscope Arrays: A large number of gyroscopes are needed to control the rotation and orientation of such a massive grid. Distribute them strategically throughout the carrier for optimal torque. More gyros mean faster and more precise turning.
- Powerful Reactors/Batteries:
- Nuclear Reactors: The most potent power source for large grids, providing continuous, high-output power for thrusters, gyros, and internal systems. You'll need multiple reactors and a large supply of Uranium Ingots.
- Batteries: Essential for buffering power spikes, providing emergency power, and supplementing reactors. A large bank of batteries allows for burst thrust and provides reserve power during transitions or low-reactor situations.
- Solar Panels (for space/low-gravity planets): Can provide passive charging for batteries, reducing reliance on uranium. Less effective for high-power demands.
- Grabbing Mechanism (for initial merge/final placement):
- Merge Blocks: The primary method for joining grids. You will typically build your carrier structure with open faces or retractable arms, and then use merge blocks to seamlessly connect to a framework built around the Monolith. Once merged, the Monolith becomes part of the carrier grid.
- Piston/Rotor Clamps: Can be used to push the carrier structure precisely against the Monolith's framework for merging, or to add additional structural bracing once merged.
- Control Systems:
- Cockpit/Flight Seat: For direct pilot control.
- Remote Control Blocks: Allow for external control, useful for delicate maneuvers or if the pilot seat is not in an ideal viewing position.
- Sensor Arrays: For collision detection and proximity warnings, especially during landing or navigating tight spaces.
- Programmable Blocks/Timer Blocks: For automating complex sequences (e.g., thruster overrides for fine adjustments, timed merge block activation).
- Advantages:
- Unrestricted travel path (assuming enough thrust).
- Ability to move Monolith to orbital or deep space locations.
- Impressive display of engineering might.
- Disadvantages:
- Extremely resource-intensive (especially hydrogen and platinum).
- High risk of catastrophic failure due to physics interactions (wobbly grids, sudden unplanned rotations).
- Requires continuous monitoring of power and fuel.
Method B: Ground-Based Rail/Wheel System (Large Grid Rover/Train)
If the Monolith is on a planet and you only need to move it across the surface, a ground-based system can be a robust, albeit slower, alternative. It leverages the planet's surface for support, reducing the need for massive vertical thrust.
- Design Philosophy:
- Stability and Torque: Focus on a wide wheelbase, powerful suspension, and sufficient motors to overcome terrain resistance and the Monolith's inertia.
- Heavy Chassis: The entire frame must be incredibly strong to withstand the immense static load and dynamic stresses of movement.
- Path Planning: This method is highly dependent on a carefully prepared path, either a temporary rail system or a heavily terraformed route.
- Key Components:
- Large Grid Wheels: Many large wheels, optimally placed for stability and traction. Consider dual wheels or tri-axle configurations for load distribution.
- Suspension: Adjustable suspension is crucial for absorbing terrain impacts and maintaining an even ride. Fine-tuning the suspension stiffness and strength is key.
- Powerful Motors: Either directly from wheel power or via a system of pistons/rotors for pushing/pulling if a train-like setup is used. Hydrogen engines or multiple reactors for abundant power generation for the motors.
- Heavy Chassis and Reinforced Structure: Built from heavy armor blocks and structural components to handle the immense weight and internal stresses.
- Merge Blocks/Piston Clamps: Similar to the airborne carrier, these are used to integrate the Monolith into the rover's grid and provide additional bracing.
- Control Systems: Cockpit, remote control, and potentially programmable blocks for advanced steering or automated path following (if using scripts like Path Auto Miner (PAM) or similar, adapted for trains/rovers).
- Track Laying/Path Preparation:
- Terraforming: The most labor-intensive part. You'll need to flatten vast swathes of terrain, fill in valleys, and remove mountains along your chosen route. This requires extensive mining operations and potentially creative use of explosives.
- Temporary Rail System: Constructing a temporary rail of light or heavy armor blocks can provide a perfectly flat, low-friction path for your wheeled system. This is extremely block-intensive but ensures smooth travel. The rails themselves can be built in segments and ground down after the Monolith passes.
- Advantages:
- Less reliant on continuous, high-output power for vertical thrust.
- More stable against physics glitches if built correctly.
- Can potentially carry even heavier loads due to ground support.
- Disadvantages:
- Extremely slow movement.
- Requires massive terraforming or rail construction, which is labor-intensive.
- Limited to planetary surface.
- Difficult to navigate steep inclines or complex terrain.
Method C: Static Enclosure and Base Relocation (Less "Transfer," More "Integration")
This method is less about physically "transferring" the Monolith in a conventional sense and more about building your entire base around it, making the Monolith a central, immovable (or minimally movable) feature. It's often used when the Monolith is already in a desirable location but needs to be incorporated into a new, larger structure.
- Design Philosophy: The Monolith becomes the unyielding core of your base. You build your refineries, assemblers, power generation, and living quarters directly connected to it, or in very close proximity. If any "relocation" occurs, it's typically minor adjustments or building detachable modules that can later be reattached to the Monolith's core structure.
- Advantages:
- Minimizes the most complex engineering challenges of moving immense mass.
- Integrates the Monolith organically into your base from the start.
- Ideal for creating truly unique base designs where the Monolith is a focal point.
- Disadvantages:
- Limited flexibility; you are bound by the Monolith's initial spawn location.
- Doesn't satisfy the "transfer" challenge directly.
Detailed Design Elements (Applicable to All Methods)
Regardless of the primary transfer method, several universal design principles apply:
- Structural Integrity and Load Distribution:
- Heavy Armor: Use heavy armor blocks for critical stress points, load-bearing frames, and any area prone to collision. While more expensive and heavier, its superior durability is invaluable.
- Girder Blocks: For lighter, yet strong, structural supports where full armor isn't needed, but strength is.
- Internal Bracing: Don't just rely on outer skin. Use internal skeletal structures, cross-bracing, and redundant connection points, especially where your transport connects to the Monolith.
- Load Balancing: Distribute weight as evenly as possible. If the Monolith is irregularly shaped when merged, ensure your thrusters/wheels and structural supports are balanced around its center of mass. Use the game's center of mass indicator (often visible in control panel) extensively.
- Power Systems: The Lifeblood of Your Operation:
- Redundancy: Multiple power sources (reactors, batteries, hydrogen engines) are critical. If one fails, others can pick up the slack.
- Efficient Distribution: A well-designed conveyer system ensures power reaches all components (thrusters, gyros, grinders, welders). Large conveyer junctions and tubes are essential for high-throughput power and resource transfer.
- Fuel Management: For hydrogen thrusters, ensure massive hydrogen tanks and multiple H2/O2 generators. Plan for refueling stops or incorporate ice miners/refineries directly into your carrier design if long distances are involved.
- Battery Management: Batteries should be set to "Recharge" when idle and "Auto" or "Discharge" during movement to provide burst power.
- Control and Automation:
- Programmable Blocks: For advanced control scripts. Examples include:
- Automatic LCDs 2: For displaying vital statistics (power, fuel, mass, thrust, structural integrity).
- PAM (Path Auto Miner) or Auto Pilot Scripts: Can be adapted for automated pathfinding for ground vehicles, or for maintaining a specific altitude/course for air vehicles.
- Thruster Overload/Balance Scripts: To fine-tune individual thruster outputs for precise maneuvering or to compensate for asymmetric thrust.
- Sensor Arrays: Strategically placed sensors can detect obstacles, trigger warnings, or even initiate automated braking sequences.
- Timer Blocks: For sequencing operations, such as activating merge blocks, extending landing gear, or initiating thruster groups in stages.
- Programmable Blocks: For advanced control scripts. Examples include:
- Safety Features:
- Emergency Power: Dedicated small reactors or batteries for critical systems in case of main power failure.
- Backup Controls: Redundant cockpits or remote control access points.
- Structural Redundancy: Multiple points of connection between major structural components.
- Warning Lights/Alarms: To indicate low fuel, low power, structural stress, or collision warnings.
- Ejector Seats/Escape Pods: For the pilot's safety in case of catastrophic failure.
Designing the Monolith transfer system is an iterative process. Expect to make adjustments, discover unforeseen challenges, and refine your design. Prototyping in Creative Mode is highly recommended to save time and resources. The immense scale of the project demands not just raw engineering skill, but also patience, foresight, and a willingness to learn from inevitable setbacks.
Phase 3: Execution - The Monolith Transfer
With your colossal transport system meticulously designed and constructed, the moment of truth arrives: initiating the transfer. This phase demands extreme caution, precision, and adherence to established protocols. Even the smallest oversight can lead to catastrophic failure, turning your engineering marvel into a pile of mangled components.
Pre-Flight/Pre-Move Checklist: The Final Safeguards
Before you attempt to move anything, conduct a thorough checklist. This is your last line of defense against preventable disasters.
- Power System Check:
- Reactors: Are all nuclear reactors fully loaded with uranium? Are they online and producing maximum power? Check their output in the control panel.
- Batteries: Are all batteries fully charged? Are they set to "Auto" or "Discharge" mode to provide supplementary power?
- Hydrogen Tanks: Are all hydrogen tanks full? Are H2/O2 Generators connected and functioning (if needed)?
- Power Distribution: Verify that all thrusters, gyroscopes, and control systems are receiving adequate power. Use the control panel to check individual block power states.
- Structural Integrity Check:
- Welding Completeness: Ensure every single block of your transport vessel and the structure connecting it to the Monolith is 100% welded. Use a handheld grinder's alt-mode (outline view) or a ship-mounted camera to visually inspect. A single unwelded block can cause unexpected grid instability or detachment.
- Damage Assessment: Are there any blocks that have taken damage during construction or testing? Repair them completely. Even slightly damaged blocks are weak points.
- Connection Points: Pay special attention to the merge blocks or piston/rotor clamps. Ensure they are fully welded and securely connecting the Monolith's grid to your transport grid. Verify in the control panel that the grids are indeed merged.
- Thruster/Wheel Functionality:
- Thrusters: For airborne carriers, test all thrusters individually or in small groups. Do they fire correctly? Is their output consistent? Check for block damage on thrusters. Engage overrides for a brief moment to ensure they respond.
- Wheels: For ground systems, test wheel functionality: steering, braking, and forward/reverse motion. Check suspension settings – are they appropriate for the expected load? Are the motors providing enough torque?
- Gyroscopes/Suspension Calibration:
- Gyroscopes: Ensure all gyroscopes are online. Check their power consumption. You can briefly enable "Override" in creative mode to test their responsiveness, but be cautious in survival.
- Suspension: For wheeled vehicles, fine-tune the suspension strength, damping, and height offset. A correctly calibrated suspension can significantly improve stability and control.
- Fuel/Battery Levels: Reconfirm sufficient fuel for hydrogen thrusters and sufficient charge for batteries. Calculate your estimated travel time and ensure you have reserves.
- Clearance of Obstructions: Double-check your intended flight path or ground route. Are there any last-minute obstacles (rogue rocks, forgotten construction debris, unexpected terrain features) that could impede movement or cause a collision? Clear them meticulously.
- Save Game! This is perhaps the most critical step. Create a new, dedicated save file immediately before starting the transfer. This "point of no return" save ensures that if anything goes disastrously wrong, you can revert to a stable state without losing hours of construction work. Name it clearly, e.g., "Monolith_Transfer_Pre_Move."
Securing the Monolith: The Point of No Return
This is the moment the Monolith becomes part of your creation.
- Encasement: If not already done, fully encase the Monolith within your transport structure. This isn't just for aesthetics; it provides maximum surface area for connection and structural bracing. Use heavy armor blocks to form a tight shell around the Monolith.
- Building Direct Connections: The most reliable method is to build blocks of your transport grid directly onto the Monolith's surface. As soon as a player-owned block touches the Monolith, it should merge into your grid. Confirm this in the control panel: your grid's mass should instantly increase by a staggering amount, indicating the Monolith's mass has been incorporated.
- Merge Blocks (if used for external connection): If your design uses merge blocks to link the Monolith's framework to your main carrier, ensure they are perfectly aligned. Activate them, and once merged, verify the grid connection. Once merged, the Monolith is no longer an independent entity but a fixed part of your vessel.
- Additional Bracing: After the primary merge, add extra layers of heavy armor, interior plates, and girders to further secure the Monolith within its new host. Reinforce any stress points, especially where the Monolith's irregular shape meets your structure. The goal is to make the Monolith and its carrier behave as one solid, indivisible unit.
The Move Itself: Patience and Precision
This is where the rubber meets the road, or the thruster meets the atmosphere.
- Slow and Steady Wins the Race: This cannot be overstressed. Do not attempt rapid acceleration or sharp turns. Incrementally increase thrust. For airborne carriers, slowly lift off the ground, monitoring altimeter and ascent rate. For ground vehicles, gently apply forward motion. Sudden movements are the primary cause of physics anomalies and grid instability.
- Constant Monitoring:
- Power Output/Consumption: Keep a close eye on your power systems. Are reactors producing enough? Are batteries discharging too quickly? Adjust thruster overrides or reduce non-essential power consumption if needed.
- Fuel Levels: For hydrogen thrusters, constantly monitor hydrogen levels. Plan for refueling if the journey is long.
- Grid Integrity: Listen for unusual sounds (grinding, cracking, block damage notifications). Look for visual cues of structural stress (blocks turning red or yellow, sparking). If you detect issues, stop immediately, land/park, and inspect for damage.
- Velocity and Altitude (Airborne): Maintain a controlled ascent and descent rate. Avoid extreme altitudes where atmospheric thrusters lose efficiency. In space, manage your inertia carefully.
- Steering and Terrain (Ground-based): For ground vehicles, steer gently. Anticipate terrain changes. If you encounter an unexpected slope or obstacle, stop and assess the best way to proceed rather than forcing it.
- Center of Mass: Pay attention to how the ship/rover handles. If it's tilting or pulling unexpectedly, it could indicate an imbalance or structural stress. Make micro-adjustments to thruster overrides or wheel power to compensate.
- Dealing with Physics Interactions:
- Inertia: A massive grid has immense inertia. It will resist changes in motion. Allow for long braking distances and wide turning radii.
- Gravity: On planets, gravity is your constant adversary. Maintain enough upward thrust. On the moon or low-gravity planets, overshooting can be a problem due to reduced braking effectiveness.
- Grid Instability (Klang): The Space Engineers physics engine, affectionately known as Klang, can be temperamental with large, complex, or heavily loaded grids. If you notice violent shaking, erratic movement, or blocks detaching, immediately stop all movement, disengage thrusters/wheels, and save your game. Then, carefully inspect for issues. Sometimes, simply saving and reloading the game can stabilize a momentarily unstable grid. This is why frequent saves are crucial.
- Adjusting Controls: Use thruster overrides for fine control. For example, if your ship is drifting slightly to one side, apply a small, constant override to the opposing thruster. This is much more precise than attempting to correct with joystick or keyboard inputs alone.
Integration at the New Location: The Final Act
Once you arrive at your designated spot, the final delicate steps involve integrating the Monolith and its carrier into its new home.
- Careful Landing/Parking:
- Airborne: Approach the landing zone slowly and carefully. Use landing gear or designated landing pads. Ensure the ground beneath can support the immense weight without collapsing (especially important on uneven or soft terrain). Engage reverse thrusters early for a controlled descent.
- Ground-based: Park precisely on your designated spot. Engage parking brakes.
- Securing the Monolith:
- If the Monolith is to remain part of a mobile base, engage all landing gear, magnetic plates, or other securing mechanisms.
- If it's to be a stationary core, you might want to build additional static base structures directly onto the Monolith's grid, further cementing its position and integrating it into the local environment.
- Dismantling the Transport Mechanism (Optional):
- If the carrier ship was purely for transport, you can now begin the process of grinding it down. Carefully detach or grind away the parts of the transport vehicle that are no longer needed, salvaging valuable components.
- Be extremely careful not to grind away blocks that are directly part of the Monolith's merged grid unless you intend to disconnect it from the carrier (which is an advanced and risky maneuver).
- Integrating into the New Base:
- Begin constructing your new base around the Monolith. Connect your refineries, assemblers, power systems, and living modules directly to the Monolith-carrier grid.
- The Monolith can now serve its intended purpose: a majestic centerpiece, a formidable defensive core, or a unique architectural element.
The successful transfer of a Monolith is one of the most satisfying achievements in Space Engineers. It's a testament to your patience, engineering skill, and ability to overcome seemingly insurmountable challenges. Revel in your accomplishment, for you have tamed a piece of the cosmos and bent its raw power to your will.
APIPark is a high-performance AI gateway that allows you to securely access the most comprehensive LLM APIs globally on the APIPark platform, including OpenAI, Anthropic, Mistral, Llama2, Google Gemini, and more.Try APIPark now! 👇👇👇
Advanced Strategies and Considerations
Having successfully navigated the basic and intermediate challenges of Monolith transfer, seasoned Space Engineers might seek to push the boundaries further or anticipate more complex scenarios. These advanced strategies and considerations cater to optimizing performance, handling unique game conditions, and recovering from inevitable setbacks.
Multiplayer Implications: Coordination and Conflict
Moving a Monolith in a multiplayer environment adds layers of complexity, requiring not only technical skill but also strong interpersonal skills.
- Coordination is Key: In cooperative servers, this project becomes a team effort. Designating roles (pilot, co-pilot, structural engineer, resource manager, ground support) is crucial. Clear communication channels (voice chat highly recommended) are paramount for synchronized actions, hazard warnings, and emergency procedures. Miscommunications can lead to costly errors, especially when dealing with such a massive, physics-intensive object.
- Server Performance: Large, complex grids, especially those undergoing significant physical interaction, can be taxing on server performance. A Monolith transport vessel with thousands of blocks, hundreds of thrusters, and intricate subgrids might cause server lag (sim speed drops). This can make precise control difficult and even exacerbate physics glitches. Discuss with server administrators if special optimizations (e.g., increased sim speed priority for your grid, temporary object limits) can be made during your transfer operation. Minimize unnecessary subgrids or block complexity where possible.
- Potential Griefing/Hostility: In public or PvP servers, a Monolith transfer can attract unwanted attention. The sight of a massive, slowly moving object represents a tempting target for opportunistic players looking to disrupt or destroy.
- Security Measures: Consider arming your transport vessel with defensive turrets, decoy blocks, and heavy armor. Escort ships with dedicated combat capabilities might be necessary.
- Stealth/Timing: Attempting the transfer during off-peak server hours might reduce visibility.
- Diplomacy: If you are part of a faction, coordinate with allies for protection. On more diplomatic servers, you might even negotiate safe passage.
- Shared Resources: In a shared economy, ensuring exclusive access to the vast quantities of resources needed for the Monolith transfer might require prior negotiation or a dedicated resource-gathering effort that doesn't deplete common supplies.
Modded Gameplays: Expanding Possibilities and Challenges
Mods can profoundly alter the dynamics of a Monolith transfer, either simplifying or complicating the process.
- Larger Blocks/New Thrusters: Mods introducing larger, more powerful thrusters (e.g., capital thrusters), super-heavy armor, or specialized construction blocks can make the engineering requirements more manageable or allow for even grander scales. However, they might also introduce new physics interactions or balance issues that need testing.
- Physics Alterations: Some mods might tweak the game's physics engine, affecting mass calculations, thruster effectiveness, or grid stability. Be aware of how such mods might interact with a massive Monolith grid.
- New Tools/Automation: Mods like "Welders & Grinders Everywhere" or advanced automation scripts can significantly reduce the manual labor involved in construction and even the transfer itself. Scripted auto-pilot mods could be adapted for autonomous ground routes or precise orbital insertions.
- Resource/Economy Mods: Mods that overhaul resource rarity or economic systems could drastically change the resource gathering phase, making certain materials even harder to acquire or introducing entirely new logistics challenges.
Always test your Monolith transfer design in a modded creative save before attempting it in a survival game to ensure compatibility and stability with your chosen mods.
Optimization Tips: Efficiency in Every Block
- Minimizing Block Count for Performance: While it's tempting to build a giant, sprawling carrier, excessive block count (especially unnecessary subgrids) can negatively impact sim speed. Streamline your design, using multi-purpose blocks and efficient layouts. Every block adds to the computational load.
- Using Subgrids Wisely: Pistons, rotors, and hinges create subgrids. While powerful for dynamic structures (like extendable clamps or landing gear), too many subgrids or poorly designed connections can introduce "wobbliness" or lead to Klang-induced instability. Minimize their use in critical structural paths and ensure robust connections. Merge blocks are generally more stable than subgrids for permanent connections.
- Scripting for Automation (e.g., PAM, Thruster Control Scripts):
- PAM (Path Auto Miner): While primarily for mining, PAM scripts can be adapted for automated pathfollowing for ground-based Monolith carriers, allowing for precise, hands-off movement over prepared terrain.
- Thruster Control Scripts: Programmable blocks can host scripts that manage thruster output dynamically, balancing thrust, providing precise braking, or ensuring stable hovering. This can be invaluable for controlling a massive, inertially challenging vessel.
- Power Management Scripts: Automate the balancing of power generation and consumption, prioritizing critical systems and ensuring optimal battery usage.
- Pre-building Modules: Design and build modular sections of your carrier in Creative Mode, then blueprint them. Project these blueprints in Survival Mode for faster, more accurate construction, minimizing errors and speeding up assembly.
Dealing with Failure: The Inevitability of Klang
Space Engineers is a game where things will go wrong, often spectacularly so, due to unexpected physics interactions or simple human error. The true engineer isn't defined by avoiding failure, but by how they recover from it.
- Backups, Backups, Backups: This cannot be stressed enough. Frequent, labeled saves are your lifeline. Before any critical step (merging the Monolith, starting the move, complex maneuvers), create a new save. If disaster strikes, you can revert without losing hours of work.
- Identifying the Cause: When a failure occurs (e.g., a structural collapse, an uncontrolled spin, a crash), pause the game (if possible), and try to understand what happened. Was it:
- Structural Weakness? A block not fully welded, a connection point stressed beyond its limit, or an unbalanced load.
- Physics Glitch (Klang)? Unexplained explosions, spontaneous grid separation, or violent shaking.
- Pilot Error? Too much thrust, sharp turns, misjudgment of terrain.
- Power/Fuel Depletion? Thrusters shutting off mid-flight.
- Recovery Strategies:
- Salvage and Rebuild: If the damage is extensive but not total, salvage what you can. Grind down undamaged components, recover valuable resources, and use your backup save as a reference to rebuild stronger.
- Emergency Landing: If an airborne carrier is failing, attempt an emergency landing. Cut engines, deploy landing gear, and try to guide it to the least damaging impact zone.
- Structural Repair in Situ: If a ground-based system develops issues, stop, stabilize the grid, and immediately begin repairs with handheld or ship-mounted welders.
- Grid Separation: In rare cases, if the Monolith itself somehow separates from your carrier grid (highly unlikely if properly merged but theoretically possible), you might need to re-engage your merging mechanisms or rebuild connections.
- Learning from Mistakes: Every failure is a learning opportunity. Analyze what went wrong, adjust your design, improve your procedures, and try again. The satisfaction of overcoming such a challenge is proportional to the difficulties encountered.
By embracing these advanced strategies, engineers can tackle the Monolith transfer with even greater confidence, efficiency, and a robust plan for both success and recovery. The journey is as much about mastering the game's mechanics as it is about fostering a resilient engineering mindset.
Integrating Real-World Engineering Insights: The Role of Digital Infrastructure
The meticulous planning and precise execution required for a successful Monolith transfer in Space Engineers mirror the complex challenges faced in real-world engineering, particularly in managing sophisticated digital ecosystems. Just as you need a unified system to control numerous thrusters, gyroscopes, and power grids for a monumental task, modern enterprises require robust platforms to manage their growing array of APIs and AI models. The sheer scale and complexity of coordinating countless components in Space Engineers—from resource acquisition and processing to designing and operating a colossal vehicle—highlights the paramount importance of efficient management and reliable infrastructure.
Consider the parallels: in Space Engineers, you're orchestrating the lifecycle of various blocks and systems, ensuring they work together harmoniously to achieve a specific goal. In the real world, developers and operations teams are dealing with an ever-expanding universe of digital services. They need to integrate diverse AI models, manage their APIs across different teams, ensure security, and monitor performance, all while keeping costs in check. The challenge isn't just about building individual components, but about seamlessly connecting them and managing their interactions at scale. For developers and teams navigating this landscape, tools that provide an all-in-one solution for integration, deployment, and lifecycle management are invaluable.
This is where products like APIPark step in. APIPark is an open-source AI gateway and API management platform designed to streamline the management of diverse AI and REST services. Much like a well-designed central control system simplifies the operation of a massive Space Engineers vessel, APIPark provides a unified platform to quickly integrate over 100 AI models, standardize API invocation formats, and encapsulate prompts into reusable REST APIs. It offers end-to-end API lifecycle management, enabling teams to share API services, set independent permissions for different tenants, and ensure resource access requires approval—critical features for maintaining security and control in complex digital infrastructures. With performance rivaling Nginx, detailed call logging, and powerful data analysis capabilities, APIPark empowers enterprises to manage their digital assets with efficiency and foresight, preventing issues before they occur. It provides the kind of robust, managed environment that real-world engineers rely on to tackle their own "monolith" projects, ensuring their digital creations move smoothly and reliably through the complex landscapes of modern technology.
Table: Essential Components Checklist for a Large Grid Monolith Carrier Ship (Airborne)
This table outlines the critical components required for constructing a large grid carrier ship capable of lifting and transporting a Monolith, primarily focusing on an atmospheric/space hybrid design. Quantities are approximate and highly dependent on Monolith size, target destination, and desired performance.
| Component Category | Specific Component | Minimum Recommended Quantity | Primary Purpose | Key Resources (Survival Mode) | Notes |
|---|---|---|---|---|---|
| Structure | Heavy Armor Blocks | 5,000 - 20,000+ | Core structural integrity, Monolith casing, collision resistance | Iron, Cobalt | Use for crucial load-bearing areas and around Monolith. |
| Light Armor Blocks | 2,000 - 10,000+ | General plating, non-critical structural elements | Iron | Lighter, cheaper, but less durable. | |
| Interior Plates | 1,000 - 5,000+ | Internal wiring, small structural sections | Iron | ||
| Construction Components | 5,000 - 20,000+ | Basic building component for almost all blocks | Iron, Silicon | ||
| Girders | 500 - 2,000+ | Lightweight structural support | Iron | Good for internal bracing. | |
| Propulsion | Large Hydrogen Thrusters | 50 - 200+ | Primary lift and high-thrust maneuvers (especially in atmosphere) | Iron, Cobalt, Nickel, Gold | Distribute evenly on all 6 axes. |
| Large Ion Thrusters | 50 - 150+ | Efficient space propulsion, fine control | Iron, Cobalt, Platinum, Gold | Critical for space operations. | |
| Large Atmospheric Thrusters | 50 - 150+ | Efficient atmospheric propulsion | Iron, Cobalt, Nickel | For sustained flight within atmosphere. | |
| Hydrogen Tanks | 10 - 50+ | Fuel storage for Hydrogen Thrusters | Iron | Massive storage needed for long flights. | |
| H2/O2 Generators | 10 - 30+ | Produce hydrogen from ice | Iron, Nickel, Silicon | For refueling or in-flight production. | |
| Control | Gyroscopes | 50 - 200+ | Orientation control, turning, stabilization | Iron, Nickel, Silicon, Gold | More gyros = better maneuverability for heavy grids. |
| Cockpit/Flight Seat | 1 - 2+ | Pilot control interface | Iron, Nickel, Silicon | Redundant cockpits for safety. | |
| Remote Control Block | 1 - 5+ | External control, automated flight via scripts | Iron, Nickel, Silicon | For precise maneuvers or remote operation. | |
| Programmable Blocks | 2 - 5+ | Scripting for automation (e.g., thruster management, power balancing) | Iron, Nickel, Silicon | Requires basic programming knowledge. | |
| Timer Blocks | 5 - 20+ | Sequencing operations | Iron, Nickel, Silicon | For timed events (e.g., landing gear deployment). | |
| Sensor Blocks | 5 - 15+ | Collision detection, proximity warnings | Iron, Nickel, Silicon | Strategically placed. | |
| Power | Large Nuclear Reactors | 5 - 20+ | Primary power generation | Iron, Uranium | Continuous, high-output power. |
| Batteries (Large) | 20 - 100+ | Power buffering, emergency power, burst thrust | Iron, Nickel, Silicon | Essential for stable power delivery. | |
| Uranium Ingots | 1,000 - 5,000+ | Fuel for Nuclear Reactors | Uranium Ore | Significant reserve needed. | |
| Power Cells | 500 - 2,000+ | Component for Batteries | Iron, Nickel, Silicon | ||
| Utility | Large Cargo Containers | 10 - 30+ | Resource storage, component holding | Iron | For components, fuel, emergency supplies. |
| Connectors | 5 - 10+ | Refueling, resupply, docking | Iron | For connecting to bases/refueling stations. | |
| Landing Gear (Large) | 10 - 30+ | Securing the carrier on ground/landing | Iron | For ground operations. | |
| Merge Blocks | 10 - 20+ | Key for merging Monolith grid to carrier | Iron, Silicon, Nickel | Crucial for initial Monolith integration. | |
| Conveyor Junctions/Tubes | 100 - 500+ | Resource and power distribution | Iron, Nickel | Efficient internal logistics. | |
| Grinders/Welders (Ship) | 2 - 4+ | Onboard repair/disassembly | Iron, Nickel, Silicon | For quick repairs or modifications. | |
| Medbay/Survival Kit | 1 | Player healing, respawn point | Iron, Nickel, Silicon, Gold | Essential for crew. |
Conclusion
The endeavor to transfer a Monolith in Space Engineers is far more than a simple exercise in moving an object; it is a profound journey into the heart of the game's engineering possibilities. From the initial spark of an idea to the final, triumphant placement, every stage demands meticulous planning, relentless resource management, innovative design, and unwavering perseverance. This guide has dissected each phase, from understanding the Monolith's unique properties and the critical distinctions between game modes, through the exhaustive pre-transfer planning and the intricate design of colossal transport systems, to the precise and cautious execution of the move itself. We've explored advanced strategies for multiplayer environments, modded gameplays, optimization, and the crucial art of recovery from inevitable failures, known only too well to veteran Space Engineers players.
The successful relocation of a Monolith stands as a testament to a player's mastery of physics, structural integrity, power generation, and the sheer logistical challenges inherent in Space Engineers. It is a project that pushes the boundaries of imagination and skill, forging a deeper understanding of the game's complex mechanics. Just as real-world engineers tackle complex digital ecosystems with robust platforms, such as APIPark for managing APIs and AI, Space Engineers players demonstrate their prowess in managing complex physical systems.
Whether your Monolith now serves as the unyielding core of an orbital fortress, a majestic centerpiece for a planetary base, or simply a monument to your engineering genius, the satisfaction derived from such an achievement is unparalleled. Embrace the challenges, learn from every setback, and innovate relentlessly. For in Space Engineers, the only limits are those of your own imagination and the relentless pursuit of engineering excellence.
5 Frequently Asked Questions (FAQs)
Q1: Can I actually mine or destroy the Monolith in Space Engineers? A1: No, the Monolith in Space Engineers is an indestructible, static object. You cannot mine it, grind it down, or destroy it with weapons. The method for "transferring" it involves building a player-controlled grid directly onto it, effectively merging the Monolith into your new grid, giving it a colossal mass, and then moving your entire structure (with the Monolith as part of it). It maintains its indestructible properties even when merged into your grid.
Q2: How much mass does a Monolith add to my ship/grid? A2: The exact mass depends on the specific Monolith and its default properties when merged, but it is always enormous, often equivalent to tens of thousands or even hundreds of thousands of standard armor blocks. This immense mass is the primary engineering challenge, requiring a disproportionate amount of thrust (for airborne solutions) or torque (for ground-based solutions) and structural reinforcement to move. Always check your grid's mass in the control panel after merging the Monolith to get an accurate figure.
Q3: What's the biggest risk when attempting a Monolith transfer? A3: The biggest risks are physics glitches (often referred to as "Klang"), structural failure, and power/fuel depletion. Physics glitches can cause spontaneous grid explosions, violent shaking, or unexpected movements, especially with massive, complex grids. Structural failure can occur if your carrier isn't robust enough to handle the Monolith's immense weight and inertia. Power or fuel depletion in an airborne carrier will inevitably lead to a crash. Always save frequently and perform thorough pre-move checks.
Q4: Is it easier to move a Monolith on a planet or in space? A4: Both have unique challenges. Moving a Monolith on a planet requires immense upward thrust to counteract gravity and often extensive terraforming for ground-based systems, which is very resource and labor intensive. Moving a Monolith in space (after lifting it from a planet, if applicable) avoids gravity but demands powerful ion thrusters for efficiency and precise control to manage inertia in a frictionless vacuum. Generally, getting it off a planet is the most challenging part, due to the constant fight against gravity.
Q5: Can I build my base around the Monolith and then move the whole base? A5: Yes, you absolutely can. This is essentially a variation of the "static enclosure and base relocation" method described in the guide. You can construct a comprehensive base around the Monolith, making it the central core. If you then decide to move this entire base, the Monolith becomes an integrated, exceptionally heavy component of your mobile base. The engineering principles remain the same: you'll need a very robust, powerful, and well-balanced system (either airborne or ground-based) to move the combined mass of the Monolith and your base. This typically becomes an extremely late-game, colossal project.
🚀You can securely and efficiently call the OpenAI API on APIPark in just two steps:
Step 1: Deploy the APIPark AI gateway in 5 minutes.
APIPark is developed based on Golang, offering strong product performance and low development and maintenance costs. You can deploy APIPark with a single command line.
curl -sSO https://download.apipark.com/install/quick-start.sh; bash quick-start.sh

In my experience, you can see the successful deployment interface within 5 to 10 minutes. Then, you can log in to APIPark using your account.

Step 2: Call the OpenAI API.