Use Nginx with Password-Protected Key Files


In the contemporary digital landscape, where data breaches and cyber threats are increasingly sophisticated and frequent, the security of web applications and the underlying infrastructure has become an paramount concern for businesses and developers alike. Nginx, a powerful, high-performance web server, reverse proxy, and load balancer, stands as a cornerstone for countless web services worldwide. Its efficiency and robust feature set make it an ideal choice for serving content, managing traffic, and, critically, terminating SSL/TLS connections to secure data in transit. However, merely enabling SSL/TLS is often just the first step in a comprehensive security strategy. The true strength of this encryption hinges profoundly on the protection of the private keys involved. This extensive guide delves into an advanced security measure: using password-protected key files with Nginx. We will explore not only the technical intricacies of implementing this safeguard but also the crucial 'why' behind it, ensuring your digital assets, from simple websites to complex API gateways and even specialized LLM gateways, are fortified against unauthorized access and compromise.
The journey through this article will be multifaceted, commencing with the foundational principles of web security and Nginx's pivotal role within it. We will then transition into the indispensable necessity of shielding your private keys, introducing the concept of encrypting them with a passphrase. Subsequent sections will meticulously detail the practical steps for generating and managing these protected key files, followed by comprehensive instructions on configuring Nginx to seamlessly integrate them into your serving infrastructure. Beyond the 'how-to,' we will explore advanced security considerations, best practices, and effective troubleshooting techniques, ultimately providing a holistic understanding of how to significantly elevate the security posture of your Nginx deployments.
1. The Foundations of Web Security and Nginx's Role
The bedrock of secure internet communication is built upon cryptographic protocols designed to ensure confidentiality, integrity, and authenticity of data exchanged between clients and servers. Understanding these fundamentals is crucial before delving into the specifics of key protection.
1.1 Understanding TLS/SSL and Private Keys
At the heart of secure web communication lies Transport Layer Security (TLS), the successor to Secure Sockets Layer (SSL). When you see "https://" in your browser's address bar, it signifies that TLS is in effect, providing a secure, encrypted channel over which your data travels. This encryption protects sensitive information—such as login credentials, personal data, and financial transactions—from being intercepted and read by malicious actors.
TLS operates using a combination of asymmetric and symmetric cryptography. Asymmetric cryptography, also known as public-key cryptography, involves a pair of mathematically linked keys: a public key and a private key. * Public Key: This key can be freely distributed. It's used to encrypt data or verify digital signatures. Anyone can use your public key to encrypt a message, but only the holder of the corresponding private key can decrypt it. * Private Key: This key must be kept absolutely secret. It's used to decrypt data that was encrypted with the corresponding public key or to create digital signatures. The security of the entire TLS connection, and indeed the trustworthiness of the server, critically depends on the secrecy of its private key. If an attacker gains access to your server's private key, they can decrypt all traffic intended for your server, impersonate your server, and potentially launch Man-in-the-Middle (MITM) attacks, effectively compromising the integrity and confidentiality of all communications.
A digital certificate, issued by a Certificate Authority (CA), binds your public key to your domain name and organizational identity, allowing clients to verify that they are indeed communicating with the legitimate server. When a client initiates an HTTPS connection, the server sends its certificate, allowing the client to verify its authenticity and then establish a secure, encrypted session using the server's public key for the initial handshake and then a symmetric key for the bulk of data transfer. This initial handshake process is where the private key plays its indispensable role in establishing trust and securing the communication channel.
1.2 Why Nginx is a Premier Choice for Secure Front-ending
Nginx (pronounced "engine-x") has risen to prominence as a high-performance web server, reverse proxy, and load balancer, renowned for its efficiency, stability, and low resource consumption. Its event-driven architecture allows it to handle thousands of concurrent connections with minimal overhead, making it an ideal choice for high-traffic websites and complex web applications.
Beyond its performance capabilities, Nginx is a robust choice for implementing secure front-ends due to its comprehensive SSL/TLS termination features: * SSL/TLS Termination: Nginx can handle the cryptographic handshake and encryption/decryption processes, offloading this CPU-intensive task from backend application servers. This allows application servers to focus purely on business logic, improving overall system performance and simplifying their configuration. * Flexible Configuration: Nginx's declarative configuration syntax provides granular control over SSL/TLS settings, including protocols (TLSv1.2, TLSv1.3), cipher suites, session caching, and OCSP stapling. This flexibility allows administrators to implement strong cryptographic policies that meet current security standards. * Reverse Proxy Capabilities: As a reverse proxy, Nginx can sit in front of multiple backend servers, routing client requests to the appropriate service. This centralizes security management, allowing a single Nginx instance to enforce TLS for all services behind it, simplifying certificate management and ensuring consistent security policies across an entire application ecosystem. This function is particularly vital when Nginx acts as an API Gateway, directing traffic to various microservices while ensuring all communication is encrypted. * Load Balancing: Nginx can distribute incoming traffic across multiple backend servers, enhancing availability and scalability. When combined with SSL/TLS termination, it ensures that all load-balanced traffic is secured from the client to the gateway itself. * Security Headers: Nginx can easily inject critical security headers, such as HTTP Strict Transport Security (HSTS), Content Security Policy (CSP), and X-Frame-Options, which further harden web applications against various attack vectors.
In essence, Nginx's versatility and performance make it an indispensable component in modern web infrastructure. Its ability to efficiently manage SSL/TLS connections, coupled with its role as a reverse proxy and load balancer, positions it perfectly as a central gateway for all incoming web traffic, including that destined for complex API gateways and specialized LLM Gateways. However, the power of Nginx in securing communications is directly proportional to the measures taken to protect the private keys it uses.
2. The Imperative of Protecting Your Private Keys
The private key is the ultimate secret in your SSL/TLS setup. Its compromise is akin to an attacker gaining the master key to your digital castle. Understanding the severe repercussions of an unprotected private key underscores the critical importance of safeguarding it, ideally through encryption.
2.1 The Vulnerability of Unprotected Private Keys
When a private key file resides on a server without any additional encryption—that is, it's stored in plain text—it becomes a single point of failure for the entire secure communication channel it underpins. While file system permissions (like chmod 600) offer a basic layer of protection by restricting access to the root user or the specific user running Nginx, these measures are insufficient against a determined and successful attacker.
Consider the following scenarios where an unprotected private key can be compromised: * Server Breach: If an attacker successfully exploits a vulnerability in your operating system, Nginx, or any other software running on your server, they might gain root access or equivalent privileges. Once they have such access, file system permissions become irrelevant. The attacker can simply copy the plain-text private key file. This is perhaps the most direct and devastating form of compromise. * Insider Threat: Malicious insiders, such as disgruntled employees, contractors, or even careless administrators, who have legitimate access to the server, could intentionally or unintentionally expose the private key. Even if their access is limited, configuration mistakes or lax security practices could inadvertently expose the key. * Backup Compromise: Private keys are often included in server backups. If these backups are not themselves encrypted or are stored in insecure locations, they represent another vector for compromise. An attacker gaining access to an unencrypted backup could extract the private key. * Misconfiguration: Inadvertent misconfigurations, such as accidentally placing the private key in a publicly accessible web directory or setting overly permissive file permissions, could inadvertently expose the key. While less common with experienced administrators, it highlights the fragility of relying solely on permissions. * Lost/Stolen Physical Media: If your server image or disk containing the private key is lost or stolen without full-disk encryption, the key is exposed.
The consequences of a stolen private key are catastrophic and far-reaching: * Decryption of Past and Future Traffic: An attacker possessing your private key can decrypt any past communication that was recorded (if Perfect Forward Secrecy was not properly implemented or if they intercepted traffic before PFS was fully established) and can decrypt all future traffic to your server. This exposes sensitive user data, internal communications, and proprietary information. * Server Impersonation (Man-in-the-Middle Attacks): With your private key, an attacker can set up a rogue server that appears legitimate to clients. They can then intercept traffic between your users and your actual server, read and even modify the data, completely undermining trust and security. Users would see a valid padlock icon in their browser, unaware they are being duped. * Damage to Reputation and Trust: A security breach involving a private key severely damages an organization's reputation, leading to loss of customer trust, legal liabilities, and significant financial repercussions. * Revocation Process: Upon discovering a private key compromise, you must immediately revoke the associated certificate and issue a new one with a new key pair. This is an urgent, time-sensitive process that can cause service disruption and administrative overhead.
Given these severe risks, relying solely on file system permissions for private keys, which are only effective against unauthorized users who do not have root access, is a precarious security posture. A more robust solution is required.
2.2 Introducing Password-Protected Key Files
This is where password-protected key files, also known as encrypted private keys or passphrase-protected private keys, come into play as an essential additional layer of defense. A password-protected key file is essentially your private key, but it has been encrypted itself using a symmetric encryption algorithm (like AES-256) and a passphrase.
Here's how it works: * Encryption at Rest: When you generate a private key with a passphrase, or apply a passphrase to an existing key, the key file on disk is not stored in plain text. Instead, it is encrypted. This means that even if an attacker manages to copy the private key file from your server, they cannot use it without first knowing the passphrase. * Passphrase Required for Decryption: Before Nginx (or any other application) can use the private key to establish an SSL/TLS connection, the key must first be decrypted using the correct passphrase. This decryption typically happens in memory, and the plain-text key is then used by Nginx. * Defense in Depth: This mechanism provides a critical layer of "defense in depth." Even if your server is breached and the attacker gains access to the private key file, the key remains unusable without the passphrase. This significantly raises the bar for an attacker, requiring them to not only breach your server but also to separately obtain the passphrase. This strategy transforms a single point of failure (the private key file) into two distinct points of failure (the key file and the passphrase), making a full compromise much more difficult. * Protection Against Specific Threats: Password-protected keys are particularly effective against offline attacks where an attacker obtains a copy of the key file but does not have persistent access to the server to extract the passphrase in real-time. This includes scenarios like compromised backups, stolen disks, or attackers who gain temporary read-only access to file systems.
While password-protected keys significantly enhance security, they introduce an operational challenge: how does Nginx, an automated process, get the passphrase when it starts up or reloads? This challenge requires careful consideration and will be addressed in detail in subsequent sections, presenting various strategies to balance security with operational practicality. The fundamental principle, however, remains: encrypting your private key with a strong, unique passphrase is an indispensable step towards a truly secure web infrastructure.
3. Generating and Managing Password-Protected Key Files
The openssl command-line tool is the de facto standard for generating and managing cryptographic keys and certificates. This section will guide you through the processes of creating a new password-protected key, adding a passphrase to an existing key, and, for specific scenarios, removing a passphrase.
3.1 Generating a New Key Pair with a Passphrase
When setting up SSL/TLS for a new service or domain, the best practice is to generate a fresh private key with a strong passphrase from the outset. This ensures that the key is encrypted from its very creation.
The process involves two main steps: first, generating the private key with a passphrase, and second, using that key to generate a Certificate Signing Request (CSR) that will be submitted to a Certificate Authority (CA).
Step 1: Generate the Private Key with a Passphrase
To generate a new RSA private key (2048-bit or 4096-bit is recommended) and encrypt it with AES-256 using a passphrase, you'll use the openssl genrsa command:
openssl genrsa -aes256 -out server.key 4096
Let's break down this command: * openssl: The main command for OpenSSL utilities. * genrsa: Specifies that we want to generate an RSA private key. RSA is a widely used public-key cryptosystem. * -aes256: This crucial flag tells OpenSSL to encrypt the private key using the AES-256 cipher (Advanced Encryption Standard with a 256-bit key). This is a strong, industry-standard symmetric encryption algorithm. Other options include -des3 (Triple DES), but AES-256 is generally preferred for its security and performance characteristics. * -out server.key: Specifies the output file name for your private key. It's conventional to use the .key extension. * 4096: This is the key size in bits. A 4096-bit RSA key offers a very high level of security and is recommended for new deployments. While 2048-bit keys are still widely accepted, 4096-bit provides a greater margin of safety against future advances in cryptanalysis. Generating a 4096-bit key will take slightly longer and require more computational resources than a 2048-bit key, but for the security benefits, it is generally worth the minor trade-off.
Upon executing this command, you will be prompted to "Enter PEM pass phrase" and "Verifying - Enter PEM pass phrase" twice. It is absolutely critical to choose a strong, unique passphrase. A strong passphrase should be: * Long: At least 12-16 characters, ideally longer. * Complex: A mix of uppercase and lowercase letters, numbers, and special characters. * Unique: Not used for any other purpose or account. * Memorable (but not guessable): Consider using passphrases instead of passwords (e.g., "This-is-a-Strong-Passphrase-for-my-Nginx-Key!2024").
Once generated, the server.key file will contain your encrypted private key. You can verify its encrypted status by opening it with a text editor; it will start with -----BEGIN ENCRYPTED PRIVATE KEY----- (for PKCS#8 format) or -----BEGIN RSA PRIVATE KEY----- followed by the output of the encryption process, which looks like gibberish.
Step 2: Generate a Certificate Signing Request (CSR)
With your private key generated, the next step is to create a CSR. The CSR contains your public key and information about your organization and domain. This is what you submit to a Certificate Authority (CA) to obtain an SSL/TLS certificate.
openssl req -new -key server.key -out server.csr
Let's break down this command: * openssl: The OpenSSL command. * req: Specifies that we are dealing with Certificate Signing Request (CSR) management. * -new: Indicates that we want to create a new CSR. * -key server.key: Specifies the private key file that will be used to generate the CSR. Since server.key is password-protected, you will be prompted to "Enter pass phrase for server.key:" before the CSR generation can proceed. * -out server.csr: Specifies the output file name for your CSR.
After entering the passphrase for your private key, OpenSSL will prompt you for various pieces of information to include in the certificate request. This typically includes: * Country Name (C): Two-letter country code (e.g., US, GB). * State or Province Name (ST): Full name of your state or province. * Locality Name (L): City or town name. * Organization Name (O): Your company or organization's legal name. * Organizational Unit Name (OU): (Optional) Department or division within your organization (e.g., IT, Web Operations). * Common Name (CN): This is the most critical field. It must be the fully qualified domain name (FQDN) that your certificate will secure (e.g., www.example.com or api.example.com). For wildcard certificates, use *.example.com. * Email Address: (Optional) An email address associated with the certificate request. * A challenge password: (Optional) This password protects the CSR itself, but it's typically left blank for general web server certificates as it's not commonly used by CAs. * An optional company name: (Optional)
Fill in these details accurately. Once completed, the server.csr file will be created. You can then submit this .csr file to your chosen CA (e.g., Let's Encrypt, DigiCert, GlobalSign). The CA will verify your ownership of the domain and issue a signed certificate (typically server.crt or fullchain.pem) that can be used with your private key in Nginx.
3.2 Applying a Passphrase to an Existing Key
What if you have an existing private key that was generated without a passphrase, and you now want to add this layer of security? OpenSSL provides a straightforward way to do this.
Suppose you have an unprotected private key named unprotected.key. To encrypt it with AES-256 and a new passphrase, you would use the following command:
openssl rsa -aes256 -in unprotected.key -out protected.key
Let's dissect this command: * openssl rsa: Specifies that we are working with RSA private keys. * -aes256: Encrypts the output key using AES-256. * -in unprotected.key: Specifies the input file, which is your existing unprotected private key. * -out protected.key: Specifies the output file, which will contain the new, password-protected version of the key. You will be prompted to "Enter PEM pass phrase" and "Verifying - Enter PEM pass phrase" to set the passphrase for protected.key.
After executing this command and providing a strong passphrase, the protected.key file will be created, containing the encrypted version of your original private key. You should then securely delete unprotected.key after confirming protected.key works as expected.
3.3 Removing a Passphrase from a Key (and why it's generally not recommended)
While adding a passphrase enhances security, there might be rare operational scenarios where removing it seems necessary, for instance, to facilitate fully automated server reboots or Nginx restarts without requiring manual passphrase entry or a specialized key management solution. However, it is crucial to understand that removing the passphrase significantly reduces the security posture of your private key. This should only be considered if you have other extremely robust security controls in place (e.g., Hardware Security Modules, highly secured isolated environments, or external key managers that provide the key on demand), and even then, it is generally discouraged for keys directly used by public-facing services.
If you absolutely must remove a passphrase from a key (e.g., for protected.key), you can do so with the following command:
openssl rsa -in protected.key -out unprotected.key
Explanation: * openssl rsa: Works with RSA private keys. * -in protected.key: Specifies the input file, which is your password-protected private key. You will be prompted to "Enter pass phrase for protected.key:" to decrypt it. * -out unprotected.key: Specifies the output file, which will contain the plain-text, unprotected version of the key. No passphrase will be requested for this output file.
After running this command, unprotected.key will be a copy of the private key without any encryption. You should treat this file with extreme caution, ensuring its permissions are set very restrictively (chmod 600) and that it is stored only where absolutely necessary. The best practice remains to keep private keys encrypted whenever possible, leveraging secure key management solutions to handle the passphrase for automated processes.
In summary, openssl provides powerful tools for managing your private keys. The ability to encrypt these keys with passphrases is a vital security feature that adds a significant layer of protection against unauthorized access. Careful management of these keys and their passphrases is a cornerstone of a secure Nginx deployment.
APIPark is a high-performance AI gateway that allows you to securely access the most comprehensive LLM APIs globally on the APIPark platform, including OpenAI, Anthropic, Mistral, Llama2, Google Gemini, and more.Try APIPark now! 👇👇👇
4. Configuring Nginx to Use Password-Protected Key Files
Integrating a password-protected private key with Nginx presents a unique challenge: Nginx is typically started and restarted automatically, often by init systems (like systemd or SysVinit), which cannot interactively prompt for a passphrase. This section will explore this challenge and detail various solutions, from basic configuration options to more advanced, enterprise-grade key management strategies.
4.1 The Challenge: Nginx and Passphrases at Startup
When Nginx starts or attempts to reload its configuration, it needs immediate access to a decrypted private key to establish SSL/TLS connections. If the private key file (ssl_certificate_key) is encrypted with a passphrase, Nginx will fail to start or reload, as it cannot prompt for the passphrase interactively. The Nginx process, running non-interactively, simply won't know how to decrypt the key. This results in error messages in the Nginx error logs, often indicating "bad decrypt" or "PEM_read_bio_SSL_PRIVATE_KEY:bad decrypt" if the passphrase isn't provided or is incorrect.
This fundamental conflict between automated server operations and the interactive nature of passphrase entry necessitates specific strategies to securely provide the passphrase to Nginx. The goal is to ensure the passphrase is available when Nginx needs it, without compromising the security benefits of having an encrypted key in the first place.
4.2 Solutions and Strategies
Several approaches can be taken to bridge this gap, each with its own trade-offs between security, complexity, and automation.
4.2.1 Storing Passphrase in a File (Nginx ssl_password_file Directive)
One of the simplest methods, directly supported by Nginx, is to store the passphrase in a plain-text file and point Nginx to it using the ssl_password_file directive.
How it works: Nginx can be configured to read the passphrase from a specified file during startup. The file should contain the passphrase on a single line.
Example Configuration:
First, create a file containing your passphrase. Let's call it /etc/nginx/ssl/key_passphrase.txt:
echo "MySuperSecretPassphrase123!" > /etc/nginx/ssl/key_passphrase.txt
Crucial Security Measure: File Permissions It is absolutely vital to restrict access to this file. The passphrase file should only be readable by the root user or the Nginx user (if Nginx runs as a specific user with permissions to read it, which is less common for root-owned files).
sudo chmod 600 /etc/nginx/ssl/key_passphrase.txt
sudo chown root:root /etc/nginx/ssl/key_passphrase.txt # or nginx:nginx if appropriate
This command (chmod 600) ensures that only the file owner has read and write access, and no one else (group or others) has any access.
Then, in your Nginx configuration (e.g., in nginx.conf or a server block configuration file), add the ssl_password_file directive:
server {
listen 443 ssl;
server_name your_domain.com;
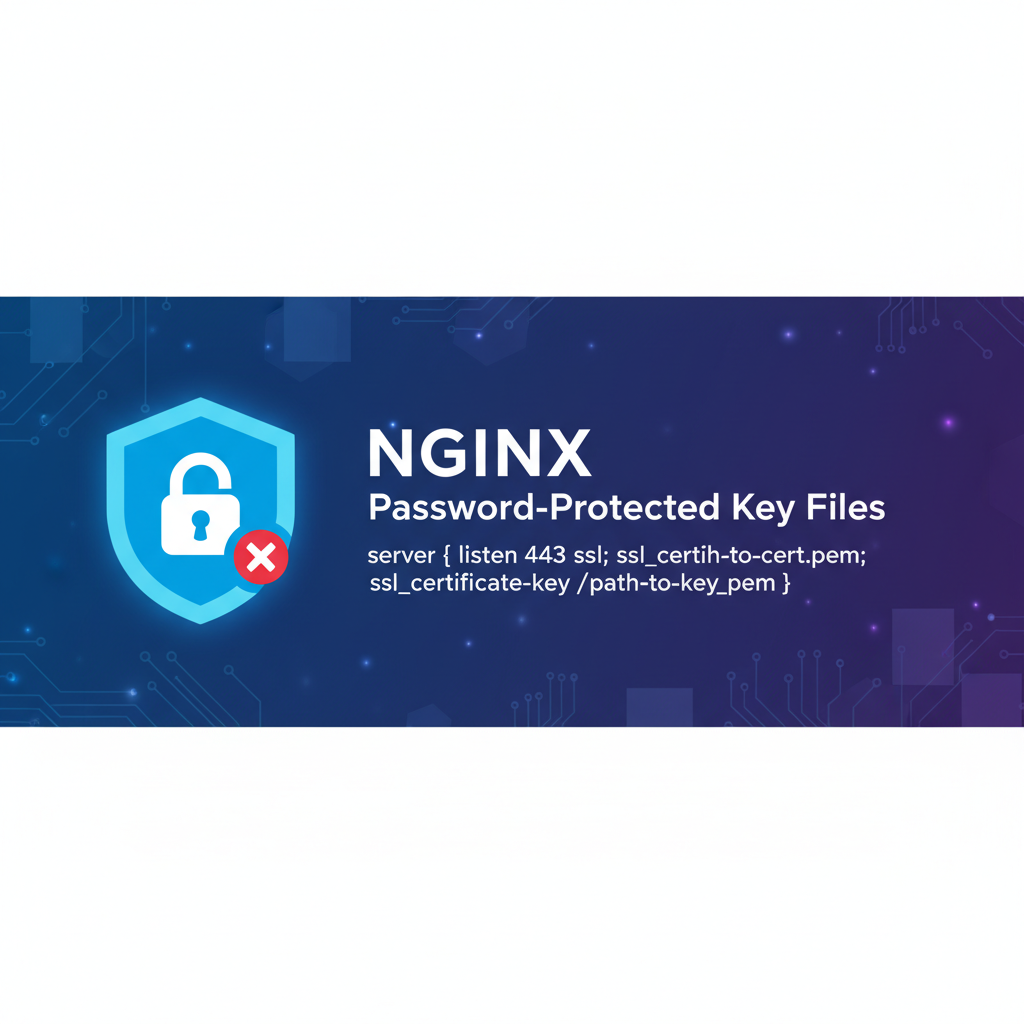
ssl_certificate /etc/nginx/ssl/your_domain.crt;
ssl_certificate_key /etc/nginx/ssl/server.key; # Your password-protected key
ssl_password_file /etc/nginx/ssl/key_passphrase.txt; # Path to the passphrase file
# ... other SSL/TLS settings and server configurations
}
Security Implications and Trade-offs: * Pros: Simple to implement, natively supported by Nginx, allows for full automation of Nginx startup and restarts. * Cons: The passphrase is still stored in plain text on the file system. While restricted by file permissions, an attacker with root access or who can exploit a privilege escalation vulnerability can still read this file and obtain the passphrase. This method protects against casual snooping or an attacker who only obtains a copy of the encrypted key file, but it offers limited protection against a full server compromise. It effectively creates a new single point of failure (the passphrase file) that is directly linked to the server.
This method is suitable for environments where the threat model focuses on protecting the key at rest (e.g., from stolen backups) and where full server compromise is considered a higher-level threat that ssl_password_file alone cannot mitigate.
4.2.2 Using a Script/Wrapper for Nginx Startup
A more advanced approach involves decrypting the private key into a temporary file in memory (or a tmpfs file system) before starting Nginx. This requires a wrapper script that handles the decryption and then invokes Nginx.
How it works: The script would: 1. Read the passphrase from a secure location (e.g., environment variable, a more robust secrets management system, or a file with very strict permissions that is potentially deleted after use). 2. Use openssl rsa to decrypt the password-protected key, piping the passphrase to it. 3. Store the decrypted key in a temporary file (ideally in RAM, like /dev/shm or /run/shm). 4. Start Nginx, pointing ssl_certificate_key to this temporary decrypted file. 5. Optionally, the script or a separate mechanism could be responsible for deleting the temporary file once Nginx is running or on shutdown.
Example Wrapper Script (Illustrative - production-ready requires more robustness):
#!/bin/bash
# nginx_start_wrapper.sh

# --- Configuration ---
ENCRYPTED_KEY="/techblog/en/etc/nginx/ssl/server.key"
DECRYPTED_KEY_TEMP="/techblog/en/dev/shm/nginx_server.key" # Use /dev/shm for in-memory storage
NGINX_PASS_FILE="/techblog/en/etc/nginx/ssl/key_passphrase.txt" # Securely store passphrase here

# Ensure the passphrase file is readable only by root
chmod 600 "$NGINX_PASS_FILE"
chown root:root "$NGINX_PASS_FILE"

# --- Decrypt the key ---
# Read passphrase and decrypt
# Using 'cat "$NGINX_PASS_FILE"' directly to openssl can be insecure
# A better approach is to pipe it securely or use a mechanism that doesn't expose it
# For demonstration, we'll use a relatively safer pipe
cat "$NGINX_PASS_FILE" | openssl rsa -in "$ENCRYPTED_KEY" -passin stdin -out "$DECRYPTED_KEY_TEMP"

if [ $? -ne 0 ]; then
    echo "Error decrypting private key."
    exit 1
fi

# Set strict permissions for the temporary decrypted key
chmod 600 "$DECRYPTED_KEY_TEMP"
chown root:root "$DECRYPTED_KEY_TEMP"

# --- Start Nginx ---
# Modify Nginx config to point to DECRYPTED_KEY_TEMP for startup.
# This requires dynamic config generation or a pre-configured temporary path.
# For simplicity, assume Nginx is configured to look at $DECRYPTED_KEY_TEMP path.

# A common approach is to simply overwrite the Nginx config's key path
# with the temporary one before starting, then revert it.
# Or, configure Nginx to read from DECRYPTED_KEY_TEMP.

# Important: Nginx's main configuration cannot dynamically pick up different key path easily.
# It means either a custom Nginx build to handle this, or running Nginx with a temporary config,
# or more practically, decrypting the key into a *new* file in the expected path,
# then reverting/deleting after Nginx reloads.
# A simpler version: Decrypt to the original path, start Nginx, then re-encrypt if needed.
# But this means the original key is briefly plain-text.

# A more practical approach for production:
# 1. Decrypt key to a *secured* location that Nginx can read.
# 2. Start Nginx.
# 3. Use `post_start_hook` or similar in systemd to delete the temporary key.

# A more direct but less dynamic way for the wrapper:
# 1. Decrypt key to temp file.
# 2. Start Nginx using a modified config for this run, or having the Nginx config
#    already pointing to DECRYPTED_KEY_TEMP and the key is cleaned up after startup.

# For this example, let's assume Nginx is configured to find the key at DECRYPTED_KEY_TEMP.
# You would then manage Nginx lifecycle (start/stop/reload) via this script.
/usr/sbin/nginx -c /etc/nginx/nginx.conf

# --- Cleanup (optional, but highly recommended) ---
# For long-running Nginx, the decrypted key will stay in memory.
# The temporary file DECRYPTED_KEY_TEMP should be deleted once Nginx is safely running
# or if Nginx is stopped. Systemd unit files with `ExecStopPost` can help here.
# For manual cleanup:
# rm "$DECRYPTED_KEY_TEMP" # Be careful with this, Nginx still needs it for its lifetime.
# This method is primarily useful for *bootstrapping* or single-shot operations.
# For Nginx to function continuously, the decrypted key must remain accessible,
# typically in its original location after decryption, or Nginx process must hold it in memory.
# The most common pattern with this is:
# 1. Decrypt key to original path (temporarily replacing encrypted).
# 2. Start Nginx.
# 3. (Optional) Re-encrypt / move original encrypted key back.
# This is complex and usually less secure than `ssl_password_file` unless passphrase comes from KMS.
Revised Approach for Scripting (More Practical): Instead of dynamically changing Nginx config, the typical pattern is: 1. Read passphrase. 2. Decrypt the server.key into a temporary file in memory (e.g., /dev/shm/nginx_decrypted.key). 3. Start Nginx, configuring Nginx to read from this temporary file path. 4. Ensure the temporary file is securely cleaned up upon Nginx shutdown or restart.
This requires Nginx configuration to point to /dev/shm/nginx_decrypted.key permanently. The wrapper script would handle the decryption before Nginx is invoked.
Security Implications and Trade-offs: * Pros: The plain-text private key is never stored persistently on disk. It exists only in memory (or a tmpfs filesystem) for the duration Nginx is running. This is a significant security improvement over ssl_password_file because if the server is breached after Nginx has started and the temporary file is removed (if possible), the attacker cannot easily recover the plain-text key from disk. * Cons: More complex to implement and manage, especially ensuring proper cleanup of the temporary decrypted key and integration with init systems like systemd. If the passphrase source is still a plain-text file on disk, the initial weakness remains, though mitigated by the temporary nature of the decrypted key.
4.2.3 External Key Management Systems (KMS) or Hardware Security Modules (HSM)
For enterprise-grade security and compliance requirements, relying on external Key Management Systems (KMS) or Hardware Security Modules (HSM) is the gold standard. These solutions provide robust, centralized, and audited management of cryptographic keys.
How they work: * KMS: Services like HashiCorp Vault, AWS KMS, Azure Key Vault, or Google Cloud KMS store cryptographic keys securely. Nginx (or an intermediary service/plugin) can be configured to fetch the decrypted private key or perform cryptographic operations directly through the KMS API. The actual key material never leaves the KMS. * HSM: Physical hardware devices designed to securely store and perform cryptographic operations. HSMs provide a tamper-resistant environment for private keys. Nginx, through specialized modules or by integrating with a KMS that in turn uses an HSM, can offload cryptographic operations to the HSM, meaning the private key never directly resides on the Nginx server in plain text.
Integration with Nginx: Direct integration of Nginx with KMS/HSM often requires custom modules or a proxy layer. For example, Nginx might be configured to use a specially built OpenSSL library that can communicate with an HSM or KMS. Alternatively, a proxy service could be deployed locally that fetches the key from the KMS/HSM and serves it to Nginx over a secure, localhost-only connection.
Security Implications and Trade-offs: * Pros: Highest level of security. Private keys are never exposed in plain text on the Nginx server's file system. Centralized key management, rotation, and auditing are simplified. Protects against virtually all forms of software-level server compromise impacting key confidentiality. * Cons: Significantly more complex to implement, configure, and operate. Involves additional infrastructure components (KMS/HSM), potential licensing costs, and specialized expertise. Not typically suitable for small to medium-sized deployments unless mandated by compliance.
The choice of method depends heavily on your specific security requirements, operational complexity tolerance, and threat model. For many, ssl_password_file with extremely restrictive permissions offers a good balance for basic protection against key file compromise, while script-based decryption into memory provides an elevated layer of defense. KMS/HSM solutions are reserved for the most stringent security environments.
4.3 Nginx Configuration Directives
Regardless of how the passphrase is managed, certain core Nginx directives are essential for enabling SSL/TLS with your certificate and key.
server {
    listen 443 ssl http2; # Listen for HTTPS traffic, enable HTTP/2 for performance
    server_name your_domain.com www.your_domain.com; # Your domain name(s)

    # --- SSL/TLS Certificate and Key Configuration ---
    ssl_certificate /etc/nginx/ssl/fullchain.pem; # Path to your certificate bundle (includes intermediate CAs)
    ssl_certificate_key /etc/nginx/ssl/server.key; # Path to your password-protected private key
    # If using ssl_password_file, uncomment the line below:
    # ssl_password_file /etc/nginx/ssl/key_passphrase.txt;

    # --- Secure SSL/TLS Protocols and Ciphers ---
    # Only allow modern, secure protocols
    ssl_protocols TLSv1.2 TLSv1.3;
    # Strong cipher suites for forward secrecy (PFS)
    ssl_ciphers 'TLS_AES_256_GCM_SHA384:TLS_CHACHA20_POLY1305_SHA256:TLS_AES_128_GCM_SHA256:ECDHE-RSA-AES256-GCM-SHA384:ECDHE-RSA-AES128-GCM-SHA256:DHE-RSA-AES256-GCM-SHA384:DHE-RSA-AES128-GCM-SHA256';
    # Prioritize server ciphers over client ciphers
    ssl_prefer_server_ciphers on;

    # --- SSL/TLS Session Caching for Performance ---
    # Enable session caching to avoid full handshakes for subsequent connections
    ssl_session_cache shared:SSL:10m; # 10MB cache, capable of storing approx 80,000 sessions
    ssl_session_timeout 1h; # Session timeout of 1 hour

    # --- Diffie-Hellman Parameters for Perfect Forward Secrecy ---
    # Essential for strong Perfect Forward Secrecy. Generate using `openssl dhparam -out /etc/nginx/ssl/dhparam.pem 4096`
    ssl_dhparam /etc/nginx/ssl/dhparam.pem;

    # --- OCSP Stapling for Certificate Revocation Status ---
    # Improves performance and privacy by allowing Nginx to fetch OCSP responses
    ssl_stapling on;
    ssl_stapling_verify on;
    # Resolver to lookup OCSP responder hostnames (use a reliable DNS resolver)
    resolver 8.8.8.8 8.8.4.4 valid=300s;
    resolver_timeout 5s;

    # --- Strict Transport Security (HSTS) ---
    # Forces browsers to only connect via HTTPS after the first visit
    add_header Strict-Transport-Security "max-age=63072000; includeSubDomains; preload" always;

    # --- Other Security Headers (Highly Recommended) ---
    add_header X-Frame-Options "SAMEORIGIN" always;
    add_header X-Content-Type-Options "nosniff" always;
    add_header X-XSS-Protection "1; mode=block" always;
    add_header Referrer-Policy "no-referrer-when-downgrade" always;
    add_header Content-Security-Policy "default-src 'self' https: data: 'unsafe-inline' 'unsafe-eval'" always; # Customize carefully!

    # --- Location blocks and proxy_pass settings ---
    location / {
        proxy_pass http://localhost:8080; # Example backend
        proxy_set_header Host $host;
        proxy_set_header X-Real-IP $remote_addr;
        proxy_set_header X-Forwarded-For $proxy_add_x_forwarded_for;
        proxy_set_header X-Forwarded-Proto $scheme;
    }

    # ... other location blocks
}
Let's elaborate on some key directives:
listen 443 ssl http2;: Instructs Nginx to listen on port 443 for HTTPS traffic and enables HTTP/2 for improved performance.ssl_certificate /etc/nginx/ssl/fullchain.pem;: Specifies the path to your SSL/TLS certificate file. This file often contains both your server certificate and any intermediate CA certificates, creating a "full chain."ssl_certificate_key /etc/nginx/ssl/server.key;: Specifies the path to your private key file. If this key is password-protected, Nginx will attempt to decrypt it.ssl_password_file /etc/nginx/ssl/key_passphrase.txt;: (Optional, but required forssl_password_filemethod) This directive tells Nginx where to find the passphrase for the private key.ssl_protocols TLSv1.2 TLSv1.3;: Restricts Nginx to use only modern and secure TLS protocols. Older protocols (like TLSv1.0, TLSv1.1, and SSLv3) are known to have vulnerabilities and should be disabled.ssl_ciphers ...;: Defines the list of allowed cipher suites. This is critical for security. The provided list prioritizes strong, modern ciphers that support Perfect Forward Secrecy (PFS).ssl_prefer_server_ciphers on;: Ensures that Nginx's preferred cipher order is used, rather than the client's. This allows you to enforce the strongest available ciphers.ssl_session_cache shared:SSL:10m;andssl_session_timeout 1h;: These directives enable and configure SSL session caching. Caching allows clients who have previously established a secure connection to reuse the session parameters, skipping the expensive full TLS handshake for subsequent connections and improving performance.ssl_dhparam /etc/nginx/ssl/dhparam.pem;: Specifies the path to your Diffie-Hellman parameters file. These parameters are essential for enabling Perfect Forward Secrecy (PFS) with DHE (Diffie-Hellman Ephemeral) cipher suites, preventing an attacker from decrypting past recorded traffic even if they later compromise your private key. You generate this file usingopenssl dhparam -out /etc/nginx/ssl/dhparam.pem 4096. This command can take a significant amount of time, so it's usually run once during setup.add_header Strict-Transport-Security ...;: Enables HTTP Strict Transport Security (HSTS). This header instructs browsers to only interact with your domain over HTTPS for a specified duration, even if the user explicitly typeshttp://. This helps protect against downgrade attacks and cookie hijacking.
By meticulously configuring these directives and employing one of the passphrase management strategies, you can ensure your Nginx server uses its password-protected private key securely and efficiently, forming a robust gateway for all your web services, including critical API gateways and sensitive LLM gateways.
5. Advanced Security Considerations and Best Practices
Securing Nginx with password-protected keys is a significant step, but it's part of a broader, multi-layered security strategy. To truly harden your infrastructure, especially when operating as a critical gateway for services like an API gateway or a sensitive LLM Gateway, several other best practices must be observed.
5.1 File Permissions and Ownership
Beyond merely encrypting your private key, the fundamental security of the key file, certificate file, and passphrase file (if used) relies heavily on correct file system permissions and ownership. Incorrect permissions are a common vector for compromise.
- Private Key File (
server.key):- Permissions:
chmod 600 /etc/nginx/ssl/server.key - This sets read/write access only for the file owner and no access for anyone else. This is the absolute minimum level of security.
- Ownership:
chown root:root /etc/nginx/ssl/server.key(ornginx:nginxif Nginx runs as its own user and needs to read the key directly, butrootis generally safer if usingssl_password_fileor a wrapper that decrypts as root). - The private key should ideally be owned by
rootand readable only byroot. Nginx, when running as a less privileged user, typically has its master process running asrootto bind to port 443 and decrypt the key, then forks worker processes as a less privileged user. The master process can read the key.
- Permissions:
- Certificate File (
fullchain.pemorserver.crt):- Permissions:
chmod 644 /etc/nginx/ssl/fullchain.pem - This sets read/write for the owner and read-only for others. Certificates contain public information, so they don't need to be as strictly protected as private keys.
- Ownership:
chown root:root /etc/nginx/ssl/fullchain.pem
- Permissions:
- Passphrase File (
key_passphrase.txt): (If usingssl_password_file)- Permissions:
chmod 600 /etc/nginx/ssl/key_passphrase.txt - Ownership:
chown root:root /etc/nginx/ssl/key_passphrase.txt(or the Nginx user if that's how it's configured to run). - Similar to the private key, this file contains sensitive information and must be heavily restricted.
- Permissions:
Always verify these permissions after placing your key and certificate files on the server using ls -l. A common mistake is to copy files and inherit default, overly permissive permissions.
5.2 Secure Storage of Passphrases
While ssl_password_file is a convenient solution, it stores the passphrase in plain text on the server. For higher security environments, consider these alternatives:
- Environment Variables: Passphrases can be passed as environment variables to the Nginx startup script. This keeps the passphrase out of files on disk. However, environment variables can sometimes be inspected by other processes on the same system (e.g., via
ps auxwwor/procfilesystem) or persist in shell histories, so this is not a foolproof solution. - Secrets Management Systems: For robust, scalable, and auditable passphrase management, integrate with a dedicated secrets management system like HashiCorp Vault, Kubernetes Secrets, AWS Secrets Manager, Azure Key Vault, or Google Cloud Secret Manager. These systems store secrets encrypted, provide access control, audit trails, and often offer dynamic secret generation. Nginx would typically interact with these systems through an intermediary service or a custom module to retrieve the passphrase just-in-time. This is the most secure approach for environments requiring high assurance.
- Hardware Security Modules (HSM): As mentioned earlier, HSMs can store private keys directly and perform cryptographic operations, completely eliminating the need for Nginx to handle the plain-text key or passphrase. This is the pinnacle of key security.
The choice of passphrase storage method should align with your organization's overall security policies, risk assessment, and operational capabilities.
5.3 Regular Key Rotation
Even with password-protected keys, private keys and their associated certificates should be rotated periodically. This practice limits the window of exposure if a key is ever compromised without detection. Best practices usually dictate annual or biannual rotation, although some highly sensitive systems might rotate more frequently. * Process: Generate a new key pair (with a new, strong passphrase!), obtain a new certificate from your CA, and deploy it to Nginx. Ensure the old key and certificate are securely retired. Automating this process (e.g., with Let's Encrypt's certbot for certificate renewal, but with manual steps for passphrase-protected keys) is crucial to avoid service disruption.
5.4 Using Diffie-Hellman Parameters for Perfect Forward Secrecy
Perfect Forward Secrecy (PFS) is a property of secure communication protocols that ensures a session key derived from a set of long-term keys will not be compromised even if one of the long-term keys is later compromised. For TLS, this means that even if an attacker steals your private key, they cannot decrypt past recorded traffic because each session uses unique, ephemeral session keys.
To achieve strong PFS with Nginx, especially when using DHE (Diffie-Hellman Ephemeral) cipher suites, you must generate your own robust Diffie-Hellman parameters. * Generation: Use the openssl dhparam command to generate a dhparam.pem file. A 4096-bit parameter is recommended: bash openssl dhparam -out /etc/nginx/ssl/dhparam.pem 4096 This command can take a long time (minutes to hours depending on system entropy), so it's a one-time setup step. * Nginx Directive: Configure Nginx to use this file: nginx ssl_dhparam /etc/nginx/ssl/dhparam.pem; This is a critical step that often gets overlooked but significantly enhances the long-term security of your encrypted communications.
5.5 HTTP Strict Transport Security (HSTS)
HSTS is a security mechanism that helps protect websites against man-in-the-middle attacks, particularly SSL stripping. It forces web browsers to interact with a site only over HTTPS, even if the user types http:// or follows an insecure link.
- Nginx Directive: Add the
Strict-Transport-Securityheader in your Nginx configuration:nginx add_header Strict-Transport-Security "max-age=63072000; includeSubDomains; preload" always;max-age: Specifies how long (in seconds) the browser should remember to only connect via HTTPS. Two years (63072000 seconds) is a common recommendation.includeSubDomains: Applies the HSTS policy to all subdomains as well. Use with caution if not all subdomains support HTTPS.preload: Allows your domain to be preloaded into browsers' HSTS lists. This provides protection even on the very first visit. You can submit your domain to the HSTS Preload List.
Implementing HSTS is a powerful defense but requires careful planning, as once enabled, it can be difficult to revert to HTTP for the specified max-age period.
5.6 Nginx as a Secure Gateway and its Relevance to APIPark
Nginx's robust capabilities make it an excellent choice for acting as a secure gateway for various services. In this role, Nginx handles incoming client requests, terminates SSL/TLS, applies security policies, and then routes traffic to the appropriate backend services. This centralizes security, performance optimization, and traffic management.
When Nginx functions as an API gateway, it becomes the single entry point for all API traffic. This means it's responsible for enforcing authentication, authorization, rate limiting, and, crucially, secure communication for all APIs. The use of password-protected keys in such a setup is paramount because APIs often handle sensitive data, and the compromise of the private key on the API gateway could expose a vast amount of information or allow an attacker to impersonate legitimate API clients or servers. For example, an API gateway might route requests to various microservices, each processing specific data. If the gateway's key is compromised, an attacker could potentially decrypt all requests and responses flowing to and from these services.
The need for stringent security is even more pronounced for specialized LLM Gateway deployments. Large Language Models (LLMs) are increasingly integrated into applications, handling sensitive user queries, proprietary data in prompts, and generating potentially confidential responses. An LLM Gateway typically acts as an intermediary, managing access to multiple LLM providers, applying rate limits, caching, and ensuring secure communication. The data flowing through an LLM Gateway can be extremely sensitive, ranging from personally identifiable information (PII) to intellectual property. Therefore, protecting the private keys used by the LLM Gateway to establish TLS connections is absolutely critical. A compromised key could allow an attacker to intercept, read, or even manipulate prompts and responses, leading to data exfiltration, privacy violations, or even malicious model interference.
In this context, it's worth noting how advanced platforms complement and rely on robust infrastructure. For instance, APIPark, an open-source AI gateway and API management platform, excels in managing the entire lifecycle of APIs, integrating diverse AI models, standardizing API formats, and providing rich analytics. While APIPark focuses on the higher-level management of API invocation, authentication, and cost tracking, its underlying security and performance are inherently dependent on the robustness of the infrastructure it operates on. Technologies like Nginx, configured with best practices such as password-protected key files, provide the secure transport layer that is foundational for platforms like APIPark. APIPark's ability to achieve over 20,000 TPS on modest hardware and its detailed API call logging further emphasize the need for a highly secure and efficient base. By ensuring Nginx, when used in conjunction with APIPark, employs strong key protection, the sensitive data flowing through APIPark's managed API gateway and LLM Gateway functions is afforded the highest level of cryptographic security, protecting everything from prompt encapsulation into REST APIs to shared API services within teams. This synergy highlights that while specialized platforms offer immense value in API and AI management, foundational security practices for network infrastructure remain non-negotiable.
5.7 Regular Security Audits and Monitoring
Finally, no security measure is set and forget. Regular security audits, vulnerability scanning, and continuous monitoring are essential. * Audit Configuration: Periodically review your Nginx configuration, especially SSL/TLS settings, to ensure they adhere to current best practices and address any newly discovered vulnerabilities. Tools like SSL Labs' SSL Server Test can help evaluate your configuration. * Log Monitoring: Monitor Nginx access and error logs for suspicious activity. Look for failed login attempts (if using HTTP basic auth with Nginx), unusual traffic patterns, or repeated certificate/key errors. Comprehensive API call logging, as offered by platforms like APIPark, provides invaluable data for tracing and troubleshooting issues, further aiding in security monitoring. * System Updates: Keep your operating system, Nginx, OpenSSL, and all other software dependencies up to date to patch known vulnerabilities.
By adopting these advanced security considerations and best practices, you can build a highly resilient Nginx-based gateway that not only performs exceptionally but also provides a formidable defense against the evolving landscape of cyber threats, ensuring the integrity and confidentiality of your critical data, whether for a general API gateway or a specialized LLM Gateway.
6. Troubleshooting Common Issues
Even with careful configuration, issues can arise when implementing password-protected keys with Nginx. Understanding common error messages and their remedies is crucial for efficient troubleshooting.
6.1 "PEM_read_bio_SSL_PRIVATE_KEY:bad decrypt"
This is perhaps the most common error when working with password-protected keys in Nginx.
- Cause: This error explicitly means that Nginx attempted to decrypt the private key, but the provided passphrase was incorrect or the key file itself is corrupted.
- Troubleshooting Steps:
- Verify Passphrase: Double-check the passphrase you entered in
key_passphrase.txt(if usingssl_password_file) or provided to your decryption script. Even a single character mistake will cause this error. - Test Key Decryption Manually: Attempt to decrypt the private key using
openssldirectly from the command line, which will prompt you for the passphrase:bash openssl rsa -in /etc/nginx/ssl/server.key -out /dev/nullIf this command succeeds after you manually enter the passphrase, it confirms your key is intact and your passphrase is correct. If it fails, either the key is corrupted or your passphrase memory is incorrect. - Check
ssl_password_filePath: Ensure the path specified inssl_password_file(if used) is absolutely correct and points to the file containing the passphrase. - No Extra Characters: Make sure there are no invisible characters (e.g., trailing spaces, newlines) in your
key_passphrase.txtfile. Usingcat -v /etc/nginx/ssl/key_passphrase.txtcan sometimes reveal such characters.
- Verify Passphrase: Double-check the passphrase you entered in
6.2 "No such file or directory"
This error indicates that Nginx cannot find one of the specified files.
- Cause: Incorrect file paths for
ssl_certificate,ssl_certificate_key, orssl_password_file. - Troubleshooting Steps:
- Verify Paths: Carefully re-check all file paths in your Nginx configuration. Even a small typo can lead to this error.
- File Existence: Use
ls -lto confirm that the files actually exist at the specified paths. - Absolute Paths: Always use absolute paths (starting from
/) in your Nginx configuration to avoid ambiguity.
6.3 "Permission denied"
This error means Nginx is trying to access a file but does not have the necessary permissions.
- Cause: The Nginx user (or
rootif master process is involved) does not have sufficient read permissions for the private key, certificate, or passphrase file. - Troubleshooting Steps:
- Check File Permissions: Use
ls -l /path/to/fileto inspect the permissions of your key, certificate, and passphrase files. - Correct Permissions: Ensure permissions are set correctly:
chmod 600for private keys and passphrase files.chmod 644for certificate files.
- Check Ownership: Verify the file ownership. The Nginx process (or its parent process) must have permission to read the files. Typically,
rootowner with600permissions is sufficient if Nginx's master process runs asroot. - SELinux/AppArmor: If you're running on a system with SELinux or AppArmor enabled, these security modules might be preventing Nginx from accessing the files even if standard file permissions seem correct. Check system logs (
/var/log/audit/audit.logfor SELinux,dmesgorjournalctlfor AppArmor) for AVC (Access Vector Cache) denial messages. You may need to create or modify SELinux policies or AppArmor profiles to allow Nginx access.
- Check File Permissions: Use
6.4 Nginx Fails to Start Silently
Sometimes Nginx might fail to start or reload without immediately printing a clear error message to the console.
- Cause: This often indicates a configuration issue that prevents Nginx from parsing its files, or a background process failure.
- Troubleshooting Steps:
- Check Nginx Configuration Syntax: Always run
sudo nginx -t(ornginx -tif Nginx is in your PATH) after making changes to your Nginx configuration. This command tests the syntax of your configuration files and will report any syntax errors or problematic directives. - Consult Error Logs: The most important step is to check the Nginx error logs. The default location is typically
/var/log/nginx/error.log. These logs will contain detailed messages about why Nginx failed to start, including decryption errors, permission issues, or syntax errors missed bynginx -t. - System Logs (
journalctl): If Nginx is managed bysystemd, checkjournalctl -xeu nginx.servicefor messages related to the Nginx service's startup and any errors reported bysystemd.
- Check Nginx Configuration Syntax: Always run
6.5 Browser Warnings
Even if Nginx starts correctly, clients might receive browser warnings when trying to access your site over HTTPS.
- Cause: Issues with the certificate itself (e.g., expired, not trusted, mismatched domain), or incomplete certificate chain.
- Troubleshooting Steps:
- Certificate Expiration: Check if your certificate has expired. Most CAs provide tools or emails to notify you before expiration.
- Common Name Mismatch: Ensure the
Common Name(CN) in your certificate (or one of theSubject Alternative Names- SANs) exactly matches the domain name your users are trying to access. A certificate forexample.comwon't work forwww.example.comunlesswww.example.comis also listed as a SAN. - Untrusted CA/Incomplete Chain: Verify that your
ssl_certificatefile contains the full certificate chain, including any intermediate CA certificates, up to the root CA. If your certificate file only contains your server certificate, browsers might not be able to build a trusted chain to a root CA they already trust. Most CAs provide a "fullchain.pem" file for this reason. - SSL Labs Test: Use online tools like SSL Labs' SSL Server Test to perform a comprehensive analysis of your Nginx SSL/TLS configuration. It will check for common errors, protocol support, cipher strength, and certificate chain issues, providing an overall grade and detailed recommendations.
By systematically addressing these common troubleshooting scenarios and leveraging available diagnostic tools, you can resolve most issues related to Nginx and password-protected keys, ensuring your secure gateway operates smoothly and effectively.
7. Conclusion
The journey through securing Nginx with password-protected key files reveals a fundamental truth in cybersecurity: layers of defense are indispensable. While Nginx stands as a highly performant and versatile gateway for web traffic, its strength in securing communications through SSL/TLS is directly proportional to the diligence with which its private keys are protected. The implementation of password-protected keys introduces a critical additional layer, transforming a single point of failure—the private key file—into a more robust two-factor dependency involving both the encrypted key and a securely managed passphrase.
We've explored the significant risks posed by unprotected private keys, ranging from devastating server breaches to insidious insider threats, all leading to the potential for data decryption, server impersonation, and irreparable damage to trust and reputation. The adoption of password-protected keys, meticulously generated and managed with openssl, acts as a powerful deterrent against such offline attacks, making a full compromise substantially more challenging for adversaries.
The technical intricacies of configuring Nginx for this heightened security, including the strategic use of ssl_password_file for simpler deployments, or more advanced wrapper scripts and enterprise-grade Key Management Systems for high-assurance environments, underscore the balance between security and operational practicality. Each method offers a distinct trade-off, and the optimal choice hinges on your specific threat model, resources, and compliance requirements.
Beyond the core implementation, we emphasized a holistic approach to security through a suite of best practices: stringent file permissions, secure passphrase storage, diligent key rotation, the imperative of Diffie-Hellman parameters for Perfect Forward Secrecy, and the deployment of HTTP Strict Transport Security (HSTS). These measures collectively fortify your Nginx gateway, ensuring robust protection not just for general web services but especially for sensitive deployments like API gateways and the increasingly critical LLM gateways where confidential data flows constantly. For platforms like APIPark, which provides an open-source AI gateway and API management platform for seamless AI integration and API lifecycle management, the underlying secure transport mechanism provided by a well-configured Nginx is absolutely foundational to protect the sensitive prompts and responses that define modern AI applications. APIPark's impressive performance and detailed logging capabilities are best leveraged when built upon a bedrock of ironclad infrastructural security.
Finally, we equipped you with practical troubleshooting techniques for common Nginx and SSL/TLS issues, reinforcing the idea that proactive testing and vigilant monitoring are non-negotiable components of an effective security strategy.
In conclusion, implementing password-protected key files with Nginx is more than just a technical step; it's a commitment to a higher standard of digital asset protection. While it introduces a degree of operational complexity, the enhanced security it provides against persistent and sophisticated threats is an invaluable investment in the resilience and trustworthiness of your online presence. By embracing a multi-layered security paradigm, your Nginx-powered infrastructure can confidently stand as a secure, high-performance gateway in an increasingly interconnected and vulnerable digital world.
Frequently Asked Questions (FAQ)
1. What is a password-protected key file in the context of Nginx, and why is it important?
A password-protected key file is a private cryptographic key that has been encrypted with a symmetric cipher (like AES-256) using a passphrase. This means the key material on disk is unreadable without the correct passphrase. It's crucial because it adds an extra layer of security: even if an attacker gains unauthorized access to your server and copies the key file, they cannot use it to decrypt traffic or impersonate your server unless they also obtain the passphrase. This protects against offline attacks and provides defense in depth.
2. What are the main methods to provide the passphrase to Nginx for an encrypted private key?
There are three primary methods, each with varying levels of security and operational complexity: 1. ssl_password_file directive: Nginx reads the passphrase from a plain-text file specified in its configuration. This is simple but means the passphrase is still on disk, albeit with restricted permissions. 2. Wrapper script for Nginx startup: A script decrypts the key into a temporary, often in-memory, location before Nginx starts, then Nginx uses the decrypted key. This keeps the plain-text key off persistent storage. 3. External Key Management Systems (KMS) or Hardware Security Modules (HSM): These enterprise-grade solutions store keys securely and either decrypt them on demand or perform cryptographic operations within their secure confines, preventing the plain-text key or passphrase from ever residing on the Nginx server directly.
3. Can I use a password-protected key for an API Gateway or LLM Gateway?
Absolutely, and it's highly recommended. When Nginx functions as an API Gateway or a specialized LLM Gateway, it handles potentially very sensitive data (e.g., user requests, API tokens, proprietary prompts, LLM responses). Using a password-protected key ensures that the cryptographic private key, which underpins the TLS security for all this traffic, is itself protected at rest. This adds a critical layer of defense against compromise, especially important for maintaining data confidentiality and integrity in these high-value data flows.
4. What are the best practices for file permissions for SSL/TLS keys and certificates?
Strict file permissions are fundamental. * Private Key (.key): Should have chmod 600 (read/write only for the owner) and typically owned by root. * Certificate (.crt or .pem): Should have chmod 644 (read/write for owner, read-only for group and others) and typically owned by root. * Passphrase File (if used): Should also have chmod 600 and owned by root. These permissions prevent unauthorized users or processes from reading your sensitive key material.
5. What should I do if Nginx gives a "PEM_read_bio_SSL_PRIVATE_KEY:bad decrypt" error?
This error almost certainly means the passphrase Nginx is trying to use for your private key is incorrect. 1. Verify Passphrase: Double-check the passphrase in your ssl_password_file or script. Ensure no extra characters (like newlines or spaces). 2. Manual Decryption Test: Attempt to decrypt the key manually using openssl rsa -in /path/to/server.key -out /dev/null on the command line. If this prompts for a passphrase and succeeds, your key is fine, and the issue is how Nginx is receiving the passphrase. 3. Check Paths and Permissions: Ensure the ssl_certificate_key and ssl_password_file paths in Nginx config are correct, and that Nginx has appropriate read permissions for both files. 4. Review Nginx Logs: Always check /var/log/nginx/error.log for more detailed context on the failure.
🚀You can securely and efficiently call the OpenAI API on APIPark in just two steps:
Step 1: Deploy the APIPark AI gateway in 5 minutes.
APIPark is developed based on Golang, offering strong product performance and low development and maintenance costs. You can deploy APIPark with a single command line.
curl -sSO https://download.apipark.com/install/quick-start.sh; bash quick-start.sh

In my experience, you can see the successful deployment interface within 5 to 10 minutes. Then, you can log in to APIPark using your account.

Step 2: Call the OpenAI API.