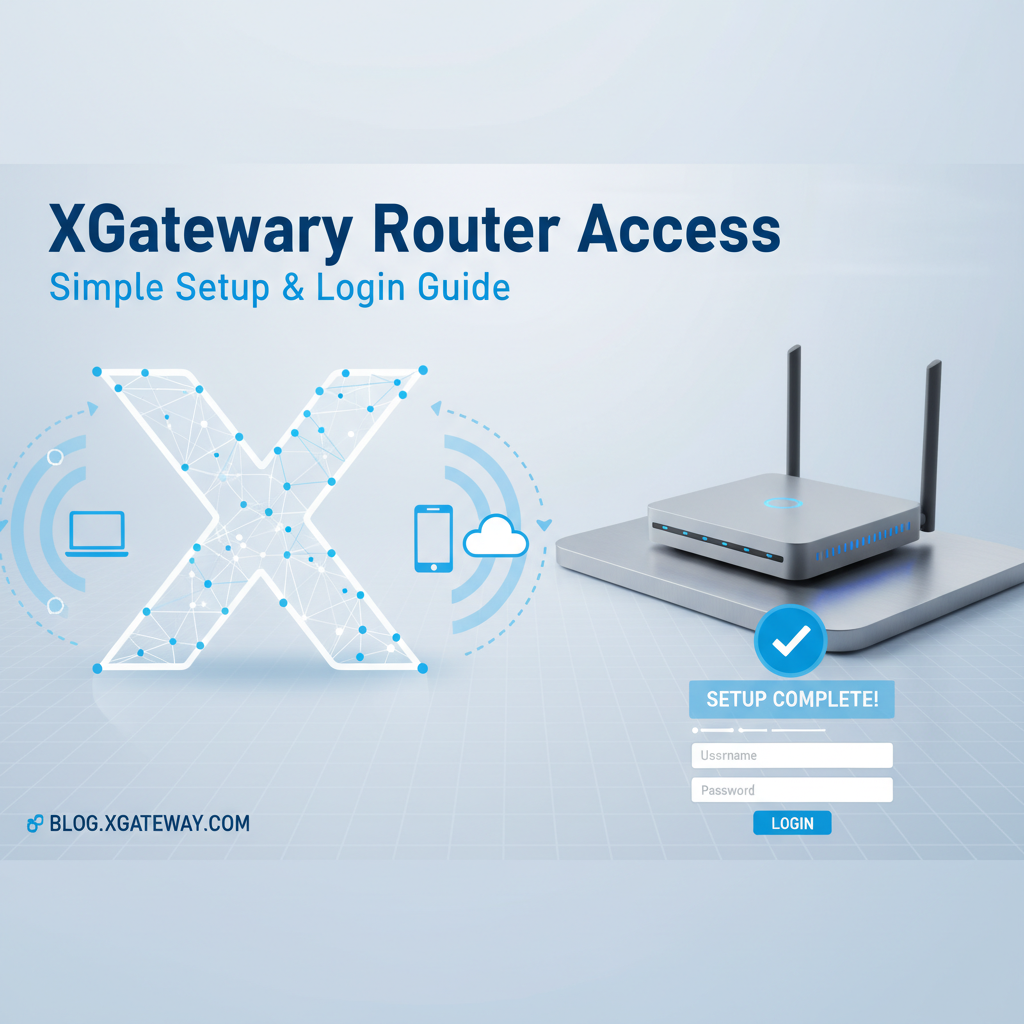
XGateway Router Access: Simple Setup & Login Guide


The modern digital landscape is inextricably linked to robust and reliable network connectivity. At the heart of most home and small office networks lies a crucial device: the router. More specifically, for many users, this central component functions as their primary gateway to the internet. An XGateway router, in this context, serves not just as a device to distribute Wi-Fi, but as the principal interface between your local network and the vast expanse of the global internet. Understanding how to properly set up and log into your XGateway router is fundamental to establishing a stable, secure, and high-performing network environment. This comprehensive guide aims to demystify the process, providing detailed, step-by-step instructions for both initial setup and ongoing management, ensuring that even novice users can confidently navigate their network's foundational access point.
I. Introduction: Demystifying Your XGateway Router
In an era where nearly every aspect of our lives, from communication to entertainment, work, and education, relies on internet access, the significance of your home or office router cannot be overstated. An XGateway router isn't merely a piece of hardware; it is the critical junction, the literal gateway, that facilitates the flow of data packets between your internal devices and the external internet. Without it, your smart TV couldn't stream, your laptop couldn't browse, and your phone couldn't connect to social media when you're at home. This introductory section will lay the groundwork, explaining precisely what an XGateway router is, why its proper configuration is paramount, and who stands to benefit most from the detailed instructions that follow.
A. What is an XGateway Router and Why is it Important?
An XGateway router, or any router functioning as a gateway, is a sophisticated network device designed to connect multiple computer networks and forward data packets between them. In simpler terms, it acts as the traffic controller for your home or small business network. It takes the single internet connection provided by your Internet Service Provider (ISP) and broadcasts it, typically via both wired (Ethernet) and wireless (Wi-Fi) connections, to all your connected devices. The "gateway" aspect refers to its role as the entry and exit point for all data traveling between your local area network (LAN) and the wider internet (WAN). Every single byte of data that leaves your computer for the internet, or arrives from the internet to your smartphone, passes through this gateway.
The importance of your XGateway router extends beyond mere connectivity. It often incorporates features like a firewall for security, Network Address Translation (NAT) to allow multiple devices to share a single public IP address, and DHCP (Dynamic Host Configuration Protocol) to assign unique IP addresses to each device on your local network. A properly configured XGateway ensures not only seamless internet access but also provides a layer of security, protects your privacy, and optimizes network performance for all connected devices. Conversely, a poorly set up or insecure gateway can lead to frustrating connectivity issues, slow speeds, and leave your network vulnerable to external threats.
B. The Core Purpose of a Gateway in Your Network
To fully appreciate the role of your XGateway, it's helpful to understand the fundamental concept of a gateway in networking. In essence, a gateway is a node on a network that serves as an access point to another network. For home users, their XGateway router is the default gateway because it is the only device that can communicate directly with the internet service provider's network. When your computer wants to access a website, it doesn't know the exact path to that website on the internet. Instead, it sends the request to its default gateway – your XGateway router. The router then takes on the responsibility of forwarding that request out to the internet and directing the incoming response back to the correct device on your local network.
Beyond this routing function, modern XGateway routers often integrate several other critical network services: * Wi-Fi Access Point: Broadcasting a wireless signal, allowing devices to connect without cables. * Firewall: Acting as a barrier, inspecting incoming and outgoing network traffic to block unauthorized access attempts and malicious data. * DHCP Server: Automatically assigning unique IP addresses to devices as they connect to the network, eliminating the need for manual configuration. * DNS Resolver: Translating human-readable domain names (like google.com) into machine-readable IP addresses. * Network Address Translation (NAT): A process that allows multiple devices on a private network to share a single public IP address for accessing the internet, conserving public IP addresses and adding a layer of privacy.
Understanding these multifaceted roles highlights why mastering your XGateway's setup and login procedures is not just a convenience, but a necessity for anyone seeking reliable and secure internet connectivity.
C. Who This Guide Is For
This extensive guide is meticulously crafted for a diverse audience, ensuring clarity and utility for various levels of technical proficiency. * First-Time Router Owners: If you've just purchased an XGateway router and are unsure where to begin, this guide will walk you through every physical and digital step. * Users Experiencing Connectivity Issues: If your internet is slow, dropping frequently, or you're unable to access certain services, troubleshooting often starts with logging into your router. This guide will help you regain control. * Individuals Upgrading Their Network: For those replacing an old router or switching ISPs, understanding the setup process is crucial for a smooth transition. * Anyone Seeking Enhanced Network Security: Learning how to change default passwords, update firmware, and configure security features through your XGateway's interface is vital for protecting your digital life. * Small Business Owners: For home offices or small businesses relying on an XGateway, this guide provides the foundational knowledge to ensure continuous operation and basic network management. * Tech Enthusiasts: Even experienced users might find new tips or a refreshed perspective on optimizing their XGateway's performance and exploring advanced features.
Regardless of your background, this guide aims to empower you with the knowledge and confidence to set up, log in, and manage your XGateway router effectively, transforming it from a mysterious black box into a reliable cornerstone of your digital experience.
II. Pre-Setup Essentials: Preparing for XGateway Access
Before you even think about plugging in your new XGateway router, a small investment of time in preparation can save you significant frustration down the line. Proper groundwork ensures a smooth setup process and helps you avoid common pitfalls. This section details everything you need to know and gather before you begin the physical installation, covering everything from identifying your specific router model to understanding the default credentials and ensuring you have the necessary physical connections. Think of this as your essential pre-flight checklist for a successful XGateway launch.
A. Identifying Your XGateway Model and Documentation
XGateway is a generic term used here to represent a category of routers that also function as network gateways. In reality, routers are manufactured by various companies, each with specific models, firmware interfaces, and features. Therefore, the very first step in preparing for setup is to accurately identify the brand and model number of your specific XGateway device. This information is typically printed on a label on the bottom or back of the router itself. It might look something like "XGateway Pro 7000" or "XGateway HomeHub AC1900".
Once you've identified the model, the next crucial step is to locate its accompanying documentation. Most routers come with a quick start guide or a more comprehensive user manual, either in printed form or accessible online from the manufacturer's support website. This documentation is invaluable as it often contains: * Specific setup instructions tailored to your model. * Default IP addresses for accessing the web interface. * Default login credentials (username and password). * Detailed explanations of indicator lights. * Troubleshooting tips unique to your device.
If you don't have the physical manual, a quick search online for "[Your XGateway Model] manual" will usually lead you to a downloadable PDF. Having this information readily available will be your most significant asset throughout the setup and login process.
B. Locating Essential Information: Default IP, Username, Password
Every XGateway router, fresh out of the box, comes pre-configured with a set of default credentials and a specific IP address that allows you to access its administrative interface. This information is absolutely critical for your first login.
- Default IP Address (Default Gateway IP): This is the numerical address you'll type into your web browser to reach the router's login page. Common default gateway IPs include
192.168.1.1,192.168.0.1,192.168.2.1, or10.0.0.1. - Default Username: Often "admin" or "user."
- Default Password: Frequently "admin," "password," "1234," or simply left blank.
This vital information is almost always printed on a sticker on the bottom or side of your XGateway router. Take a moment to physically turn the router over and locate this label. If you can't find it there, consult the manufacturer's documentation you just located. It is incredibly important to accurately note these down before proceeding. If these defaults have been changed previously and you don't know them, you might need to perform a factory reset, which we will discuss later.
C. Physical Connections: Power, Ethernet, Internet Source
Understanding and preparing your physical connections is paramount for a successful XGateway setup. This isn't just about plugging things in; it's about ensuring the right connections are made in the correct sequence.
- Power Adapter: Locate the power adapter that came with your XGateway router. Ensure it is the correct one for your specific model, as using an incompatible adapter can damage the device.
- Ethernet Cables: You will typically need at least two Ethernet cables.
- One for the WAN (Wide Area Network) port: This cable connects your XGateway router to your internet source (e.g., modem, ONT).
- One for a LAN (Local Area Network) port (optional but recommended for initial setup): This cable connects your computer directly to the XGateway router for the most stable first-time access. Ensure these cables are in good condition and long enough for your intended setup.
- Internet Source (Modem/ONT): Identify your existing internet source. This is usually a modem (for cable or DSL internet) or an Optical Network Terminal (ONT) for fiber optic internet. Ensure this device is powered on and actively receiving an internet signal from your ISP before connecting your XGateway. Your XGateway router acts as the second gateway in your chain, following your modem which acts as the initial gateway to your ISP's network.
D. Required Tools and Environment Setup
While setting up an XGateway router is generally straightforward, having a few basic tools and a conducive environment can make the process even smoother.
- Computer or Mobile Device: You'll need a device (laptop, desktop, tablet, or smartphone) with a web browser to access the router's administration page. For initial setup, a wired connection from a laptop or desktop is highly recommended for stability and ease of troubleshooting.
- Web Browser: Any modern web browser (Chrome, Firefox, Edge, Safari) will work. Ensure it's updated to the latest version.
- Pen and Paper: Crucial for jotting down default credentials, new passwords, Wi-Fi names, and any other important configuration details. Trust us, you'll thank yourself later.
- A Clear Workspace: Choose a location for your router that is central, elevated, and free from obstructions (like large metal objects or thick walls) that can interfere with Wi-Fi signals. This initial placement is important for optimal wireless performance. Avoid placing it in enclosed cabinets or near other electronics that might cause interference.
- Power Outlets: Ensure you have readily accessible power outlets for both your XGateway router and your internet source (modem/ONT).
By diligently completing these pre-setup essentials, you've laid a robust foundation for a hassle-free XGateway router installation and initial login. You're now equipped with all the necessary information and tools to proceed confidently to the physical setup stage.
III. Step-by-Step XGateway Router Physical Setup
With your preparations complete, it's time to bring your XGateway router to life. The physical setup involves a sequence of connections that are crucial for establishing a working network. Following these steps carefully will ensure that your router is correctly integrated into your home or office network infrastructure, serving as the essential gateway for all your internet-bound traffic. Pay close attention to the specific ports and indicator lights, as they provide valuable feedback throughout the installation.
A. Unboxing and Initial Placement Considerations
Upon opening the box, carefully remove the XGateway router, its power adapter, and any included Ethernet cables. Take a moment to familiarize yourself with the device itself: identify the various ports on the back or side, and note the location of any indicator lights on the front or top panel.
The physical placement of your XGateway router is more critical than many realize, directly impacting your Wi-Fi coverage and overall network performance. As the central gateway for your wireless devices, its signal propagation is key. * Central Location: Ideally, place the router in a central location within your home or office. This minimizes the distance to all your connected devices. * Elevated Position: Placing the router on a shelf or desk, rather than on the floor, can significantly improve signal strength, as Wi-Fi signals tend to travel downwards. * Avoid Obstructions: Keep the router away from large metal objects (like filing cabinets, refrigerators, or metal shelving), thick concrete walls, and reflective surfaces (like mirrors), as these can absorb or block Wi-Fi signals. * Minimize Interference: Position the router away from other electronics that emit radio waves, such as cordless phones (especially older 2.4 GHz models), microwave ovens, Bluetooth devices, and even smart home hubs, which can cause signal interference.
Thoughtful placement from the outset can prevent future Wi-Fi dead zones and enhance the efficiency of your network gateway.
B. Connecting the Power Adapter
This is the simplest, yet most fundamental, step. Locate the power port on your XGateway router, which is usually clearly labeled or identifiable as a round input jack.
- Plug the small end of the power adapter into the power port on the back of your XGateway router.
- Plug the other end of the power adapter into a wall outlet or a surge protector.
Do not power on the router yet, or if it powers on automatically, observe the lights but proceed to the next step before connecting the internet source. The proper sequence of connections can sometimes influence the router's initial configuration process, especially for the WAN connection.
C. Connecting to Your Internet Source (Modem/ONT)
This is the most critical connection, as it establishes the link between your XGateway router and the internet service provider's network. Your XGateway serves as the primary internal gateway, but it needs to connect to the external gateway provided by your ISP (typically a modem or ONT).
- Identify the WAN Port: On your XGateway router, locate the WAN (Wide Area Network) port. This port is often distinctively colored (e.g., blue) or clearly labeled "WAN," "Internet," or with a globe icon. It's usually separated from the other LAN ports.
- Connect to Modem/ONT: Take one of your Ethernet cables.
- Plug one end into the WAN port of your XGateway router.
- Plug the other end into the Ethernet port on your modem or Optical Network Terminal (ONT).
- Crucially, ensure your modem/ONT is already powered on and has established an internet connection (look for its internet indicator light to be solid green or blue). If your modem/ONT is not yet online, your XGateway router will not be able to connect to the internet. If you're replacing an old router, it's often a good practice to power cycle your modem (unplug, wait 30 seconds, plug back in) after connecting the new XGateway router to help it establish a new connection.
D. Connecting Devices to Your XGateway (Wired & Wireless Considerations)
While the XGateway router will broadcast Wi-Fi, for initial setup and troubleshooting, a wired connection is often preferred for its stability.
- Wired Connection (Recommended for Setup):
- Identify LAN Ports: On your XGateway router, locate the LAN (Local Area Network) ports. These are typically numbered (e.g., 1, 2, 3, 4) and often share the same color (e.g., yellow, black).
- Connect Your Computer: Take another Ethernet cable.
- Plug one end into any available LAN port on your XGateway router.
- Plug the other end into the Ethernet port on your computer or laptop. This direct connection ensures reliable access to the router's configuration page.
- Wireless Connection (for Post-Setup Access):
- Once your XGateway router is powered on and broadcasting a signal, you can connect wireless devices. You'll need the default Wi-Fi network name (SSID) and password, usually found on the sticker on the router. We'll detail this more in the next section.
E. First Power On and Indicator Lights Check
Now that all physical connections are made, it's time to power on your XGateway router (if it wasn't already).
- Power On: If you unplugged the power in step B, plug it back in. Most routers will automatically power on.
- Observe Indicator Lights: After powering on, your XGateway router will go through a startup sequence. This can take a few minutes. Pay close attention to the indicator lights on the front or top panel. While specific light configurations vary by model, generally look for:
- Power Light: Should be solid green or blue, indicating the device is powered on.
- Internet/WAN Light: Should turn solid green/blue or blink, indicating a connection to your modem/ONT and potentially to the internet. If it remains off or blinks amber/red, there's an issue with the internet connection.
- Wi-Fi Light: Should be solid or blinking, indicating that the wireless network is active.
- LAN Lights: If you have a device connected via Ethernet, the corresponding LAN port light should be solid or blinking, indicating a wired connection.
Consult your router's manual to understand the exact meaning of each light on your specific XGateway model. A stable set of lights, particularly for Power, WAN, and Wi-Fi, indicates a successful physical setup and that your XGateway router is ready for initial configuration and login. If lights are consistently off or red, double-check all your connections.
With the physical setup complete, your XGateway router is now a functional gateway hardware-wise. The next crucial step is to access its internal settings via a web browser and configure it for your specific needs.
IV. Initial Access and Login to Your XGateway Router
Once your XGateway router is physically set up and its indicator lights signal readiness, the next crucial step is to access its web-based management interface. This is where you'll configure your network settings, set up Wi-Fi, and secure your gateway. This section will guide you through connecting to the router, finding its default IP address, navigating to the login page, and successfully entering your credentials, ultimately leading to the critical step of changing those default security settings.
A. Establishing a Connection to the Router (Wired vs. Wi-Fi)
Before you can log into your XGateway router, your computer or device needs to be connected to its network. You have two primary methods for this: a wired Ethernet connection or a wireless Wi-Fi connection.
1. Wired Connection (Ethernet)
For the most reliable initial setup, especially if you're dealing with potential Wi-Fi issues or just prefer stability, a wired connection is highly recommended.
- Ensure Connection: As outlined in the physical setup, make sure an Ethernet cable runs from one of your XGateway's LAN ports to the Ethernet port on your computer.
- Verify Network Connectivity: Once connected, your computer should automatically obtain an IP address from the XGateway router (via DHCP). You can quickly verify this by checking your computer's network status. For Windows, go to Network & Internet settings; for macOS, look at Network Preferences. You should see an active Ethernet connection. This wired connection places your computer directly inside the network gateway's local area network, enabling direct access to its administrative interface.
2. Wireless Connection (SSID & Default Password)
If a wired connection isn't feasible or you prefer wireless, you can connect via Wi-Fi.
- Identify Default SSID: Look for the sticker on your XGateway router. It will list the default Wi-Fi network name, also known as the SSID (Service Set Identifier). This is often something like "XGateway_XXXX" or "XGateway-Setup."
- Find Default Wi-Fi Password: The sticker will also provide the default Wi-Fi password (sometimes called a "Network Key," "WPA/WPA2 Key," or "Wireless Password").
- Connect Your Device:
- On your computer or mobile device, open your Wi-Fi settings.
- Scan for available networks and locate the default SSID of your XGateway router.
- Select the network and enter the default Wi-Fi password when prompted.
- Once connected, your device will receive an IP address from the router, establishing communication within the XGateway's local network.
B. Identifying Your XGateway's Default IP Address
To access the router's login page, you need its IP address, which is typically referred to as the "default gateway IP address" in your device's network settings.
1. Common Default IPs for Gateways
Many XGateway routers, regardless of brand, use a few common IP addresses as their default gateway. * 192.168.1.1 (Very common, e.g., Linksys, TP-Link, some Netgear) * 192.168.0.1 (Also very common, e.g., D-Link, some Netgear, Trendnet) * 192.168.2.1 (Less common, but seen in some brands like Belkin) * 10.0.0.1 (Often used by ISPs for their provided gateway devices, e.g., Xfinity, AT&T)
2. Finding the IP on the Router Label
As mentioned in the pre-setup section, the easiest way to find your XGateway's default IP address is to look for the sticker on the bottom or back of the router itself. It will often be labeled "Router IP," "Default IP," or "IP Address."
3. Using Command Prompt (Windows) or Terminal (macOS/Linux)
If the label is missing or illegible, your connected computer can tell you the default gateway IP.
- For Windows:
- Press
Win + Rto open the Run dialog. - Type
cmdand press Enter to open the Command Prompt. - In the Command Prompt, type
ipconfigand press Enter. - Look for your active connection (Ethernet Adapter or Wireless LAN Adapter) and find the line labeled "Default Gateway." The IP address listed there is your XGateway router's IP.
- Press
- For macOS:
- Open Terminal (Applications > Utilities > Terminal).
- Type
netstat -rn | grep defaultand press Enter. - The IP address next to "default" in the "Gateway" column is your XGateway router's IP.
- For Linux:
- Open Terminal.
- Type
ip r | grep defaultorroute -n | grep UGand press Enter. - The IP address listed as the "gateway" for your main interface is your XGateway router's IP.
4. Checking Network Settings on Your Device
You can also find the default gateway IP through your device's graphical network settings:
- Windows: Settings > Network & Internet > (Ethernet or Wi-Fi) > Hardware properties (or View hardware and connection properties) > Look for "Default Gateway."
- macOS: System Settings > Network > (select your active connection, e.g., Wi-Fi or Ethernet) > Details > TCP/IP tab > Router.
- Android/iOS: Go to Wi-Fi settings, tap on your connected network, and look for "Router," "Gateway," or "IP Address."
C. Accessing the Router's Login Page Through a Web Browser
Once you have the XGateway's IP address, accessing its configuration interface is straightforward.
- Open a Web Browser: Launch your preferred web browser (Chrome, Firefox, Edge, Safari).
- Enter the IP Address: In the address bar (where you usually type website URLs like
google.com), type the default IP address you identified (e.g.,192.168.1.1) and press Enter. - Login Prompt: If successful, your browser will display a login page or a pop-up window asking for a username and password. This is the gateway's authentication interface.
D. Entering Default Login Credentials (Username & Password)
This is where the information you noted down from the router's sticker or manual becomes crucial.
1. Where to Find Default Credentials
- Router Label: As covered, the most common place is a sticker on the bottom or back of the XGateway router. It will clearly list "Username" and "Password."
- Manufacturer's Documentation: If the sticker is missing or faded, refer to the quick start guide or user manual specific to your XGateway model.
- Online Search: As a last resort, you can search online for "default username password [Your XGateway Model]" (e.g., "default username password XGateway Pro 7000"). Be cautious with third-party sites and cross-reference information if possible.
Table of Common Default Router Credentials:
| Manufacturer (Example) | Common Default IP Address | Common Default Username | Common Default Password |
|---|---|---|---|
| XGateway (Generic) | 192.168.1.1, 192.168.0.1 | admin | admin, password, (blank) |
| Linksys | 192.168.1.1 | admin | admin |
| TP-Link | 192.168.0.1, 192.168.1.1 | admin | admin |
| Netgear | 192.168.1.1, 10.0.0.1 | admin | password |
| D-Link | 192.168.0.1 | admin | (blank) |
| Asus | 192.168.1.1 | admin | admin |
| Eero | 192.168.4.1 (via app) | (email/phone login) | (app based) |
Note: Always consult your specific XGateway router's label or manual first, as these are generic examples.
2. What to Do If Defaults Don't Work (Reset Option Preview)
If you enter the default credentials and are denied access, it usually means one of two things: * Typo: Double-check your spelling and case sensitivity. * Credentials Were Changed: Someone previously configured the router and changed the default username and password.
If you cannot recall the changed credentials, your only option is typically to perform a factory reset of your XGateway router. This process reverts all settings, including the login credentials, back to their original factory defaults. We will cover how to perform a hard reset in the troubleshooting section, but be aware that this will erase all custom configurations you might have on the router, including Wi-Fi names, passwords, and any port forwarding rules.
E. Security Prompt: Changing Default Credentials Immediately
This is the most critical security step after your first successful login. XGateway routers come with default credentials for ease of setup, but these are widely known and pose a significant security risk. Anyone with access to your network or even external attackers attempting brute-force logins can easily guess these default passwords.
Upon logging in for the first time, many XGateway routers will automatically prompt you to change the default administrator username and password. If yours doesn't, navigate immediately to the "Administration," "Security," "Management," or "Tools" section within the router's interface.
- Change Username: If possible, change the default "admin" username to something unique and non-obvious.
- Change Password: Create a strong, unique password for your router's administration interface. A strong password should:
- Be at least 12-16 characters long.
- Include a mix of uppercase and lowercase letters.
- Incorporate numbers and symbols.
- Not be easily guessable (avoid personal information, common words).
- Be unique (not used for any other online account).
- Save Changes: After changing, ensure you click "Apply," "Save," or "OK" to store the new credentials.
Write down these new credentials and store them in a secure place. Losing them means you'll have to perform a factory reset to regain access, losing all your custom configurations. By changing these defaults, you've significantly hardened your XGateway, transforming it from a potentially open gateway into a securely locked one.
With a successful login and updated credentials, you've now mastered the initial access to your XGateway router. You are ready to explore its interface and configure your network to your specific preferences and security needs.
V. Navigating the XGateway Router Interface: First Steps After Login
Congratulations! You've successfully logged into your XGateway router's administration interface, securing your initial gateway access. This interface is your control panel for the entire network. While the exact layout and terminology may vary slightly between XGateway models and manufacturers, the core functionalities remain consistent. This section will guide you through understanding the dashboard, making essential first configurations, and exploring basic network settings to customize your network experience.
A. Understanding the Dashboard/Main Screen
Upon logging in, you'll typically be greeted by a dashboard or a main status screen. This screen usually provides an overview of your XGateway router's current operational status.
Common elements you might find on the dashboard include: * Internet Status: Indicating whether your router is successfully connected to the internet. * Connected Devices: A list or count of devices currently connected to your network, both wired and wireless. * Wi-Fi Status: Information about your wireless networks (SSID, security type, channel). * Firmware Version: The current software version running on your XGateway router. * Network Map: Some more advanced interfaces offer a visual representation of your network topology. * Quick Settings/Setup Wizard: Often, a link to a wizard for common configurations like Wi-Fi setup.
Spend a few moments familiarizing yourself with this dashboard. It’s the central point from which you’ll navigate to all other settings, acting as your command gateway for network management.
B. Essential First Configurations
After securing the admin login, the very next steps involve configuring your Wi-Fi and ensuring your router's software is up to date. These are crucial for both usability and security.
1. Changing the Wi-Fi Name (SSID) and Password
Leaving your Wi-Fi network with its default name and password is both unmemorable and insecure. A personalized Wi-Fi setup enhances your network's identity and security.
- Navigate to Wireless/Wi-Fi Settings: Look for a section labeled "Wireless," "Wi-Fi," "WLAN," or similar. This is usually under a main menu item.
- Change SSID: Find the field for "Network Name" or "SSID." Change it to something recognizable and unique, but avoid including personal identifiable information.
- Change Wi-Fi Password (Security Key): Locate the field for "Wireless Password," "Pre-Shared Key (PSK)," or "Network Key." Create a strong, unique password using a mix of upper and lowercase letters, numbers, and symbols. This is distinct from your router's admin password.
- Choose Security Type: Ensure the security type is set to WPA2-PSK (AES) or, if available and supported by all your devices, WPA3-Personal. Avoid WEP and WPA/WPA-PSK (TKIP) as they are less secure.
- Save Changes: Click "Apply," "Save," or "OK." Your Wi-Fi devices will temporarily disconnect as the router reconfigures. You will then need to reconnect all your devices using the new Wi-Fi name and password. This effectively re-secures the wireless gateway to your network.
2. Updating Router Firmware
Firmware is the operating software embedded in your XGateway router. Manufacturers regularly release updates to improve performance, add features, and, most importantly, patch security vulnerabilities. Running outdated firmware is akin to leaving a digital back door open.
- Navigate to Firmware/System Update: Look for sections like "Administration," "System Tools," "Firmware Upgrade," or "Maintenance."
- Check for Updates: Some routers have an automatic "Check for Updates" feature. Others require you to manually download the firmware file from the manufacturer's website (ensure it's for your exact model) and then upload it through the interface.
- Follow Instructions Carefully: Firmware updates can be risky if not performed correctly. Ensure you have a stable power supply and do not interrupt the process. Read any on-screen warnings or instructions thoroughly.
- Reboot: After the update, the router will usually reboot automatically.
- Benefits: Updated firmware ensures your XGateway router benefits from the latest security patches and performance enhancements, making it a more resilient and efficient gateway.
3. Setting Up a Secure Administrator Password (If Not Already Done)
While we covered this immediately after the first login, it bears repeating. If your router did not force you to change the default admin password, do it now. This password protects access to the entire router configuration. Find the "Administration," "Management," or "Security" section and change the password from the default to a strong, unique one. This is the single most important step to prevent unauthorized access to your network's control gateway.
C. Exploring Basic Network Settings
Beyond Wi-Fi, your XGateway router manages the fundamental aspects of your local network and its connection to the internet.
1. LAN Settings (IP Address, DHCP Server)
The LAN (Local Area Network) settings define how devices within your home network communicate with each other and with the router itself.
- Router's LAN IP Address: This is the default gateway IP address (e.g.,
192.168.1.1) you used to log in. You generally don't need to change this unless it conflicts with another device on your network or you have advanced networking requirements. - Subnet Mask: Typically
255.255.255.0for home networks. This defines the range of IP addresses within your local network. - DHCP Server: This service automatically assigns IP addresses to new devices that connect to your XGateway router.
- Enable/Disable: It should almost always be enabled for home users.
- IP Address Pool: This specifies the range of IP addresses (e.g.,
192.168.1.100to192.168.1.200) that the DHCP server will hand out. You can adjust this if you need more or fewer available addresses, or want to reserve some for static IP assignments. - Lease Time: How long a device keeps its assigned IP address before requesting a new one. Default values (e.g., 24 hours) are usually fine.
Understanding these settings gives you control over how your devices obtain their network identity within the XGateway's domain.
2. WAN Settings (Internet Connection Type)
The WAN (Wide Area Network) settings dictate how your XGateway router connects to your Internet Service Provider (ISP).
- Connection Type: This is one of the most important settings and must match what your ISP provides. Common types include:
- Dynamic IP (DHCP): Most common for cable and fiber internet. Your XGateway router automatically receives an IP address from your ISP's modem.
- Static IP: Less common for homes, typically used if your ISP provides a fixed, unchanging IP address. You'll need to manually enter the IP address, subnet mask, gateway, and DNS server information provided by your ISP.
- PPPoE (Point-to-Point Protocol over Ethernet): Common for DSL connections. You'll need to enter a username and password provided by your ISP.
- L2TP/PPTP: Less common for typical home use, sometimes for specific VPN configurations from ISPs.
- DNS Servers: By default, your XGateway router might use your ISP's DNS servers. You can often manually set these to public DNS servers (like Google DNS:
8.8.8.8,8.8.4.4or Cloudflare DNS:1.1.1.1,1.0.0.1) for potentially faster browsing and enhanced privacy.
Ensure these WAN settings are correctly configured, as they are the primary gateway for your XGateway router to connect to the outside world. Incorrect settings here will result in no internet access.
D. Introduction to Advanced Features (Brief Mention)
While we'll delve deeper into advanced features shortly, it's worth noting their presence during your initial exploration. Most XGateway routers offer sections for: * Port Forwarding: Directing specific internet traffic to internal devices. * QoS (Quality of Service): Prioritizing certain types of network traffic. * Parental Controls: Managing internet access for specific devices or users. * VPN: Virtual Private Network settings. * Firewall: More granular control over network security rules. * Guest Network: Creating a separate Wi-Fi network for visitors.
For now, focus on the essentials. Once those are secure and functioning, you can confidently explore these advanced settings to further optimize your XGateway for performance and security. By mastering these initial configurations, you've established a solid foundation for a well-managed and secure network, ensuring your XGateway functions as a reliable gateway for all your digital needs.
APIPark is a high-performance AI gateway that allows you to securely access the most comprehensive LLM APIs globally on the APIPark platform, including OpenAI, Anthropic, Mistral, Llama2, Google Gemini, and more.Try APIPark now! 👇👇👇
VI. Advanced XGateway Configurations for Enhanced Performance and Security
Beyond the basic setup and login, your XGateway router harbors a suite of advanced features designed to fine-tune your network, enhance security, and cater to specific usage scenarios. Mastering these configurations can transform your network from merely functional to highly optimized, secure, and tailored to your household or business needs. This section dives into some of the most impactful advanced settings, explaining their purpose and guiding you through their setup within your XGateway's interface, allowing you to unlock its full potential as a sophisticated network gateway.
A. Port Forwarding: Opening the Gateway for Specific Applications
Port forwarding is a network configuration that redirects incoming network requests from a specific external port to a particular device and port on your local network. Essentially, it creates a direct path through your XGateway's firewall for certain types of traffic, allowing external services to initiate connections to devices behind your router.
1. What is Port Forwarding?
Imagine your XGateway router's firewall as a protective wall around your local network. Most incoming requests from the internet are blocked by default for security. Port forwarding acts like telling your gateway (the router) to create a specific "doorway" (a port) for a particular type of traffic and direct it to a specific "room" (a device's internal IP address) on your network.
2. Use Cases (Gaming, CCTV, Remote Access)
Port forwarding is essential for applications that require inbound connections from the internet: * Online Gaming: Many peer-to-peer multiplayer games require specific ports to be open for optimal connectivity with other players. * CCTV/Security Cameras: If you want to access your home security camera system remotely from outside your network. * Remote Desktop Access: Allowing you to remotely connect to a computer on your home network from a different location. * Home Servers: Hosting a personal website, FTP server, or media server (e.g., Plex) that needs to be accessible from the internet. * IoT Devices: Certain smart home devices might require specific ports for external control.
3. How to Configure Port Forwarding on XGateway
The process typically involves these steps:
- Assign a Static IP Address: The device you are forwarding ports to (e.g., your gaming PC, CCTV recorder) needs a static (unchanging) internal IP address. If its IP changes, the port forward rule will break. You can usually do this in your XGateway router's DHCP settings by reserving an IP address for that device's MAC address, or by manually setting a static IP on the device itself (outside the DHCP pool range).
- Navigate to Port Forwarding Settings: Look for sections like "Port Forwarding," "Virtual Servers," "NAT," or "Applications & Gaming" within your router's interface.
- Create a New Rule: You'll typically need to provide the following information:
- Service Name: A descriptive name for the rule (e.g., "Minecraft Server," "CCTV Access").
- Internal IP Address: The static IP address of the device on your local network that you want to forward traffic to.
- External Port(s): The port numbers that external requests will use to reach your XGateway router.
- Internal Port(s): The port numbers on the internal device that the traffic should be directed to. These are often the same as the external ports.
- Protocol: Choose TCP, UDP, or Both, depending on the application's requirements.
- Enable: Ensure the rule is active.
- Save/Apply: Save the changes to activate the port forwarding rule.
Caution: Opening ports can expose your internal network to external threats if not done carefully. Only forward ports that are absolutely necessary and ensure the target device is secure. This allows controlled opening of the network gateway for specific applications.
B. QoS (Quality of Service): Prioritizing Network Traffic
QoS is a feature that allows you to prioritize certain types of network traffic over others, ensuring that critical applications receive the bandwidth they need, even when your network is busy.
1. Importance of QoS
Without QoS, all network traffic is treated equally. This means if someone is downloading a large file, it could cause lag for someone trying to video conference or play an online game. QoS lets you specify that voice calls (VoIP), video streaming, or online gaming traffic should take precedence over less time-sensitive activities like file downloads or software updates. This helps in maintaining a smooth experience for critical applications across your XGateway.
2. Setting Up QoS Rules
- Navigate to QoS Settings: Look for "QoS," "Bandwidth Control," or "Traffic Management."
- Enable QoS: Often, you'll need to enable the feature first.
- Define Rules: QoS systems vary widely. Some allow you to prioritize by:
- Application/Service: Pre-defined rules for common applications (e.g., Skype, Netflix, Xbox Live).
- Device: Prioritizing all traffic from a specific device (e.g., your work laptop).
- Port Range: Prioritizing traffic on specific ports.
- Bandwidth Allocation: Some advanced systems allow you to guarantee minimum bandwidth for certain devices or applications, or set maximums for others.
- Upload/Download Speed: Some QoS settings require you to input your actual internet upload and download speeds to work effectively. You can get these from a speed test (e.g., Speedtest.net).
- Save Changes: Apply your QoS rules.
Properly configured QoS can significantly improve the perceived performance of your network by intelligently managing the flow through your XGateway, especially under heavy load.
C. Parental Controls: Managing Network Access for Children
Parental controls allow you to supervise and restrict internet access for specific devices or users on your XGateway network, promoting a safer online environment for children.
1. Filtering Websites
- Navigate to Parental Controls: Look for "Parental Controls," "Access Restrictions," or "Security" settings.
- Block Websites/Keywords: You can often:
- Block specific URLs (websites): Enter the exact addresses of sites you want to prevent access to.
- Block keywords: Prevent access to pages containing certain words.
- Use content categories: Some XGateway routers integrate with external filtering services that categorize websites (e.g., adult content, gambling, violence) for broader blocking.
- Schedule Blocking: Apply these filters to specific devices and often schedule them (e.g., blocking social media during homework hours).
2. Scheduling Internet Access
- Time-Based Restrictions: A common feature is to restrict internet access for specific devices (e.g., a child's tablet) during certain hours of the day or week. This can be useful for enforcing bedtime or study time.
- Usage Limits: Less common on basic XGateway routers, but some advanced ones allow setting daily or weekly internet usage limits.
Parental controls, while not foolproof, provide a valuable first line of defense at the network gateway level against inappropriate content and excessive screen time.
D. VPN Pass-through/Server: Securing Your Connection
VPN (Virtual Private Network) functionality on an XGateway router can serve two main purposes: allowing VPN clients to pass through the router's firewall, or making the router itself a VPN server.
1. Client vs. Server
- VPN Pass-through (Client): Most modern XGateway routers support VPN pass-through by default. This means if you have a VPN client software running on your computer, the router won't block its encrypted traffic. You typically don't need to configure anything for this.
- VPN Server (XGateway as Server): Some XGateway routers have built-in VPN server capabilities (e.g., OpenVPN, PPTP, L2TP). This allows you to securely connect to your home network from anywhere in the world, creating an encrypted "tunnel" through the internet to your XGateway. For example, you could access your home network shares or devices as if you were physically at home. This is especially useful for remote work or accessing local resources securely.
2. Configuration Steps (for VPN Server)
- Navigate to VPN Server Settings: Look for "VPN Server," "VPN," or "Security" settings.
- Choose VPN Protocol: Select the protocol (OpenVPN is generally preferred for security).
- Configure Users/Certificates: Create user accounts and, for OpenVPN, generate certificates.
- Dynamic DNS (DDNS): If your ISP provides a dynamic public IP address, you'll need a DDNS service configured so you can always find your XGateway from the internet, even if its IP changes.
- Enable and Save: Activate the VPN server and save your settings.
Setting up an XGateway as a VPN server effectively extends the secure perimeter of your home network, making it a truly private gateway for remote access.
E. Guest Wi-Fi Network: Providing Secure Access
A Guest Wi-Fi Network is a separate wireless network that your XGateway router broadcasts, designed for visitors or IoT devices.
1. Benefits of a Guest Network
- Security: Guests connect to a separate network that typically has no access to your main local network devices (like shared files, printers, or smart home controls). This isolates potential threats from guest devices.
- Privacy: Keeps your main Wi-Fi password private.
- Bandwidth Control: Some XGateway routers allow you to set bandwidth limits for the guest network, preventing guests from monopolizing your internet connection.
2. Setup Instructions
- Navigate to Guest Network Settings: Look for "Guest Network," "Guest Wi-Fi," or "Wireless" settings.
- Enable Guest Network: Turn the feature on.
- Configure SSID and Password: Give it a unique name (SSID) and a separate password.
- Isolation: Ensure "Client Isolation" or "AP Isolation" is enabled to prevent guest devices from seeing each other and your main network.
- Access: Define whether guests can access the internet only or also limited local resources.
- Save/Apply: Activate the guest network.
A guest network provides a secure and controlled gateway for temporary users, protecting the integrity of your primary home network. These advanced configurations elevate your XGateway from a simple internet provider to a sophisticated network manager, granting you granular control over performance, security, and access, ensuring it remains a highly optimized digital gateway for your evolving needs.
VII. Troubleshooting Common XGateway Access and Login Issues
Even with the most meticulous setup, network issues can occasionally arise. When you encounter problems accessing your XGateway router's login page or maintaining a stable internet connection, a systematic troubleshooting approach is key. This section addresses the most common XGateway-related issues, providing practical solutions that empower you to diagnose and resolve problems efficiently, minimizing downtime and restoring your network's full functionality as a reliable digital gateway.
A. "Cannot Access Router Login Page"
This is a frequently encountered problem during initial setup or when trying to reconfigure your XGateway. Several factors can prevent your browser from reaching the router's interface.
1. Incorrect IP Address
- Verification: Double-check the IP address you are entering into your browser's address bar. It must be your XGateway's LAN IP address (the default gateway). Refer to the router's sticker, manual, or use
ipconfig/netstatas described in Section IV.B. - Prefix: Ensure you're not including "http://" or "www." at the beginning, though modern browsers usually handle this. Simply
192.168.1.1should suffice.
2. Network Connectivity Issues
- Wired Connection: If using Ethernet, ensure the cable is firmly plugged into both the XGateway's LAN port and your computer's Ethernet port. Check the corresponding LAN light on the router. Try a different Ethernet cable if available.
- Wireless Connection: If using Wi-Fi, verify that your device is actually connected to your XGateway's Wi-Fi network (and not, for example, a neighbor's network or your mobile data). Ensure the Wi-Fi indicator light on the router is active.
- IP Address Conflict: Rarely, another device on your network might somehow have the same IP address as your router. Restarting all devices (router, modem, computer) can often resolve this temporary conflict.
- No IP from DHCP: Your computer might not be receiving an IP address from the XGateway. Check your computer's network adapter settings to ensure it's set to "Obtain an IP address automatically" (DHCP).
3. Browser Cache/Compatibility
- Clear Cache: Sometimes, a browser's cache can interfere. Try clearing your browser's cache and cookies, or try using a different web browser (e.g., if you're using Chrome, try Firefox or Edge).
- Incognito/Private Mode: Open an Incognito/Private browsing window and try to access the IP address. This often bypasses problematic extensions or cache.
- Browser Extensions: Temporarily disable browser extensions, as some can interfere with local network access.
4. Firewall Interference
- Computer Firewall: Your computer's antivirus or firewall software might be blocking access to the router's IP. Temporarily disable your computer's firewall (just long enough to test access) to see if it's the culprit. Remember to re-enable it afterwards.
B. "Incorrect Username or Password"
This issue arises when you successfully reach the login page but are unable to gain administrative access to your XGateway.
1. Typing Errors
- Case Sensitivity: Usernames and passwords are often case-sensitive. Ensure Caps Lock is off unless intentionally part of your password.
- Special Characters: Double-check any special characters.
- Numeric Keypad: Be careful if using a numeric keypad; ensure Num Lock is on if needed.
2. Changed Credentials
- Recall History: Did you (or someone else) change the default username and password at some point? Try any custom credentials you might have set. Check your notes.
- ISP-Provided Gateways: If your XGateway router was provided by your ISP, they sometimes use custom default credentials unique to their devices, or sometimes they even pre-configure it with a unique password printed on the sticker.
3. Router Reset as a Last Resort
- Factory Reset: If you've tried every possible combination and still can't log in, a factory reset is usually the only option. This will revert the XGateway router to its original default username and password (which will be on the sticker or in the manual) and erase all custom configurations you've made. Proceed with caution, as you'll have to reconfigure everything from scratch, including Wi-Fi names and passwords, port forwarding, etc.
C. "No Internet Connection After Setup"
Your XGateway router is connected, you can log in, but there's no internet access on any device. This means the gateway to the outside world is blocked.
1. Modem/ISP Issues
- Modem Status: Check your modem/ONT's indicator lights. Is it online and receiving a signal from your ISP? If not, the problem is with your ISP or the modem, not necessarily your XGateway router. Contact your ISP if the modem isn't online.
- ISP Outage: Check your ISP's website or social media for local outages.
- Power Cycle Modem: Unplug your modem from power for 30 seconds, then plug it back in. Wait for it to fully restart and establish an internet connection before checking your XGateway.
2. Incorrect WAN Settings
- Connection Type: This is the most common culprit. Log into your XGateway router and navigate to "WAN" or "Internet Settings." Ensure the "Internet Connection Type" (e.g., Dynamic IP, PPPoE, Static IP) matches what your ISP requires. If it's PPPoE, ensure the username and password are correct.
- MAC Address Clone: Some ISPs tie your internet service to the MAC address of your original modem or a specific router. In the WAN settings, you might find an option to "Clone MAC Address." If your previous router worked and the new XGateway doesn't, try cloning the MAC address of the old device (or your computer's if you connected directly to the modem previously).
3. Cable Connections
- WAN Port: Ensure the Ethernet cable from your modem is securely plugged into your XGateway's WAN port (not a LAN port). Check the WAN indicator light on the router.
D. Slow Network Performance
Even if you have internet access, if it's consistently slow, the XGateway router might be the bottleneck.
1. Wi-Fi Interference
- Channel Congestion: Other Wi-Fi networks in your area, or other devices (microwaves, cordless phones), can interfere. Log into your XGateway, go to "Wireless" settings, and look for "Channel" or "Wireless Channel." Try changing the 2.4 GHz channel to 1, 6, or 11, which are non-overlapping. For 5 GHz, there are more channels, and auto-selection usually works well, but you can try experimenting.
- Signal Strength: Ensure your router is optimally placed (central, elevated, away from obstructions) to maximize signal strength throughout your space.
2. Outdated Firmware
- Update: As mentioned, outdated firmware can lead to performance issues and security vulnerabilities. Check for and install the latest firmware updates for your XGateway.
E. The Importance of a Hard Reset: When and How to Reset Your XGateway Router
A hard reset, or factory reset, is a powerful troubleshooting step that should be used as a last resort. It wipes all custom configurations and reverts your XGateway router to its original factory settings.
When to Perform a Hard Reset:
- Lost Admin Password: When you can't access the login page because you forgot the administrator password.
- Persistent Connectivity Issues: When you've tried all other troubleshooting steps, and your XGateway router continues to have major, unresolvable issues (e.g., constant drops, severe slowdowns).
- Selling/Giving Away Router: To wipe all personal data and settings before transferring ownership.
How to Perform a Hard Reset:
- Locate the Reset Button: On the back or bottom of your XGateway router, you'll find a small, recessed button labeled "Reset." It's usually a pinhole, requiring a paperclip or pen to press.
- Power On: Ensure the router is powered on.
- Press and Hold: Use a paperclip or similar pointed object to press and hold the reset button for 10-15 seconds. Do not release until the indicator lights start blinking rapidly or change color significantly.
- Release: Release the button. The router will then reboot, which can take a few minutes.
- Reconfigure: After the reboot, your XGateway router will be in its factory default state. You'll need to reconnect to it using the default Wi-Fi SSID and password (from the sticker), log in with the default admin credentials, and reconfigure all your settings (Wi-Fi name, password, WAN settings, etc.) from scratch.
By systematically working through these troubleshooting steps, you'll be well-equipped to resolve most common access and connectivity problems with your XGateway router, ensuring your digital gateway remains open and functional.
VIII. Securing Your XGateway Router: Beyond the Basics
While we've touched upon changing default passwords, securing your XGateway router is an ongoing process that extends beyond initial setup. Your router is the primary gateway to your home network, making it a prime target for malicious actors. A compromised router can expose all your connected devices to surveillance, data theft, and other cyber threats. This section details essential security practices that will fortify your XGateway, transforming it from a mere access point into a robust digital fortress.
A. Regular Firmware Updates: Patching Vulnerabilities
This is perhaps the single most important ongoing security measure. Firmware is the operating system of your XGateway router, and like any software, it can have vulnerabilities.
- Why it's crucial: Manufacturers continuously discover and patch security flaws in their firmware. An unpatched router is an open invitation for attackers to exploit known weaknesses, potentially gaining full control over your network gateway.
- How to do it: Regularly (e.g., quarterly) log into your XGateway's administration interface. Navigate to the "Firmware Upgrade," "System Update," or "Maintenance" section. Check for and apply any available updates. If your router supports automatic updates, enable them. If not, you might need to manually download the latest firmware from the manufacturer's official support website for your specific model. Always ensure a stable power supply during the update process.
B. Strong, Unique Passwords for Admin and Wi-Fi
We've emphasized this previously, but it bears repeating due to its critical importance. Default passwords are a massive security liability.
- Router Admin Password: This protects access to your XGateway's settings. It must be strong, unique, and complex (long, mix of characters, not a dictionary word).
- Wi-Fi Password (WPA2/WPA3 Key): This protects access to your wireless network. While not directly protecting the router's settings, a weak Wi-Fi password allows unauthorized individuals onto your network, from where they could attempt to access your router. This too should be strong, unique, and complex.
- Regular Changes: Consider changing these passwords periodically, perhaps annually or bi-annually, especially if you suspect unauthorized access or have shared them temporarily.
C. Disabling Remote Management if Not Needed
Remote management is a feature that allows you to log into and configure your XGateway router from outside your local network (i.e., from the internet).
- Security Risk: While convenient for some users, it presents a significant security risk if not absolutely necessary. An open remote management port is a direct gateway for attackers to probe and potentially exploit your router.
- Recommendation: If you don't explicitly need to configure your router when you're away from home, disable remote management. This setting is usually found under "Administration," "Security," or "Remote Access" within the router's interface. Ensure it's off by default.
D. MAC Address Filtering
MAC (Media Access Control) address filtering allows you to create a whitelist or blacklist of devices that are permitted or denied access to your Wi-Fi network.
- Whitelist Approach: You can configure your XGateway router to only allow devices with specific MAC addresses to connect. This means any unknown device, even if it has the Wi-Fi password, will be blocked.
- How to Configure:
- Find the MAC address of all your legitimate devices (usually in the device's network settings).
- Navigate to "Wireless Security," "MAC Filtering," or "Access Control" in your XGateway's interface.
- Enable MAC filtering and select the "Allow" or "Whitelist" option.
- Add the MAC addresses of all your approved devices.
- Limitations: MAC address filtering is a good deterrent but not foolproof, as MAC addresses can be "spoofed" (faked) by determined attackers. It should be used as an additional layer of security, not a primary one.
E. Understanding Firewall Settings on Your Gateway
Your XGateway router has a built-in firewall that acts as the first line of defense against external threats. While usually sufficient in its default configuration for home users, understanding its settings can offer deeper insights.
- SPI Firewall: Most routers use a Stateful Packet Inspection (SPI) firewall, which keeps track of active connections and only allows incoming traffic that is part of an established, legitimate connection. This is generally enabled by default and should remain so.
- DoS Protection: Many XGateway routers offer Denial-of-Service (DoS) protection, which helps mitigate certain types of attacks aimed at overwhelming your network. Ensure this is enabled.
- Port Blocking: Beyond port forwarding, you can explicitly block specific ports for outgoing or incoming traffic if you have a specific security concern. However, be cautious as this can impact legitimate applications.
- VPN Pass-through: Ensure this is enabled if you use VPN client software on your devices (as discussed in Section VI.D).
The XGateway's firewall is your network's perimeter defense; understanding its basic functions empowers you to confirm its robust operation.
F. Regular Review of Connected Devices
It's a good practice to periodically check which devices are connected to your XGateway network.
- Device List: Log into your XGateway router and look for a section like "Connected Devices," "DHCP Client List," or "Wireless Clients." This will show all devices currently connected (or recently connected) to your network, along with their MAC addresses and assigned IP addresses.
- Identify Unknown Devices: If you see any unfamiliar devices, it could indicate unauthorized access. Investigate immediately. You can often block unknown devices directly from this list within the router's interface.
- Rename Devices: If your XGateway router allows it, rename connected devices (e.g., "John's iPhone," "Living Room TV") to easily identify them.
By diligently implementing these security measures, you fortify your XGateway router, making it a much harder target for cyber threats. A secure gateway is the bedrock of a safe and private digital life, safeguarding your personal data and ensuring peace of mind.
IX. The Broader Context: Gateways in Modern IT Infrastructure
The concept of a "gateway" extends far beyond the home router. In the vast and intricate world of enterprise IT, the term "gateway" takes on more sophisticated meanings, underpinning the architecture of modern applications and services. While your XGateway router is a physical device that serves as a network gateway for internet access, in complex digital environments, gateways often refer to logical constructs that manage the flow of digital traffic, particularly for APIs (Application Programming Interfaces) and increasingly, AI models. This expanded understanding helps contextualize the critical role that specialized gateway solutions play in ensuring efficiency, security, and scalability in the digital economy.
A. Expanding the "Gateway" Concept Beyond Home Routers
At its core, any device or system that allows traffic to pass from one network to another, or from one domain of services to another, can be considered a gateway. Your XGateway router is a network layer gateway, translating and forwarding IP packets between your home LAN and the internet WAN. In enterprise settings, this concept scales up dramatically.
- Enterprise Network Gateways: Large organizations have complex network gateways that manage traffic between different departments, data centers, and cloud environments, often involving advanced firewalls, load balancers, and VPN concentrators.
- Application Gateways: At the application layer, gateways act as reverse proxies, routing web requests to the correct backend services, providing SSL termination, and enforcing security policies. These are crucial for microservices architectures.
- API Gateways: As applications increasingly rely on APIs to communicate, a specialized form of gateway has emerged to manage this interaction.
The transition from a physical network gateway (like your XGateway router) to these more abstract, software-defined gateways highlights the ever-evolving nature of network and service management. These specialized gateways are designed to handle specific types of digital traffic and enforce complex rulesets tailored to application logic, rather than just network addresses.
B. The Role of API Gateways in Enterprise Environments
An API gateway is a server that acts as an API frontend, taking all API requests, determining the correct service, and routing them to the appropriate backend. It is the single entry point for a group of microservices or external APIs.
1. Centralized Management
For businesses running numerous microservices and consuming external APIs, an API gateway provides a centralized point to manage them all. Instead of clients needing to know the addresses and specific details of dozens of individual services, they simply interact with the gateway. This simplifies client-side development and allows for easier refactoring of backend services without affecting consumers.
2. Security and Authentication
API gateways are crucial for implementing security policies. They can handle authentication (verifying user identity) and authorization (determining what resources a user can access), offloading this complexity from individual backend services. They can also perform rate limiting to prevent abuse, inject security headers, and integrate with enterprise identity management systems.
3. Traffic Management
High-traffic APIs require intelligent management. API gateways can implement load balancing to distribute requests across multiple instances of a service, ensuring high availability and performance. They can also apply routing rules, circuit breakers to prevent cascading failures, and caching to reduce latency and backend load.
4. Monitoring and Analytics
By sitting at the entry point of all API traffic, gateways are perfectly positioned to collect valuable data on API usage, performance, and errors. This allows for real-time monitoring, detailed analytics, and insights into how APIs are being consumed and performing, which is critical for capacity planning and troubleshooting.
C. Introducing APIPark: Your Open-Source AI Gateway & API Management Platform
In the evolving landscape of digital services, where Artificial Intelligence (AI) models are rapidly integrating into applications, the need for advanced gateway solutions has become even more pronounced. This is precisely where a platform like APIPark comes into play. Just as your XGateway router serves as the essential gateway for your home internet, APIPark acts as a sophisticated digital gateway designed specifically for managing, integrating, and deploying AI and REST services within enterprise environments.
APIPark is an all-in-one AI gateway and API developer portal, open-sourced under the Apache 2.0 license, making it an accessible yet powerful solution for developers and enterprises. It addresses the growing complexity of integrating a multitude of AI models and traditional REST APIs by providing a unified and secure gateway.
Think of your XGateway router as managing the traffic of basic data packets. APIPark elevates this concept by managing the much more complex traffic of API calls, particularly those interacting with diverse AI models. This platform offers several key features that resonate with the advanced gateway functionality discussed:
- Quick Integration of 100+ AI Models: Similar to how your XGateway router connects diverse devices to the internet, APIPark provides a unified management system to integrate a vast array of AI models, handling authentication and cost tracking centrally. This removes the overhead of managing each AI model individually.
- Unified API Format for AI Invocation: A significant challenge with AI models is their varied interfaces. APIPark standardizes the request data format across all integrated AI models. This means developers don't have to rewrite their application code if an underlying AI model changes, dramatically simplifying AI usage and reducing maintenance costs, much like a router standardizes network protocols for connected devices.
- Prompt Encapsulation into REST API: APIPark allows users to combine AI models with custom prompts to create new, specialized APIs, such as sentiment analysis or translation APIs. This transforms raw AI capabilities into readily consumable REST APIs, making them easily accessible through the gateway.
- End-to-End API Lifecycle Management: Just as an advanced XGateway router provides tools for managing network traffic and security, APIPark assists with the entire lifecycle of APIs—from design and publication to invocation and decommissioning. It helps regulate API management processes, manage traffic forwarding, load balancing, and versioning, ensuring robust and scalable service delivery.
- API Service Sharing within Teams & Tenant Isolation: Analogous to how a router securely segments different parts of a network (like guest networks), APIPark allows for centralized display and sharing of API services within teams, while also enabling independent APIs, data, and security policies for each tenant (team), improving resource utilization.
- API Resource Access Requires Approval: Similar to how a secure gateway might require credentials for access, APIPark can activate subscription approval features, ensuring callers must subscribe to an API and await administrator approval before invocation, preventing unauthorized API calls and potential data breaches.
- Performance Rivaling Nginx & Detailed API Call Logging: Performance is critical for any gateway. APIPark boasts high performance (over 20,000 TPS with modest resources) and provides comprehensive logging for every API call, essential for tracing, troubleshooting, and ensuring system stability and data security. This is like the advanced logging and diagnostic features you'd expect from a high-end network gateway.
- Powerful Data Analysis: Beyond raw logs, APIPark analyzes historical call data to display long-term trends and performance changes, helping businesses with preventive maintenance, a proactive approach to managing the gateway's health.
APIPark can be quickly deployed in minutes, demonstrating its ease of adoption. While its open-source version meets basic API needs, a commercial version offers advanced features and professional support for larger enterprises. As a product from Eolink, a leader in API lifecycle governance, APIPark brings significant value to enterprises by enhancing efficiency, security, and data optimization for developers, operations personnel, and business managers navigating the complex world of AI and API integration. It represents the next generation of gateway technology, tailored for the demands of the AI-driven digital economy, extending the very concept of a secure, managed access point into the realm of intelligent services.
X. Maintaining Optimal XGateway Router Performance
Beyond initial setup and advanced configurations, maintaining the optimal performance of your XGateway router is an ongoing task. A well-maintained gateway ensures consistent speed, reliable connectivity, and a smoother overall internet experience for everyone on your network. This section provides practical tips and strategies for keeping your XGateway running at its peak, prolonging its lifespan, and preventing common performance degradation issues.
A. Strategic Placement for Best Wi-Fi Coverage
As discussed in the initial setup, router placement is paramount for Wi-Fi performance. However, conditions can change, or you might realize your initial placement isn't optimal.
- Re-evaluate Location: If you're experiencing Wi-Fi dead zones or slow speeds in certain areas, consider relocating your XGateway router. Experiment with different spots.
- Central and Elevated: Always aim for a central, elevated location. Avoid corners, behind large furniture, inside cabinets, or near other electronics.
- Line of Sight: Wi-Fi signals degrade significantly when passing through walls, floors, and metal objects. Try to place your XGateway router in a position that offers the clearest line of sight to the most frequently used devices.
- Antenna Orientation: If your XGateway has external antennas, experiment with their orientation. Often, one vertical and one horizontal antenna can help optimize signal coverage for both horizontal (same floor) and vertical (multi-floor) propagation.
Optimal placement ensures your XGateway can effectively broadcast its Wi-Fi signal, acting as an efficient wireless gateway across your entire space.
B. Managing Connected Devices
The more devices connected to your XGateway router, especially those actively using bandwidth, the more strain is placed on its resources.
- Disconnect Unused Devices: Periodically review the list of connected devices in your router's interface. Disconnect or temporarily disable Wi-Fi on devices that are not actively in use (e.g., old smartphones, rarely used smart home gadgets).
- Prioritize with QoS: Utilize the QoS (Quality of Service) feature (Section VI.B) to prioritize bandwidth for critical devices or applications. This ensures that your work laptop or streaming device gets the necessary bandwidth even when other devices are active.
- Limit Concurrent Streaming/Downloads: If multiple users are simultaneously streaming high-definition video or downloading large files, it can overwhelm your internet connection and XGateway router. Encourage sensible usage during peak times.
Efficient management of connected devices ensures that your XGateway doesn't become oversaturated, maintaining its performance as a responsive network gateway.
C. Regular Reboots
Just like computers, XGateway routers benefit from occasional reboots. Over time, a router's memory can become fragmented or filled with cached data, leading to performance slowdowns or minor glitches.
- Benefits: A reboot clears the router's memory, refreshes its connections, and can resolve minor connectivity issues, IP address conflicts, and general sluggishness.
- How Often: A weekly or bi-weekly reboot is a good practice.
- Method: The simplest way is to unplug the XGateway router's power adapter from the wall, wait for about 10-15 seconds, and then plug it back in. Wait a few minutes for the router to fully boot up and re-establish internet connectivity. Avoid constantly power cycling it if there's no problem, but don't hesitate if you notice a dip in performance.
A simple reboot can often restore your XGateway to its optimal working state, acting as a refresh for your digital gateway.
D. Monitoring Network Activity
Being aware of what's happening on your network can help you identify potential issues before they become major problems.
- Router Logs: Most XGateway routers keep system logs that record events like connection attempts, security alerts, and firmware updates. Periodically check these logs (usually under "System Log," "Event Log," or "Status") for any unusual activity.
- Traffic Monitoring: Some XGateway routers offer basic traffic monitoring features that show bandwidth usage per device or overall. This can help you identify bandwidth-hogging devices or applications.
- External Tools: Consider using network analysis tools or smartphone apps that can scan your Wi-Fi channels to identify interference and recommend less congested channels.
Proactive monitoring allows you to stay informed about the health and activity of your XGateway gateway.
E. Future-Proofing Your Gateway
Technology evolves rapidly, and your XGateway router needs to keep pace to remain effective.
- Upgrade When Necessary: While software updates extend the life of your current router, there comes a point when older hardware simply cannot keep up with newer standards (e.g., Wi-Fi 6/6E, faster internet speeds). If you're consistently experiencing slow speeds despite a high-speed internet plan, or if your router is very old, consider upgrading to a newer model that supports the latest Wi-Fi standards and has a more powerful processor.
- Consider Mesh Systems: For very large homes or those with significant architectural obstacles, a single XGateway router might not provide adequate coverage. A mesh Wi-Fi system can create a seamless, whole-home wireless network, extending the reach of your gateway more effectively.
By following these maintenance practices, you ensure that your XGateway router remains a highly efficient, reliable, and secure gateway to the internet for years to come, adapting to your evolving digital demands.
XI. Conclusion: Mastering Your XGateway for a Robust Network
The XGateway router, often perceived as a mundane piece of hardware, is in fact the cornerstone of your entire digital experience, serving as the indispensable gateway between your local network and the boundless opportunities and challenges of the internet. From the foundational steps of unboxing and physical connection to the intricate layers of advanced configuration and vigilant security, mastering your XGateway is not merely a technical exercise; it's an investment in the reliability, speed, and safety of your interconnected world.
This comprehensive guide has traversed every critical aspect, beginning with the crucial preparations and a clear understanding of the XGateway's role as a network gateway. We meticulously walked through the physical setup, ensuring every cable found its correct home, and then transitioned to the digital realm, providing detailed instructions for initial access and login. The emphasis on immediately changing default credentials underscores the paramount importance of security from the outset, transforming a potentially vulnerable entry point into a fortified access control system.
Further, we delved into the rich capabilities hidden within your XGateway's interface, guiding you through essential first configurations like customizing Wi-Fi, updating firmware, and understanding core network settings. Moving beyond the basics, we explored advanced features such as port forwarding for specific applications, QoS for prioritizing crucial traffic, parental controls for digital safety, and VPN options for secure remote access. Each of these functions empowers you to tailor your network's behavior, ensuring your XGateway operates not just as a traffic controller but as a smart, responsive conductor of your digital life.
Troubleshooting common issues provided a systematic approach to problem-solving, equipping you with the knowledge to diagnose and rectify connectivity woes, login failures, and performance bottlenecks, with the factory reset reserved as a powerful, albeit last-resort, solution. The commitment to security was reinforced through dedicated practices, from diligent firmware updates and strong passwords to understanding firewall functions and regular device review, transforming your XGateway into a resilient guardian against cyber threats.
Finally, by broadening the perspective to include advanced gateway concepts in enterprise IT, we illuminated how these principles scale up to manage complex API and AI services. The introduction of APIPark served as a tangible example of how the gateway concept evolves, offering a sophisticated, open-source solution for managing modern digital interactions with the same core objectives of efficiency, security, and scalability that you seek in your home XGateway router.
In essence, understanding and proactively managing your XGateway router empowers you. It grants you control over your digital environment, mitigates risks, and optimizes performance, ensuring that your journey through the digital landscape is as smooth and secure as possible. By embracing the knowledge imparted in this guide, you are no longer just a passive consumer of internet service, but an active architect and guardian of your personal or small business network, leveraging your XGateway as the robust, reliable digital gateway it was designed to be.
XII. Frequently Asked Questions (FAQs)
1. What is the "default gateway" and why is it important for my XGateway router? The "default gateway" is the IP address of your XGateway router itself (e.g., 192.168.1.1). It's crucial because it acts as the primary access point for all devices on your local network to send and receive data from the internet. When your computer needs to access a website, it sends the request to the default gateway, which then routes it to the broader internet. Without a properly configured default gateway, your devices cannot access external networks.
2. I forgot my XGateway router's login password. How can I access it? If you've forgotten the administrator password for your XGateway router, the most common solution is to perform a factory reset. This will revert all router settings, including the login credentials, back to their original factory defaults (usually printed on a sticker on the router or found in its manual). You will then need to reconfigure your Wi-Fi name, password, and any other custom settings from scratch.
3. Why should I update my XGateway router's firmware regularly? Updating your XGateway router's firmware is critical for security and performance. Manufacturers frequently release firmware updates to patch newly discovered security vulnerabilities, improve network stability, enhance performance, and sometimes add new features. Running outdated firmware leaves your network susceptible to known cyber threats and can lead to unreliable performance. It's akin to updating your computer's operating system for protection and efficiency.
4. What is the difference between a modem and an XGateway router? A modem (modulator-demodulator) is a device that connects your home network to your Internet Service Provider's (ISP) network. It translates the digital signals from your computer into analog signals that can travel over phone lines, cable lines, or fiber optic cables, and vice-versa. An XGateway router, on the other hand, creates a local network within your home, allowing multiple devices to share that single internet connection (via Wi-Fi and Ethernet) and acts as the gateway between your local network and the modem. Some devices are "modem-routers" or "gateway devices" that combine both functionalities into a single unit.
5. How can I improve my XGateway router's Wi-Fi signal and speed? Several strategies can improve your XGateway router's Wi-Fi signal and speed: * Optimal Placement: Place the router in a central, elevated location, away from obstructions (thick walls, metal objects) and sources of interference (microwaves, cordless phones). * Firmware Updates: Ensure your router's firmware is up to date. * Channel Optimization: In the router's settings, try changing the Wi-Fi channel (especially for 2.4 GHz) to a less congested one (e.g., 1, 6, or 11). * QoS (Quality of Service): Configure QoS to prioritize bandwidth for critical devices or applications. * Upgrade Hardware: If your router is old or your internet speed has increased significantly, consider upgrading to a newer XGateway router that supports the latest Wi-Fi standards (e.g., Wi-Fi 6/6E). * Mesh Wi-Fi System: For larger homes, a mesh Wi-Fi system can provide more consistent whole-home coverage than a single router.
🚀You can securely and efficiently call the OpenAI API on APIPark in just two steps:
Step 1: Deploy the APIPark AI gateway in 5 minutes.
APIPark is developed based on Golang, offering strong product performance and low development and maintenance costs. You can deploy APIPark with a single command line.
curl -sSO https://download.apipark.com/install/quick-start.sh; bash quick-start.sh

In my experience, you can see the successful deployment interface within 5 to 10 minutes. Then, you can log in to APIPark using your account.

Step 2: Call the OpenAI API.