API Setup Guide: What You Need to Get Started


The intricate dance of modern software applications hinges on a single, often unseen, yet undeniably crucial element: the Application Programming Interface, or API. From the moment you open a mobile app that fetches weather data to complex enterprise systems exchanging millions of records, APIs are the invisible threads weaving together the fabric of our digital world. For developers, product managers, and even business strategists, understanding how to effectively set up and manage APIs is no longer a niche skill but a fundamental requirement for innovation and competitive advantage. This comprehensive guide, "API Setup Guide: What You Need to Get Started," aims to demystify the process, taking you on a journey from foundational concepts to advanced management strategies, ensuring you have all the knowledge required to confidently embark on your API integration endeavors. We will delve into the core components, practical steps, and best practices that underpin a robust and scalable API ecosystem, ensuring your digital initiatives are built on a solid, interconnected foundation.
The digital landscape is increasingly characterized by interconnectedness. Applications rarely exist in isolation; instead, they thrive by consuming and exposing functionalities through well-defined interfaces. Whether you're integrating a third-party payment gateway, building a mobile application that communicates with a backend service, or orchestrating a complex microservices architecture, the principles of API setup remain paramount. A successful API integration can unlock new functionalities, streamline operations, and accelerate development cycles, while a poorly executed one can lead to security vulnerabilities, performance bottlenecks, and significant maintenance overhead. Therefore, approaching API setup with a structured, informed perspective is not just beneficial—it's essential for long-term success in today's API-driven economy.
Deconstructing the API Ecosystem: Foundational Concepts
Before diving into the practicalities of setting up an API, it's crucial to establish a firm understanding of the underlying concepts. These foundational building blocks will serve as your compass in navigating the complexities of API integration and management.
What is an API? A Deep Dive into the Intermediary
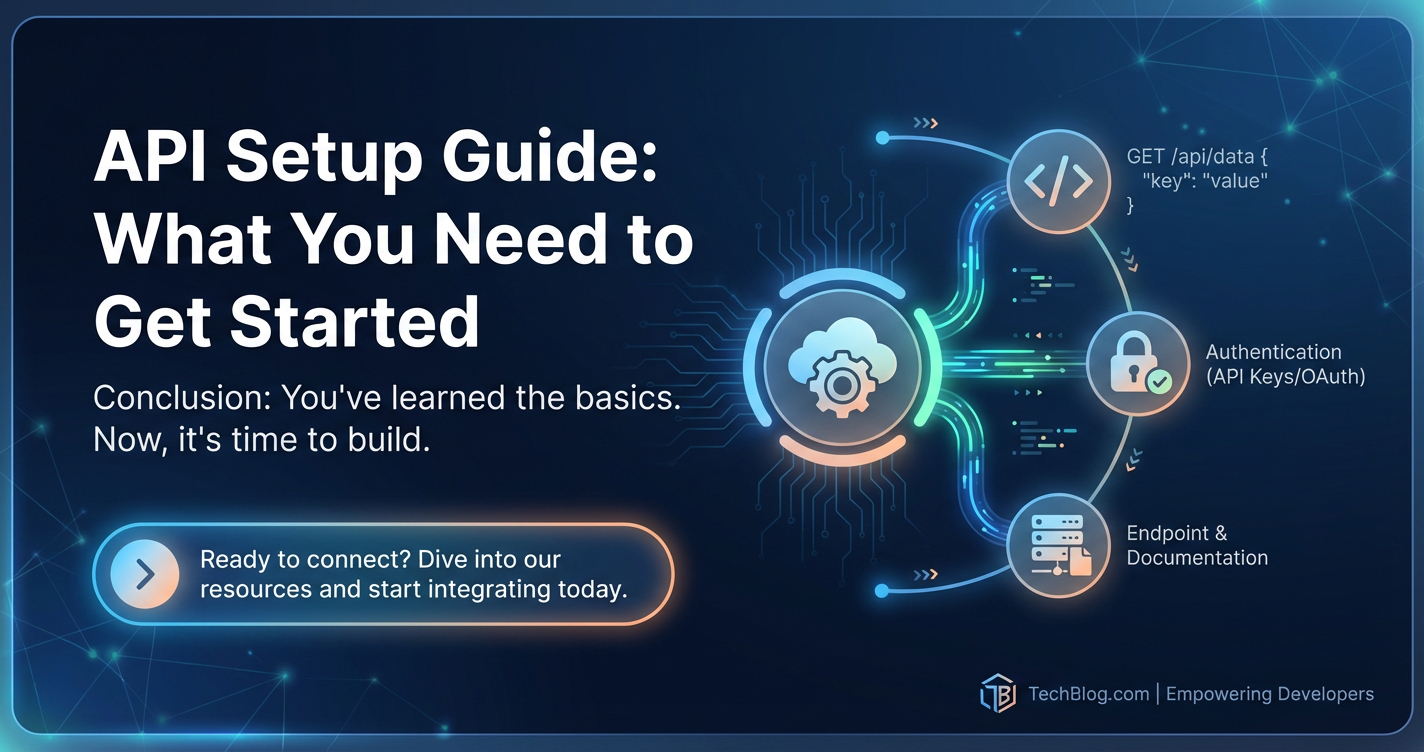
At its most fundamental level, an API acts as a messenger, facilitating communication between different software applications. Imagine ordering food at a restaurant: you, the customer, are an application; the kitchen is another application that prepares food. The waiter is the API. You tell the waiter what you want (a request), and the waiter takes your order to the kitchen. The kitchen then prepares the food and gives it to the waiter, who brings it back to you (a response). You don't need to know how the kitchen prepares the food; you only need to know how to communicate with the waiter. Similarly, an API defines the methods and data formats that applications can use to request and exchange information.
In the context of modern web development, most discussions about APIs revolve around Web APIs. These are APIs accessed over the internet using standard web protocols like HTTP. Within Web APIs, several architectural styles exist, with REST (Representational State Transfer) being the most prevalent. RESTful APIs leverage standard HTTP methods (GET, POST, PUT, DELETE) to perform operations on resources, making them intuitive and easy to understand. * GET: Retrieves data from the server. For instance, fetching a list of products. * POST: Sends data to the server to create a new resource. Like submitting a new order. * PUT: Updates an existing resource with new data. Changing the details of an existing product. * DELETE: Removes a resource from the server. Deleting an item from a shopping cart.
Beyond these common methods, understanding HTTP status codes is also vital for interpreting API responses. Codes like 200 OK (successful request), 201 Created (resource successfully created), 400 Bad Request (client error), 401 Unauthorized (authentication failed), 403 Forbidden (authenticated but no permission), 404 Not Found (resource not found), and 500 Internal Server Error (server error) provide immediate feedback on the outcome of an API call. A comprehensive grasp of these basics ensures that you can effectively send requests and correctly interpret the responses, which is the cornerstone of any successful API integration. Other API styles like SOAP (Simple Object Access Protocol) and GraphQL also exist, each with their own strengths and use cases, often chosen based on specific enterprise requirements or data querying needs.
The Strategic Importance of an API Gateway
As the number of APIs consumed and exposed by an organization grows, managing them individually becomes an arduous and error-prone task. This is where an API gateway becomes indispensable. An API gateway acts as a single entry point for all API calls, sitting in front of a collection of backend services. It serves as a reverse proxy, routing incoming requests to the appropriate backend service, but its capabilities extend far beyond simple traffic forwarding.
An API gateway provides a centralized layer for implementing cross-cutting concerns that would otherwise need to be duplicated across multiple services. Key functionalities include: * Security and Authentication: The gateway can handle authentication (e.g., verifying API keys, OAuth tokens) and authorization, offloading these responsibilities from individual backend services. It acts as a primary defense line, protecting backend services from direct exposure. * Rate Limiting and Throttling: To prevent abuse and ensure fair usage, the gateway can enforce limits on how many requests a client can make within a given timeframe. This protects your backend infrastructure from being overwhelmed. * Routing and Load Balancing: It intelligently routes requests to the correct backend service instance, often employing load balancing algorithms to distribute traffic evenly and ensure high availability. * Caching: The gateway can cache responses from backend services, reducing the load on these services and significantly improving response times for frequently accessed data. * Monitoring and Logging: It can collect metrics on API usage, performance, and errors, providing a unified view of the API ecosystem's health. Comprehensive logging of every API call is critical for auditing, troubleshooting, and compliance. * Protocol Translation: It can translate requests from one protocol to another, for example, exposing a SOAP service as a RESTful endpoint. * Request/Response Transformation: It can modify request and response payloads on the fly, tailoring them to the needs of different consumers or integrating with diverse backend systems without altering the core services.
In a microservices architecture, an API gateway is particularly crucial as it abstracts away the complexity of managing numerous smaller services, presenting a simplified, unified interface to external clients. It minimizes network latency by reducing the number of round trips between the client and various backend services, aggregating multiple internal service calls into a single client request. The strategic deployment of an API gateway thus enhances security, improves performance, simplifies client-side development, and provides greater control over the API landscape, making it a cornerstone of robust API management.
Unlocking Clarity with OpenAPI Specification
In the world of APIs, clear and consistent documentation is paramount. Without it, developers struggle to understand how to interact with an API, leading to errors, delays, and frustration. This is precisely the problem that the OpenAPI Specification (formerly Swagger Specification) was designed to solve. OpenAPI defines a standard, language-agnostic interface description for RESTful APIs, allowing both humans and computers to discover and understand the capabilities of a service without access to source code, documentation, or network traffic inspection.
Think of OpenAPI as a blueprint for your API. It precisely describes: * Available Endpoints: The different URLs your API exposes (e.g., /products, /orders/{id}). * Operations: The HTTP methods supported for each endpoint (GET, POST, PUT, DELETE). * Parameters: Inputs required for each operation, including their type, format, and whether they are required (e.g., query parameters, path parameters, request headers, request body). * Authentication Methods: How clients can authenticate to access the API (e.g., API keys, OAuth2). * Request and Response Bodies: The data structures (schemas) expected for requests and provided in responses, often defined using JSON Schema. * Error Messages: Possible error codes and their associated descriptions.
The beauty of OpenAPI lies in its machine-readability. Tools can leverage an OpenAPI definition to automatically generate interactive documentation (like Swagger UI), client SDKs in various programming languages, server stubs, and even automated test cases. This significantly reduces the manual effort involved in API consumption and development, fostering greater collaboration between API providers and consumers. For instance, a developer looking to integrate with an API can simply import its OpenAPI definition into their development environment or a tool like Postman, and instantly gain a complete, executable understanding of how to interact with it, complete with examples and schema validations. It ensures consistency, accelerates development, and drastically improves the overall developer experience.
Planning Your API Integration Strategy
Successfully setting up an API is not merely a technical exercise; it requires careful strategic planning to ensure it aligns with your overall business objectives and technical architecture. Rushing into integration without a clear strategy can lead to unforeseen challenges and costly rework.
Defining Your Requirements: The Blueprint for Success
Before writing a single line of code, thoroughly define what you aim to achieve with the API integration. This foundational step dictates subsequent technical decisions. * Problem Statement: What specific business problem or user need will this API solve? Is it to automate data synchronization, enable new functionalities, or integrate with a third-party service? A clear problem statement guides the entire process. * Data Flow and Transformation: Meticulously map out the data you expect to send to the API and the data you anticipate receiving. What format will it be in? Are any transformations necessary before sending or after receiving? Consider data types, mandatory fields, and potential validations. * Performance Expectations: What are the acceptable latency targets? How many requests per second (RPS) or transactions per second (TPS) do you expect to handle? These metrics will influence choices regarding API providers, infrastructure, and caching strategies. An API expected to handle real-time financial transactions will have vastly different performance requirements than one fetching static blog posts. * Security Considerations: Beyond basic authentication, what level of data security is required? Will sensitive data be transmitted? Are there specific compliance requirements (e.g., GDPR, HIPAA, PCI DSS)? This will dictate encryption methods, access controls, and data governance policies. * Scalability Needs: How much growth do you anticipate? Will your usage of the API increase over time? Your integration must be designed to scale gracefully without becoming a bottleneck. This often involves planning for efficient resource utilization and potentially leveraging an API gateway to manage traffic effectively. * Error Handling and Resilience Strategy: What happens when the API fails or returns an error? How will your system gracefully handle these scenarios to maintain user experience and data integrity? This involves defining retry mechanisms, fallback strategies, and clear error logging.
Choosing the Right API: Public, Private, or Partner?
The type of API you choose to integrate with significantly influences your setup process and long-term management. * Public APIs: These are openly available for developers to use, often requiring only registration and an API key. Examples include weather APIs, social media APIs, or payment processors. While convenient, they come with potential limitations like rate limits, changing terms of service, and reliance on an external provider's reliability. * Private APIs: Developed for internal use within an organization, these APIs connect different internal systems or microservices. They offer complete control over design and implementation but require internal development effort and robust internal governance. * Partner APIs: These are exposed to specific business partners, often with strict agreements and tailored access. They require a balance between flexibility and security, ensuring that only authorized partners can access specific functionalities.
When integrating with third-party APIs (public or partner), additional considerations come into play: * Provider Reliability and SLA: How reliable is the API provider? Do they offer a Service Level Agreement (SLA) guaranteeing uptime and performance? * Documentation Quality: Is the documentation clear, comprehensive, and up-to-date? An OpenAPI specification is a huge plus here. * Support and Community: What kind of support does the provider offer? Is there an active developer community that can help with issues? * Cost and Pricing Model: Understand the pricing structure. Is it per call, per data volume, or subscription-based? Factor this into your budget. * Rate Limits and Quotas: Be aware of any restrictions on the number of requests you can make within a certain timeframe. Design your system to respect these limits to avoid being blocked. * Terms of Service and Data Privacy: Thoroughly read the terms to understand usage restrictions, data handling policies, and compliance requirements.
Architecture Considerations: Client-Side vs. Server-Side Integration
Deciding where your API integration logic resides is a critical architectural choice with implications for security, performance, and scalability. * Client-Side Integration: The client (e.g., a web browser or mobile app) directly calls the third-party API. * Pros: Simpler to implement for basic use cases, reduces server load. * Cons: Exposes API keys and credentials to the client (a major security risk unless using highly restricted public keys), vulnerable to manipulation, limited control over data transformation or caching. Generally unsuitable for sensitive operations. * Server-Side Integration: Your backend server makes the calls to the third-party API. * Pros: Securely store API keys and sensitive credentials, greater control over data transformation and validation, ability to implement caching and rate limiting, better error handling, and more robust logging. * Cons: Adds latency if the client-server-API round trip is long, increases server load.
For most production applications, especially those handling sensitive data or requiring complex logic, server-side integration is the recommended and more secure approach. The server acts as a trusted intermediary, protecting client-side applications from direct interaction with potentially insecure or complex external APIs. Furthermore, architectural patterns like asynchronous communication (e.g., webhooks, message queues) can be employed to handle long-running API calls without blocking client requests, enhancing overall system responsiveness.
The Essential Steps for API Setup
With a solid understanding of the foundational concepts and a clear strategic plan, it's time to delve into the practical steps of setting up an API. Each step builds upon the previous one, guiding you towards a robust and functional integration.
Step 1: Gaining Access and Authentication
Accessing a protected API always begins with authentication, which verifies your identity, and authorization, which determines what actions you are permitted to perform. This is arguably the most critical step, as compromised credentials can lead to severe security breaches.
- API Keys: The simplest form of authentication. An API key is a unique string that identifies your application or user. You typically include it in a request header or as a query parameter.
- How it works: When your application makes a request, the API gateway or backend service checks if the provided key is valid and associated with your account.
- Security Implications: API keys should be treated like passwords. Never hardcode them directly into client-side code (JavaScript, mobile apps). Store them securely on your backend server using environment variables or secret management services. If an API key is compromised, it can be used to impersonate your application, leading to unauthorized access and potentially significant costs due to excessive usage.
- OAuth 2.0: A more robust and widely adopted authorization framework, particularly for delegated authorization (e.g., allowing a third-party app to access your user data on another service like Google or Facebook without sharing your password). OAuth 2.0 defines different "flows" or "grant types" suitable for various application types.
- Authorization Code Grant: The most secure and common flow for web applications. The client redirects the user to the authorization server to log in and grant permission. The authorization server then redirects back with an authorization code, which the client exchanges for an access token.
- Client Credentials Grant: Used for server-to-server communication where there's no end-user involvement. The client authenticates directly with its client ID and secret to obtain an access token.
- Implicit Grant (deprecated): Previously used for single-page applications, but now largely replaced by Authorization Code with PKCE (Proof Key for Code Exchange) due to security concerns.
- Access Tokens and Refresh Tokens: Access tokens are short-lived credentials used to authorize API calls. Refresh tokens are long-lived and used to obtain new access tokens when the current one expires, reducing the need for the user to re-authenticate frequently.
- Scopes: OAuth allows you to request specific permissions (scopes), ensuring the application only accesses the necessary resources (e.g.,
read_profile,write_posts).
- JWT (JSON Web Tokens): A compact, URL-safe means of representing claims to be transferred between two parties. JWTs are often used as access tokens in OAuth 2.0 flows. They consist of three parts: a header, a payload (containing claims like user ID, roles, expiration time), and a signature.
- How it works: The server signs the JWT, and the client sends it with each request. The receiving API can then verify the signature to ensure the token hasn't been tampered with and extract the claims without needing to query a database, making them stateless and efficient.
- Security: JWTs are signed, not encrypted, so sensitive data should not be stored in the payload. They are secure as long as the signing key remains secret.
- Other Methods:
- Basic Authentication: Sending username and password base64 encoded in the
Authorizationheader. Simple but less secure without HTTPS. - Digest Authentication: An improvement over Basic Auth, preventing the password from being sent in plaintext, but still less common for modern APIs.
- Basic Authentication: Sending username and password base64 encoded in the
Best Practices for Credential Management: * Never embed secrets directly in code. Use environment variables, configuration files, or secret management services (e.g., AWS Secrets Manager, HashiCorp Vault). * Rotate API keys/tokens regularly. * Implement least privilege: Grant only the necessary permissions to your API credentials. * Encrypt secrets at rest and in transit.
Step 2: Understanding API Documentation
Effective API integration is impossible without comprehensive and accurate documentation. It serves as the primary resource for developers to understand an API's functionalities, limitations, and how to interact with it.
- Reading OpenAPI Specifications: If an API provides an OpenAPI (or Swagger) definition, you're in luck. This machine-readable specification often comes with an interactive UI (like Swagger UI or Redoc) that makes it easy to explore:
- Endpoints and Paths: Clearly lists all available API paths and the HTTP methods they support.
- Parameters: For each operation, it details required and optional parameters, their types (string, integer, boolean), formats (date-time, email), and where they should be sent (path, query, header, body).
- Request/Response Models: Defines the JSON or XML schemas for input payloads and expected responses, including nested objects and arrays. This is crucial for correctly structuring your requests and parsing responses.
- Authentication Methods: Explains how to authenticate, often linking back to the details of API keys or OAuth flows.
- Error Codes: Documents possible error responses (e.g., 400 Bad Request, 401 Unauthorized, 404 Not Found) and their corresponding error structures, allowing you to build robust error handling.
- Examples: Many OpenAPI documents include example request and response payloads, which are incredibly helpful for quickly understanding expected data formats.
- Beyond OpenAPI: For APIs without an OpenAPI spec, you'll rely on traditional developer documentation, which should cover:
- Introduction and Getting Started: A high-level overview and quick-start guide.
- Authentication Guide: Detailed instructions for obtaining and using credentials.
- Endpoint Reference: A list of all endpoints with descriptions of what they do, their HTTP methods, parameters, and example requests/responses.
- Rate Limits and Usage Policies: Clear explanation of any restrictions on API calls and terms of service.
- SDKs and Libraries: Information on officially supported client libraries that can simplify integration.
- Changelog/Versioning: Details on API updates, deprecations, and how to handle different versions.
Importance of Examples: Examples are invaluable. They demonstrate concrete requests and their expected responses, often clarifying ambiguities that text descriptions alone cannot. Always cross-reference your integration with the provided examples to ensure your requests are correctly formatted.
Step 3: Making Your First API Call (and Handling Responses)
Once you understand the API's requirements and have your credentials, it's time to make your first request. This iterative process of sending requests and parsing responses forms the core of API integration.
- Tools for Testing: Before writing code, use dedicated API client tools to test endpoints manually:
- Postman/Insomnia: Powerful GUI clients that allow you to construct HTTP requests with headers, body, authentication, and view responses easily. They support collections, environment variables, and scripting for more complex testing.
curl: A command-line tool for transferring data with URLs. Excellent for quick tests, automation, and understanding the raw HTTP request/response.- Browser Developer Tools: For simple GET requests to public APIs, your browser's developer console (Network tab) can show you the request and response details.
- Choosing a Programming Language/Library: Select a language and an HTTP client library suitable for your project.
- Python:
requestslibrary is highly popular for its simplicity and power. - Node.js:
axiosornode-fetchare common choices. - Java:
HttpClient(Apache or standard Java),OkHttp,Retrofit. - C#:
HttpClient. - Go:
net/httppackage. These libraries abstract away the complexities of low-level HTTP communication, allowing you to focus on constructing the request and processing the response.
- Python:
- Constructing Requests:
- URL: Ensure the base URL and endpoint path are correct.
- HTTP Method: Use the correct method (GET, POST, PUT, DELETE).
- Headers: Set necessary headers, including
Authorization(with your API key or token),Content-Type(e.g.,application/jsonfor JSON payloads), andAccept(e.g.,application/jsonto indicate preferred response format). - Query Parameters: Append key-value pairs to the URL after a
?for filtering, pagination, or sorting (e.g.,/products?category=electronics&limit=10). - Body (Payload): For POST and PUT requests, send the data as a JSON or XML string in the request body. Ensure it conforms to the API's expected schema.
- Parsing Responses:
- HTTP Status Codes: Always check the status code first. A 2xx code indicates success, while 4xx or 5xx indicates an error.
- Response Body: Most modern APIs return JSON. Use your language's JSON parsing capabilities to convert the response string into a usable data structure (e.g., Python dictionary, JavaScript object, Java POJO).
- Error Responses: For error codes, parse the error body to understand the specific issue (e.g., missing parameter, invalid data).
- Implementing Retries and Exponential Backoff: Network glitches, temporary server overloads, or rate limit hits are common. Implement a retry mechanism with exponential backoff. This means waiting a progressively longer time between retries (e.g., 1s, 2s, 4s, 8s) to avoid overwhelming the API and giving it time to recover. Always have a maximum number of retries.
Step 4: Securing Your API Integration
Security is not an afterthought; it must be ingrained into every stage of your API setup. A single vulnerability can expose sensitive data, disrupt services, or lead to regulatory non-compliance.
- Data Encryption (HTTPS/TLS): Always use HTTPS (HTTP Secure) for all API communications. This encrypts data in transit, protecting it from eavesdropping and tampering. Modern web browsers and HTTP client libraries enforce HTTPS by default or warn against insecure HTTP connections. Ensure the API endpoint you are calling uses
https://in its URL. - Input Validation: Never trust user input, even if it comes from your own client application. Validate all data sent to an API (both your own and third-party) to ensure it conforms to expected types, formats, and constraints. This prevents common vulnerabilities like SQL injection, cross-site scripting (XSS), and buffer overflows.
- Preventing Common Web Vulnerabilities:
- SQL Injection: Never construct database queries by concatenating user input directly. Use parameterized queries or ORMs.
- Cross-Site Scripting (XSS): Sanitize any data received from an API before rendering it in a web page to prevent malicious scripts from being executed in users' browsers.
- Cross-Site Request Forgery (CSRF): If your API uses cookies for authentication, implement CSRF tokens to protect against unauthorized requests initiated from other websites.
- Secure Storage of API Keys and Tokens: As discussed in Step 1, sensitive credentials must be stored securely.
- Environment Variables: A common approach for server-side applications.
- Secret Management Services: Dedicated services like AWS Secrets Manager, Azure Key Vault, or HashiCorp Vault provide robust encryption, access control, and auditing for secrets.
- Never Hardcode: Avoid embedding credentials directly into your codebase.
- API Gateway as a Security Enforcement Point: An API gateway plays a pivotal role in securing your API ecosystem. It can enforce security policies centrally:
- Authentication and Authorization: Centralizing token validation and permission checks.
- IP Whitelisting/Blacklisting: Controlling which IP addresses can access your APIs.
- Threat Protection: Identifying and blocking common attack patterns (e.g., injection attempts, DDoS attacks).
- Data Masking/Redaction: Automatically removing or obfuscating sensitive data from responses before they reach the client.
- Monitoring for Suspicious Activity: Implement robust monitoring and logging (discussed in Step 6) to detect unusual API access patterns, excessive error rates, or unauthorized access attempts. Set up alerts for such events.
Step 5: Error Handling and Resiliency
Even the most reliable APIs can experience issues. Designing your integration to gracefully handle errors and remain resilient to failures is critical for maintaining application stability and user experience.
- Designing Robust Error Handling Mechanisms:
- Specific Error Codes: Don't just check for a generic 4xx or 5xx. Parse the API's detailed error responses to understand the specific problem (e.g., "invalid_api_key," "insufficient_funds," "product_not_found").
- User-Friendly Messages: Translate technical API errors into clear, actionable messages for your users. Avoid exposing raw API error messages directly to end-users.
- Logging: Log all API errors with sufficient detail (timestamp, endpoint, request data, response data, error message) to aid in debugging and troubleshooting.
- Circuit Breakers: Inspired by electrical engineering, a circuit breaker pattern prevents an application from repeatedly trying to invoke a failing service.
- How it works: When a service continuously fails, the circuit breaker "trips" (opens), immediately failing subsequent calls instead of waiting for the service to timeout. After a configurable duration, it transitions to a "half-open" state, allowing a limited number of test requests to pass through. If these succeed, the circuit closes; otherwise, it reopens.
- Benefits: Prevents cascading failures, reduces resource consumption on the failing service, and provides a faster failure response to the client. Libraries like Hystrix (Java) or Polly (.NET) implement this pattern.
- Bulkheads: Another resiliency pattern that isolates failing components to prevent them from taking down the entire system.
- How it works: Divides resources (e.g., thread pools, connection pools) into isolated groups for different services. If one service starts consuming excessive resources or failing, it only affects its own bulkhead, leaving others operational.
- Benefits: Limits the impact of failures to a subset of the application, ensuring other functionalities remain available.
- Timeouts: Set reasonable timeouts for all API calls. An API that hangs indefinitely can consume valuable resources and degrade application performance. Timeouts ensure that your application doesn't wait forever for a response.
- Idempotency for Retriable Operations: For operations that modify data (POST, PUT, DELETE), ensure they are idempotent if they might be retried. An idempotent operation produces the same result regardless of how many times it's executed with the same input. For example, deleting a resource multiple times should only succeed the first time and then return a "resource not found" or "no change" status without causing further errors. Use unique request IDs where applicable to achieve idempotency.
- Fallbacks: For non-critical API calls, consider implementing fallback mechanisms. If an API is unavailable, can you provide cached data, a default value, or a degraded experience rather than a complete failure?
Step 6: Testing and Monitoring
Thorough testing and continuous monitoring are indispensable for ensuring the reliability, performance, and security of your API integrations over their entire lifecycle.
- Unit Tests: Test individual components of your API integration logic (e.g., the function that constructs a request, the function that parses a response).
- Integration Tests: Verify that your application correctly interacts with the actual API endpoint. These tests often involve making real API calls, which can be slow and incur costs.
- Mocking APIs: For development and testing, you can use mocking frameworks or tools (like WireMock, Nock, MockServer) to simulate API responses. This allows you to test different scenarios (success, various errors, edge cases) without depending on the actual API's availability or incurring rate limit penalties.
- Load Testing: Simulate high traffic volumes to assess how your API integration (and the external API) performs under stress. Identify bottlenecks, determine capacity limits, and ensure your system can handle expected peak loads. Tools like JMeter, k6, or Locust can be used.
- API Monitoring Tools: Once in production, continuous monitoring is crucial.
- Uptime Monitoring: Ensure the API endpoint is reachable.
- Response Time Monitoring: Track latency to identify performance degradation.
- Error Rate Monitoring: Observe the percentage of failed requests. Spikes in error rates often indicate a problem.
- Payload Validation: Verify that responses conform to expected schemas.
- Synthetic Monitoring: Periodically make automated API calls from different geographical locations to simulate user experience and detect issues proactively.
- Alerting: Set up alerts for critical metrics (e.g., high error rates, long response times, complete outages) to notify your team immediately when problems arise.
- Comprehensive Logging: Implement detailed logging for all API calls:
- Request Details: Timestamp, endpoint, HTTP method, request headers, (sanitized) request body.
- Response Details: Status code, response headers, (sanitized) response body, response time.
- Error Details: Specific error messages, stack traces, correlation IDs.
- Centralized Logging: Send logs to a centralized logging system (e.g., ELK stack, Splunk, Datadog) for easy searching, analysis, and visualization. This enables quick troubleshooting and retrospective analysis of API issues. For instance, ApiPark, an open-source AI gateway and API management platform, provides comprehensive logging capabilities, recording every detail of each API call. This feature is invaluable for businesses to quickly trace and troubleshoot issues, ensuring system stability and data security.
APIPark is a high-performance AI gateway that allows you to securely access the most comprehensive LLM APIs globally on the APIPark platform, including OpenAI, Anthropic, Mistral, Llama2, Google Gemini, and more.Try APIPark now! 👇👇👇
Advanced Considerations for API Management
Beyond the initial setup, effective API management involves addressing long-term challenges like evolving APIs, managing traffic, and extracting value from usage data.
Version Control and Backward Compatibility
APIs evolve. New features are added, old ones are deprecated, and data structures may change. Managing these changes gracefully is crucial to avoid breaking existing integrations and frustrating consumers.
- Why API Versioning is Crucial:
- Avoid Breaking Changes: Prevents updates from breaking applications that rely on previous API behavior.
- Parallel Development: Allows new features to be developed and tested without impacting existing production integrations.
- Phased Rollouts: Enables a gradual migration of consumers to newer API versions.
- Strategies for Versioning:
- URI Versioning (e.g.,
/v1/products,/v2/products): Simple, explicit, and easy to cache. However, it violates RESTful principles by treating versions as different resources. - Header Versioning (e.g.,
Accept: application/vnd.myapi.v1+json): Adheres to REST principles, allowing the same URI to serve different versions based on theAcceptheader. Less visible in browser, requires custom header handling. - Query Parameter Versioning (e.g.,
/products?version=1): Simple to implement but can lead to non-cacheable URLs. - Hybrid Approaches: Many APIs combine these methods, e.g., using URI for major versions and headers for minor ones.
- URI Versioning (e.g.,
- Backward Compatibility and Deprecation:
- Never Make Breaking Changes Lightly: If possible, always strive for backward compatibility. Add new fields or endpoints rather than modifying existing ones.
- Graceful Deprecation: When a breaking change is unavoidable, clearly communicate it well in advance.
- Announce deprecation in documentation and changelogs.
- Provide a timeline for when the old version will be decommissioned.
- Offer clear migration guides.
- Use HTTP response headers (e.g.,
Deprecationheader,Warningheader) to inform clients that an endpoint is deprecated.
Rate Limiting and Throttling
To protect your backend infrastructure, prevent abuse, and ensure fair usage among all consumers, implementing rate limiting and throttling is essential. This is typically managed at the API gateway level.
- Protecting APIs from Abuse: Prevents malicious actors from overwhelming your services with excessive requests (e.g., DDoS attacks, brute-force password attempts).
- Ensuring Fair Usage: Distributes available API capacity equitably among all legitimate users.
- Different Strategies:
- Fixed Window Counter: Limits requests within a fixed time window (e.g., 100 requests per minute). Simple but can suffer from "bursty" traffic at the start and end of windows.
- Sliding Window Log: Stores a timestamp for each request. When a new request arrives, it counts timestamps within the last window. More accurate but uses more memory.
- Token Bucket: A conceptual bucket with a fixed capacity. Tokens are added to the bucket at a constant rate. Each request consumes a token. If the bucket is empty, requests are rejected. Allows for bursts but limits sustained rate.
- Leaky Bucket: Requests are processed at a constant rate (like water leaking from a bucket). If the bucket overflows, requests are dropped. Smooths out traffic.
- Communicating Rate Limits: Inform clients about their current rate limit status via HTTP response headers:
X-RateLimit-Limit: The maximum number of requests permitted in the current window.X-RateLimit-Remaining: The number of requests remaining in the current window.X-RateLimit-Reset: The time at which the current rate limit window resets, usually in UTC epoch seconds. Clients should be designed to respect these headers and implement exponential backoff if they hit a rate limit (HTTP 429 Too Many Requests).
Caching Strategies
Caching is a powerful technique to improve API performance, reduce latency, and offload your backend services by storing frequently accessed data closer to the consumer or at an intermediate layer.
- Reducing Load on Backend Services: By serving cached responses, you reduce the number of requests that hit your application servers and databases, saving computational resources.
- Improving Response Times: Retrieving data from a cache is significantly faster than fetching it from a backend service, especially for complex queries or remote services.
- Cache-Control Headers: HTTP
Cache-Controlheaders allow both API providers and consumers to define caching policies:public/private: Specifies whether the response can be cached by any cache or only by a private client cache.max-age=<seconds>: Maximum time a response can be considered fresh.no-cache: Must revalidate with the origin server before serving.no-store: Do not cache any part of the request or response.
- ETag (Entity Tag): A unique identifier for a specific version of a resource. The client can send an
If-None-Matchheader with the ETag. If the resource on the server hasn't changed, the server can respond with a304 Not Modified, saving bandwidth. - Invalidation Strategies: The biggest challenge with caching is ensuring data freshness.
- Time-Based Expiration (TTL): Cache items expire after a set duration.
- Event-Driven Invalidation: Invalidate cache entries when the underlying data changes (e.g., through a message queue event).
- Stale-While-Revalidate: Serve a stale cached response immediately while asynchronously revalidating it in the background.
API Observability and Analytics
Understanding how your APIs are being used is vital for operational health, capacity planning, and business intelligence. Observability goes beyond simple monitoring to provide deep insights into the internal state of your systems.
- Centralized Logging, Metrics, Tracing:
- Logs: Detailed records of events within your API gateway and backend services, crucial for debugging and auditing.
- Metrics: Numerical measurements collected over time (e.g., response times, error rates, request counts, CPU/memory usage). These are aggregated and visualized in dashboards to track trends and identify anomalies.
- Tracing: Tracks the full lifecycle of a request as it flows through multiple services, providing a "call stack" for distributed systems. This helps identify latency bottlenecks across microservices.
- Business Intelligence from API Usage Data: API analytics can reveal valuable insights beyond operational health:
- Popular Endpoints: Which APIs are most frequently called?
- Top Consumers: Which users or applications consume the most API resources?
- Geographical Usage Patterns: Where are your API calls originating from?
- Feature Adoption: How are new API features being adopted by your users? This data can inform product decisions, identify growth opportunities, and optimize resource allocation.
- Importance of Detailed API Call Logging: As mentioned earlier, platforms like ApiPark provide comprehensive logging of every detail of each API call. This feature is critical not just for troubleshooting but also for compliance, security auditing, and generating the raw data needed for powerful analytics. By understanding long-term trends and performance changes from historical call data, businesses can transition from reactive problem-solving to proactive, preventive maintenance, ensuring system stability and improving overall service quality. APIPark's ability to analyze this historical data empowers businesses to predict potential issues before they impact users, strengthening their operational resilience.
Elevating Your API Strategy with APIPark
As organizations scale their digital initiatives, the complexity of managing a multitude of APIs – particularly with the burgeoning integration of AI models – can quickly become overwhelming. This is where an advanced API management solution, such as APIPark, truly shines. APIPark isn't just another API gateway; it's an open-source AI gateway and comprehensive API management platform designed to streamline the entire API lifecycle, from integration to deployment and analysis.
Consider the challenges we've discussed: securing APIs, managing traffic, versioning, robust logging, and providing an excellent developer experience. APIPark directly addresses these needs while also offering specialized capabilities for the unique demands of AI integration. Its core value proposition lies in its ability to unify disparate APIs and AI models under a single, efficient, and secure management layer.
Let's explore how APIPark aligns with and enhances the API setup journey:
1. Unified API Management and Gateway Capabilities: APIPark functions as a high-performance API gateway, providing a single entry point for all API calls. This centralizes critical functions like authentication, authorization, rate limiting, and traffic routing, exactly as described in our section on API Gateways. Its performance, rivaling Nginx with over 20,000 TPS on modest hardware, ensures that even high-traffic applications run smoothly. This unified approach simplifies the API management process, regulating traffic forwarding, load balancing, and versioning of published APIs across your entire ecosystem.
2. Seamless AI Model Integration: For enterprises leveraging artificial intelligence, APIPark offers a significant advantage. It allows for the quick integration of over 100 AI models with a unified management system for authentication and cost tracking. This means that instead of dealing with diverse APIs and authentication methods for each AI service, you can manage them all through APIPark. Furthermore, it standardizes the request data format across all AI models, ensuring that changes in underlying AI models or prompts do not disrupt your applications or microservices, drastically simplifying AI usage and reducing maintenance costs – a critical feature for any modern, AI-driven application.
3. Prompt Encapsulation into REST API: One of APIPark's innovative features is the ability to quickly combine AI models with custom prompts to create new, specialized REST APIs. For example, you can take a large language model and encapsulate a prompt for "sentiment analysis" or "data summarization" into a distinct API endpoint. This transforms complex AI invocations into simple, standardized REST calls, empowering developers to build sophisticated AI-powered features without deep AI expertise.
4. End-to-End API Lifecycle Management: From design and publication to invocation and decommission, APIPark supports the entire API lifecycle. This holistic approach helps organizations enforce consistent API management processes, ensuring that APIs are developed, deployed, and retired in a controlled and efficient manner.
5. Enhanced Security and Access Control: APIPark elevates API security by enabling independent API and access permissions for each tenant or team. This multi-tenancy support allows for the creation of multiple isolated environments, each with its own applications, data, user configurations, and security policies, while sharing underlying infrastructure. Furthermore, its "API Resource Access Requires Approval" feature ensures that callers must subscribe to an API and await administrator approval before invocation, effectively preventing unauthorized API calls and potential data breaches, which is a significant boost to the security considerations discussed in Step 4.
6. Powerful Data Analysis and Observability: Reinforcing the importance of monitoring and analytics, APIPark provides powerful data analysis capabilities. By analyzing the detailed API call logs it collects, it displays long-term trends and performance changes. This predictive analytics capability allows businesses to proactively identify and address potential issues before they escalate, moving from reactive troubleshooting to preventive maintenance. This directly addresses the need for robust observability and business intelligence from API usage, as covered in our advanced considerations.
7. Simplified Deployment: Getting started with APIPark is remarkably straightforward. With a single command line, you can deploy the platform in just 5 minutes: curl -sSO https://download.apipark.com/install/quick-start.sh; bash quick-start.sh. This ease of deployment lowers the barrier to entry for robust API management, allowing teams to quickly leverage its powerful features without extensive setup overhead.
APIPark, being an open-source solution from Eolink—a leader in API lifecycle governance—offers both a robust open-source product and commercial versions with advanced features and professional technical support for leading enterprises. Its powerful API governance solution is designed to enhance efficiency, security, and data optimization for developers, operations personnel, and business managers, solidifying its place as a valuable tool in any organization's API setup and management toolkit.
Best Practices for Sustainable API Integration
Setting up an API is just the beginning. To ensure your integrations remain robust, scalable, and secure over time, adhere to these best practices.
- Start Small, Iterate Often: Avoid trying to integrate everything at once. Begin with a minimal viable integration that addresses your most critical needs. Deploy, gather feedback, and then iterate, gradually adding more features and complexity. This reduces risk and allows for quicker adaptation.
- Prioritize Security from Day One: Security should never be an afterthought. Design your integrations with security in mind from the very first step. This includes secure credential storage, input validation, HTTPS enforcement, and adherence to least privilege principles. Regularly audit your integrations for potential vulnerabilities.
- Document Everything: Maintain clear, comprehensive, and up-to-date documentation for your internal API integrations, just as you would expect from a third-party API. Document authentication methods, endpoints, parameters, data models, error codes, and any custom logic. This reduces institutional knowledge silos and simplifies onboarding for new team members.
- Monitor Proactively: Don't wait for users to report issues. Implement robust monitoring for uptime, performance, and error rates across all your API integrations. Set up automated alerts to notify your team of anomalies, allowing for proactive problem resolution. Leverage detailed logging and analytics provided by platforms like APIPark to gain deep insights into API health and usage patterns.
- Plan for Scale and Failure: Design your integrations with future growth in mind. Implement load balancing, caching, and efficient resource utilization to handle increased traffic. Crucially, design for failure: incorporate robust error handling, retry mechanisms with exponential backoff, circuit breakers, and fallbacks to ensure your application remains resilient even when external APIs experience issues.
- Engage with the API Provider Community: For third-party APIs, actively participate in developer communities, forums, or support channels. This allows you to stay informed about updates, best practices, and potential issues, and to seek help when needed. Providing feedback can also contribute to improving the API for everyone.
Conclusion
The journey of API setup is a multifaceted endeavor, requiring a blend of technical acumen, strategic planning, and a commitment to best practices. From understanding the fundamental role of an API as an intermediary, to leveraging the power of an API gateway for unified management and security, and interpreting the clarity offered by the OpenAPI Specification, each component plays a vital role in building a resilient and efficient interconnected system. We've explored the critical steps of authentication, documentation, making your first call, securing your integration, handling errors, and ensuring continuous testing and monitoring. Furthermore, we've delved into advanced considerations such as versioning, rate limiting, caching, and the indispensable role of observability and analytics in deriving long-term value.
Solutions like APIPark exemplify how a comprehensive platform can simplify these complexities, especially in the evolving landscape of AI-driven applications, by providing an integrated gateway, management, and analysis solution. By adopting a structured approach, prioritizing security and resilience, and embracing continuous improvement, you can transform the daunting task of API setup into a strategic advantage, unlocking new capabilities and driving innovation within your organization. The digital future is intrinsically linked to the efficacy of our API integrations; armed with this guide, you are now better equipped to master that future.
Frequently Asked Questions (FAQs)
1. What is the single most important security measure to implement when setting up an API? The single most important security measure is to always use HTTPS (TLS encryption) for all API communications and to never hardcode or expose sensitive API keys/tokens directly in client-side code or public repositories. Instead, store them securely on your backend server using environment variables or dedicated secret management services. This protects data in transit and prevents unauthorized access to your API resources.
2. How can I handle API rate limits effectively to avoid getting blocked? To handle API rate limits effectively, you should: a) Read the API documentation to understand the specific rate limits and how they are communicated (e.g., via HTTP headers like X-RateLimit-Remaining). b) Implement a client-side rate limiting strategy in your application to stay within the limits. c) Implement exponential backoff and retry mechanisms for requests that fail with a 429 Too Many Requests status code. This means waiting for progressively longer intervals before retrying a request, giving the API time to reset its internal counters. d) Consider using an API gateway that can manage and enforce rate limits for both incoming and outgoing API calls.
3. What is the difference between an API and an API Gateway? An API (Application Programming Interface) defines the methods and data formats for software applications to communicate with each other. It's the "contract" for interaction. An API Gateway, on the other hand, is a server that acts as a single entry point for a collection of APIs. It sits in front of your backend services, handling tasks like authentication, rate limiting, routing, caching, and monitoring, effectively abstracting complexities from clients and centralizing cross-cutting concerns for improved security and manageability.
4. Why is OpenAPI Specification important, and how does it help with API setup? The OpenAPI Specification (formerly Swagger) provides a standardized, language-agnostic format for describing RESTful APIs. It's important because it enables: a) Machine-readable documentation: Tools can automatically generate interactive API documentation (like Swagger UI), client SDKs, and server stubs. b) Consistency: It ensures all aspects of an API (endpoints, parameters, responses, security) are clearly and consistently defined. c) Improved Developer Experience: Developers can quickly understand how to interact with an API without manual interpretation, accelerating integration time and reducing errors. It acts as a clear contract between the API provider and consumer.
5. How can APIPark help with my API setup and management? APIPark is an open-source AI gateway and API management platform that can significantly streamline your API setup and ongoing management. It helps by: a) Providing a high-performance API gateway for centralized security, routing, and traffic management. b) Offering specialized features for integrating and managing 100+ AI models with unified authentication and cost tracking, simplifying complex AI API consumption. c) Enabling prompt encapsulation into REST APIs, allowing you to create custom AI-powered APIs easily. d) Supporting end-to-end API lifecycle management, from design to decommissioning. e) Enhancing security with independent access permissions and approval workflows for each tenant/team. f) Offering detailed API call logging and powerful data analysis to ensure system stability and provide business intelligence, aiding in proactive maintenance and optimization. Its quick deployment capabilities also get you up and running rapidly.
🚀You can securely and efficiently call the OpenAI API on APIPark in just two steps:
Step 1: Deploy the APIPark AI gateway in 5 minutes.
APIPark is developed based on Golang, offering strong product performance and low development and maintenance costs. You can deploy APIPark with a single command line.
curl -sSO https://download.apipark.com/install/quick-start.sh; bash quick-start.sh

In my experience, you can see the successful deployment interface within 5 to 10 minutes. Then, you can log in to APIPark using your account.

Step 2: Call the OpenAI API.