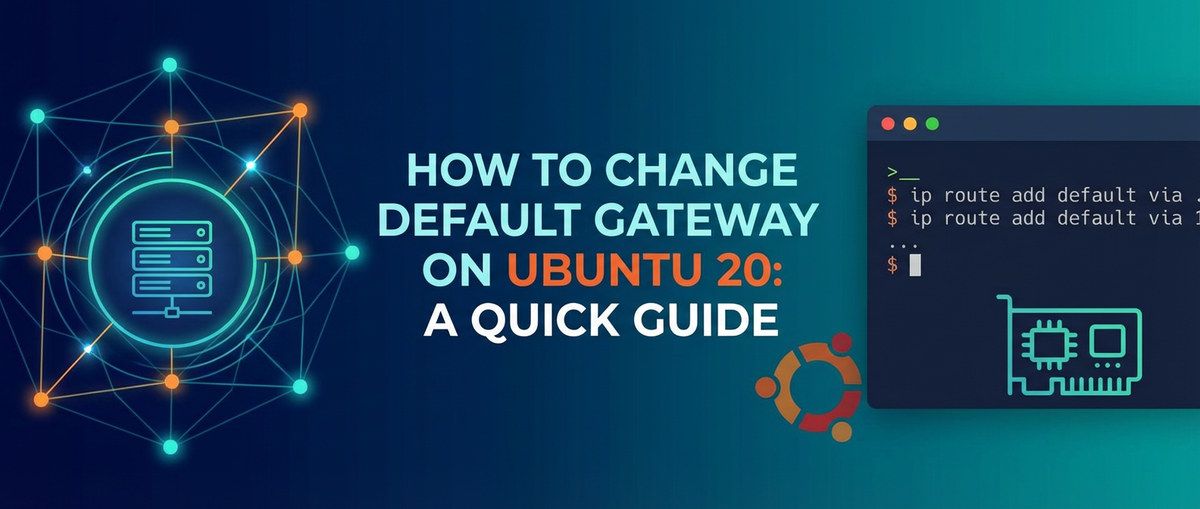
How to Change Default Gateway on Ubuntu 20: A Quick Guide


In the intricate landscape of network connectivity, the default gateway stands as a pivotal component, serving as the essential bridge between your local network and the vast expanse of the internet or other external networks. For users and administrators navigating the robust environment of Ubuntu 20.04 LTS (Focal Fossa), understanding how to configure and, more importantly, how to change this default gateway is a fundamental skill that underpins reliable and flexible network management. This comprehensive guide will delve deep into the nuances of modifying your default gateway, offering a detailed exploration of the methods available, their implications, and best practices for ensuring seamless network operations.
Introduction: The Unseen Gatekeeper of Your Network
Every device connected to a network, be it a desktop computer, a server, or a mobile phone, needs a way to send data to destinations outside its immediate local segment. This is precisely the role of the default gateway. Imagine your local network as a self-contained neighborhood. When you want to send a letter to someone within your neighborhood, you simply walk it over. But if you want to send a letter to someone in another town, you need a post office to route it to the correct destination. In networking terms, the default gateway is that post office. It's a specific router on your local network that knows how to forward traffic destined for external networks. Without a properly configured default gateway, your Ubuntu system, despite having a valid IP address, would be confined to its local subnet, unable to access websites, cloud services, or even other machines on a different subnet within your organization.
Ubuntu 20.04, like its predecessors, offers a variety of tools and methodologies for network configuration. From the command-line flexibility of ip route to the more structured approach of Netplan, and the graphical convenience of NetworkManager, there are multiple avenues to achieve the goal of changing your default gateway. Each method caters to different scenarios and user preferences, and a deep understanding of each is crucial for effective system administration.
What Exactly is a Default Gateway?
A default gateway is essentially a router's IP address within your local area network (LAN). When your Ubuntu system needs to send data to an IP address that isn't on its local subnet, it consults its routing table. If no specific route exists for that destination, the traffic is automatically forwarded to the default gateway. This gateway then takes responsibility for routing the traffic further, either directly to the destination if it's within its own connected networks or to another router (another gateway) that is closer to the final destination. This process continues until the data reaches its intended recipient. The concept of a default gateway is integral to the entire internet architecture, enabling devices worldwide to communicate seamlessly across diverse and interconnected networks.
Why Would You Need to Change Your Default Gateway?
While most home and small office networks rely on a single, static default gateway configured by a DHCP server, there are numerous scenarios in enterprise environments, development setups, or even advanced home labs where changing the default gateway becomes a necessity:
- Network Migration or Reconfiguration: During network upgrades, ISP changes, or a complete overhaul of an organization's network topology, the IP address of the primary router (your default gateway) might change. Updating your Ubuntu servers and workstations to reflect this new gateway is paramount for maintaining connectivity.
- Troubleshooting Network Issues: If you suspect your primary gateway is experiencing problems (e.g., unresponsiveness, slow performance, or packet loss), you might temporarily switch to an alternative, backup gateway to diagnose the issue or restore connectivity while the primary one is being fixed.
- Custom Network Configurations: In environments with multiple routers or specialized routing policies, administrators might need to direct specific traffic through different gateways or change the default path for all outbound traffic. This is common in multi-homed systems or those with advanced security requirements.
- Implementing Security Policies: For enhanced security, an organization might introduce a dedicated firewall or security appliance that acts as an intermediate gateway for all outbound traffic, inspecting and filtering it before it reaches the internet. Changing the default gateway to this appliance is a common practice.
- VPN Integration: When a VPN client connects, it often reconfigures the routing table to direct all or specific traffic through the VPN tunnel, effectively changing the logical default gateway for that traffic. While often automated, understanding manual configuration helps troubleshooting.
- Load Balancing and High Availability: In advanced setups, multiple gateways might exist for redundancy or to distribute network load. Changing the default gateway could be part of an active-passive failover strategy or a manual load-balancing adjustment.
- Virtualization and Containerization: In virtualized environments (VMware, KVM) or container orchestration platforms (Docker, Kubernetes), virtual machines or containers often have their own network interfaces and require specific gateway configurations to communicate with the host network or the outside world.
- Testing and Development: Developers or network engineers might frequently alter gateway settings to test different network paths, simulate specific network conditions, or isolate systems for testing purposes.
- Bypassing Network Restrictions: While not always recommended without proper authorization, in some restrictive network environments, users might attempt to configure an alternative gateway to bypass certain internal routing rules or content filters.
- Multi-homed Systems: A server with multiple network interfaces connected to different subnets might require careful default gateway management to ensure traffic egresses through the intended interface.
Understanding these scenarios highlights why the ability to change the default gateway is not just a niche skill but a fundamental aspect of robust network administration on Ubuntu 20.04.
Understanding Network Fundamentals: The Building Blocks
Before diving into the practical steps of changing your default gateway, a solid grasp of underlying network concepts is essential. This foundational knowledge empowers you to make informed decisions, troubleshoot effectively, and understand the "why" behind each command and configuration.
IP Addresses, Subnet Masks, and Routers
At the heart of all network communication are IP addresses. An IP address (Internet Protocol address) is a unique numerical label assigned to each device connected to a computer network that uses the Internet Protocol for communication. On IPv4, these are typically represented as four octets separated by dots (e.g., 192.168.1.100). Each IP address consists of two parts: the network portion and the host portion.
The subnet mask determines which part of an IP address identifies the network and which part identifies the host. It's a 32-bit number that "masks" the IP address to distinguish between the network address and the host address. For example, a subnet mask of 255.255.255.0 (or /24 in CIDR notation) indicates that the first three octets of the IP address represent the network, and the last octet represents the host on that network. Devices within the same subnet can communicate directly with each other without needing a router.
A router is a networking device that forwards data packets between computer networks. Routers perform the traffic directing functions on the Internet. A data packet is typically forwarded from one router to another through the networks that constitute the internet until it reaches its destination node. Your default gateway is simply the IP address of the router that connects your local network to other networks, including the internet.
The OSI Model (Layer 3 Focus)
The Open Systems Interconnection (OSI) model is a conceptual framework that standardizes the functions of a telecommunication or computing system into seven distinct layers. When discussing gateways and routing, we are primarily concerned with Layer 3: The Network Layer.
- Layer 3 (Network Layer): This layer is responsible for logical addressing (IP addresses), routing, and forwarding packets from source to destination across multiple networks. Routers operate at this layer. When your Ubuntu system sends a packet, the Network Layer determines if the destination is local or remote. If remote, it sends the packet to the default gateway, which is a Layer 3 device capable of making routing decisions based on IP addresses. This is where the concept of a default gateway truly shines, as it acts as the designated router for all traffic that doesn't have a more specific route.
ARP (Address Resolution Protocol) and Its Role with Gateways
While IP addresses provide logical addressing at Layer 3, network interfaces physically communicate using MAC addresses (Media Access Control addresses) at Layer 2 (the Data Link Layer). The Address Resolution Protocol (ARP) is a crucial protocol that bridges this gap.
When your Ubuntu system wants to send an IP packet to its default gateway, it first needs to know the gateway's MAC address. It uses ARP for this purpose. Your system broadcasts an ARP request on the local network, asking, "Who has IP address X.X.X.X (the gateway's IP)? Tell Y.Y.Y.Y (my IP)." The gateway, upon receiving this request, replies with its MAC address. Your Ubuntu system then stores this IP-to-MAC mapping in its ARP cache. Subsequent packets destined for the gateway can then be encapsulated with the gateway's MAC address for physical transmission. Without ARP, your system wouldn't be able to physically deliver IP packets to the default gateway, rendering network communication impossible.
Routing Tables: The Gateway's Blueprint
Every operating system maintains a routing table, which is essentially a database of rules that dictates how network traffic should be directed. When your Ubuntu system needs to send an IP packet, it consults its routing table to determine the best path to the destination.
A typical routing table entry contains information such as:
- Destination Network: The IP address range for which this route is applicable (e.g.,
0.0.0.0/0for the default route, meaning "all networks"). - Gateway (Next Hop): The IP address of the router to which the packet should be sent next. For the default route, this is your default gateway.
- Genmask (Subnet Mask): The subnet mask for the destination network.
- Flags: Indicate characteristics of the route (e.g.,
Ufor Up,Gfor Gateway,Hfor Host). - Metric: A cost associated with the route, used to choose between multiple routes to the same destination. Lower metrics are preferred.
- Interface: The network interface through which the packet should be sent (e.g.,
eth0,enp0s3).
The default route, often represented as 0.0.0.0 with a 0.0.0.0 netmask (or 0.0.0.0/0 in CIDR), is the most critical entry. It specifies the gateway to use for any traffic whose destination is not explicitly listed in the routing table. Changing your default gateway essentially means altering this default route entry in your system's routing table.
You can view your current routing table using commands like ip route show or netstat -rn. Understanding how to interpret this output is crucial for verifying your gateway changes and troubleshooting any connectivity issues. For instance, an entry like default via 192.168.1.1 dev enp0s3 clearly indicates that 192.168.1.1 is the default gateway accessible via the enp0s3 network interface.
With these foundational concepts firmly in place, you are now well-equipped to tackle the practical aspects of modifying your default gateway on Ubuntu 20.04.
Prerequisites and Essential Precautions
Before you begin altering critical network configurations, it's imperative to ensure you have the necessary privileges and take appropriate precautions. Rushing into network changes without a clear understanding of the existing setup or a fallback plan can lead to frustrating downtime and loss of connectivity.
1. Administrative Privileges (sudo)
To make any significant changes to your system's network configuration, you will need administrative privileges. This typically means using the sudo command before your network-related commands. If you are not logged in as the root user, ensure your user account is part of the sudo group.
2. Understanding Your Current Network Configuration
Before making any changes, it is absolutely vital to document your existing network setup. This serves multiple purposes: * Baseline: Provides a reference point to compare against after your changes. * Troubleshooting: Helps you identify what might have gone wrong if connectivity is lost. * Reversion: Gives you the information needed to revert to the original configuration if necessary.
Use the following commands to gather critical information:
ip a(orip addr show): Displays all network interfaces, their IP addresses, subnet masks, and current state (UP/DOWN). Identify the interface you are working with (e.g.,enp0s3,eth0,wlp2s0).bash ip aExample Output Snippet:2: enp0s3: <BROADCAST,MULTICAST,UP,LOWER_UP> mtu 1500 qdisc fq_codel state UP group default qlen 1000 link/ether 08:00:27:xx:xx:xx brd ff:ff:ff:ff:ff:ff inet 192.168.1.100/24 brd 192.168.1.255 scope global dynamic enp0s3 valid_lft 86241sec preferred_lft 86241secFrom this, you can identify your interface name (enp0s3), current IP address (192.168.1.100), and subnet mask (/24).ip r(orip route show): Shows the current routing table, including the default gateway.bash ip rExample Output Snippet:default via 192.168.1.1 dev enp0s3 proto dhcp metric 100 192.168.1.0/24 dev enp0s3 proto kernel scope link src 192.168.1.100 metric 100This output clearly states that thedefault gatewayis192.168.1.1and it's reachable via theenp0s3interface.cat /etc/netplan/*.yaml: If you are using Netplan (the default on Ubuntu 20.04), this command will display your current Netplan configuration files, which define how your network interfaces are configured permanently.bash cat /etc/netplan/*.yamlThis is critical for understanding the current persistent configuration and for making permanent changes.
3. Backup Current Configuration Files
Before modifying any configuration files, especially those related to networking, it's a golden rule to create backups. This allows you to quickly revert to a working state if your changes cause issues.
For Netplan configuration files (e.g., /etc/netplan/01-netcfg.yaml):
sudo cp /etc/netplan/01-netcfg.yaml /etc/netplan/01-netcfg.yaml.bak
If you are using NetworkManager and modifying connections via nmcli, the configurations are typically stored in /etc/NetworkManager/system-connections/. You might back up the relevant connection file.
For the older ifupdown method (if still used), backup /etc/network/interfaces:
sudo cp /etc/network/interfaces /etc/network/interfaces.bak
4. Understand the Risks: Loss of Connectivity
The most significant risk when changing your default gateway is losing network connectivity. If you enter an incorrect IP address for the gateway, specify the wrong interface, or introduce syntax errors in configuration files, your system may no longer be able to reach external networks. In a remote server environment (e.g., via SSH), this can be disastrous, requiring console access or a server reboot with a rescue image to fix.
- Always test temporarily first (if possible): If you're unsure, try the temporary
ip routemethod before committing to permanent changes. - Have console access: For critical servers, ensure you have out-of-band management (like IPMI, iDRAC, or virtual machine console access) in case you lose SSH connectivity.
- Double-check your IP addresses: Verify the new gateway IP address, your system's IP, and the subnet mask.
- Be patient: Network changes can sometimes take a moment to apply. Don't assume something went wrong immediately.
5. Testing After Changes
Once you've applied your changes, immediately verify that they have taken effect and that network connectivity is restored or improved as expected. We'll cover specific verification steps later in this guide, but generally, this involves checking the routing table and pinging external addresses.
By adhering to these prerequisites and precautions, you significantly mitigate the risks associated with altering your Ubuntu 20.04 system's default gateway, ensuring a smoother and more controlled configuration process.
Method 1: Temporary Change using the ip Command (Command Line)
For quick tests, troubleshooting, or situations where you only need a temporary adjustment to your network routing, the ip command is your most powerful and immediate tool. Changes made with ip route are applied instantly to the kernel's routing table but are not persistent across reboots or network service restarts.
The ip utility is part of the iproute2 suite, which is the standard toolkit for network configuration on modern Linux systems, superseding the older ifconfig and route commands.
Understanding ip route
The ip route command allows you to view, add, delete, and modify entries in the kernel's routing table. For changing the default gateway, we'll focus on adding and deleting the default route.
A default route entry typically looks like this: default via <gateway_ip> dev <interface>
default: This keyword signifies that this route is the default gateway for traffic destined to any network not explicitly listed in the routing table.via <gateway_ip>: Specifies the IP address of the next-hop router (your default gateway). This IP must be on your local subnet.dev <interface>: Indicates the network interface through which packets should be sent to reach the gateway. Examples includeenp0s3,eth0,wlp2s0.
Step-by-Step: Changing the Default Gateway Temporarily
1. Identify Current Default Gateway
First, verify your current default gateway using ip route show or ip r:
ip r
You'll see an entry like: default via 192.168.1.1 dev enp0s3 proto dhcp metric 100
This tells you the current gateway is 192.168.1.1 on interface enp0s3. Note down your current gateway IP and interface.
2. Delete the Existing Default Gateway
Before adding a new default gateway, it's good practice to remove the existing one to avoid conflicts or ambiguous routing.
sudo ip route del default
Upon executing this command, your system will likely lose external connectivity until a new default route is added. If you are connected via SSH, your session might freeze or terminate. Be prepared to quickly add the new gateway.
3. Add the New Default Gateway
Now, add the new default gateway using the ip route add default command. Replace <new_gateway_ip> with the actual IP address of your new gateway and <your_interface> with your network interface name.
sudo ip route add default via <new_gateway_ip> dev <your_interface>
Example: If your new gateway is 192.168.1.254 and your interface is enp0s3:
sudo ip route add default via 192.168.1.254 dev enp0s3
4. Verify the Change
Immediately after adding the new gateway, check your routing table again to confirm the change:
ip r
You should now see the default route pointing to your <new_gateway_ip>.
To test actual connectivity, try pinging an external IP address (e.g., Google's DNS server 8.8.8.8) or a website (e.g., google.com - which also tests DNS resolution):
ping -c 4 8.8.8.8
ping -c 4 google.com
If these pings are successful, your temporary default gateway change has worked.
Use Cases for Temporary Gateway Changes
- Quick Diagnostics: If you suspect a specific router is failing, you can quickly switch your default gateway to another operational router to see if it resolves the issue.
- Testing New Configurations: Before committing to a permanent configuration, you can use the
ipcommand to test a new gateway's IP address or a different routing path. - Ad-hoc Routing: In specific, short-lived scenarios where you need traffic to temporarily bypass a particular network segment or reach a unique destination, this method is invaluable.
- Recovery Scenarios: In a multi-homed server (a server with multiple network interfaces), if one
gatewaygoes down, an administrator might temporarily change thedefault gatewayto use the alternative activegatewayon another interface for emergency traffic redirection.
Important Considerations for Temporary Changes
- Non-Persistent: Remember, these changes will be lost upon reboot, network service restart, or even if the network interface goes down and comes back up. For permanent changes, you must configure your system using Netplan (Ubuntu's default) or NetworkManager.
- Immediate Impact: The change is immediate. Be aware that you might briefly lose connectivity, especially if you remove the old default route without immediately adding a new valid one.
- Single Default Gateway: Typically, a system should only have one default gateway. While you can technically add multiple default routes with different metrics, the system will primarily use the one with the lowest metric. Removing the existing default is usually the safest approach when setting a new primary one.
The ip command provides granular control over your system's routing table, making it an indispensable tool for network administrators and users needing immediate, albeit temporary, gateway adjustments.
Method 2: Permanent Change using Netplan (Ubuntu's Default)
Ubuntu 20.04 primarily uses Netplan for network configuration. Netplan is a utility that allows you to configure network interfaces using YAML syntax. It works by generating configuration files for different renderers, such as networkd (the default for server installations) or NetworkManager (typically used on desktop installations). Changes made via Netplan are persistent across reboots.
Introduction to Netplan
Netplan simplifies network configuration by providing a unified YAML-based interface. Instead of directly editing complex configuration files for specific network backends (like ifupdown or systemd-networkd), you define your desired network state in a simple YAML file, and Netplan generates the appropriate backend configuration. This abstraction makes network management more consistent and less error-prone.
Location of Netplan Configuration Files
Netplan configuration files are typically found in the /etc/netplan/ directory. You might see files like 01-netcfg.yaml, 00-installer-config.yaml, or others, depending on how your system was installed and configured. It's common for an installer to create a file named 00-installer-config.yaml.
You can list the files in this directory:
ls /etc/netplan/
Structure of a Netplan File
A basic Netplan YAML file for an Ethernet interface might look something like this:
network:
  version: 2
  renderer: networkd
  ethernets:
    enp0s3:
      dhcp4: no
      addresses:
        - 192.168.1.100/24
      routes:
        - to: default
          via: 192.168.1.1
      nameservers:
        addresses: [8.8.8.8, 8.8.4.4]
Let's break down the key sections relevant to changing the default gateway:
network:: The root element of all Netplan configuration files.version: 2: Specifies the Netplan configuration file format version.renderer: networkd: (orNetworkManager) Specifies the backend Netplan will use to apply the configuration.networkdis common for servers,NetworkManagerfor desktops.ethernets:: Defines configurations for wired Ethernet interfaces. For wireless, it would bewifis:.enp0s3:: The name of your network interface. Replace this with your actual interface name (e.g.,eth0).dhcp4: no: Disables DHCP for IPv4. If you're setting a static IP and gateway, this should beno. Ifyes, DHCP will typically assign the gateway, and your staticroutesmight conflict or be overridden.addresses:: A list of static IP addresses and their subnet masks for the interface.routes:: This is the crucial section for defining routing.- to: default: Specifies that this route is for the default gateway (i.e., traffic to any destination not explicitly routed).via: 192.168.1.1: The IP address of your default gateway.
nameservers:: Defines DNS server addresses. While not directly related to the gateway, it's essential for name resolution (e.g., convertinggoogle.comto an IP address).
Step-by-Step: Changing the Default Gateway Permanently with Netplan
1. Identify Your Netplan Configuration File
As discussed in the prerequisites, use ls /etc/netplan/ to find your primary Netplan YAML file. It's usually 00-installer-config.yaml or 01-netcfg.yaml. Let's assume it's 00-installer-config.yaml for this guide.
2. Backup the File
Always back up the original configuration file before making changes:
sudo cp /etc/netplan/00-installer-config.yaml /etc/netplan/00-installer-config.yaml.bak
3. Edit the Netplan File
Open the Netplan file using a text editor like nano or vim:
sudo nano /etc/netplan/00-installer-config.yaml
4. Modify the routes Section for the New Gateway
Locate the section corresponding to your network interface (e.g., enp0s3).
Scenario A: Changing an Existing Static Gateway
If you already have a static IP and gateway configured, you'll see a routes section like this:
      # ... other config ...
      routes:
        - to: default
          via: 192.168.1.1 # Old gateway IP
Change the via: entry to your new default gateway IP address. For example, to change it to 192.168.1.254:
      # ... other config ...
      routes:
        - to: default
          via: 192.168.1.254 # New gateway IP
Scenario B: Setting a Static Gateway from a DHCP-configured Interface
If your interface is currently configured via DHCP (dhcp4: yes), and you want to switch to a static IP and gateway, you'll need to:
- Change
dhcp4: yestodhcp4: no. - Add an
addresses:entry with your desired static IP and subnet mask. - Add the
routes:section to specify your default gateway. - Optionally, add
nameservers:for DNS.
Before (DHCP):
network:
  version: 2
  renderer: networkd
  ethernets:
    enp0s3:
      dhcp4: yes
After (Static IP and Gateway):
network:
  version: 2
  renderer: networkd
  ethernets:
    enp0s3:
      dhcp4: no
      addresses:
        - 192.168.1.100/24 # Your static IP and subnet
      routes:
        - to: default
          via: 192.168.1.254 # Your new default gateway IP
      nameservers:
        addresses: [8.8.8.8, 8.8.4.4] # Optional: DNS servers
Important YAML Indentation: YAML is sensitive to indentation. Use spaces, not tabs, and ensure consistent indentation. Typically, two spaces per level are used. A common mistake is incorrect indentation, which will lead to Netplan errors.
Save the file and exit the editor (Ctrl+X, Y, Enter for nano).
5. Test and Apply the Configuration
After saving the changes, Netplan provides commands to test and apply them.
sudo netplan generate(Optional but Recommended): This command generates the backend configuration files (e.g., forsystemd-networkd) from your YAML file. It's a good first step to catch syntax errors without applying the changes. If there are errors, Netplan will usually tell you where.sudo netplan apply: This is the command that applies the new configuration. It will activate the changes, and you might experience a brief network interruption.bash sudo netplan applyIfnetplan applyreports any errors, it's crucial to address them before proceeding. Common errors include incorrect YAML syntax.
6. Verify the Change
After applying the configuration, verify that the new default gateway is active:
ip r
You should see the default route now pointing to your newly configured gateway IP.
Also, test external connectivity:
ping -c 4 8.8.8.8
ping -c 4 google.com
If everything is successful, your default gateway has been permanently changed.
Troubleshooting Netplan Issues
- Syntax Errors: The most common issue with Netplan is incorrect YAML syntax (e.g., wrong indentation, missing colons, invalid values).
netplan generateandnetplan applyare usually quite good at pointing out where the error is. Use a YAML linter if you're struggling. netplan applyhangs or fails:- Check
/var/log/syslogorjournalctl -xefor detailed error messages from Netplan orsystemd-networkd. - Ensure the gateway IP is reachable from your system's interface. Is the gateway itself online?
- Double-check that your interface name (e.g.,
enp0s3) in the YAML matches the actual interface name on your system (ip a).
- Check
- No Connectivity After Apply: If you lose connectivity and cannot even revert changes via SSH, you'll need physical or console access to your machine.
- You can often revert to the backup file:
sudo cp /etc/netplan/00-installer-config.yaml.bak /etc/netplan/00-installer-config.yamland thensudo netplan apply. - Alternatively, you can manually use
ip routeto set a temporary default gateway to regain connectivity and then fix the Netplan file.
- You can often revert to the backup file:
Netplan, while initially seeming complex due to YAML, offers a robust and consistent way to manage network configurations on Ubuntu 20.04. Mastering it is essential for persistent network changes.
Method 3: Permanent Change using NetworkManager (GUI and nmcli)
NetworkManager is a dynamic network management daemon often used on Ubuntu desktop installations and sometimes on servers, especially if a graphical environment is installed. It provides both a graphical user interface (GUI) and a powerful command-line interface (nmcli) for managing network connections. Changes made through NetworkManager are persistent.
When to Use NetworkManager
- Desktop Environments: If you're running Ubuntu 20.04 with a desktop environment (like GNOME, KDE, XFCE), NetworkManager is likely handling your connections, and the GUI method is often the most intuitive.
- Servers with GUI: Even if it's a server, if you've installed a desktop environment for management, NetworkManager GUI can be an option.
- Flexible CLI Control: The
nmclicommand-line tool offers advanced control and scripting capabilities for NetworkManager managed connections, making it useful even on headless servers where NetworkManager is in use.
A. Graphical User Interface (GUI) Method
This method is straightforward if you have physical access to your Ubuntu desktop or are connected via a VNC/RDP session.
1. Access Network Settings
- Click on the network icon in the top-right corner of your screen (usually two arrows for wired, or Wi-Fi icon).
- Select "Wired Connected" or "Wi-Fi Connected" depending on your connection type.
- Click on "Wired Settings" or "Wi-Fi Settings".
- Alternatively, go to "Activities" -> search for "Settings" -> navigate to "Network" in the left sidebar.
2. Select Your Network Interface
In the Network settings window, you'll see a list of network interfaces (e.g., "Wired," "Wi-Fi"). * Locate the interface you want to configure (e.g., your wired Ethernet connection). * Click the gear icon (⚙️) next to the active connection to open its configuration.
3. Navigate to IPv4 Settings
In the connection settings window, go to the "IPv4" tab (or "IPv6" if you're configuring an IPv6 gateway).
4. Change the Gateway
- Automatic (DHCP): If "IPv4 Method" is set to "Automatic (DHCP)," your gateway is assigned by the DHCP server. If you need to override it, you might need to switch to "Manual" or explore advanced DHCP client options, though direct gateway override is generally not standard with DHCP.
- Manual: If "IPv4 Method" is set to "Manual":
- You'll see fields for "Addresses," "Netmask," and "Gateway."
- Change the IP address in the "Gateway" field to your new default gateway IP.
- Ensure your system's IP address and Netmask are also correctly configured if they are static.
- You can also specify DNS servers here.
5. Apply the Changes
- Click the "Apply" or "Save" button to commit your changes.
- You might be prompted to authenticate with your password.
- NetworkManager will usually re-apply the network configuration, which may cause a brief disconnection.
6. Verify the Change
- Close the settings window.
- Open a terminal and use
ip rto verify the default route. - Test connectivity by pinging an external IP address (e.g.,
8.8.8.8).
B. nmcli Command Line Tool Method
nmcli is a powerful and versatile command-line client for NetworkManager. It allows you to control NetworkManager and manage network connections and devices from the terminal, making it ideal for scripting or managing headless servers where NetworkManager is present.
1. List Network Connections
First, identify the name of the network connection you want to modify. Connections are named entities managed by NetworkManager.
nmcli connection show
Example Output:
NAME                UUID                                  TYPE      DEVICE
Wired connection 1  a1b2c3d4-e5f6-7890-1234-567890abcdef  ethernet  enp0s3
My_Wi-Fi            fedcba98-7654-3210-fedc-ba9876543210  wifi      wlp2s0
Note the NAME of your active connection (e.g., "Wired connection 1").
2. Modify the Gateway for the Connection
To change the default gateway, you'll modify the ipv4.gateway property of your connection. Replace <connection_name> with the name you identified (e.g., "Wired connection 1") and <new_gateway_ip> with the IP of your new gateway.
sudo nmcli connection modify "<connection_name>" ipv4.gateway <new_gateway_ip>
Example:
sudo nmcli connection modify "Wired connection 1" ipv4.gateway 192.168.1.254
If your connection uses DHCP, and you want to switch to a static IP with a specific gateway, you'll also need to set the IPv4 method to manual and specify the IP address.
sudo nmcli connection modify "Wired connection 1" ipv4.method manual
sudo nmcli connection modify "Wired connection 1" ipv4.addresses 192.168.1.100/24
sudo nmcli connection modify "Wired connection 1" ipv4.gateway 192.168.1.254
# Optionally, set DNS servers
sudo nmcli connection modify "Wired connection 1" ipv4.dns "8.8.8.8 8.8.4.4"
3. Apply the Changes (Reactivate Connection)
For the changes to take effect, you usually need to bring the connection down and then up again.
sudo nmcli connection down "<connection_name>"
sudo nmcli connection up "<connection_name>"
Example:
sudo nmcli connection down "Wired connection 1"
sudo nmcli connection up "Wired connection 1"
If you are connected via SSH, this will likely disconnect you. Ensure your commands are correct before executing, or have console access ready.
4. Verify the Change
Once the connection is up, verify the new default gateway:
ip r
You should see the default route updated. Also, check NetworkManager's understanding of the connection:
nmcli device show <device_name> | grep GATEWAY
(e.g., nmcli device show enp0s3 | grep GATEWAY)
Finally, test external connectivity:
ping -c 4 8.8.8.8
ping -c 4 google.com
Important Considerations for NetworkManager
- Service State: Ensure the NetworkManager service is running (
sudo systemctl status NetworkManager). - Conflicts: Be aware that NetworkManager might conflict with Netplan if both are attempting to manage the same interface, although Netplan can be configured to use NetworkManager as its renderer. On typical desktop installations, NetworkManager is the primary manager.
- Connection Name vs. Device Name: Remember that
nmclioperates on "connection names" (e.g., "Wired connection 1"), which are logical configurations, rather than directly on "device names" (e.g.,enp0s3), which are physical interfaces. A single device can have multiple connection profiles. - Automatic vs. Manual: When changing
ipv4.gatewayvianmcli, ifipv4.methodis set toauto(DHCP), the manual gateway might not be used or might be overridden. For persistent static gateway configuration, settingipv4.method manualis crucial.
NetworkManager, especially through its nmcli interface, offers a powerful and flexible way to manage network settings persistently, catering to both graphical users and command-line enthusiasts on Ubuntu 20.04.
APIPark is a high-performance AI gateway that allows you to securely access the most comprehensive LLM APIs globally on the APIPark platform, including OpenAI, Anthropic, Mistral, Llama2, Google Gemini, and more.Try APIPark now! 👇👇👇
Method 4: Permanent Change using ifupdown (Older Method, Less Common on Ubuntu 20)
The ifupdown system was the traditional method for configuring network interfaces on Debian-based systems like Ubuntu for many years. It relies on the /etc/network/interfaces file. While Ubuntu 20.04 primarily uses Netplan by default for new installations, ifupdown might still be present and in use on upgraded systems or in specific legacy configurations.
When ifupdown Might Be Used
- Upgraded Systems: If your Ubuntu 20.04 installation was an upgrade from an older version (e.g., 16.04 or 18.04) that used
ifupdown, and Netplan was not fully adopted during the upgrade, you might still find your network configured via/etc/network/interfaces. - Minimal/Specialized Builds: In some highly customized or minimal server installations,
ifupdownmight be manually enabled or preferred over Netplan. - Legacy Appliances: Certain network appliances or older software might still rely on this configuration method.
Important Note: If Netplan is active and configured for an interface, it will likely override or conflict with settings in /etc/network/interfaces. It's generally not recommended to use both simultaneously for the same interface. Check for Netplan configuration files (/etc/netplan/*.yaml) and if they exist and are active, prioritize Netplan.
Structure of /etc/network/interfaces
A typical entry for a static IP configuration in /etc/network/interfaces looks like this:
# The loopback network interface
auto lo
iface lo inet loopback

# The primary network interface
auto enp0s3
iface enp0s3 inet static
    address 192.168.1.100
    netmask 255.255.255.0
    gateway 192.168.1.1
    dns-nameservers 8.8.8.8 8.8.4.4
Let's break down the relevant parts:
auto enp0s3: Tells the system to bring this interface (enp0s3) up automatically at boot.iface enp0s3 inet static: Defines the interfaceenp0s3for IPv4 (inet) and specifies that it uses astaticIP configuration. For DHCP, it would beiface enp0s3 inet dhcp.address 192.168.1.100: Your system's static IP address.netmask 255.255.255.0: The subnet mask.gateway 192.168.1.1: This is the line where the default gateway is specified.dns-nameservers 8.8.8.8 8.8.4.4: (Optional) Specifies DNS servers.
Step-by-Step: Changing the Default Gateway with ifupdown
1. Backup the Configuration File
Always start by backing up the interfaces file:
sudo cp /etc/network/interfaces /etc/network/interfaces.bak
2. Edit the interfaces File
Open the file with a text editor:
sudo nano /etc/network/interfaces
3. Locate and Modify the gateway Line
Find the iface section corresponding to your network interface (e.g., enp0s3). If your configuration is static, you'll find a line starting with gateway. Change the IP address to your new default gateway.
Before:
iface enp0s3 inet static
    address 192.168.1.100
    netmask 255.255.255.0
    gateway 192.168.1.1  # Old gateway
After (New Gateway: 192.168.1.254):
iface enp0s3 inet static
    address 192.168.1.100
    netmask 255.255.255.0
    gateway 192.168.1.254 # New gateway
If your interface is configured with DHCP (iface enp0s3 inet dhcp), the gateway is usually assigned by the DHCP server. To force a static gateway, you would need to change dhcp to static and then manually add address, netmask, and gateway lines. However, this is usually not recommended unless you fully control the network and require a specific setup.
Save the changes and exit the editor.
4. Apply the Changes
To apply changes made in /etc/network/interfaces, you typically need to restart the networking service or bring the interface down and up.
Restart networking service (recommended for ifupdown):
sudo systemctl restart networking
This command restarts the entire networking service, which will re-read the configuration files and apply them to all interfaces managed by ifupdown. This might cause a brief network interruption.
Alternatively, bring the interface down and up:
sudo ifdown enp0s3
sudo ifup enp0s3
Replace enp0s3 with your actual interface name. Be very cautious with ifdown on remote servers, as it will immediately cut off your connection.
5. Verify the Change
After applying, verify the default gateway:
ip r
The default route should now reflect your new gateway. Test external connectivity:
ping -c 4 8.8.8.8
ping -c 4 google.com
Why Netplan is Preferred on Ubuntu 20.04
For new installations and modern Ubuntu systems, Netplan is the recommended and default network configuration tool. Here's why:
- Unified Configuration: Netplan provides a single, consistent YAML syntax for configuring all network interfaces, regardless of the underlying backend (networkd or NetworkManager). This reduces complexity compared to managing multiple different configuration file formats.
- Abstraction: It abstracts away the intricacies of different network renderers, allowing administrators to define the desired network state without worrying about the specifics of
systemd-networkdor NetworkManager's internal configurations. - Robust Error Checking: Netplan includes built-in validation for its YAML files, helping to catch syntax errors before applying potentially disruptive configurations.
- Modern Approach: It aligns with modern Linux system management principles, integrating well with
systemdand providing a more programmatic way to manage networks.
While ifupdown remains a viable option for legacy systems or specific use cases, Netplan offers a more streamlined and future-proof approach to network configuration on Ubuntu 20.04 and later. If you find yourself needing to use ifupdown, ensure it's not conflicting with an active Netplan configuration.
Verifying the Default Gateway Change
Successfully modifying your default gateway is only half the battle. The other crucial half is meticulously verifying that the changes have taken effect and that your network connectivity is functioning as expected. This involves checking the system's routing table and testing actual outbound reachability.
1. Inspecting the Routing Table
This is your primary method for confirming that the default route has been updated in the kernel.
ip route show
or
ip r
Expected Output: Look for a line that starts with default. It should now point to your new gateway IP address.
Example (after changing gateway to 192.168.1.254):
default via 192.168.1.254 dev enp0s3 proto static
192.168.1.0/24 dev enp0s3 proto kernel scope link src 192.168.1.100 metric 100
Here, default via 192.168.1.254 confirms the change. The proto static indicates that this route was manually configured (e.g., via Netplan or ifupdown), as opposed to proto dhcp which would be assigned by a DHCP server.
Alternative netstat command: The older netstat command can also show the routing table, though ip route is preferred on modern Linux.
netstat -rn
Example Output Snippet:
Kernel IP routing table
Destination     Gateway         Genmask         Flags   MSS Window  irtt Iface
0.0.0.0         192.168.1.254   0.0.0.0         UG        0 0          0 enp0s3
192.168.1.0     0.0.0.0         255.255.255.0   U         0 0          0 enp0s3
The entry with Destination 0.0.0.0 and Genmask 0.0.0.0 represents the default route, and its Gateway column shows the default gateway IP. The UG flags indicate that it's an "Up" route to a "Gateway."
2. Testing External IP Connectivity (ping)
After confirming the routing table, the next logical step is to test actual network reachability beyond your local network.
ping -c 4 8.8.8.8
This command sends four ICMP echo requests to Google's public DNS server (an external IP address). * Success: You should see replies with low latency, indicating that your system can reach the internet via the new gateway. * Failure: If you see "Destination Host Unreachable," "Network Unreachable," or 100% packet loss, it indicates a problem.
3. Testing DNS Resolution and Internet Access (ping a domain, curl)
While pinging an IP address confirms basic routing, pinging a domain name further verifies that your DNS resolution is also working correctly, which is crucial for web browsing and most internet services.
ping -c 4 google.com
- Success: You'll see replies. This confirms both routing and DNS.
- Failure (pinging IP works): If
ping 8.8.8.8works butping google.comfails, your default gateway is likely correct, but your DNS configuration might be incorrect or missing. (Check/etc/resolv.confor your Netplan/NetworkManager configuration fornameservers).
For a more comprehensive test of web access:
curl -I https://www.google.com
This command attempts to fetch the HTTP headers from Google's website. A successful response (e.g., HTTP/2 200) confirms full internet connectivity.
4. Tracing the Network Path (traceroute or mtr)
For more in-depth diagnostics, especially if you're experiencing latency or intermittent issues, traceroute or mtr can show you the exact path your packets are taking to a destination. This helps confirm that your packets are indeed exiting via your new default gateway.
First, ensure traceroute is installed:
sudo apt update && sudo apt install traceroute
Then, run:
traceroute google.com
Example Output Snippet:
traceroute to google.com (142.250.72.14), 30 hops max, 60 byte packets
 1  _gateway (192.168.1.254)  1.000 ms   1.000 ms   1.000 ms
 2  some-isp-router (xxx.xxx.xxx.xxx)  5.000 ms   5.000 ms   6.000 ms
 3  another-isp-router (yyy.yyy.yyy.yyy)  10.000 ms  10.000 ms  10.000 ms
...
The very first hop (1) in the traceroute output should be the IP address of your default gateway. If it is, your packets are correctly being forwarded to the new gateway. If the first hop is something else, or traceroute fails, there's a problem with your routing.
mtr (My Traceroute) is an enhanced tool that combines the functionality of ping and traceroute, providing continuous updates and statistics.
sudo apt install mtr
mtr google.com
5. Checking Interface Statistics
While not directly verifying the gateway change, checking your network interface statistics can confirm that traffic is flowing through the correct interface.
ip -s link show enp0s3
(Replace enp0s3 with your interface name). Look for RX (received) and TX (transmitted) packet and byte counts to increase as you perform network tests.
By systematically applying these verification steps, you can confidently confirm that your default gateway has been successfully changed and that your Ubuntu 20.04 system has proper network connectivity. If any of these checks fail, it's time to move into troubleshooting mode.
Common Pitfalls and Troubleshooting
Even with careful planning, network configuration changes can sometimes lead to unexpected issues. Knowing how to diagnose and rectify common problems is a vital skill.
1. Incorrect IP Address or Subnet Mask
This is perhaps the most frequent mistake. * Symptom: "Destination Host Unreachable," "Network Unreachable," or no replies when pinging the gateway or external IPs. * Diagnosis: * Typo in Gateway IP: Double-check the via IP in your ip r output or the gateway setting in your Netplan/NetworkManager configuration. * Gateway not on local subnet: Your default gateway's IP address must be on the same local subnet as your Ubuntu system's IP address. For example, if your system is 192.168.1.100/24, your gateway must be 192.168.1.X. If it's 192.168.2.1, it won't work without specific routes. * Incorrect Subnet Mask: An incorrect subnet mask can make your system think the gateway is on a different subnet, or vice-versa. Ensure your system's subnet mask is correctly configured (e.g., /24 or 255.255.255.0). * Solution: Correct the IP address of the gateway or your system's subnet mask in the configuration file (Netplan, NetworkManager) or ip route command. Re-apply changes.
2. Network Interface Issues
- Symptom:
ip ashows your interface asDOWNor no IP address. No network connectivity whatsoever. - Diagnosis:
- Interface not UP: Check
ip a. If the interfaceenp0s3doesn't showUP,LOWER_UPin its flags, it's down. - Wrong Interface Name: Did you use the correct interface name (e.g.,
enp0s3,eth0) in your commands or configuration files?
- Interface not UP: Check
- Solution:
- Bring the interface up:
sudo ip link set dev <interface> up. - Ensure the interface name in your Netplan/NetworkManager config matches the output of
ip a. - Check physical cable connection if it's a wired interface.
- Bring the interface up:
3. Firewall Rules (ufw)
Even if your routing is perfect, a firewall might block outbound connections. * Symptom: ping 8.8.8.8 works, but ping google.com fails (DNS issue), or specific applications can't connect. * Diagnosis: * Check ufw status: sudo ufw status. * If ufw is active and blocking outbound traffic, you might need to add rules. * Solution: Temporarily disable ufw (sudo ufw disable) for testing purposes. If connectivity returns, re-enable it and configure appropriate rules for your traffic.
4. DNS Resolution Issues (Indirectly Related to Gateway)
While your gateway handles traffic routing, DNS servers translate domain names to IP addresses. If your gateway is correct but you can't access websites by name, it's often a DNS problem. * Symptom: ping 8.8.8.8 works, but ping google.com fails. * Diagnosis: * Check cat /etc/resolv.conf to see which DNS servers your system is using. * Try pinging the DNS servers listed in resolv.conf. If they are unreachable, or if they don't respond, that's the issue. * Verify DNS server configuration in Netplan or NetworkManager. * Solution: Ensure you have valid, reachable DNS servers configured (e.g., Google's 8.8.8.8 and 8.8.4.4, or your ISP's DNS servers). Update the nameservers section in Netplan or NetworkManager.
5. IP Conflicts
If another device on your network has the same IP address as your system or the gateway, it will cause communication problems. * Symptom: Intermittent connectivity, duplicate IP address warnings in logs. * Diagnosis: Use arp -a to look for suspicious ARP entries. Check your router's DHCP lease table. * Solution: Assign a unique static IP address to your Ubuntu system, or ensure your DHCP server doesn't hand out the static IP you've chosen.
6. Misconfigured Netplan/NetworkManager/ifupdown Files
Syntax errors or logical errors in these configuration files can prevent the network configuration from applying correctly. * Symptom: netplan apply fails with errors. nmcli commands report issues. systemctl restart networking reports errors. * Diagnosis: * Read error messages carefully. They often point to the exact line or section of the problem. * For Netplan, use sudo netplan generate to check for YAML syntax errors. * Check logs: journalctl -xe or /var/log/syslog can provide more context from networkd or NetworkManager. * Solution: Correct the errors in the configuration file. Use a YAML linter for Netplan if unsure about syntax. Revert to a backup if necessary.
7. Reverting Changes
If all else fails, the fastest way to restore connectivity is often to revert to a known good configuration. * For Netplan: bash sudo cp /etc/netplan/00-installer-config.yaml.bak /etc/netplan/00-installer-config.yaml sudo netplan apply * For NetworkManager (via nmcli): If you know the old gateway, use nmcli connection modify to set it back, then nmcli connection up/down. If you had a DHCP connection before, reset the method: sudo nmcli connection modify "<connection_name>" ipv4.method auto then bring it up/down. * For ifupdown: bash sudo cp /etc/network/interfaces.bak /etc/network/interfaces sudo systemctl restart networking * Temporary ip route fix: In an emergency, if you have console access, use sudo ip route del default and then sudo ip route add default via <original_gateway_ip> dev <interface> to regain temporary connectivity while you troubleshoot persistent settings.
By systematically approaching troubleshooting with these common pitfalls in mind, you can effectively diagnose and resolve most issues that arise when changing your default gateway on Ubuntu 20.04.
Advanced Considerations: Beyond the Basics
While changing a single default gateway is a common task, modern network environments often present more complex scenarios. Understanding these advanced considerations can deepen your expertise and enable you to manage sophisticated network setups.
Multiple Gateways and Policy-Based Routing
In advanced network configurations, especially in servers or specialized routers, a system might be connected to multiple networks, each with its own gateway. This is known as a multi-homed system. In such cases, simply having one "default" gateway isn't sufficient.
- Multiple Default Routes (with metrics): Linux kernels allow you to define multiple default routes, each with a different "metric" (a cost value). The route with the lowest metric is preferred. If the primary gateway becomes unavailable, the kernel can automatically switch to the next best default route. This provides a basic form of failover.
bash sudo ip route add default via 192.168.1.1 dev enp0s3 metric 100 sudo ip route add default via 192.168.2.1 dev enp0s4 metric 200Here,192.168.1.1onenp0s3would be preferred. - Policy-Based Routing (PBR): For even more granular control, Policy-Based Routing allows you to make routing decisions not just based on the destination IP, but also on other factors like:PBR involves creating multiple routing tables and rules that dictate which table to consult based on specific criteria. This is typically configured using
ip ruleandip route table <table_name>commands, and can be complex to set up and manage. For instance, you might want all SSH traffic to go through onegatewaywhile HTTP traffic uses another.- Source IP Address: Traffic originating from a specific IP on your system can be routed through a particular gateway.
- Source Port/Application: Traffic from a certain application or using a specific port might be directed through a specialized gateway (e.g., a VPN gateway).
- Type of Service (ToS): QoS (Quality of Service) markings can influence routing decisions.
Static vs. DHCP Assigned Gateways
- DHCP (Dynamic Host Configuration Protocol): This is the most common method for assigning network configurations automatically. A DHCP server on the network provides your Ubuntu system with an IP address, subnet mask, default gateway, and DNS servers. This is convenient and reduces manual configuration errors. When troubleshooting, remember that the DHCP lease might need to be renewed (
sudo dhclient -r && sudo dhclient <interface>) or obtained fresh. - Static IP and Gateway: Manually assigning these parameters ensures that your system always has the same IP and gateway, which is critical for servers, network devices, and systems providing fixed services. This is where Netplan and NetworkManager (in manual mode) excel. The
gatewayyou set will persist.
The choice between DHCP and static configuration often depends on the role of the Ubuntu system in the network. Servers typically require static IPs for consistent accessibility, while workstations often benefit from DHCP's ease of management.
Impact of Changing Gateway on Services (Docker, VPNs)
Changing the default gateway on your host system can have significant implications for services running on it, particularly those that create their own virtual networks:
- Docker: Docker containers often run within their own bridge networks (e.g.,
docker0). If your Docker containers need to reach external networks, they rely on the host system's routing. A change in the host's default gateway will affect how Docker routes outbound traffic from its containers. Ensure that Docker's internal DNS and routing are correctly configured to use the host's new network path. - VPN Clients: When a VPN client establishes a connection, it typically modifies the system's routing table to direct traffic through the VPN tunnel. This effectively creates a new logical default gateway for VPN-bound traffic. Changing the underlying physical default gateway might affect how the VPN client establishes its initial connection or how non-VPN traffic is routed.
- Other Network-Dependent Services: Any application or service that needs to communicate with external resources (databases, APIs, cloud services) will be affected by a default gateway change. Always test critical applications after modifying your gateway.
Security Implications: Ensuring Your Gateway is Trusted
Your default gateway is a critical point of trust in your network. All your outbound (and incoming routed) traffic passes through it. * Malicious Gateway: If an attacker can manipulate your system to use a malicious default gateway, they could potentially intercept, inspect, or redirect all your internet traffic. This is a common attack vector in hostile networks. * Configuration Integrity: Always ensure your gateway configurations are protected from unauthorized changes. Use strong passwords for root/sudo users, and secure your Netplan or NetworkManager configuration files. * Network Segmentation: In advanced security postures, different gateways might be used to segment traffic, directing sensitive data through highly secured firewalls or intrusion detection systems.
Virtualization and Networking in VMs
In virtualized environments (e.g., KVM, VMware, VirtualBox), virtual machines (VMs) also require a default gateway. This gateway is often provided by the host hypervisor's virtual networking components or a virtual router within the VM network. * Bridge vs. NAT: * Bridged Networking: The VM appears as a full participant on the physical network, obtaining its IP and gateway directly from the physical router or DHCP server. Changes to the physical network's gateway directly affect the VM. * NAT Networking: The VM gets an IP address from a virtual DHCP server on the host, and the host performs Network Address Translation. The VM's default gateway is usually an IP address on the host's virtual network interface. Changing the host's physical default gateway affects the host's ability to forward NAT'd traffic for the VM. * Specific VM Gateway: Each VM can have its own gateway configuration just like a physical machine. When changing the default gateway on a VM, you'd follow the same methods (Netplan, NetworkManager) as for a physical Ubuntu system.
The Role of API Gateways in Modern Architectures
While network gateways handle the fundamental routing of IP packets, the concept of a "gateway" has evolved significantly in modern software architectures. Enter the API gateway. Just as a network gateway directs traffic efficiently between networks, platforms like APIPark act as sophisticated AI gateways and API management platforms, streamlining the flow and control of API calls, particularly for AI services. They manage the complexities of routing, authentication, and monitoring for modern applications, much like your network's default gateway manages fundamental network traffic.
APIPark, as an open-source AI gateway and API developer portal, exemplifies this evolution. It provides a unified control point for managing, integrating, and deploying a myriad of AI and REST services. Where your network's default gateway ensures your Ubuntu machine can reach the internet, an API gateway like APIPark ensures your applications can reliably and securely interact with external and internal APIs, including over 100+ AI models, offering features like unified API formats, prompt encapsulation into REST APIs, and end-to-end API lifecycle management. This architectural layer becomes indispensable for modern microservices and AI-driven applications, allowing developers to focus on business logic rather than the intricate details of API invocation, authentication, and traffic management.
By understanding these advanced aspects, you can not only manage your Ubuntu system's network more effectively but also appreciate how the fundamental principles of "gateways" extend into various layers of technology, from hardware-based network routing to software-defined API traffic orchestration.
Comparison of Default Gateway Configuration Methods
To provide a clear overview and help you choose the most appropriate method for your specific needs on Ubuntu 20.04, here's a comparative table of the techniques discussed:
| Feature/Method | ip command (Temporary) |
Netplan (Permanent) | NetworkManager (GUI/nmcli) (Permanent) |
ifupdown (Older, Permanent) |
|---|---|---|---|---|
| Persistence | No (Lost on reboot/service restart) | Yes (Persists across reboots) | Yes (Persists across reboots) | Yes (Persists across reboots) |
| Ease of Use (Basic) | High (Single command) | Medium (YAML syntax, careful indentation) | High (GUI) / Medium (CLI - nmcli) |
Medium (Text file editing, service restart) |
| Suitable For | Quick tests, troubleshooting, temporary changes | Servers, systematic, large-scale deployments, declarative config | Desktops, laptops, GUIs, scripting via nmcli |
Legacy systems, specific minimal server setups |
| Configuration File | None (Direct kernel manipulation) | /etc/netplan/*.yaml |
/etc/NetworkManager/system-connections/* (Binary/internal) |
/etc/network/interfaces |
| Primary Tool(s) | ip route |
netplan generate, netplan apply |
GUI (System Settings), nmcli |
nano/vim to edit, systemctl restart networking or ifup/ifdown |
| Learning Curve | Low | Medium (YAML syntax, debugging Netplan errors) | Low (GUI) / Medium (CLI for nmcli command structure) |
Low (Simple text syntax) |
| Conflict Potential | Low (overrides temporarily) | High (if conflicting Netplan files or other managers) | High (if Netplan also manages interface or manual ip route conflicts) |
High (if Netplan or NetworkManager also manage interface) |
| Feedback/Errors | Immediate in terminal | Verbose errors from netplan apply/generate |
GUI prompts / nmcli error messages |
Less verbose; requires checking logs |
| Default in Ubuntu 20.04 | N/A (Core utility) | Yes (for new installations) | Yes (for desktop installations) | No (deprecated as default) |
This table underscores that for permanent changes on Ubuntu 20.04, Netplan is the preferred method for servers, and NetworkManager for desktops. The ip command remains indispensable for immediate diagnostic and temporary adjustments. Understanding these distinctions allows you to apply the right tool for the job.
Conclusion: Mastering Your Network's Front Door
The default gateway, though often operating silently in the background, is the single most critical component ensuring your Ubuntu 20.04 system's connectivity to the wider world. Whether you're a system administrator managing a fleet of servers, a developer setting up a test environment, or a desktop user troubleshooting an internet connection, the ability to understand, configure, and change this essential network setting is paramount.
We've traversed the landscape of Ubuntu's networking tools, from the immediate, session-bound changes offered by the ip command, through the robust and persistent configuration of Netplan for server environments, to the user-friendly graphical interface and powerful nmcli tool provided by NetworkManager for desktop users. We've also touched upon the legacy ifupdown method, acknowledging its presence while highlighting the modern preference for Netplan.
Beyond the "how-to," we've emphasized the "why": the fundamental network concepts, the crucial prerequisites and precautions, and the systematic approach to verification and troubleshooting. Understanding these deeper layers empowers you to not only execute commands but to genuinely comprehend their impact and react effectively when issues inevitably arise.
Furthermore, we've explored advanced considerations like policy-based routing and the interplay with virtualization and containerization, broadening the scope of network management. And in a nod to modern network architectures, we briefly highlighted how the concept of a gateway extends to API management, with platforms like APIPark providing sophisticated control over API traffic, akin to how your network gateway manages data packets.
In summary, mastering your default gateway on Ubuntu 20.04 is more than just knowing a few commands; it's about embracing a mindset of informed configuration, diligent verification, and proactive troubleshooting. By consistently applying the best practices outlined in this guide, you ensure your Ubuntu systems remain seamlessly connected, reliable, and adaptable to the ever-evolving demands of your network environment.
5 Frequently Asked Questions (FAQs)
Q1: What is a default gateway, and why is it important? A1: A default gateway is the IP address of a router on your local network that acts as the entry and exit point for all data traffic destined for or coming from external networks (like the internet or other subnets). It's crucial because without a properly configured default gateway, your Ubuntu system would be isolated to its local network segment and unable to communicate with anything outside of it. It's the "post office" that directs all your outgoing "letters" that aren't addressed to someone in your immediate neighborhood.
Q2: How do I find my current default gateway on Ubuntu 20.04? A2: You can easily find your current default gateway using the command line. Open a terminal and type ip r or ip route show. Look for a line that starts with default. The IP address immediately following via is your current default gateway. For example, in default via 192.168.1.1 dev enp0s3, 192.168.1.1 is the default gateway.
Q3: What's the difference between a temporary and a permanent gateway change? A3: A temporary change, typically done using the ip route command, alters the kernel's routing table immediately but is lost upon system reboot or network service restart. It's useful for quick tests or troubleshooting. A permanent change modifies configuration files (like Netplan's YAML files or NetworkManager settings), ensuring the new gateway is automatically applied every time the system boots up or the network service starts. For Ubuntu 20.04, Netplan and NetworkManager are the standard tools for permanent configurations.
Q4: I changed my gateway, but now I have no internet access. What should I do? A4: First, do not panic. This is a common issue. 1. Check the routing table: Run ip r to ensure your default route points to the correct new gateway IP. 2. Verify gateway reachability: Try to ping your new gateway IP (e.g., ping 192.168.1.254). If it's unreachable, the gateway IP might be incorrect, or the gateway device itself is offline. 3. Check your system's IP and subnet: Ensure your Ubuntu system has a valid IP address on the same subnet as the new gateway. Use ip a. 4. Check DNS: If you can ping 8.8.8.8 but not google.com, it's a DNS issue, not a gateway issue. Verify your DNS server settings (e.g., in /etc/resolv.conf or your Netplan/NetworkManager config). 5. Revert to backup: If you made a permanent change, revert to your backup configuration file (e.g., sudo cp /etc/netplan/00-installer-config.yaml.bak /etc/netplan/00-installer-config.yaml) and re-apply (sudo netplan apply). If using ip route temporarily, just remove the bad default and add the correct one.
Q5: Can I have multiple default gateways on Ubuntu 20.04? A5: While a system typically only uses one default gateway at a time, you can configure multiple default routes with different "metrics" (costs). The system will prefer the route with the lowest metric. This can provide a basic form of failover, where if the primary gateway (lowest metric) becomes unreachable, the system automatically switches to the next available default route. For more advanced scenarios like routing specific traffic through different gateways based on source or application, you would use Policy-Based Routing, which involves creating multiple routing tables and rules.
🚀You can securely and efficiently call the OpenAI API on APIPark in just two steps:
Step 1: Deploy the APIPark AI gateway in 5 minutes.
APIPark is developed based on Golang, offering strong product performance and low development and maintenance costs. You can deploy APIPark with a single command line.
curl -sSO https://download.apipark.com/install/quick-start.sh; bash quick-start.sh

In my experience, you can see the successful deployment interface within 5 to 10 minutes. Then, you can log in to APIPark using your account.

Step 2: Call the OpenAI API.