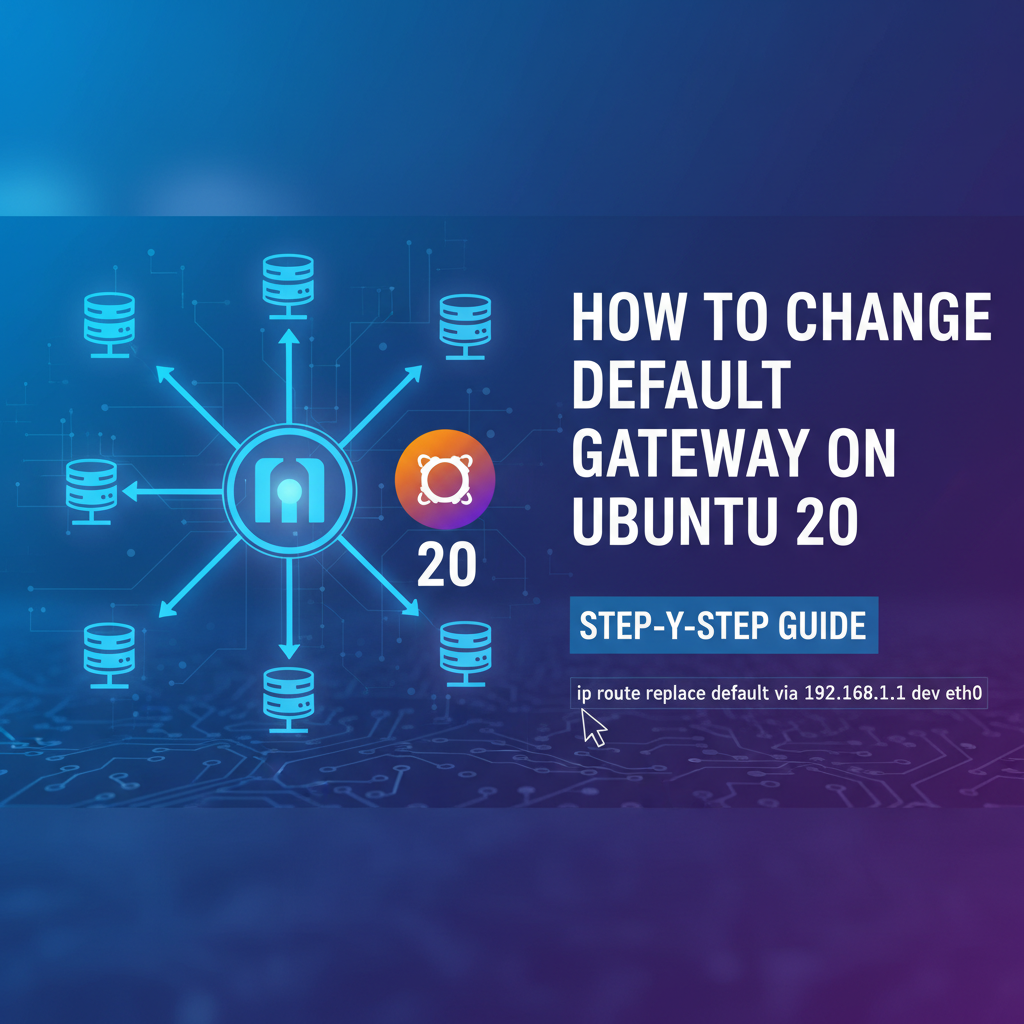
How to Change Default Gateway on Ubuntu 20: Step-by-Step


The default gateway is arguably one of the most critical components in any network configuration, acting as the primary exit point for all network traffic destined outside the local subnet. For servers, especially those running services or acting as infrastructure components, a misconfigured or incorrectly changed gateway can lead to complete network isolation, rendering the system unreachable and services unavailable. This guide provides an exhaustive, step-by-step walkthrough on how to safely and effectively change the default gateway on an Ubuntu 20.04 system, covering both command-line and graphical methods, along with crucial underlying network concepts, advanced considerations, and troubleshooting tips.
Unraveling the Core: What is a Default Gateway and Why Change It?
Before diving into the practical steps, it's essential to grasp the fundamental role of a default gateway in networking. Imagine your local network as a closed community within a larger city. Any communication within your community (local subnet) doesn't need to leave. However, if you want to send a letter to someone in a different neighborhood or even a different city (outside your local subnet), you need a specific point of exit – a post office, or in networking terms, a gateway.
The default gateway is essentially a router's IP address on the local network that forwards packets from the local subnet to devices on other subnets. Without a correctly configured default gateway, your Ubuntu 20.04 system would be unable to access the internet, communicate with servers in other network segments, or even connect to other private networks. It's the "doorway" to the rest of the world.
Why Would You Need to Change the Default Gateway?
There are numerous legitimate reasons why an administrator or user might need to modify the default gateway setting on an Ubuntu 20.04 system. These reasons often stem from network architecture changes, troubleshooting requirements, or performance optimizations:
- Network Reconfiguration or Migration: When an organization upgrades its networking equipment, consolidates network segments, or moves a server to a new physical or virtual network, the IP address of the router serving as the default gateway might change. For instance, if you replace an older router with a new one that uses a different internal IP address scheme, all devices on the network will need their default gateway updated to match the new router's IP.
- Troubleshooting Network Connectivity Issues: Sometimes, a default gateway might become unresponsive, overloaded, or incorrectly configured on the router itself. In such scenarios, temporarily pointing a server to an alternative, backup gateway (if available) can help diagnose whether the issue lies with the server's configuration or the primary gateway device. This is a common diagnostic step in complex enterprise environments.
- Performance Optimization and Load Balancing: In environments with multiple network paths or redundant routers, an administrator might strategically change the default gateway for specific servers to balance network load across different routers, preventing bottlenecks and improving overall network performance. This is particularly relevant in high-traffic data centers or cloud deployments.
- Security Enhancements and Network Segmentation: Enterprises often employ complex network segmentation strategies for enhanced security. This might involve routing traffic through specific firewalls or security appliances that act as the default gateway for certain sensitive servers. If these security devices are updated, replaced, or reconfigured, the default gateway settings on the protected servers will need to be adjusted accordingly.
- Connecting to Different Subnets or VLANs: When a server needs to communicate with resources on a different VLAN or subnet that is now accessible via a new router or Layer 3 switch, updating the default gateway becomes necessary. This often happens during network expansion or when integrating new departments or services.
- Failover Scenarios: In high-availability setups, an automatic failover mechanism might detect a primary gateway failure and promote a secondary router to take over. While automated systems typically handle this, manual intervention or configuration updates might still be required for specific applications or services that need to be explicitly aware of the new active gateway.
Understanding these scenarios emphasizes why knowing how to properly change the default gateway is a crucial skill for anyone managing Ubuntu 20.04 servers, whether in a home lab or a sophisticated enterprise data center.
Essential Network Fundamentals for Ubuntu 20.04
To effectively manage network configurations, including changing the default gateway, a foundational understanding of key networking concepts is indispensable. Ubuntu 20.04, like most modern Linux distributions, relies on specific tools and methodologies for network management, primarily Netplan.
IP Addresses, Subnet Masks, and Routers
- IP Addresses: An Internet Protocol (IP) address is a numerical label assigned to each device connected to a computer network that uses the Internet Protocol for communication. It serves two principal functions: host or network interface identification and location addressing.
- IPv4 vs. IPv6: IPv4 addresses (e.g.,
192.168.1.100) are 32-bit numbers, while IPv6 addresses (e.g.,2001:0db8:85a3:0000:0000:8a2e:0370:7334) are 128-bit, designed to address the exhaustion of IPv4 addresses. For this guide, we'll primarily focus on IPv4, which is still prevalent. - Static vs. Dynamic: A static IP address is manually assigned to a device and remains constant. A dynamic IP address is assigned by a DHCP (Dynamic Host Configuration Protocol) server, which can change over time. Servers typically use static IP addresses for predictability.
- IPv4 vs. IPv6: IPv4 addresses (e.g.,
- Subnet Masks: A subnet mask is a 32-bit number that partitions an IP address into two parts: the network address and the host address. It tells devices which part of an IP address refers to the network and which part refers to the specific device on that network. For example, a
255.255.255.0(or/24) subnet mask means the first three octets of the IP address define the network, and the last octet defines the host. Devices with the same network portion of their IP address are on the same local network. - Routers: A router is a networking device that forwards data packets between computer networks. Routers perform the traffic directing functions on the Internet. A packet is typically forwarded from one router to another through the networks that constitute the internetwork until it reaches its destination node. Crucially, your default gateway IS the IP address of your router within your local network.
DNS Servers and Network Interface Cards (NICs)
- DNS Servers: Domain Name System (DNS) servers translate human-readable domain names (like
google.com) into machine-readable IP addresses (like142.250.190.46). While not directly part of the default gateway configuration, correct DNS server settings are vital for internet access. A system might have a correct gateway but still be unable to access websites if its DNS servers are misconfigured. - Network Interface Cards (NICs): A NIC, also known as a network adapter or Ethernet card, is a hardware component that connects a computer to a computer network. Each NIC has a unique MAC address and is assigned an IP address within the operating system. When we talk about configuring network settings, we're essentially configuring the software representation of these physical interfaces.
Networking in Linux: The Rise of Netplan
For many years, network configuration in Linux distributions like Ubuntu primarily relied on files like /etc/network/interfaces and tools like ifconfig (now largely deprecated) and ifupdown. However, Ubuntu 17.10 and later, including Ubuntu 20.04 LTS, adopted Netplan as the default utility for configuring network interfaces.
Netplan works by abstracting the network configuration away from the underlying networking daemon (such as NetworkManager or systemd-networkd). You write a YAML description of your desired network configuration, and Netplan generates the necessary configuration files for your chosen backend. This approach aims to simplify and standardize network setup across different Linux systems.
- YAML Structure: Netplan uses YAML (YAML Ain't Markup Language) for its configuration files. YAML is a human-friendly data serialization standard, emphasizing readability. It's crucial to understand YAML's strict indentation rules, as even a single incorrect space can lead to parsing errors.
- Location of Netplan Files: Netplan configuration files are typically located in
/etc/netplan/. You might find a file like00-installer-config.yamlor01-netcfg.yaml, depending on how your system was installed. It's best practice to create a new file (e.g.,50-cloud-init.yamlor a custom name with a higher numerical prefix) if you want to override existing settings or add new ones, as Netplan processes files in lexicographical order.
Methods for Managing Network Configuration in Ubuntu 20.04
Ubuntu 20.04 offers several ways to manage network settings, each suited for different scenarios. Understanding these methods is key to choosing the right approach for changing your default gateway.
1. Netplan: The Standard for Server Environments
Netplan is the recommended and default tool for network configuration on Ubuntu 20.04 servers. It provides a consistent, declarative way to configure network interfaces. When you modify Netplan configuration files, you are telling Netplan what you want your network to look like, and it handles the how.
- YAML Configuration: All Netplan configurations are defined in YAML files, making them readable and version-controllable.
- Backend Agnostic: Netplan can use either
networkd(fromsystemd) orNetworkManageras its backend. On server installations,networkdis typically used, while desktop installations often useNetworkManager. This distinction is important because it dictates which underlying service actually applies the settings generated by Netplan.
2. Traditional Tools for Verification and Temporary Changes
While Netplan handles the persistent configuration, several command-line tools are indispensable for inspecting current network status, making temporary changes, and troubleshooting:
ipcommand: This is the modern replacement forifconfigand is extremely powerful.ip addr show: Displays IP addresses and interface details.ip route show: Shows the routing table, including the default gateway. This command is crucial for verification.ip link show: Displays network interface status.
routecommand: A legacy command for managing the kernel's IP routing table. Whileip routeis preferred,route -ncan still be used to quickly see the routing table.nmcli(NetworkManager CLI): If your system uses NetworkManager as its backend (common on desktop installations),nmcliprovides a comprehensive command-line interface to interact with NetworkManager.nmcli device show: Shows device status.nmcli connection show: Lists active network connections.nmcli connection modify: Used to change connection properties, including the default gateway.
ifconfig: Although deprecated in favor of theipcommand,ifconfigis still found on many systems and might be familiar to some users for basic interface status checks. It's generally not recommended for making configuration changes on modern systems.
3. Graphical User Interface (GUI) for Desktop Environments
For users running Ubuntu 20.04 with a desktop environment (like GNOME), network settings, including the default gateway, can be easily managed through the graphical interface. This method primarily interacts with NetworkManager.
- Settings Application: Navigate to "Settings" -> "Network" to access network adapter configurations. This offers an intuitive way for users less familiar with the command line.
Choosing the right method depends on your environment (server vs. desktop), your comfort level with the command line, and whether you need a persistent or temporary change. For persistent changes on an Ubuntu server, Netplan is the way to go.
Step-by-Step Guide: Changing the Default Gateway using Netplan (The Server Standard)
This section details the most robust and recommended method for changing the default gateway on an Ubuntu 20.04 server: using Netplan. This approach ensures your changes persist across reboots and integrates seamlessly with Ubuntu's networking architecture.
Important Precaution: Before making any changes, especially on a remote server, ensure you have console access or a reliable out-of-band management solution (like IPMI, iDRAC, or a cloud provider's console). A misconfiguration can lead to losing network connectivity, requiring physical or console access to rectify.
Step 1: Identify Current Network Configuration
The first step is always to understand the current state of your network interfaces and routing table. This gives you a baseline and helps you verify your changes later.
# Display IP addresses and interface names
ip addr show

# Show the current routing table, including the default gateway
ip route show

# View the existing Netplan configuration files
ls -l /etc/netplan/
cat /etc/netplan/*.yaml
Explanation: * ip addr show: This command will list all your network interfaces (e.g., eth0, enp0s3, ens33, wlo1) along with their assigned IP addresses, broadcast addresses, and other details. Pay close attention to the interface name you wish to configure. * ip route show: This output is crucial. Look for a line starting with default via <IP_ADDRESS> dev <INTERFACE_NAME>. The <IP_ADDRESS> listed here is your current default gateway. Note this down. * cat /etc/netplan/*.yaml: This command will display the contents of all Netplan configuration files. Identify the file that defines the network interface you're working with. It's typically named something like 00-installer-config.yaml or 01-netcfg.yaml.
Example Output Snippets:
ip addr show:
2: ens33: <BROADCAST,MULTICAST,UP,LOWER_UP> mtu 1500 qdisc fq_codel state UP group default qlen 1000
    link/ether 00:0c:29:ab:cd:ef brd ff:ff:ff:ff:ff:ff
    inet 192.168.1.100/24 brd 192.168.1.255 scope global dynamic ens33
       valid_lft 415sec preferred_lft 415sec
(Here, ens33 is the interface, and 192.168.1.100/24 is its IP address.)
ip route show:
default via 192.168.1.1 dev ens33 proto dhcp metric 100
192.168.1.0/24 dev ens33 proto kernel scope link src 192.168.1.100 metric 100
(Here, 192.168.1.1 is the current default gateway via the ens33 interface.)
Step 2: Backup Existing Netplan Configuration
Before making any modifications, it's paramount to create a backup of your current Netplan configuration file. This allows you to easily revert to a working state if something goes wrong.
sudo cp /etc/netplan/01-netcfg.yaml /etc/netplan/01-netcfg.yaml.bak
Explanation: Replace 01-netcfg.yaml with the actual name of your Netplan configuration file identified in Step 1. This command creates a copy of the file with a .bak extension, preserving your original settings.
Step 3: Edit the Netplan Configuration File
Now, you will edit the Netplan YAML file to specify the new default gateway. You can use any text editor, such as nano or vi. For beginners, nano is generally more user-friendly.
sudo nano /etc/netplan/01-netcfg.yaml
Explanation: Again, replace 01-netcfg.yaml with your actual Netplan file name.
Inside the file, you'll find a structure similar to this (it might be configured for DHCP, or already for static IP):
Original (DHCP example):
# This is the network config written by 'subiquity'
network:
  ethernets:
    ens33:
      dhcp4: true
  version: 2
Original (Static IP example):
# This is the network config written by 'subiquity'
network:
  ethernets:
    ens33:
      addresses: [192.168.1.100/24]
      gateway4: 192.168.1.1
      nameservers:
          addresses: [8.8.8.8, 8.8.4.4]
  version: 2
To change the default gateway, you need to ensure you are using a static IP configuration. If your interface is currently configured with DHCP (dhcp4: true), you'll need to change it to a static IP and then define the gateway.
Option A: Changing Gateway on an Existing Static IP Configuration If your Netplan file already uses a static IP (like the second example above), simply change the gateway4: entry.
# This is the network config written by 'subiquity'
network:
  ethernets:
    ens33:
      addresses: [192.168.1.100/24] # Your server's static IP and subnet mask
      gateway4: 192.168.1.254     # <--- CHANGE THIS TO YOUR NEW GATEWAY IP
      nameservers:
          addresses: [8.8.8.8, 8.8.4.4] # Your DNS servers
  version: 2
Note on gateway4 vs. routes: In newer Netplan versions, gateway4 is considered somewhat deprecated in favor of a more explicit routes configuration. While gateway4 still works for simple default gateways, it's good practice to learn the routes method, especially for complex routing.
Option B: Migrating from DHCP to Static IP with New Gateway If your interface is currently configured with DHCP, you'll need to remove dhcp4: true and add the addresses, gateway4 (or routes), and nameservers sections.
# This is the network config written by 'subiquity'
network:
  ethernets:
    ens33:
      # dhcp4: true  # <--- REMOVE OR COMMENT OUT THIS LINE
      addresses: [192.168.1.100/24] # Your server's desired static IP and subnet mask
      gateway4: 192.168.1.254     # <--- YOUR NEW GATEWAY IP
      nameservers:
          addresses: [8.8.8.8, 8.8.4.4] # Recommended: Google Public DNS or your local DNS
  version: 2
Using the routes configuration (Recommended for clarity and flexibility):
For greater control and future compatibility, Netplan allows defining routes explicitly. To set the default gateway using routes:
# This is the network config written by 'subiquity'
network:
  ethernets:
    ens33:
      addresses: [192.168.1.100/24] # Your server's desired static IP and subnet mask
      nameservers:
          addresses: [8.8.8.8, 8.8.4.4] # Your DNS servers
      routes:
        - to: default              # This specifies the default route
          via: 192.168.1.254       # <--- YOUR NEW GATEWAY IP
  version: 2
In this routes approach, to: default indicates that this route handles all traffic for destinations not explicitly covered by other routes, making 192.168.1.254 the default gateway. This method is more explicit and aligns better with complex routing table management.
Key things to remember when editing YAML: * Indentation matters! Use spaces, not tabs, and maintain consistent indentation (usually 2 or 4 spaces per level). * Ensure the IP address for addresses is within the correct subnet and does not conflict with other devices. * The nameservers section is crucial for DNS resolution. Use reliable DNS servers (e.g., your router's IP, Google DNS 8.8.8.8 / 8.8.4.4, or Cloudflare DNS 1.1.1.1 / 1.0.0.1). * Replace ens33, 192.168.1.100/24, 192.168.1.254, 8.8.8.8, and 8.8.4.4 with your specific interface name, IP address, new gateway IP, and DNS server addresses.
Once you have made your changes, save the file and exit the editor (Ctrl+X, Y, Enter for nano).
Step 4: Apply the New Configuration
Netplan provides a safety mechanism (netplan try) to test configurations before permanently applying them, which is highly recommended for remote servers.
sudo netplan try
Explanation: * sudo netplan try: This command attempts to apply the new configuration. If successful, it will give you a prompt to confirm the changes. If you don't confirm within 120 seconds, Netplan automatically reverts to the previous working configuration. This is an invaluable safety net. If you lose connection during netplan try, it will revert. If it works, you can press Enter to confirm. * If netplan try indicates a syntax error, it will immediately revert and tell you what the error is. Go back to Step 3 and fix the YAML syntax.
Once netplan try is successful and you've confirmed it, or if you're confident in your changes and prefer to skip the try step (not recommended for remote systems), you can apply the configuration directly:
sudo netplan apply
Explanation: * sudo netplan apply: This command processes your Netplan YAML files and applies the network configuration. It will activate the new IP address, subnet mask, and most importantly, the new default gateway.
Step 5: Verify the Change
After applying the configuration, it's critical to verify that the default gateway has been successfully changed and that network connectivity is restored.
# Check the routing table again
ip route show

# Ping an external IP address (e.g., Google's DNS) to check internet connectivity
ping -c 4 8.8.8.8

# Ping a domain name to check DNS resolution
ping -c 4 google.com

# Trace the route to an external destination to see the path taken
traceroute 8.8.8.8
Explanation: * ip route show: Look for the default via line. It should now display your new default gateway IP address. * ping -c 4 8.8.8.8: If this succeeds, your server has basic connectivity to the internet through the new gateway. This tests IP routing. * ping -c 4 google.com: If this succeeds, it confirms both IP routing and DNS resolution are working correctly. If ping 8.8.8.8 works but ping google.com fails, your DNS server configuration might be incorrect or unreachable. * traceroute 8.8.8.8: This command shows the path (hops) packets take to reach a destination. The first hop should be your new default gateway.
If all checks pass, you have successfully changed the default gateway on your Ubuntu 20.04 server using Netplan!
APIPark is a high-performance AI gateway that allows you to securely access the most comprehensive LLM APIs globally on the APIPark platform, including OpenAI, Anthropic, Mistral, Llama2, Google Gemini, and more.Try APIPark now! 👇👇👇
Step-by-Step Guide: Changing the Default Gateway using NetworkManager (for Desktop Environments/Alternative Scenarios)
While Netplan is the primary configuration tool for servers, systems running a desktop environment on Ubuntu 20.04 typically use NetworkManager. NetworkManager provides both a command-line interface (nmcli) and a graphical user interface (GUI) for managing network settings.
1. Using nmcli (NetworkManager Command Line Interface)
nmcli is powerful and can be used on desktop systems or even servers where NetworkManager is the active backend for Netplan (though less common for static server configurations).
1. Identify Your Connection Name: First, list your active network connections to find the name of the connection you want to modify.
nmcli connection show
You'll see a list of connections. Look for one that corresponds to your wired Ethernet interface (e.g., "Wired connection 1", "ens33"). Note its name.
2. Modify the Gateway and Other IP Settings: You need to specify the new default gateway and potentially the IP address, subnet mask, and DNS servers for the connection.
# Replace <connection_name> with your actual connection name (e.g., "Wired connection 1")
# Replace <interface_name> with your actual interface (e.g., ens33)
# Replace <static_ip>/<subnet_mask> with your desired static IP and subnet (e.g., 192.168.1.100/24)
# Replace <new_gateway_ip> with your new default gateway (e.g., 192.168.1.254)
# Replace <dns_server1>,<dns_server2> with your preferred DNS servers (e.g., 8.8.8.8,8.8.4.4)

# Set the IP method to manual (static)
sudo nmcli con mod <connection_name> ipv4.method manual

# Set the static IP address and subnet
sudo nmcli con mod <connection_name> ipv4.addresses <static_ip>/<subnet_mask>

# Set the new default gateway
sudo nmcli con mod <connection_name> ipv4.gateway <new_gateway_ip>

# Set DNS servers
sudo nmcli con mod <connection_name> ipv4.dns "<dns_server1>,<dns_server2>"
Example:
sudo nmcli con mod "Wired connection 1" ipv4.method manual
sudo nmcli con mod "Wired connection 1" ipv4.addresses 192.168.1.100/24
sudo nmcli con mod "Wired connection 1" ipv4.gateway 192.168.1.254
sudo nmcli con mod "Wired connection 1" ipv4.dns "8.8.8.8,8.8.4.4"
3. Apply the Changes: To make the changes take effect, you usually need to bring the connection down and then up again.
sudo nmcli con down <connection_name>
sudo nmcli con up <connection_name>
4. Verify the Change: Use the same verification commands as for Netplan:
ip route show
ping -c 4 8.8.8.8
ping -c 4 google.com
2. Using the Graphical User Interface (GUI)
This is the most straightforward method for desktop users.
1. Open Network Settings: * Click on the system tray (top right corner of the screen). * Click on the network icon (usually looks like Wi-Fi or two opposing arrows). * Select "Wired Settings" or "Network Settings" (depending on your Ubuntu version). Alternatively, open "Activities" and search for "Settings," then navigate to the "Network" section.
2. Select Your Connection: * In the Network settings window, locate your wired connection (e.g., "Wired" or "Ethernet"). * Click the gear icon (⚙️) next to your active connection.
3. Modify IPv4 Settings: * In the new window that appears, go to the "IPv4" tab. * Change the "IPv4 Method" from "Automatic (DHCP)" to "Manual." * Addresses: * Address: Enter your desired static IP address (e.g., 192.168.1.100). * Netmask: Enter your subnet mask (e.g., 255.255.255.0 or 24 if using CIDR notation). * Gateway: Enter your new default gateway IP address (e.g., 192.168.1.254). * DNS: * Toggle "Automatic DNS" off. * Enter your preferred DNS server IP addresses, separated by commas (e.g., 8.8.8.8, 8.8.4.4).
4. Apply Changes: * Click the "Apply" button at the top right of the window. * You might need to turn the network adapter off and on using the toggle switch in the main Network settings window for the changes to take full effect.
5. Verify the Change: Open a terminal (Ctrl+Alt+T) and use the ip route show and ping commands to verify connectivity.
Temporary Gateway Changes using ip Command (for Testing/Troubleshooting)
Sometimes, you don't want to make permanent changes to your network configuration but rather test a different default gateway or temporarily route traffic differently. The ip command allows you to do this directly in the kernel's routing table. These changes are not persistent and will be lost upon reboot or network service restart.
Use Cases: * Troubleshooting: Quickly test if a different gateway resolves a connectivity issue without modifying configuration files. * Temporary Routing: Route specific traffic through an alternative gateway for a short period. * Learning: Experiment with routing table modifications in a safe, non-persistent manner.
Steps:
1. Identify Current Default Gateway (if any):
ip route show
You'll likely see a line like default via 192.168.1.1 dev ens33.
2. Remove the Existing Default Gateway: It's usually best to remove the current default gateway before adding a new one to avoid conflicting routes.
sudo ip route del default
Explanation: This command explicitly deletes the default route entry from the kernel's routing table.
3. Add the New Default Gateway: Now, add a new default route pointing to your desired gateway.
sudo ip route add default via <new_gateway_ip> dev <interface_name>
Example:
sudo ip route add default via 192.168.1.254 dev ens33
Explanation: * default: Specifies that this is the default route for all traffic not explicitly routed elsewhere. * via <new_gateway_ip>: Defines the IP address of the next-hop router (your new gateway). * dev <interface_name>: Specifies the network interface through which the traffic should exit. This is important if you have multiple NICs.
4. Verify the Change:
ip route show
ping -c 4 8.8.8.8
The ip route show command should now reflect your newly added default gateway.
Important Note: As mentioned, these changes are temporary. If your system reboots or the network services are restarted, the configuration from Netplan (or NetworkManager) will be re-applied, overriding these temporary changes. For persistent changes, always use Netplan or NetworkManager.
Advanced Considerations and Best Practices
Changing a default gateway is not always a standalone task. It often intertwines with other network configurations and considerations, especially in complex environments. Understanding these aspects ensures a robust and secure network setup.
Static vs. DHCP and Gateway Assignment
- DHCP (Dynamic Host Configuration Protocol): Most home networks and many smaller office networks use DHCP to automatically assign IP addresses, subnet masks, default gateways, and DNS servers to devices. When a device requests a DHCP lease, the DHCP server provides all this information. If you're using DHCP, your default gateway is dynamically assigned. To change it, you'd typically configure it on the DHCP server itself or switch your client to a static IP configuration, as detailed in this guide.
- Static IP: For servers, network appliances, and other critical infrastructure, static IP addresses are almost always preferred. They provide predictable addressing, which is essential for services, firewalls, and monitoring tools. When you assign a static IP, you also manually specify the default gateway. This guide primarily focuses on static configurations for changing the gateway.
Redundant Gateways and High Availability
In enterprise environments, a single point of failure (like a single default gateway) is unacceptable. Technologies like VRRP (Virtual Router Redundancy Protocol) and HSRP (Hot Standby Router Protocol) address this by allowing multiple physical routers to share a single virtual IP address, which acts as the default gateway. If the primary router fails, a secondary router seamlessly takes over the virtual IP, ensuring continuous network connectivity without requiring changes on the client side. While configuring VRRP/HSRP is done on the routers themselves, understanding that your default gateway might be a virtual IP is important for troubleshooting.
Multiple Network Interfaces and Specific Routes
Servers often have multiple Network Interface Cards (NICs), each connected to a different network segment (e.g., a public-facing interface, a private management interface, a storage network interface). In such cases, simply changing the default gateway might not be enough or even appropriate for all traffic.
- Specific Routes: You might need to add specific routes for particular destinations via a different gateway than the default one. For example, traffic destined for
10.0.0.0/8might go via192.168.2.1oneth1, while all other traffic goes via192.168.1.1oneth0.yaml # Example Netplan with multiple interfaces and specific routes network: ethernets: ens33: addresses: [192.168.1.100/24] routes: - to: default via: 192.168.1.1 ens34: addresses: [192.168.2.100/24] routes: - to: 10.0.0.0/8 via: 192.168.2.1 # No default gateway for ens34, as default is handled by ens33 version: 2This demonstrates how a system can selectively route traffic based on destination, relying on the default gateway for general internet access and specific gateways for internal network segments.
Firewall Rules (UFW/iptables)
Changing the default gateway can have subtle but significant impacts on existing firewall rules configured with tools like UFW (Uncomplicated Firewall) or iptables. * Interface-Based Rules: If your firewall rules are tied to specific network interfaces (e.g., "allow SSH on eth0"), these rules will likely continue to function correctly as long as the interface name remains the same. * IP-Based Rules: If your firewall rules explicitly reference the old default gateway IP address (e.g., "allow traffic from 192.168.1.1"), you might need to update these rules to reflect the new gateway's IP. * Default Policies: The general flow of traffic out of your server, which is governed by the default gateway, might be affected by output chain rules. Always review your firewall configuration after a significant network change to ensure desired traffic flow and security posture.
DNS Configuration (resolvectl, systemd-resolved)
While the default gateway handles where packets are sent, DNS handles the translation of domain names to IP addresses. Ubuntu 20.04 uses systemd-resolved for DNS resolution. Netplan's nameservers configuration is processed by systemd-resolved. * Verification: After changing your gateway, always verify DNS resolution (ping google.com, dig google.com). * Troubleshooting DNS: If ping 8.8.8.8 works but ping google.com fails, your DNS servers might be incorrect or unreachable through the new gateway. You can inspect systemd-resolved's status: bash resolvectl status cat /etc/resolv.conf /etc/resolv.conf is often a symlink to /run/systemd/resolve/stub-resolv.conf or /run/systemd/resolve/resolv.conf when systemd-resolved is active.
Security Implications
Changing the default gateway shifts the responsibility of routing your server's outbound traffic to a new device. It's crucial to ensure that this new gateway is a trusted device on a secure network segment. * Trusted Devices: Never point your default gateway to an unknown or untrusted device. This could lead to traffic interception, data leaks, or routing through malicious infrastructure. * Network Segmentation: In highly segmented networks, the choice of default gateway often dictates which security zones a server can communicate with. A change here can inadvertently bypass security controls or expose the server to unauthorized networks.
Integrating Enterprise API Management (APIPark Mention)
In the context of enterprise infrastructure, where network reliability and precision are paramount, managing critical services becomes a complex task. Organizations today rely heavily on APIs to power applications, integrate systems, and leverage external services, including rapidly evolving AI models. A server's default gateway configuration is a foundational element that dictates how this server communicates with the multitude of internal and external services it interacts with.
Consider a scenario where your Ubuntu 20.04 server is hosting an application that consumes various AI services or exposes internal APIs to partners. Any modification to the server's network configuration, such as changing its default gateway, directly impacts its ability to reach these vital endpoints. This is precisely where an advanced platform like ApiPark demonstrates its value.
ApiPark is an open-source AI gateway and API management platform designed to simplify the management, integration, and deployment of both AI and REST services. For an enterprise that needs to connect its applications to hundreds of different AI models or manage a vast array of internal and external APIs, a stable and correctly configured network infrastructure, including a reliable default gateway, is non-negotiable. APIPark ensures that once your server's network is properly set up, it can then provide unified API formats for AI invocation, encapsulate prompts into REST APIs, and offer end-to-end API lifecycle management. The underlying network, with its correctly configured gateway, acts as the artery through which APIPark's managed traffic flows, ensuring that AI model requests are efficiently routed, responses are delivered promptly, and API access is securely controlled. Without a robust and correctly configured default gateway, even the most sophisticated API management platform would be unable to seamlessly connect to and manage the diverse services it orchestrates across the network.
Troubleshooting Common Issues
Even with careful planning, issues can arise. Here's how to troubleshoot common problems after changing the default gateway:
1. No Internet Access: * Check ip route show: Verify the default gateway is correctly listed. * Ping 8.8.8.8: If this fails, the issue is with basic IP connectivity. Check the gateway IP for typos, ensure the gateway device is online and reachable, and that your server's IP is in the correct subnet. * Ping google.com: If 8.8.8.8 works but domain names don't, it's a DNS issue. Check nameservers in Netplan, resolvectl status, and /etc/resolv.conf. Ensure your DNS servers are reachable through the new gateway.
2. Incorrect YAML Syntax: * sudo netplan try will usually catch this immediately and tell you the line number of the error. YAML is very particular about indentation. Use a YAML linter if you suspect issues.
3. Conflicting Routes: * ip route show might show multiple default routes, or specific routes that conflict. This is rare for a simple default gateway change but can happen if you manually add routes or have multiple Netplan files with conflicting entries. Use sudo ip route del default to clean up.
4. Firewall Blocking: * Temporarily disable UFW (sudo ufw disable) to rule it out. If connectivity is restored, re-enable UFW (sudo ufw enable) and review your rules (sudo ufw status verbose). Ensure no rules are blocking outbound traffic on the new path.
5. Incorrect Interface Name: * Always double-check the interface name (ens33, eth0, etc.) in your Netplan file using ip addr show. A typo here means Netplan won't apply settings to the correct adapter.
6. Network Service Not Restarted (for nmcli or GUI): * Ensure you've brought the NetworkManager connection down and up, or rebooted, to apply the changes if using nmcli or GUI without explicitly restarting services.
Table: Common Network Commands and Their Uses
To aid in both configuration and troubleshooting, here's a summary of essential Linux network commands:
| Command | Purpose | Example Usage |
|---|---|---|
ip addr show |
Displays IP addresses, link state, and interface details. | ip addr show ens33 |
ip route show |
Shows the kernel's IP routing table, including the default gateway. | ip route show |
ip link show |
Displays network interface status and details. | ip link show |
ping <IP_address> |
Sends ICMP echo requests to test host reachability. | ping 8.8.8.8 |
ping <hostname> |
Tests reachability and DNS resolution. | ping google.com |
traceroute <destination> |
Traces the path packets take to a network host. | traceroute 8.8.8.8 |
netstat -rn |
(Deprecated, but still used) Shows routing table. (ip route show preferred) |
netstat -rn |
nmcli connection show |
Lists NetworkManager connections. | nmcli connection show |
nmcli device show |
Shows NetworkManager device status. | nmcli device show ens33 |
resolvectl status |
Displays status of systemd-resolved service and configured DNS servers. |
resolvectl status |
cat /etc/netplan/*.yaml |
Views the contents of Netplan configuration files. | cat /etc/netplan/01-netcfg.yaml |
sudo netplan try |
Tests Netplan configuration changes safely. | sudo netplan try |
sudo netplan apply |
Applies Netplan configuration changes. | sudo netplan apply |
This table serves as a quick reference for common commands used throughout the process of changing and verifying your default gateway.
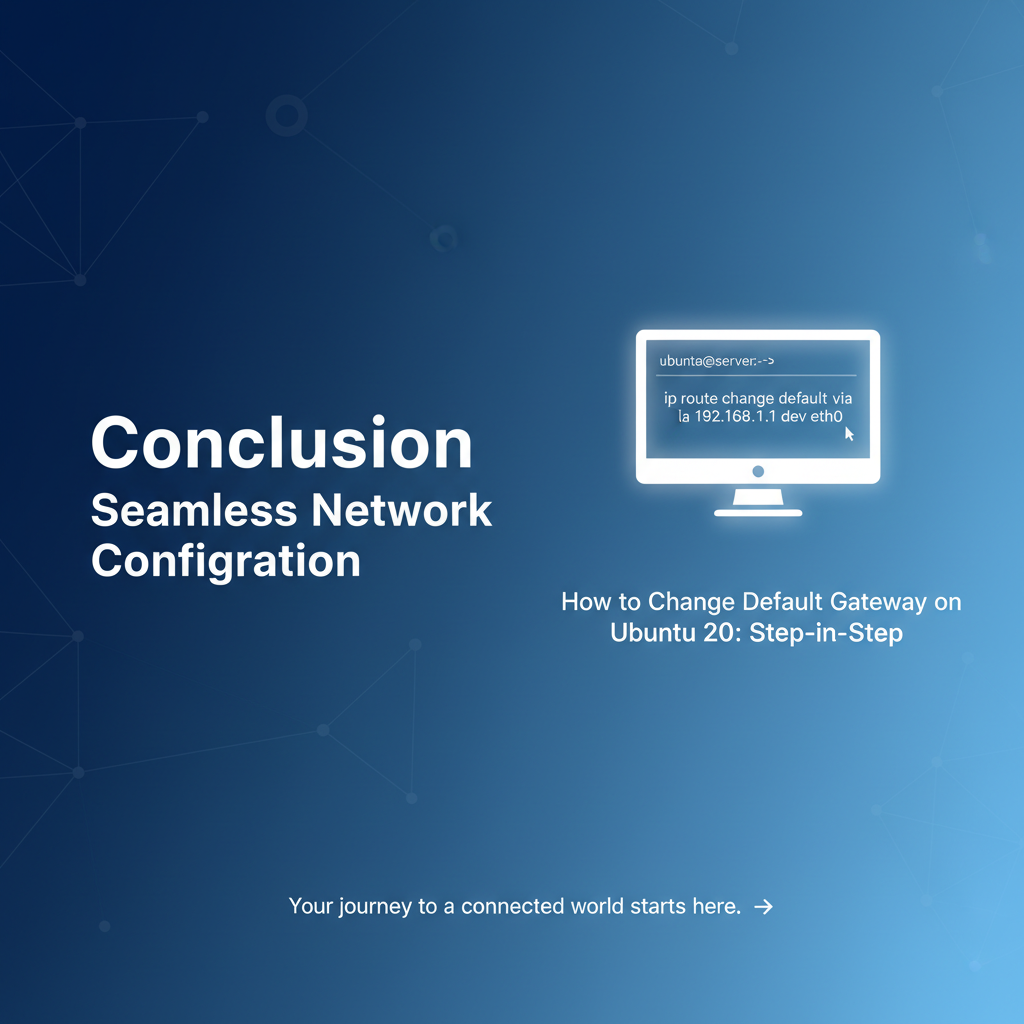
Conclusion
Changing the default gateway on an Ubuntu 20.04 system, while seemingly a simple task, requires a thorough understanding of network fundamentals, careful execution, and rigorous verification. Whether you're configuring a server using Netplan or managing a desktop environment with NetworkManager, the principles remain consistent: identify the current state, back up your configuration, make precise changes, apply them cautiously, and always verify connectivity.
This comprehensive guide has walked you through the intricate details, from understanding what a default gateway is and why you might need to change it, to executing the modifications using Netplan, nmcli, or the GUI, and finally to troubleshooting common pitfalls. The detailed explanations of IP addresses, subnet masks, DNS, and Netplan's YAML structure empower you to make informed decisions and maintain a stable network environment. Furthermore, considering advanced aspects like multiple interfaces, firewall rules, and the crucial role of network configuration for sophisticated platforms such as ApiPark underscores the importance of mastering these foundational skills for any system administrator or network engineer working with Ubuntu 20.04. Always prioritize caution, especially in production environments, and leverage the safety mechanisms available to ensure seamless network operations.
Frequently Asked Questions (FAQs)
1. What is the difference between a router and a gateway?
In the context of a local area network (LAN), the terms "router" and "gateway" are often used interchangeably, but they refer to slightly different concepts. A router is a physical device that forwards data packets between different computer networks. It operates at the network layer (Layer 3) of the OSI model. A gateway is a conceptual network node that serves as an access point to another network. The default gateway on your computer is simply the IP address of your router on your local network. So, while your router acts as your default gateway, "gateway" refers to its function as the entry/exit point for your local network to the outside world, whereas "router" refers to the device that performs this function.
2. How do I find my current default gateway on Ubuntu 20.04?
You can find your current default gateway using the command line. Open a terminal (Ctrl+Alt+T) and run: ip route show Look for a line that starts with default via <IP_ADDRESS>. The IP address listed after via is your current default gateway. For example, default via 192.168.1.1 dev ens33 indicates 192.168.1.1 is the gateway.
3. What happens if I set the wrong gateway?
If you set an incorrect default gateway, your Ubuntu system will likely lose its ability to communicate with any device outside its immediate local network. This means you won't be able to access the internet, connect to other subnets, or reach any external services. Locally, you might still be able to ping other devices on the same subnet (e.g., 192.168.1.x if your IP is 192.168.1.100 and subnet is 255.255.255.0), but any traffic destined elsewhere will fail because the system won't know where to send it. On a remote server, this will result in loss of SSH access, requiring console access to fix.
4. Does changing the gateway require a server reboot?
No, changing the default gateway on Ubuntu 20.04 typically does not require a full server reboot. When using Netplan, applying the configuration with sudo netplan apply (or sudo netplan try followed by confirmation) immediately updates the network settings in the kernel. Similarly, with NetworkManager (via nmcli or GUI), bringing the connection down and then up again will apply the changes. A reboot is only necessary if the network configuration changes are not taking effect as expected, or if you prefer a complete fresh start for all network services.
5. Can I have multiple default gateways?
Technically, a system can only have one active default gateway for most traffic at any given time. The purpose of a default gateway is to provide a single, universal path for traffic when no more specific route is defined. However, you can have multiple physical interfaces, each connected to a different network, and each potentially configured with its own default gateway if it's intended to be the default for traffic originating from that specific interface. More commonly, in advanced scenarios, you might configure specific routes to direct certain traffic through different gateways based on the destination network, while maintaining a single default gateway for all other traffic. In high-availability setups, multiple routers might share a single virtual IP address that acts as the default gateway, providing redundancy, but from the client's perspective, it's still communicating with a single default gateway IP.
🚀You can securely and efficiently call the OpenAI API on APIPark in just two steps:
Step 1: Deploy the APIPark AI gateway in 5 minutes.
APIPark is developed based on Golang, offering strong product performance and low development and maintenance costs. You can deploy APIPark with a single command line.
curl -sSO https://download.apipark.com/install/quick-start.sh; bash quick-start.sh

In my experience, you can see the successful deployment interface within 5 to 10 minutes. Then, you can log in to APIPark using your account.

Step 2: Call the OpenAI API.