How to Create a Proxy in MuleSoft: A Step-by-Step Guide


In the rapidly evolving landscape of digital transformation, Application Programming Interfaces (APIs) have become the bedrock of modern application development, enabling seamless communication and data exchange between diverse systems. As organizations increasingly rely on APIs to power their services, partner integrations, and internal operations, the need for robust API management solutions becomes paramount. Among the critical components of effective API management is the strategic implementation of API proxies. These proxies act as intermediaries, safeguarding backend services, applying crucial policies, and enhancing the overall governance of your API ecosystem.
MuleSoft, with its powerful Anypoint Platform, offers a comprehensive solution for designing, building, deploying, and managing APIs and integrations. Its capabilities extend far beyond simple data transformation, providing a sophisticated api gateway that allows businesses to exert fine-grained control over their API landscape. Creating an API proxy in MuleSoft is a fundamental skill for any developer or architect looking to secure, scale, and optimize their backend services. This in-depth guide will walk you through the process of creating a proxy in MuleSoft, from understanding the core concepts to deploying and securing your proxied API, ensuring you master this essential aspect of API lifecycle management. We'll delve into the intricacies, best practices, and advanced configurations that empower you to build resilient and high-performing API architectures.
The Indispensable Role of API Proxies and the API Gateway Concept
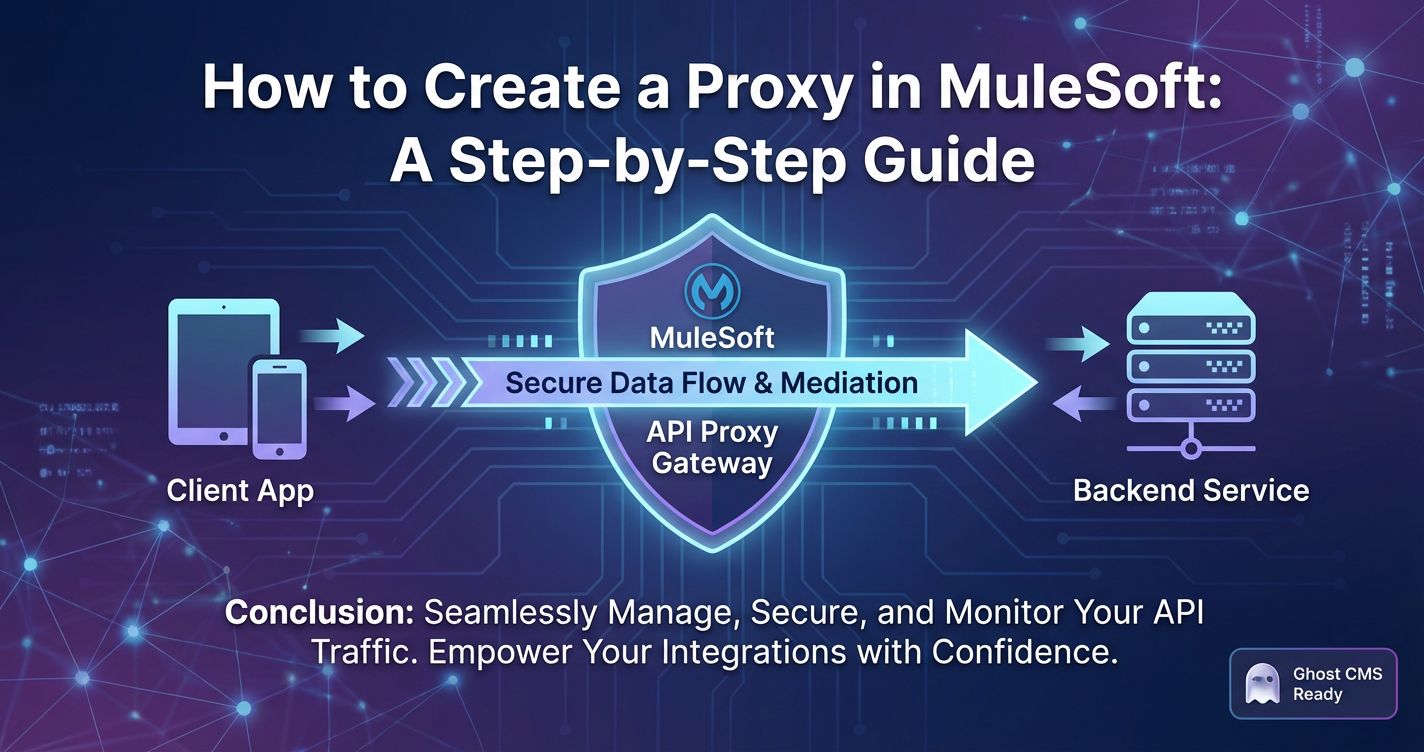
Before we dive into the practical steps, it's crucial to solidify our understanding of what an API proxy is and why it forms an integral part of any modern api gateway strategy. At its heart, an API proxy is a layer of abstraction that sits between API consumers (clients) and the actual backend services that fulfill requests. Instead of clients calling the backend service directly, they interact with the proxy. This intermediary role provides a multitude of benefits, transforming raw backend services into managed, secure, and monitorable assets.
Think of an api gateway as the front door to your API landscape. It's the single entry point for all incoming API requests, responsible for routing them to the correct backend service, enforcing security policies, handling authentication and authorization, managing traffic, and often translating protocols or data formats. An API proxy is a specific pattern implemented within this gateway to achieve these goals for individual APIs.
The strategic advantages of implementing an API proxy through a robust api gateway like MuleSoft's Anypoint Platform are extensive:
- Enhanced Security: Proxies act as a defensive shield, protecting backend systems from direct exposure to the internet. They enable the enforcement of security policies such as OAuth 2.0, API key validation, JSON threat protection, and IP whitelisting, preventing unauthorized access and mitigating common attack vectors. This is perhaps the most critical function of a gateway in safeguarding sensitive data and business logic.
- Decoupling and Abstraction: Proxies decouple the API's external interface from its internal implementation. If the backend service's URL or internal structure changes, only the proxy configuration needs updating, not every consumer application. This provides a stable interface for consumers, shielding them from backend complexities and ensuring business continuity. This abstraction is a cornerstone of agile development.
- Traffic Management and Optimization: An API proxy allows for sophisticated traffic management. Capabilities like rate limiting (controlling the number of requests a consumer can make within a time frame), spike arrest (preventing sudden surges in traffic from overwhelming backend services), and caching (storing responses to reduce backend load and improve response times) are crucial for maintaining service quality and availability. Effective gateway solutions can significantly boost performance.
- Monitoring and Analytics: By centralizing API traffic through a proxy, organizations gain invaluable visibility into API usage. The gateway can log requests, responses, errors, and performance metrics, providing rich data for analytics, performance monitoring, troubleshooting, and understanding consumer behavior. This data is vital for making informed business decisions and optimizing API offerings.
- Policy Enforcement and Governance: Proxies enforce various business and technical policies consistently across all API calls. These policies can range from transformation (converting data formats), mediation (enriching messages), to routing decisions. This centralized policy enforcement simplifies governance and ensures compliance.
- Versioning Management: As APIs evolve, new versions are introduced. Proxies can intelligently route requests based on version numbers, allowing older versions to coexist with newer ones and facilitating a smooth transition for consumers without breaking existing applications.
- Reduced Backend Load: Through caching and request aggregation, proxies can significantly reduce the load on backend systems, allowing them to focus on core business logic rather than handling every single request directly.
- Service Mesh Integration: In microservices architectures, an api gateway often complements a service mesh by handling "north-south" traffic (external to internal), while the service mesh manages "east-west" traffic (internal service-to-service communication). The proxy plays a crucial role in this external traffic management.
In essence, an API proxy, managed through a robust api gateway solution like MuleSoft's Anypoint Platform, transforms raw backend services into secure, scalable, and manageable digital assets. It provides the essential control plane for your entire API ecosystem, empowering developers and operations teams to deliver high-quality, reliable APIs.
Understanding MuleSoft Anypoint Platform and Its API Management Capabilities
MuleSoft's Anypoint Platform is an industry-leading integration platform that provides a unified approach to API-led connectivity. It encompasses a suite of tools and services that cover the entire API lifecycle, from design and development to deployment, management, and governance. Understanding its core components is essential before creating an API proxy.
- Anypoint Design Center: This is where you design and document your APIs using industry standards like RAML or OpenAPI Specification (OAS). It provides a web-based environment for crafting API contracts that define how your API behaves, its endpoints, methods, and data structures.
- Anypoint Exchange: A central hub for discovering, sharing, and reusing API assets, templates, connectors, and examples. It acts as a private or public marketplace for your organization's digital assets, promoting discoverability and reuse, which significantly accelerates development cycles.
- Anypoint Studio: A desktop-based integrated development environment (IDE) for building Mule applications. While you can deploy proxies directly from API Manager, Anypoint Studio is indispensable for developing complex integration flows, custom policies, and more intricate Mule applications that might serve as the backend for your proxy.
- Anypoint Runtime Manager: This component allows you to deploy, monitor, and manage your Mule applications (including proxy applications) across various environments, whether in CloudHub (MuleSoft's fully managed cloud), on-premises, or in hybrid deployments like Runtime Fabric. It provides insights into application health, logs, and performance metrics.
- Anypoint API Manager: This is the cornerstone for API governance and management. API Manager is specifically designed to manage the runtime behavior of your APIs and proxies. It allows you to:
- Register and Discover APIs: Import API definitions from Exchange or define them directly.
- Create and Deploy Proxies: Automatically generate and deploy proxy applications that shield your backend services.
- Apply Policies: Enforce security (authentication, authorization), quality of service (rate limiting, caching), and transformation policies to your APIs without modifying the backend code. This is where the core api gateway functionality shines.
- Monitor and Analyze: Track API usage, performance, and errors through customizable dashboards and alerts, providing deep operational visibility.
- Manage API Consumers: Register client applications, issue API keys, and control access permissions.
For the purpose of creating an API proxy, Anypoint API Manager will be our primary interface. It simplifies the process of standing up a gateway layer for your existing services, allowing you to quickly apply governance and security measures without extensive coding.
Why Create an API Proxy in MuleSoft Anypoint Platform? Deeper Dive into Benefits
While we've touched upon the general benefits of API proxies, let's explore why leveraging MuleSoft specifically for this purpose provides distinct advantages, especially in an enterprise context.
1. Robust Security Posture
MuleSoft's Anypoint Platform, as a sophisticated api gateway, provides a comprehensive suite of out-of-the-box and customizable policies to secure your APIs. This goes beyond simple authentication:
- OAuth 2.0 Enforcement: Seamlessly integrate with external OAuth providers (like Okta, Azure AD, Auth0) or use Anypoint Platform's built-in client management to secure your APIs with industry-standard token-based authentication. The proxy ensures only requests with valid access tokens reach your backend.
- API Key Enforcement: A simple yet effective security measure for identifying and tracking API consumers. The proxy can validate API keys against registered applications.
- JSON Threat Protection: Protects your backend from malicious JSON payloads (e.g., excessively large arrays, deep nesting, or malformed JSON) that could lead to denial-of-service attacks.
- XML Threat Protection: Similar to JSON threat protection, it safeguards against XML vulnerabilities.
- IP Whitelisting/Blacklisting: Control access based on source IP addresses, allowing only trusted networks to interact with your APIs.
- Custom Policies: For scenarios requiring unique security logic, MuleSoft allows you to develop and deploy custom policies using Mule applications, providing unparalleled flexibility.
- SLA-based Security: Tie security levels to Service Level Agreements (SLAs) for different consumer tiers, ensuring premium users receive higher allowances or stronger security configurations.
By centralizing these security controls at the api gateway layer, you ensure consistent enforcement across your entire API portfolio, significantly reducing the attack surface on your backend services.
2. Sophisticated Traffic Management
Managing fluctuating API traffic is critical for maintaining service availability and performance. MuleSoft's proxy capabilities offer fine-tuned control:
- Rate Limiting: Prevents individual consumers from overwhelming your backend by limiting the number of requests permitted within a specified time window. This is crucial for fair usage and preventing resource starvation.
- Spike Arrest: A more dynamic form of rate limiting designed to smooth out sudden bursts of traffic, protecting your backend from unexpected load spikes.
- Concurrency Throttling: Limits the number of concurrent requests to a backend service, preventing overload during periods of high demand.
- Client ID Enforcement: Combine rate limiting with client ID validation to apply different limits to different applications, enforcing tiered access based on subscriptions.
- Caching: Implement response caching at the proxy level to reduce the number of requests reaching your backend, dramatically improving response times for frequently accessed, static, or semi-static data. This offloads significant work from your backend systems and enhances user experience.
These policies, applied at the gateway, ensure your APIs remain responsive and available, even under heavy load, by intelligently managing the flow of traffic.
3. Comprehensive Monitoring and Analytics
Visibility into API usage is crucial for operational health and strategic decision-making. MuleSoft's API Manager, through its proxy capabilities, provides:
- Real-time Dashboards: Monitor API performance metrics like average response time, throughput, error rates, and latency in real-time.
- Detailed Logging: Comprehensive logging of all API requests, responses, and errors, providing invaluable data for troubleshooting and auditing.
- Customizable Alerts: Set up alerts based on predefined thresholds for key metrics, ensuring operations teams are immediately notified of any issues or anomalies.
- Usage Reports: Generate reports on API consumption patterns, identifying top consumers, peak usage times, and popular endpoints. This data helps in capacity planning, identifying potential abuse, and understanding the business value derived from your APIs.
- Integration with External Monitoring Tools: Easily integrate with third-party monitoring solutions (e.g., Splunk, ELK stack, Datadog) for consolidated observability.
This deep level of insight, all channeled through the api gateway, empowers organizations to proactively identify and resolve issues, optimize performance, and demonstrate the business impact of their APIs.
4. Seamless Decoupling and Versioning
- Backend Agility: The proxy acts as a stable contract for consumers, allowing backend services to evolve independently. If a backend service needs to be refactored, migrated, or replaced, the changes can be made without impacting existing consumers, provided the proxy configuration is updated appropriately. This enables true microservices agility.
- Controlled Versioning: Manage multiple versions of an API through the same proxy. You can route requests to different backend versions based on URL path, header, or query parameters, facilitating smooth transitions between API versions and minimizing breaking changes for consumers. This capability is essential for long-term API lifecycle management.
5. Centralized Management and Governance
With MuleSoft's Anypoint Platform, the api gateway acts as a central control point for all your APIs. This means:
- Consistent Policy Enforcement: Apply policies uniformly across your entire API portfolio from a single interface, ensuring compliance with organizational standards and regulatory requirements.
- Simplified Operations: Instead of configuring security, traffic management, and monitoring at the individual backend service level (which can be disparate and complex), you manage it centrally at the proxy. This reduces operational overhead and simplifies troubleshooting.
- Developer Productivity: Developers can focus on building core business logic for backend services, knowing that cross-cutting concerns like security, observability, and traffic management are handled by the api gateway.
- API Discovery and Consumption: By registering proxies in Anypoint Exchange, internal and external developers can easily discover, understand, and consume your APIs, fostering reuse and accelerating development.
In summary, leveraging MuleSoft for API proxy creation transcends merely shielding a backend. It's about establishing an intelligent, secure, and highly manageable api gateway that serves as the strategic interface for your entire digital ecosystem, driving efficiency, agility, and robust governance.
Prerequisites for Creating a MuleSoft Proxy
Before embarking on the step-by-step creation process, ensure you have the following in place:
- MuleSoft Anypoint Platform Account: You will need an active account to access API Manager and Runtime Manager. A trial account will suffice for demonstration purposes.
- Basic Understanding of APIs: Familiarity with RESTful APIs, HTTP methods (GET, POST, PUT, DELETE), and concepts like endpoints, request/response bodies, and headers is assumed.
- A Backend Service to Proxy: You need an existing API or a mock service that your MuleSoft proxy will front. This can be:
- A public API (e.g., JSONPlaceholder, dummy REST APIs).
- An internal REST service deployed within your organization.
- A simple Mule application you developed in Anypoint Studio and deployed to CloudHub.
- A mock service created using tools like Mocky.io or even Anypoint Design Center's mocking service.
- For this guide, we'll assume a simple public REST API like
https://jsonplaceholder.typicode.com/posts.
- Mule Runtime Knowledge (Optional but Recommended): While API Manager handles much of the underlying Mule application generation, a basic understanding of how Mule applications run can be helpful for troubleshooting or customizing advanced proxy scenarios.
With these prerequisites in place, you are ready to begin creating your API proxy.
APIPark is a high-performance AI gateway that allows you to securely access the most comprehensive LLM APIs globally on the APIPark platform, including OpenAI, Anthropic, Mistral, Llama2, Google Gemini, and more.Try APIPark now! 👇👇👇
Step-by-Step Guide to Creating an API Proxy in MuleSoft Anypoint Platform
This section will detail the process of setting up an API proxy using Anypoint API Manager. We will cover each configuration step thoroughly.
Step 1: Access Anypoint Platform and API Manager
- Log In: Open your web browser and navigate to
https://anypoint.mulesoft.com. Enter your Anypoint Platform username and password. - Navigate to API Manager: Once logged in, you'll be on the Anypoint Platform homepage. In the left-hand navigation pane, locate and click on "API Manager." This will take you to the dashboard where you can view and manage all your APIs.
Step 2: Add a New API
- Initiate API Creation: On the API Manager dashboard, you will typically see a "Manage API" button or a "Add API" button/dropdown. Click "Manage API" to start the process of defining a new API to be managed.
- Select "New API": A prompt will appear asking you to choose between "New API" or "Import API from Exchange." For creating a proxy from scratch, select "New API." This option guides you through configuring the API details directly within API Manager.
Step 3: Configure API Details (API Definition)
This step involves providing fundamental information about the API you intend to proxy.
- API Name: Provide a descriptive name for your API, for example,
MyProxyService. This name will be used throughout Anypoint Platform for identification. - Asset Version: Specify the version of your API, e.g.,
v1. This helps in managing different iterations of your API over time. - API Instance Label (Optional): This allows for a more descriptive label for a specific instance of your API. Useful when managing multiple instances of the same API version.
- API Definition: This is a crucial choice. You have several options:For our example, select "HTTP API".
- RAML: API Manager can import a RAML (RESTful API Modeling Language) file from Anypoint Exchange or a local file. RAML is MuleSoft's preferred API definition language, known for its human-readability.
- OAS (OpenAPI Specification/Swagger): You can also use an OAS definition, which is widely adopted in the industry.
- HTTP API: If you don't have a formal API definition document (RAML or OAS) or are simply proxying a basic HTTP endpoint, choose "HTTP API." This is the simplest option for a basic proxy and is what we will use for this guide.
- GraphQL API: For GraphQL services, API Manager also supports defining and managing them.
- API Definition Source (Optional for HTTP API): If you had chosen RAML or OAS, you would specify whether to import it from Exchange or upload a file. Since we selected HTTP API, this is not applicable.
- Next: Click the "Next" button to proceed.
Step 4: Choose Proxy Deployment Model
MuleSoft offers flexible deployment options for your proxy application. The choice often depends on your infrastructure strategy, performance requirements, and operational model.
- Deployment Target:For this guide, we will choose "CloudHub" for its simplicity and quick setup.
- CloudHub: This is MuleSoft's fully managed, multi-tenant cloud environment. It's the simplest and most recommended option for quick deployments, as MuleSoft handles all infrastructure management. The proxy application will be deployed to a CloudHub worker (a dedicated virtual server).
- Hybrid (on-premises/Runtime Fabric): For organizations with specific data residency requirements, existing on-premises infrastructure, or demanding performance needs, this option allows you to deploy the proxy to a private instance of Mule runtime, whether on a physical server, virtual machine, or in a containerized environment (e.g., Runtime Fabric, which provides Kubernetes-level orchestration). This offers more control but requires more operational effort.
- Next: Click "Next."
Step 5: Configure Proxy Endpoint
This is where you define how the proxy will interact with your actual backend service and how it will be exposed to consumers.
- Mule Version: Select the Mule Runtime version for your proxy application. It's generally recommended to choose the latest stable version for optimal performance and security updates. For example,
4.4.0or newer. - Proxy Application Name: Provide a unique name for the Mule application that API Manager will generate and deploy. This name must be globally unique within CloudHub. A good practice is to combine your API name and a suffix, e.g.,
my-proxy-service-v1-proxy. - Proxy Base Path: This defines the base URL path under which your proxy will be accessible. For instance, if you set it to
/myproxyservice, and your CloudHub domain ismycompany.anypoint.cloudhub.io, the proxy endpoint would behttp://my-proxy-service-v1-proxy.anypoint.cloudhub.io/myproxyservice. This path defines the entry point for your consumers. - Implementation URL: This is the most critical field. It is the URL of your actual backend service that the proxy will forward requests to. For our example, use
https://jsonplaceholder.typicode.com/posts. The proxy will send all requests it receives to this backend URL.- Important Consideration: Ensure your backend URL is accessible from where your Mule application (proxy) will be deployed (e.g., CloudHub workers). If your backend is behind a firewall, you might need to configure VPN or dedicated load balancers.
- Description (Optional): Add a brief description for your proxy application.
- Next: Click "Next."
Step 6: Deploy the Proxy Application
Upon clicking "Next" in the previous step, API Manager will automatically:
- Generate a Mule Application: It creates a lightweight Mule application package (.jar file) configured as a proxy.
- Deploy to CloudHub: It then deploys this application to CloudHub using the specified application name and Mule Runtime version.
- Associate API Instance: The deployed proxy application is automatically linked to the API instance you are managing in API Manager.
The deployment process typically takes a few minutes. You will see a progress indicator within API Manager.
Step 7: Verify Proxy Deployment
Once the deployment is complete, it's crucial to verify that your proxy is up and running correctly.
- Check Runtime Manager:
- Navigate back to the Anypoint Platform homepage and click on "Runtime Manager" in the left-hand navigation pane.
- You should see your proxy application (e.g.,
my-proxy-service-v1-proxy) listed with a "Started" status. If it's not "Started," check the application logs for errors.
- Obtain Proxy URL:
- In Runtime Manager, click on your proxy application name.
- Under the "Settings" tab, you'll find the "Application URL." This is the base URL for your deployed proxy.
- Combine this with your "Proxy Base Path" (e.g.,
/myproxyservice) to get the full proxy endpoint URL. For example:http://my-proxy-service-v1-proxy.anypoint.cloudhub.io/myproxyservice.
- Test the Proxy:
- Use an API client tool like Postman, Insomnia, or even
curlfrom your terminal. - Send a GET request to your full proxy endpoint URL. For example:
GET http://my-proxy-service-v1-proxy.anypoint.cloudhub.io/myproxyservice - If your backend is
https://jsonplaceholder.typicode.com/posts, you should receive a JSON array of post objects, just as if you had called the backend directly. - You can also try a specific path, e.g.,
GET http://my-proxy-service-v1-proxy.anypoint.cloudhub.io/myproxyservice/1(which would hithttps://jsonplaceholder.typicode.com/posts/1).
- Use an API client tool like Postman, Insomnia, or even
Congratulations! You have successfully created and deployed a basic API proxy in MuleSoft. This proxy now acts as your gateway to the backend service.
Step 8: Apply Policies to the Proxy
This is where the real power of an api gateway comes into play. Policies allow you to enforce security, manage traffic, and transform messages without altering your backend service.
- Navigate to API Manager: Go back to API Manager.
- Select Your API: Click on the API instance you just created (e.g.,
MyProxyService v1). - Go to "Policies" Tab: On the API details page, click the "Policies" tab.
- Apply a New Policy:
- Click "Apply New Policy."
- You'll see a list of available policies (e.g., "Client ID Enforcement," "Rate Limiting," "Basic Authentication," "Caching," "JSON Threat Protection").
- Let's add a simple "Rate Limiting" policy to demonstrate. Select it and click "Configure Policy."
- Configure Rate Limiting:
- Time Period: e.g.,
1minute. - Number of Requests: e.g.,
5. - Apply Policy To: Choose
All methods & resourcesfor now. - Expose Headers: (Optional) Allows the client to see remaining limits.
- Action if quota exceeded:
Reject Request(default).
- Time Period: e.g.,
- Click "Apply."
- Observe Policy Application: The policy will now be listed under the "Policies" tab. It typically takes a few moments for the policy to be pushed to the running proxy application.
Step 9: Test Policies and Refine
- Test the Rate Limiting Policy:
- Using your API client (Postman, curl), send repeated GET requests to your proxy endpoint (
http://my-proxy-service-v1-proxy.anypoint.cloudhub.io/myproxyservice). - You should successfully get responses for the first 5 requests within a minute.
- For the 6th request within that same minute, the proxy should return an error message (typically HTTP 429 Too Many Requests) indicating that the rate limit has been exceeded.
- Using your API client (Postman, curl), send repeated GET requests to your proxy endpoint (
- Refine or Add More Policies:
- You can go back to the "Policies" tab in API Manager, select your applied policy, and click "Configure" to modify its settings.
- Experiment with other policies like "Client ID Enforcement" (which requires you to set up an API client in API Manager under the "API Consumers" tab first), "Basic Authentication," or "JSON Threat Protection."
- Policy Chaining: Notice that you can apply multiple policies. They are executed in the order they appear in the "Policies" list. This concept of policy chaining is powerful for building complex gateway logic.
This concludes the basic step-by-step guide to creating, deploying, and securing an API proxy in MuleSoft. You now have a functional api gateway managing your backend service.
Advanced Proxy Configurations and Best Practices
Building a basic proxy is a good start, but a truly robust API architecture requires deeper consideration. Here, we delve into more advanced configurations and best practices for leveraging MuleSoft's api gateway capabilities.
1. Policy Chaining and Execution Order
As briefly mentioned, MuleSoft allows you to apply multiple policies to a single API proxy. The order in which these policies are applied is crucial, as it dictates the flow of execution. For instance, you would typically want to perform authentication (e.g., Client ID Enforcement) before applying rate limiting, ensuring that only authenticated clients consume your quota. Similarly, threat protection should happen early to prevent malicious payloads from even reaching other policies or the backend.
- Best Practice: Arrange policies logically from broadest (e.g., IP whitelist) to most specific (e.g., data transformation) and from security-focused to QoS-focused. API Manager allows you to reorder policies by dragging and dropping them in the "Policies" tab.
- Example Order: IP Whitelist -> Client ID Enforcement -> OAuth 2.0 -> JSON Threat Protection -> Rate Limiting -> Caching -> Header Injection -> Data Transformation.
2. Custom Policies for Unique Requirements
While MuleSoft provides a rich set of out-of-the-box policies, there will inevitably be scenarios where your specific business logic or integration patterns require something unique. MuleSoft addresses this by allowing you to develop custom policies using Anypoint Studio.
- When to Use:
- Integrating with proprietary authentication systems.
- Performing complex data validations or transformations not covered by standard policies.
- Implementing custom logging or audit trails.
- Enforcing highly specific routing logic.
- Development Process: Custom policies are developed as Mule applications in Anypoint Studio, using XML configuration and potentially custom Java components. They are then packaged and uploaded to Anypoint Exchange, making them available for application in API Manager just like any other built-in policy.
- Benefit: This extensibility ensures that your MuleSoft api gateway can adapt to virtually any enterprise requirement, avoiding vendor lock-in for critical functionalities.
3. Client Management and Application Registration
For effective API governance, especially in an external-facing api gateway context, you need to manage who is consuming your APIs. MuleSoft's API Manager provides robust client management features.
- API Consumers Tab: In API Manager, under the "API Consumers" tab, you can register client applications. Each application typically represents a consuming system (e.g., a mobile app, a partner integration, an internal microservice).
- Client ID and Secret: Upon registration, Anypoint Platform generates a unique Client ID and Client Secret for each application. These credentials are then used with policies like "Client ID Enforcement" or OAuth 2.0 to authenticate and authorize requests.
- SLA Tiers: You can define different Service Level Agreements (SLAs) or tiers (e.g., "Free," "Premium," "Enterprise") with varying rate limits, access to features, or security levels. When a client application registers, it subscribes to an SLA tier, and the proxy automatically enforces the associated policies.
- Approval Workflow: For sensitive APIs, you can configure an approval workflow, meaning an administrator must approve a client application's subscription before it can access the API.
This centralized management of API consumers through the gateway is critical for monetization, partner management, and preventing unauthorized access.
4. Monitoring, Alerts, and Performance Tuning
Beyond basic monitoring, consider a proactive approach:
- Custom Dashboards: In Anypoint Monitoring, create custom dashboards tailored to your specific APIs and operational concerns. Track metrics like latency to backend, request size, or specific error codes.
- Advanced Alerts: Configure alerts not just on overall error rates but also on specific error types, latency spikes, or sudden drops in throughput, indicating potential issues. Integrate these alerts with your existing IT operations management (ITOM) tools.
- Load Testing: Before going live, perform rigorous load testing on your proxied APIs to understand their capacity and identify bottlenecks. This ensures your gateway can handle expected traffic volumes.
- Caching Strategies: Dive deeper into caching. Beyond global caching, consider resource-specific caching or cache invalidation strategies for highly dynamic data. Tune cache TTLs (Time To Live) to balance freshness with performance gains.
- Worker Sizing: For CloudHub deployments, monitor worker CPU and memory utilization in Runtime Manager. If consistently high, consider scaling up worker size or adding more workers to handle increased load, ensuring your gateway doesn't become a bottleneck.
5. Security Considerations Beyond Policies
While policies provide foundational security, holistic API security involves more:
- OWASP API Security Top 10: Regularly review your API designs and proxy configurations against the OWASP API Security Top 10 list (e.g., Broken Object Level Authorization, Broken User Authentication, Excessive Data Exposure). Ensure your gateway policies contribute to mitigating these risks.
- Input Validation: While some validation can happen at the proxy (e.g., JSON Schema Validation policy), comprehensive input validation should also occur at the backend service. The proxy can complement this by filtering obvious malformed requests.
- Transport Layer Security (TLS): Always enforce HTTPS for both client-to-proxy and proxy-to-backend communication. MuleSoft handles this by default for CloudHub, but verify configurations for hybrid deployments.
- Secrets Management: Ensure API keys, client secrets, and other sensitive credentials used by your proxy or backend are stored securely, ideally in a secrets management system like MuleSoft's Secret Manager or external vaults (e.g., HashiCorp Vault).
6. Integration with CI/CD Pipelines
For agile development and reliable deployments, integrate your proxy management into your Continuous Integration/Continuous Delivery (CI/CD) pipelines.
- Automated Deployment: Use MuleSoft's Anypoint Platform APIs (e.g., Anypoint CLI or Maven plugins) to automate the deployment of proxy applications and the application of policies. This ensures consistency and reduces manual errors.
- Policy as Code: Treat your API policies as code. Store policy configurations in version control (Git) and apply them programmatically during deployment.
- Automated Testing: Include automated functional and performance tests for your proxied APIs within your pipeline.
7. The Broader API Ecosystem and Specialized Gateways
MuleSoft's Anypoint Platform provides a powerful, all-encompassing api gateway solution for enterprise integration and general API management. However, the API landscape is vast, and specialized gateway solutions are emerging to address particular niches. For instance, while MuleSoft can proxy any HTTP API, including those for AI services, some platforms offer highly optimized features for the unique demands of AI models.
When considering comprehensive API management, especially for emerging technologies like Artificial Intelligence, enterprises might look for solutions that streamline the integration and governance of these specialized services. This is where platforms like APIPark come into play. APIPark, an open-source AI gateway and API management platform, excels at quickly integrating 100+ AI models, unifying API formats for AI invocation, and simplifying prompt encapsulation into REST APIs. It offers robust features for both AI and traditional REST service management within a single platform, making it an attractive option for organizations deeply invested in AI capabilities. While MuleSoft provides extensive integration and general gateway functionalities, specialized platforms can offer tailored features, such as unified prompt management and cost tracking for AI models, which complement a broader api gateway strategy, allowing enterprises to choose the best tool for each specific job within their diverse API landscape.
Table: Comparison of Key MuleSoft Proxy Policy Categories
To illustrate the breadth of capabilities within MuleSoft's api gateway, let's look at common policy categories and their typical use cases:
| Policy Category | Description | Key Policies Examples | Primary Benefit |
|---|---|---|---|
| Security | Safeguards APIs and backend services from unauthorized access, malicious attacks, and data breaches. Ensures only legitimate requests reach the backend. | Client ID Enforcement, OAuth 2.0, Basic Auth, IP Blacklist/Whitelist, JSON/XML Threat Protection | Protects sensitive data and backend systems, ensures compliance. |
| Quality of Service | Manages API traffic flow, prevents overload, and optimizes performance and availability for consumers. Guarantees a consistent level of service. | Rate Limiting, Spike Arrest, Throttling, Caching | Enhances API reliability, prevents DDoS, improves response times, reduces backend load. |
| Mediation & Transformation | Modifies request and response messages (headers, body, query parameters) to align with backend requirements or consumer expectations. Can enrich or sanitize data. | Header Injection, Set Payload, Message Transformation, Content-Type Negotiation | Adapts APIs to different integration needs, simplifies backend development. |
| Auditing & Monitoring | Provides visibility into API usage, performance, and operational health. Collects logs and metrics for analysis and troubleshooting. | Custom Policy (for specific logging), External Log Integration (via custom policy) | Offers deep operational insights, aids troubleshooting, supports business intelligence. |
| Governance | Enforces organizational standards, lifecycle management, and access controls across the API portfolio. | SLA-based policies (via Client ID), API Auto Discovery, Client Management | Ensures consistent API management, simplifies consumer onboarding. |
This table provides a snapshot of how a robust api gateway like MuleSoft's helps in managing diverse aspects of API operations.
Conclusion
The journey of creating an API proxy in MuleSoft Anypoint Platform is a fundamental step towards establishing a mature and resilient API strategy. As we have explored in this comprehensive guide, an API proxy is far more than a simple passthrough; it is the cornerstone of an effective api gateway, providing a critical layer of security, management, and abstraction for your backend services. From protecting your sensitive systems with robust security policies to optimizing performance through intelligent traffic management and gaining invaluable insights via comprehensive monitoring, the benefits are profound.
MuleSoft's Anypoint Platform empowers organizations to take control of their API ecosystem, transforming raw services into governed, scalable, and discoverable digital assets. By following the detailed step-by-step instructions, you can confidently deploy and configure proxies, apply essential policies, and lay the groundwork for a highly manageable API landscape.
As the world continues its digital acceleration, the strategic importance of a well-architected api gateway will only grow. Whether you are building internal microservices architectures, integrating with external partners, or leveraging advanced technologies like AI, mastering API proxy creation in MuleSoft equips you with the essential skills to navigate the complexities of modern integration. Embrace these capabilities, and you'll be well on your way to building a future-proof, high-performing, and secure API infrastructure that drives innovation and business value. The gateway to your digital future starts here.
Frequently Asked Questions (FAQs)
1. What is the main purpose of an API proxy in MuleSoft?
The main purpose of an API proxy in MuleSoft is to act as an intermediary layer between API consumers and your actual backend services. It provides a centralized point for applying policies (security, traffic management, quality of service, transformation), decoupling the backend implementation from the consumer interface, and enabling comprehensive monitoring and analytics. This forms the core functionality of MuleSoft's api gateway, protecting and governing your APIs without modifying the backend code.
2. What are the different deployment options for a MuleSoft API proxy?
MuleSoft offers flexible deployment options for API proxies: * CloudHub: MuleSoft's fully managed cloud platform, ideal for ease of use and quick deployment, with MuleSoft handling infrastructure. * Hybrid (On-premises/Runtime Fabric): Allows deployment to private Mule runtime instances on your own infrastructure (physical servers, VMs, or containerized environments like Runtime Fabric) for greater control over data residency and specific performance needs.
3. Can I apply multiple policies to a single API proxy in MuleSoft?
Yes, absolutely. MuleSoft's API Manager allows you to apply multiple policies to a single API proxy, a concept known as "policy chaining." The policies are executed in the order they appear in the "Policies" list within API Manager. This enables complex governance and security strategies, where you can combine authentication, threat protection, rate limiting, and other policies to create a robust api gateway experience.
4. How does MuleSoft's API proxy help with API security?
MuleSoft's API proxy enhances security by acting as a protective gateway for backend services. It allows you to enforce various security policies such as OAuth 2.0 validation, API key enforcement, IP whitelisting/blacklisting, JSON/XML threat protection, and basic authentication. These policies block unauthorized or malicious requests before they can reach and potentially harm your backend systems, providing a strong defensive perimeter for your APIs.
5. What is the difference between an API proxy and the backend service it proxies?
An API proxy is a thin layer that fronts an existing backend service. The proxy itself does not contain the business logic or data of the backend service. Instead, it intercepts requests from consumers, applies various management policies, and then forwards the request to the actual backend service. The backend service is the original application or database that performs the core business function and returns the necessary data. The proxy adds a managed gateway layer to the raw backend service, making it more secure, controllable, and observable.
🚀You can securely and efficiently call the OpenAI API on APIPark in just two steps:
Step 1: Deploy the APIPark AI gateway in 5 minutes.
APIPark is developed based on Golang, offering strong product performance and low development and maintenance costs. You can deploy APIPark with a single command line.
curl -sSO https://download.apipark.com/install/quick-start.sh; bash quick-start.sh

In my experience, you can see the successful deployment interface within 5 to 10 minutes. Then, you can log in to APIPark using your account.

Step 2: Call the OpenAI API.