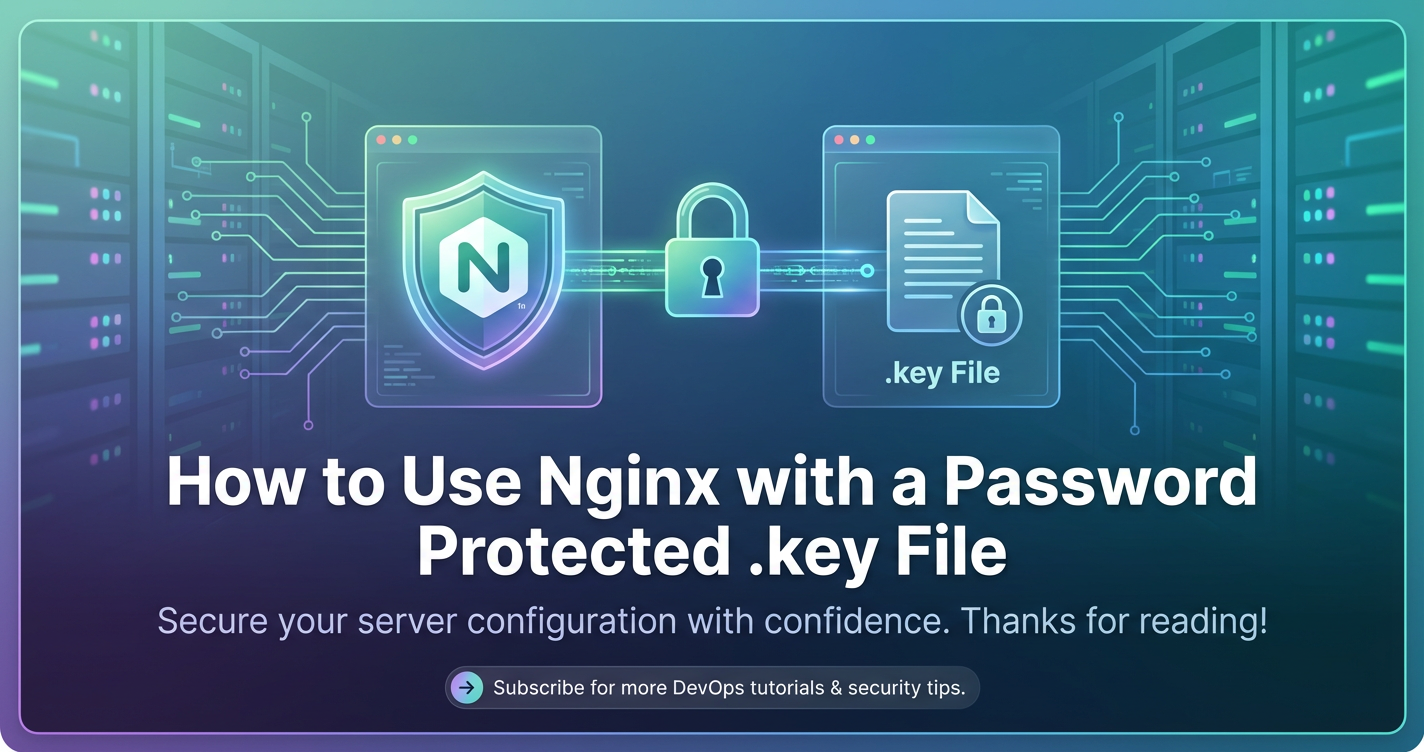
How to Use Nginx with a Password Protected .key File


Introduction: Fortifying the Digital Frontier with Nginx and Encrypted Private Keys
In the contemporary digital landscape, where data breaches are a pervasive and often catastrophic threat, the sanctity of secure communication is paramount. Every interaction, from a simple website visit to a complex financial transaction, increasingly relies on robust encryption to protect sensitive information from malicious interception. At the heart of this secure communication lies the Secure Sockets Layer/Transport Layer Security (SSL/TLS) protocol, which underpins the ubiquitous HTTPS. Nginx, a high-performance web server, reverse proxy, and load balancer, plays a pivotal role in serving a vast portion of the internet's encrypted traffic. While Nginx efficiently handles the mechanics of SSL/TLS, the true bedrock of its security posture rests on the integrity and protection of its private keys.
A private key is the cryptographic analogue of a physical key to a vault, capable of unlocking and deciphering data encrypted with its corresponding public key. If this private key falls into the wrong hands, it can lead to devastating consequences: an attacker could impersonate your server, decrypt sensitive user data, or even inject malicious content into ostensibly secure connections. To mitigate this profound risk, an essential security measure involves protecting the private key itself with a password or passphrase. This article delves deeply into the rationale, methodology, and operational considerations of utilizing Nginx with a password-protected .key file. We will explore the intricacies of generating, configuring, and managing encrypted private keys, providing a comprehensive guide for system administrators and developers striving to build a more secure and resilient web infrastructure. By understanding and implementing these practices, we aim to strike a critical balance between stringent security protocols and operational efficiency, ensuring that your Nginx-powered services remain both impenetrable and highly available.
1. The Foundation of Web Security – SSL/TLS and Private Keys
The internet as we know it would be a far more perilous place without the foundational security layers provided by SSL/TLS. This set of cryptographic protocols ensures privacy, authentication, and data integrity in network communications. When you see "HTTPS" in your browser's address bar, it signifies that SSL/TLS is actively securing your connection, and Nginx is often the server facilitating this critical handshake. Understanding the components and their roles is the first step towards robust security.
1.1 Understanding SSL/TLS in Nginx Context: The Secure Handshake
At its core, SSL/TLS establishes a secure channel over an insecure network, primarily the internet. This is achieved through a complex yet elegant dance between the client (your web browser) and the server (your Nginx instance). The process, commonly known as the SSL/TLS handshake, involves several steps designed to verify the server's identity, agree on encryption algorithms, and exchange cryptographic keys securely. When a client initiates a connection to an Nginx server configured for HTTPS, Nginx presents its digital certificate. This certificate, issued by a trusted Certificate Authority (CA), contains the server's public key and verifies the server's ownership of that key. The client then uses the public key from the certificate to encrypt a "pre-master secret," which only the server, possessing the corresponding private key, can decrypt. From this secret, both client and server derive symmetrical session keys, which are then used to encrypt and decrypt all subsequent communication, ensuring speed and confidentiality.
Nginx's role in this process is critical. It is configured with directives such as ssl_certificate and ssl_certificate_key to specify the location of the server's certificate and its corresponding private key, respectively. When a request for an HTTPS resource arrives, Nginx efficiently orchestrates the handshake, leveraging its internal modules to perform the necessary cryptographic operations. Its performance capabilities allow it to handle thousands of concurrent SSL/TLS connections without significant degradation, making it an ideal choice for high-traffic secure websites. However, this efficiency hinges entirely on the secure and correct configuration of these foundational cryptographic assets. Any misstep in handling the private key can severely undermine the entire security apparatus that SSL/TLS is designed to build.
1.2 The Critical Nature of the Private Key: The Unbreakable Lock
Among the various components involved in an SSL/TLS connection, the private key stands out as the single most critical and sensitive asset. While the public key is freely distributed as part of your server's certificate, allowing anyone to encrypt data intended for your server, the private key is exclusively held by the server. It is the only means to decrypt information that has been encrypted with its public counterpart. This asymmetric cryptography forms the backbone of the entire system's security. Without the private key, the server cannot establish secure, encrypted communication, nor can it prove its identity. This fundamental principle underscores why its protection is not merely a best practice but an absolute imperative.
The consequences of a private key compromise are far-reaching and severe. If an attacker gains access to your Nginx server's private key, they can effectively become your server. This means they could decrypt all past and future communications that were or are encrypted with that key, allowing them to read sensitive user data like login credentials, personal information, or financial details. Furthermore, with the private key, an attacker can launch man-in-the-middle attacks, impersonating your server to unsuspecting clients, intercepting their traffic, and even issuing seemingly legitimate but forged SSL/TLS certificates. They could also sign malicious code or updates, making it appear as if they originated from your trusted organization. Given this catastrophic potential, treating the private key with the utmost care, akin to the master key to a highly secure facility, is not an exaggeration. Its security directly dictates the trust and integrity of your entire web presence, making robust protection mechanisms, such as password encryption, indispensable.
2. The Imperative of Password Protection for Private Keys
While Nginx expertly handles the cryptographic heavy lifting of SSL/TLS, the security of the underlying private key remains a persistent concern. Storing an unencrypted private key directly on a server, even with restrictive file permissions, presents a single point of failure that could be exploited in various scenarios. The addition of a passphrase to encrypt the private key file introduces an essential layer of defense, mitigating some of the most significant risks associated with key management.
2.1 Why Encrypt Your Private Key? A Multi-Layered Defense
Encrypting your private key with a password serves as a crucial component of a robust defense-in-depth strategy. Imagine a scenario where an attacker successfully breaches your server's perimeter, perhaps through a vulnerability in an unrelated application, a misconfigured service, or even stolen administrator credentials. If your private key is stored unencrypted, the attacker gains immediate access to it, enabling them to decrypt past and future communications. However, if the key file itself is encrypted with a strong passphrase, the attacker, even with full file system access, would still need to crack that passphrase to render the key usable. This dramatically increases the effort and time required for a successful exploit, providing a vital window for detection and remediation.
Beyond external threats, encrypted private keys also offer protection against internal risks, such as accidental exposure or insider threats. A key inadvertently copied to an insecure location, or accessed by an unauthorized employee, would remain unusable without the passphrase. In disaster recovery scenarios, where backups might be stored offline or on less-secure media, an encrypted key provides an additional safeguard. Furthermore, regulatory compliance standards, such as PCI DSS (Payment Card Industry Data Security Standard) for handling credit card information or GDPR (General Data Protection Regulation) for personal data, often implicitly or explicitly require robust protection for cryptographic keys. Encrypting private keys helps meet these stringent requirements by demonstrating a proactive approach to securing sensitive assets, thereby bolstering an organization's overall security posture and reducing its legal and financial liabilities in the event of a breach.
2.2 The Trade-offs: Security vs. Automation – The Operational Challenge
While the security benefits of a password-protected private key are undeniable, this enhanced protection comes with a notable operational trade-off: the need for human intervention. When a private key is encrypted, Nginx cannot automatically load it during startup or restart without the passphrase being provided. This means that every time your Nginx server needs to be restarted – whether due to a software update, a configuration change, or an unexpected outage – a human operator must manually enter the passphrase to decrypt the key and allow Nginx to start serving HTTPS traffic. This process introduces friction into automated deployment pipelines, continuous integration/continuous delivery (CI/CD) workflows, and disaster recovery scenarios.
Consider an environment where servers are frequently restarted or scaled dynamically. Manually entering passphrases for numerous Nginx instances can become a significant bottleneck, potentially leading to increased downtime and human error. In fully automated environments, this manual step is often unacceptable, as it breaks the seamless flow of operations. The challenge, therefore, lies in finding a balance: maximizing the security benefits of an encrypted key while minimizing the operational overhead. This often involves exploring advanced automation techniques that can securely provide the passphrase to Nginx at startup, without compromising the very security that the encryption aims to achieve. The decision to encrypt a private key, and how to manage its decryption, thus requires a careful evaluation of an organization's security requirements, operational capabilities, and tolerance for manual intervention.
3. Generating a Password-Protected Private Key for Nginx
The process of securing your Nginx server with SSL/TLS begins with the creation of a robust and securely protected private key. This is typically accomplished using OpenSSL, a versatile command-line tool that provides a wide range of cryptographic functionalities. Understanding how to generate this key and its associated components correctly is crucial for establishing a strong security foundation.
3.1 Choosing the Right Encryption Algorithm (OpenSSL): A Cryptographic Toolkit
OpenSSL is the de facto standard for handling SSL/TLS certificates and keys on Linux and Unix-like systems. When generating a password-protected private key, OpenSSL offers various encryption algorithms to secure the key file itself. The choice of algorithm impacts the strength and performance of the encryption. Historically, algorithms like DES3 (Triple DES) were common, but due to modern cryptographic advancements and the increasing power of brute-force attacks, more robust algorithms are now recommended. AES256 (Advanced Encryption Standard with a 256-bit key) is generally considered the preferred choice today, offering a high level of security and widely supported by modern systems. Its strong cryptographic properties make it resistant to known attacks, providing a robust layer of protection for your private key.
When using OpenSSL, you specify the desired encryption algorithm as part of the command. For instance, to generate a new RSA private key that is immediately encrypted with AES256, you would incorporate the -aes256 flag. Similarly, -des3 would use Triple DES. It's important to keep OpenSSL updated on your server to leverage the latest cryptographic best practices and security patches. Regularly reviewing the recommended algorithms and practices from security experts ensures that your key encryption remains robust against evolving threats. While the key strength (e.g., 2048-bit or 4096-bit for RSA) relates to the strength of the RSA key itself, the encryption algorithm (e.g., AES256) applies to how the key file is protected on disk. Both contribute significantly to the overall security posture.
3.2 Step-by-Step Key Generation: From Raw Key to Encrypted Asset
The journey to an encrypted private key for Nginx involves a few distinct steps, all managed through OpenSSL. Each step builds upon the previous one, culminating in a secure .key file and the necessary components for your SSL/TLS certificate.
3.2.1 Generating a New RSA Private Key: The Raw Material
The very first step is to generate the raw, unencrypted private key. This key is typically an RSA key, and its length (e.g., 2048 bits or 4096 bits) dictates its cryptographic strength. While 2048-bit RSA keys are still considered secure for most applications, 4096-bit keys offer an even higher level of theoretical security, albeit with a slight performance overhead during the initial handshake.
To generate a 2048-bit RSA private key, you would use the following OpenSSL command:
openssl genrsa -out yourdomain.key 2048
This command creates a file named yourdomain.key which contains your private key in an unencrypted PKCS#1 format. At this stage, it is crucial to immediately secure this file with restrictive file permissions (e.g., chmod 400 yourdomain.key) to prevent unauthorized access, even if it's only temporarily unencrypted. This raw key is the foundation upon which your entire SSL/TLS security will be built.
3.2.2 Encrypting the Private Key with a Passphrase: Adding the Lock
Once you have your unencrypted private key, the next critical step is to encrypt it with a passphrase. This process converts the raw key file into a password-protected version, using an algorithm like AES256. This is where you introduce the additional layer of security that requires human intervention to unlock the key.
To encrypt an existing unencrypted private key (yourdomain.key) using AES256 and store the encrypted version as yourdomain-encrypted.key, you would execute:
openssl rsa -aes256 -in yourdomain.key -out yourdomain-encrypted.key
During this process, OpenSSL will prompt you to "Enter PEM pass phrase:" and then "Verifying - Enter PEM pass phrase:" (for confirmation). Choose a strong, complex passphrase that is difficult to guess or brute-force. It should be a lengthy string combining uppercase and lowercase letters, numbers, and symbols, similar to a secure password for a critical account. Once this command is successful, the yourdomain-encrypted.key file will contain your private key, now protected by the passphrase you just provided. The original yourdomain.key (unencrypted) can and should then be securely deleted or moved to an extremely secure, offline storage location if needed for backup, as it represents a significant vulnerability.
3.2.3 Creating a Certificate Signing Request (CSR): Requesting Your Identity
With your private key now securely encrypted, the next step in obtaining an SSL/TLS certificate is to generate a Certificate Signing Request (CSR). A CSR is a standardized block of encrypted text that contains your public key and information about your organization (e.g., common name, organization name, locality). You send this CSR to a Certificate Authority (CA) to request a signed certificate.
To create a CSR using your encrypted private key, you would use:
openssl req -new -key yourdomain-encrypted.key -out yourdomain.csr
OpenSSL will first prompt you to "Enter pass phrase for yourdomain-encrypted.key:". This is where you input the passphrase you set in the previous step to temporarily decrypt the key in memory and extract the public key needed for the CSR. After successfully entering the passphrase, you will be prompted to enter various details (country, state, organization, common name, etc.). It is crucial that the "Common Name" (e.g., www.yourdomain.com) exactly matches the domain name for which the certificate will be issued. The other fields provide identifying information that will be embedded within your certificate.
3.2.4 Obtaining the Signed Certificate: The Trust Anchor
After generating the CSR, you submit it to your chosen Certificate Authority (CA), such as Let's Encrypt, DigiCert, GlobalSign, or Comodo. The CA will verify your ownership of the domain (typically through DNS records or file-based validation) and, upon successful verification, will issue you a signed SSL/TLS certificate. This certificate typically comes in .crt or .pem format and often includes intermediate certificates that form a chain of trust back to the CA's root certificate.
Once you receive your signed certificate (e.g., yourdomain.crt) and any intermediate certificates, you will place them alongside your yourdomain-encrypted.key file in a secure directory on your Nginx server, ready for configuration. The certificate itself is public information and does not need password protection, but its integrity is validated by its digital signature, which relies on the CA's private key. The secure storage of your private key and the correct configuration of Nginx with both the certificate and the encrypted key are the final pieces of the puzzle for enabling HTTPS.
APIPark is a high-performance AI gateway that allows you to securely access the most comprehensive LLM APIs globally on the APIPark platform, including OpenAI, Anthropic, Mistral, Llama2, Google Gemini, and more.Try APIPark now! 👇👇👇
4. Configuring Nginx to Use an Encrypted Private Key
While generating a password-protected private key is a robust security measure, integrating it with Nginx introduces a specific operational challenge: Nginx, by design, cannot interactively prompt for a passphrase during its startup sequence. This fundamental limitation necessitates careful planning and alternative strategies to ensure that your server can boot successfully and serve HTTPS traffic while still leveraging the enhanced security of an encrypted private key.
4.1 The Challenge: Nginx and Passphrases – A Design Limitation
The core issue stems from how Nginx, like many server processes designed for automated operation, handles its startup. When Nginx initializes, it expects to load its configuration files, including the SSL/TLS certificate and private key, without requiring any interactive input. If the private key file specified in the ssl_certificate_key directive is encrypted, Nginx will attempt to read it, encounter the encryption, and fail because it has no mechanism to prompt for the necessary passphrase. This results in an SSL_CTX_use_PrivateKey_file() error, preventing Nginx from starting or restarting correctly and effectively taking your HTTPS services offline.
Historically, there was an Nginx directive called ssl_password_file which theoretically allowed you to point Nginx to a file containing the passphrase. However, this directive is rarely used in production environments and is often considered a poor security practice. Storing the passphrase in a plaintext file on the same server that holds the encrypted key largely negates the security benefits of encrypting the key in the first place. An attacker who gains access to the server would likely find both the encrypted key and its decryption passphrase, rendering the encryption useless. For this reason, modern deployments generally avoid ssl_password_file and opt for more robust, albeit more complex, solutions for managing encrypted keys. The challenge, therefore, is not merely to get Nginx to use the key, but to securely decrypt the key before Nginx even attempts to load it.
4.2 The Standard Approach: Decrypting the Key at Boot-time (or Pre-deployment)
Given Nginx's inability to interactively handle passphrases, the most common and secure approach involves decrypting the private key before Nginx starts, and then configuring Nginx to use the temporarily decrypted, unencrypted version. This strategy moves the passphrase management away from Nginx itself and into the realm of system startup scripts or secure secret management systems.
4.2.1 Manual Decryption: A Hands-On Approach
For environments with fewer servers, less frequent restarts, or stringent security policies requiring human oversight for every critical operation, manual decryption might be a viable, albeit labor-intensive, option. This involves a human operator explicitly decrypting the key whenever the Nginx server needs to start or restart.
The process is straightforward: 1. Decrypt the key: Using OpenSSL, you manually decrypt the password-protected key into a temporary, unencrypted file. bash openssl rsa -in /etc/ssl/private/yourdomain-encrypted.key -out /etc/ssl/private/yourdomain-decrypted.key You will be prompted to "Enter pass phrase for /etc/ssl/private/yourdomain-encrypted.key:". After entering the correct passphrase, an unencrypted version of your private key will be saved to /etc/ssl/private/yourdomain-decrypted.key. 2. Set permissions: Crucially, set very strict permissions on the decrypted key file, ensuring only the Nginx user can read it. bash chmod 400 /etc/ssl/private/yourdomain-decrypted.key chown root:nginx /etc/ssl/private/yourdomain-decrypted.key (Note: The Nginx user/group might vary, commonly www-data or nginx). 3. Configure Nginx: Update your Nginx configuration to point to this newly decrypted key file. ```nginx server { listen 443 ssl; server_name yourdomain.com;
    ssl_certificate /etc/ssl/certs/yourdomain.crt;
    ssl_certificate_key /etc/ssl/private/yourdomain-decrypted.key; # Point to the decrypted key

    # ... other Nginx directives
}
```
- Start/Restart Nginx: With the key decrypted and Nginx configured, you can now safely start or restart your Nginx service.
bash sudo systemctl restart nginx - Clean up (critical!): Once Nginx is running, it is paramount to securely delete the
yourdomain-decrypted.keyfile. Nginx loads the key into memory at startup, so the file is no longer needed on disk while Nginx is running. Leaving an unencrypted key on disk, even temporarily, introduces a significant security vulnerability.bash rm /etc/ssl/private/yourdomain-decrypted.keyThis manual process, while secure when executed diligently, is clearly not scalable or automation-friendly.
4.2.2 Automated Decryption (with extreme caution): Balancing Security and Efficiency
For environments requiring high availability and automation, such as those relying on CI/CD pipelines, automated decryption becomes necessary. This is where the balance between security and operational efficiency becomes most delicate. The goal is to provide the passphrase to the openssl command programmatically during server startup without exposing it in a persistent, easily accessible manner.
One common method involves using a startup script (e.g., within a systemd service file or an init script) that executes the decryption command. The passphrase itself must be sourced from an extremely secure location, often an environment variable or, more robustly, a dedicated secret management system.
Example using a systemd service unit:
First, ensure your encrypted key and certificate are in place, and Nginx is configured to point to a placeholder for the decrypted key.
- Create a cleanup script (e.g.,
/usr/local/bin/cleanup-nginx-key.sh):bash #!/bin/bash DECRYPTED_KEY="/techblog/en/etc/ssl/private/yourdomain-decrypted.key" if [ -f "$DECRYPTED_KEY" ]; then rm "$DECRYPTED_KEY" echo "Cleaned up decrypted key: $DECRYPTED_KEY" fi exit 0Make this script executable:chmod +x /usr/local/bin/cleanup-nginx-key.sh. - Modify Nginx systemd service unit (
/etc/systemd/system/nginx.service.d/override.conf): (Create this directory and file if it doesn't exist to avoid modifying the main Nginx service file directly)ini [Service] ExecStartPre=/usr/local/bin/decrypt-nginx-key.sh ExecStopPost=/usr/local/bin/cleanup-nginx-key.sh EnvironmentFile=/etc/default/nginx-key-passphrase # File containing NGINX_KEY_PASSPHRASEYou would then create/etc/default/nginx-key-passphrasecontaining:NGINX_KEY_PASSPHRASE="YourSuperSecretPassphraseHere"WARNING: Storing the passphrase in a plaintext file on the server, even with restrictive permissions, is a significant security risk. This approach is only marginally better thanssl_password_fileand is generally not recommended for production environments.
Create a script (e.g., /usr/local/bin/decrypt-nginx-key.sh): ```bash #!/bin/bash
Path to your encrypted key
ENCRYPTED_KEY="/techblog/en/etc/ssl/private/yourdomain-encrypted.key"
Path where the decrypted key will be temporarily stored
DECRYPTED_KEY="/techblog/en/etc/ssl/private/yourdomain-decrypted.key"
Ensure passphrase is provided as an environment variable (e.g., NGINX_KEY_PASSPHRASE)
if [ -z "$NGINX_KEY_PASSPHRASE" ]; then echo "Error: NGINX_KEY_PASSPHRASE environment variable not set." >&2 exit 1 fi
Decrypt the key using the passphrase
echo "$NGINX_KEY_PASSPHRASE" | openssl rsa -in "$ENCRYPTED_KEY" -out "$DECRYPTED_KEY" -passin stdinif [ $? -ne 0 ]; then echo "Error: Key decryption failed." >&2 exit 1 fi
Set strict permissions
chmod 400 "$DECRYPTED_KEY" chown root:nginx "$DECRYPTED_KEY" # Adjust user/group as per your Nginx installationecho "Key decrypted successfully to $DECRYPTED_KEY" exit 0 `` Make this script executable:chmod +x /usr/local/bin/decrypt-nginx-key.sh`.
More Secure Automated Decryption:
For truly secure automation, the passphrase should not be stored directly on the Nginx server in a static file. Instead, it should be retrieved dynamically from a secret management system (e.g., HashiCorp Vault, AWS Secrets Manager, Google Secret Manager, Azure Key Vault, Kubernetes Secrets).
The ExecStartPre script would then be modified to: * Authenticate with the secret management system. * Retrieve the passphrase securely. * Use the retrieved passphrase to decrypt the key.
This involves additional complexity, including setting up the secret management system, configuring authentication for your Nginx host/service, and ensuring network connectivity. However, it represents the gold standard for automated passphrase management, significantly reducing the attack surface.
4.3 Nginx Configuration Snippets: Pointing to the Key
Regardless of whether you choose manual or automated decryption, the final Nginx configuration for SSL/TLS will point to the decrypted private key file. Your main Nginx configuration file (or a virtual host configuration file within sites-available or conf.d) will contain a server block for your HTTPS traffic.
Here's an example:
server {
    listen 443 ssl http2; # Listen on port 443 for SSL/TLS, enabling HTTP/2 for performance
    listen [::]:443 ssl http2; # For IPv6
    server_name yourdomain.com www.yourdomain.com; # Your domain name(s)

    # Path to your full certificate chain (including intermediate certificates)
    ssl_certificate /etc/ssl/certs/yourdomain_fullchain.crt;

    # Path to your (temporarily) decrypted private key
    ssl_certificate_key /etc/ssl/private/yourdomain-decrypted.key;

    # Strong SSL/TLS protocols and ciphers for modern security
    ssl_protocols TLSv1.2 TLSv1.3;
    ssl_ciphers 'TLS_AES_128_GCM_SHA256:TLS_AES_256_GCM_SHA384:TLS_CHACHA20_POLY1305_SHA256:ECDHE-RSA-AES128-GCM-SHA256:ECDHE-RSA-AES256-GCM-SHA384:DHE-RSA-AES128-GCM-SHA256:DHE-RSA-AES256-GCM-SHA384';
    ssl_prefer_server_ciphers off; # Ensures server uses strong client ciphers if preferred

    # HSTS (HTTP Strict Transport Security) to enforce HTTPS
    add_header Strict-Transport-Security "max-age=31536000; includeSubDomains; preload" always;

    # OCSP Stapling for faster certificate validation
    ssl_stapling on;
    ssl_stapling_verify on;
    ssl_trusted_certificate /etc/ssl/certs/yourdomain_fullchain.crt; # Same as ssl_certificate for most cases
    resolver 8.8.8.8 8.8.4.4 valid=300s; # Google DNS, adjust to your preferred resolvers
    resolver_timeout 5s;

    # ... other Nginx directives for location blocks, proxying, etc.
}
This configuration snippet demonstrates the essential ssl_certificate and ssl_certificate_key directives, pointing to the certificate and the decrypted key, respectively. The other directives (ssl_protocols, ssl_ciphers, add_header Strict-Transport-Security, ssl_stapling) are critical for implementing modern SSL/TLS best practices and should be carefully configured to achieve optimal security and performance. Once Nginx successfully loads the decrypted key, it operates normally, serving HTTPS traffic with the full cryptographic protection.
5. Advanced Strategies and Best Practices for Key Management
Securing private keys for Nginx goes beyond mere encryption. It encompasses a holistic approach to key lifecycle management, including secure storage, robust automation, regular rotation, and continuous monitoring. These advanced strategies ensure that the keys remain protected throughout their operational lifespan and that the overall web server infrastructure maintains a high level of security.
5.1 Secure Key Storage: Protecting the Vault
Even an encrypted private key is only as secure as its storage location and permissions. It is paramount to treat all key material with extreme care, regardless of its encryption status. The following best practices are non-negotiable for secure key storage:
- Restrictive File Permissions: The most immediate and critical step is to apply stringent file permissions. The private key file should be readable only by the
rootuser and the Nginx process user (e.g.,nginx,www-data). No other user or group should have read, write, or execute permissions.bash sudo chmod 400 /etc/ssl/private/yourdomain-encrypted.key sudo chown root:nginx /etc/ssl/private/yourdomain-encrypted.key # Adjust group as necessarySimilarly, the certificate file should also have restricted permissions, typically readable byrootand the Nginx user. - Dedicated Directories: Store all SSL/TLS related files (certificates, keys, CSRs) in dedicated, isolated directories that are not directly web-accessible. Common locations include
/etc/ssl/privatefor private keys and/etc/ssl/certsfor certificates. These directories should also have strict permissions. - Hardware Security Modules (HSMs) and Cloud Key Management Services (KMS): For high-security environments, enterprise-level applications, or organizations handling highly sensitive data (e.g., financial institutions), offloading private key management to Hardware Security Modules (HSMs) or cloud-based Key Management Services (KMS) is the gold standard. HSMs are physical cryptographic devices that securely generate, store, and protect cryptographic keys within a tamper-resistant environment. They prevent the keys from ever being exposed in plaintext, even to administrators. Cloud KMS offerings (like AWS KMS, Google Cloud Key Management, Azure Key Vault) provide similar benefits in a cloud context, allowing you to manage and use cryptographic keys while keeping them protected within the cloud provider's secure infrastructure. While more complex to integrate, HSMs/KMS significantly enhance security by removing the private key from the general-purpose server's file system entirely, preventing compromise even if the server itself is fully breached. They interact with Nginx via PKCS#11 modules or other API integrations, enabling SSL/TLS operations without the key ever leaving the secure module.
5.2 Automating Decryption Securely: The Art of Balance
As discussed, manual decryption is impractical for scalable, automated environments. Secure automation of key decryption requires careful architectural design, balancing the need for efficiency with uncompromised security.
- Integration with Configuration Management Tools: Tools like Ansible, Puppet, or Chef can be used to manage the deployment and configuration of Nginx, including SSL/TLS certificates and keys. These tools can securely retrieve passphrases or decrypted keys from integrated secret management systems (e.g., Ansible Vault, eyaml for Puppet) and then deploy the decrypted key to the Nginx server just before a service restart, immediately cleaning it up afterward. This ensures that the plaintext key is only present on the disk for the absolute minimum necessary time.
- Using Secret Management Systems (Vault, Kubernetes Secrets, AWS Secrets Manager): This is the recommended approach for automated decryption in production environments. A dedicated secret management system acts as a centralized, secure repository for sensitive data, including private key passphrases.
- Centralized Storage: The passphrase for the encrypted private key is stored securely within the secret management system, not directly on the Nginx server.
- Dynamic Retrieval: At Nginx startup, a pre-start script (as outlined in section 4.2.2) authenticates with the secret management system (using roles, tokens, or IAM credentials), retrieves the passphrase, decrypts the Nginx private key, and places the decrypted key in the Nginx configuration path.
- Ephemeral Decryption: Once Nginx has started and loaded the key into memory, the decrypted key file is immediately and securely deleted from the disk. This ensures that the plaintext key is never stored persistently on the Nginx server itself, significantly reducing its exposure window.
- Auditability: Most secret management systems offer comprehensive auditing capabilities, allowing you to track who accessed which secret, when, and from where, providing a crucial layer of accountability.
- The
ssl_password_fileDirective (Revisited): Whilessl_password_fileexists, storing a plaintext passphrase in a file on the server is almost universally discouraged for production environments due to its inherent security risks. If an attacker gains file system access, both the encrypted key and its passphrase file would likely be compromised. Its only justifiable use might be in highly controlled, isolated development environments, or in niche scenarios where the passphrase file itself is protected by an even stronger, ephemeral encryption method, which quickly adds significant complexity. Generally, it's best to avoid this directive in favor of dynamic secret retrieval.
5.3 Key Rotation and Lifecycle Management: A Dynamic Security Posture
Cryptographic keys, like passwords, should not be static. Regular key rotation is a fundamental security practice that limits the damage from a potential compromise and helps maintain a dynamic security posture.
- Regular Key Rotation: Establishing a policy for routine private key rotation (e.g., annually, biennially) is crucial. Even if a key has not been compromised, rotating it reduces the window of opportunity for an attacker to exploit a long-lived key. This involves generating a completely new private key, obtaining a new certificate from the CA, and updating Nginx configurations.
- Certificate Renewal Processes: Private keys are intrinsically linked to SSL/TLS certificates, which have finite lifespans. Automating certificate renewal (e.g., using Certbot with Let's Encrypt) is essential to prevent service outages. While Certbot primarily handles certificate renewal, it can also be configured to generate new private keys upon renewal, contributing to key rotation.
- Auditing and Logging Key Access: All operations involving private keys – generation, encryption, decryption, access, and deletion – should be meticulously logged. These logs should be sent to a centralized logging system and monitored for suspicious activity. Comprehensive auditing provides an immutable record for forensic analysis in the event of a security incident.
5.4 Monitoring Nginx for Key-Related Issues: Vigilance is Key
Even with robust configuration, continuous monitoring is essential to detect and address key-related issues proactively.
- Log File Analysis: Regularly review Nginx error logs and system logs (e.g.,
/var/log/nginx/error.log,journalctl) for any SSL/TLS errors, especially those related to loading the private key or certificate. Error messages likeSSL_CTX_use_PrivateKey_file()orX509_check_private_key:key values mismatchare clear indicators of problems. - Health Checks for SSL/TLS Services: Implement external health checks (e.g., using
curl -vI https://yourdomain.comor dedicated monitoring tools) that specifically verify the SSL/TLS handshake. These checks can alert you immediately if your server stops serving HTTPS traffic or if the certificate appears invalid or expired, allowing for swift intervention. - Certificate Expiry Monitoring: Utilize monitoring tools (e.g., Prometheus with exporters, specialized certificate monitoring services) to track the expiry dates of your SSL/TLS certificates. Receiving alerts well in advance of expiry provides ample time to initiate renewal processes and prevent unexpected service interruptions.
| Key Management Aspect | Description | Best Practices | Security Impact | Operational Impact |
|---|---|---|---|---|
| Key Generation | Creation of the private and public key pair. | Use strong algorithms (e.g., RSA 4096-bit, ECDSA). | High: Basis of cryptographic strength. | Low: One-time effort. |
| Key Encryption | Protecting the private key file on disk with a passphrase. | Use robust algorithms (e.g., AES256). Strong, unique passphrases. | Very High: Prevents unauthorized key use if file is stolen. | Medium: Requires passphrase management at startup. |
| Key Storage | Where and how the key file is kept. | Restrictive file permissions (400), dedicated directories, HSM/KMS. | Very High: Protects against file system compromise. | Medium: Requires careful setup of permissions/integrations. |
| Automated Decryption | Programmatic un-encryption of key for Nginx startup. | Secret management systems (Vault, KMS) for passphrase retrieval. | High: Reduces human error, but introduces new attack vectors if misconfigured. | High: Simplifies restarts, enables CI/CD. Complex initial setup. |
| Key Rotation | Periodically replacing keys with new ones. | Defined rotation schedule (e.g., annual), automated renewal. | High: Limits exposure window of a compromised key. | Medium: Requires planned downtime or seamless certificate update mechanism. |
| Monitoring & Auditing | Tracking key status, access, and SSL/TLS health. | Centralized logging, expiry alerts, SSL/TLS health checks. | High: Proactive detection of issues and accountability. | Medium: Requires setup of monitoring infrastructure. |
6. Overcoming Operational Hurdles with Encrypted Keys
While the security benefits of using password-protected private keys with Nginx are significant, their implementation often introduces operational complexities, particularly in high-availability or highly automated environments. Addressing these hurdles requires careful planning, robust scripting, and a clear understanding of the trade-offs involved.
6.1 Server Restarts and Automation: Navigating the Passphrase Paradox
The most immediate operational hurdle presented by encrypted private keys is the requirement for a passphrase during server restarts. In a modern infrastructure, servers are frequently restarted for various reasons: applying operating system updates, patching Nginx itself, modifying Nginx configurations, or performing planned maintenance. Each of these events necessitates the decryption of the private key, which, if not properly automated, can lead to unacceptable downtime and increased operational burden.
Developing robust restart procedures is crucial. For development and staging environments, where security might be slightly relaxed (though still essential), a simple manual passphrase entry during scheduled maintenance windows might suffice. However, for production systems, especially those requiring high uptime, fully automated solutions are indispensable. As discussed in Section 4.2.2, integrating with secret management systems (like HashiCorp Vault or cloud KMS) becomes the preferred method. This allows Nginx to be restarted programmatically, with the passphrase being securely fetched and used to decrypt the key just before Nginx starts. The decrypted key is then immediately wiped from the disk after Nginx loads it into memory. This integration transforms what would be a manual bottleneck into a seamless, secure, and automated process, ensuring that CI/CD pipelines can deploy updates and configuration changes without human intervention for key decryption. The initial setup cost for such systems is higher, but the long-term benefits in terms of security, reliability, and operational efficiency are substantial, aligning perfectly with the demands of scalable web services.
6.2 Disaster Recovery Planning: Ensuring Business Continuity
The secure handling of private keys extends fundamentally into disaster recovery planning. A lost or inaccessible private key, especially for a critical service, can be as detrimental as a complete server failure, potentially rendering your HTTPS services unusable. Therefore, a comprehensive disaster recovery strategy must explicitly address the backup, storage, and recovery of encrypted private keys.
Firstly, secure backups of your encrypted private keys (along with their corresponding certificates and the passphrase) are paramount. These backups should be stored offline, in geographically separate locations, and with the same or even stronger levels of encryption and access control as the live key. For instance, storing backups on an encrypted USB drive in a bank vault or leveraging cloud storage services with robust encryption and multi-factor authentication for access are common strategies. Simply copying the encrypted key to another server without additional protection is insufficient.
Secondly, well-documented recovery procedures for key loss or corruption are essential. This includes step-by-step instructions on how to retrieve the backup, decrypt it using the passphrase, and restore it to a new or recovered Nginx instance. These procedures should be regularly tested, ideally as part of broader disaster recovery drills, to ensure their efficacy and identify any potential pitfalls before a real crisis occurs. The passphrase for the encrypted backup key should also be managed with extreme care, perhaps in a different secure location (e.g., an offline password manager, a physical vault) than the live operational passphrase. A robust disaster recovery plan for encrypted private keys ensures that, even in the face of catastrophic events, your web services can quickly regain their secure communication capabilities, minimizing downtime and maintaining user trust.
6.3 The Role of an API Gateway in Modern Architectures: Centralizing Security and Simplification
In increasingly complex distributed systems and microservices architectures, managing SSL/TLS termination and private keys across numerous Nginx instances, each potentially serving different services or components, can become a significant operational burden. This is where the concept of an API Gateway shines as a powerful architectural pattern. An API Gateway acts as a single entry point for all API calls to your backend services, handling common cross-cutting concerns like authentication, authorization, rate limiting, and crucially, SSL/TLS termination. By centralizing these functions, organizations can significantly simplify the management of certificates and private keys.
Instead of configuring each backend Nginx server or microservice with its own encrypted key and decryption mechanism, the API Gateway can manage the primary SSL/TLS handshake. This means the gateway handles the public-facing HTTPS connection, decrypts incoming requests using its own private key, and then forwards the (potentially unencrypted or internally re-encrypted) requests to the appropriate backend services. This approach allows backend services to communicate over internal, often less exposed or even unencrypted (though internal encryption is still recommended for sensitive data) channels, thereby reducing the attack surface and operational complexity on individual microservices or backend Nginx instances. The responsibility for securing the "last mile" to the user, including the management of the highly sensitive private key and its passphrase, is consolidated at a single, well-protected point.
For those seeking a robust, open-source solution to manage their APIs and even integrate AI models, platforms like APIPark offer a comprehensive suite of features that align perfectly with this architectural approach. APIPark, an open-source AI gateway and API management platform, excels not only at quickly integrating over 100 AI models and providing unified API formats but also at streamlining the entire API lifecycle. Its capabilities include end-to-end API lifecycle management, performance rivaling Nginx (achieving over 20,000 TPS with modest hardware), and detailed API call logging—all critical for secure and efficient API operations. By consolidating API management, including aspects like SSL/TLS offloading and centralized certificate management at the gateway level, APIPark can significantly streamline infrastructure, reduce the burden on individual backend servers, and enhance overall system security and maintainability. This allows developers to focus on core application logic while relying on the gateway for critical cross-cutting concerns, making the management of sensitive assets like private keys more centralized, controllable, and efficient across an enterprise's diverse service offerings, from traditional REST APIs to advanced AI-driven functionalities.
7. Troubleshooting Common Issues with Encrypted Nginx Keys
Even with meticulous planning and configuration, issues can arise when working with password-protected Nginx keys. Understanding common error messages and their root causes is vital for quick diagnosis and resolution, minimizing potential downtime for your secure web services.
7.1 Incorrect Passphrase: The Most Common Pitfall
By far the most frequent issue encountered when using encrypted private keys is an incorrect passphrase. If the passphrase provided during decryption (either manually or via an automated script) does not match the one used to encrypt the key, OpenSSL will fail to decrypt it, and consequently, Nginx will be unable to load the key.
Common Error Messages in Nginx logs (/var/log/nginx/error.log or journalctl -xe):
nginx: [emerg] SSL_CTX_use_PrivateKey_file("/techblog/en/etc/ssl/private/yourdomain-decrypted.key") failed (SSL: error:0B080074:x509 certificates routines:X509_check_private_key:key values mismatch)
or
nginx: [emerg] PEM_read_bio_PrivateKey() failed (SSL: error:0906700D:PEM routines:PEM_ASN1_read_bio:ASN1 lib)
or if the openssl decryption command itself failed:
Error: Key decryption failed.
(This message would come from your custom decryption script if implemented.)
Diagnosis and Solution: * Verify Passphrase: The first step is to confirm the passphrase you are using is absolutely correct. It's incredibly easy to make a typo, especially with complex passphrases. Double-check case sensitivity, special characters, and any leading/trailing spaces. * Manual Decryption Test: Attempt to manually decrypt the key using the openssl rsa command (as shown in Section 4.2.1). If it prompts for the passphrase and fails, you've confirmed an incorrect passphrase. If it succeeds, the issue might lie in how your automated script is providing the passphrase (e.g., incorrect environment variable, malformed input). * Check Automated Script: If using an automated decryption script, carefully review how the passphrase is being passed to OpenSSL. Ensure the environment variable is correctly set and accessible to the script, and that echo "$PASSPHRASE" | openssl ... -passin stdin syntax is correctly implemented to avoid interactive prompts.
7.2 File Permissions: The Access Denied Barrier
Even if the key is correctly decrypted, Nginx still needs the appropriate file system permissions to read it. If the permissions are too restrictive for the Nginx process user, or too lax (which is a security risk), Nginx will fail to load the key.
Common Error Messages in Nginx logs:
nginx: [emerg] cannot load certificate key "/techblog/en/etc/ssl/private/yourdomain-decrypted.key": BIO_read_filename failed (SSL: error:0B084002:x509 certificates routines:X509_load_cert_crl_file:system lib)
This error message typically indicates that Nginx does not have sufficient permissions to read the specified key file. The "system lib" part suggests a low-level file access issue.
Diagnosis and Solution: * Check File Permissions: Use ls -l /etc/ssl/private/yourdomain-decrypted.key to check the file's ownership and permissions. * Verify Nginx User: Determine which user Nginx runs as (often www-data, nginx, or nobody). This can usually be found in your nginx.conf file (look for the user directive) or by checking the running Nginx processes: ps aux | grep nginx. * Adjust Permissions: Ensure the decrypted key file has permissions 400 (read-only for owner) and is owned by root with its group set to the Nginx user's group, or directly owned by the Nginx user. bash sudo chmod 400 /etc/ssl/private/yourdomain-decrypted.key sudo chown root:nginx /etc/ssl/private/yourdomain-decrypted.key # Replace 'nginx' with your actual Nginx user/group Remember that the encrypted key file should also have similarly strict permissions (400).
7.3 Certificate/Key Mismatch: The Identity Crisis
Another common issue arises when the private key being used does not match the public key embedded within the SSL/TLS certificate. Every certificate is cryptographically linked to a specific private key; they are a pair. If you attempt to use a private key with a certificate that was generated from a different key pair, Nginx will detect this mismatch and refuse to load them.
Common Error Messages in Nginx logs:
nginx: [emerg] SSL_CTX_use_PrivateKey_file("/techblog/en/etc/ssl/private/yourdomain-decrypted.key") failed (SSL: error:0B080074:x509 certificates routines:X509_check_private_key:key values mismatch)
This specific error message is a strong indicator of a certificate/key mismatch.
Diagnosis and Solution: * Verify Key and Certificate Match: You can use OpenSSL to compare the modulus of your private key and your certificate to ensure they belong to the same pair. * Get key modulus: bash openssl rsa -noout -modulus -in /etc/ssl/private/yourdomain-decrypted.key | openssl md5 * Get certificate modulus: bash openssl x509 -noout -modulus -in /etc/ssl/certs/yourdomain.crt | openssl md5 * Compare: The MD5 hashes (or the raw modulus values) produced by these two commands must be identical. If they differ, your key and certificate do not match. * Root Cause: * You might be using an old key with a newly renewed certificate (or vice-versa). * You might have accidentally generated a new key without generating a corresponding new CSR and getting a new certificate signed. * You might be pointing to the wrong key or certificate file in your Nginx configuration. * Resolution: Ensure you are using the correct, matching pair of private key and certificate. If necessary, re-generate your private key, create a new CSR, and obtain a fresh certificate from your CA. Always double-check your ssl_certificate and ssl_certificate_key directives in your Nginx configuration.
By systematically approaching these common troubleshooting scenarios, you can quickly identify and rectify issues related to password-protected Nginx keys, maintaining the continuous and secure operation of your web services.
Conclusion: Mastering Secure Nginx Operations with Encrypted Keys
The journey through the intricacies of using Nginx with a password-protected .key file reveals a fundamental truth about cybersecurity: true security is a delicate balance between robust protection mechanisms and operational efficiency. While the initial setup and ongoing management of encrypted private keys introduce complexities, the enhanced security they provide against various threats — from unauthorized disk access to insider threats — unequivocally justifies the effort. By encrypting your private key, you erect an additional, formidable barrier that significantly raises the bar for potential attackers, protecting the very core of your SSL/TLS encrypted communications.
We have traversed the landscape from understanding the critical nature of the private key in SSL/TLS to the practical, step-by-step generation of an encrypted key using OpenSSL. We then delved into the crucial operational challenge of integrating these keys with Nginx, exploring both manual and sophisticated automated decryption strategies leveraging secret management systems to circumvent Nginx's inability to interactively prompt for passphrases. Beyond mere configuration, we emphasized the importance of advanced key management best practices, including secure storage methodologies, dynamic key rotation, and vigilant monitoring—all essential components of a proactive security posture. Furthermore, we touched upon how modern architectural patterns, such as deploying an API Gateway like APIPark, can centralize and simplify the management of SSL/TLS and private keys in complex, distributed environments, transforming individual server security challenges into a more manageable, infrastructure-wide concern.
In an ever-evolving threat landscape, complacency is the greatest vulnerability. Mastering the use of password-protected private keys for Nginx is not merely a technical exercise; it is an investment in the integrity, privacy, and trust of your digital services. By diligently applying these principles and continuously refining your security practices, you empower your Nginx servers to stand as resilient guardians of your online presence, ensuring that your web applications remain both secure and seamlessly operational for your users.
5 Frequently Asked Questions (FAQs)
Q1: Why should I bother password-protecting my Nginx private key if Nginx can't prompt for the password at startup anyway? A1: Password-protecting your Nginx private key adds a crucial layer of "defense in depth." While it's true Nginx cannot interactively prompt for a passphrase, the encryption protects the key file itself on disk. If an attacker gains unauthorized access to your server's file system (e.g., through a separate software vulnerability, stolen credentials, or physical disk theft), they would still need to crack the passphrase to use the private key. Without encryption, a compromised file system immediately exposes your key, allowing attackers to decrypt your traffic or impersonate your server. Secure automation methods (like using secret management systems) allow you to securely provide the passphrase during startup without compromising the key's on-disk protection.
Q2: What is the most secure way to automate the decryption of a password-protected Nginx private key for an automated server restart? A2: The most secure way involves using a dedicated secret management system (e.g., HashiCorp Vault, AWS Secrets Manager, Google Cloud Secret Manager). At server startup, a pre-start script (e.g., a systemd ExecStartPre directive) dynamically authenticates with the secret management system, retrieves the passphrase, uses it to decrypt the private key into a temporary file, and then starts Nginx. Once Nginx has loaded the key into memory and is running, the temporary decrypted key file is immediately and securely deleted from disk. This ensures the passphrase is never stored persistently on the Nginx server in plaintext, and the decrypted key exists on disk for only a minimal duration.
Q3: My Nginx server won't start after configuring an encrypted private key, and I see key values mismatch or PEM routines errors in the logs. What should I check first? A3: This error typically indicates either an incorrect passphrase or a mismatch between your SSL/TLS certificate and the private key. 1. Incorrect Passphrase: First, manually attempt to decrypt the private key using openssl rsa -in yourdomain-encrypted.key -out yourdomain-decrypted.key. If it asks for a passphrase and fails, your passphrase is wrong. If it succeeds, the issue might be with how your automated script is providing the passphrase. 2. Certificate/Key Mismatch: If the passphrase is correct, verify that your certificate and private key are a matching pair. You can compare their moduli using OpenSSL: openssl rsa -noout -modulus -in yourkey.key | openssl md5 and openssl x509 -noout -modulus -in yourcert.crt | openssl md5. The MD5 hashes should be identical. If not, you are using mismatched files and need to locate the correct pair or generate a new one.
Q4: Can I use the ssl_password_file directive in Nginx to automate the passphrase entry? Is it secure? A4: While the ssl_password_file directive technically exists, it is highly discouraged for production environments due to significant security risks. It involves storing the passphrase in a plaintext file directly on the Nginx server, which largely negates the security benefits of encrypting the private key itself. If an attacker gains access to your server's file system, they would likely find both the encrypted key and the file containing its decryption passphrase, rendering the encryption useless. It's generally better to avoid this directive and opt for more robust, dynamic secret management solutions.
Q5: How does an API Gateway like APIPark help with SSL/TLS and private key management in a complex architecture? A5: An API Gateway (such as APIPark) centralizes SSL/TLS termination. Instead of configuring and managing encrypted private keys on numerous individual Nginx backend servers or microservices, the API Gateway handles the public-facing HTTPS connections and the initial SSL/TLS handshake. This means you only need to manage the primary private key and its passphrase on the gateway itself. The gateway then forwards requests to backend services, often over an internal, trusted (and potentially re-encrypted) network. This approach significantly simplifies private key management, reduces the attack surface on individual backend components, streamlines certificate rotation, and enhances overall security and operational efficiency for complex, distributed systems. APIPark specifically offers robust API lifecycle management and high performance, making it an excellent choice for centralizing such critical infrastructure concerns.
🚀You can securely and efficiently call the OpenAI API on APIPark in just two steps:
Step 1: Deploy the APIPark AI gateway in 5 minutes.
APIPark is developed based on Golang, offering strong product performance and low development and maintenance costs. You can deploy APIPark with a single command line.
curl -sSO https://download.apipark.com/install/quick-start.sh; bash quick-start.sh

In my experience, you can see the successful deployment interface within 5 to 10 minutes. Then, you can log in to APIPark using your account.

Step 2: Call the OpenAI API.