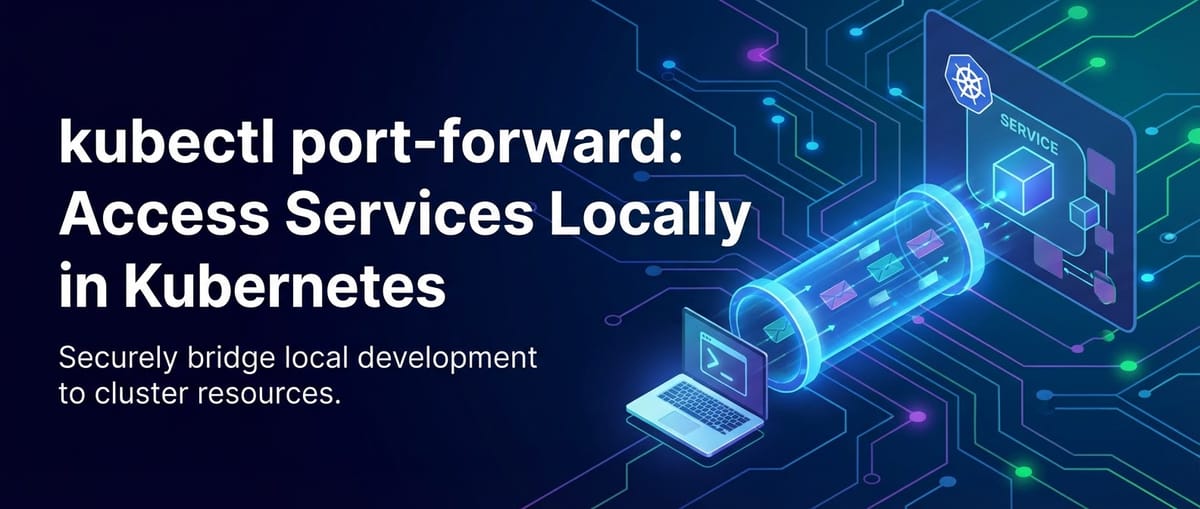
kubectl port-forward: Access Services Locally in Kubernetes


In the intricate landscape of modern cloud-native development, Kubernetes stands as the undisputed orchestrator of containerized applications. It provides a robust, scalable, and resilient environment for deploying and managing microservices. However, the very isolation and distributed nature that make Kubernetes powerful can also present challenges for developers and operators who need to interact directly with individual services running within the cluster, especially during development, debugging, or troubleshooting phases. This is where the humble yet incredibly powerful kubectl port-forward command enters the picture, serving as an indispensable bridge between your local machine and services residing deep within your Kubernetes cluster.
This comprehensive guide will meticulously explore kubectl port-forward, delving into its core mechanics, diverse applications, advanced configurations, inherent security considerations, and how it fits into the broader ecosystem of Kubernetes service exposure. We will unravel its capabilities, provide practical examples, and discuss best practices to ensure you leverage this tool effectively and securely. Furthermore, we'll examine its relationship with broader API management strategies and gateway technologies, providing a holistic view of accessing and managing services within and outside your Kubernetes deployments.
The Challenge of Local Access in a Distributed Environment
Before diving into kubectl port-forward, it's crucial to understand the problem it solves. In a traditional monolithic application architecture, accessing a service meant running it locally or connecting directly to a known IP address and port on a server. With Kubernetes, this paradigm shifts dramatically. Your applications, or rather their constituent microservices, are encapsulated within containers, which are then scheduled onto nodes in a cluster. These containers are ephemeral, have dynamically assigned internal IP addresses, and are often shielded from direct external access by default.
Consider a typical Kubernetes setup: * Pods: The smallest deployable units in Kubernetes, containing one or more containers. Each Pod gets its own internal IP address. * Services: An abstraction layer that defines a logical set of Pods and a policy by which to access them. Services provide stable IP addresses and DNS names within the cluster, enabling internal communication. * Nodes: The virtual or physical machines that run your Pods. * Cluster Network: A private network that allows Pods and Services to communicate with each other, often isolated from external networks.
When you, as a developer, are working on a new feature for a frontend application, and that frontend needs to communicate with a backend API service running in your Kubernetes development cluster, how do you do it? You can't simply point your local frontend to a Pod's IP address because Pods are ephemeral and their IPs are internal to the cluster. You could expose the backend service externally using a NodePort, LoadBalancer, or Ingress controller, but these methods often involve public exposure, DNS configuration, and can be overkill or even risky for temporary development or debugging tasks. This is precisely the gap kubectl port-forward fills, offering a direct, temporary, and localized tunnel to your Kubernetes services without exposing them publicly.
What is kubectl port-forward? A Developer's Direct Line
At its heart, kubectl port-forward establishes a secure, bidirectional network tunnel between a port on your local machine and a port on a specific Pod, Deployment, Service, or StatefulSet within your Kubernetes cluster. It effectively makes a service running inside your cluster appear as if it's running on your local machine on a specified port. This means you can use localhost:<local-port> to interact with the service, just as you would with any local application.
The command leverages the Kubernetes API server to initiate this connection. When you execute kubectl port-forward, your kubectl client communicates with the API server, which then instructs a Kubelet agent on the node hosting the target Pod to establish a connection. This connection is typically secure (using TLS) and remains active as long as the kubectl port-forward command is running. Crucially, the traffic flows through the API server and Kubelet, bypassing any external gateway or ingress rules that might otherwise govern external access to your services. This makes it an ideal tool for isolated testing and debugging.
Analogy to SSH Tunneling
To better grasp its mechanism, kubectl port-forward can be thought of as conceptually similar to SSH local port forwarding. In SSH forwarding, you establish an SSH connection to a remote host and instruct it to forward traffic from a local port to a specific port on the remote host (or a host accessible from the remote host). kubectl port-forward operates on a similar principle, but instead of an SSH server, it uses the Kubernetes API server and Kubelet to manage the tunnel, providing a more Kubernetes-native and secure way to achieve the same outcome for containerized services.
Basic Usage and Syntax: Opening the Tunnel
The fundamental syntax for kubectl port-forward is straightforward, yet it offers several variations to target different Kubernetes resources.
Targeting a Specific Pod
The most common and granular way to use port-forward is by targeting a specific Pod. This is particularly useful when you need to interact with a single instance of your application, perhaps one that's exhibiting a particular bug.
Syntax:
kubectl port-forward <pod-name> [LOCAL_PORT:]REMOTE_PORT
Example: Imagine you have a Pod named my-backend-api-7b8f9d6c5-xyz12 running an API service that listens on port 8080 inside the container. You want to access this API from your local machine on port 8000.
kubectl port-forward my-backend-api-7b8f9d6c5-xyz12 8000:8080
Once this command is executed, kubectl will display a message indicating that it's forwarding traffic. You can then open your web browser or use curl to access http://localhost:8000, and your requests will be securely routed to port 8080 of the my-backend-api-7b8f9d6c5-xyz12 Pod.
my-backend-api-7b8f9d6c5-xyz12: This is the exact name of the Pod you want to connect to. Pod names often include unique identifiers (like hash suffixes) for distinct instances, especially when managed by Deployments or StatefulSets.8000: This is the port on your local machine that will be used to access the forwarded service. You can choose any unused port on your system.8080: This is the port inside the Pod's container where the service is actually listening. This must match the port exposed by your application within the container.
Omitting the Local Port: If you omit LOCAL_PORT (e.g., kubectl port-forward my-backend-api-7b8f9d6c5-xyz12 8080), kubectl will automatically use the REMOTE_PORT as the LOCAL_PORT. So, in this case, localhost:8080 on your machine would forward to port 8080 in the Pod. This is a convenient shorthand when the local and remote ports are the same.
Targeting a Service
While targeting a Pod is precise, it can be cumbersome if your Pods are frequently restarted or scaled, leading to new Pod names. A more stable approach is to target a Kubernetes Service. When you port-forward to a Service, kubectl automatically selects one of the healthy Pods backing that Service and establishes the tunnel to it. This provides a level of abstraction, allowing you to connect to the logical service rather than a specific ephemeral Pod.
Syntax:
kubectl port-forward service/<service-name> [LOCAL_PORT:]REMOTE_PORT
Example: If your API service is exposed via a Kubernetes Service named my-backend-api-service, and that Service targets Pods listening on port 8080, you can forward to it like this:
kubectl port-forward service/my-backend-api-service 8000:8080
service/my-backend-api-service: This specifies that you're targeting a Service namedmy-backend-api-service.8000:8080: Same as before, local port 8000 maps to container port 8080.
This method is generally preferred for development and debugging because it's more robust to Pod restarts or scaling events. kubectl will intelligently maintain the connection to a healthy backend Pod associated with the Service.
Targeting a Deployment or StatefulSet
You can also target Deployments or StatefulSets directly. When you do, kubectl will automatically select one of the Pods managed by that resource.
Syntax:
kubectl port-forward deployment/<deployment-name> [LOCAL_PORT:]REMOTE_PORT
kubectl port-forward statefulset/<statefulset-name> [LOCAL_PORT:]REMOTE_PORT
Example: To forward to a Pod managed by a Deployment named my-backend-deployment:
kubectl port-forward deployment/my-backend-deployment 8000:8080
This acts similarly to forwarding to a Service, picking a healthy Pod to connect to. It's useful when you specifically want to interact with a Pod within a particular Deployment or StatefulSet, perhaps for testing an update or a specific configuration tied to that workload controller.
Advanced Options and Configurations: Fine-Tuning Your Tunnel
While the basic usage covers most scenarios, kubectl port-forward comes with several flags that allow for more granular control over the forwarding process. Understanding these can significantly enhance your debugging and development workflows.
Specifying the Namespace (-n or --namespace)
Kubernetes clusters often host multiple applications or environments separated by namespaces. By default, kubectl operates in the default namespace. If your target Pod, Service, Deployment, or StatefulSet resides in a different namespace, you must specify it using the -n or --namespace flag.
Example: Forwarding to a Pod in the development namespace:
kubectl port-forward -n development my-backend-api-pod-xyz12 8000:8080
This ensures that kubectl looks for the specified resource within the correct logical isolation boundary of your cluster.
Binding to a Specific Address (--address)
By default, kubectl port-forward binds the local port to localhost (127.0.0.1). This means the forwarded service is only accessible from your local machine. However, there are scenarios where you might want to make the forwarded service accessible from other machines on your local network, for instance, if you're demonstrating something to a colleague or if you're running a virtual machine that needs to access the service from your host OS.
The --address flag allows you to specify the IP address(es) on which to listen.
Syntax:
kubectl port-forward <resource-name> [LOCAL_PORT:]REMOTE_PORT --address <ip-address(es)>
Example: To make the forwarded service accessible from any IP address on your local machine (including your local network interfaces), you can bind to 0.0.0.0:
kubectl port-forward my-backend-api-pod-xyz12 8000:8080 --address 0.0.0.0
Important Security Note: Binding to 0.0.0.0 exposes the forwarded port to your entire local network. Exercise extreme caution when using this flag, especially in untrusted networks, as it effectively creates a temporary, unsecured entry point into a service within your Kubernetes cluster. It's generally recommended for isolated development environments only.
You can also specify specific IP addresses, for example, a local network interface if you only want to expose it to a specific subnet.
Targeting a Specific Container within a Pod (--container)
A Pod can contain multiple containers. In most cases, you'll only have one main application container. However, if your Pod includes sidecar containers (e.g., for logging, monitoring, or api proxying), and you need to forward a port specifically from one of these sidecars, the --container flag is essential.
Syntax:
kubectl port-forward <pod-name> [LOCAL_PORT:]REMOTE_PORT --container <container-name>
Example: If your api Pod has a main api-server container and a metrics-sidecar container, and the metrics sidecar exposes a Prometheus endpoint on port 9090, you could access it like this:
kubectl port-forward my-backend-api-pod-xyz12 9000:9090 --container metrics-sidecar
Without this flag, kubectl will attempt to forward from the first container defined in the Pod, which might not be the one you intend to access.
Setting a Pod Running Timeout (--pod-running-timeout)
When you target a Service, Deployment, or StatefulSet, kubectl needs to find a running Pod to establish the forward connection. If all Pods are currently restarting, pending, or in an unhealthy state, kubectl might wait indefinitely. The --pod-running-timeout flag allows you to specify how long kubectl should wait for a healthy Pod to become available before giving up.
Syntax:
kubectl port-forward service/my-service 8000:8080 --pod-running-timeout 1m30s
This command will wait for up to 1 minute and 30 seconds for a healthy Pod backing my-service to be available. This is particularly useful in CI/CD pipelines or automated scripts where you want to prevent indefinite hangs.
Running in Background (& or nohup)
kubectl port-forward is a foreground process. As long as it's running, it keeps the tunnel open. If you close your terminal, the tunnel closes. For longer-running development sessions or if you need to run multiple port-forward commands simultaneously, you might want to run them in the background.
Using & (Linux/macOS):
kubectl port-forward service/my-backend-api-service 8000:8080 &
This will run the command in the background, freeing up your terminal. You can bring it back to the foreground using fg or kill it using kill %<job-number>.
Using nohup (Linux/macOS for more robust backgrounding):
nohup kubectl port-forward service/my-backend-api-service 8000:8080 > /dev/null 2>&1 &
nohup ensures the command continues to run even if your terminal session is disconnected. Redirecting output to /dev/null keeps your console clean.
For Windows users, you might use start /B or run it in a separate terminal window.
Real-World Use Cases: Where port-forward Shines
kubectl port-forward is an incredibly versatile tool, solving a multitude of common development and operational challenges. Its ability to create a temporary, isolated connection to internal services without public exposure makes it ideal for several scenarios.
1. Local Development Against Remote Services
One of the most frequent uses of port-forward is for local application development. Imagine you're building a new feature for a frontend application on your laptop. This frontend needs to interact with a complex backend API that's already deployed in your Kubernetes development cluster. Instead of deploying your frontend to Kubernetes every time you make a change, or setting up a full local copy of the backend, you can simply port-forward the backend API service to your local machine.
# In one terminal, forward your backend API service
kubectl port-forward service/my-backend-api-service 8080:8080

# Now, run your local frontend application and configure it to talk to http://localhost:8080
npm start
This setup allows for rapid iteration on your local frontend code while relying on the authoritative, shared backend API in the cluster. It significantly speeds up the development cycle by removing the need for repeated deployments to test integration.
2. Debugging Microservices
When a microservice in your cluster isn't behaving as expected, port-forward becomes an invaluable debugging aid. * Direct API Interaction: If your service exposes an API (REST, gRPC, etc.), you can forward its port and use tools like Postman, Insomnia, curl, or even your custom test scripts to send requests directly to the service. This bypasses any gateway or load balancer, allowing you to isolate the service under test. You can examine raw responses, test specific endpoints, and rule out issues with external routing.
```bash
kubectl port-forward my-problematic-api-pod 8000:8080 &
curl http://localhost:8000/health
curl -X POST -H "Content-Type: application/json" -d '{"key": "value"}' http://localhost:8000/api/data
```
- Monitoring and Tracing: If your service has internal monitoring endpoints (e.g., Prometheus metrics, health checks) that aren't exposed publicly,
port-forwardallows you to access them locally to gather diagnostics.
Database Access: If your application connects to a database (e.g., PostgreSQL, MySQL, Redis) running as a Pod within Kubernetes, you can port-forward the database service to connect to it with your local GUI client (like DBeaver, pgAdmin, DataGrip, RedisInsight). This is far safer than exposing your database publicly.```bash
Forward PostgreSQL running in a Pod
kubectl port-forward postgres-pod-xyz12 5432:5432
Now connect with your local PostgreSQL client to localhost:5432
```
3. Accessing Internal Tools and Dashboards
Many Kubernetes applications include administrative dashboards or internal monitoring tools that are not meant for external access. Examples include: * A custom application dashboard. * RabbitMQ management UI. * Kafka Manager. * Prometheus or Grafana instances deployed within the cluster.
You can port-forward these services to access their web interfaces securely from your local browser without setting up complex Ingress rules or public exposure.
# Access a custom admin dashboard running on port 80
kubectl port-forward admin-dashboard-service 8080:80
# Now navigate to http://localhost:8080 in your browser
4. Testing Newly Deployed Service Versions
Before rolling out a new version of an API to all users, you might want to perform some final integration tests. You can deploy the new version alongside the old one (perhaps in a canary deployment setup or with a temporary replica) and then port-forward directly to the Pod running the new version. This allows you to thoroughly test the new API without affecting existing traffic or going through external gateway configurations.
5. Interacting with Services in Isolated Environments
In multi-tenant or highly secure Kubernetes environments, direct exposure of services, even within the cluster network, might be restricted. port-forward provides a way for authorized users to establish a point-to-point connection to specific services, bypassing more restrictive network policies or firewall rules that prevent direct Pod-to-Pod communication from outside the network. It essentially punches a hole through these layers specifically for the user's local machine, under strict kubectl authorization.
6. Bypassing an API Gateway for Direct Service Testing
When an API gateway is in front of your microservices (as is often the case in production for routing, security, and observability), it adds a layer of abstraction. While the API gateway is crucial for production, during development or debugging, you might want to test an individual API service directly, without the gateway's influence. kubectl port-forward allows you to do precisely that.
For instance, if you're developing a new feature for your Order Service API and want to test its direct response without it passing through the main API Gateway (which might apply rate limiting, authentication, or transformations), you can forward its port:
kubectl port-forward service/order-api-service 8001:8080
Then, interact with http://localhost:8001. This allows you to verify the core API logic independently before integrating it with the gateway and broader system. It’s an effective way to isolate issues to either the service itself or the gateway configuration.
Security Considerations and Best Practices
While kubectl port-forward is incredibly useful, it's a powerful tool that, if misused, can pose security risks. Understanding these risks and implementing best practices is paramount.
Principle of Least Privilege
The kubectl port-forward command requires specific Kubernetes RBAC (Role-Based Access Control) permissions. Specifically, the user or service account executing the command needs get, list, and watch permissions on Pods, and portforward permission on Pods.
Example RBAC Role Definition:
apiVersion: rbac.authorization.k8s.io/v1
kind: Role
metadata:
  name: port-forward-user
  namespace: default
rules:
- apiGroups: [""]
  resources: ["pods", "pods/portforward"]
  verbs: ["get", "list", "watch", "create"] # `create` for pods/portforward
Granting these permissions should be done judiciously. Avoid giving portforward access to users or service accounts that don't absolutely need it. Restrict access to specific namespaces or even specific Pods where possible.
Binding Address Security
As discussed with the --address flag, binding to 0.0.0.0 exposes the forwarded port to your entire local network. This means anyone on the same network segment could potentially access the service within your Kubernetes cluster, bypassing all Kubernetes network policies and authentication mechanisms. * Always prefer binding to 127.0.0.1 (the default) unless absolutely necessary. * If you must use 0.0.0.0, ensure you are in a secure, isolated network environment (e.g., your private home network, not a public Wi-Fi). * Consider using a local firewall on your machine to restrict access to the forwarded port to only specific IP ranges or applications if you bind to 0.0.0.0.
Ephemeral Nature and Cleanup
kubectl port-forward connections are temporary. They terminate when the kubectl process is killed (e.g., by pressing Ctrl+C or closing the terminal). While this makes them convenient, it also means you need to be mindful of cleaning up background processes. If you run port-forward in the background (using & or nohup), remember to terminate these processes when they are no longer needed to free up local ports and sever the connection to the cluster. Long-lived, unattended port-forward tunnels can be a security risk if the local machine is compromised.
Data in Transit
The traffic through kubectl port-forward is tunneled through the Kubernetes API server and Kubelet, typically using TLS for the initial connection setup. However, the application-level traffic within the tunnel is encrypted or not based on how your application communicates. If your API service uses HTTPS within the cluster, then the traffic from your local machine to the service will still be encrypted end-to-end. If your service uses plain HTTP, then the traffic within the tunnel will also be plain HTTP. For sensitive data, always ensure your applications enforce TLS within the cluster where possible, even if you are using port-forward.
Auditing and Logging
While kubectl port-forward itself doesn't provide extensive application-level logging, the Kubernetes API server logs will show portforward requests. Your application logs within the Pod will also show incoming connections from localhost (from the perspective of the Pod, the connection originates from the Kubelet on the node, but the traffic is specifically routed to the forwarded port). Monitor these logs for unusual activity.
Using APIPark for Managed API Exposure
For production-grade API exposure, management, and security, kubectl port-forward is explicitly not the solution. It is a development and debugging tool. For robust API governance, rate limiting, authentication, authorization, transformation, and detailed observability, a dedicated API Gateway is essential. This is where platforms like APIPark come into play.
APIPark is an all-in-one AI gateway and API developer portal that's open-sourced under the Apache 2.0 license. It's designed for managing, integrating, and deploying AI and REST services with ease. While kubectl port-forward helps you access your API locally for testing, APIPark handles the full lifecycle management of those APIs once they are ready for broader consumption, offering features like quick integration of 100+ AI models, unified API format for AI invocation, prompt encapsulation into REST APIs, and end-to-end API lifecycle management. It provides the robust gateway functionality that ensures your APIs are secure, performant, and discoverable for internal teams and external consumers, complete with detailed API call logging and powerful data analysis capabilities. You can learn more about this comprehensive platform at ApiPark.
The distinction is critical: port-forward is a developer's temporary scalpel; APIPark is the enterprise-grade API management operating system.
APIPark is a high-performance AI gateway that allows you to securely access the most comprehensive LLM APIs globally on the APIPark platform, including OpenAI, Anthropic, Mistral, Llama2, Google Gemini, and more.Try APIPark now! 👇👇👇
Troubleshooting Common kubectl port-forward Issues
Even with its simplicity, you might encounter issues when using kubectl port-forward. Here are some common problems and their solutions.
1. Error: unable to listen on any of the requested ports
Symptom: You try to forward a port, but kubectl reports that it cannot bind to the local port. Cause: The LOCAL_PORT you specified is already in use by another application on your machine. Solution: * Choose a different LOCAL_PORT that is not currently in use. * Identify and terminate the process already using that port. On Linux/macOS, you can use lsof -i :<port-number> to find the process ID and then kill <PID>. On Windows, netstat -ano | findstr :<port-number> and then taskkill /PID <PID> /F.
2. Error: Pod "<pod-name>" not found or Error: Service "<service-name>" not found
Symptom: kubectl reports that it cannot find the specified resource. Cause: * Incorrect resource name. * Resource exists in a different namespace than the one kubectl is currently configured to use (or the default namespace). * The resource has not been deployed or is in a non-existent state. Solution: * Double-check the spelling of the Pod/Service/Deployment/StatefulSet name. * Ensure you are in the correct namespace. Use kubectl config view --minify | grep namespace: to see your current context's namespace, or explicitly add the -n <namespace> flag to your command. * Verify the resource exists using kubectl get pods -n <namespace> or kubectl get services -n <namespace>.
3. Error: current user cannot port-forward pods/<pod-name> in namespace "<namespace>"
Symptom: Permission denied error when attempting to port-forward. Cause: Your Kubernetes user or service account lacks the necessary RBAC permissions (specifically portforward on Pods) in the target namespace. Solution: * Contact your cluster administrator to request the appropriate RBAC permissions for pods/portforward. Refer to the RBAC example provided in the "Security Considerations" section.
4. Connection Refused or Timeout When Accessing localhost
Symptom: kubectl port-forward appears to be running, but when you try to access localhost:<local-port>, the connection is refused or times out. Cause: * The application inside the container is not listening on the REMOTE_PORT you specified. * The application inside the container is not running or is unhealthy. * The Pod itself is not healthy or is stuck in a non-running state. * A firewall on the node or within the cluster is blocking traffic to the Pod (less common for port-forward but possible in highly restricted environments). Solution: * Verify the application's listening port: Check your application's configuration or logs to confirm it's truly listening on REMOTE_PORT inside the container. * Check Pod status: Use kubectl get pods -n <namespace> and kubectl describe pod <pod-name> -n <namespace> to ensure the Pod is Running and healthy, and all containers within it are Ready. * Check Pod logs: Use kubectl logs <pod-name> -n <namespace> to see if the application started successfully and is not encountering errors. If there are multiple containers, use kubectl logs <pod-name> -c <container-name> -n <namespace>. * Confirm REMOTE_PORT is exposed: Ensure the service within the Pod is actually bound to 0.0.0.0 or the Pod's IP within the container, not just 127.0.0.1. If it's only bound to 127.0.0.1 inside the Pod, it won't be reachable from the Kubelet. * Consider --container flag: If the Pod has multiple containers, ensure you're forwarding the correct one.
5. kubectl port-forward Hangs or Exits Unexpectedly
Symptom: The port-forward command starts but then hangs indefinitely without forwarding, or exits prematurely. Cause: * The target Pod crashed or was terminated. * Network connectivity issues between your client, the API server, and the Kubelet. * kubectl client version incompatibility with the cluster API server (less common for basic port-forward). Solution: * Check Pod status: Verify the target Pod is still Running using kubectl get pods. If it was terminated, its name might have changed, especially if managed by a Deployment. * Re-run the command: Sometimes a transient network issue can cause a hang. * Check kubectl and cluster version compatibility.
Comparison with Other Kubernetes Service Exposure Methods
kubectl port-forward is one of several ways to access services in Kubernetes, but it serves a very specific niche. Understanding its advantages and disadvantages relative to other methods is key to choosing the right tool for the job.
Let's compare port-forward with NodePort, LoadBalancer, and Ingress:
| Feature / Method | kubectl port-forward |
NodePort Service |
LoadBalancer Service |
Ingress Controller & Resource |
|---|---|---|---|---|
| Primary Use Case | Local development, debugging, temporary access to internal services. | Exposing services to external traffic on a static port on each Node. | Exposing services externally via a cloud provider's load balancer. | Exposing HTTP/HTTPS routes from outside the cluster to services within the cluster. |
| Exposure Scope | Local machine only (or local network with --address 0.0.0.0). |
Cluster-wide, on a specific port of every Node. | Publicly accessible IP provided by cloud provider. | Publicly accessible (often via LoadBalancer or NodePort) with hostname/path routing. |
| Persistence | Temporary; lasts as long as kubectl process is running. |
Persistent; defined as part of the Service object in Kubernetes. | Persistent; defined as part of the Service object. IP can be static. | Persistent; defined as Ingress resource. |
| Setup Complexity | Very low (single kubectl command). |
Low (add type: NodePort to Service manifest). |
Medium (add type: LoadBalancer to Service manifest, requires cloud provider integration). |
High (deploy Ingress controller, create Ingress resources, configure DNS). |
| Security | High security for local access. Risk if --address 0.0.0.0 used carelessly. |
Lower security (exposes ports on all nodes). | Medium security (requires firewall rules, often public IP). | Higher security (centralized TLS, auth, WAF capabilities, often via an API gateway like APIPark). |
| Authentication/Auth | Relies on kubectl RBAC for connection, application handles auth. |
Application handles authentication and authorization. | Application handles authentication and authorization. | Can handle authentication/authorization at the gateway layer, or pass to application. |
| URL Routing | Direct IP:Port access. | Direct NodeIP:NodePort access. | Direct LoadBalancerIP:ServicePort access. | Advanced HTTP routing based on host, path, headers (e.g., api.example.com/v1/users). |
| TLS/SSL | Relies on application's internal TLS. | Application handles TLS. | Application handles TLS (or LB can terminate). | Ingress controller can terminate TLS centrally. |
| Cost | Free (no additional infrastructure). | Free (no additional infrastructure beyond Nodes). | Costs associated with cloud provider's load balancer. | Costs for Ingress controller (if commercial) and underlying LoadBalancer/Nodes. |
| API Gateway Interaction | Bypasses API gateway for direct service access during development/debugging. |
Can be used by API gateway (e.g., if gateway runs outside cluster). |
Often fronts an API gateway or is used by the API gateway as its external entry point. |
Often is the entry point for an API gateway or works in conjunction with it for advanced routing and management. |
When to Use Each Method:
kubectl port-forward: Use it when you, as a developer or operator, need to temporarily access a single service directly from your local machine for debugging, local development, or testing. It's an internal-only, person-to-service connection.NodePort: Use for simple, often development or internal staging environments, where you need to expose a service on a well-known port across all nodes, and you can access those nodes directly. It's less common for public production exposure.LoadBalancer: The standard way to expose services publicly in cloud environments. Ideal for single, high-traffic applications that need a dedicated external IP address and basic load balancing.Ingress: The preferred method for exposing multiple HTTP/HTTPS services externally, especially when you need advanced routing rules, hostname-based routing, path-based routing, and centralized TLS termination. AnIngresscontroller often functions as anAPI gatewayfor basicAPIrouting and can be augmented with full-featured platforms like APIPark for advancedAPImanagement.
Advanced kubectl port-forward Scenarios and Automation
Beyond basic development and debugging, kubectl port-forward can be integrated into more complex workflows, though care must be taken with automation for security reasons.
Scripting and Automation
You might want to automate port-forward for setting up a development environment or running automated tests. * Wrapper Scripts: Create shell scripts that automatically find the correct Pod name (e.g., using kubectl get pods -l app=my-backend-api -o jsonpath='{.items[0].metadata.name}') and then execute port-forward in the background. * Testing Pipelines: In CI/CD pipelines, you could spin up port-forward for integration tests that need to talk directly to services within a temporary cluster. Ensure these are short-lived and properly cleaned up. * Health Checks for port-forward: When scripting, you might want to wait until the port-forward connection is actually established before proceeding. You can often parse the output of the kubectl port-forward command, or simply try to connect to the local port in a loop with a timeout.
Example Script Snippet (Linux/macOS):
#!/bin/bash

NAMESPACE="development"
SERVICE_NAME="my-backend-api-service"
LOCAL_PORT="8000"
REMOTE_PORT="8080"

echo "Attempting to port-forward service/$SERVICE_NAME in namespace $NAMESPACE..."

# Find the Pod name associated with the service, robustly
POD_NAME=$(kubectl get pods -n "$NAMESPACE" -l app=my-backend-api -o jsonpath='{.items[0].metadata.name}')

if [ -z "$POD_NAME" ]; then
  echo "Error: No Pod found for service $SERVICE_NAME in namespace $NAMESPACE. Exiting."
  exit 1
fi

echo "Found Pod: $POD_NAME. Forwarding $LOCAL_PORT:$REMOTE_PORT..."

# Run port-forward in background and store its PID
kubectl port-forward "$POD_NAME" "$LOCAL_PORT":"$REMOTE_PORT" -n "$NAMESPACE" > /dev/null 2>&1 &
PF_PID=$!

echo "Port-forward started with PID $PF_PID. Waiting for connection to establish..."

# Simple check to see if the local port is open
# This is a rudimentary check; for robust scripts, use a proper health check against the application
sleep 5 # Give it a moment to establish

if lsof -i :"$LOCAL_PORT" > /dev/null; then
  echo "Port-forward established successfully. Access at http://localhost:$LOCAL_PORT"
  echo "Press Ctrl+C to terminate this script and the port-forward."
  wait $PF_PID # Keep the script running until port-forward exits
else
  echo "Error: Port-forward failed to establish on local port $LOCAL_PORT."
  kill $PF_PID # Clean up if it started but failed
fi

trap "echo 'Terminating port-forward (PID $PF_PID)'; kill $PF_PID" EXIT
This script demonstrates a basic wrapper. More sophisticated versions would include robust error handling, retries, and proper health checks against the actual service endpoint.
Multiple Forwards
You can run multiple kubectl port-forward commands concurrently, either in separate terminal windows or in the background using &. This is common when your local application needs to talk to several backend services (e.g., an API service, a database, and a cache). Just ensure each forward uses a unique LOCAL_PORT.
# Forward backend API
kubectl port-forward service/my-backend-api-service 8000:8080 -n dev &

# Forward database
kubectl port-forward service/my-db-service 5432:5432 -n dev &

# Forward cache
kubectl port-forward service/my-cache-service 6379:6379 -n dev &

echo "All services forwarded. Access them on localhost:8000, localhost:5432, localhost:6379"
Dynamic Port Assignment
If you're unsure which local port is free, or you want to write a script that doesn't hardcode local ports, you can omit the local port when targeting a Pod, and kubectl will dynamically assign a random free port for you.
kubectl port-forward my-backend-api-pod-xyz12 :8080 # Note the colon before 8080
kubectl will then output the local port it chose, e.g., Forwarding from 127.0.0.1:54321 -> 8080. This is generally more robust for scripting but requires parsing kubectl's output to know which local port to use.
Performance Implications
When considering performance, kubectl port-forward is designed for development and debugging, not for high-throughput, production traffic. * Latency: Traffic has to travel from your local machine, through the Kubernetes API server, to the Kubelet on the node, and finally to the Pod. This adds a small amount of overhead compared to direct network communication, but for typical development interactions, it's negligible. * Bandwidth: The API server can become a bottleneck if you're trying to push massive amounts of data through a port-forward tunnel. It's not designed to be a high-performance data transfer mechanism. * Resource Usage: The kubectl client process on your machine, and the API server and Kubelet components in the cluster, will consume some CPU and memory to maintain the connection. For a few concurrent forwards, this is minimal, but a large number of simultaneous forwards could strain the API server.
For production performance, scalability, and robust traffic management, API gateway solutions like APIPark, or Kubernetes Ingress controllers backed by efficient load balancers, are the appropriate choice. They are built to handle high TPS (Transactions Per Second), offer advanced load balancing, and are designed for distributed, resilient operations.
Designing Your Kubernetes Applications with Local Access in Mind
While kubectl port-forward can bridge the gap, designing your applications with local development and debugging in mind can make the process smoother. * Standardized Ports: Consistently use well-known ports for your services (e.g., 8080 for HTTP APIs, 5432 for PostgreSQL). This makes port-forward commands easier to remember and script. * Clear Service Names: Use descriptive and consistent naming conventions for your Services, Deployments, and Pods. * Health Endpoints: Implement /health or /metrics endpoints in your API services. These are excellent candidates for quick port-forward checks to verify service availability. * Configuration Flexibility: Design your local frontend applications to easily switch between a local backend and a port-forwarded backend through environment variables or configuration files. This means your frontend might connect to http://localhost:8080 in dev and https://api.example.com in production. * Observability: Ensure your API services produce meaningful logs and metrics that can be easily accessed via kubectl logs or after port-forwarding to a monitoring endpoint.
By incorporating these practices, you empower developers to use kubectl port-forward more efficiently, reducing friction in the development workflow and accelerating the journey from code to production. The ultimate goal is to move from local testing to a fully managed, production-ready API ecosystem, for which robust platforms like APIPark provide the necessary gateway and management capabilities.
Conclusion
kubectl port-forward is an essential utility in the Kubernetes toolkit, providing a secure, temporary, and direct channel to access services running within your cluster from your local machine. It empowers developers and operators to streamline local development, debug services with precision, access internal dashboards, and thoroughly test new API versions without the overhead or security implications of public exposure. Its simplicity belies its immense value in bridging the gap between a developer's workstation and the distributed, isolated world of Kubernetes.
However, it is crucial to remember its purpose: a developer's utility, not a production-grade solution for exposing APIs. For stable, secure, and scalable API exposure, management, and governance, dedicated API Gateway and API management platforms are indispensable. Tools like APIPark provide the comprehensive features needed to manage the full lifecycle of your APIs, integrate AI models, ensure security, and provide performance rivaling leading commercial solutions. By understanding when and how to use kubectl port-forward effectively, and when to transition to robust API gateway solutions, you can significantly enhance your Kubernetes development and operational workflows, driving efficiency and security across your cloud-native deployments.
Frequently Asked Questions (FAQs)
Q1: What is kubectl port-forward primarily used for in Kubernetes?
A1: kubectl port-forward is primarily used by developers and operators to establish a temporary, secure tunnel from their local machine to a specific Pod or Service within a Kubernetes cluster. Its main applications include local development (e.g., running a local frontend against a remote backend API), debugging microservices by interacting with them directly, and accessing internal tools or dashboards that are not exposed publicly. It's a key tool for interacting with services in an isolated manner, bypassing external API gateways or load balancers for specific testing scenarios.
Q2: Is kubectl port-forward a secure way to access services?
A2: Yes, kubectl port-forward is generally considered secure for its intended purpose (local, temporary access). The connection is tunneled through the Kubernetes API server, which enforces RBAC permissions, meaning only authorized users can initiate a forward. By default, it binds to localhost (127.0.0.1) on your machine, making the service accessible only to your local applications. However, using the --address 0.0.0.0 flag can expose the forwarded port to your local network, which introduces a security risk if not done in a controlled and trusted environment. For production-grade security and external access, a dedicated API Gateway like APIPark is necessary.
Q3: Can I port-forward multiple services simultaneously?
A3: Yes, you can port-forward multiple services simultaneously. You'll need to run a separate kubectl port-forward command for each service you wish to access. Each command should use a unique local port on your machine to avoid conflicts. For example, you might forward your API service on localhost:8000, a database on localhost:5432, and a caching service on localhost:6379. You can run these commands in separate terminal windows or in the background using your shell's job control features (& or nohup).
Q4: How does kubectl port-forward differ from using NodePort, LoadBalancer, or Ingress?
A4: kubectl port-forward provides a temporary, direct, and local connection for a single user, primarily for development and debugging. It doesn't expose services to the wider network. In contrast: * NodePort exposes a service on a static port on every node in the cluster, making it accessible from outside the cluster, often for internal testing or simple external exposure. * LoadBalancer exposes a service via a cloud provider's external load balancer, assigning a public IP, suitable for exposing a single service publicly with basic load balancing. * Ingress provides HTTP/HTTPS routing rules for multiple services, often incorporating a dedicated Ingress controller (which can act as an API gateway) for advanced features like URL-based routing, TLS termination, and host-based virtual hosting. These latter methods are for production-grade external exposure and traffic management, whereas port-forward is a developer convenience.
Q5: Can I use kubectl port-forward to access an API that is eventually managed by an API Gateway like APIPark?
A5: Absolutely, and it's a common use case during the development lifecycle. While an API Gateway like APIPark is designed to manage, secure, and expose your APIs to consumers in production, kubectl port-forward allows developers to bypass that gateway during initial development and debugging. This direct access lets you test the core API logic of your microservice without the gateway's layers (like authentication, rate limiting, or transformations) potentially interfering. Once the API is stable through local port-forward testing, it can then be fully integrated and managed by APIPark for its production deployment and exposure.
🚀You can securely and efficiently call the OpenAI API on APIPark in just two steps:
Step 1: Deploy the APIPark AI gateway in 5 minutes.
APIPark is developed based on Golang, offering strong product performance and low development and maintenance costs. You can deploy APIPark with a single command line.
curl -sSO https://download.apipark.com/install/quick-start.sh; bash quick-start.sh

In my experience, you can see the successful deployment interface within 5 to 10 minutes. Then, you can log in to APIPark using your account.

Step 2: Call the OpenAI API.