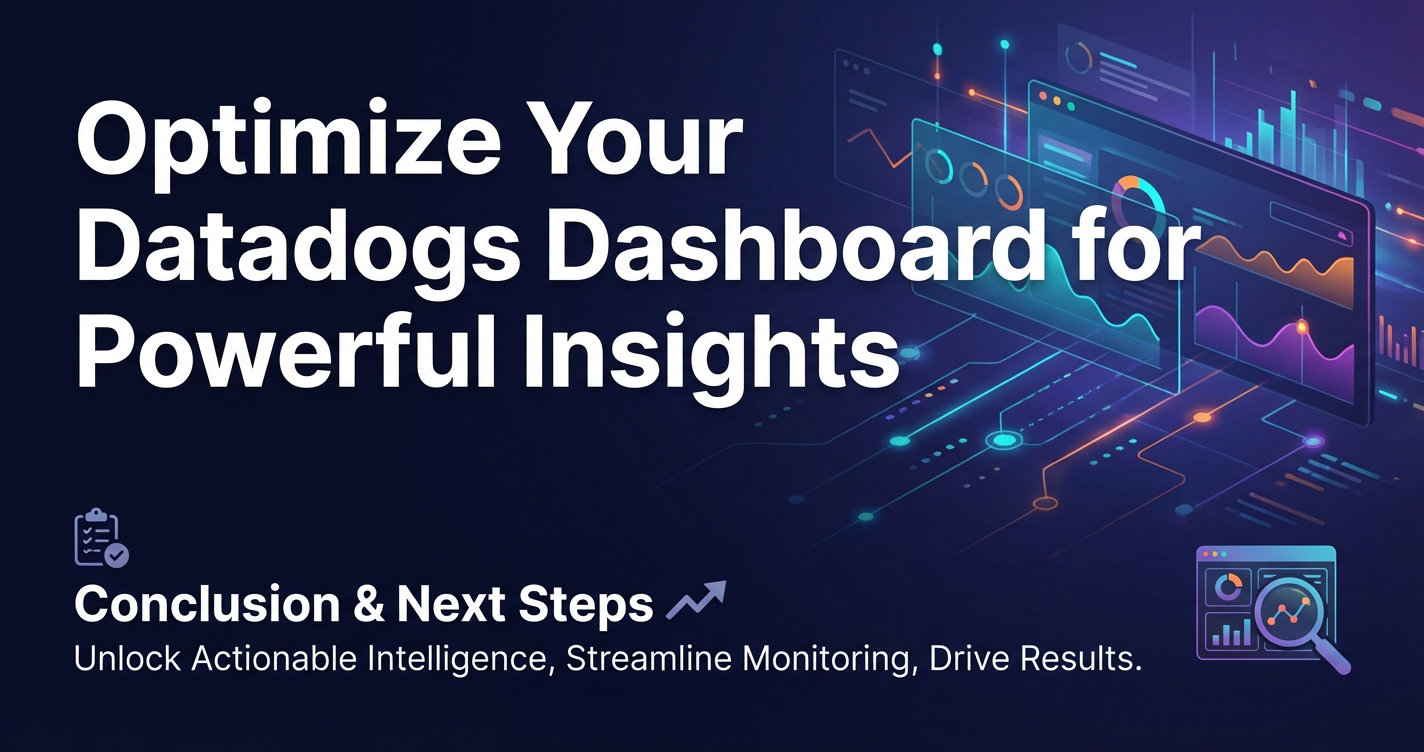
Optimize Your Datadogs Dashboard for Powerful Insights


In the sprawling landscape of modern software development and operations, where systems are increasingly distributed, dynamic, and complex, observability has transcended from a mere buzzword to an indispensable strategic imperative. At the heart of this imperative lies the ability to transform torrents of raw data – metrics, logs, and traces – into clear, actionable insights that drive informed decisions, accelerate troubleshooting, and proactively manage system health. Datadog stands as a powerful, unified observability platform, providing the tooling to collect, aggregate, and analyze this vast ocean of operational data. However, the sheer volume and diversity of data can often overwhelm, turning a potential fountain of wisdom into a data deluge. This is where the art and science of optimizing your Datadog dashboards come into play.
An optimized Datadog dashboard is far more than a collection of graphs; it is a meticulously crafted narrative, a visual storytelling tool designed to illuminate the current state of your systems, pinpoint emerging issues, and surface performance trends that might otherwise remain buried. It serves as the command center for engineers, a single pane of glass for executives, and an early warning system for anomalies. Without proper optimization, dashboards can become cluttered, slow, and ultimately ineffective, failing to deliver the "powerful insights" they promise. This extensive guide delves deep into the strategies, principles, and advanced techniques required to transform your Datadog dashboards from rudimentary data displays into sophisticated, intelligent decision-support systems. We will explore everything from foundational design principles and data ingestion strategies to advanced visualization techniques, performance optimization, and the specialized monitoring of critical components like APIs, Gateways, and even sophisticated AI Gateways, ensuring your Datadog environment truly empowers your teams.
The Bedrock of Observability: Understanding Datadog's Pillars
Before embarking on the journey of dashboard optimization, it's crucial to grasp the fundamental data types that fuel Datadog's capabilities. These pillars form the raw material from which all insights are forged, and a clear understanding of each is paramount for effective dashboard design.
Metrics: The Pulse of Your Systems
Metrics are numerical measurements collected over time, representing the health, performance, and resource utilization of your infrastructure and applications. They are typically aggregated and provide a high-level overview. Datadog excels at collecting a myriad of metrics: CPU utilization, memory consumption, network I/O, disk usage from hosts; request rates, error counts, latency distributions from applications; database query times, cache hit ratios, and much more. These time-series data points are the foundation for trend analysis, capacity planning, and detecting deviations from normal behavior. An optimized dashboard prioritizes key metrics that directly correlate to business objectives and service level agreements (SLAs), presenting them in a way that allows for rapid comprehension of system health at a glance. Visualizations like line graphs, area charts, and heatmaps are commonly employed to display metric data effectively.
Logs: The Storytellers of Events
Logs are immutable, timestamped records of discrete events that occur within your applications and infrastructure. Unlike metrics, which provide aggregated summaries, logs offer granular details about specific occurrences—errors, warnings, user actions, system processes, and more. They are invaluable for root cause analysis, security auditing, and understanding the precise sequence of events leading to an issue. Datadog's log management capabilities allow for centralized collection, parsing, indexing, and analysis of logs from diverse sources. On a dashboard, logs can be filtered, searched, and aggregated to reveal patterns, identify error hotspots, or track specific user journeys. Integrating logs into dashboards often involves displaying log streams, log count widgets, or log pattern visualizations that highlight anomalies or frequently occurring messages.
Traces: Unraveling the Distributed Web
In modern microservices architectures, a single user request often traverses multiple services, databases, and external APIs. Traces provide an end-to-end view of a request's journey across these distributed components, illustrating the latency and dependencies at each step. Each segment of the request within a service is called a "span," and a collection of related spans forms a "trace." Datadog APM (Application Performance Monitoring) captures these traces, allowing developers to visualize the flow, identify bottlenecks, and diagnose performance issues across complex systems. Dashboards leverage trace data to display service maps, critical path visualizations, latency breakdowns by service, and error rates at specific API endpoints. Traces are crucial for understanding application performance in a holistic, distributed context.
Real User Monitoring (RUM): Experiencing It Through Their Eyes
Real User Monitoring (RUM) focuses on the actual user experience by collecting data directly from web browsers and mobile applications. It measures front-end performance metrics such as page load times, resource loading, JavaScript errors, and user interaction latencies. RUM provides invaluable insights into how end-users perceive the performance and availability of your applications, complementing back-end monitoring by revealing issues that might not be apparent from server-side metrics alone. Datadog RUM dashboards often feature metrics like web vitals, error rates, slowest pages, and user journeys, enabling teams to optimize for the true user experience.
Synthetic Monitoring: Proactive Availability and Performance Testing
Synthetic monitoring involves simulating user interactions or API calls from various global locations to proactively test the availability, performance, and functionality of your applications and APIs. These tests run periodically, providing consistent, measurable data points independent of actual user traffic. Datadog synthetic tests can range from simple HTTP checks to complex multi-step browser tests. Dashboards can display the success rate of these tests, their response times, and identify geographic performance variations. Synthetic monitoring acts as an early warning system, often detecting issues before real users are affected.
By intelligently combining and visualizing data from these diverse pillars, an optimized Datadog dashboard transcends simple monitoring. It becomes a diagnostic powerhouse, a predictive analytics tool, and a strategic guide for engineering teams.
Core Principles of Datadog Dashboard Design: Crafting Clarity from Complexity
An effective Datadog dashboard doesn't happen by accident; it's the result of thoughtful design rooted in clear objectives and a deep understanding of its intended audience. Ignoring these principles can lead to dashboards that confuse more than they clarify, ultimately undermining their utility.
1. Define Purpose and Audience: Who, What, Why?
Every dashboard must have a clearly defined purpose and a specific audience in mind. A dashboard for a DevOps engineer troubleshooting a production incident will look drastically different from one designed for a product manager tracking feature adoption, or an executive monitoring high-level business KPIs. * For SREs/On-Call Engineers: Focus on critical health indicators, error rates, resource utilization, and immediate actionable metrics for triage. Dashboards should answer: "Is something broken?", "What is broken?", "Where is it broken?". * For Developers: Emphasize application-specific metrics, API performance, database query times, and trace data relevant to code health. Dashboards should answer: "Is my code performing as expected?", "Are there new errors?". * For Product Managers/Business Owners: Highlight business metrics like conversion rates, user engagement, revenue impact of outages, and key customer journey steps. Dashboards should answer: "Is the business healthy?", "How are our users interacting with the product?".
Defining these upfront ensures that only relevant data is displayed, preventing cognitive overload and improving decision-making speed.
2. Keep it Clean, Focused, and Minimalist: Less is Often More
The temptation to cram every available metric onto a single dashboard is strong but must be resisted. Clutter obscures insight. A minimalist approach focuses on the most critical information required to answer the dashboard's primary question. * Avoid Redundancy: Don't show the same data in multiple ways unless there's a specific reason (e.g., raw count vs. percentage). * Group Related Information: Place widgets showing related metrics (e.g., CPU, Memory, Disk for a single host) close together. * Use White Space: Allow widgets to breathe; ample white space improves readability and reduces visual noise. * Limit Widgets: While there's no hard rule, a single dashboard should generally not overwhelm the user with dozens of disparate widgets. If you find yourself with too many, consider splitting them into multiple, more focused dashboards.
3. Prioritize Key Metrics and KPIs: The "North Star" Indicators
Not all metrics are created equal. Identify the crucial Service Level Indicators (SLIs) and Key Performance Indicators (KPIs) that directly reflect the health, performance, and business value of your systems. These should be prominently displayed and easily discernible. * SLAs/SLOs: Metrics directly tied to Service Level Agreements (SLAs) or Objectives (SLOs) should be front and center. For example, a 99.9% uptime SLO for an API would mean the API's error rate and latency are prime candidates for prominent display. * Business Impact: Which metrics, if compromised, would have the most significant business impact? These are your priority metrics. * Leading vs. Lagging Indicators: Prioritize leading indicators (e.g., queue length growing) over lagging indicators (e.g., high error rate already occurred) when possible, to enable proactive intervention.
4. Tell a Story: From Overview to Detail
A well-designed dashboard guides the viewer through a logical narrative, moving from a high-level overview down to granular details as needed. * Top-Left for Critical Info: Users typically scan from top-left. Place the most critical, high-level metrics (e.g., overall system health, top-line performance) here. * Logical Flow: Arrange widgets in a logical flow, often from left to right, top to bottom. For example, overall system health, then specific service health, then detailed resource utilization. * Drill-Down Capability: Design dashboards with the expectation that users will need to drill down. Use links to more detailed dashboards, or leverage template variables to explore specific services or hosts.
5. Iterate and Refine: Dashboards are Living Documents
Dashboard design is an iterative process, not a one-time event. Systems evolve, priorities change, and new insights emerge. * Gather Feedback: Regularly solicit feedback from the dashboard's users. Are they finding the information they need? Is anything confusing? * Review and Prune: Periodically review dashboards for relevance. Remove obsolete widgets or entire dashboards that are no longer useful. * Adapt to Changes: As your architecture or business goals shift, update dashboards to reflect these changes. New services, new API endpoints, or new gateway deployments will necessitate dashboard adjustments.
By adhering to these principles, you lay a solid foundation for building Datadog dashboards that are not only aesthetically pleasing but, more importantly, profoundly insightful and action-oriented.
Section 1: Data Source Integration and Ingestion Strategies
The power of a Datadog dashboard is directly proportional to the quality and breadth of the data feeding it. Understanding how data gets into Datadog is fundamental to designing effective monitoring strategies and ensuring your dashboards reflect the true state of your systems.
Agent-Based Collection: The Workhorse of Infrastructure Monitoring
The Datadog Agent is a lightweight, open-source software that runs on your hosts (servers, VMs, containers) and collects metrics, logs, and traces. It's the primary method for gathering infrastructure-level data. * Metrics Collection: The Agent leverages integrations for common technologies (e.g., Apache, Nginx, PostgreSQL, Kubernetes) to collect specific application and service metrics. It also collects host-level metrics like CPU, memory, disk I/O, and network statistics. Configuring these integrations involves simply enabling them and providing necessary credentials in the agent's configuration files. For custom applications, DogStatsD can be used to send application-specific metrics directly to the agent. * Log Forwarding: The Agent can be configured to tail log files, capture standard output from processes, and even receive logs over syslog, forwarding them to Datadog's log processing pipeline. Proper parsing rules (processors) in Datadog are crucial to extract meaningful facets from these logs, making them searchable and visualizable on dashboards. * Tracing: For APM, language-specific Datadog tracing libraries are integrated directly into your application code. These libraries send trace data to the Datadog Agent, which then forwards it to the Datadog APM backend. This enables the end-to-end visibility of requests across distributed services. Optimizing agent configuration involves careful selection of integrations, appropriate sampling rates for metrics, and robust log parsing rules to minimize ingestion costs while maximizing data utility.
API Integrations: Bridging to External Services
Beyond agent-based collection, Datadog offers a vast array of out-of-the-box API integrations for third-party cloud providers (AWS, Azure, GCP), SaaS applications (Salesforce, Zendesk), and other monitoring tools. These integrations pull metrics and events directly from the respective service's API. * Cloud Provider Metrics: For instance, the AWS integration collects metrics from CloudWatch for EC2, S3, RDS, Lambda, and many other services. This is critical for monitoring serverless components or services where direct agent installation isn't feasible. * SaaS Application Data: Integrate with your CI/CD pipelines, error tracking systems, or even business intelligence tools to bring in relevant operational data. These integrations are typically configured directly within the Datadog UI, requiring API keys or service principal access. The key here is to choose integrations that provide valuable context to your existing infrastructure and application data, enriching your dashboards without overwhelming them.
Custom Metrics via DogStatsD and OpenMetrics: Tailoring Your Telemetry
Sometimes, standard integrations don't capture everything you need. DogStatsD (a Datadog-specific implementation of StatsD) and OpenMetrics (Prometheus exposition format) provide flexible ways to send custom metrics from your applications. * DogStatsD: Developers can instrument their code to send custom metrics (counters, gauges, histograms, timers) to the Datadog Agent. This is ideal for tracking application-specific KPIs like login attempts, successful transactions, cache hit ratios, or the duration of internal processing steps. Properly tagging these custom metrics (e.g., service:auth, environment:prod) is crucial for segmenting and filtering them effectively on dashboards. * OpenMetrics/Prometheus: Datadog can also scrape Prometheus endpoints, allowing you to leverage existing instrumentation in services that expose metrics in this format. Custom metrics are often the bedrock for highly specialized dashboards, offering granular insights into unique application behaviors that are critical for performance tuning and business intelligence.
Log Forwarding Beyond the Agent: Centralized Log Management
While the agent is excellent for host-level logs, large-scale, complex environments often use centralized log forwarding solutions (e.g., Fluentd, Logstash, Vector) or cloud-native log services (e.g., AWS CloudWatch Logs, Google Cloud Logging). Datadog provides capabilities to ingest logs from these sources directly. * Direct TCP/UDP: Forward logs directly to Datadog's log intake endpoints. * Cloud Integrations: Configure AWS Lambda or GCP Cloud Functions to push logs from CloudWatch or Cloud Logging to Datadog. Effective log ingestion requires careful planning of data retention policies, sensitive data redaction, and robust parsing rules within Datadog to ensure logs are useful for analysis and don't incur excessive costs.
Synthetic Test Creation: Proactive Monitoring of User Paths and API Endpoints
Creating Datadog synthetic tests is a straightforward process within the Datadog UI. * API Tests: Define HTTP, TCP, DNS, or SSL tests to monitor the availability and performance of individual API endpoints. Specify URL, headers, authentication, and expected response codes or content. * Browser Tests: Record user journeys on your web application (e.g., login, add to cart, checkout) and play them back periodically from various global locations. This simulates real user interactions and flags performance or functional issues. Synthetic tests provide objective, consistent performance benchmarks that are invaluable for understanding system availability from an external perspective, feeding crucial data into dashboards for uptime and response time monitoring.
The robust and flexible data ingestion mechanisms of Datadog ensure that virtually any operational data point can be brought into the platform. The strategic choice of ingestion methods, coupled with meticulous configuration, forms the indispensable foundation for building powerful and insightful dashboards.
Section 2: Crafting Effective Widgets and Visualizations
Widgets are the building blocks of any Datadog dashboard, each designed to present data in a specific, compelling way. The key to powerful insights lies not just in collecting data, but in choosing the right visualization to convey its meaning most effectively.
1. Timeseries Graphs: Unveiling Trends and Anomalies
Timeseries graphs are the most common and versatile widgets, ideal for visualizing metrics over time. * Line Graphs: Best for showing trends of a single metric or comparing a few related metrics over time (e.g., CPU utilization, request count, latency percentiles). Use different colors and line styles for clarity. * Area Graphs: Useful for showing total contribution or stacking components (e.g., total memory usage broken down by application). Can be stacked or unstacked. * Bar Graphs: Effective for comparing discrete values at specific points in time or showing a distribution (e.g., number of errors per hour, count of different log types). Optimization Tips: * Clear Legends and Units: Ensure graphs are clearly labeled, axes have appropriate units, and legends are concise. * Time Aggregation: Choose appropriate time aggregations (e.g., avg, sum, max, p99) based on the metric's nature and the insights you seek. For latency, p99 (99th percentile) is often more informative than average. * Overlays for Context: Overlay relevant events (deployments, alerts) onto graphs to correlate changes in metrics with specific activities. * Conditional Formatting: Use thresholds and conditional formatting to visually highlight when metrics cross critical levels (e.g., latency turning red above 500ms).
2. TopLists: Identifying Frontrunners and Underperformers
TopLists display ranked lists of entities (hosts, services, users, API endpoints) based on a specific metric. They are excellent for quickly identifying the highest or lowest performers. * Use Cases: Top N hosts by CPU usage, slowest API endpoints, services with the most errors, top user agents by request count. Optimization Tips: * Meaningful Metrics: Select metrics that genuinely reflect "top" or "bottom" performance relevant to the dashboard's purpose. * Clear Ranking: Ensure the ranking is intuitive and easy to scan. * Clickable Elements: Leverage Datadog's ability to make list items clickable, allowing users to drill down to detailed dashboards for specific entities.
3. Heatmaps: Revealing Distribution and Patterns
Heatmaps are powerful for visualizing the distribution of a metric across different dimensions, often over time. They are particularly effective for identifying performance bottlenecks or uneven resource distribution. * Use Cases: Latency distribution for a service, CPU usage across a cluster of hosts, API response times by geographic region. Each cell's color represents the intensity of the metric. Optimization Tips: * Choose Appropriate Palette: Select a color palette that clearly distinguishes different metric ranges. * Meaningful Dimensions: Ensure the dimensions (e.g., host, service, latency bucket) are relevant to the insight you're trying to gain.
4. Tables: Detailed Data at a Glance
Tables provide a structured way to display multiple metrics and attributes for a list of entities. While less visual than graphs, they are indispensable for presenting precise figures and comprehensive comparisons.
| Entity Type | Key Metrics (Examples) | Visualization Type | Best Use Case |
|---|---|---|---|
| Host | CPU, Memory, Disk, Net I/O | Timeseries, Heatmap | Overall infrastructure health, resource utilization |
| Service | Request Rate, Errors, Latency | Timeseries, TopList | Application performance, service health |
| API Endpoint | Request Rate, Errors, Latency | TopList, Timeseries | API performance, identifying slow endpoints |
| Container | CPU, Memory, Restart Count | Timeseries, Table | Container health, resource contention |
| Database | Query Time, Connections, Errors | Timeseries, Table | Database performance bottlenecks |
| User Session | Load Time, Errors, Geographic | Timeseries, RUM View | Real user experience, front-end issues |
Optimization Tips: * Select Relevant Columns: Include only the most important metrics and attributes. * Sorting and Filtering: Allow users to sort and filter table data for deeper exploration. * Conditional Formatting: Use color coding for cells to highlight values that are out of bounds or warrant attention. * Compactness: Design tables to be concise and easily digestible, avoiding excessive scrolling.
5. Gauges and Change Widgets: Quick Status Indicators
- Gauges: Display a single, current metric value against a predefined scale, often with thresholds (e.g., current CPU utilization, percentage of free memory). Excellent for conveying immediate status.
- Change Widgets: Show the percentage or absolute change of a metric over a specific time period (e.g., "CPU utilization is up 15% in the last hour"). Useful for highlighting trends quickly. Optimization Tips:
- Clear Thresholds: Define clear, actionable thresholds for color changes (green, yellow, red).
- Contextual Labels: Provide context around the metric being displayed.
6. HostMaps and ContainerMaps: Geographic and Cluster-Wide Overviews
These widgets provide a visual overview of your infrastructure, coloring hosts or containers based on a selected metric (e.g., CPU, memory, number of unhealthy containers). * Use Cases: Quickly identify clusters or regions with high resource utilization or failing instances. Optimization Tips: * Meaningful Metric for Coloring: Choose a metric that immediately conveys health or performance status. * Interactive Drill-Down: Ensure clicking on a host or container leads to a more detailed dashboard.
7. Event Stream and Log Stream Widgets: Real-time Context
- Event Stream: Displays a chronological list of events (deployments, alerts, auto-scaling activities). Provides crucial context for correlating metric changes with system activities.
- Log Stream: Shows a real-time feed of logs, often filtered to specific services or error levels. Invaluable for live troubleshooting. Optimization Tips:
- Filter Aggressively: For log streams, filter to show only relevant or high-severity logs to avoid overwhelming the view.
- Tagging for Context: Ensure events and logs are well-tagged to allow for easy filtering and searching.
8. Markdown Widgets: Providing Narrative and Guidance
Markdown widgets allow you to add rich text, links, and images to your dashboards. They are crucial for providing context, explanations, and instructions. * Use Cases: Dashboard descriptions, team contacts, links to runbooks, explanations of complex metrics, definitions of business terms. Optimization Tips: * Concise Explanations: Keep text brief and to the point. * Link to Resources: Use links to external documentation, JIRA tickets, or other relevant dashboards. * Visual Hierarchy: Use headings and lists to make information scannable.
By thoughtfully selecting and configuring these widgets, you can construct dashboards that not only display data but actively guide users towards insights and facilitate rapid problem resolution. The choice of widget should always serve the dashboard's purpose and its audience, ensuring maximum clarity and utility.
APIPark is a high-performance AI gateway that allows you to securely access the most comprehensive LLM APIs globally on the APIPark platform, including OpenAI, Anthropic, Mistral, Llama2, Google Gemini, and more.Try APIPark now! 👇👇👇
Section 3: Optimizing for Performance and Scalability
A dashboard, no matter how beautifully designed, loses its value if it's slow to load, difficult to navigate, or unresponsive. Performance and scalability are not just about the underlying systems being monitored, but also about the monitoring platform itself. Optimizing your Datadog dashboards ensures they remain snappy and effective, even as your environment grows.
1. Filtering and Grouping with Template Variables: Dynamic Insights
Template variables are perhaps one of the most powerful features for creating flexible, interactive, and performant dashboards. They allow users to dynamically filter and group data across all widgets on a dashboard without needing to edit each query individually. * Global Filters: Define variables for common dimensions like host, service, environment, region, availability-zone, or API endpoint. Users can select values from dropdowns, and all widgets on the dashboard will update to reflect the chosen filter. * Grouping and Aggregation: Template variables can also be used in group by clauses in queries, allowing users to dynamically switch the aggregation level (e.g., view metrics per host, then per container, then per service). Optimization Tips: * Judicious Use: While powerful, too many variables can overwhelm. Stick to the most frequently needed filters. * Sensible Defaults: Set intelligent default values for variables to ensure the dashboard loads with a useful initial view. * Dependent Variables: Create cascaded variables where the options of one variable depend on the selection of another (e.g., selecting a region then populating service options only for that region). This reduces options and improves query performance. * Reduce Cardinality for Variables: Avoid variables that have extremely high cardinality (millions of unique values), as this can slow down variable loading and query performance.
2. Conditional Formatting: Highlighting What Matters Most
Conditional formatting goes beyond simple color-coding in graphs. It allows you to set rules that change the appearance of widgets (colors, icons, text) based on predefined thresholds. This draws immediate attention to critical states without requiring manual inspection of values. * Alert Integration: Connect conditional formatting to your Datadog monitors. If a monitor is in ALERT or WARNING state, the associated widget can turn red or yellow, providing a visual cue of an active issue. * Thresholds for KPIs: For key performance indicators, set thresholds that highlight good (green), warning (yellow), and critical (red) states. For example, an API latency gauge turning red if p99 latency exceeds 500ms. Optimization Tips: * Clear Thresholds: Ensure thresholds are well-defined, actionable, and aligned with your SLOs. * Don't Overuse: Too much conditional formatting can lead to visual noise and desensitize users to warnings. Use it judiciously for truly critical information.
3. Dashboard Scope: Global, Service-Specific, or Targeted Views
Consider the scope of each dashboard carefully. * Global Overview Dashboards: These provide a high-level view of your entire infrastructure or all critical services. They should be lightweight, focusing on aggregate metrics and overall health indicators. * Service-Specific Dashboards: Dedicated dashboards for individual services, microservices, or gateway components offer deeper insights into their specific performance, dependencies, and resource consumption. These can be accessed by drilling down from a global dashboard. * Incident Response Dashboards: Highly focused dashboards activated during an incident, providing all necessary metrics, logs, and traces for a specific problematic component to aid in rapid diagnosis. Optimization Tips: * Linked Dashboards: Use Markdown widgets or widget configuration to link between dashboards, enabling a logical navigation path from high-level overviews to detailed views. * Template Variable for Scope: A single powerful dashboard can often serve multiple scopes by leveraging template variables (e.g., select all for a global view, or a specific service for a targeted view).
4. Avoiding Dashboard Bloat: The Less is More Philosophy
Dashboard bloat occurs when too many widgets, too many complex queries, or too much raw data are loaded onto a single dashboard. This directly impacts loading times and overall usability. * Simplify Queries: Complex queries involving multiple functions, high-cardinality group by operations, or extensive filtering can be resource-intensive. Optimize queries to be as simple and efficient as possible. * Reduce Time Ranges (When Appropriate): While longer time ranges provide historical context, they also require more data to be loaded. For real-time operational dashboards, a shorter time range (e.g., 1 hour) might be sufficient, with options to extend for historical analysis. * Aggregate Data: Instead of plotting every single data point, use Datadog's aggregation capabilities (e.g., avg, sum, max, p99 over 1-minute or 5-minute intervals) to reduce the number of points rendered. * Review and Archive: Regularly review dashboards. If a dashboard hasn't been used in months or contains obsolete information, archive it or prune its widgets. * Split Large Dashboards: If a dashboard is consistently slow or contains too much disparate information, consider splitting it into multiple smaller, more focused dashboards.
By actively managing template variables, leveraging conditional formatting, defining appropriate scopes, and diligently fighting dashboard bloat, you ensure your Datadog dashboards remain agile, responsive, and a reliable source of insights, even as your monitored environment scales exponentially.
Section 4: Advanced Dashboard Techniques for Deeper Insights
Moving beyond basic visualizations, advanced Datadog dashboard techniques unlock sophisticated analytical capabilities, allowing teams to uncover hidden correlations, anticipate issues, and perform more robust root cause analysis.
1. Composite Graphs: Synthesizing Multiple Metrics
Composite graphs allow you to combine multiple metric queries into a single visualization, often using different scales or applying mathematical functions across them. This is incredibly powerful for showing relationships between metrics that might not be obvious when viewed separately. * Use Cases: * CPU vs. Request Count: Plot CPU utilization on one Y-axis and request rate on another to see if CPU spikes correlate with traffic surges. * Error Rate vs. Latency: Show how an increase in error rate might coincide with an increase in API latency. * Percentage of Free Resources: Calculate (total - used) / total for memory or disk and display as a percentage. * Technique: Use as_count(), as_rate(), rollup(), and mathematical expressions (+, -, *, /) directly within your metric queries. Insight Enhancement: Composite graphs help illustrate causality or strong correlation, making it easier to identify the root cause of performance degradation or system anomalies.
2. Event Overlays: Contextualizing Performance Changes
Overlays allow you to superimpose specific events onto your timeseries graphs. These events can be deployments, configuration changes, alerts, or even custom business events. * Use Cases: * Deployment Markers: See if a deployment led to a spike in errors or a drop in performance for a particular API or gateway. * Alerts as Context: Overlay past alerts to understand the conditions under which they triggered and how the system recovered (or didn't). * Feature Rollouts: Mark the rollout of a new feature to observe its impact on system resources or user engagement. Insight Enhancement: Event overlays provide crucial context, helping engineers correlate observed metric changes with specific actions or occurrences, drastically speeding up root cause analysis and understanding the impact of changes.
3. Correlation Across Data Types: The Unified Observability Dream
One of Datadog's greatest strengths is its ability to seamlessly link metrics, logs, and traces. Optimized dashboards leverage this to provide a truly unified view. * Metrics to Logs: If a metric (e.g., API error rate) spikes, a well-designed dashboard will allow you to click on that spike and jump directly to relevant logs (e.g., all error logs from that specific API during that time period). This is achieved through clever use of facet links and log search queries embedded in widgets. * Traces for Deeper Dive: From a service map widget showing high latency, you should be able to click on a service and immediately jump to a filtered list of traces for that service during the affected period. This allows developers to see the exact execution path and identify the slow span. * RUM to Backend: For front-end issues detected via RUM, dashboards can link to backend traces or logs associated with the problematic user session. Insight Enhancement: This interconnectedness enables a "follow-the-data" troubleshooting workflow, transforming dashboards from static displays into dynamic diagnostic tools that guide engineers from a high-level symptom to a precise root cause across the entire stack.
4. Alerting Integration: Dashboards as Monitor Command Centers
Dashboards shouldn't just show data; they should also show the state of your monitors. * Monitor Status Widgets: Display the current status of key monitors directly on your dashboard. This provides an immediate understanding of what is (or isn't) currently alerting. * Widget-Based Alerts: Many widgets allow you to create a monitor directly from the graph, leveraging the exact query you've already visualized. * Alert Overlay: As mentioned, overlaying past alert events onto graphs helps understand alert fatigue and the effectiveness of your alert thresholds. Insight Enhancement: Integrating alerts turns dashboards into proactive operational centers, allowing teams to quickly identify active issues and understand the monitoring coverage of their systems.
5. Forecasting and Anomaly Detection: Predictive Power
Datadog offers built-in machine learning capabilities to enhance your dashboards: * Anomaly Detection: Apply anomaly detection algorithms to timeseries metrics to highlight deviations from normal behavior. This helps surface subtle issues that might be missed by static thresholds (e.g., an API latency that is unusually high for a Tuesday afternoon, even if it's below a hard threshold). * Forecasting: Use forecasting algorithms to predict future metric values based on historical trends. This is invaluable for capacity planning (e.g., predicting when a disk will fill up, or when a gateway might hit its traffic limit) or anticipating performance bottlenecks. Insight Enhancement: These advanced techniques shift dashboards from reactive problem-solving to proactive problem prevention, allowing teams to address potential issues before they impact users.
By mastering these advanced techniques, you elevate your Datadog dashboards from mere data displays to intelligent, predictive, and deeply analytical tools that empower your teams with unparalleled visibility and diagnostic capabilities.
Section 5: Monitoring Key Architectural Components – A Deep Dive
To truly optimize Datadog dashboards for powerful insights, we must tailor our monitoring strategies to specific architectural components. Modern systems are built on diverse layers, and each requires a nuanced approach to observability.
1. Infrastructure Monitoring: The Foundation
Monitoring the underlying infrastructure – physical servers, virtual machines, containers, and serverless functions – is the absolute bedrock. Without a healthy foundation, application performance is moot. * Key Metrics: * CPU: Utilization (system, user, idle), load average, CPU steal. * Memory: Used, free, cached, swapped, page faults. * Disk: Read/write IOPS, latency, free space, utilization. * Network: In/out bytes, packets, errors, dropped packets. * Host/Container Count: For dynamic environments, tracking the number of active instances is crucial. * Dashboard Focus: * Overall Health: High-level widgets showing aggregate CPU, memory, and network health across clusters or environments. * Resource Distribution: Heatmaps or HostMaps to quickly identify hosts with unusually high resource consumption. * Bottleneck Identification: Timeseries graphs for specific resources, allowing drill-down to individual hosts or containers that are over-utilized. * Availability: Uptime metrics, number of instances running. * Example Widgets: Timeseries graphs for CPU/Memory/Disk utilization, TopList for processes consuming the most resources, HostMap colored by CPU steal.
2. Application Performance Monitoring (APM): The User Experience Layer
APM focuses on the performance and behavior of your applications and the services they comprise. This is where user experience directly manifests. * Key Metrics (per Service/Endpoint): * Request Rate: Requests per second (RPS). * Error Rate: Percentage of requests returning errors (e.g., HTTP 5xx). * Latency: Average, p95, p99 (99th percentile) response times. * Throughput: Bytes sent/received. * Saturation: Queue depth, number of active threads/connections. * Dashboard Focus: * Service Health Overview: Aggregated RPS, error rate, and latency for critical services. * Slowest Endpoints: TopList of API endpoints with the highest latency or error rates. * Dependencies: Service maps showing upstream and downstream dependencies and their performance. * Resource Usage by Service: How much CPU, memory, and network resources are consumed by a specific application service. * Example Widgets: Timeseries graphs for RPS, error rates, and latency; Service Map to visualize dependencies; TopList for slowest API endpoints; Trace search widgets for specific error types.
3. API Gateway Monitoring: The Crucial Traffic Cop (incorporating api and gateway)
In modern microservices architectures, an API gateway acts as the single entry point for all external API calls, handling routing, authentication, rate limiting, and more. Monitoring your gateway is paramount for understanding incoming traffic patterns, identifying external-facing issues, and ensuring robust API governance. The gateway is often the first place problems manifest or where load needs to be managed for downstream services.
- Why Monitor API Gateways?
- Traffic Visibility: Understand incoming request volume and patterns.
- Error Detection: Catch errors at the edge before they propagate or impact users.
- Performance Bottlenecks: Identify if the
gatewayitself is introducing latency. - Security & Policy Enforcement: Monitor rate limiting, authentication failures, and suspicious traffic.
- Capacity Planning: Assess
gatewayresource usage relative to traffic load.
- Key Metrics for an API Gateway:
- Total Request Count: Overall
APIcalls handled by thegateway. - Requests Per Second (RPS): Real-time traffic volume.
- Latency (p95, p99): Time taken by the
gatewayto process requests. - Error Rate (HTTP 4xx, 5xx): Percentage of client-side and server-side errors originating from or passing through the
gateway. This includes rate-limit errors (429) and authentication failures (401/403). - Upstream Latency: Time taken for the
gatewayto receive a response from the backend service. - Backend Service Errors: Errors reported by the downstream services.
- Resource Utilization: CPU, memory, network I/O of the
gatewayinstances themselves. - Active Connections: Number of open connections.
- Certificate Expiry: For SSL/TLS termination, monitor certificate validity.
- Total Request Count: Overall
- Example API Gateway Dashboard Widgets:
- Overview Timeseries: Combined graph of total RPS and total error rate for the entire
gateway. - Latency Distribution Heatmap: Latency of
APIcalls segmented byAPIendpoint or upstream service. - Top 5
APIEndpoints by Error Rate: A TopList widget to quickly identify problematicAPIs. - Top 5
APIEndpoints by Request Volume: A TopList to show the most usedAPIs, indicating potential areas for scaling. GatewayInstance Health: HostMap or individual timeseries for CPU/Memory ofgatewaynodes.- Authentication & Authorization Errors: Timeseries graph specifically for 401/403 errors, potentially segmented by source IP or user agent for security insights.
- Rate Limiting Overages: Timeseries graph for 429 errors.
- Log Stream: Filtered to
gatewayerrors and warnings, providing immediate context.
- Overview Timeseries: Combined graph of total RPS and total error rate for the entire
By building dedicated dashboards for your API gateway, you gain unparalleled visibility into your external-facing interfaces, ensuring robust performance and secure operations.
4. Specialized AI Gateway Monitoring (incorporating AI Gateway and APIPark)
The rise of Artificial Intelligence and Large Language Models (LLMs) has introduced a new class of infrastructure components: the AI Gateway. An AI Gateway centralizes access to various AI models, handling aspects like model routing, versioning, cost tracking, prompt management, and unified API formats. Monitoring such a specialized gateway requires tracking unique metrics related to AI inference and model management.
For organizations leveraging specialized solutions like an APIPark, an open-source AI Gateway and API Management Platform, to manage their AI models and services, Datadog becomes an invaluable tool for continuous oversight. APIPark, designed for seamless integration and deployment of AI and REST services, can expose a rich set of operational metrics related to model invocation, performance, and resource consumption. Integrating these APIPark metrics into Datadog dashboards allows for comprehensive monitoring of your AI infrastructure.
- Why Monitor AI Gateways?
- Model Performance: Track inference latency and throughput for specific models.
- Cost Optimization: Monitor token usage or computational resource consumption per model/request.
- Model Versioning Impact: Observe performance changes after deploying new model versions.
- Prompt Engineering Effectiveness: Track metrics related to prompt length, response quality, or failure rates tied to prompts.
- AI-Specific Errors: Identify model inference failures, timeout errors, or issues with specific AI provider integrations.
- Resource Allocation: Ensure the underlying hardware/cloud resources supporting the AI models (GPUs, TPUs) are performing optimally.
- Key Metrics for an AI Gateway:
- Model Inference Latency (p95, p99): Time taken by the AI model to generate a response, segmented by model ID or version.
- Request Rate by Model: RPS for each AI model being served.
- Token Usage (Input/Output): Number of tokens processed or generated, critical for cost tracking.
- AI Provider
APICall Latency/Errors: If theAI Gatewayproxies to external AIAPIs (e.g., OpenAI, Claude), monitor the performance and errors of these external calls. - Model Load/Unload Times: If models are dynamically loaded into memory.
- GPU/TPU Utilization: For self-hosted models, track the specific resource usage of AI accelerators.
- Prompt Processing Time: Time taken to process and enrich prompts before sending to the model.
- Model-Specific Error Codes: Track custom error codes from AI models, beyond generic HTTP errors.
- Rate Limit Errors (AI Provider): If hitting limits with external AI providers.
- Example AI Gateway Dashboard Widgets:
- Overall AI Performance: Timeseries graph showing aggregate inference latency and request rate for all AI models.
- Model Performance Breakdown: A TopList widget showing the slowest or highest error-rate AI models.
- Token Consumption by Model: A bar chart or timeseries visualizing input and output token usage, potentially grouped by tenant or application (if using a multi-tenant platform like
APIPark). - AI Provider Status: Timeseries of latency and errors for calls to external AI
APIs. - GPU/TPU Health: HostMap or timeseries for GPU memory, core utilization, and temperature for self-hosted AI infrastructure.
- Model Version Performance Comparison: Overlaying latency for different model versions to assess impact of updates.
- Prompt-Related Errors: A timeseries of errors specifically tied to prompt parsing or model input validation.
By extending Datadog's observability to specialized components like AI Gateways and leveraging platforms like APIPark, you ensure that even your most advanced, intelligent systems are transparent, performant, and cost-effective. The ability to monitor these unique metrics within your unified Datadog dashboards provides critical insights for managing the rapidly evolving landscape of AI-driven applications.
Section 6: Dashboard Governance and Best Practices
Creating powerful Datadog dashboards is an ongoing process that requires more than just technical skill; it demands discipline, collaboration, and a commitment to maintaining a healthy monitoring environment. Effective dashboard governance ensures that your dashboards remain relevant, accurate, and easy to use over time.
1. Naming Conventions: The Key to Discoverability
A consistent and intuitive naming convention is crucial for navigating a growing number of dashboards. Without it, finding the right dashboard during an incident becomes a frustrating scavenger hunt. * Hierarchical Naming: [Scope] - [Service/Component] - [Purpose] * Examples: Global - Infrastructure - Overview, Service - AuthZ - APM Details, Team - DevOps - CI/CD Pipeline, API Gateway - Production - Performance, AI Gateway - LLM Farm - Cost & Usage. * Tags: Utilize Datadog's tagging system extensively. Tag dashboards with relevant teams, services, environments (prod, staging), and technologies (Kubernetes, Lambda, Nginx, APIPark). This makes dashboards searchable and filterable. * Clear Descriptions: Provide a concise description for each dashboard, explaining its purpose, key metrics, and intended audience.
2. Version Control (Datadog API/Terraform): Infrastructure as Code for Observability
Treat your dashboards as code. Manual creation and modification are prone to errors, inconsistencies, and lack of auditability. * Datadog API: Datadog provides a robust API that allows you to create, update, and manage dashboards programmatically. * Infrastructure as Code (IaC) Tools: Tools like Terraform, Pulumi, or Ansible can manage Datadog dashboards as code. Define your dashboards in configuration files, store them in Git, and deploy them through your CI/CD pipeline. * Benefits: * Consistency: Ensure all environments (prod, staging) have identical dashboards. * Auditability: Track changes to dashboards, who made them, and when. * Rollback Capability: Easily revert to previous dashboard versions if an issue arises. * Collaboration: Enable multiple team members to contribute to dashboard development through standard code review workflows. * Template Dashboards: Create generic, reusable dashboard templates that can be instantiated for specific services or environments using variables.
3. Regular Review and Cleanup: Fighting Dashboard Sprawl
Dashboards, like any other artifact in a dynamic environment, can become obsolete, redundant, or simply unused. A proactive cleanup strategy is essential. * Scheduled Reviews: Periodically (e.g., quarterly) review all dashboards with their primary users. Ask: "Is this dashboard still relevant?", "Does it provide value?", "Can it be improved or merged?". * Archiving/Deleting: Archive or delete dashboards that are no longer needed. Datadog provides metrics on dashboard usage; leverage these to identify dormant dashboards. * Consolidation: Identify dashboards that show similar information and consolidate them into more comprehensive, template-driven dashboards using variables.
4. Documentation: The Unsung Hero of Observability
Even the most intuitive dashboard can benefit from clear documentation, especially for complex metrics or specific troubleshooting workflows. * Dashboard-Level Documentation: Use Markdown widgets to embed a brief description of the dashboard's purpose, key metrics, and links to relevant runbooks, Jira boards, or team contacts. * Metric-Level Documentation: Within Datadog, provide descriptions for custom metrics, explaining what they measure and how they are calculated. * Runbooks: Link dashboards directly to runbooks that guide engineers through troubleshooting steps for common issues surfaced by the dashboard.
5. Training Users: Empowering Your Teams
The best dashboards are useless if users don't know how to interpret them or leverage their full potential. * Onboarding: Incorporate Datadog dashboard training into your onboarding process for new engineers and SREs. * Workshops: Conduct regular workshops on advanced Datadog features, including template variables, composite graphs, and correlation techniques. * Feedback Loops: Establish clear channels for users to provide feedback on dashboards, suggest improvements, or report issues.
By implementing robust dashboard governance, treating dashboards as code, fostering a culture of continuous improvement, and empowering users through documentation and training, you transform Datadog from a tool into a strategic asset that consistently delivers powerful insights across your organization. This holistic approach ensures that your observability investment continues to pay dividends as your systems and teams evolve.
Conclusion
Optimizing your Datadog dashboards is a continuous journey, not a destination. In a world defined by ever-increasing complexity and the relentless pace of technological evolution, the ability to translate vast streams of operational data into actionable intelligence is a competitive differentiator. This comprehensive guide has traversed the critical facets of this journey, from understanding Datadog's foundational observability pillars and adhering to core design principles, to mastering advanced visualization techniques and tailoring monitoring strategies for specialized components like API gateways and sophisticated AI Gateways. We've emphasized the importance of data source integration, performance optimization, and robust governance practices to ensure that your dashboards remain agile, insightful, and reliable.
The goal is to move beyond mere data display to fostering a culture of proactive problem-solving, accelerated root cause analysis, and informed decision-making. By thoughtfully selecting and configuring widgets, leveraging the power of template variables, embracing infrastructure-as-code principles for dashboard management, and fostering continuous refinement, you transform your Datadog environment into a highly effective command center. The strategic integration of monitoring for critical interfaces like your API gateways, which serve as the frontline for all external interactions, and the specialized oversight of AI Gateways, crucial for managing the burgeoning landscape of artificial intelligence, ensures that no critical component operates in the dark. Whether it’s tracking the performance of a traditional API, understanding the intricacies of an AI Gateway managed by platforms like APIPark, or simply maintaining the health of your core infrastructure, an optimized Datadog dashboard empowers your teams with the clarity and context needed to thrive. Embrace these strategies, and you will unlock the true potential of your observability data, turning raw information into the powerful insights that drive success in the digital age.
Frequently Asked Questions (FAQs)
1. What is the most common mistake people make when building Datadog dashboards? The most common mistake is dashboard bloat: trying to put too much information on a single dashboard, or adding widgets without a clear purpose. This leads to clutter, slow loading times, and makes it difficult to quickly identify critical issues. Instead, focus on creating purpose-driven dashboards for specific audiences and use cases, leveraging template variables for flexibility and linking to more detailed dashboards for drill-down capabilities.
2. How can I ensure my Datadog dashboards are performant and load quickly? Several strategies contribute to dashboard performance. Firstly, simplify your queries by avoiding overly complex functions or high-cardinality aggregations where possible. Secondly, optimize time ranges: while historical data is valuable, real-time dashboards might only need the last hour or few hours. Thirdly, use template variables to filter data efficiently rather than having multiple hardcoded queries. Finally, regularly review and prune unused or redundant widgets and entire dashboards to reduce unnecessary data fetching.
3. What's the best way to incorporate logs and traces into a Datadog dashboard? Logs and traces should complement metrics, providing deeper context. For logs, use widgets like "Log Stream" (filtered to critical logs) or "Log Count by Facet" to identify patterns. For traces, "Service Map" widgets visualize application dependencies and bottlenecks. The key is correlation: ensure your metrics widgets allow you to click through to relevant logs or traces for the specific service or time range showing an issue. This often involves configuring "facet links" in Datadog.
4. How can I monitor my API Gateway effectively using Datadog? Effective API gateway monitoring in Datadog involves tracking key metrics such as total request count, requests per second (RPS), API latency (especially p95/p99), and various error rates (HTTP 4xx, 5xx, including rate limit errors like 429). Create dedicated dashboards with timeseries graphs for these metrics, TopLists to identify slowest or highest-error API endpoints, and potentially a HostMap to monitor the resource utilization of your gateway instances. Don't forget to include log streams filtered for gateway errors.
5. Why is it important to monitor AI Gateways, and what unique metrics should I look for? Monitoring AI Gateways is crucial for understanding the performance, cost, and reliability of your AI-driven applications. Unique metrics to look for include model inference latency (how long a model takes to generate a response), request rate per model, token usage (input and output tokens, vital for cost tracking), AI provider API call latency and errors (if proxying to external AI services), and potentially GPU/TPU utilization for self-hosted models. Platforms like APIPark, an open-source AI Gateway and API Management Platform, can expose these specialized metrics, which Datadog can ingest to provide comprehensive insights into your AI infrastructure's health and efficiency.
🚀You can securely and efficiently call the OpenAI API on APIPark in just two steps:
Step 1: Deploy the APIPark AI gateway in 5 minutes.
APIPark is developed based on Golang, offering strong product performance and low development and maintenance costs. You can deploy APIPark with a single command line.
curl -sSO https://download.apipark.com/install/quick-start.sh; bash quick-start.sh

In my experience, you can see the successful deployment interface within 5 to 10 minutes. Then, you can log in to APIPark using your account.

Step 2: Call the OpenAI API.