Optimizing Ingress Controller Upper Limit Request Size


The intricate tapestry of modern web applications is woven with threads of microservices, containers, and orchestration platforms like Kubernetes. At the very edge of this sophisticated infrastructure, acting as the crucial gatekeeper for all incoming traffic, stands the Ingress Controller. It’s the initial point of contact for external requests, routing them to the correct services within the cluster, and in doing so, plays an indispensable role in ensuring the performance, reliability, and security of your applications. Yet, like any gatekeeper, it operates under certain rules and limitations, one of the most frequently encountered and often overlooked being the upper limit on request size.
When applications involve uploading large files, processing extensive data payloads, or interacting with complex apis that transmit substantial amounts of information, hitting the default request size limit can be a frustrating bottleneck. Imagine a user attempting to upload a high-resolution image to a profile, or a backend system trying to push a large configuration file via an api, only to be met with an enigmatic "413 Payload Too Large" error. These failures not only degrade user experience but can also disrupt critical business processes. This issue transcends specific application logic, residing instead at the fundamental infrastructure layer, specifically within the Ingress Controller, which functions as a specialized gateway for HTTP and HTTPS traffic into your Kubernetes cluster.
While often considered a basic network routing component, the Ingress Controller inherently takes on many responsibilities typically associated with an api gateway. It manages traffic forwarding, applies TLS termination, enforces basic routing rules, and critically, sets boundaries on the size of requests it will accept. Understanding and appropriately configuring this request size limit is not merely a technical tweak; it's a strategic decision that impacts the very capabilities and resilience of your services. Failing to address it can lead to frustrating intermittent issues, particularly for data-intensive api interactions or media uploads. Conversely, setting it too high without proper consideration can expose your infrastructure to denial-of-service attacks or excessive resource consumption.
This comprehensive guide aims to demystify the request size limit within Kubernetes Ingress Controllers. We will embark on a detailed exploration, starting with the fundamental concepts of what these limits entail and why they exist. We will then delve into practical methods for identifying current configurations and diagnosing symptoms when limits are breached. A significant portion of our discussion will focus on the specific configurations required for popular Ingress Controllers such as Nginx, HAProxy, Traefik, and Envoy-based solutions, providing concrete examples and best practices. Furthermore, we will examine advanced strategies for optimizing these limits, considering both performance and security implications, including the role of dedicated api gateway solutions. Finally, we will cover rigorous validation and testing methodologies to ensure your configurations are robust and your applications can seamlessly handle large requests. By the end of this journey, you will possess the knowledge and tools to confidently manage and optimize the Ingress Controller's upper limit on request size, thereby fortifying the reliability and functionality of your Kubernetes-deployed applications and the apis they expose.
Understanding the Request Size Limit in Ingress Controllers
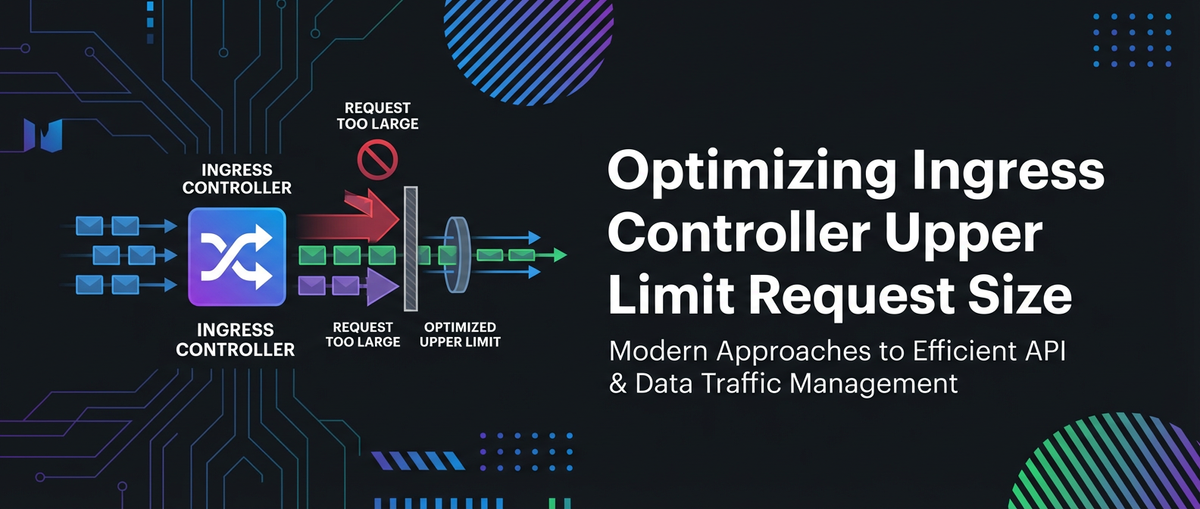
At its core, the request size limit in an Ingress Controller defines the maximum permissible size of an HTTP request body that the controller will accept before processing it. This parameter is a critical configuration point, serving multiple purposes from security to resource management, and directly influencing the types of api interactions and data transfers your applications can facilitate. When a client sends an HTTP request whose body exceeds this predefined limit, the Ingress Controller will typically reject it with an HTTP 413 "Payload Too Large" status code, preventing the request from ever reaching the backend service. This behavior is fundamental to how an Ingress Controller, acting as the primary gateway for your cluster, protects and manages internal resources.
The existence of such a limit is rooted in several practical considerations. Firstly, it acts as a preventative measure against denial-of-service (DoS) attacks. An attacker could otherwise overwhelm your services by sending an endless stream of extremely large, malformed requests, consuming significant network bandwidth, memory, and CPU cycles on the Ingress Controller itself, and potentially propagating that load to your backend pods. By imposing a size cap, the gateway can quickly shed these potentially malicious requests without expending excessive resources on parsing or forwarding them.
Secondly, resource exhaustion is a significant concern. Each incoming request, particularly those with large bodies, requires memory for buffering and processing within the Ingress Controller. Without a limit, a flood of large requests could rapidly deplete the Ingress Controller's available memory, leading to crashes or severe performance degradation for all legitimate traffic. This is especially pertinent in containerized environments like Kubernetes, where resource allocation is often tightly managed and shared. A well-configured limit helps maintain the stability of the Ingress Controller and, by extension, the entire application stack it fronts.
Thirdly, from a robustness perspective, these limits help prevent certain types of buffer overflow vulnerabilities. While modern web servers and proxies are generally resilient, setting a reasonable upper bound on request sizes adds another layer of defense against unforeseen processing edge cases or architectural weaknesses. It reinforces the principle of least privilege, ensuring the gateway only handles requests within expected operational parameters.
The specific directive or configuration parameter that controls this limit varies significantly depending on the underlying technology powering your Ingress Controller. For instance, the immensely popular Nginx Ingress Controller leverages Nginx's client_max_body_size directive. HAProxy-based Ingress Controllers will have their own equivalent, such as max-body-size. Traefik uses middleware configurations, and Envoy-based gateways (like those used in Istio or Contour) define similar parameters within their HTTP connection manager configurations. This diversity means that a "one-size-fits-all" approach to configuration is not feasible, necessitating a deep understanding of the particular Ingress Controller deployed in your cluster.
The direct impact of hitting this limit is immediate and unambiguous: an HTTP 413 error. For an api client, this translates to a failed request. For a user uploading a file via a web interface, it means a failed upload, often without a clear explanation from the application unless the error handling is meticulously implemented to interpret and present the 413 status code. These failures can be particularly disruptive for microservices architectures that rely heavily on api calls to exchange data, including large JSON or XML payloads, images, videos, or documents. If a critical api endpoint that expects substantial input unexpectedly hits this limit, it can break entire workflows, leading to data loss, corrupted states, or application outages.
It is crucial to differentiate the Ingress Controller's request size limit from similar limits that might exist further down the processing chain, such as those imposed by your application server (e.g., Node.js body-parser limits, Java Servlet container limits, Python web framework limits). The Ingress Controller's limit is the outermost layer. If a request is rejected at this stage, it never even reaches your application pod. Therefore, configuring the Ingress Controller correctly is the first and most critical step in enabling large api payloads and file uploads for your services. Recognizing the Ingress Controller as a powerful gateway responsible for initial traffic screening is key to effectively managing these configuration parameters and ensuring smooth operation across your Kubernetes ecosystem.
Identifying Current Limits and Diagnosing Symptoms
Before attempting to modify any configurations, it is paramount to accurately identify the existing request size limits within your Ingress Controller and understand how to diagnose symptoms when these limits are breached. A methodical approach to this diagnostic process will save considerable time and effort, preventing misdirected troubleshooting and ensuring that any changes you make are targeted and effective.
The primary source for identifying current limits lies within the configuration of your Ingress Controller itself. This can manifest in several forms depending on the specific Ingress Controller you are using:
- Ingress Controller Deployment Manifest: For many Ingress Controllers, especially those deployed as a DaemonSet or Deployment in Kubernetes, default limits might be hardcoded or set via command-line arguments to the controller's main executable. Inspecting the
DeploymentorDaemonSetYAML file for the Ingress Controller can reveal these initial settings. Look for arguments related tomax-body-size,client-max-body-size, or similar. - Kubernetes Ingress Resources Annotations: A common and flexible way to configure specific parameters for individual Ingress resources is through Kubernetes annotations. If an
Ingressobject has custom request size limits, you will find annotations likenginx.ingress.kubernetes.io/proxy-body-size: "100m"orhaproxy.ingress.kubernetes.io/request-body-max-size: "50m". These annotations override any global settings for the specific paths or hosts defined in that Ingress. - ConfigMaps: Many Ingress Controllers use Kubernetes
ConfigMapresources to centralize their global configuration. For instance, the Nginx Ingress Controller often uses aConfigMapnamednginx-configuration(or similar) in its namespace. Within this ConfigMap, you might find keys likeclient-max-body-sizethat apply broadly to all Ingress resources unless overridden by annotations. To inspect these, you would usekubectl get configmap <configmap-name> -n <ingress-controller-namespace> -o yaml. - Inspecting Running Container Configuration Files: For advanced debugging or when configuration is less obvious, you can directly inspect the configuration files generated and used by the running Ingress Controller pod. This usually involves:
- Getting the pod name:
kubectl get pods -n <ingress-controller-namespace> - Executing into the pod:
kubectl exec -it <ingress-controller-pod-name> -n <ingress-controller-namespace> -- /bin/bash - Navigating to the configuration directory (e.g.,
/etc/nginx/nginx.confor/etc/nginx/conf.d/for Nginx Ingress, or similar paths for other controllers) and examining the relevant configuration directives. This gives you the precise configuration that thegatewayis currently using.
- Getting the pod name:
Once you have a grasp of the potential configuration points, understanding how to observe symptoms of a breached limit is equally vital. The most prominent symptom is the HTTP 413 "Payload Too Large" status code.
How to observe symptoms:
- Application Logs (Server-side): While the 413 error originates at the Ingress Controller (the
gateway), your backend application might still log connection errors or indications of requests not reaching it. In some cases, the Ingress Controller itself might log the rejection. Check the logs of your Ingress Controller pods (kubectl logs <ingress-controller-pod-name> -n <ingress-controller-namespace>) for messages indicating rejected requests due to size limits. - Client-side Errors:
- Browser Console: If the request is initiated from a web browser, opening the developer console (F12) and checking the "Network" tab will clearly show the failed request with a 413 status code.
- API Client Responses: For
apiintegrations, the client library or tool (e.g.,curl, Postman, Pythonrequests, Java HTTPClient) will receive and report the 413 status code in its response. The body of the 413 response might also contain a small error message from the Ingress Controller. - Application UI: User-facing applications should ideally handle the 413 error gracefully, perhaps displaying a user-friendly message like "File too large" rather than a generic error. If the UI presents generic errors or timeout messages during large uploads, it's a strong hint to investigate the
apiorgatewaylimits.
- Kubernetes Events: Occasionally, if the Ingress Controller encounters severe issues related to resource exhaustion due to oversized requests, it might log events within Kubernetes. You can check
kubectl describe pod <ingress-controller-pod-name> -n <ingress-controller-namespace>orkubectl get events -n <ingress-controller-namespace>for anomalies. - Monitoring Dashboards: For environments with robust monitoring (e.g., Prometheus and Grafana), you can configure alerts or visualize metrics related to HTTP status codes. A sudden increase in 4xx errors, specifically 413s, after deploying a new feature involving large data transfers or during peak load times, is a strong indicator of hitting the request size limit. Monitoring
gatewayperformance metrics, such as ingress controller memory and CPU usage, can also indirectly point to issues if resource spikes correlate with large requests.
Example Scenario: Consider a new feature allowing users to upload large video files. After deployment, users report that uploads consistently fail for files larger than a certain size, even though the application's backend is configured to accept them. 1. Client-side: The browser's network tab shows POST /upload-video failing with a 413 Payload Too Large status. 2. Ingress Controller Logs: kubectl logs nginx-ingress-controller-xxxx -n ingress-nginx reveals lines like client intended to send too large body: 15000000 bytes. 3. Config Check: You inspect the Ingress resource: kubectl get ingress my-app-ingress -o yaml. No proxy-body-size annotation is found. 4. Global Config Check: You inspect the nginx-configuration ConfigMap: kubectl get configmap nginx-configuration -n ingress-nginx -o yaml. You find client-max-body-size: "10m". This confirms the 10MB limit is the culprit, explaining why 15MB video uploads fail.
By meticulously following these steps, you can pinpoint the exact configuration responsible for the request size limit and verify its impact, establishing a solid foundation for targeted optimization. This diagnostic clarity is essential for any effective api or gateway management strategy.
Deep Dive into Specific Ingress Controllers
The method for configuring the request size limit is highly dependent on the particular Ingress Controller deployed in your Kubernetes cluster. Each controller, leveraging different underlying proxy technologies, exposes its configuration parameters in unique ways. Understanding these specifics is critical for effective optimization. Here, we delve into the most common Ingress Controllers, providing detailed explanations and practical examples.
Nginx Ingress Controller
The Nginx Ingress Controller is arguably the most widely adopted gateway in Kubernetes due to its performance, robustness, and extensive feature set, inherited from the venerable Nginx proxy server. It uses Nginx's client_max_body_size directive to control the maximum allowed size of the client request body. If a request exceeds this size, Nginx returns a 413 (Payload Too Large) error.
Configuration Methods:
- Via Ingress Annotations (Per-Ingress or Per-Path): This is the most common and flexible method, allowing you to set the limit for specific
Ingressresources. ```yaml apiVersion: networking.k8s.io/v1 kind: Ingress metadata: name: my-app-ingress annotations: # Sets the maximum body size to 50 megabytes nginx.ingress.kubernetes.io/proxy-body-size: "50m" # Optional: Timeout settings for large uploads if they take a long time nginx.ingress.kubernetes.io/proxy-read-timeout: "300" nginx.ingress.kubernetes.io/proxy-send-timeout: "300" spec: rules:- host: myapp.example.com http: paths:
- path: /upload pathType: Prefix backend: service: name: my-upload-service port: number: 80
- path: /api pathType: Prefix backend: service: name: my-api-service port: number: 80
`` In this example, all requests tomyapp.example.comwill have aclient_max_body_sizeof 50MB. You can apply this annotation to specificIngresspaths if yourIngress` resource defines multiple backends with different requirements.
- host: myapp.example.com http: paths:
- Via ConfigMap (Global Configuration): For a cluster-wide default or if you need to apply the same limit to all Ingresses managed by a specific Nginx Ingress Controller instance, you can modify the
ConfigMapused by the controller. ThisConfigMapis typically namednginx-configurationin theingress-nginxnamespace.yaml apiVersion: v1 kind: ConfigMap metadata: name: nginx-configuration namespace: ingress-nginx # Or wherever your Nginx Ingress Controller is deployed data: # Sets the default client_max_body_size for all Ingresses to 100 megabytes client-max-body-size: "100m"Applying thisConfigMapupdate will cause the Nginx Ingress Controller to reload its configuration, applying the newclient-max-body-sizeto all managed Ingresses that don't override it with their own annotations.
Interaction with other Nginx directives: For truly large requests, especially file uploads that might take time, merely increasing client_max_body_size might not be enough. You might also need to adjust proxy_read_timeout and proxy_send_timeout to prevent timeouts during the transfer of large files. Additionally, proxy_buffer_size and proxy_buffers control how Nginx buffers data from the backend, which is generally not directly related to client request body size but can impact overall proxying of large api responses.
Real-world Scenarios: * Large File Uploads: Photo and video sharing platforms, document management systems. * Data Import/Export: api endpoints for bulk data ingestion or retrieval, where api payloads can be hundreds of megabytes. * AI Model Context: In scenarios involving AI models, large context windows or complex input apis might require significant input data, making this setting critical for seamless interaction.
HAProxy Ingress Controller
The HAProxy Ingress Controller, which leverages the high-performance HAProxy load balancer, also provides mechanisms to control the maximum request body size. HAProxy uses the reqbody-max-size directive to manage this.
Configuration Methods:
- Via Ingress Annotations: Similar to Nginx, HAProxy Ingress allows per-Ingress configuration through annotations. ```yaml apiVersion: networking.k8s.io/v1 kind: Ingress metadata: name: my-haproxy-app-ingress annotations: # Sets the maximum request body size to 75 megabytes haproxy.ingress.kubernetes.io/request-body-max-size: "75m" # Optional: Timeout settings haproxy.ingress.kubernetes.io/timeout-client: "5m" haproxy.ingress.kubernetes.io/timeout-server: "5m" spec: rules:
- host: haproxyapp.example.com http: paths:
- path: /data-upload pathType: Prefix backend: service: name: my-data-service port: number: 80 ``` This annotation will configure the HAProxy backend corresponding to this Ingress to accept request bodies up to 75MB.
- host: haproxyapp.example.com http: paths:
- Via ConfigMap (Global Configuration): You can set a global default in the
ConfigMapused by the HAProxy Ingress Controller, often namedhaproxy-ingress-config.yaml apiVersion: v1 kind: ConfigMap metadata: name: haproxy-ingress-config namespace: haproxy-ingress # Or your HAProxy Ingress Controller's namespace data: # Sets the default request body max size for all Ingresses to 150 megabytes request-body-max-size: "150m"
HAProxy's timeout client and timeout server directives are also important for long-running connections, especially those involving large data transfers, ensuring the gateway doesn't prematurely close the connection.
Traefik Ingress Controller
Traefik, a modern HTTP reverse proxy and load balancer, takes a slightly different approach, often using middleware to apply specific configurations. For limiting request body size, Traefik's Buffering middleware can be configured.
Configuration Methods (Traefik v2+ using IngressRoute/Middleware CRDs):
- Using
IngressRouteandMiddlewareCRDs: Traefik's native Kubernetes CRDs provide a flexible way to define and attach middleware to specific routes.yaml apiVersion: traefik.containo.us/v1alpha1 kind: Middleware metadata: name: limit-request-size namespace: default spec: buffering: # Set max request body size to 25 megabytes maxRequestBodyBytes: 25000000 # Bytes, so 25MB --- apiVersion: traefik.containo.us/v1alpha1 kind: IngressRoute metadata: name: my-traefik-ingress namespace: default spec: entryPoints: - web routes: - match: Host(`traefikapp.example.com`) && PathPrefix(`/upload`) kind: Rule services: - name: my-upload-service port: 80 middlewares: - name: limit-request-size # Attach the middlewareThis configuration defines aMiddlewarenamedlimit-request-sizethat setsmaxRequestBodyBytesto 25MB. This middleware is then attached to the/uploadpath of theIngressRoutefortraefikapp.example.com. This approach offers very granular control over how thegatewayhandles differentapis or endpoints.
Note: For older Traefik versions or standard Kubernetes Ingress objects, Traefik might support annotations, but the Middleware CRD approach is preferred and more powerful for newer Traefik deployments.
Envoy-based Ingress Controllers (e.g., Contour, Istio Gateway)
Envoy Proxy is a high-performance open-source edge and service proxy often used as the data plane for service meshes (like Istio) and as a robust Ingress Controller (like Contour). Envoy's configuration is highly granular, and the request body size limit is typically controlled within the HTTP connection manager configuration, specifically through the max_request_bytes parameter.
Configuration Methods (Contour example):
Contour uses a HTTPProxy Custom Resource Definition (CRD) to configure routing and gateway behavior.
apiVersion: projectcontour.io/v1
kind: HTTPProxy
metadata:
  name: my-contour-app
  namespace: default
spec:
  virtualhost:
    fqdn: contourapp.example.com
  routes:
  - conditions:
    - prefix: /large-payload
    services:
    - name: my-large-payload-service
      port: 80
    # Apply a specific client request body size limit for this route
    # Note: Envoy's default is often 1MB. Must be explicitly increased.
    requestHeadersPolicy:
      set:
      - name: X-Client-Max-Body-Size
        value: "60M" # This is often an indirect way, or via specific EnvoyFilter for Istio
    # Direct control via EnvoyFilter for Istio or Contour configuration can vary.
    # In Contour, this often requires modifying the Envoy configuration through
    # a Contour configuration file or a specific annotation/feature.
    # For example, a global config for Contour might expose a setting.
    # A more direct way in some Envoy-based systems might be through a policy.
    # For Istio, an EnvoyFilter can inject this config:
    # apiVersion: networking.istio.io/v1alpha3
    # kind: EnvoyFilter
    # metadata:
    #   name: increase-payload-limit
    # spec:
    #   workloadSelector:
    #     labels:
    #       istio: ingressgateway
    #   configPatches:
    #     - applyTo: HTTP_FILTER
    #       match:
    #         context: GATEWAY
    #         listener:
    #           portNumber: 80
    #           filterChain:
    #             filter:
    #               name: "envoy.filters.network.http_connection_manager"
    #       patch:
    #         operation: MERGE
    #         value:
    #           typed_config:
    #             "@type": type.googleapis.com/envoy.extensions.filters.network.http_connection_manager.v3.HttpConnectionManager
    #             # Set max_request_bytes within the HTTP connection manager
    #             common_http_protocol_options:
    #               max_request_bytes: 62914560 # 60 MB in bytes
    ```
    Configuring Envoy directly can be more complex due to its granular control. For Contour, specific annotations or global configuration parameters might be available depending on the version. For Istio, `EnvoyFilter` resources are typically used to inject custom Envoy configuration snippets, allowing direct manipulation of the `max_request_bytes` within the `HttpConnectionManager`. This method essentially modifies the underlying `gateway` proxy's behavior.

### General Considerations Across Ingress Controllers

*   **Layer of Application:** These limits are applied at the Ingress Controller (the `gateway` itself), meaning if the request is too large, it will be rejected *before* it reaches your backend Kubernetes Service and Pod.
*   **Backend Limits:** While configuring the Ingress Controller is crucial, remember that your backend application servers might also have their own request size limits (e.g., in `php.ini`, Java `web.xml`, Node.js server configurations). Always ensure the backend limit is equal to or greater than the Ingress Controller limit.
*   **Security Implications:** Indiscriminately increasing these limits to extremely high values without a clear need can expose your services to resource exhaustion attacks. Balance the needs of your application with security considerations.
*   **Restart/Reload:** Most Ingress Controllers, when configured via annotations or ConfigMaps, will automatically detect changes and reload their underlying proxy configuration. However, it's always good practice to verify this behavior and, if necessary, manually trigger a restart of the Ingress Controller pods (though this is rarely required for typical annotation/ConfigMap changes).

This deep dive illustrates that while the problem (request size limit) is common, the solutions are highly specific to the `gateway` technology in use. Careful review of your Ingress Controller's documentation and experimental testing are always recommended.


> [APIPark](https://apipark.com/) is a high-performance AI gateway that allows you to securely access the most comprehensive LLM APIs globally on the [APIPark](https://apipark.com/) platform, including OpenAI, Anthropic, Mistral, Llama2, Google Gemini, and more.Try [APIPark](https://apipark.com/) now! 👇👇👇

<div class="kg-card kg-button-card kg-align-center"><a href="https://github.com/APIParkLab/APIPark?ref=techblog&utm_source=techblog&utm_content=/techblog/en/optimizing-ingress-controller-upper-limit-request-size-5/" class="kg-btn kg-btn-accent">Install APIPark – it’s
free</a></div>

## Strategies for Optimizing Request Size Limits

Optimizing the Ingress Controller's request size limit is a delicate balancing act. It involves catering to the functional requirements of your applications while simultaneously safeguarding your infrastructure against resource exhaustion and security threats. A thoughtful strategy goes beyond simply increasing a number; it encompasses analysis, gradual adjustments, robust monitoring, and considering alternative architectural patterns.

### Gradual Increase with Purpose

One of the safest and most effective strategies is to adopt a gradual, iterative approach to increasing the limit. Rather than jumping to an arbitrarily large number, analyze your immediate needs.

1.  **Analyze Application Requirements:** What is the actual maximum size your applications genuinely require? For example, if you allow image uploads, what's the typical and maximum resolution/file size users are expected to submit? For `api`s, what are the largest possible JSON or XML payloads they might process? Use existing data or conduct user surveys if necessary. A document management system might need 100MB, while a simple profile picture upload might only need 5MB.
2.  **Start Small, Test, Observe:** If your current limit is 1MB and you determine you need 50MB for certain `api`s or uploads, don't immediately set it to 50MB. Increment it to 10MB, test thoroughly with simulated large requests, and observe resource utilization on your Ingress Controller and backend pods. Then increase to 25MB, and so on. This helps identify any unintended performance regressions or stability issues that might emerge before reaching your target.
3.  **Contextual Sizing:** Not all `api` endpoints or application paths require the same request size limit. Leverage the per-Ingress or per-path configuration options (e.g., Nginx Ingress annotations) to apply different limits where necessary. An `api` endpoint for metadata updates might only need a few kilobytes, while a file upload endpoint requires megabytes. Applying limits contextually minimizes the attack surface and optimizes resource allocation.

### Balancing Performance and Security

Increasing request size limits inherently introduces trade-offs between enabling functionality and maintaining optimal performance and security.

1.  **Impact on Memory and Buffering:** Larger request bodies consume more memory on the Ingress Controller (and subsequently, on backend pods) for buffering. While modern servers are efficient, an uncontrolled flood of very large requests can still lead to memory exhaustion, especially in resource-constrained Kubernetes environments. Be mindful of the Ingress Controller pod's resource requests and limits in its `Deployment` manifest.
2.  **Mitigating Large Request Attacks:** An excessively high `client_max_body_size` can be exploited in DoS attacks. Malicious actors could send very large, incomplete requests to tie up resources, or simply send numerous large requests to exhaust bandwidth and memory.
    *   **Rate Limiting:** Implement rate limiting at the Ingress Controller or via a dedicated `api gateway` to restrict the number of requests a single client or IP address can make within a given timeframe. This helps prevent a single bad actor from overwhelming your system, regardless of request size.
    *   **Web Application Firewall (WAF):** Consider integrating a WAF to inspect request bodies for malicious content or patterns, providing an additional layer of security beyond just size limits.
    *   **Request Timeouts:** Alongside `client_max_body_size`, ensure appropriate `proxy_read_timeout` and `proxy_send_timeout` settings are configured. Very slow, large requests can still tie up connections, even if they adhere to the size limit. Timeouts ensure that connections are released if data transfer stalls.

### Implementing Chunked Uploads for Massive Files

For truly massive files (e.g., hundreds of megabytes or gigabytes), increasing the Ingress Controller's request size limit to accommodate the entire file in a single HTTP request is generally inefficient and risky. A superior architectural pattern is **chunked uploads**.

1.  **How Chunking Works:** Instead of sending the entire file at once, the client breaks the file into smaller, manageable "chunks." Each chunk is sent as a separate HTTP request, typically to a dedicated `api` endpoint. The backend application then reassembles these chunks into the original file.
2.  **Benefits:**
    *   **Bypasses Single-Request Limits:** Each chunk is well within typical request size limits, eliminating the need to drastically increase the Ingress Controller's `client_max_body_size`.
    *   **Improved Resilience:** If a single chunk fails to upload (due to network interruption, server error, etc.), only that chunk needs to be retransmitted, not the entire file, significantly improving reliability for large uploads.
    *   **Progress Tracking:** Clients can easily display upload progress, enhancing user experience.
    *   **Resource Efficiency:** Backend processing can handle smaller, more predictable `api` requests, reducing peak memory usage.
3.  **Implementation:** Requires client-side logic to split files and send chunks, and server-side logic to receive, store (often in temporary storage), and reassemble them. This is a robust solution for platforms dealing with extensive media or document handling.

### Data Compression

Using data compression techniques like Gzip or Brotli can effectively reduce the *actual* amount of data transferred over the network. Most Ingress Controllers (acting as `gateway` proxies) support enabling compression for responses and, less commonly, decompressing client requests if the client sends a `Content-Encoding` header.

While compression helps with network bandwidth and potentially `api` latency, it's important to remember that the `client_max_body_size` limit applies to the *uncompressed* size of the request body as seen by the Ingress Controller *after* it has potentially decompressed it. However, if the Ingress Controller is configured to simply forward the compressed body, then the limit applies to the *compressed* size. Always verify how your specific Ingress Controller handles `Content-Encoding: gzip` on incoming requests. For most Nginx-based Ingress Controllers, the limit is on the original, uncompressed size.

### Monitoring and Alerting

After making any changes to request size limits, continuous monitoring is non-negotiable.

1.  **Track 413 Errors:** Set up robust monitoring and alerting for HTTP 413 status codes originating from your Ingress Controller. A spike in these errors indicates that your limits might still be too low or that an application is attempting to send excessively large requests.
2.  **Resource Utilization:** Monitor the CPU, memory, and network I/O of your Ingress Controller pods. Look for correlations between increased request sizes or traffic volumes and resource spikes. If increasing the limit leads to persistent high resource utilization, it might indicate a need to scale up the Ingress Controller or re-evaluate the limits.
3.  **Application Performance Metrics:** Track `api` response times and error rates for services known to handle large requests. Ensure that increasing the Ingress Controller limit doesn't introduce new performance bottlenecks further down the line.

### Leveraging Dedicated API Gateway Solutions

While Ingress Controllers provide essential `gateway` functionality, especially for routing HTTP/HTTPS traffic to services, dedicated `api gateway` solutions offer a more comprehensive suite of features for `api` management, including advanced traffic control, security policies, authentication, and monitoring, often with more sophisticated handling of request sizes and payloads.

For organizations dealing with a complex ecosystem of `api`s, particularly those involving AI models, integrating with external services, or managing a high volume of diverse `api` calls, a powerful tool like APIPark can be immensely beneficial. APIPark, an open-source AI gateway and API management platform, abstracts away many of the complexities inherent in low-level Ingress Controller configurations. It provides a unified management system for authentication and cost tracking across a variety of AI models and REST services, standardizing `api` invocation formats. This means that while your Ingress Controller handles the initial ingress traffic and its size limits, APIPark can further manage, integrate, and deploy these AI and REST services, handling `api` lifecycle, traffic forwarding, load balancing, and versioning. For example, if large language models (LLMs) or complex AI inference `api`s require extensive input contexts, APIPark's ability to encapsulate prompts into REST APIs and manage unified API formats can simplify how these large data payloads are structured and delivered, even while the underlying Ingress Controller ensures the initial connection is established within its maximum body size. With features like detailed API call logging and powerful data analysis, APIPark enables businesses to quickly trace and troubleshoot issues related to `api` calls, including those potentially impacted by request size limits, and helps with preventive maintenance. Its performance rivals Nginx, supporting cluster deployment to handle large-scale traffic, making it a robust companion to your Ingress Controller for advanced API governance. [ApiPark](https://apipark.com/) simplifies the overall `api` governance, potentially helping pinpoint where request size issues might originate or how they affect higher-level `api` interactions.

By combining the low-level traffic management of an Ingress Controller with the high-level `api` governance capabilities of platforms like APIPark, organizations can achieve a more secure, efficient, and scalable infrastructure for their modern applications and `api`s.

| Ingress Controller | Key Configuration Directive/Annotation | Scope (Global/Per-Ingress) | Example Value | Underlying Technology |
| :----------------- | :------------------------------------- | :------------------------- | :------------ | :---------------------- |
| Nginx Ingress      | `nginx.ingress.kubernetes.io/proxy-body-size` (Annotation) <br> `client-max-body-size` (ConfigMap) | Per-Ingress / Global | `50m` (50 MB) | Nginx                   |
| HAProxy Ingress    | `haproxy.ingress.kubernetes.io/request-body-max-size` (Annotation) <br> `request-body-max-size` (ConfigMap) | Per-Ingress / Global | `75m` (75 MB) | HAProxy                 |
| Traefik Ingress    | `Middleware` with `buffering.maxRequestBodyBytes` | Per-Route (via Middleware) | `25000000` (25 MB) | Traefik                 |
| Envoy (Istio Gateway, Contour) | `EnvoyFilter` (Istio) `common_http_protocol_options.max_request_bytes` <br> (Contour may use annotations/global config) | Global / Per-Route (complex) | `62914560` (60 MB) | Envoy Proxy             |

This table summarizes the core configuration points for various Ingress Controllers, highlighting their unique approaches to managing the request size limit. Regardless of the specific `gateway` in use, a thoughtful, monitored approach to these settings is paramount.

## Validation and Testing

After implementing changes to your Ingress Controller's request size limits, rigorous validation and testing are indispensable steps. Skipping this phase can lead to unexpected outages, performance degradation, or security vulnerabilities. The goal is to confirm that the new limits are correctly applied, that applications can now handle the intended large requests, and that the overall system remains stable under load.

### Unit and Integration Tests with Large Payloads

The first line of defense in validating your changes is to conduct targeted tests that specifically challenge the new request size limits.

1.  **Simulate Large Request API Calls:** Develop or modify existing test scripts to send HTTP requests with bodies that are just below, at, and just above your newly configured limit.
    *   **Using `curl`:** For ad-hoc testing, `curl` is invaluable. You can generate a large file (e.g., using `dd if=/dev/urandom of=largefile.bin bs=1M count=X`) and then `POST` it:
        ```bash
        # Create a 45MB file (if limit is 50MB)
        dd if=/dev/urandom of=45MB_file.bin bs=1M count=45
        curl -X POST -H "Content-Type: application/octet-stream" \
             --data-binary "@45MB_file.bin" \
             https://your-ingress-host/upload-endpoint

        # Create a 55MB file (if limit is 50MB, this should fail)
        dd if=/dev/urandom of=55MB_file.bin bs=1M count=55
        curl -X POST -H "Content-Type: application/octet-stream" \
             --data-binary "@55MB_file.bin" \
             https://your-ingress-host/upload-endpoint
        ```
        Observe the HTTP status code returned by `curl`. You should see `200 OK` (or `201 Created`) for requests within the limit and `413 Payload Too Large` for requests exceeding it.
    *   **Postman/Insomnia:** These GUI tools allow you to easily attach large binary files or construct large JSON/XML payloads for `api` requests and observe the responses.
    *   **Custom Scripts:** For more complex `api` interactions or programmatic testing, use client libraries in Python (`requests`), Node.js (`axios`), Java, etc., to construct and send large payloads.
2.  **Verify Backend Behavior:** After a successful large request (HTTP 2xx from the `gateway`), ensure that your backend service correctly received, processed, and stored the data. Check application logs for errors and verify the integrity of the uploaded content. This confirms that the entire data path, from Ingress Controller through to your application, can handle the increased size.
3.  **Edge Cases:** Test not just the maximum, but also any specific limits your application might have. For instance, if your application has a hardcoded 100MB internal limit, make sure the Ingress Controller's limit is sufficiently above it or matches it, but not so high that it exposes your backend to limits it cannot handle.

### Load Testing with Large Requests

Beyond individual tests, it's critical to understand how your system behaves under concurrent load when dealing with large requests.

1.  **Choose Appropriate Tools:**
    *   **JMeter:** A powerful, feature-rich tool for performance testing, capable of simulating various scenarios, including concurrent uploads of large files or large `api` payloads.
    *   **k6:** A modern, developer-centric load testing tool that allows you to write test scripts in JavaScript. It's excellent for integration with CI/CD pipelines and offers clear metrics.
    *   **Locust:** A Python-based load testing tool that lets you define user behavior with Python code. It's highly scalable and flexible.
2.  **Design Test Scenarios:**
    *   **Concurrent Large Uploads:** Simulate multiple users simultaneously uploading files near the `client_max_body_size` limit.
    *   **Mixed Traffic:** Combine large request traffic with smaller, typical `api` calls to mimic real-world usage patterns.
    *   **Sustained Load:** Run tests for an extended duration (e.g., 30 minutes to an hour) to observe any memory leaks, resource exhaustion, or long-term performance degradation in the Ingress Controller or backend services.
3.  **Observe Key Metrics:** During load testing, closely monitor:
    *   **Ingress Controller Metrics:** CPU, memory, and network I/O usage of the Ingress Controller pods. Look for unexpected spikes, saturation, or out-of-memory errors.
    *   **Backend Pod Metrics:** CPU, memory, and disk I/O of the application pods handling the large requests. Ensure they can cope with the increased load.
    *   **Latency and Throughput:** Measure the end-to-end latency for large requests and the overall throughput of your `gateway` and application.
    *   **Error Rates:** Keep a close eye on the rate of 413 errors (which should ideally be zero during successful load tests) and any other HTTP 5xx errors from the Ingress Controller or backend.
    *   **Log Files:** Scrutinize the logs of both the Ingress Controller and your application pods for any warning or error messages that might indicate underlying issues.

### Monitoring Post-Deployment

Validation doesn't end after successful pre-production testing. Continuous monitoring in your production environment is vital for detecting unforeseen issues.

1.  **Alerting for 413 Errors:** Maintain active alerts for any occurrences of HTTP 413 errors from your Ingress Controller or `api gateway`. These indicate that someone is attempting to send a request larger than the current limit, which could either be a legitimate need or a malicious attempt.
2.  **Resource Anomaly Detection:** Implement anomaly detection on Ingress Controller resource metrics. Sudden, unexplained spikes in CPU or memory usage might signal an issue related to request processing, potentially exacerbated by large payloads.
3.  **Application-Specific Metrics:** Monitor your application's internal metrics related to file uploads or large `api` processing. For instance, track the average size of successful uploads, the rate of successful vs. failed large `api` calls, and the time taken to process them.
4.  **User Feedback:** Pay attention to user reports. If users complain about failed uploads or slow data transfers, investigate immediately, correlating their reports with your monitoring data.

### Rollback Strategy

Always have a clear and tested rollback strategy. If, after increasing the limits, you observe severe performance degradation, instability, or new security vulnerabilities, you must be able to quickly revert to the previous, stable configuration. This usually involves reverting the `Ingress` annotations or `ConfigMap` changes and potentially restarting the Ingress Controller pods if they don't auto-reload. A well-defined CI/CD pipeline should make this process straightforward.

By meticulously conducting these validation and testing steps, you can ensure that your Ingress Controller's request size limits are not only functionally correct but also robust, performant, and secure, safeguarding the integrity of your `api`s and applications.

## Conclusion

The Ingress Controller, serving as the crucial `gateway` for all external traffic into a Kubernetes cluster, bears significant responsibility for the reliability and performance of your applications. Its often-overlooked yet critically important configuration, the upper limit on request size, directly dictates the ability of your services to handle large file uploads, extensive `api` payloads, and complex data transfers. Mismanaging this limit can lead to frustrating user experiences, broken `api` integrations, and even critical system failures.

Throughout this extensive guide, we've journeyed from understanding the fundamental reasons behind these limits—primarily security against DoS attacks and protection against resource exhaustion—to a detailed examination of how they are configured across various popular Ingress Controllers, including Nginx, HAProxy, Traefik, and Envoy-based solutions. We’ve provided practical steps for identifying existing limits and diagnosing the tell-tale 413 "Payload Too Large" errors.

Our exploration of optimization strategies underscored the importance of a balanced approach. Incrementally adjusting limits based on clear application requirements, while vigilantly monitoring system performance and security implications, is paramount. For truly massive data transfers, we highlighted the architectural superiority of chunked uploads over simply raising a single request limit to an impractical degree. Furthermore, we emphasized the value of robust monitoring, alerting, and thorough validation through unit, integration, and load testing to ensure that any changes made are stable and performant.

It is also worth reiterating that while Ingress Controllers provide fundamental `gateway` functionalities, complex `api` ecosystems, especially those incorporating AI models and requiring intricate management, can greatly benefit from dedicated `api gateway` solutions. Platforms like [ApiPark](https://apipark.com/) offer advanced capabilities for `api` lifecycle management, security, and performance monitoring, complementing the role of the Ingress Controller by providing a higher layer of abstraction and control for your `api`s.

Ultimately, mastering the configuration of your Ingress Controller's request size limit is a critical aspect of operating a resilient and efficient Kubernetes environment. It’s about more than just a number; it’s about enabling the full capabilities of your applications, protecting your infrastructure, and ensuring seamless communication through every `api` call. By applying the knowledge and strategies outlined here, you can confidently navigate this technical challenge, ensuring your `gateway` can handle whatever data your applications demand, today and in the future.

## Frequently Asked Questions (FAQs)

**1. What is the "Optimizing Ingress Controller Upper Limit Request Size" primarily about?**
This topic focuses on configuring the maximum size of HTTP request bodies that a Kubernetes Ingress Controller (which acts as a `gateway` for your cluster) will accept. It's crucial for applications that involve large file uploads, extensive `api` data payloads, or multimedia transfers, ensuring these requests are not rejected with a "413 Payload Too Large" error. The optimization involves balancing application needs with performance and security considerations.

**2. Why do Ingress Controllers have a request size limit, and what happens if I hit it?**
Ingress Controllers impose request size limits primarily for security and resource management. This prevents denial-of-service (DoS) attacks where malicious actors could send arbitrarily large requests to exhaust server memory and CPU. If a request body exceeds this limit, the Ingress Controller (acting as an `api gateway`) will typically reject it and return an HTTP 413 "Payload Too Large" status code to the client, preventing the request from ever reaching your backend application.

**3. How do I typically configure the request size limit for the Nginx Ingress Controller?**
For the Nginx Ingress Controller, the most common way to configure the request size limit is by adding an annotation to your Kubernetes `Ingress` resource: `nginx.ingress.kubernetes.io/proxy-body-size: "Xm"`, where `X` is the desired size in megabytes (e.g., `"50m"` for 50MB). You can also set a cluster-wide default using a `ConfigMap` named `nginx-configuration` in the Nginx Ingress Controller's namespace, by adding the `client-max-body-size: "Xm"` key-value pair.

**4. Is increasing the request size limit always the best solution for large data transfers?**
Not always. While increasing the limit resolves immediate 413 errors, for truly massive data transfers (e.g., files hundreds of megabytes or gigabytes in size), a better architectural solution is often **chunked uploads**. This involves breaking the large file into smaller, manageable chunks on the client side, sending each chunk as a separate `api` request, and then reassembling them on the backend. This approach improves resilience, allows for progress tracking, and reduces the memory footprint on the `gateway` and backend for individual requests.

**5. How can APIPark help with managing request sizes and APIs in general?**
While Ingress Controllers handle the initial layer of request size limits, APIPark is an open-source AI `gateway` and API management platform that offers comprehensive solutions for managing, integrating, and deploying `api`s. It simplifies `api` lifecycle management, provides unified `api` formats (especially useful for AI models with large contexts), and offers features like traffic forwarding, load balancing, detailed call logging, and data analysis. These capabilities complement the Ingress Controller by offering a higher level of control and visibility over your `api`s, helping to identify and troubleshoot issues related to `api` call sizes, performance, and security across your entire `api` ecosystem.

### 🚀You can securely and efficiently call the OpenAI API on [APIPark](https://apipark.com/) in just two steps:

**Step 1: Deploy the [APIPark](https://apipark.com/) AI gateway in 5 minutes.**

[APIPark](https://apipark.com/) is developed based on Golang, offering strong product performance and low development and maintenance costs. You can deploy [APIPark](https://apipark.com/) with a single command line.
```bash
curl -sSO https://download.apipark.com/install/quick-start.sh; bash quick-start.sh

In my experience, you can see the successful deployment interface within 5 to 10 minutes. Then, you can log in to APIPark using your account.

Step 2: Call the OpenAI API.